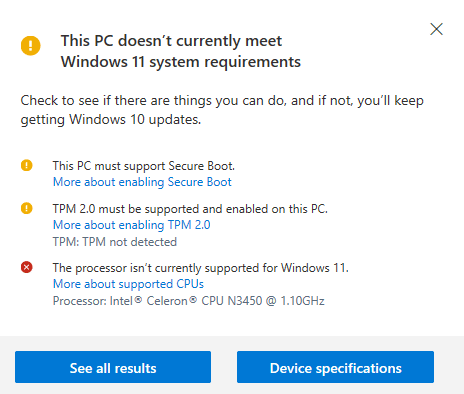
If you’ve not been in the loop lately, there’s been a stir around Microsoft’s newest operating system and it’s restrictive system requirements. Fortunately, for those who do not have compatible PCs, Microsoft themselves have published instructions on how to run Windows 11 without TPM 2.0 on most devices.
What happens if I install Windows 11 without TPM 2.0?
A fair word of warning. Microsoft have stated that if you bypass any requirements, you are no longer entitled to receive updates.
This does not necessarily mean that you will not receive any updates. It just means that Microsoft cannot guarantee that you will be eligible for future updates. Or that any future updates will be (mostly) issue-free.
To quote, the official disclaimer is as follows:
This PC doesn't meet the minimum system requirements for running Windows 11 - these requirements help ensure a more reliable and higher quality experience. Installing Windows 11 on this PC is not recommended and may result in compatibility issues. If you proceed with installing Windows 11, your PC will no longer be supported and won't be entitled to receive updates. Damages to your PC due to lack of compatibility aren't covered under the manufacturer warranty.
As a side note, Windows 10 will still be supported until 2025, so there is no immediate urgency to update.
To end with an additional disclaimer: We at DroiX cannot guarantee an issue-free experience when Windows 11 is installed via these alternative methods, and will not be responsible for any damages that arise because of this workaround. Do so at your own risk.
If you’re happy with that disclaimer, we’ll go over exactly how you can install Windows 11 without TPM 2.0 being necessary.
Windows 11 TPM 2.0 Bypass
The easiest way we have found to bypass the various Windows 11 requirements is through the use of a open-source tool. Called MediaCreationTool.
To summarize it, it is a script that automatically downloads an installation of Windows while ticking checkboxes that cause the installation media to ignore certain system requirement checks.
We would normally not defer to third-party scripts (always be extremely wary of running random scripts), but in our attempts to get Windows 11 running, we have found Microsoft’s advice to be inconsistent. As there are even PC’s that are not on Microsoft’s published list of compatible processors that pass their “PC Health Check” and will allow the installation of Windows 10.
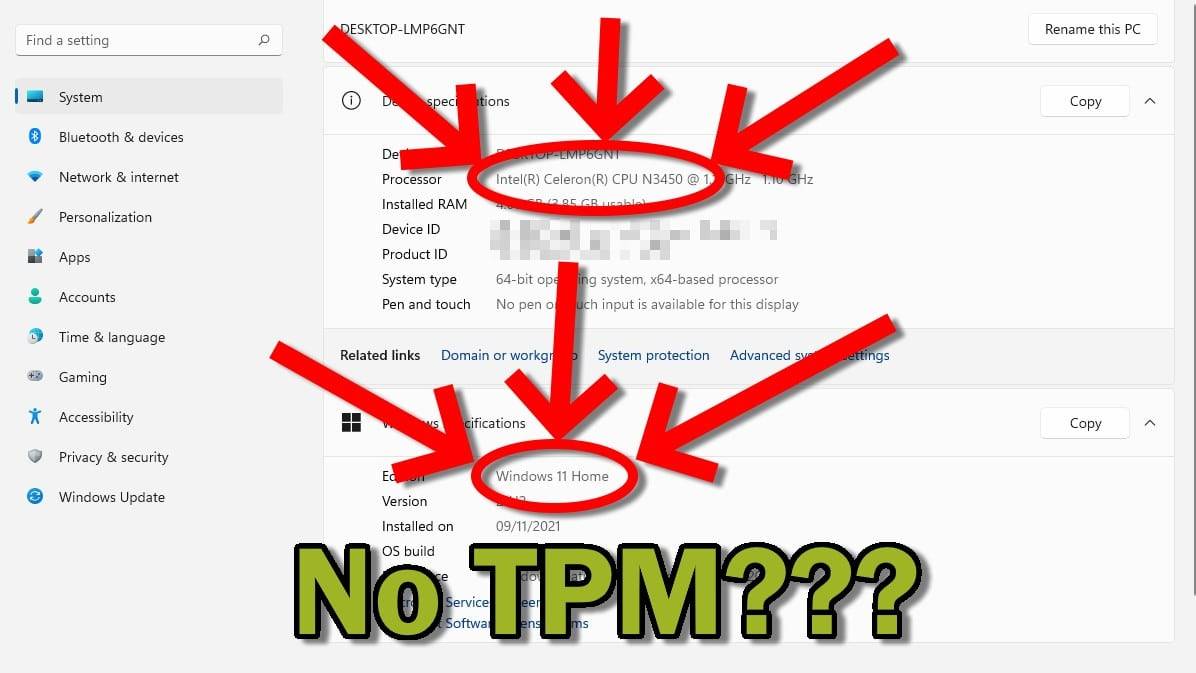
Eventually, we found a PC that would not run Windows 11 out of the box. The Beelink T34-M, a low-end mini PC containing an Intel Celeron N3450 processor.
The script itself is very straightforward to run. As all you need to do is download it, and then use the built-in GUI to select what kind of installation you wish to download (i.e., an ISO, a USB, and so on).
However, in the interest of streamlining things for you, the reader, we have created an image file of this TPM-free Windows 11 installation.
(This zip file will need to be extracted before use. Right click the file once downloaded, and select the option to to extract it using Windows 10’s native program)
Flashing the image
This image must be flashed to a USB of at least 8GB in size before it can be used.
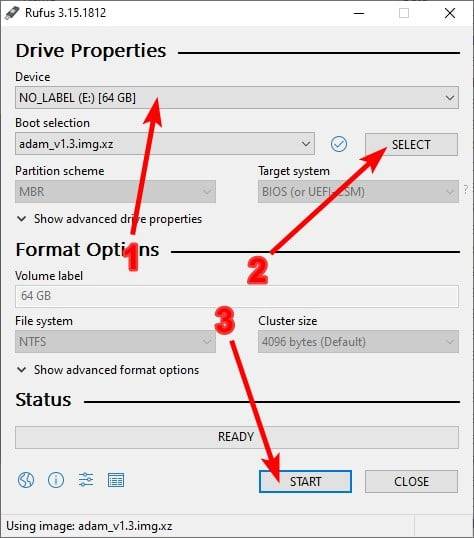
To do this, you’ll need to download Rufus, which is free, open source, lightweight USB tool preparation software.
- Select your USB, ensure the drive letter matches.
- Select the image file you downloaded and extracted earlier.
- Hit Start once ready.
Once Rufus has completed this operation, you can remove the USB and boot into it as normal (to do this, you’ll need to access the BIOS or Boot Menu for your PC).
If you don’t like Rufus, you can also use alternatives like Win32 Disk Imager, and ApplePi Baker.
My PC keeps rebooting into the setup!
If this happens, your boot order may have been changed inadvertently. Meaning that the USB is higher-priority than the newly-created Windows partition.
Because every PC is slightly different, we can’t provide a step-by-step on how to fix this. But the core of what you need to do is change the boot order in your BIOS so that the Windows Boot Manager is above any USB ports.
You can also just remove the installation USB, and the system will boot as normal.
Summary
Provided you haven’t come across any critical errors (remember that this workaround is not a guarantee), your PC should now be running an installation of Windows 11.
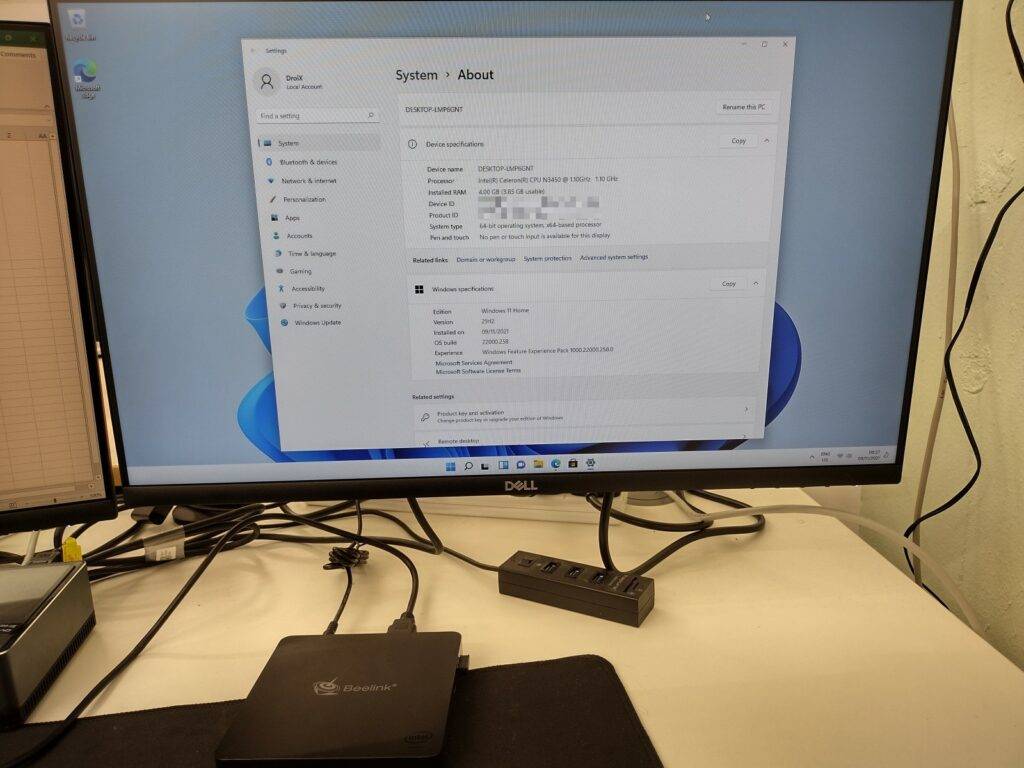
We hope you’ve found this guide to be of use, and that you’re able to enjoy your Windows 11 installation without TPM required.
But rather than commit to third-party workarounds and forego any right to security updates, why not consider upgrading to a Mini PC with Windows 11 compatibility? Save hours of problems and troubleshooting down the line by choosing a PC that is verified to be compatible straight out of the gate, and you’ll thank yourself. Believe us.
You can also check out our post on the best Windows 11 mini PCs to learn a little more about some of the devices we have on offer.


