Welcome to our brief overview of Android 8.1 on the ANBERNIC RG552. Do you find Android 7.1 to be a bit… outdated on your RG552? Why not consider upgrading? Thanks to independent developer BlackSeraph, it is now possible to update the system to massively improve your experience!
Improvements over Stock
AOSP on android has a number of improvements over the stock installation that are worth considering.
Improved Performance
A recent update to the AOSP build has overclocked the device very slightly compared to the stock firmware (by a few-hundred MHz).
While not a “game changer”, it allows the system to eke out more performance on a variety of platforms that are rife with games that may be “almost playable” or “playable with drops”, such as PSP, Sega Saturn, and more.
For those who want to get every last drop of power out of their system, there’s currently no better choice at the moment.
Root Access
The AOSP distribution developed by BlackSeraph features a baked-in installation of Magisk, which is a very useful tool for prying open the inner workings of the device. Allowing you to enable and disable root access to the device as you please.
With root access, you open up the door to a number of applications that would typically not be able to run on the system.
Newer Android Version
The stock version of the RG552 firmware is Android 7.1. Nowadays, this version is fairly old – and while many modern applications will support it, there are a few who will not. For example:
- RetroArch Plus – An enhanced version of RetroArch that supports more cores (emulators)
- AetherSX2 – A recently released PS2 emulator for Android that is highly popular.
These emulators only support a minimum of Android 8. Fortunately, the AOSP build is based upon Android 8.1., rendering these previously inaccessible emulators usable.
Apps
Unlike the stock firmware (excluding the mapping update), AOSP comes with screen mapping functionality built-in. Simply press the “F” key on the underside of the device to bring it up.
This allows you a greater range of compatibility with games. Such as those which do not support direct gamepad inputs, and instead only use on-screen touch controls.
Improved Controller Drivers
The controls on the RG552 will suffice for most applications, but when dealing with applications such as Xbox Game Pass and GeForce Now, issues can arise with how the controller is detected.
Tweaks made within this build enable the RG552’s controls to be fully used with these streaming applications without issue.
Controllable Fans
A standout feature of the RG552 has been the introduction of active cooling. In order to faciliate the higher performance chipset, a fan and heatsink cooling system has been implemented.
This comes at a cost however. The cost being that the device will passively generate far more noise than a fanless device ever could.
Installation Guide
This installation guide applies to Windows 10.
Please note that you will also need a USB A-to-C cable or a USB-C-to-C cable for the first part of the installation.
Please note that this will remove all data, apps and games from the internal storage. This installation is carried out entirely at your own risk and DroiX will not be held liable for any damage caused as a result of this firmware (bugs, etc.)
Download Necessary Files
At the moment of writing, every update will be distributed in two formats (you can obtain these files by subscribing to the Patreon page):
- Clean, full installation.
- At the time of writing, usually called something like AOSP-8.1-XXXXXXXX-UNOFFICIAL-RG552-Maskrom.7z. “XXXXXXXX” being the date.
- An update that can be installed through TWRP (for if you are updating an existing AOSP installation to a newer version)
- Called something like AOSP-8.1-XXXXXXXX-UNOFFICIAL-RG552-TWRP.7z.
If you’re installing this for the first time, you will only need the “MASKROM” file(s).
If these files have a number at the end (for example: 001), this means that they’re a split archive. To extract them, you’ll need 7zip or some other archival extraction program.
Make sure all the files are in the same folder, then extract the first one (001). You will be left with a .zip file.
Preparing your PC
The .zip file will contain numerous tools that are essential for the installation process. Extract it, and you’ll see something like this:
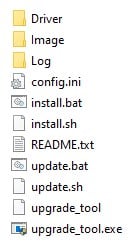
Before doing anything, first enter the “Driver” folder. In here will be a utility called DriverInstall.exe. Run it.
This executable file will automatically install all the requisite drivers that allow your PC to detect your RG552.
You are now ready to begin the installation process.
Flashing the RG552
The actual installation process for AOSP is fairly simple. It is just important that you do it correctly, and allow it to finish in its entirety. If you do not allow the installation to finish, you may potentially brick your device.
First, turn off your RG552.
Next, connect your RG552 to your computer. Make sure the RG552 is connected in the USB port and not the port labelled “DC“.
Now, hold the Volume Up key and the F Key at the same time while powering the device on. Once you hear the fan, it is safe to stop holding the buttons.
If you have done this incorrectly, you will be in the Android recovery menu. Turn the device off and try again (you can use the volume keys to navigate to the desired option, then press the power key to confirm your selection).
If you have done this correctly, the device’s screen will stay black, and Windows Device Manager will show that a “rockchip” device is connected.
Now, all you have to do is click the install.bat batch file present in the folder you extracted earlier.
This batch file will automatically detect your device and carry out the installation. Depending on your security settings, you may need to constantly authorize it at each step. This can be a little tedious, but not difficult.
Do not remove the USB cable or or otherwise interrupt this process.
Once the installation is finished, the batch file will close, and your RG552 will reboot.
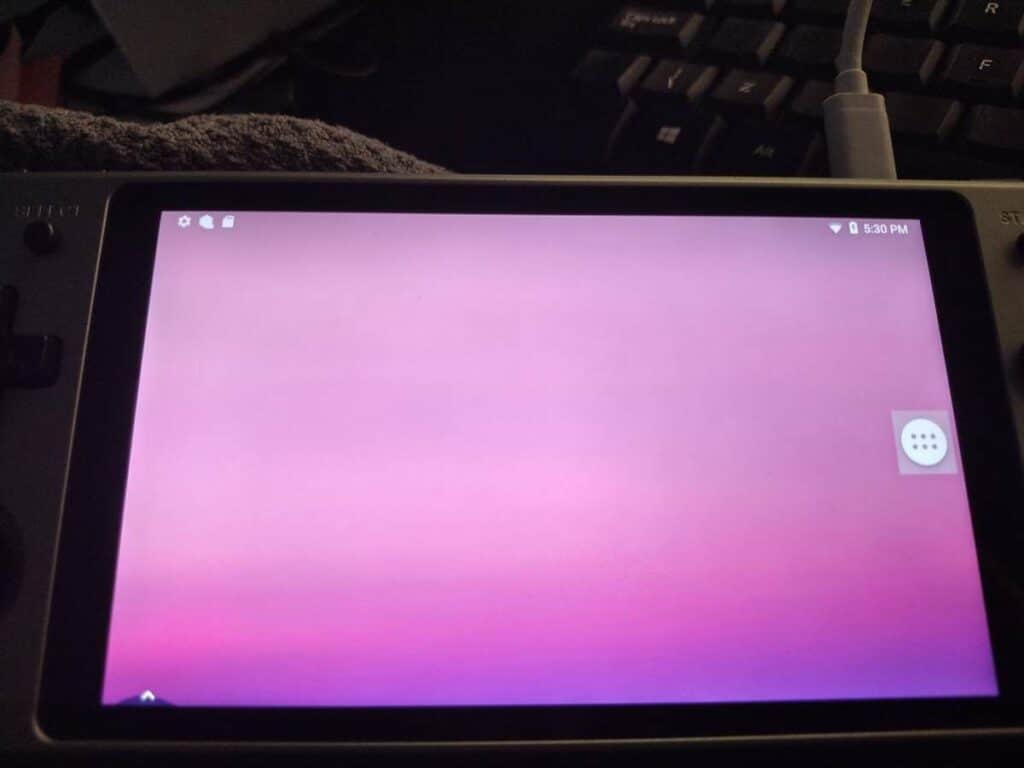
Congrats! You’re now you have Android 8.1 on the RG552!
A quick note: There is no navigation bar in the AOSP build at the time of writing. In lieu of this, the developer has included some handy shortcuts.
Hold the L1 Button and R1 button, plus the:
- Y Button – To go BACK.
- X Button – To go HOME.
- A Button – To quickly switch between recent apps.
Installing Magisk
There’s just one more step to do before continuing, and that is installing/updating the Magisk app.
To do so, you will need to connect to the internet. For more on this process, please check out our RG552 getting started guide. The user interfaces are very slightly different, but the process is pretty much the exact same.
Once you’ve connected to the internet, run the Magisk app. If prompted to provide any permissions, grant them. Your system will reboot once finished.
Magisk will now be installed.
Installing the Google Play Store
(This step assumes you’ve installed Magisk fully as per the previous step)
By default, AOSP does not come with any Google Apps pre-installed. This helps to reduce bloat a good deal.
However, this also means that you will not have acess to the Google Play Store. For users that install their applications directly via .apk, this is not a problem. For those who prefer the ease of use and convenience of the Play Store however, there is a way to get that functionality back.
You will need to install the latest OpenGapps ARM64 8.1 Pico bundle
You can do so from this link: https://opengapps.org/
Ensure that the following parameters are selected:
- Platform: ARM64
- Android: 8.1
- Variant: Pico
You’ll download a .zip file. Do not extract it, but make sure to transfer it over to your RG552.
You can do this in many ways. Personally, we used a USB stick and a USB-C adapter, and then copied the file over. You can also use a microSD card if you so wish.
You could probably even install a browser via .apk and then download it directly to the device.
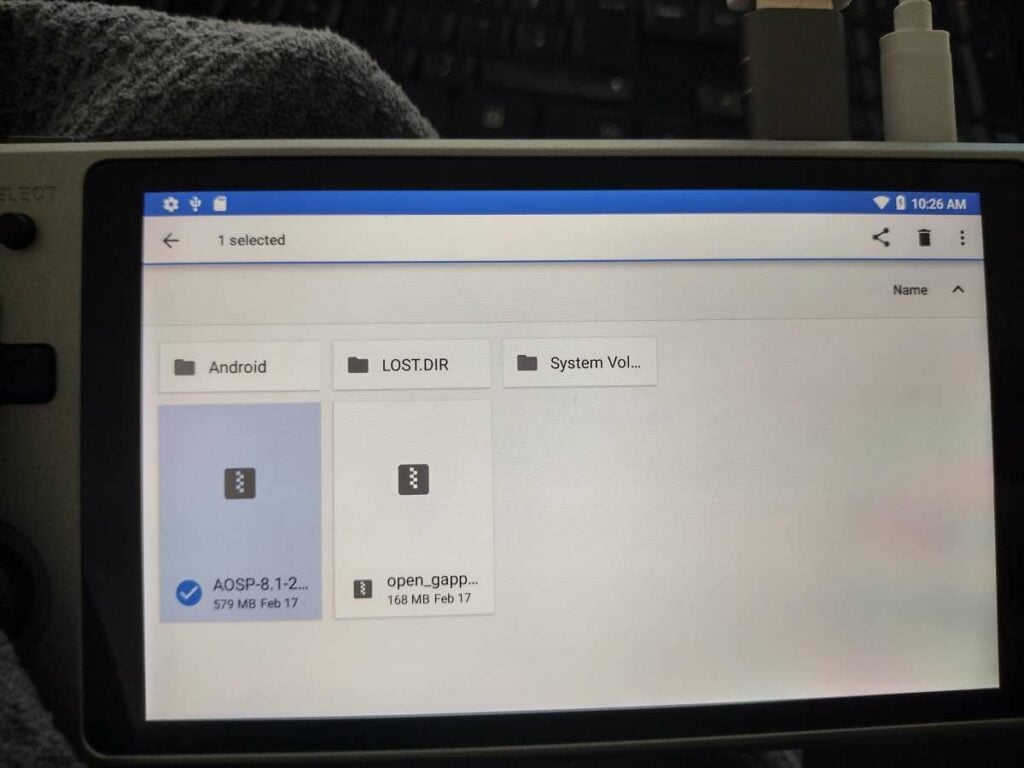
We would also advise copying the file to the device’s download directory to quickly and easily find it in the upcoming step.
Entering TWRP
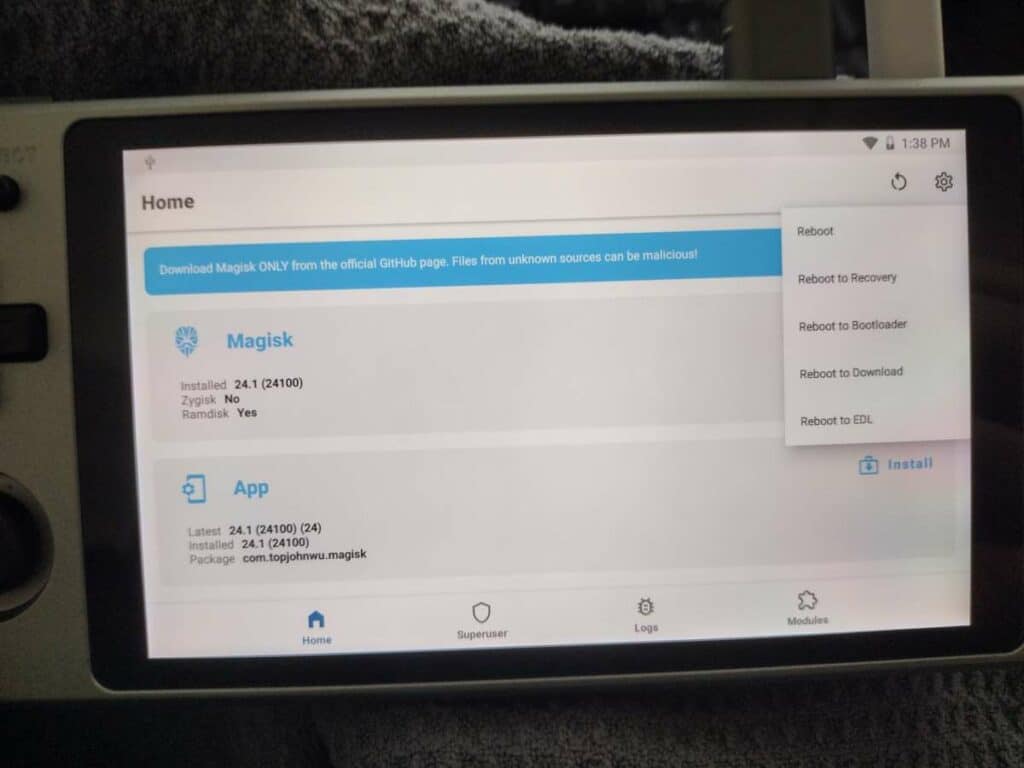
Now that you’ve copied the file over, open the Magisk app. Then click the arrow in the top right. Select Reboot to Recovery.
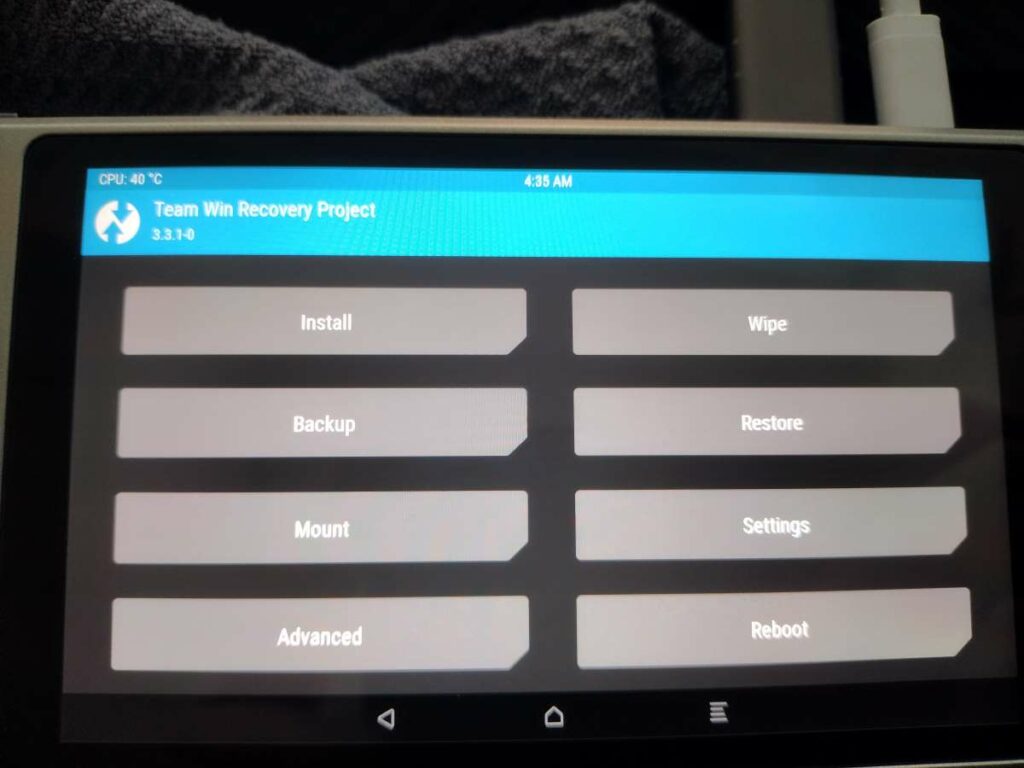
You’ll then boot into TWRP. Proceed through the initial setup, then select Install.
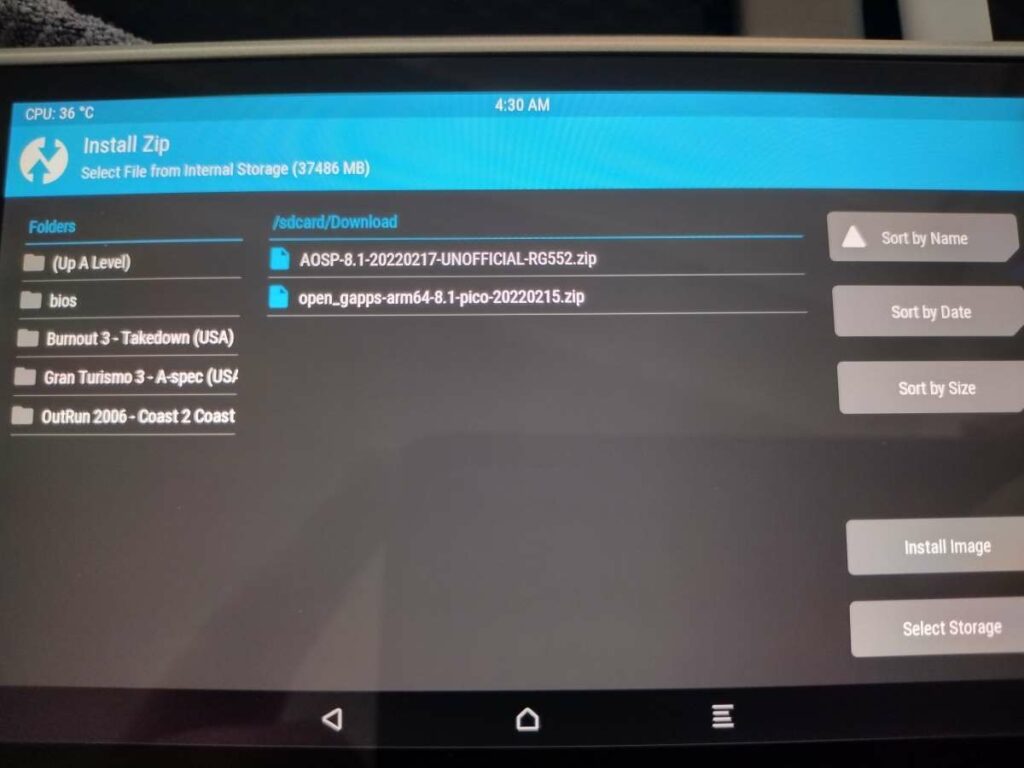
By default the device will look at your downloads directory for zip files. But if you’ve saved the files elsewhere, you’ll need to locate them.
Select the open_gapps .zip file you’ve downloaded, then select Install Image. You’ll be prompted to confirm your installation, and then it will carry out automatically.
Reboot the device once it is finished (or set it to reboot automatically), and you should now have the Google Play Store app installed.
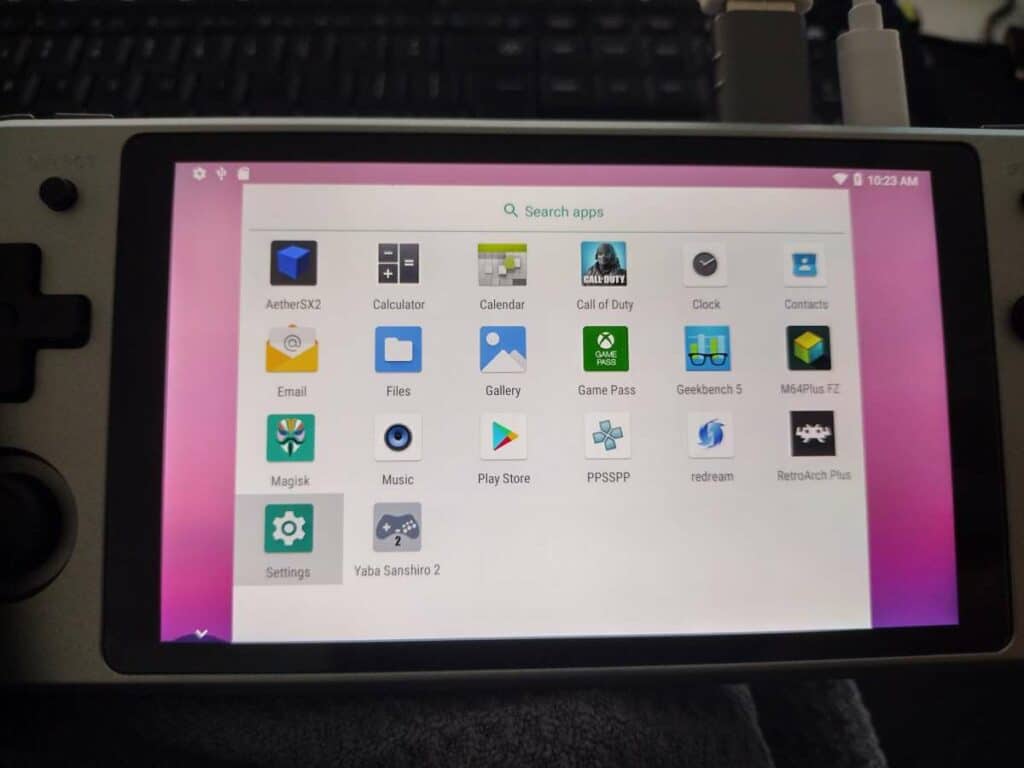
After signing into the Play Store like usual, you should now be able to freely download apps of all kinds. Emulators, streaming services, or even native android games!.
[azp_custom_product id=”13″]


