In this article
Welcome to our guide on how to install ArkOS on your RG351-series handheld (and the Gameforce Chi too!).
[Update 2021/11/09] We’ve launched a more comprehensive guide to all the firmware currently available on the RG351 family of devices. Check it out here!
The third generation of ANBERNIC handhelds laid host to a variety of firmware. All with similar goals (to provide a better experience over the stock firmware), but achieving that in slightly different ways.
While firmware such as 351ELEC aim to build upon and improve OS that the stock firmware ran on, there are some that supplant the old systems and opt for implementing something different.
ArkOS is one such custom firmware. Being based on Ubuntu 19.10 – it grants a greater degree of freedom for developers and enables a number of additional features over EmuELEC, such as:
- Simultaneous support for both 64-bit and 32-bit user-spaces. In other words, an extremely broad range of emulators and platforms are supported.
- OTA (Wi-Fi) Updates
- Both for ArkOS itself
- And for the cores within RetroArch.
- Various other minor optimizations and quality-of-life improvements
ArkOS does not come with optimized defaults or configurations for its emulators. Meaning it will require a little more set up than the stock firmware or 351ELEC.
Additionally, ArkOS does not come with the BIOS files needed for some emulators to function. You will need to add these yourself before you can play. For a full list of the emulators on ArkOS and the BIOS files needed, see here.
You Will Need:
Download the following files before proceeding.
- ArkOS itself. You can download the latest ArkOS versions here. We have also uploaded distributions here.
- Some kind of USB flashing software. Except for BalenaEtcher, most tools should work just fine.
- For Windows, you can use something like Win32DiskImager. This is what will be used in this guide.
- For Mac users, something like ApplePi Baker.
- Partition management software. It does not matter which you use in particular, as long as you can completely format devices with it.
- We like to use MiniTool Partition Wizard. This is what will be used in this guide.
How to install ArkOS
The process of installing ArkOS is identical to that of installing any other firmware on these devices. So rather than reinvent the wheel, we’ll be re-using the images from other guides where appropriate.
1. Format your card
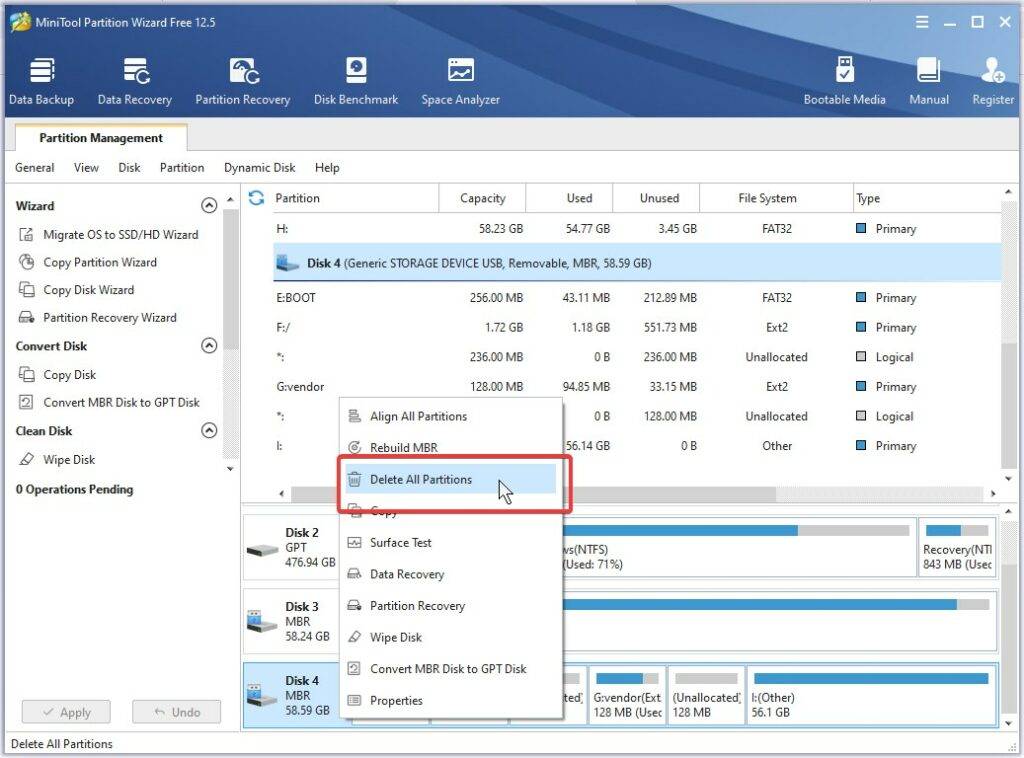
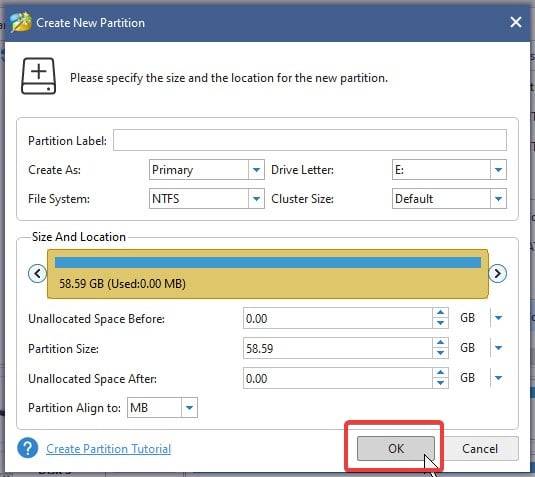
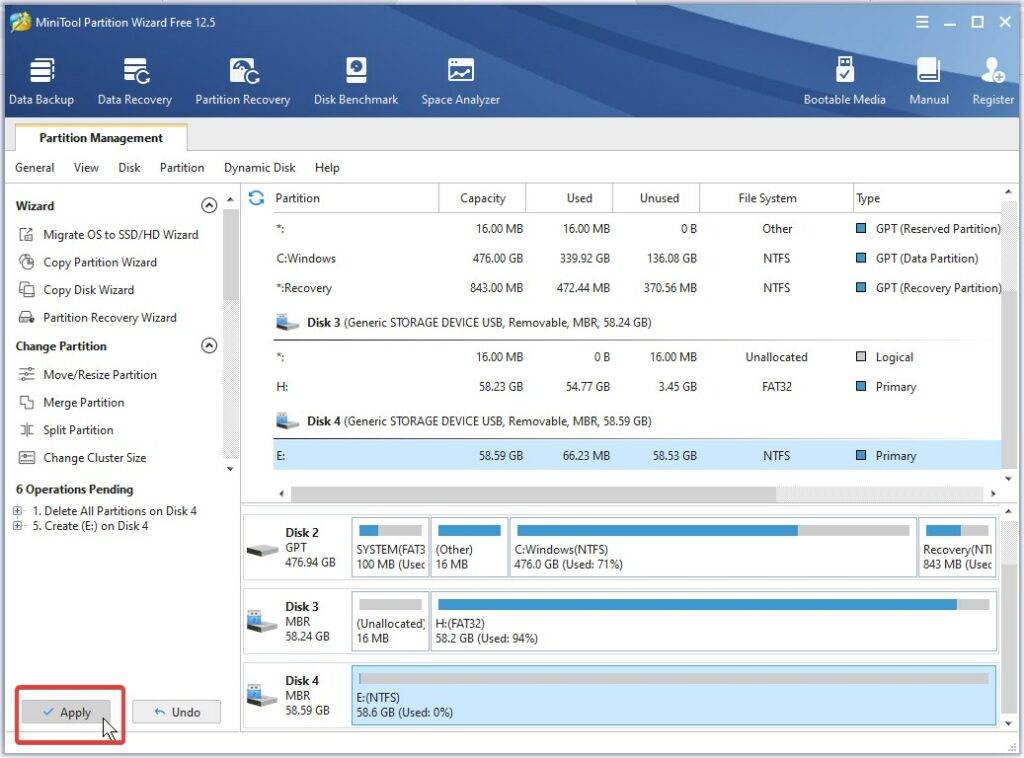
First, you’ll need to format the card so that it is cleared of data, and all in one single partition.
If your card is already formatted, you can skip this step. If you have purchased a new SD card, it is likely already formatted. Just delete any files on it and you will be good to go.
We’ll be using MiniTool paritition Wizard, but you can use whatever suits you best. You must make sure that the entire card is in one partition, and that this partition is accessible (meaning you can drag/drop files from it).
Wipe your microSD card – Images

2. Flash the Image
Now you must actually flash ArkOS onto the RG351.
This is done through the imaging tool you may have downloaded earlier. We’ll be using Win32 Disk Imager.
Once you open the program, you’ll be met with this screen.
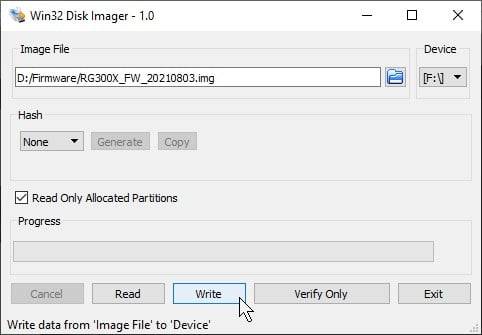
The next two steps can be performed in any particular order:
- Click the blue folder icon on the right side of the “Image File” section. Then select the firmware .img file you have downloaded previously.
- Ensure that the “Device” letter matches your microSD card.
Once you have done these two steps, click the “Write” button.
Once the card has been flashed, insert it into the device and press the power button. The system will perform some first-boot tasks (setting up the file system, expanding the storage, etc.) that may take a while, so be patience.
Now that the system has booted up, we highly advise you look through the wonderfully comprehensive ArkOS Wiki in order to get started.
If you’re interested in purchasing an RG351P, RG351M, RG351V or GameForce Chi of your own, you can buy them at these links:
- RG351P from DroiX
- RG351V from DroiX
- RG351M from DroiX
- Gameforce Chi from DroiX
We hope you’ve found this guide for installing ArkOS on your RG351 device to be of use. If you have any questions, feedback, or otherwise – please feel free to leave a comment below. Until next time!
Bringer of videos, text and images! AKA the social media guy at DROIX. Massive retro gaming fan and collector, with a far too large collection of consoles and computers from 1970's to modern. Contact me at [email protected]
Questions & comments
0Every question gets an answer. Ask before you buy — DaveC and the team reply within one working day, and answers stay public so they help the next reader too.