In this article
ANBERNIC have recently released an update for their RG552 handheld that enables keymapping functionality. What this does, and how to install it will be covered in this article, so read on to find out more!
What is “keymapping”, and why should I care?
Unlike it’s predecessors, the RG552 features a fully-functional touch screen, much like a mobile phone. If you have played any kind of game on a mobile phone within the past 10-or-so years, you may be familiar with the concept of on-screen buttons.
These on-screen buttons are small sections of the touch screen that act as the equivalent of physical button inputs, and are necessary due to mobile phones lacking buttons.
You’ll find on-screen buttons in both mobile games and on-screen games. While convenient, most people will agree that they’re not particularly “tactical”. They lack the feedback and responsiveness of physical controls.
For mobile games in particular, this “inferior” input method is often factored into the game’s difficulty/design.
Additionally, while it is possible to buy controllers for use with mobile phones, not every game or app has good support for gamepads (or even support at all).
This is where keymapping (also sometimes known as “screenmapping”) comes in. With keymapping, you can link a button to an area on the touch screen, and when you press the button, it will register an input in that location.
This allows you to use a gamepad with just about every app and emulator, regardless of if they support it or not. Making your experience more comfortable, and even providing an advantage in some mobile games.
How To Install The RG552 Keymapping Update
The process of installing the update is identical to that seen in our earlier guide.
To save space, we won’t repeat ourselves. Check out the process there!
However, make sure to use THIS firmware file instead: https://go.droix.co.uk/RG552-KEYMAP
How to use the RG552 Keymapping Tool
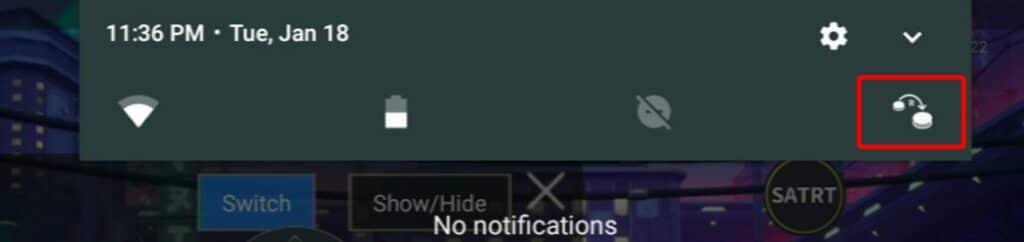
The screen mapping software can be accessed through pulling down the notifications bar, and selecting the new left-most icon. Once tapped, it may take a second or two to load.
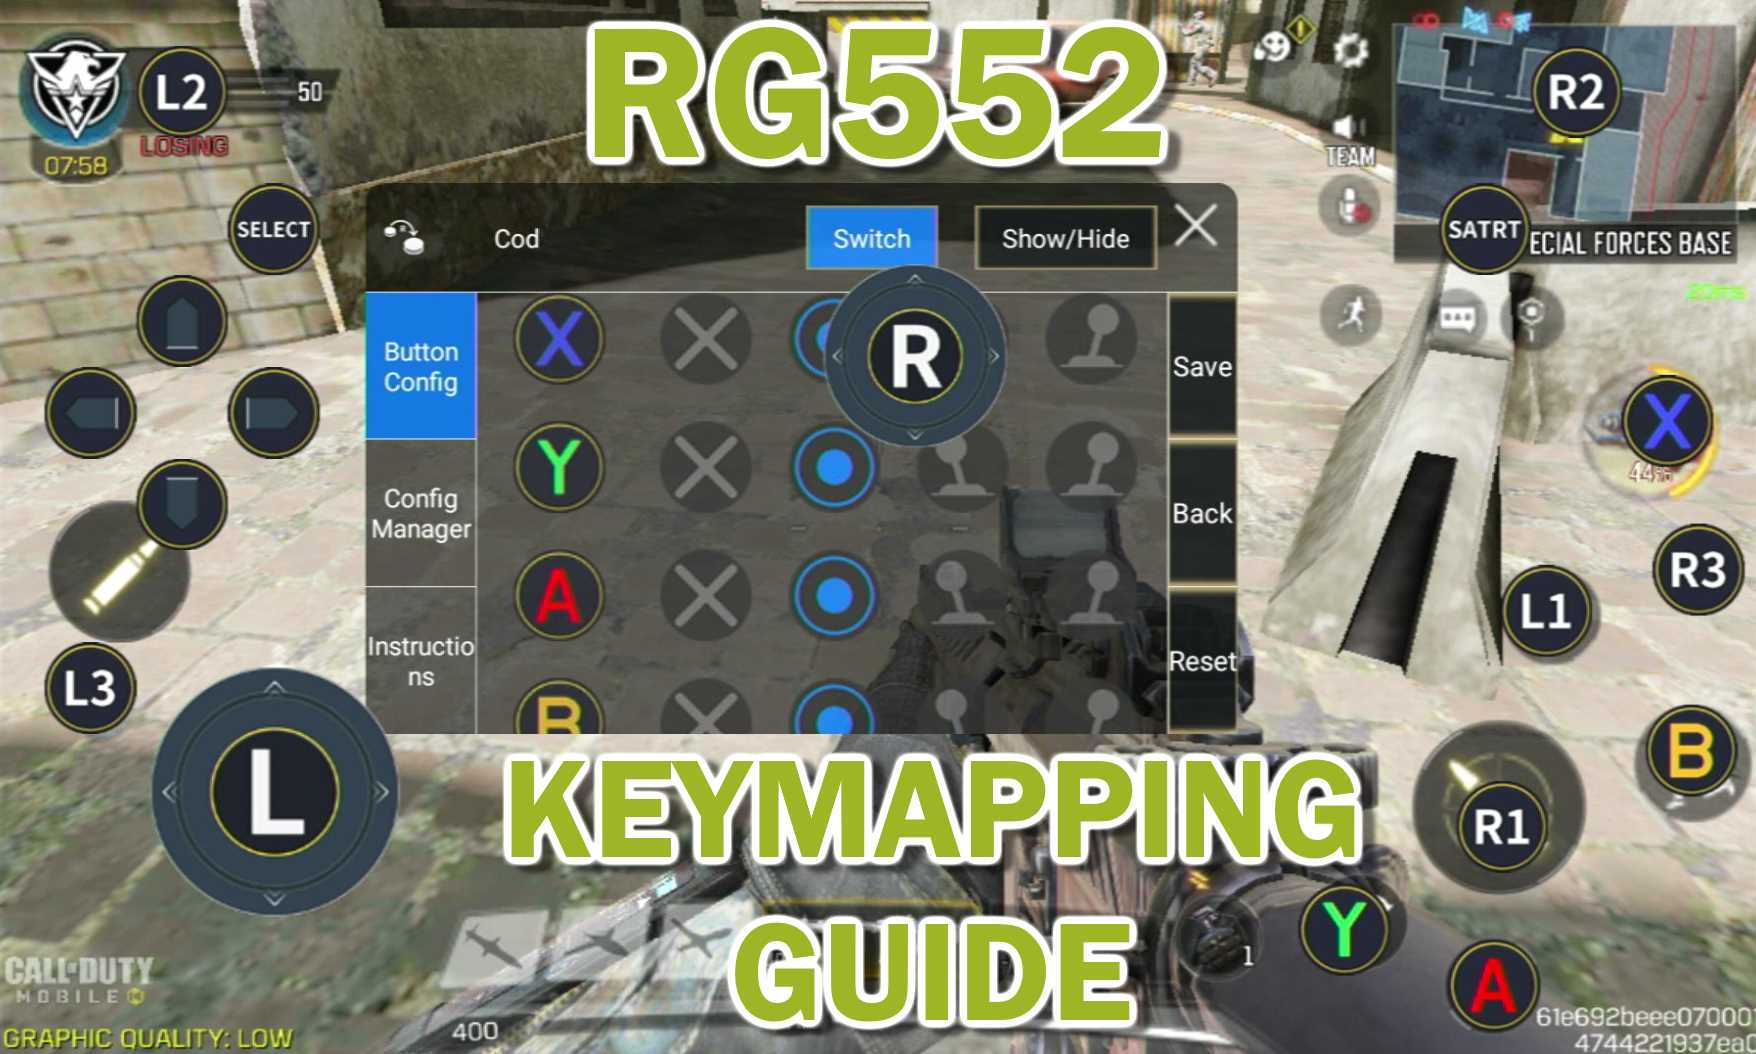
The primary buttons on the RG552 have a number of different ways they can be mapped to the device. You can view all available buttons under the “Button Config” tab.
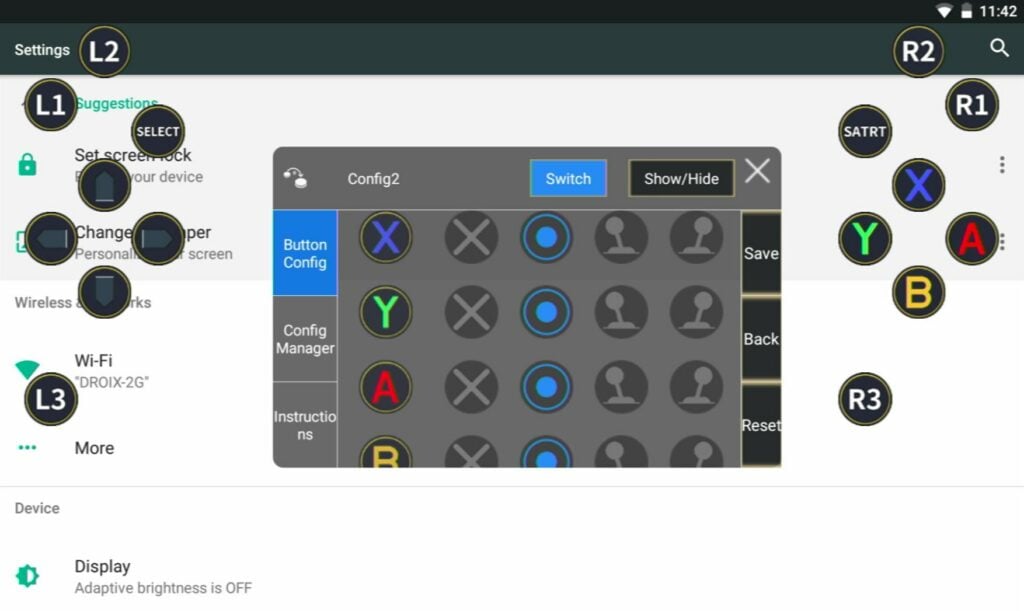
For each button, you can either tap the X icon to disable it, or choose a specific mapping style for it.
See the following table for a list of each mapping style and what buttons can use it:
| Input | Button Style | Stick Style (Left) | Stick Style (Right) | Scroll Style |
|---|---|---|---|---|
| A/B/X/Y | Yes | Yes | Yes | No |
| D-Pad | Yes | No | No | No |
| L1/R1 | Yes | No | No | No |
| L2/R2 | Yes | No | No | No |
| L3/R3 | Yes | No | No | Yes(?) |
| Left Stick | No | Yes | No | No |
| Right Stick | No | No | Yes | Yes |
Button Style

When input is detected, the device will tap (or press-and-hold as appropriate) the screen in the registered location.
Stick Style (Left/Right)

When input is detected, the device will tap (or press-and-hold as appropriate) the screen in the registered location. While held, you can move the left or right stick to drag the input around in a predefined area.
The input will snap back to its original centre afterward.
Scroll Style

(Right Stick) When input is detected, the device will register it as a constant, scrolling input in the chosen direction.
We are unable to figure out what this input does for L3/R3 at this point in time.
The official instructions describe this, verbatim, as the following:
“Selected to support combination key mapping function.”
“(In the King of Glory, L3 and R3 are skill cancellation functions, and the right joystick supports move scenes)”
If you can figure out what this does, let us know! It appears to be related to the popular Chinese MOBA Arena of Valor.
Save/Back/Reset
On the right side of the screen mapping window, there are three buttons.
SAVE is self-explanatory. Tap it to save your configuration.
BACK will revert your layout to the last saved version.
RESET will revert your layout to the default version.
Saving/Loading Configurations
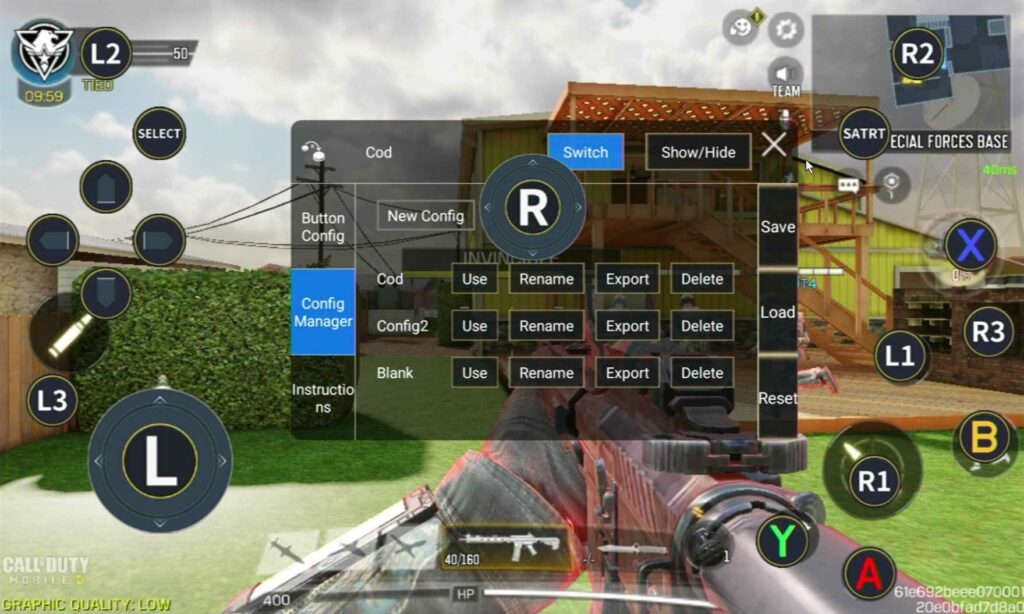
It is possible to save and load multiple different screen mapping layouts to best suit the different types of games and apps you will be using.
Select the “Config Manager” to be taken to the list of saved configs.
From here you can Use and switch to the chosen layout. Rename and give the layout an identifiable name. Export to convert the layout into a config file that can be copy/pasted to another RG552 (default location: “~/sdcard/remap/export”, import location: “~/sdcard/remap/import”). And you can Delete to remove the configuration.
Troubleshooting
I’m getting constant “Settings have stopped” errors!
We’re unsure of the root cause, but some users are getting error messages informing them that the “Settings have stopped” on their RG552.
A potential fix for this is to perform a factory reset through the RG552’s Android Recovery Menu. Please note that this will wipe any apps or data added to the device since you started using it.
To access the recovery menu for the RG552, press and hold the F button (present on the underside) while the device is powering on. When successful, you’ll be met with this screen.
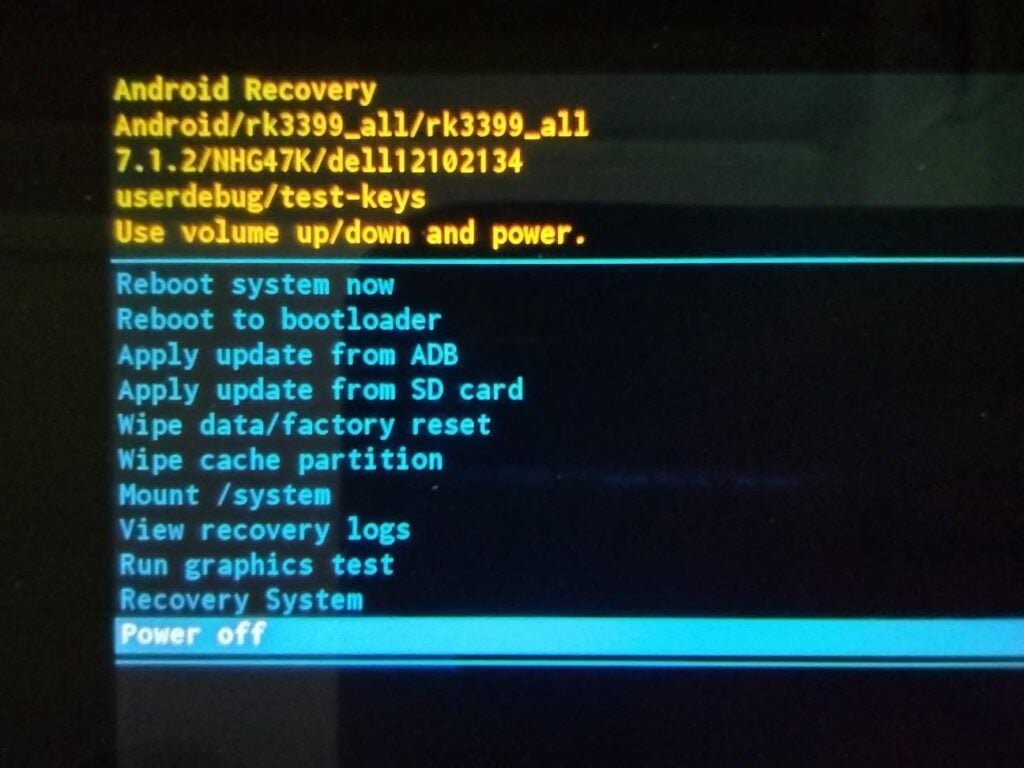
Use the VOLUME UP key and VOLUME DOWN key to scroll up and down respectively. Move the highlight onto the Wipe data/factory reset option, and tap the Power Button to select it.
Let us know your thoughts on the update below!
And if you’re interested in an RG552 of your own now, you can buy one from DroiX here, as well as learn more about it in our RG552 review!
[azp_custom_product id=”13″]
Bringer of videos, text and images! AKA the social media guy at DROIX. Massive retro gaming fan and collector, with a far too large collection of consoles and computers from 1970's to modern. Contact me at [email protected]
Questions & comments
10Every question gets an answer. Ask before you buy — DaveC and the team reply within one working day, and answers stay public so they help the next reader too.
Hi guys, i appreciate all our support with RG552, but I need to ask you if you have heard about battery calibration problems. I have my own RG552 but when I'm playing in android side, the system indicates that the battery is too low and it turns off automatically, but this not occurs in Linux. I've tried to calibrate the battery with apps but it doesn't work. Thanks for your help!
Hi guys, i appreciate all our support with RG552, but I need to ask you if you have heard about battery calibration problems. I have my own RG552 but when I'm playing in android side, the system indicates that the battery is too low and it turns off automatically, but this not occurs in Linux. I've tried to calibrate the battery with apps but it doesn't work. Thanks for your help!
Hi guys, i appreciate all our support with RG552, but I need to ask you if you have heard about battery calibration problems. I have my own RG552 but when I'm playing in android side, the system indicates that the battery is too low and it turns off automatically, but this not occurs in Linux. I've tried to calibrate the battery with apps but it doesn't work. Thanks for your help!
What else is on this new image that is not on Android 7.1.2 ? I do not plan on using the touchscreen remapping feature so I am not sure if I should update…
What else is on this new image that is not on Android 7.1.2 ? I do not plan on using the touchscreen remapping feature so I am not sure if I should update…
If you don't plan on using the keymapping feature, there's not much reason to update. We weren't really able to notice any differences aside from the keymapping.
If you don't plan on using the keymapping feature, there's not much reason to update. We weren't really able to notice any differences aside from the keymapping.
If you don't plan on using the keymapping feature, there's not much reason to update. We weren't really able to notice any differences aside from the keymapping.
What else is on this new image that is not on Android 7.1.2 ? I do not plan on using the touchscreen remapping feature so I am not sure if I should update…
What else is on this new image that is not on Android 7.1.2 ? I do not plan on using the touchscreen remapping feature so I am not sure if I should update…