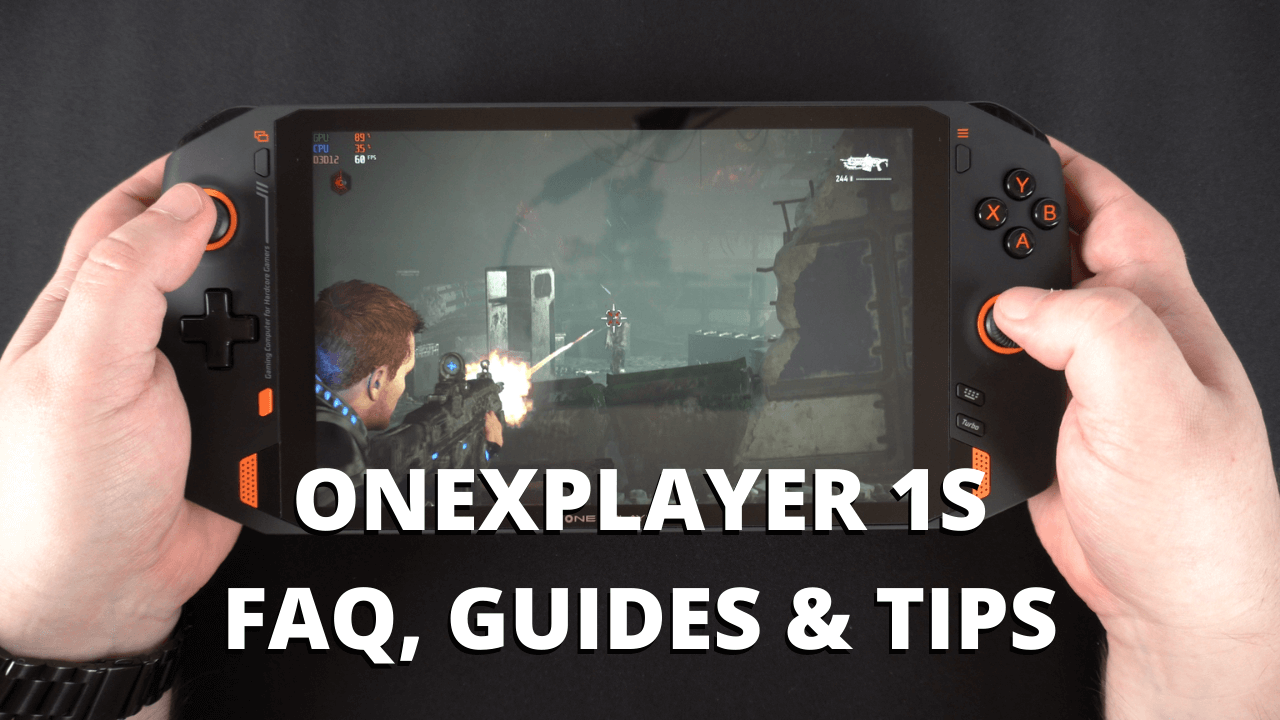
Have you just got a ONEXPLAYER 1S? Here is your first stop for regularly updated guides, hints and tips on getting the most out of your ONEXPLAYER handheld gaming PC. Whether you have the ONEXPLAYER 1165G7 or 1185G7, or the ONEXPLAYER 1S 1195G7 model, this guide covers them all.
ONEXPLAYER 1S Video Playlist
We have many videos for the ONEXPLAYER 1S covering unboxing, reviews, gameplay videos and guides. You can view the playlist via YouTube here or below.
What is the difference between ONEXPLAYER 1135G7, 1165G7, 1185G7 and 1195G7?
The only difference between the models are the processor used in the device. The ONEXPLAYER 1195G7 is the latest model.
| 1135G7 | 1165G7 | 1185G7 | 1195G7 | |
| PROCESSOR | 11th Gen Intel Core i5-1135G7 | 11th Gen Intel Core i7-1165G7 | 11th Gen Intel Core i7-1185G7 | 11th Gen Intel Core i7-1195G7 |
| MAX SPEED | 4.2 GHz | 4.7 GHz | 4.8 GHz | 5.00 GHz |
| GPU | Intel Iris Xe Graphics | Intel Iris Xe Graphics | Intel Iris Xe Graphics | Intel Iris Xe Graphics |
| EXECUTION UNITS | 80 | 96 | 96 | 96 |
| MAX SPEED | 1.3Ghz | 1.3Ghz | 1.35 GHz | 1.40 GHz |
How to reset Windows on the ONEXPLAYER?
You can watch our video guide, or if you prefer a text version with images below
First you need to ensure that your ONEXPLAYER 1S battery is fully charged.
The process to enter the Windows boot menu is as follows.
- Switch on the ONEXPLAYER
- When you see the logo, press the DESKTOP button and Volume + button together
- This will display the boot menu.
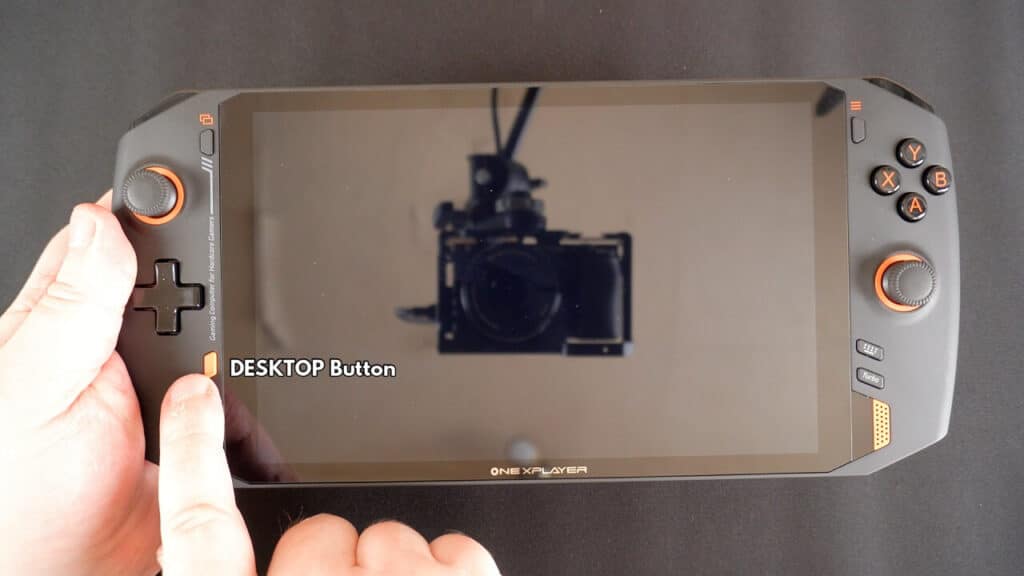
The DESKTOP button is located here
And the Volume Plus button is located on the back and is the button closest to the top of the device.
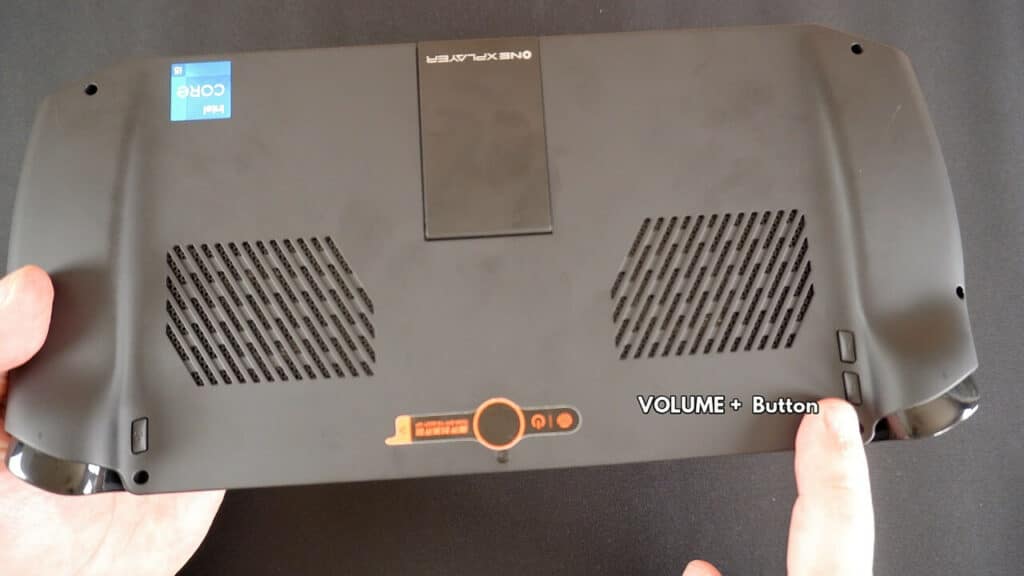
Power on the ONEXPLAYER 1S using the power button on the back. And when you see the logo, press both the DESKTOP and VOLUME + button at the same time.
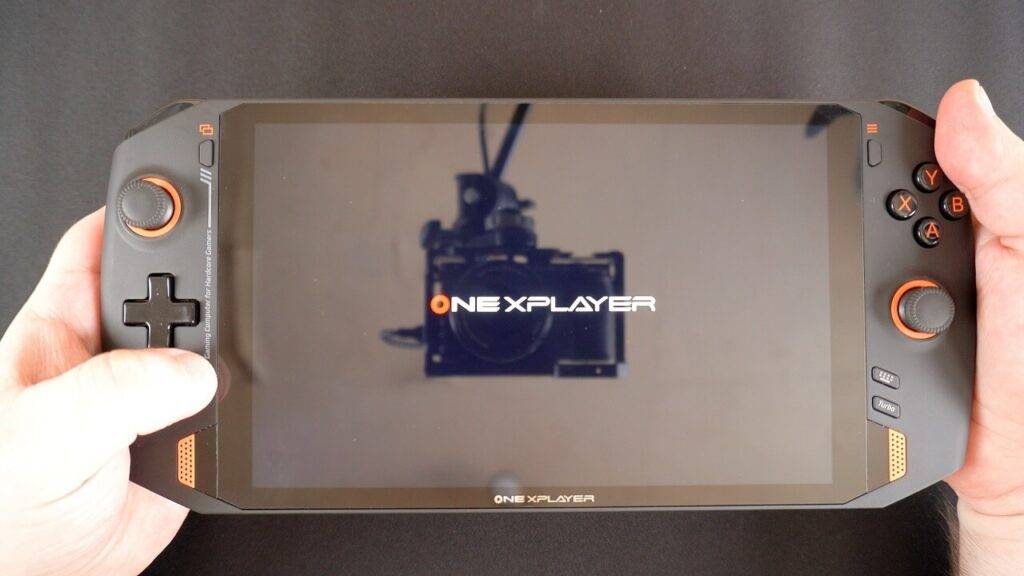
If you missed the time to do it. You can power off the ONEXPLAYER 1S and try it again. Once you have the Windows boot menu displaying. Press and hold the Keyboard button for a second or two until it illuminates.
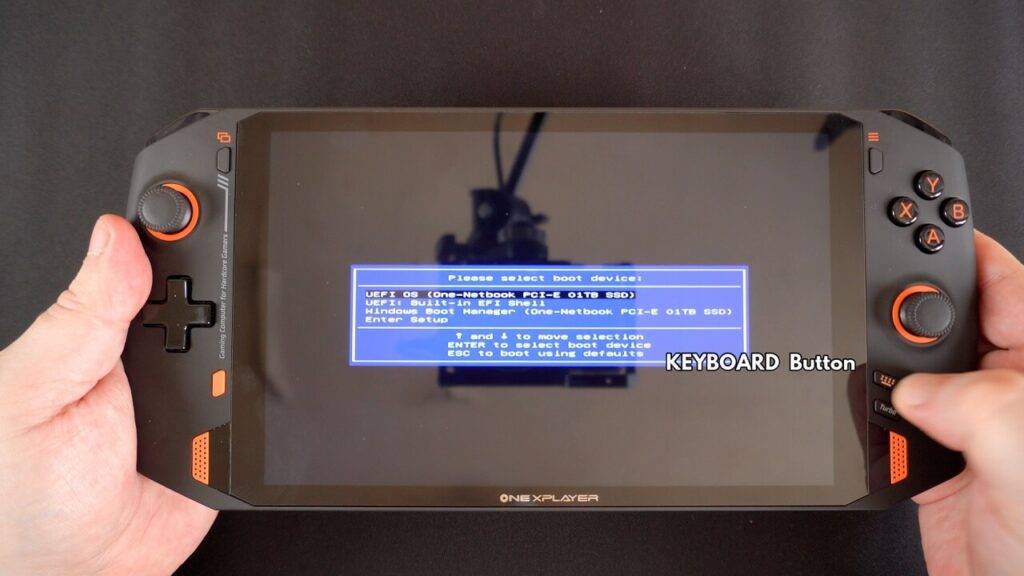
The menu option you want to select is the UEFI OS (One-netbook PCI-E 1TB SSD). If you have replaced the SSD then the name or number may be different.
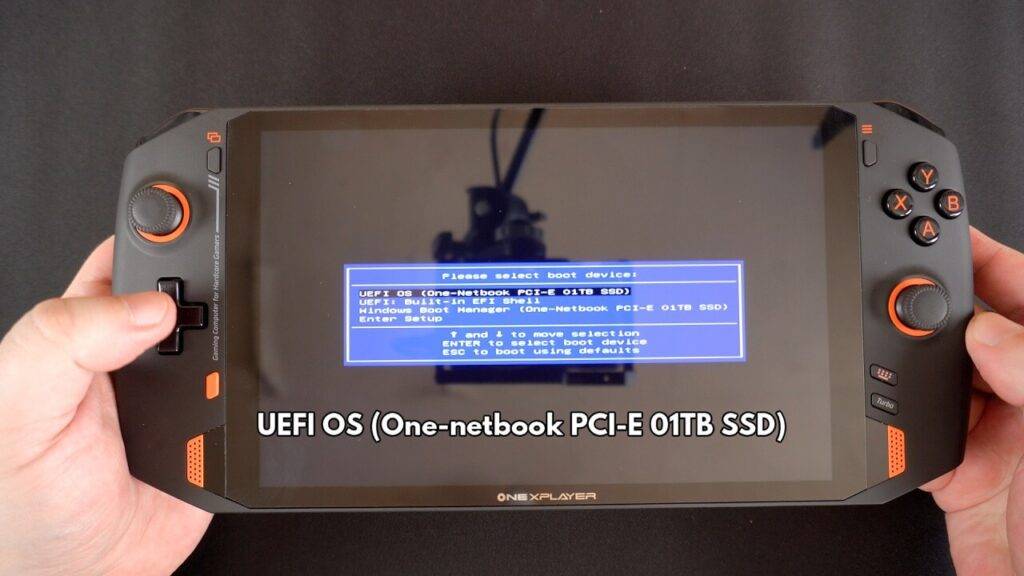
You can use the D-Pad to choose the correct menu option and then press the START button to continue. It will take a few moments for the software to load. The display will rotate to portrait, this is nothing to worry about. Once the software has loaded you will be presented with three menu options. Choose the one in the middle to start the reset process.
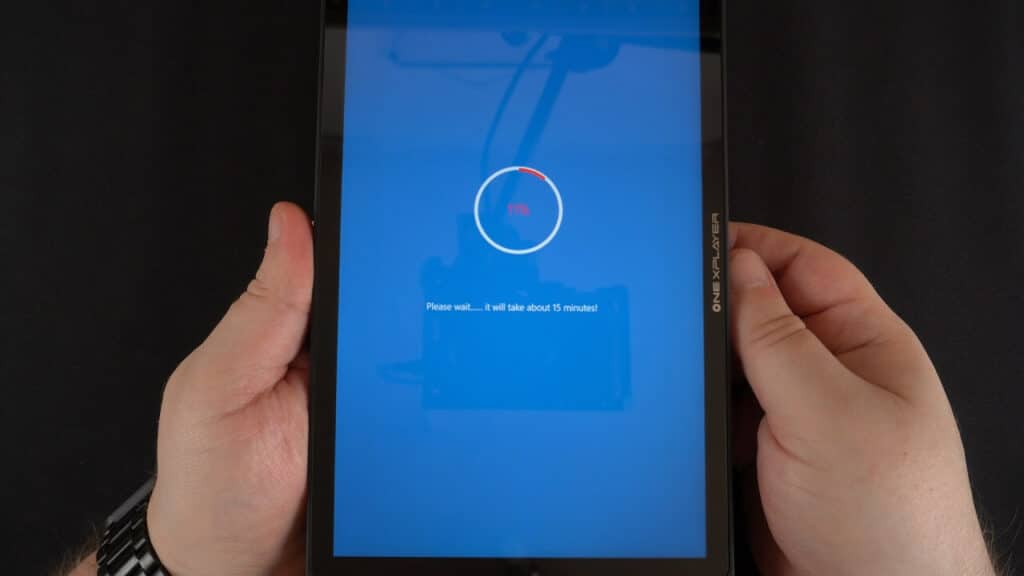
The reset process will now start. During this period, do not switch off the ONEXPLAYER.
Once the reset has completed. The ONEXPLAYER 1S will reboot and after a few moments you will be presented with the initial Windows set up menus.
ONEXPLAYER 1S Button Combinations
There are a few button and button combinations that perform useful functions and shortcuts on the ONEXPLAYER and ONEXPLAYER 1S 1195G7 models.
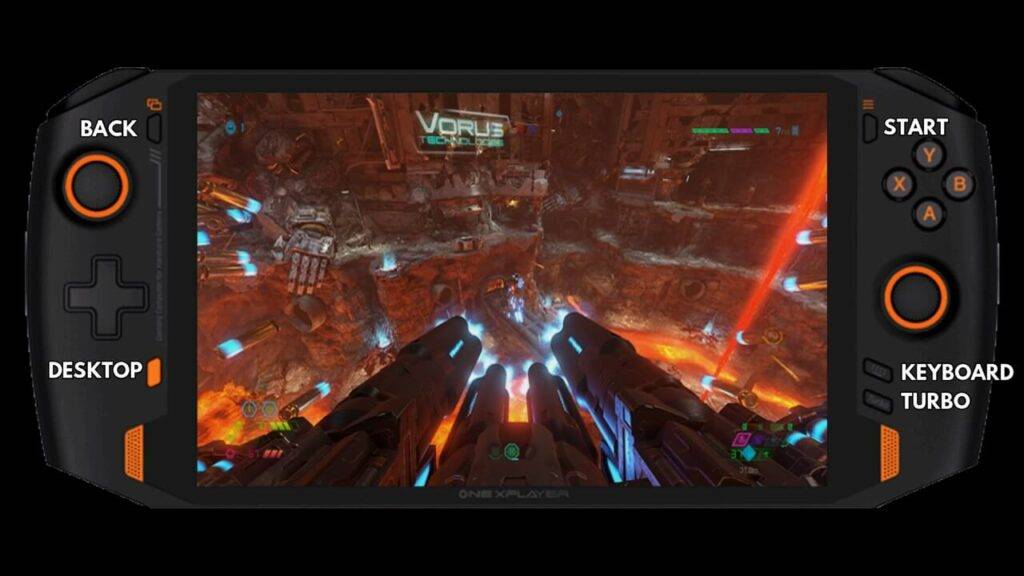
DESKTOP Button
Press once to return to the desktop. Press again to return to the last software that was opened.
Hold the Desktop button for two seconds to display the Xbox Desktop.
KEYBOARD Button
Press once to activate the on-screen keyboard. The LED will illuminate. Press again to close it.
Hold the Keyboard button for two seconds to activate the mouse function. The LED will illuminate. You can then use left analogue stick to move mouse cursor and A and B buttons as left and right mouse buttons respectively. The right analogue stick acts as a mouse wheel to scroll. Press and hold the Keyboard button for two seconds to return to normal joystick controls.
TURBO Button
Press the TURBO button to increase the TDP from 20W to 28W for a boost in performance. The LED will illuminate. Press again to return to 20W.
DESKTOP + KEYBOARD Buttons
Open Task Manager.
DESKTOP + TURBO Buttons
Take a screenshot. It is saved in your Pictures folder.
MUTE Button
Hold the MUTE button on the back of the ONEXPLAYER 1S for three seconds to activate Night Mode. In Night mode, the fans will run at a lower speed to reduce noise. Hold the Mute button again for three seconds to return to normal running mode.
How to install RetroArch on ONEXPLAYER 1S
You can watch our video guide on how to install RetroArch for retro gaming on the ONEXPLAYER 1S, or if you prefer a text and image based version just below.
First you will need to download the RetroArch software.
Open your browser and go to retroarch.com. You will see the Download menu option, choose this and scroll down a little.
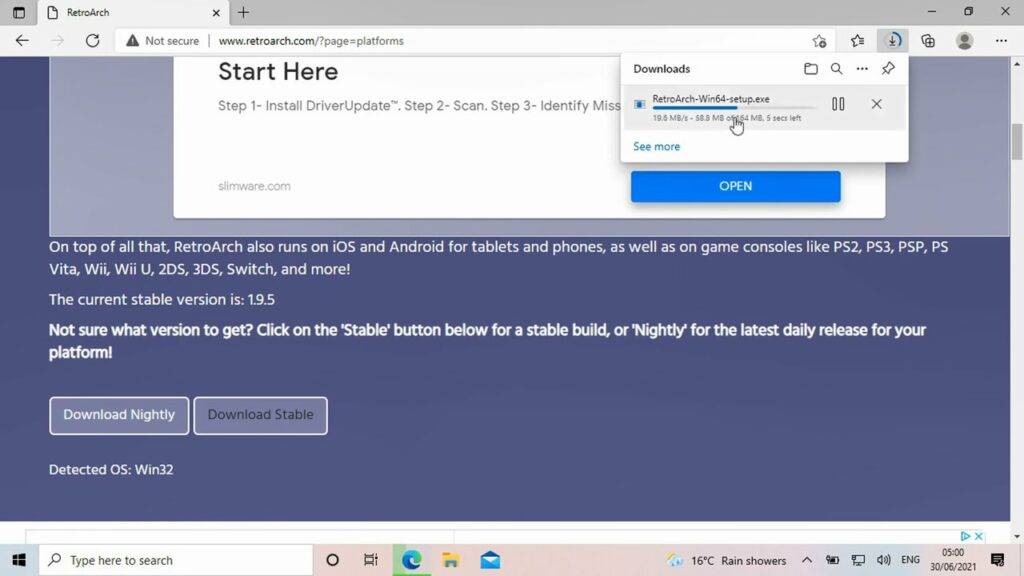
You will see an option to download Nightly which is the very latest version, but may have some bugs. Or Stable, which can be a slightly older version but should have no bugs. We recommend downloading the Stable version.
Once RetroArch has downloaded, click on the download to start the install.
Follow the prompts to proceed to install. You can optionally install DirectX if you already have it installed.
Setting up ROM Folders
Once the software is installed you can go ahead with setting up your ROM folders.
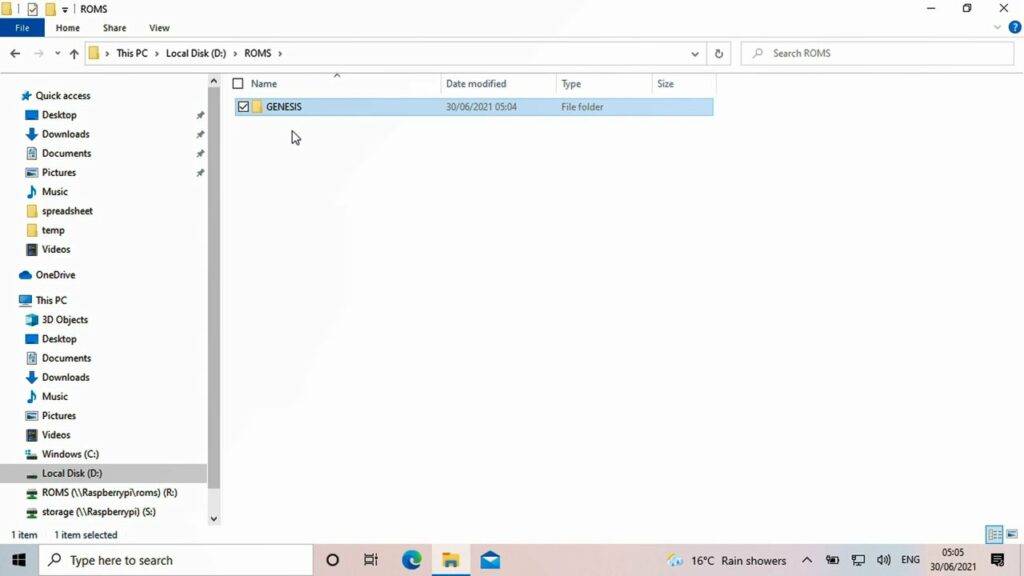
Make a new folder called ROMS and enter into it.
Next create a new folder for the system your ROMs are for, in this example we are using Genesis games.
You can now copy your Genesis games to that folder. Repeat the process for any other systems and games you may have.
Loading RetroArch
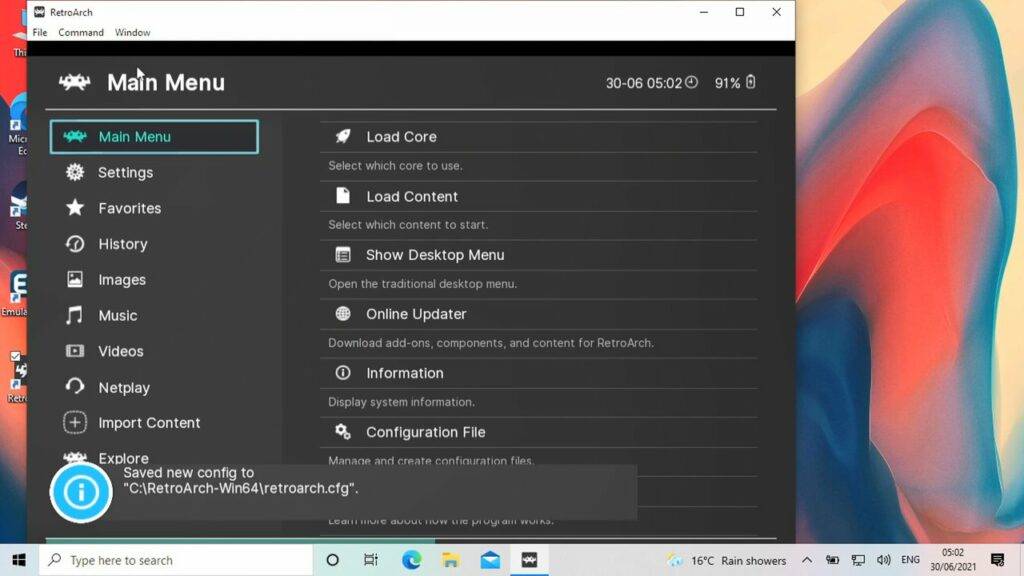
When you are ready you can load the ONEXPLAYER 1S RetroArch software.
You can use the ONEXPLAYER 1S controls to navigate the menus.
How to go full-screen in RetroArch
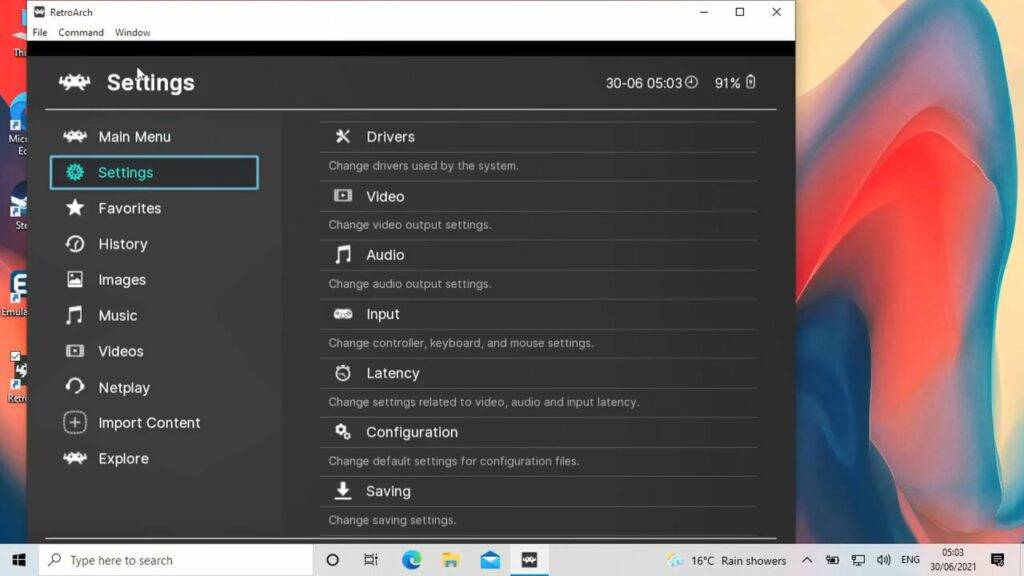
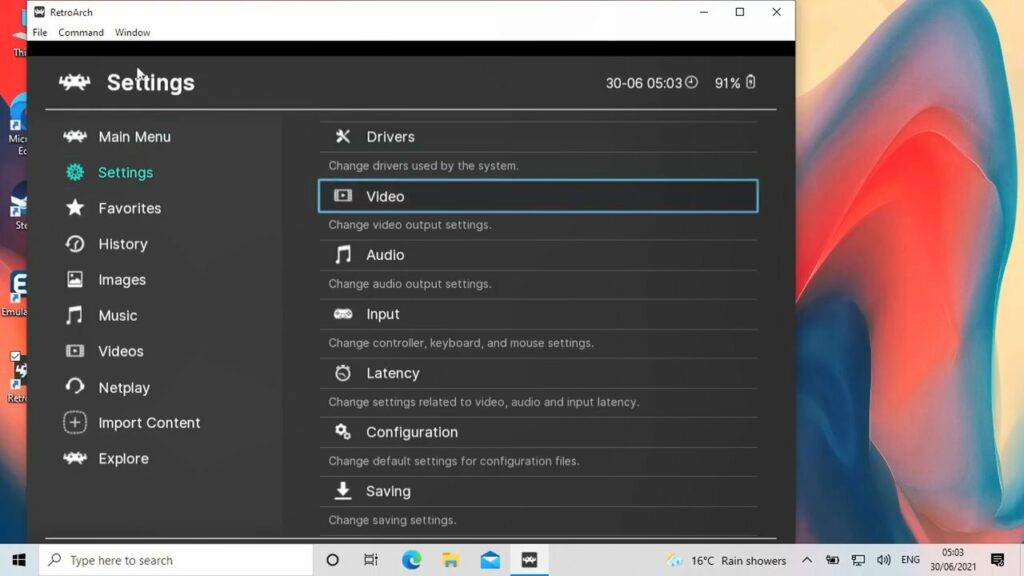
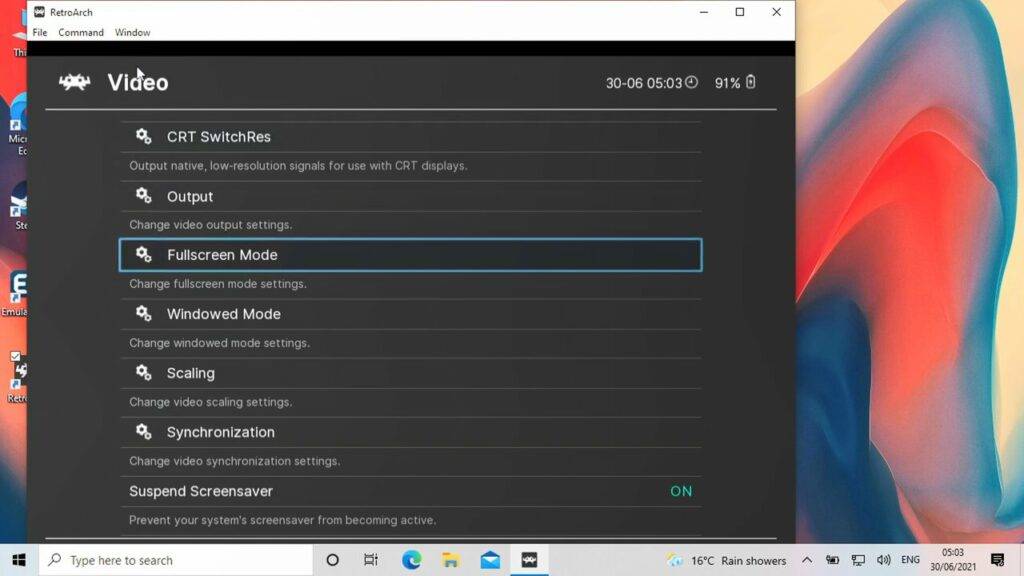
Firstly, you can make the Window full screen by going to Settings…. Then Video…. And then Fullscreen Mode. Then select Start In Fullscreen Mode and change it to ON. The software will restart and now be in full screen.
Installing RetroArch Cores
Next we want to install the emulators, known as Cores in RetroArch, for the systems you have games for.
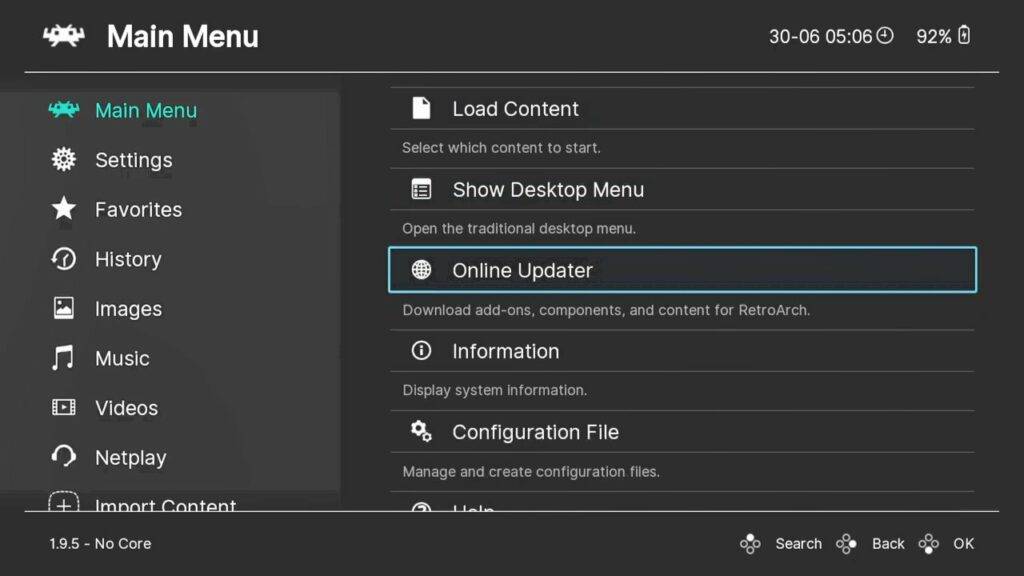
Choose Main Menu…. then Online Updater… then Core Downloader…. This will give you a list of all of the supported gaming systems and Cores available to download.
Navigate the list to your system, in this example we are downloading SEGA Genesis.
There may be multiple cores available for your system. Pick one and give it a try, you can always download and try another later.
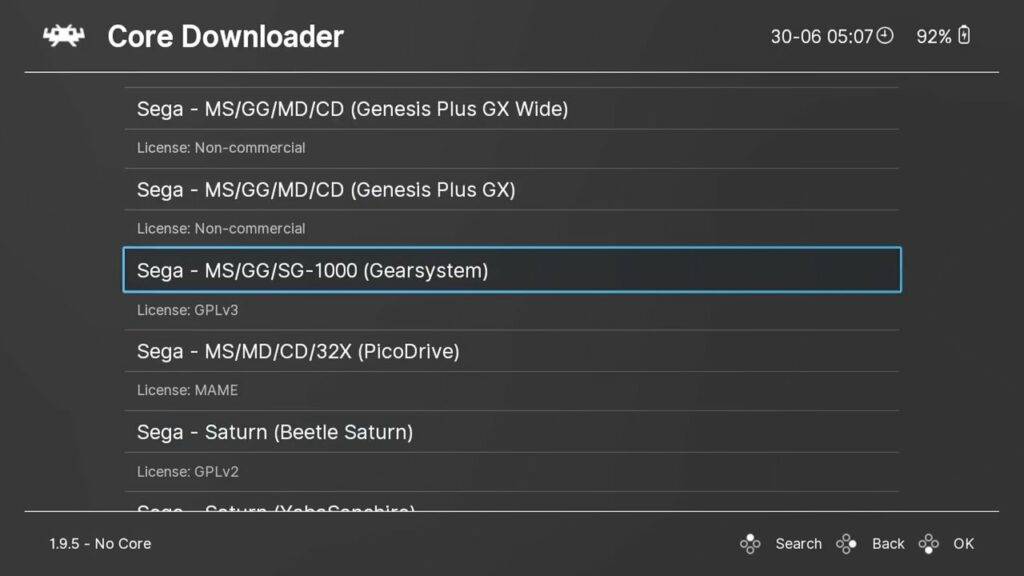
Download any cores that you need for the systems you have games for.
Scanning for your games
Next we need to add your games to the software so that you can access them without using any frontends.
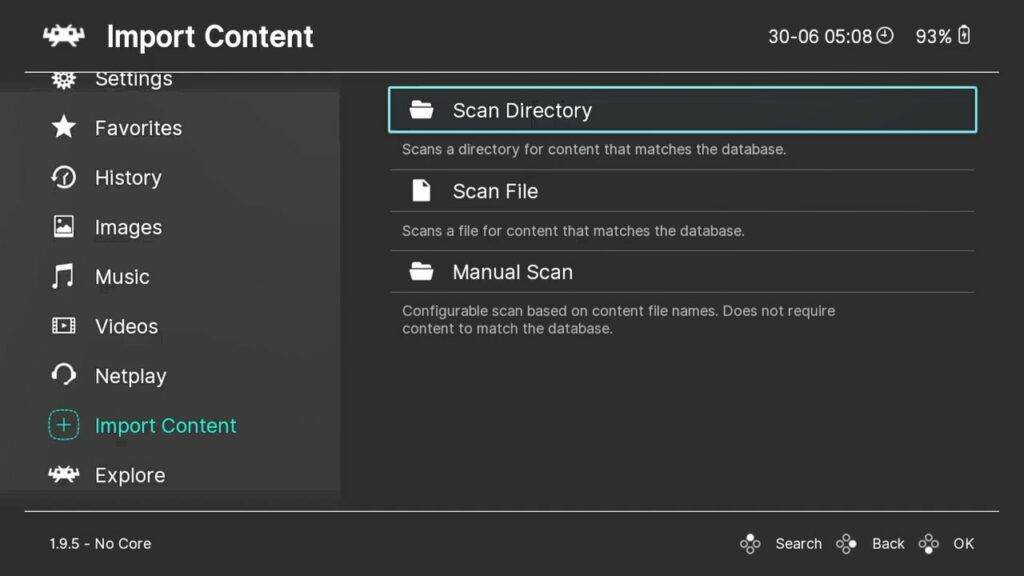
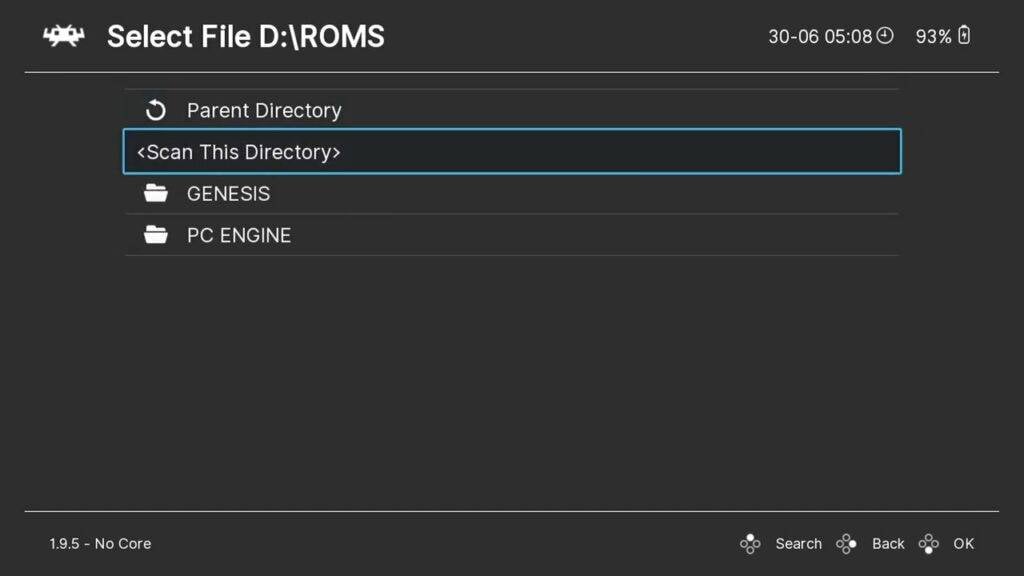
From the main menu, scroll down to Import Content…. Then Scan Directory. This will bring up a list of your drives and folders. Navigate to your ROMs folder created earlier.
Then choose the Scan This Directory option.
It will now proceed to scan the folders for recognised games and add them. Depending on how many games you have, this may take a few seconds to far longer. A progress bar will show to indicate the time.
Loading a game
Once it has completed, return back to the main menu.
Scroll down the menu and below Explore you will now see any new Systems that were found in the scan. Choose a system and it will now show any games it found.
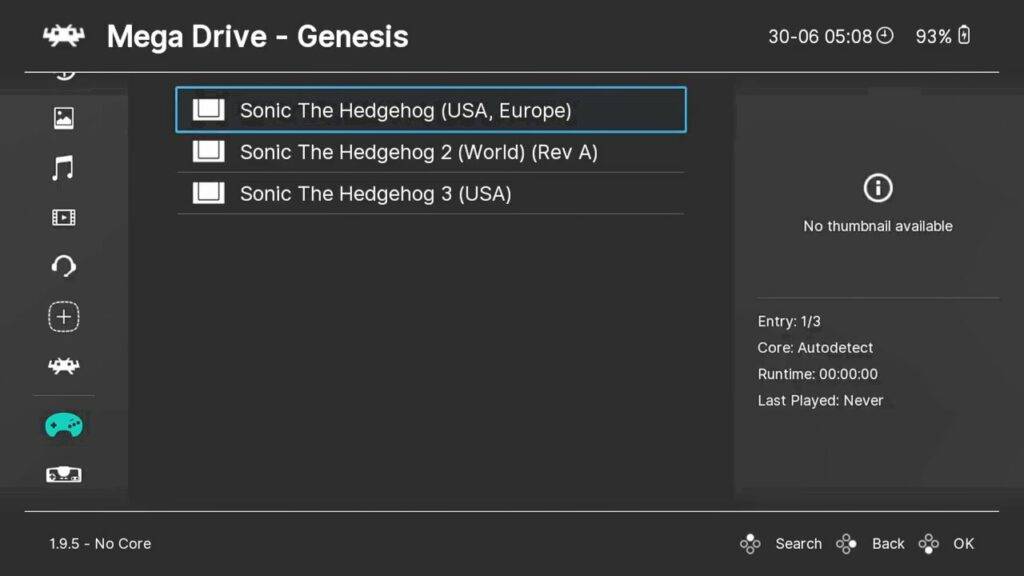
Choose a game and it will display a new menu. Select Run and it will then display a list of available Cores which can run the game. Select a Core and then Run to start the game.
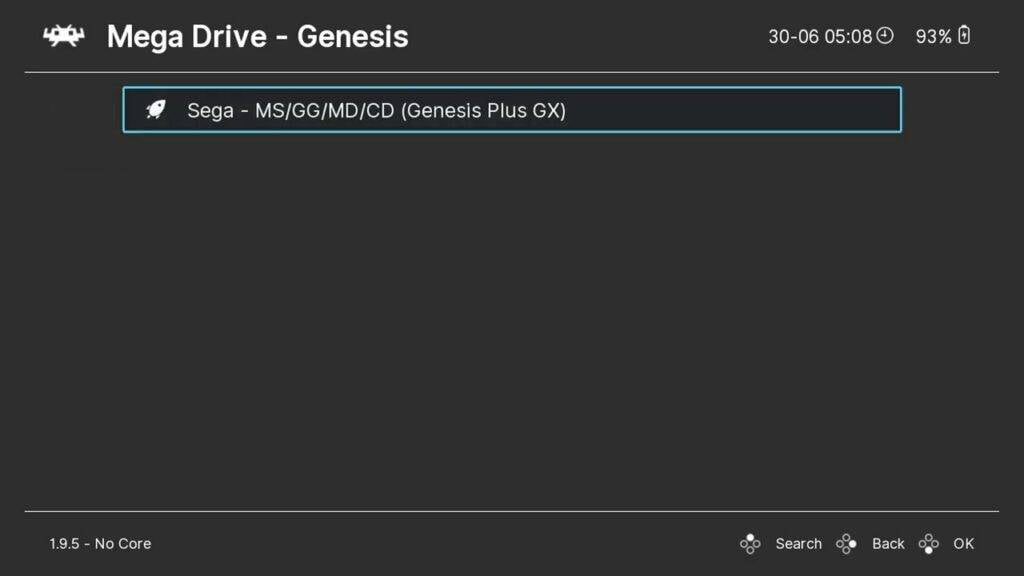
You can set up Core Association with systems to skip having to choose one.
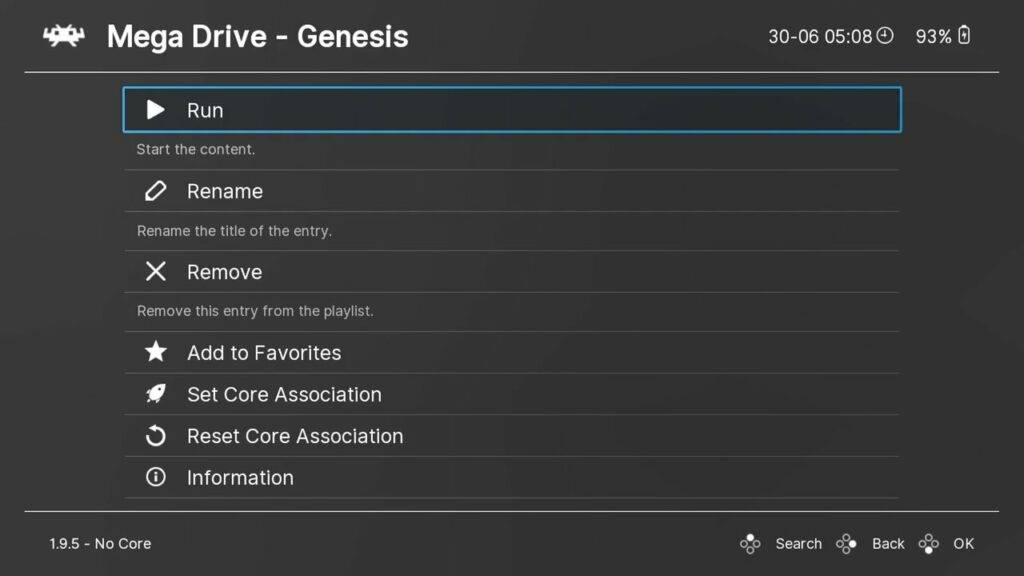
Select Run to start the emulator and enjoy some Retro Gaming!
How to extend the ONEXPLAYER Battery Life?
There are a few steps you can take to help extend the battery life on ONEXPLAYER. Some of these may decrease system performance when used. So if you notice games running slower than before for example, you can revert the changes.
Windows Power Mode
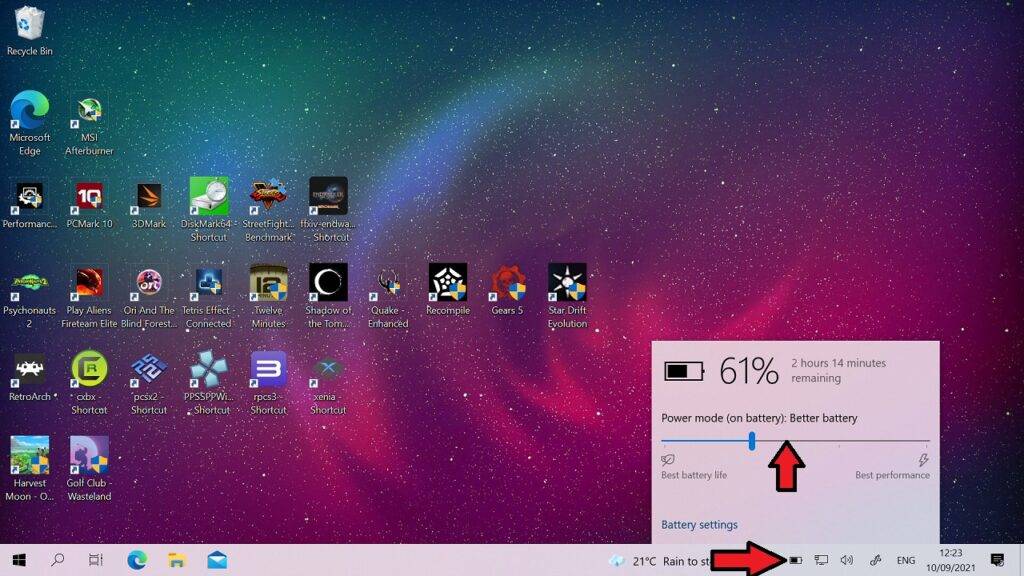
The quickest and easiest way to extend the battery life is through Windows Power Mode. Click on the battery icon on the task bar and you can move the slider from left to right from Battery Saver to Best Performance.
Switch off WiFi and Bluetooth
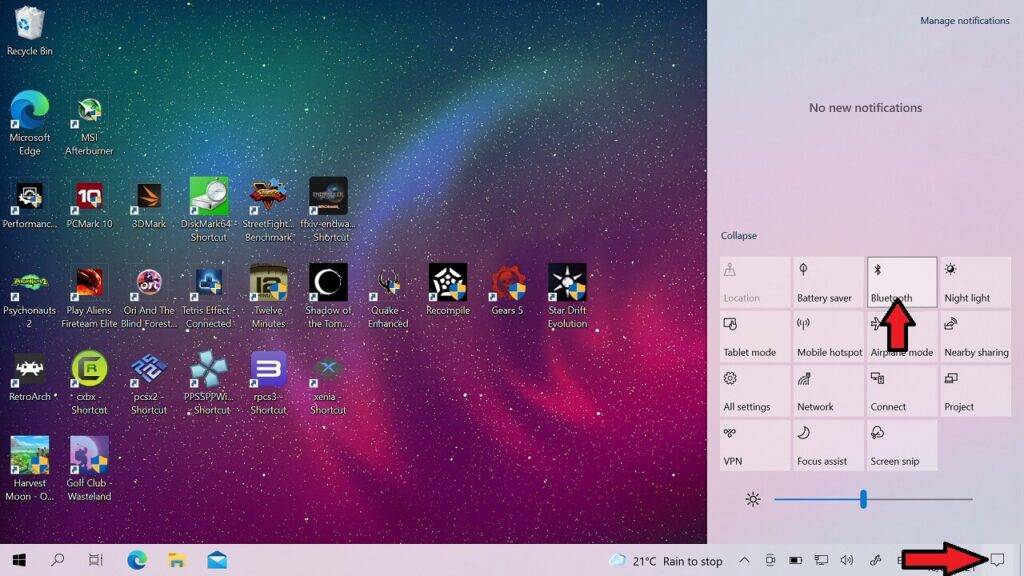
If you are not online or using any Bluetooth peripherals then switching of WiFi and Bluetooth are great for extending battery life.
Airplane Mode
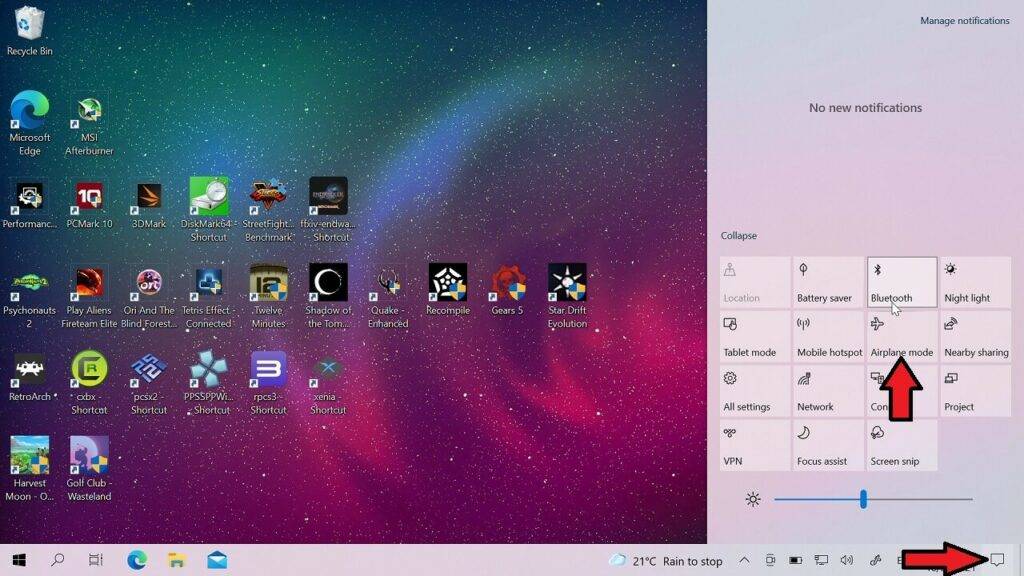
To quickly and easily switch off everything you can simply put the ONEXPLAYER into Airplane Mode.
Switch off Bluetooth
Switch off WiFi
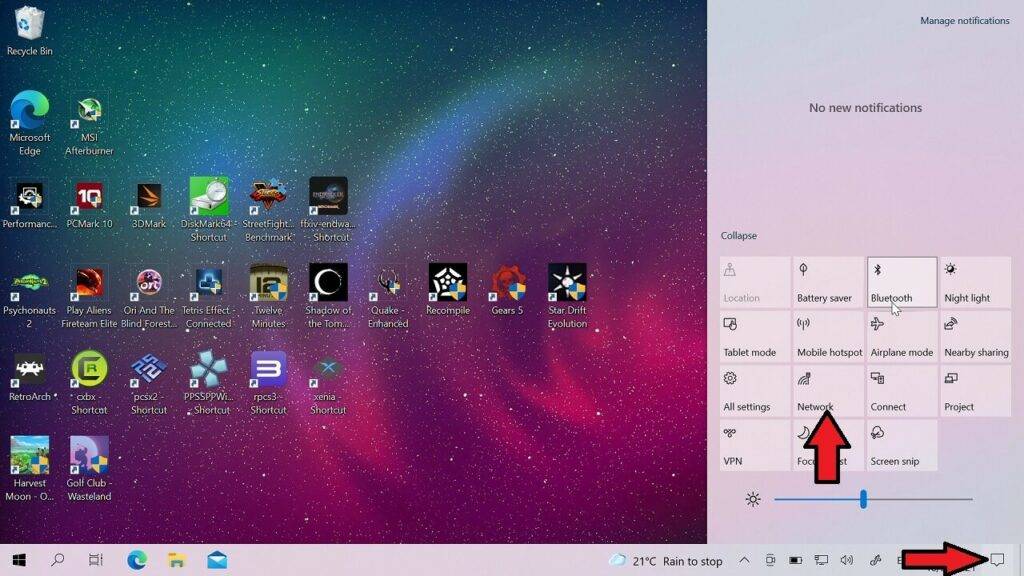
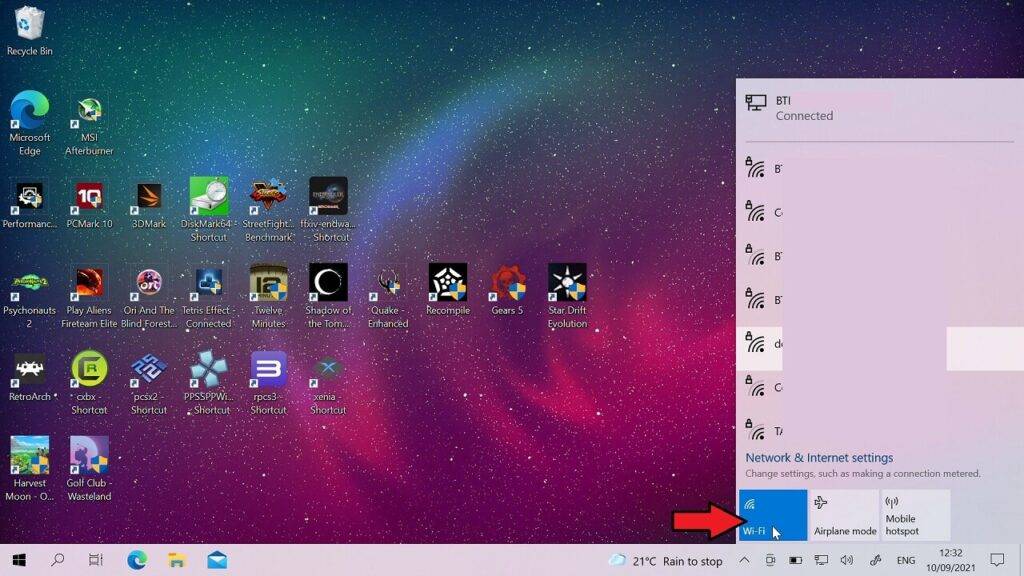
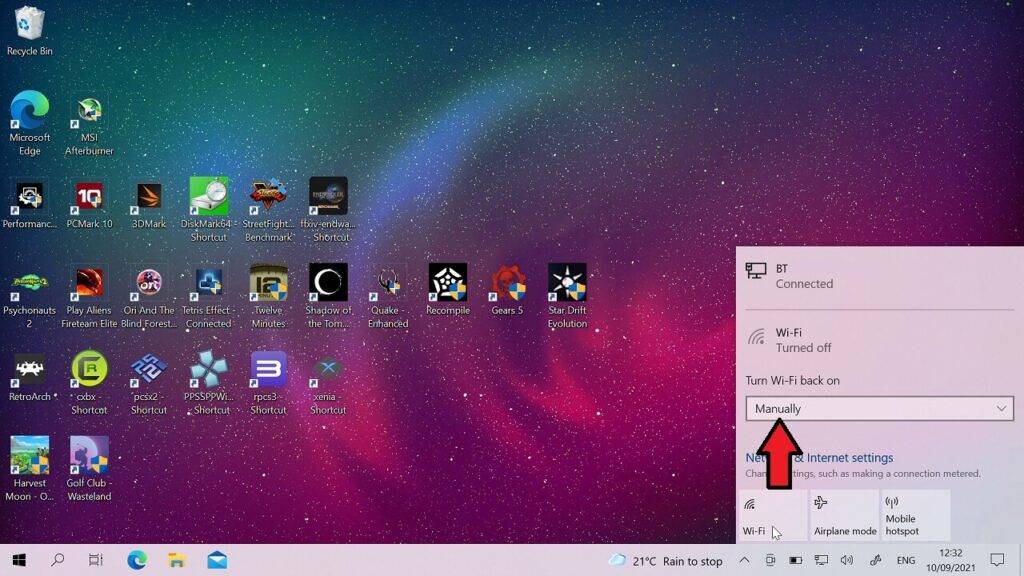
Click on the notification icon, then choose Network. Click on WiFi to disable it. You can set when to re-enable WiFi from the following menu.
Change the screen brightness
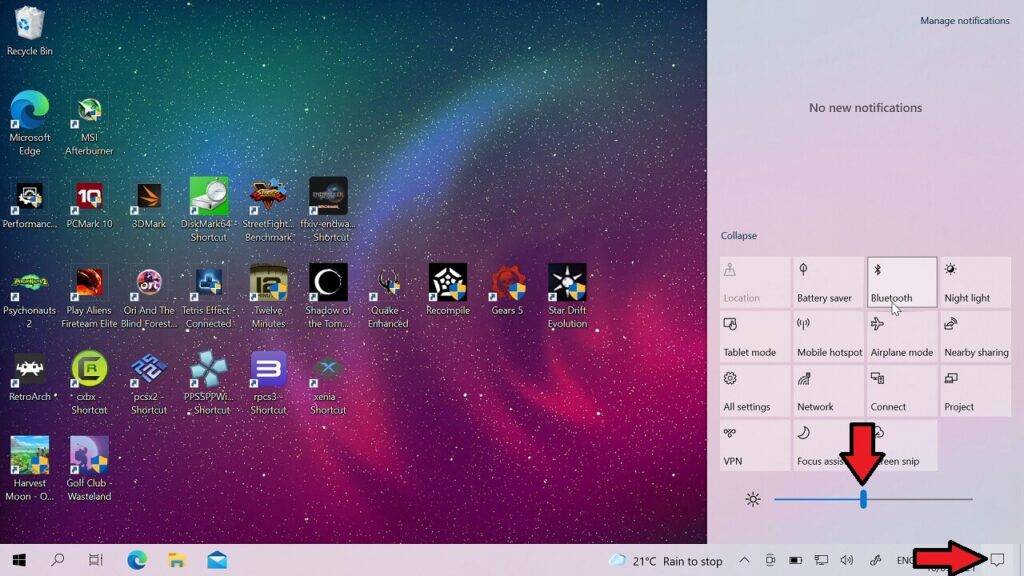
Click the notification icon. You can move the screen brightness slider from left to right to decrease and increase the brightness.
Change the ONEXPLAYER TDP
You can lower the ONEXPLAYER TDP to reduce the devices power usage and heat generated at the cost of overall performance. We will cover this in the guide soon.
ONEXPLAYER Drivers
If you’re the kind of person who likes to try different operating systems, you’ll probably find yourself needing drivers at some point. Because of the non-standard configuration of the ONEXPLAYER 1S, a number of specialized drivers may be needed.
Window is typically pretty good at filling in the gaps for missing drivers – but in the event it cannot, we’ve provided a list of downloads for the ONEXPLAYER drivers in the following sections.
ONEXPLAYER 1S Drivers
You can find the various ONEXPLAYER 1S drivers available to download at this link. These have all been taken from a stock ONEXPLAYER 1S, so they should work fine with your device.
ONEXPLAYER AMD Drivers
The ONEXPLAYER AMD uses a different CPU, thus the drivers are slightly different. You can download the drivers for the ONEXPLAYER AMD at this link, or the link just below.


