You’ve made a fantastic choice with your new Anbernic RG ARC-S & Anbernic RG ARC-D! Welcome to the thrilling world of retro gaming, unlocking a universe of classic gaming nostalgia combined with modern technology. Our Getting Started guide ensures you make the most of your retro gaming handheld, blending the charm of old-school gaming with modern-day customizability and performance.
At DroiX, we celebrate and support the spirit of retro gaming. We also stand by the principle of empowering our users. So, if you find any issues and feel confident enough to handle them, we fully support your Right to Repair! With no effect on your device warranty! But remember, DroiX Customer Support is always happy to help with any queries or assistance you might need.
Anbernic Arc Setup
Begin your Anbernic journey with the device setup. In this section, we’ll guide you through the hardware components, connections, and any additional information you might need while preparing for an immersive viewing experience.
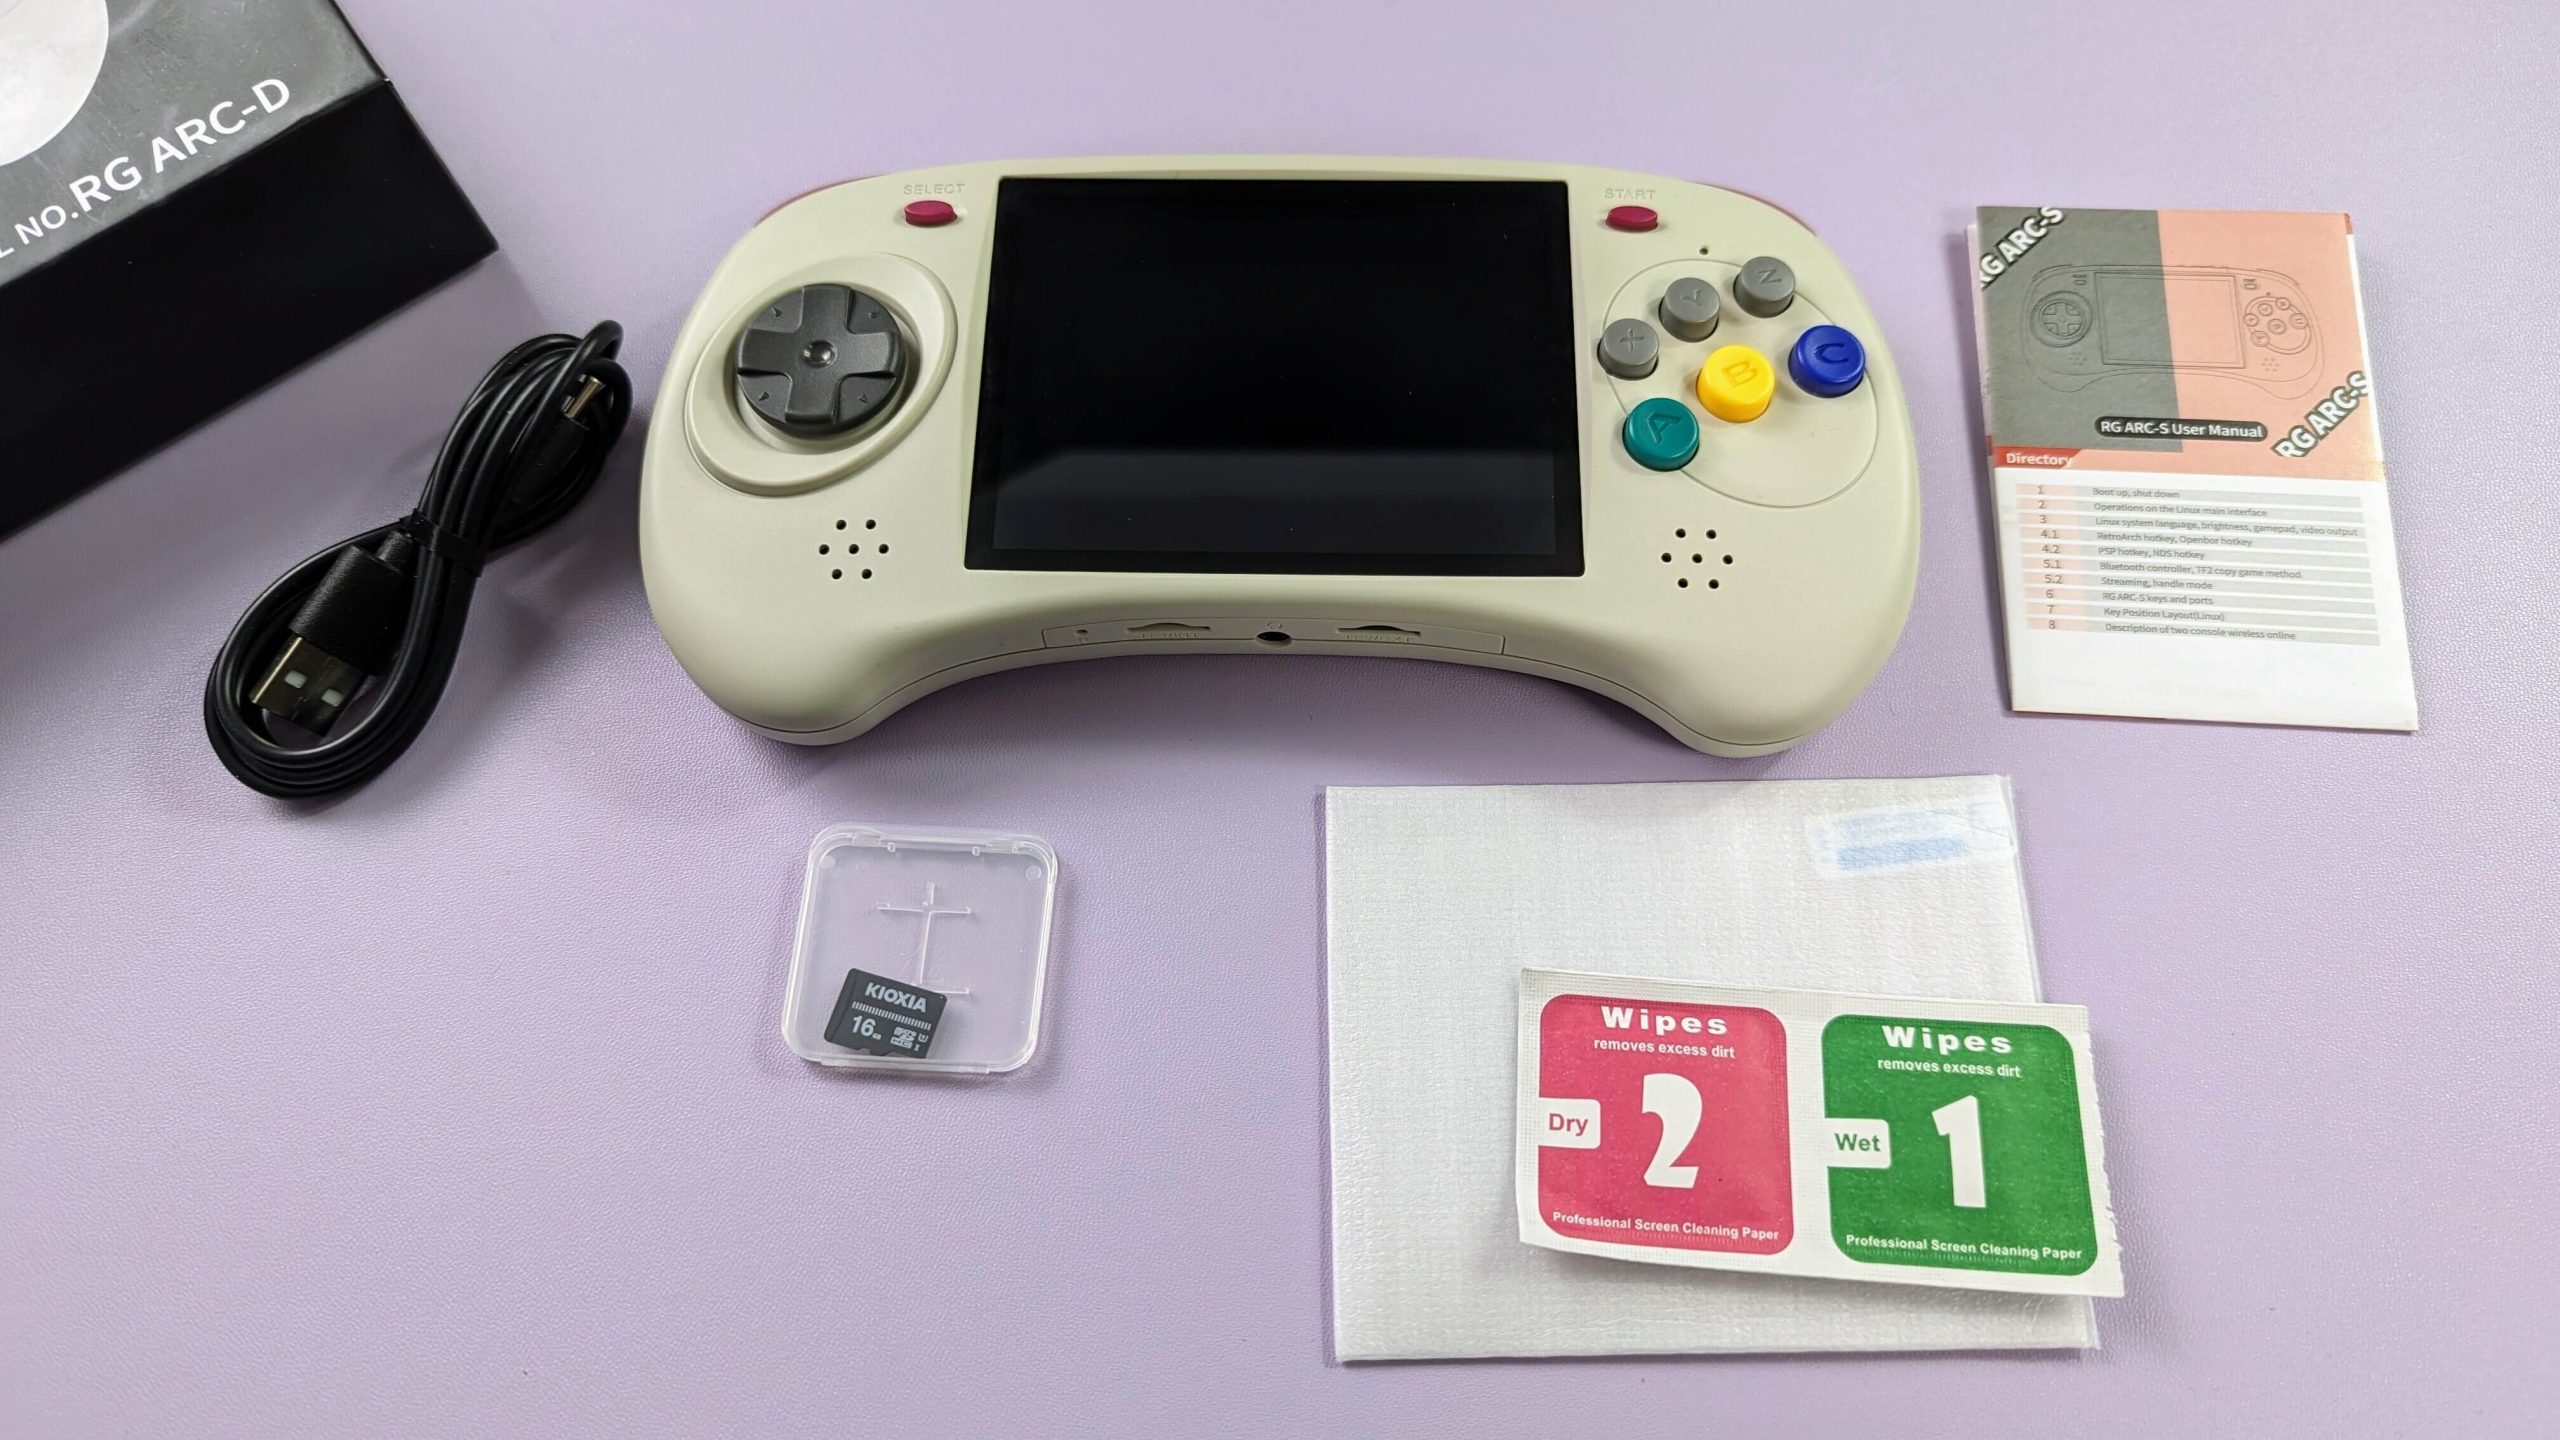
What’s Inside the Box?
When setting up your Anbernic device, it’s important to ensure you have all the necessary components and accessories for a smooth start. Notably, the MicroSD Card storing the Linux OS, which is crucial for your device’s operation, should already be inserted into the TF1/INT slot located at the bottom of the device. Additionally, please remember to check underneath the main compartment of the box, as other essential items are often placed there. Make sure to thoroughly inspect the entire box to find all the components you need for a complete and enjoyable setup experience. With your purchase, you should find:
- 1x Anbernic RG Arc Device
- 1x USB-C Cable
- 1x Screen Protector
- 1x MicroSD Card (Linux OS)
- 1x Micro SD Card (Storage)
- 1x User Manual
Any Issues or Questions?
At DroiX we pride ourselves on our high level of customer service before and after sales. If you have any questions or issues with any purchase from us, please do contact us. We are here and more than happy to answer any questions and get any issues resolved as soon as possible.
Device Overview
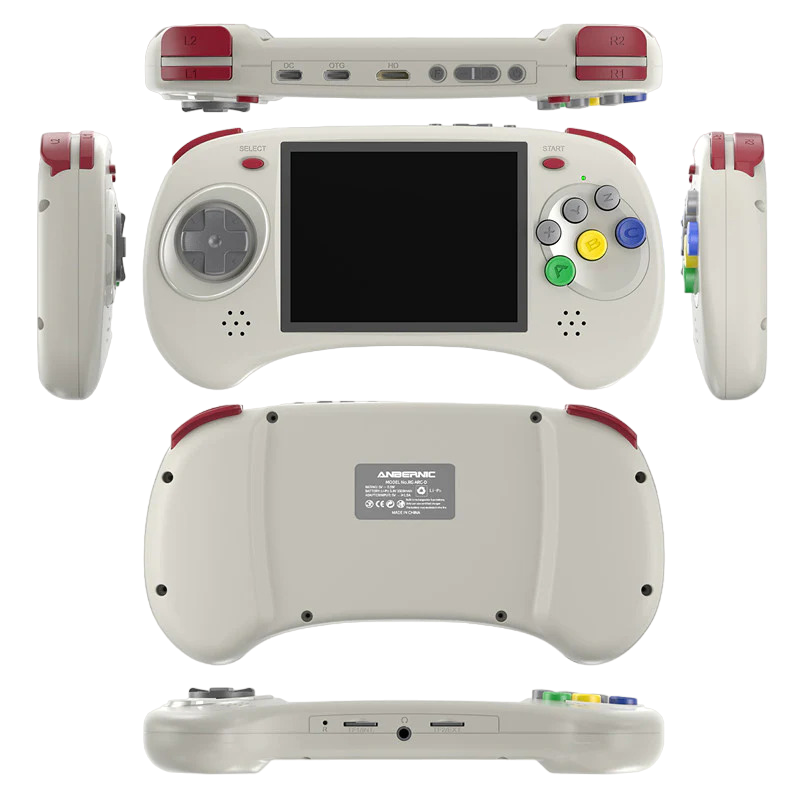
Both the Anbernic ARC-S and ARC-D models feature identical specifications with the only difference being the RAM and OS. Other than this they have the same RockChip RK3566 CPU, ARK Mali-G52 MP2 GPU and identical set of ports, which are clearly labelled on the device itself as well as in the user manual. These ports include:
- 1x USB-C PD Port: dedicated port for supplying power to the device.
- 1x USB-C OTG Port: allows for connecting peripherals for expanded functionality.
- 1x HDMI port: allows you to connect your device to an external display.
- 2x MicroSD Card slots: accommodate MicroSD cards, one primarily for the operating system (storing Linux) and the other for storage.


ARC-S And ARC-D Differences
Both the Anbernic ARC-S and ARC-D models feature identical specifications with the only difference being the RAM. Other than this they have the same RockChip RK3566 CPU, ARK Mali-G52 MP2 GPU. Both the devices run on Linux OS, loaded from a MicroSD Card in the TF1/INT slot. The ARC-D, however, has an extra feature: it can dual-boot with Android OS, offering more flexibility in gaming and app usage. Additionally, the ARC-D is equipped with touchscreen functionality, enhancing its use with specific games and apps that benefit from touch inputs, a feature not available on the ARC-S.
What To Do?
Before being transported back to the golden age of gaming, you’ll first need to get your device set up and running. Don’t worry, we’ll walk you through every step. We’re aiming to make the setup process as smooth and hassle-free as possible, allowing you to focus on the excitement and nostalgia of retro gaming. Just follow these simple steps, and you’ll soon be reliving the golden era of gaming.
Charge Device
It is crucial that the first thing to do is to fully charge your Anbernic device. A complete charge ensures that your device won’t power off unexpectedly during the initial setup, which can include vital checks and configurations – such as calibrating the device’s battery. This initial charge sets a strong foundation for the battery’s long-term health and efficiency, aligning with the best practices for preserving the device’s longevity.
Insert MicroSD Card
Next, let’s prepare your device’s memory. You’ll need to insert the MicroSD card into the TF2/EXT slot, which is conveniently located at the bottom of the device (refer to Image 1 below). This MicroSD Card is where all your data will be stored, so make sure it’s properly secured. With your storage in place, your device is almost ready to whisk you away into the world of retro gaming.
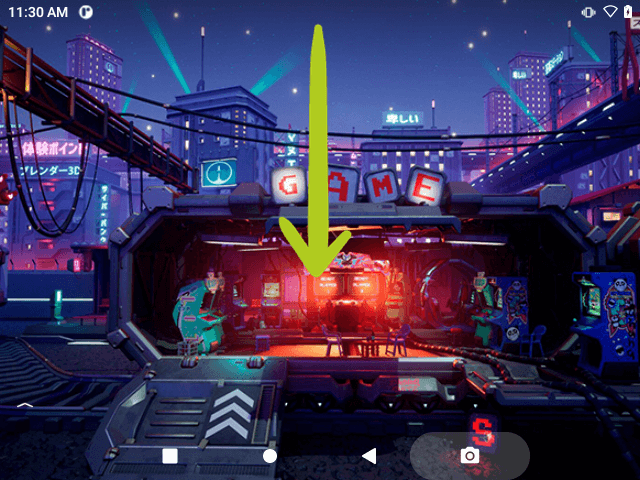
Power On Device
Now, let’s bring your Anbernic device to life! Press and hold the power button to power your device (Refer to Image 1 below). A green LED indicator will light up on the front of the device once powered (Refer to Image 2 below). Keep in mind, that the first boot might take a bit longer than usual — this is completely normal and part of the setup process. Once this initial setup is complete, subsequent boot times will be quicker, getting you into your games faster. Patience is key here; your retro gaming experience is just moments away!
Linux OS
The Linux OS is conveniently pre-loaded on a MicroSD card, slotted into the TF1/INT slot at the bottom of your device. This setup ensures that you’re ready to start your gaming adventure right out of the box. This MicroSD card with the Linux OS is a crucial component for both the Anbernic ARC-S and Anbernic ARC-D. If you ever need to remove this card, remember to re-insert it back into the same TF1/INT slot to continue enjoying the Linux-powered gaming experience.
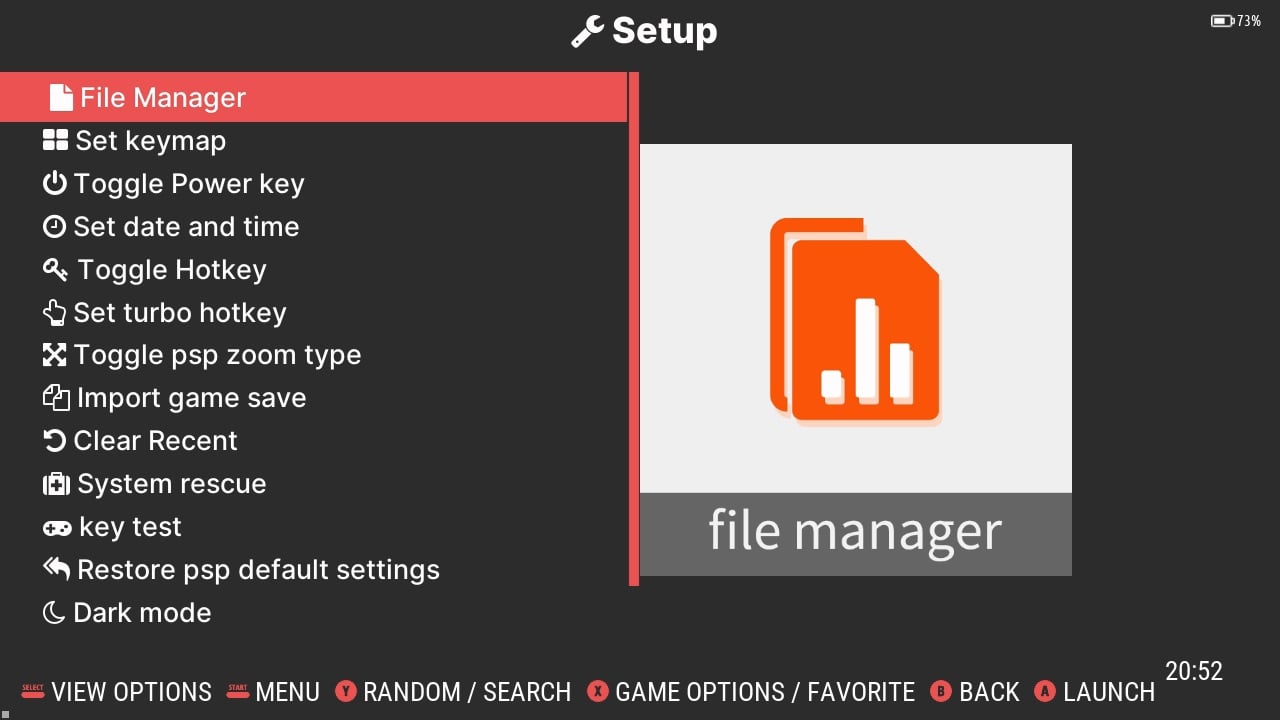
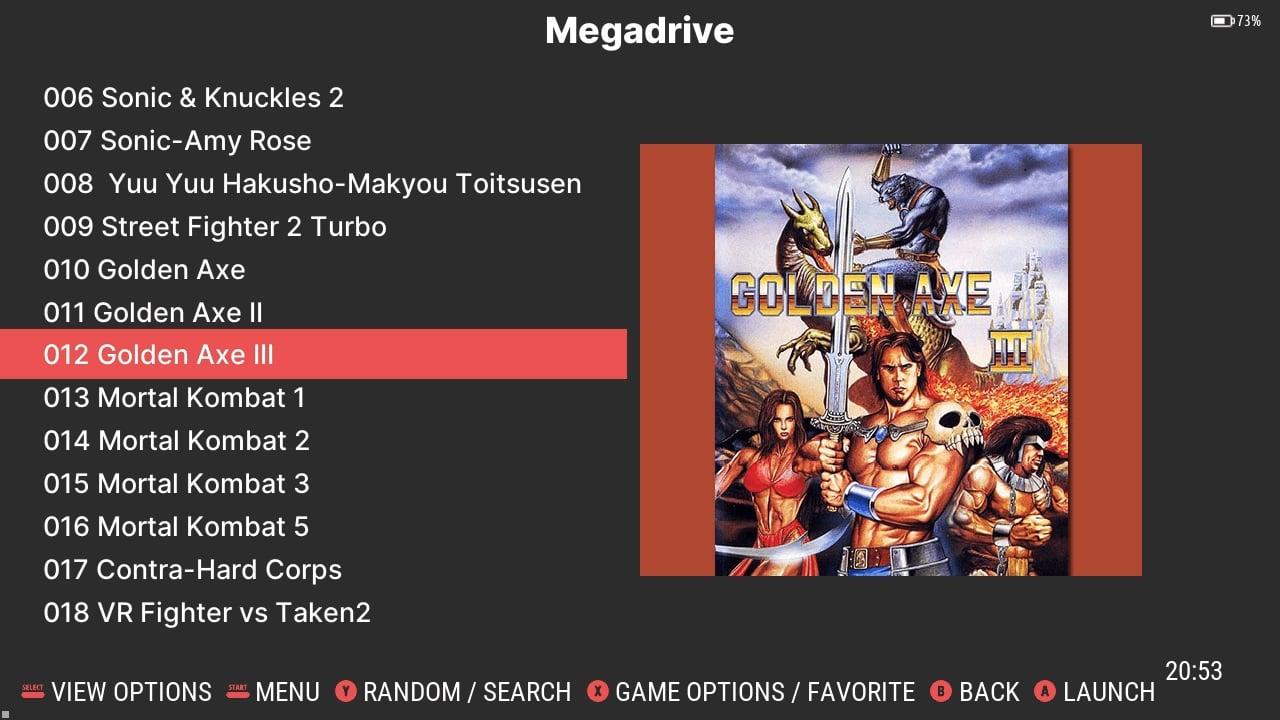
Home Menu
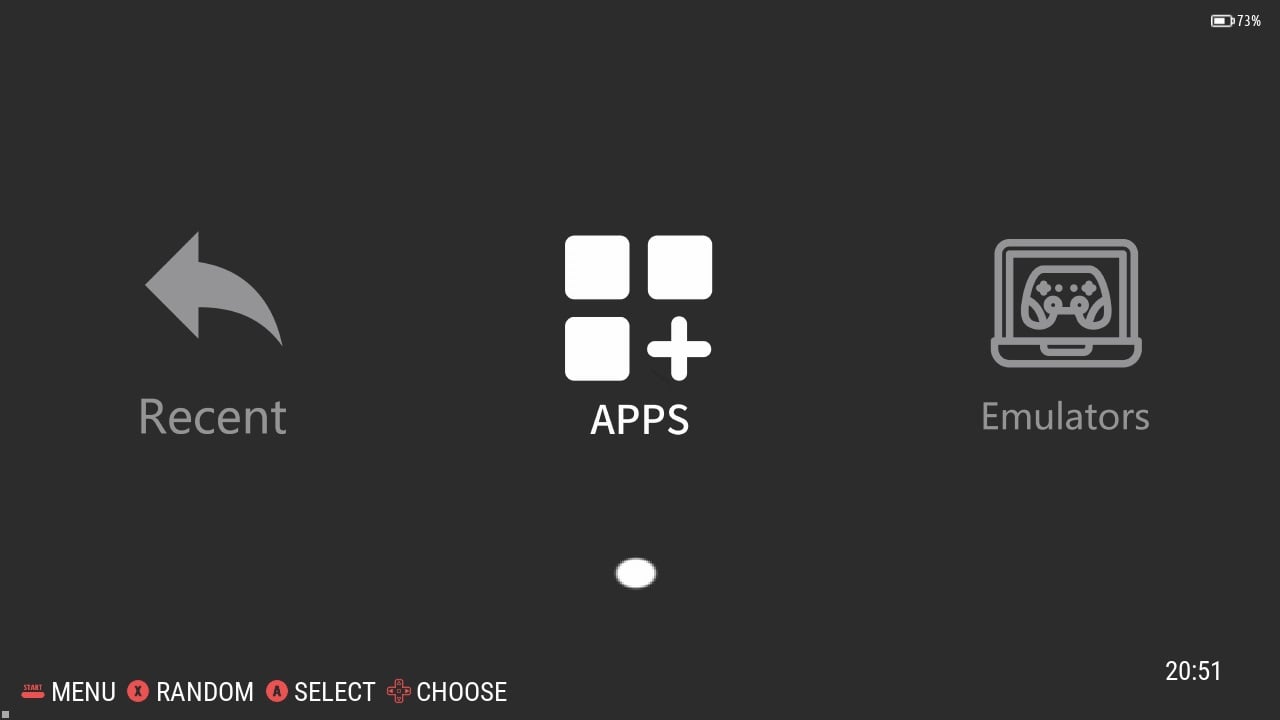
Your Anbernic devices offer a clean and simple UI, allowing for a user-friendly experience. You can choose from five main options: Favourites; Recent; Apps; Emulators and RetroArch (refer to Images 1 & 2 below). We’ll go into some more depth for each of these categories and more below.
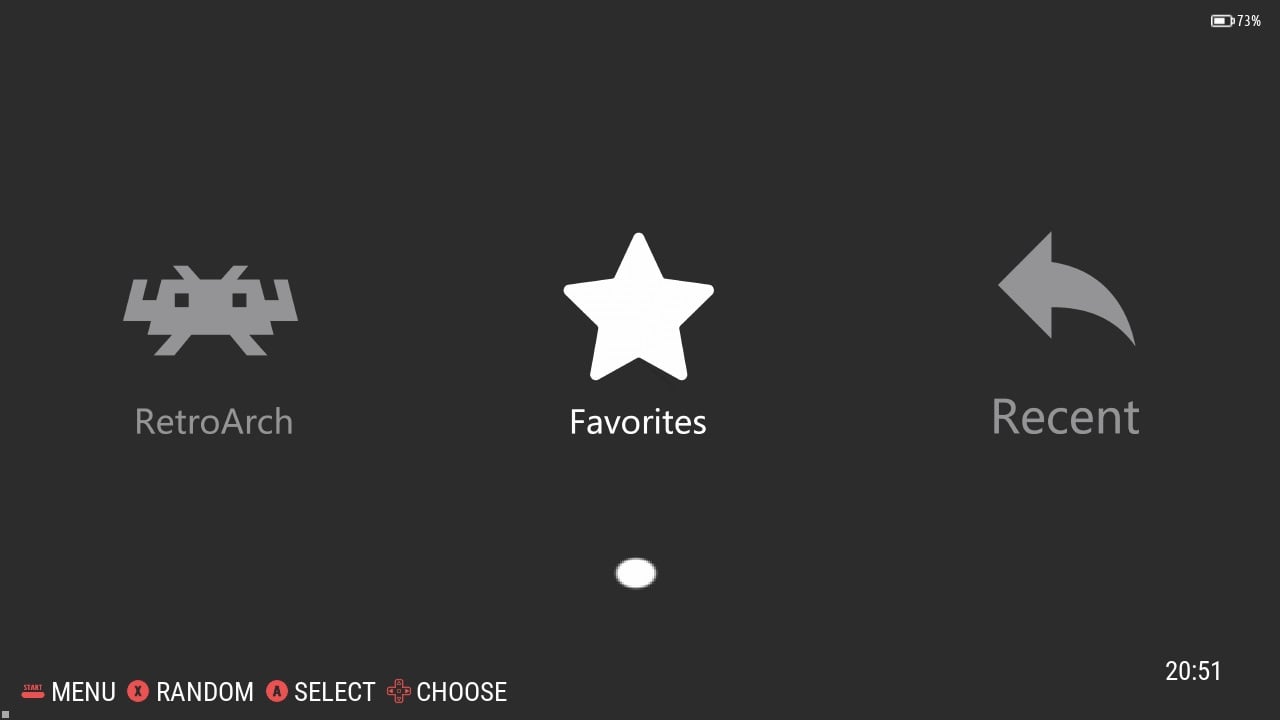
Favourites
The favourites section consists of your defined favourite games. Here, you can easily access and manage the games you love the most. Adding to your Favourites allows for quicker and hassle-free access to these selected games, making it easier to jump right back into the action. To add a game to your Favorites, simply highlight the game in the menu, then press the X button and choose ‘Add To Favorites’.
Recent
The Recent option features a list of all the games you’ve played lately, providing a convenient way to resume where you left off and keep track of your gaming experience. Simply run and play a game and it will be added to your Recents section.
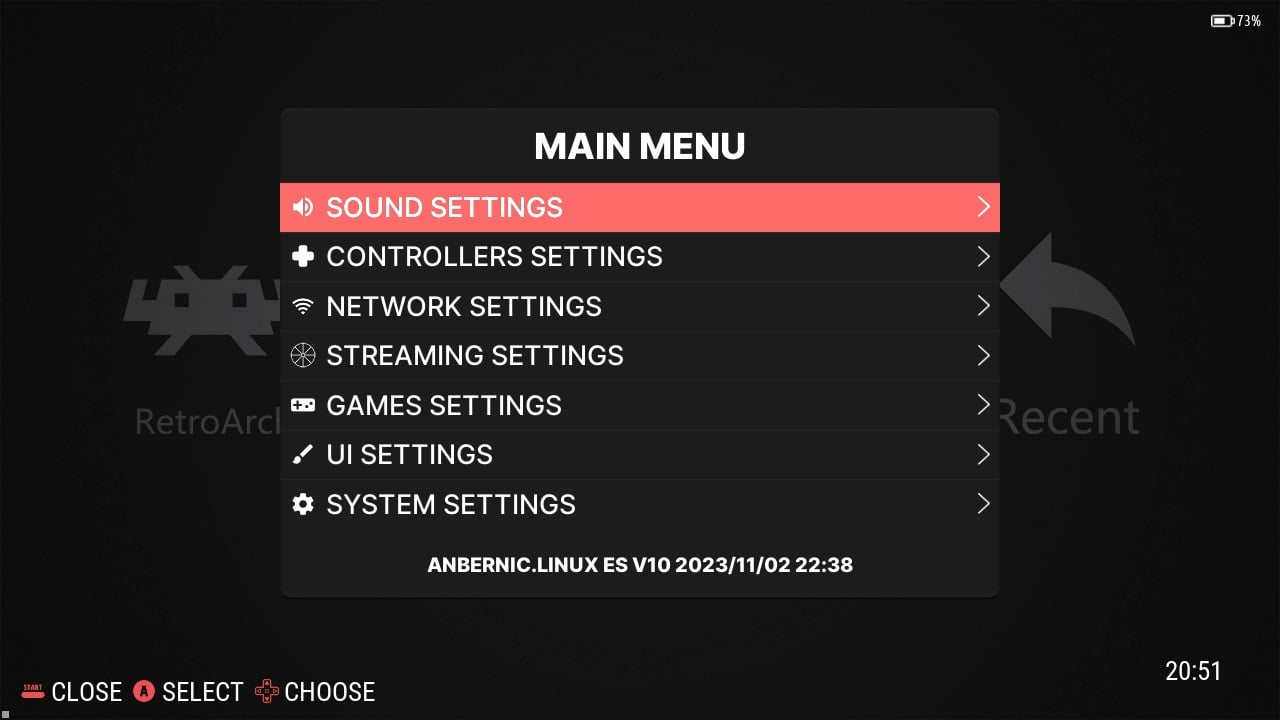
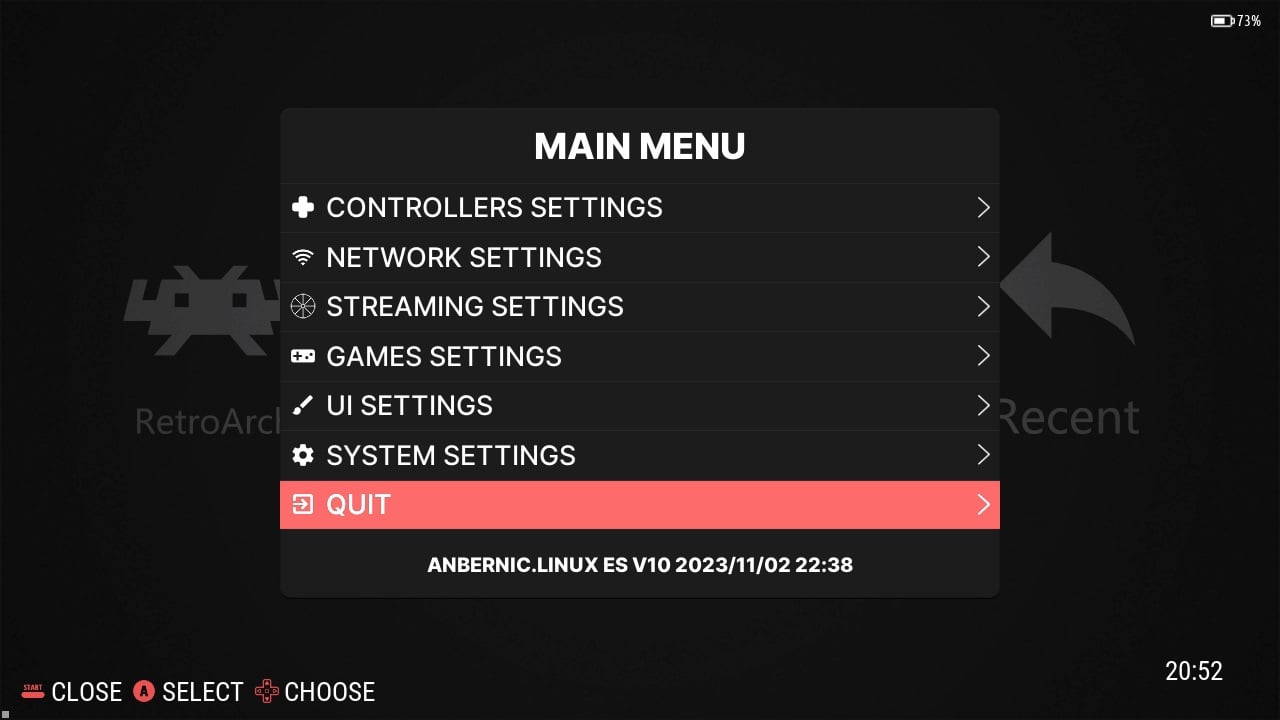
Main Menu
The options menu (referred to as the Main Menu) on your Anbernic ARC-S & ARC-D devices is the control centre for all customisation and system settings. Press START to access this menu. This intuitive menu provides a range of options, allowing you to tailor your device to your preferences. Here’s a quick overview of what you can configure:
- Sound Settings
- Controller Settings
- Network Settings
- Streaming Settings
- Game Settings
- UI Settings
- System Settings
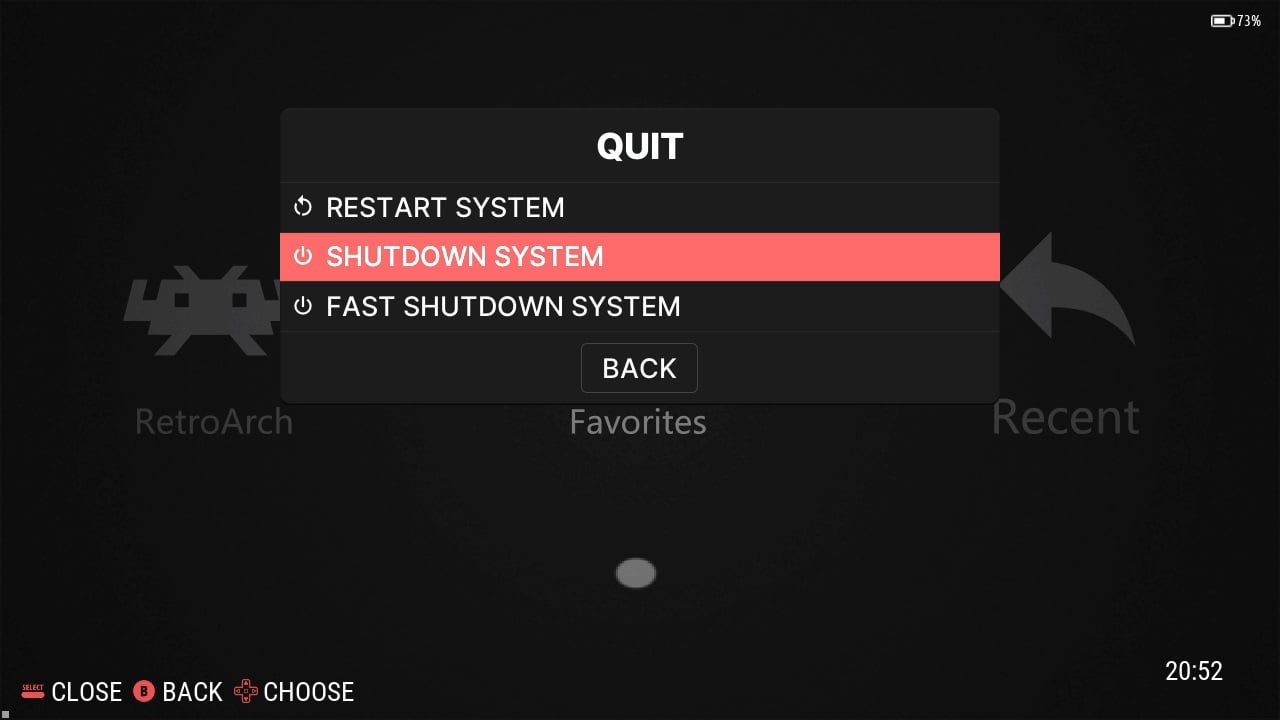
- Shutdown Settings
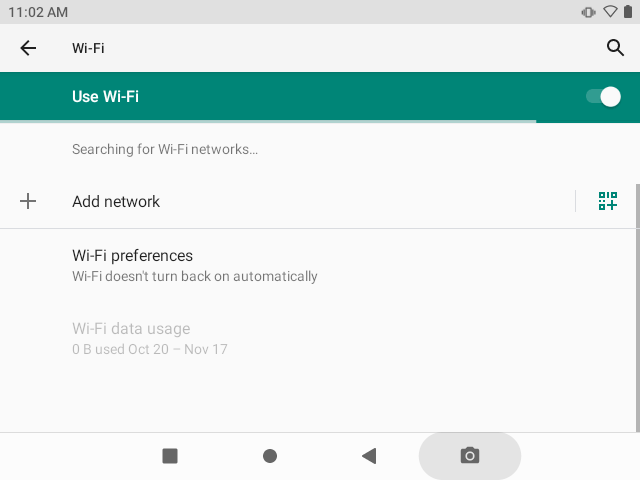
Wi-Fi Settings
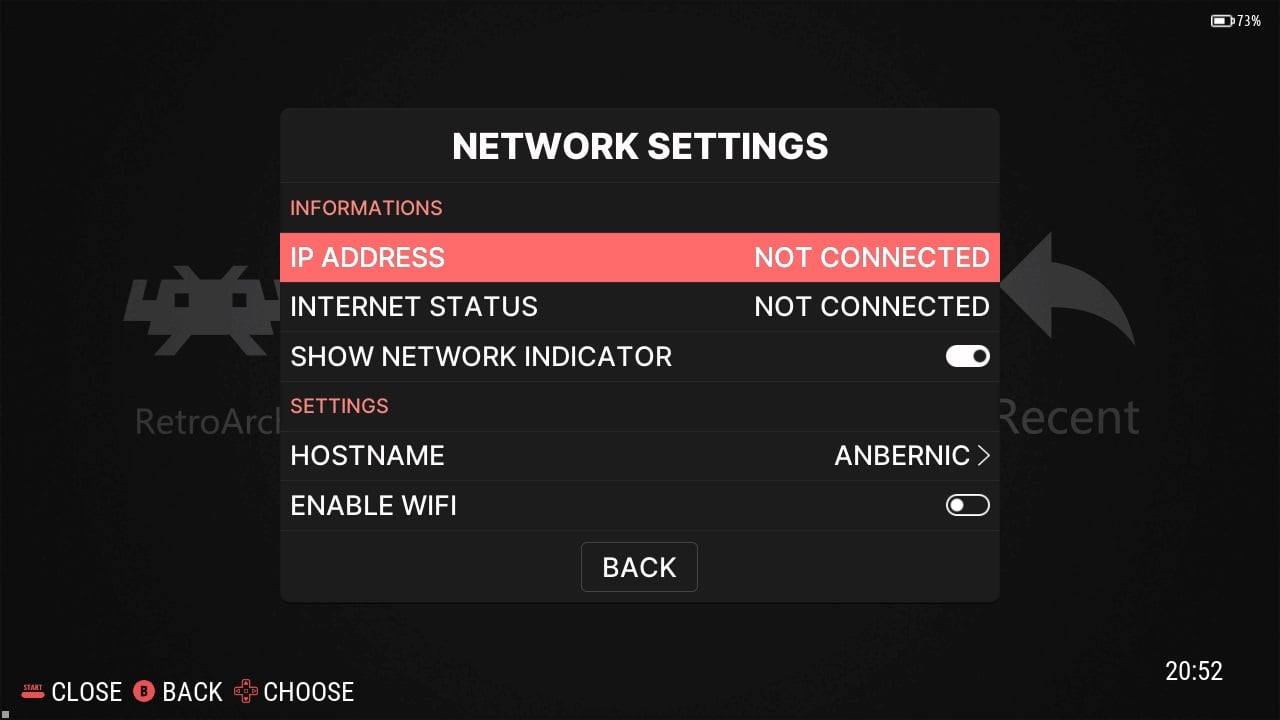
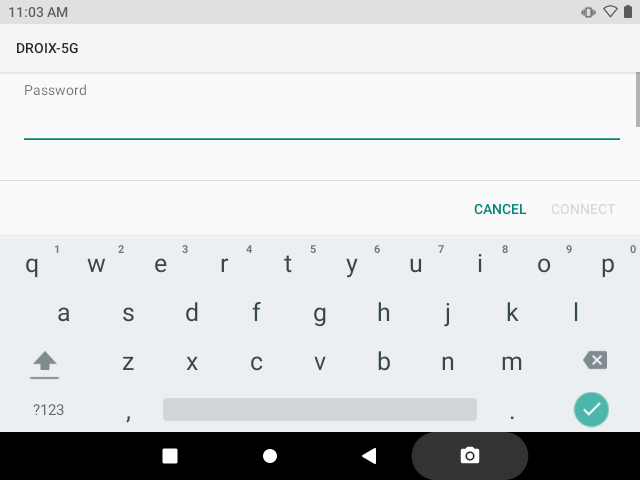
The network setup can get a little tricky so here’s a step-by-step guide to setting it up. First, head over to the Main Menu by pressing the Start button and then select ‘Network Settings‘. The next step is to enable Wi-Fi — once enabled some more options should appear (refer to Images 1 & 2 below). From here, simply select ‘Wi-FI SSID‘, choose your desired network connection and then select ‘Wi-FI Key’ and enter the correct Wi-Fi password (refer to Image 2 below).


Apps
The Apps menu is where you can manage all of your other applications.

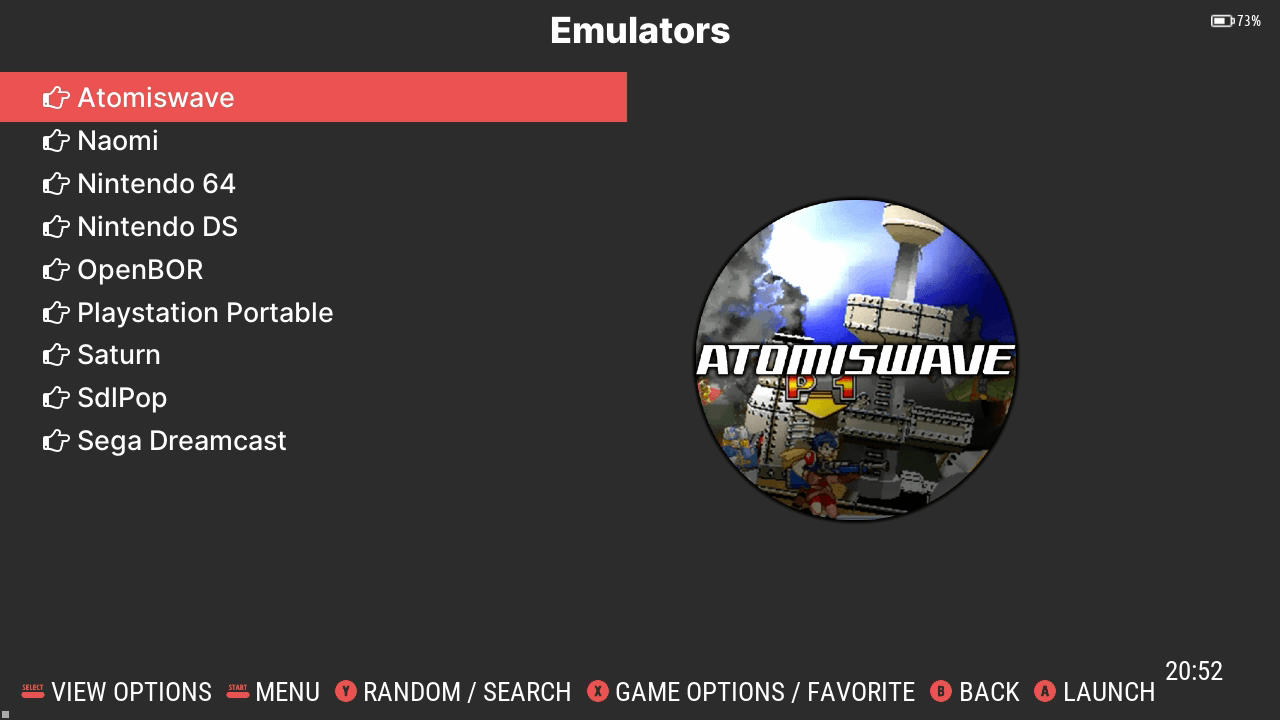
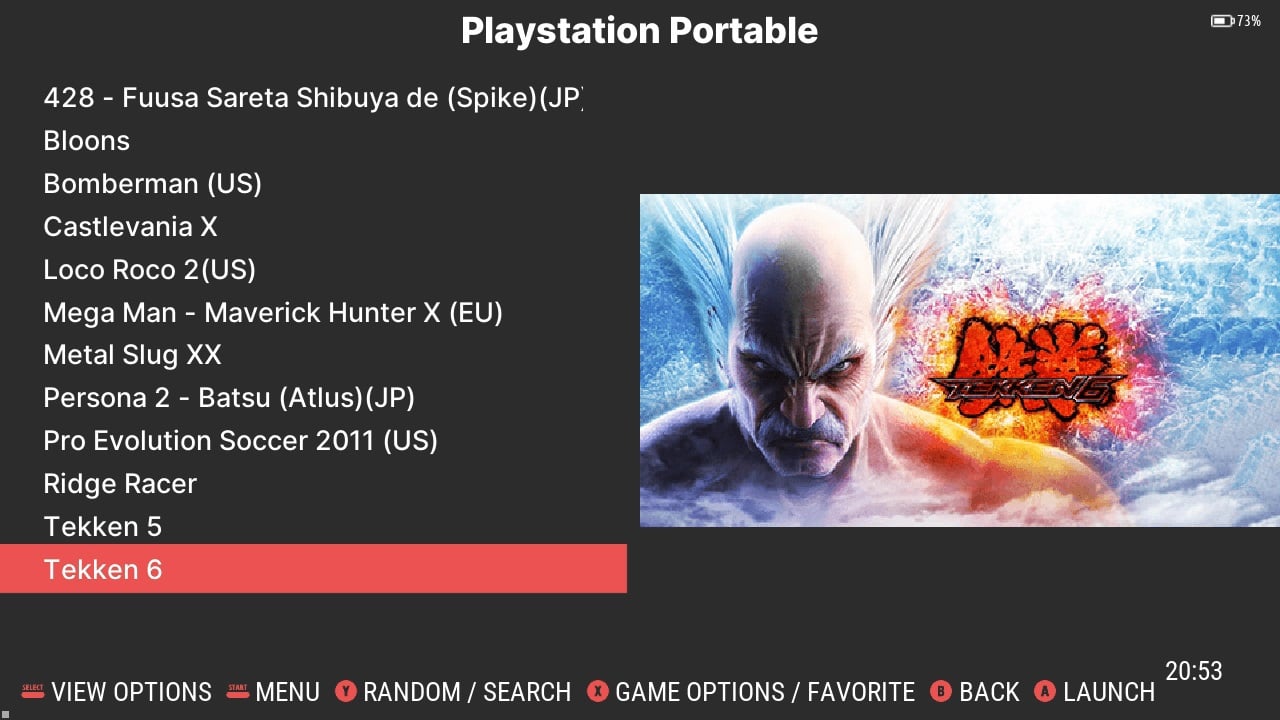
Emulators
The ‘Emulators’ option contains the individual & independent emulators that you might install onto your device. First, you will see a list of the different installed emulators (refer to Image 1 below). After selecting your emulator, it will provide a list of games installed for that emulator (refer to Image 2 below).
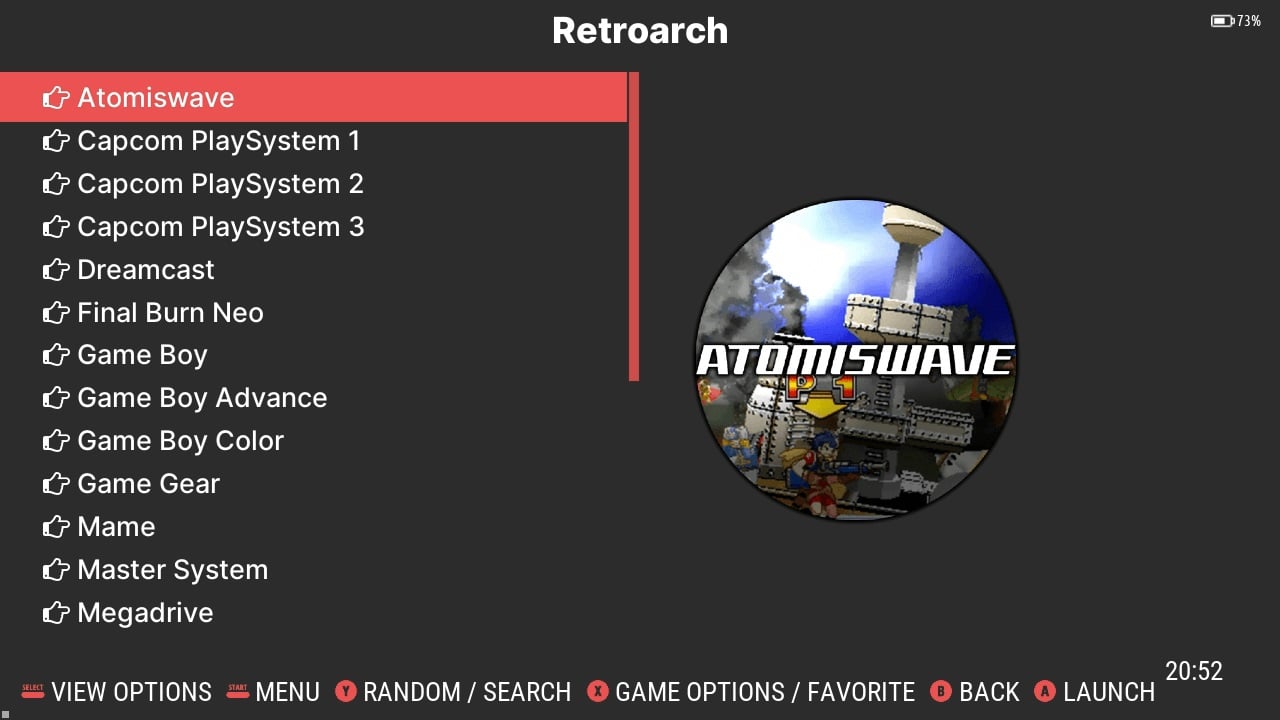
RetroArch
RetroArch is a free and open-source, frontend for emulators and games. It enables your device to run a wide range of games and devices whilst providing unified configurations and more advanced features such as custom shaders, rewinding and netplay. RetroArch is an alternative way to load emulators and games on your Anbernic ARC device that provides you with more customisation. RetroArch uses ‘Cores‘, which acts as a plugin to load emulators. These ‘Cores‘ can essentially be looked at as the emulator itself. You will be able to install and update new cores as they become available on the RetroArch build.
Android OS
The Anbernic ARC-D’s dual boot system allows you to boot from Linux or Android. To boot into Android, you’ll first need to remove the MicroSD Card from the TF1/INT slot, conveniently located at the bottom of the device. This should be the same MicroSD that was already inserted into the device when you first unboxed it – NOT the one that you had to insert! The card in the TF1/INT slot contains the Linux OS, and removing it signals to switch to its alternative operating system – Android. All you have to do now is power the device on! To boot back into Linux, simply insert the same card into the TF1/INT slot again when the device is powered down.
Once booted in Android, you’ll have access to a variety of apps and functionalities distinct from the Linux environment which we will cover now. The Android OS provides a more modern UI than the Linux boot. This means you have a lot more customizability – including access to the Google Play Store, ultimately making your Retro Device have more functionality.
Android Setup
When you launch the Android OS for the first time you will need to set up the device as if it was brand new. Simply follow the onscreen instructions and you’ll be okay! First, you will be greeted by a welcome screen, here you should select ‘Start Use’. This will cause the device to begin setup which may take a short while – it took us around 3-5 minutes! Once configured, simply select ‘Continue’ and you should now be in Android OS.
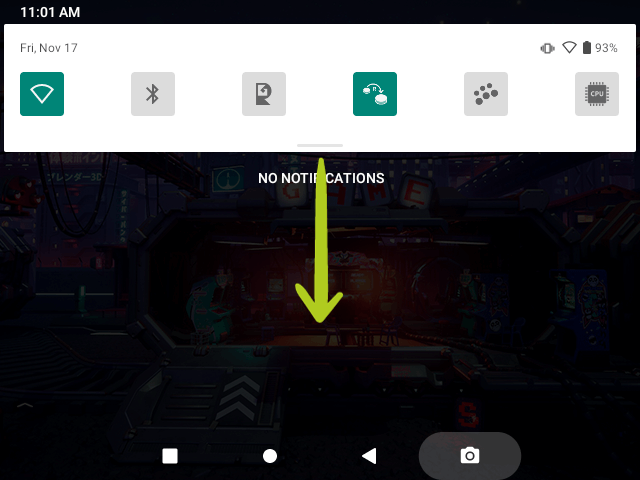
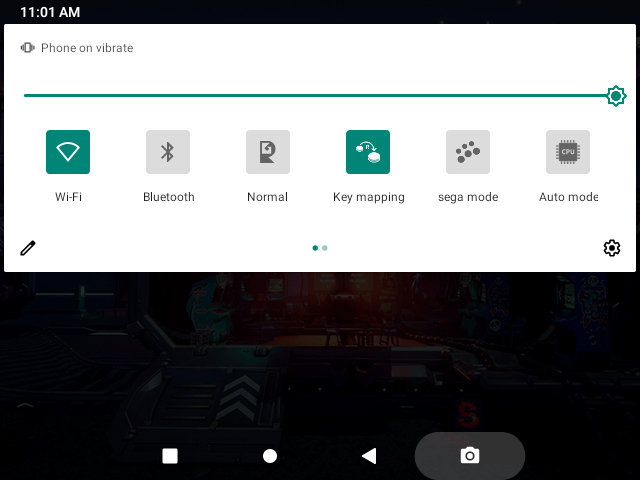
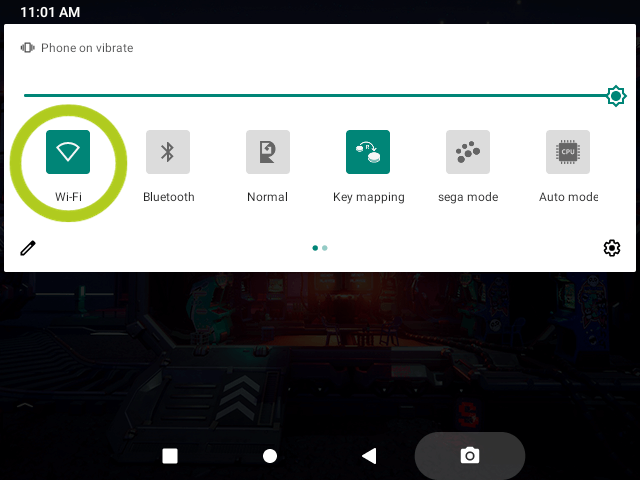
Control Centre
Your Anbernic’s device control centre can be accessed by sliding down from the top of the screen, similar to how you would on a smartphone (refer to Image 1 below). Swipe down again to expand the control panel if needed (refer to Images 2 & 3 below). from here you can easily and quickly access and modify device options such as Wi-Fi, Bluetooth, Mode Control, button keymapping and more.
Wi-Fi Settings
To access and connect Network settings, open the control centre and hold you’re finger on the Wi-Fi option. This will open the Wi-Fi menu and show all the different available network connections. Simply select your desired network, and enter the password.
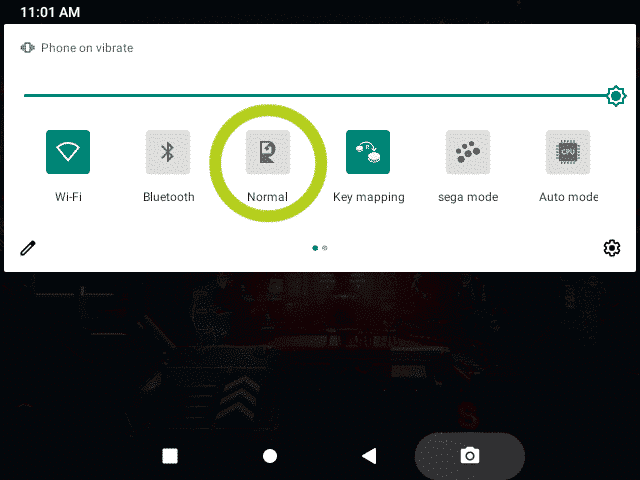
Quick Emulator Set Up – Jump Straight Into The Action
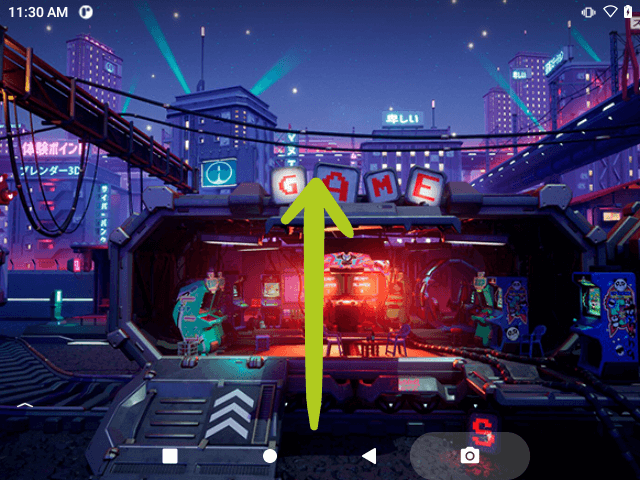
To quickly start playing games on your Anbernic device with minimal setup, open the device control centre by sliding down from the top of the screen, like you would on a smartphone. Once the control centre is open, there will be the option that has the Anbernic RG icon and is labelled either ‘Normal’ or ‘Game Mode’. Tapping this will open/close the RG Launcher.
Opening it will bring up an overlay displaying a variety of emulators. Navigate through the emulators using the left and right buttons (or swiping) to find your desired option. After selecting an emulator, you will see a list of all compatible games available. Choose the game you want to play, and you’ll be launched straight into the action with preconfigured settings, ensuring a seamless gaming experience.


Manual Emulator Set-Up
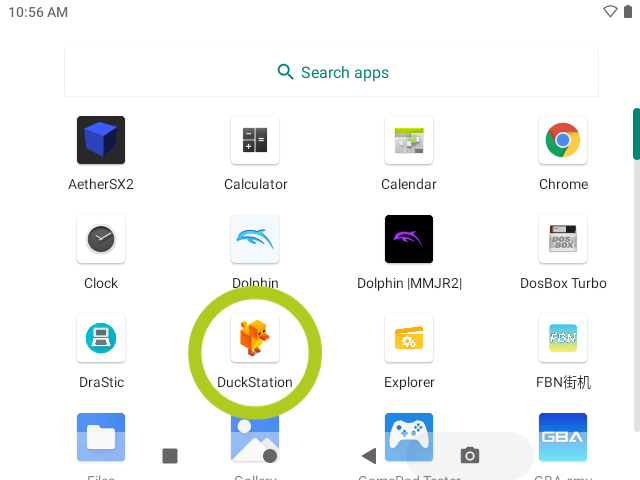
For those who prefer more control and customization over their gaming experience, manually setting up each emulator on your Anbernic device is a beneficial approach. While this process takes a bit longer, it allows for greater personalization of both the emulator and the games. Although they are not set up, emulators are already installed onto the device. We will use DuckStation, the PS1 emulator as an example below. Each emulator may look different and vary slightly in its setup process, but they will all be similar.
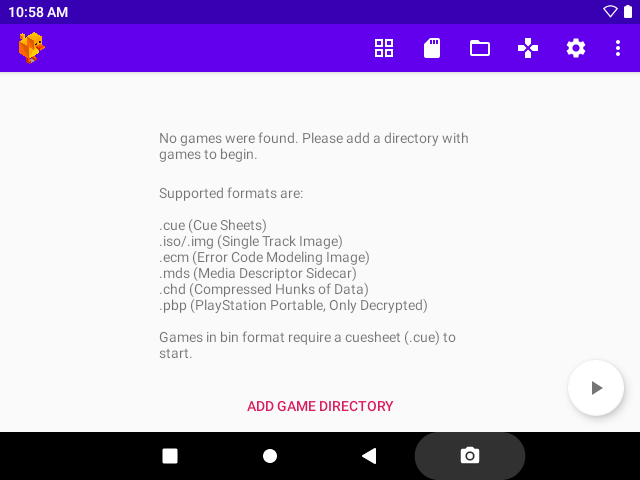
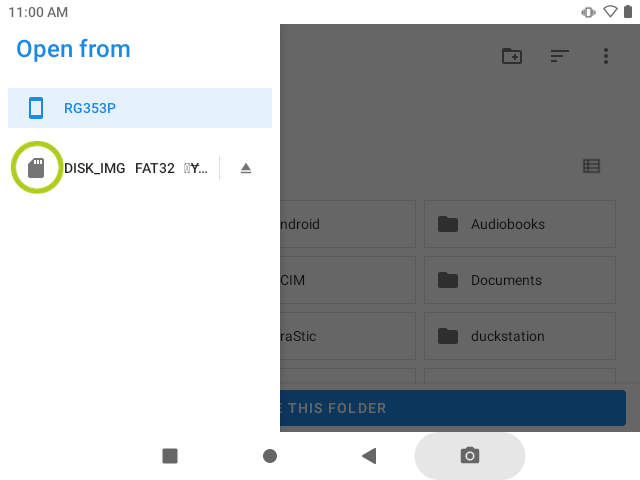
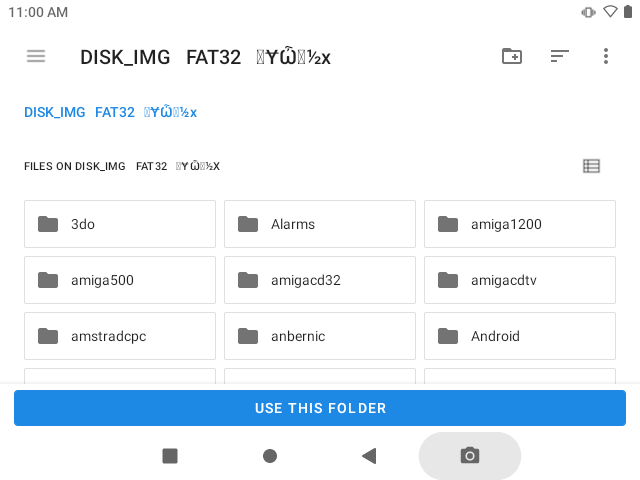
Like on an Android smartphone, swipe up from the bottom of the screen to open your app library. This is where all your installed applications, including emulators, are located. Now, scroll through to find the emulator you wish to set up and tap on its icon to open it. Typically, you won’t see any games listed initially. Instead, the emulator will prompt you to add a directory. To do this, select ‘Add directory’ and a new window will open. Here, tap the navigation icon (represented by three horizontal lines) to access different storage locations. Choose ‘SD Card’ from the menu, which is the MicroSD Card that you inserted into slot TF2/EXT earlier.
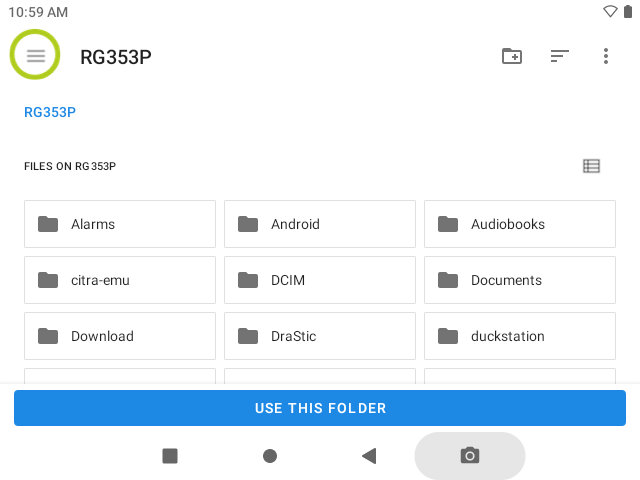
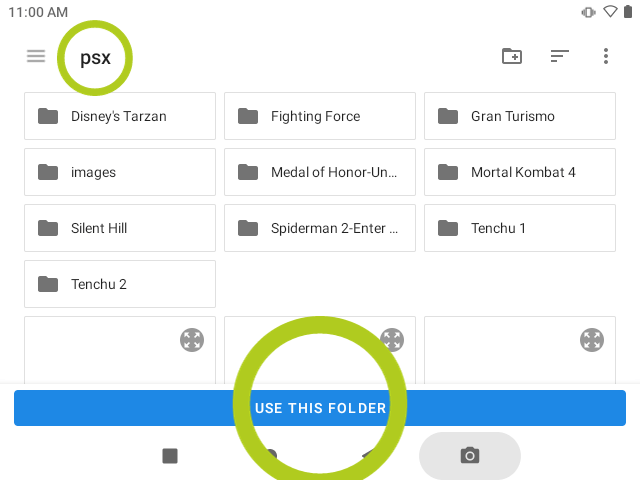
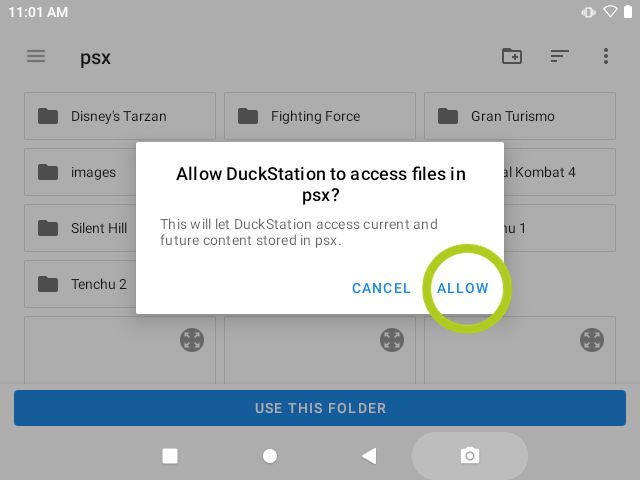
Now you need to navigate to the folder containing all the games corresponding with the emulator’s console. For example, for DuckStation (PS1 emulator), you will need to locate the folder with all your PS1 games. After selecting the folder, press ‘Use this folder’ at the bottom of the screen. This will cause a pop-up asking for access to the device. Select ‘Allow Access’ and the emulator will then begin scanning the folder for compatible games. Once complete, the games should appear in the emulator’s menu, ready for you to play!
RetroArch Setup
Dive deeper with RetroArch! We’ve already created a detailed guide that covers everything you need to know about setting up and using RetroArch below. This guide is designed to simplify the process, ensuring you can easily access and enjoy a wide array of classic games whilst also going into depth on the more complicated parts of RetroArch. Whether you’re a seasoned gamer or new to RetroArch, our guide will enhance your experience, making it more enjoyable and seamless.
Installing New Games
At DroiX, we do not preload or preinstall any games on our devices. However, we fully support your gaming passion… that’s why we’ve created a detailed, reusable guide on how to add, install, and update games (ROMs) on your device. This guide is designed to be a universal resource for all our Getting Started guides, ensuring you can set up and personalize your game library to your liking. Follow the instructions in the embedded guide to begin curating a collection of games that cater to your unique gaming tastes and preferences.
Charging your handheld
Please refer to the included guide on the best practises for charging your handheld.
Questions & answers