

In this article, we will cover the entire process of preparing and updating your GPD WIN 4 2023 and GPD WIN 4 2024 BIOS to the latest firmware version.
Next you will need to download the BIOS files. You can check by the label on the back of the device to confirm, or from within Windows Task Manager CPU. Or if you are unsure and purchased the it from us at DROIX, please contact support with your order number and we can check. We do not accept responsibility if something goes wrong.
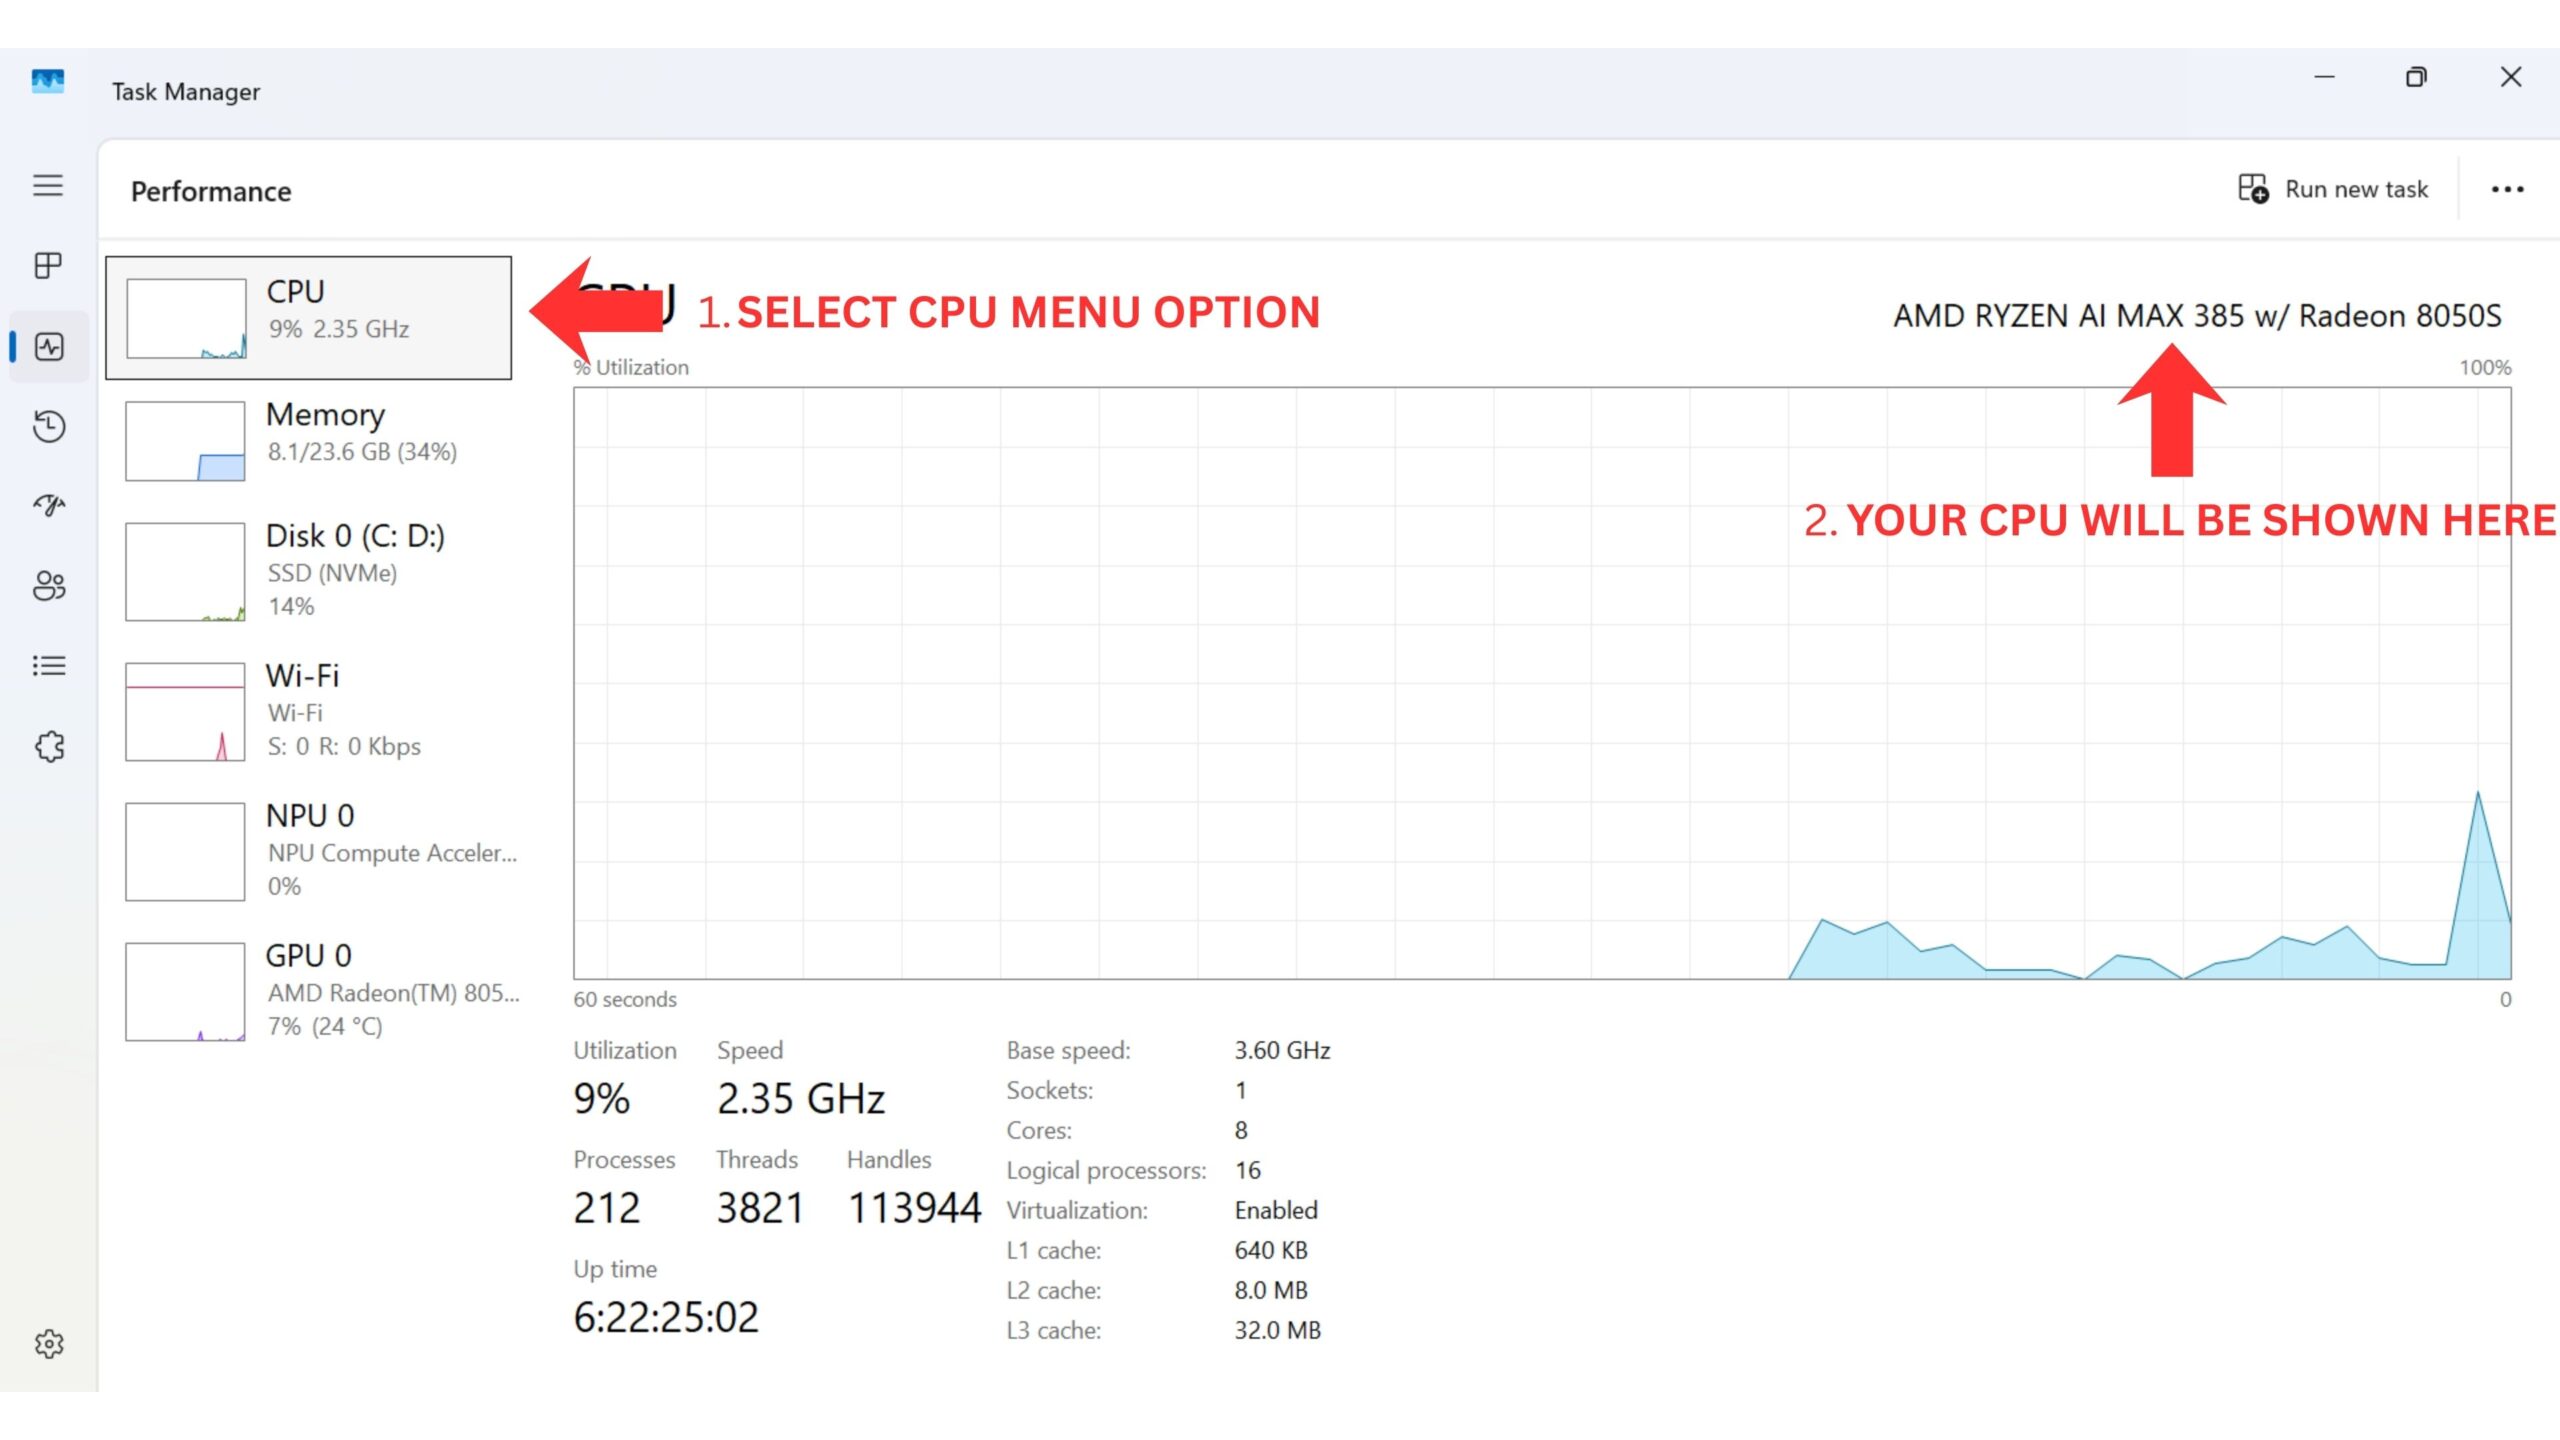
Ways to identify your CPU on your device:
- To access Task Manager, right click on the Windows Start icon and choose Task Manager from the list. Alternatively you can type Task Manager in the Windows Search Bar.
- You can find your CPU model in Windows quickly through Settings (About your PC), or the System Information app (msinfo32), all showing the processor’s name and spec.
Using Settings (Easiest for Windows 10/11)
Click the Start Menu (Windows icon) and type about.
Select About your PC from the results.
Look under “Device specifications” for the Processor entry, which lists your CPU model (e.g., Intel Core i7-10750H).
Download Firmware Update
You can download the latest BIOS update file for your respective model below and proceed. To correctly identify your model check your device’s CPU model (i.e., 6800U/7640U/7840U/8840U). We will continue to update these links for each new release.
GPD WIN 4 2023 (7640U/7840U) and 2024 (8840U)
| Firmware | Download Link |
| BIOS V0.60 | Download |
Updating GPD BIOS Video
We have a video covering how to install a BIOS update on GPD devices
Prepare Firmware Update
Once you have downloaded it, extract the contents of it to your PC. There should be a Readme.txt and startup.nsh files, and two folders; EFI and win4_BIOS_Relase_V0.60, or similar named depending on firmware version).
Copy all of the contents to a FAT32-formatted USB flash drive. You can now safely eject the USB stick and plug it into your GPD WIN 4. Connect the power supply to the device.
Installing the GPD WIN 4 BIOS Update
Power on the GPD device immediately press and hold the FN key, and tap the F7 key during the startup. You may need to repeatedly tap the F7 key a few times to get the boot menu. Once the menu appears, select the USB drive as the boot device.
The BIOS update will now proceed and take a few moments. During this time, do not remove the USB stick or switch off the device. We heavily suggest keeping your device connected to a charger during this time. Once completed, the device will automatically power down.
Powering on your device
You can now power on your GPD WIN 4 and use your device as normal.
Please note that due to the BIOS update effectively resetting the BIOS, the first boot may take a few minutes and show a black screen while it updates. Do not switch it off during the process. Subsequent boots will be at the normal fast speed you are used to.
