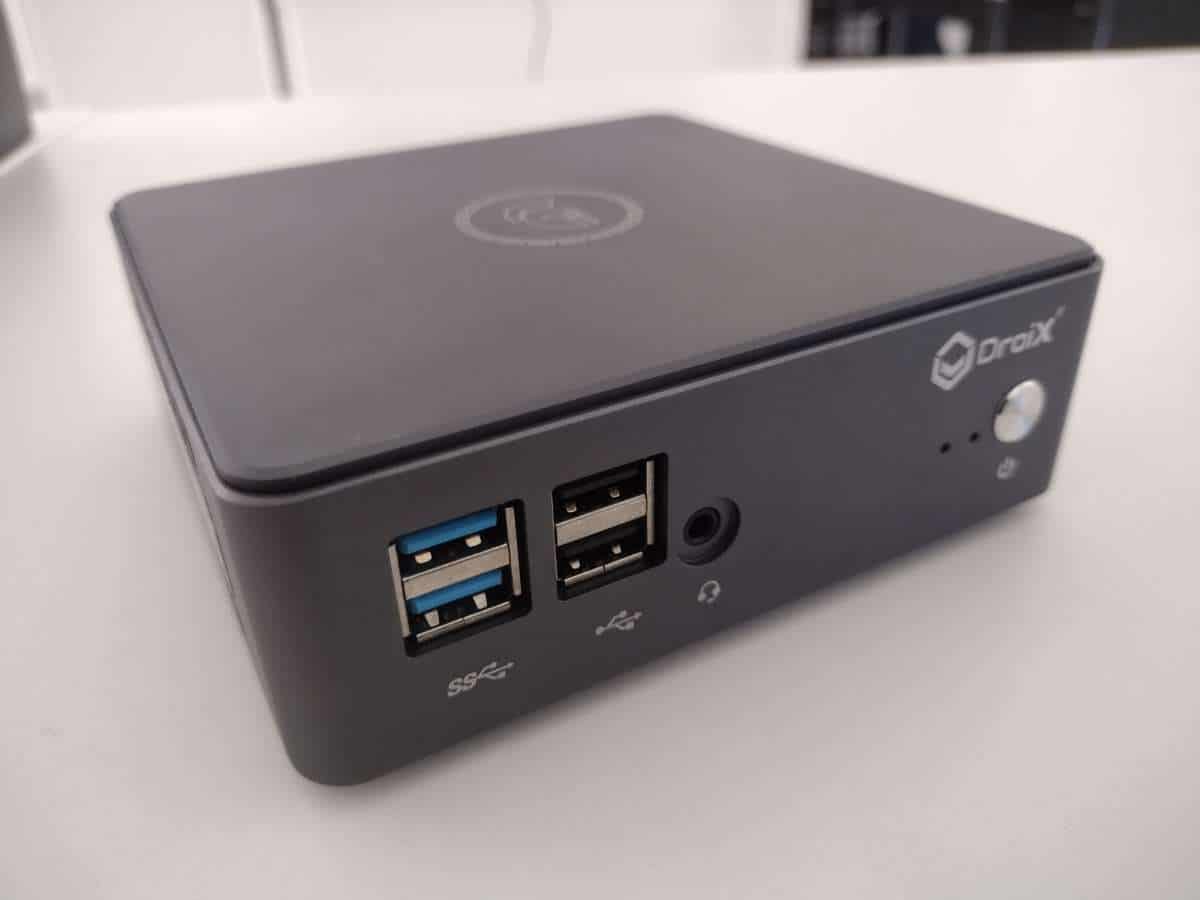
If you are looking to upgrade your DroiX Proteus 10, we at DroiX have put together a short guide to help you disassemble the unit and upgrade your device as soon as possible.
Step 1 – Remove the lid

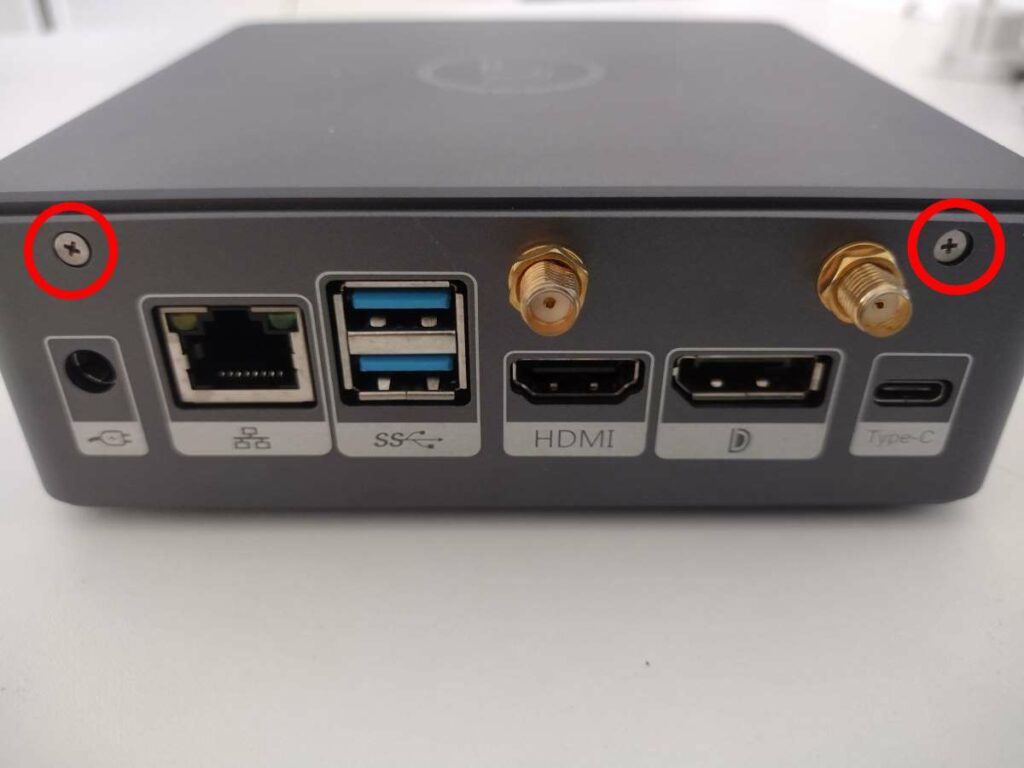
To access the Proteus 10, you first need to remove the lid of the unit.
To do so, remove the screws in the rear side. You will then be able to pry the lid off the unit. You may need to gently tap the base of the Proteus 10 in order to loosen it.
Step 2 – Replacing Components

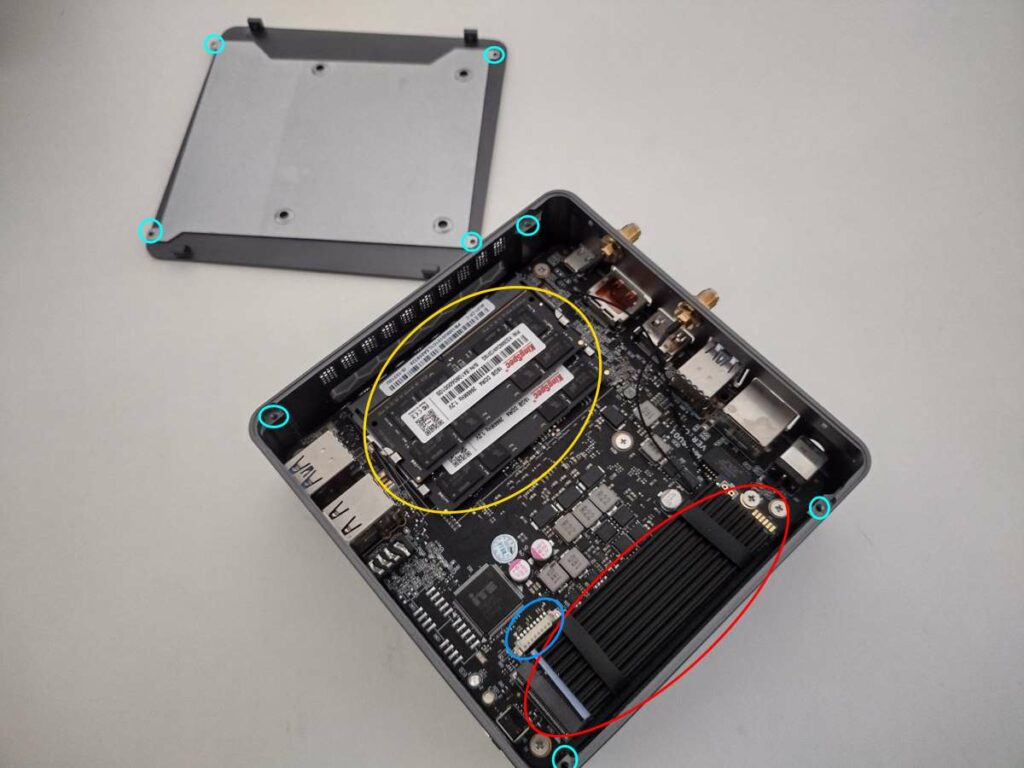
You will now be at the heart of the DroiX Proteus 10. From here, you can upgrade and replace the components as you wish.
To remove the RAM, lightly pull the securing clips (circled in yellow) outward until the stick springs up by itself. You can then pull it out without resistance.
To replace the M.2 SSD (circled in red), loosen the screw at the end of the socket, and you can then insert/remove the M.2 SSD as you please.
The blue circle denotes the connector for the SATA cable (located in the CK1’s box). one end of the cable attaches to this connector, the other end attaches to a 2.5-inch SSD or HDD.
The light blue circles indicate the attachment locations for the 2.5-inch drive bay, which we highly advise you attach just before setting up your 2.5-inch HDD or SSD. Unlike many other PC models, the drive bay for the DroiX Proteus 10 does not come pre-attached, so screw it down at these locations.
Afterword
With the above in mind, you should now be able to upgrade or strip your DroiX CK1 to your preferred configuration.
Thanks for reading our guide on how to upgrade the DroiX Proteus 10’s RAM and SSD.
We hope that you’ve found this guide to be of use. If you’re looking to purchase a DroIX Proteus 10 of your own, you can buy a Proteus 10 from DroiX — with top-class customer support, affordable prices, and fast shipping, there’s no better seller of mini PC’s around!


