Files used in this guide
Changelog
- Source guide: Reinstall Windows on Handheld Devices
Older versions stay downloadable for rollbacks — every version keeps its own verified file.
Reinstalling your Windows OS can be done for several reasons. Whether something has gone wrong, you’re getting ready to sell your handheld or you just want to give your device a little refresh, this guide will show you how to get a clean install going.
For the majority of handhelds, from the Ayaneo 2 to the Anbernic Win600 and ONEXPLAYER 2, the process is very similar so we’ll be covering all of those and more in this guide; differentiating where needed. Some other handhelds, notably GPD devices, have their own process for reinstalling Windows. For GPD devices follow our guide here.
The first process will be where the guide is the same for all devices, so regardless of what you’re using follow along with these steps. If your device is not useable, for whatever reason, the first part can be done on another PC. This will erase your system, so back up anything you wish to keep.
For this section you will need:
- Your device – plugged in and charging.
- A high-speed 16GB or larger USB flash drive.
- Internet connection.
Installing Windows
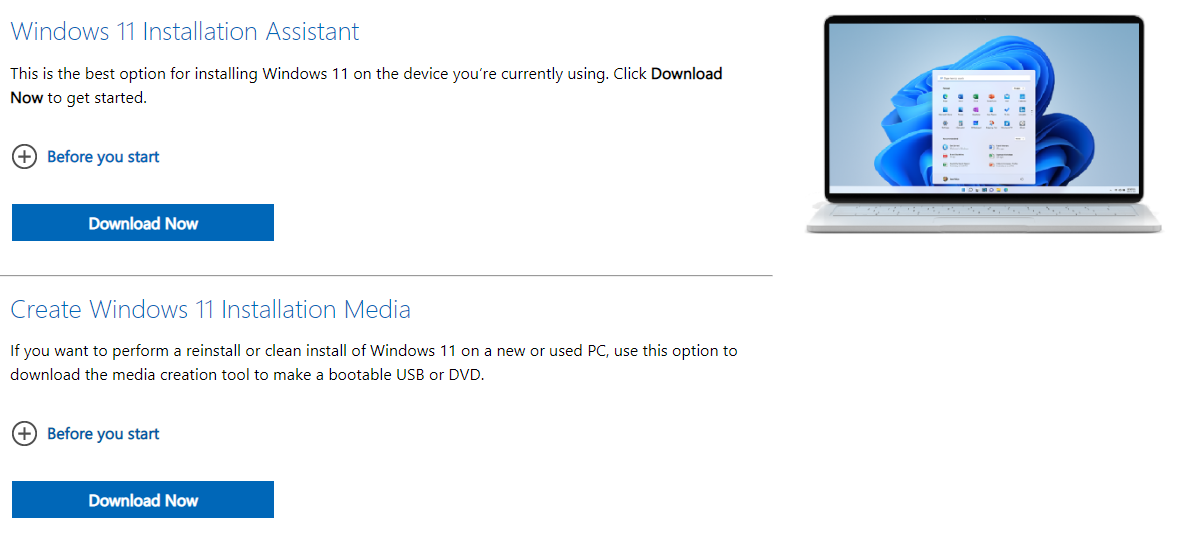
The first step is to download the Windows 11 Media Creation Tool. While we can use Windows 11 Installation Assistant to install Windows 11 on your device, in this guide we’re going to Create Windows 11 Installation Media. So go ahead and click ‘Download Now’ underneath the Create Windows 11 Installation Media.
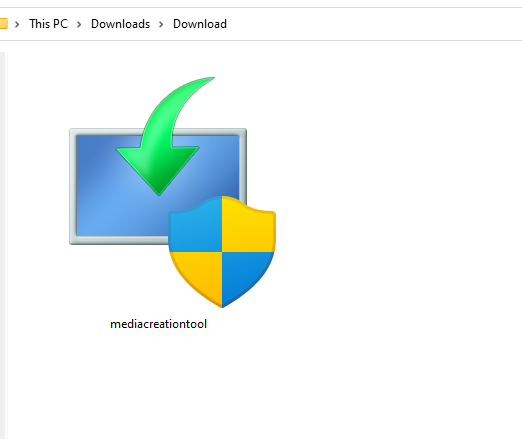
Once it has completed downloading, find the program where you downloaded it. It will be called ‘mediacreationtool’. Double-click to run the application. Enter your administrator details, if you do not know them then ask the administrator of your device to enter them, and click yes.
The program will load the Notices and License terms. Read through them and if you wish to click ‘Accept’. You are now able to begin to create a bootable device.

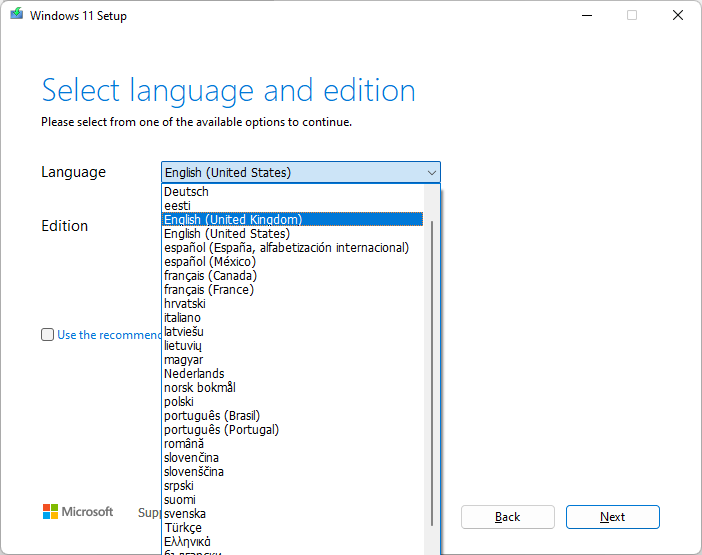
You will be asked to select your language and edition of Windows 11 to create installation media. If you wish to change your language and edition from the auto-selected option uncheck ‘Use the recommended options for this PC’ and make any changes you wish to. Once you’re happy with your choices click on ‘Next’.

Ensure that you are flashing to a USB Drive and not an ISO file.

If you haven’t already, plug the USB device you wish to use into your handheld. If your handheld does not have a USB Port and/or you don’t have a USB-C flash drive you will need to use a USB Dock to add the necessary port to the device. Once you can see the Removable drive, click ‘Next’.

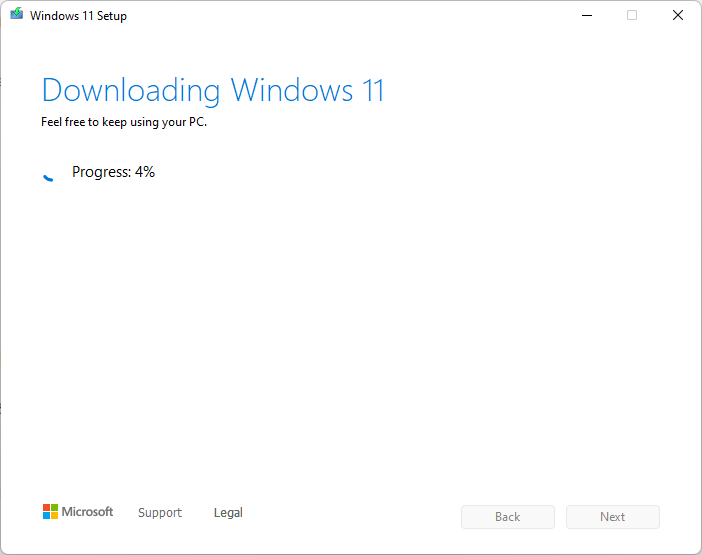
The program will then download Windows 11 before flashing it to your USB drive. Feel free to make a cup of coffee or continue using your handheld.
It will create the media using the downloaded copy. Let it do its thing.
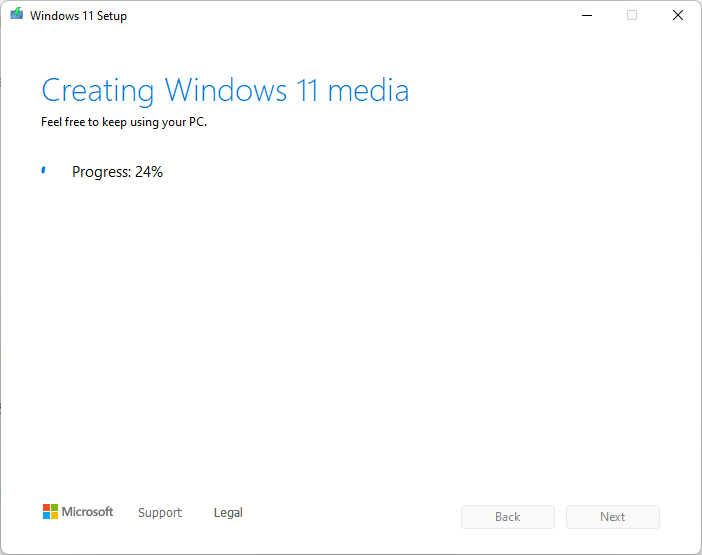
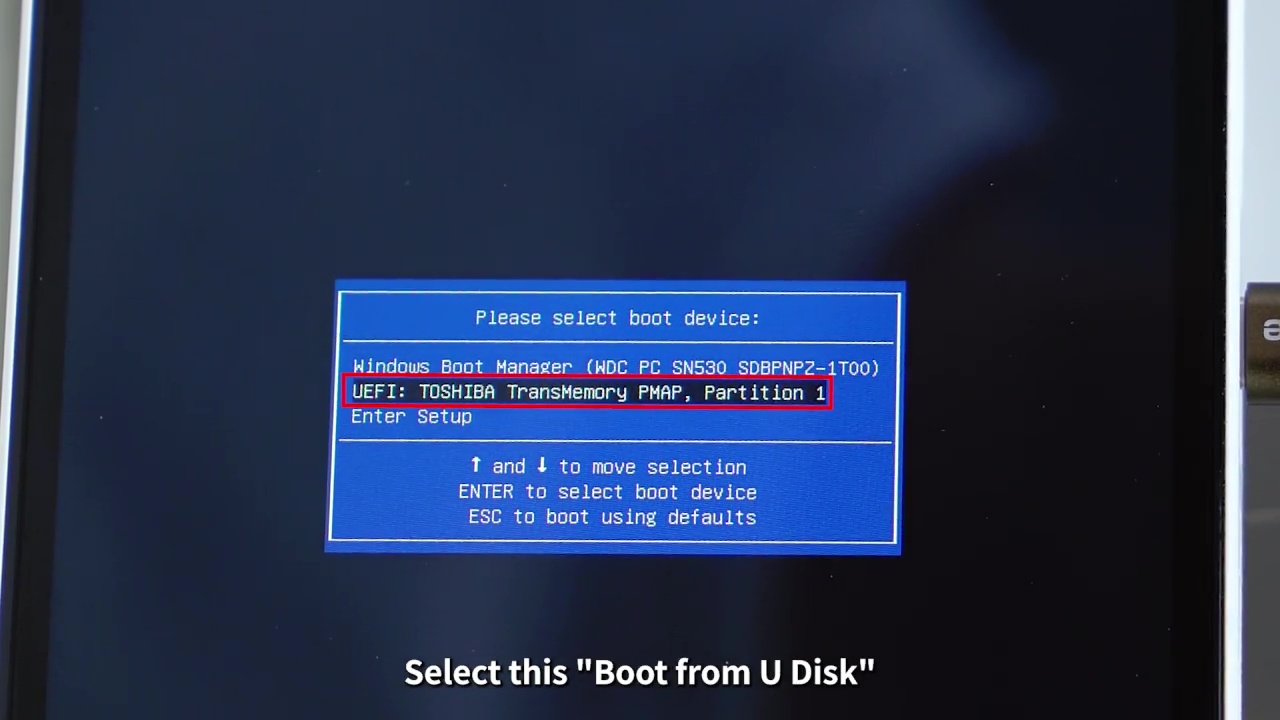
Once the installation media has been created and it says ‘Your USB flash drive is ready’ you can click ‘Finish’ and reboot. We will be booting from the drive. This will be different for most devices, so we’ll go through a few of them. If your device is not explained refer to its manual, or try one of these methods chances are it will work.
| Ayaneo | ANBERNIC WIN600 | ONEXPLAYER |
| Connect a keyboard and press F7 when the device is booting to enter Boot Menu. Select USB drive. | Connect a keyboard and press F7 when the device is booting to enter the Boot Menu. Select USB drive. | Switch on the ONEXPLAYER When you see the logo, press the DESKTOP button and Volume + button together This will display the boot menu. Press and hold the Keyboard button for a second or two until it illuminates. use the D-Pad to choose the USB drive and press the START button to continue. |
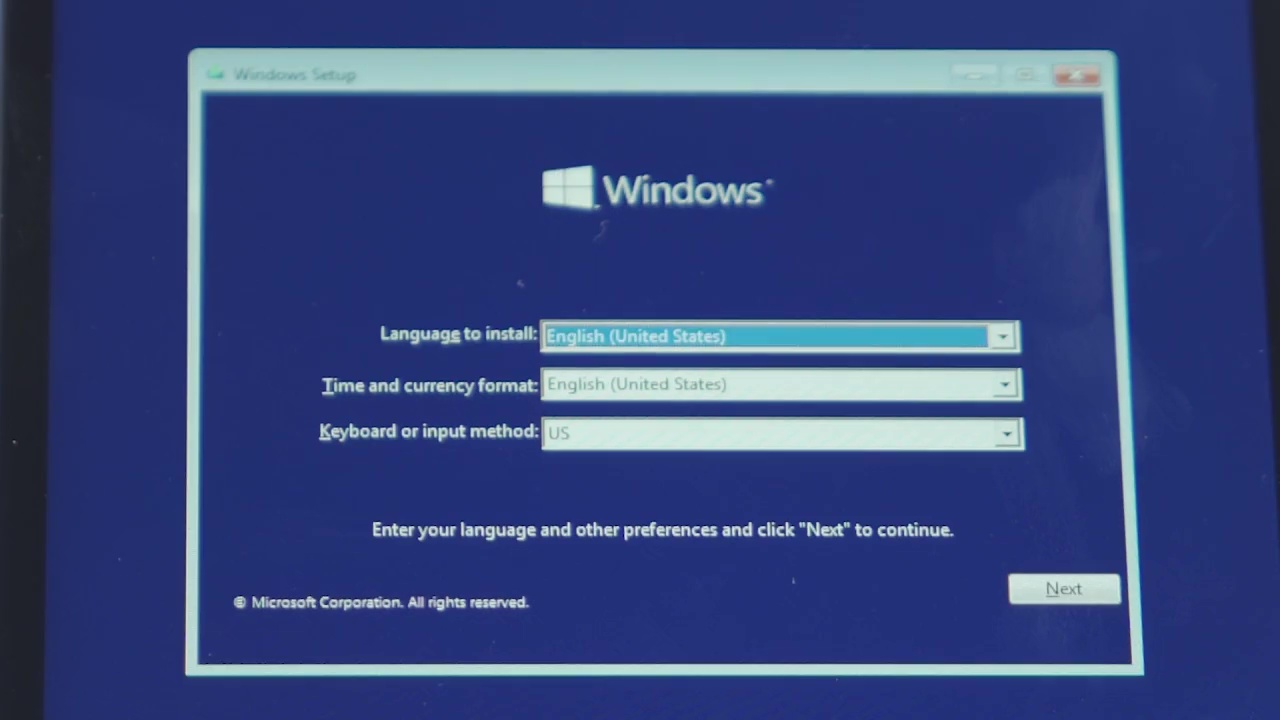
Once you are in the boot menu, select the USB and boot into it. Once it has loaded, you can select your preferred language, time & currency format and keyboard of your choice.
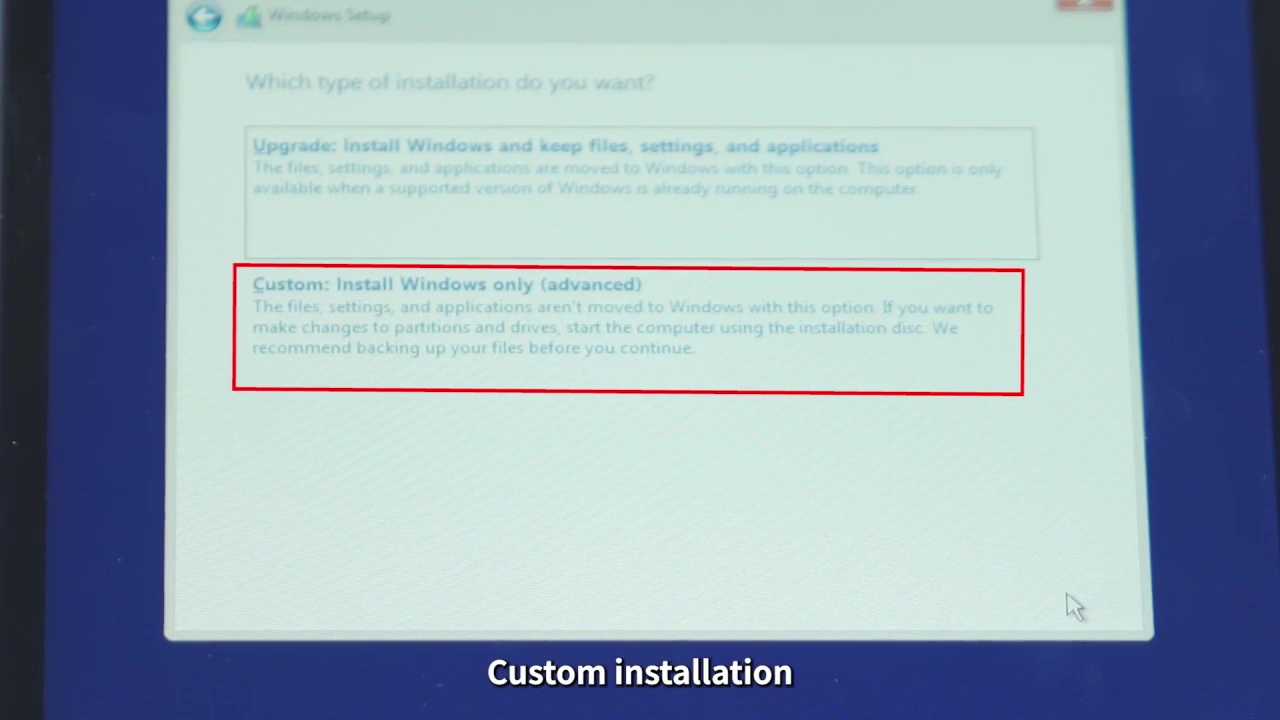
Click on ‘Install Now’ and accept the Terms and Conditions.
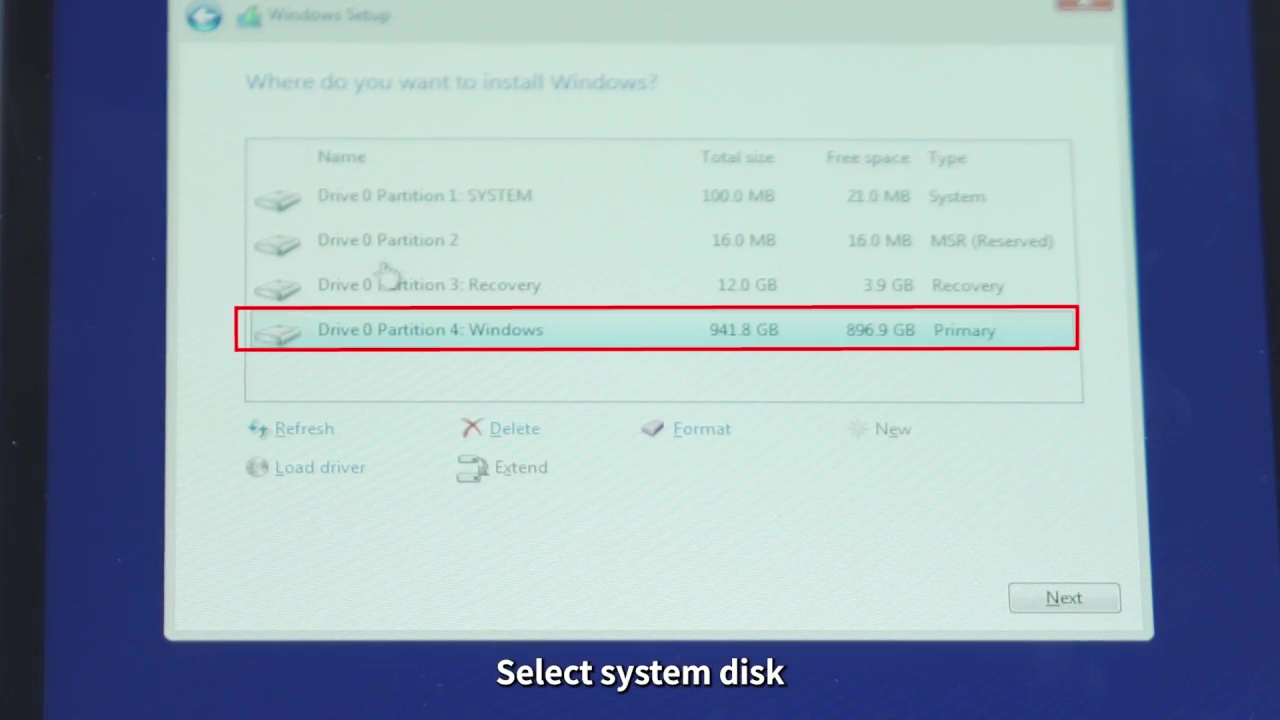
Click on Custom Install. Then select your System Disk, this will be the largest partition on your handheld. Click ‘Format’ and then ‘OK’. Once that has been completed click ‘Next’.
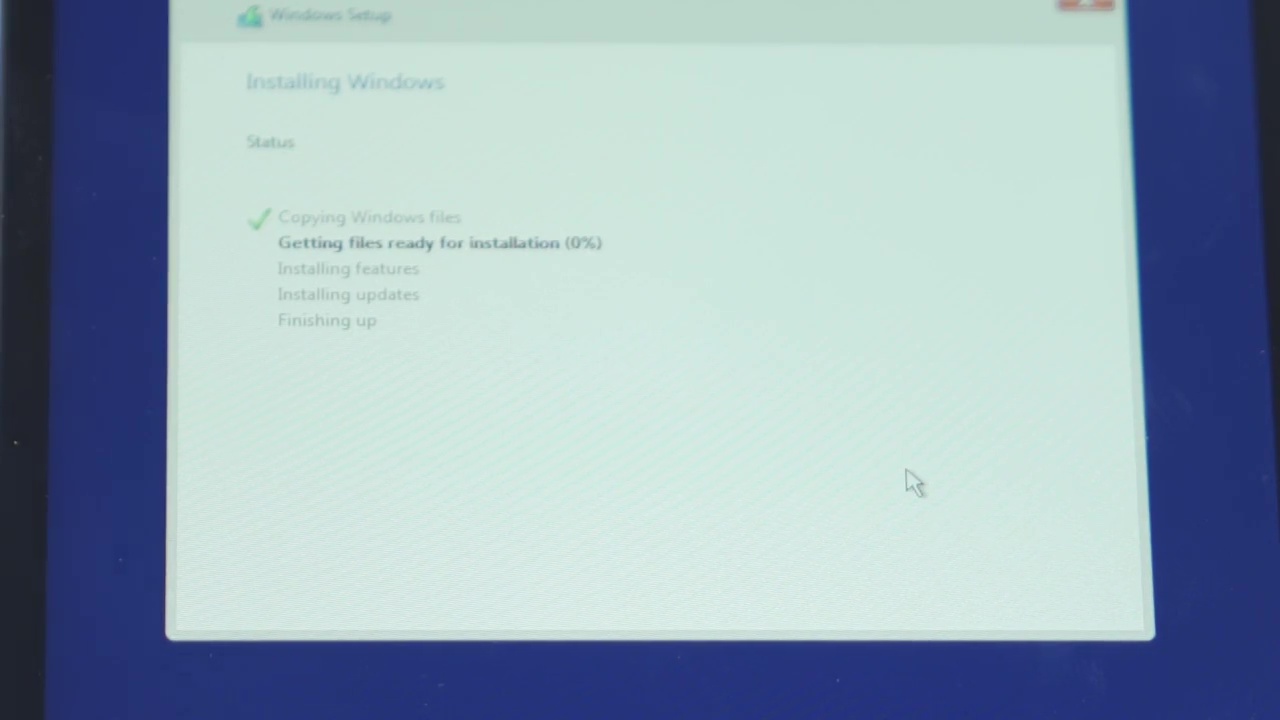
Windows will install, let it do its thing. Once it has been completed it will automatically restart your handheld.
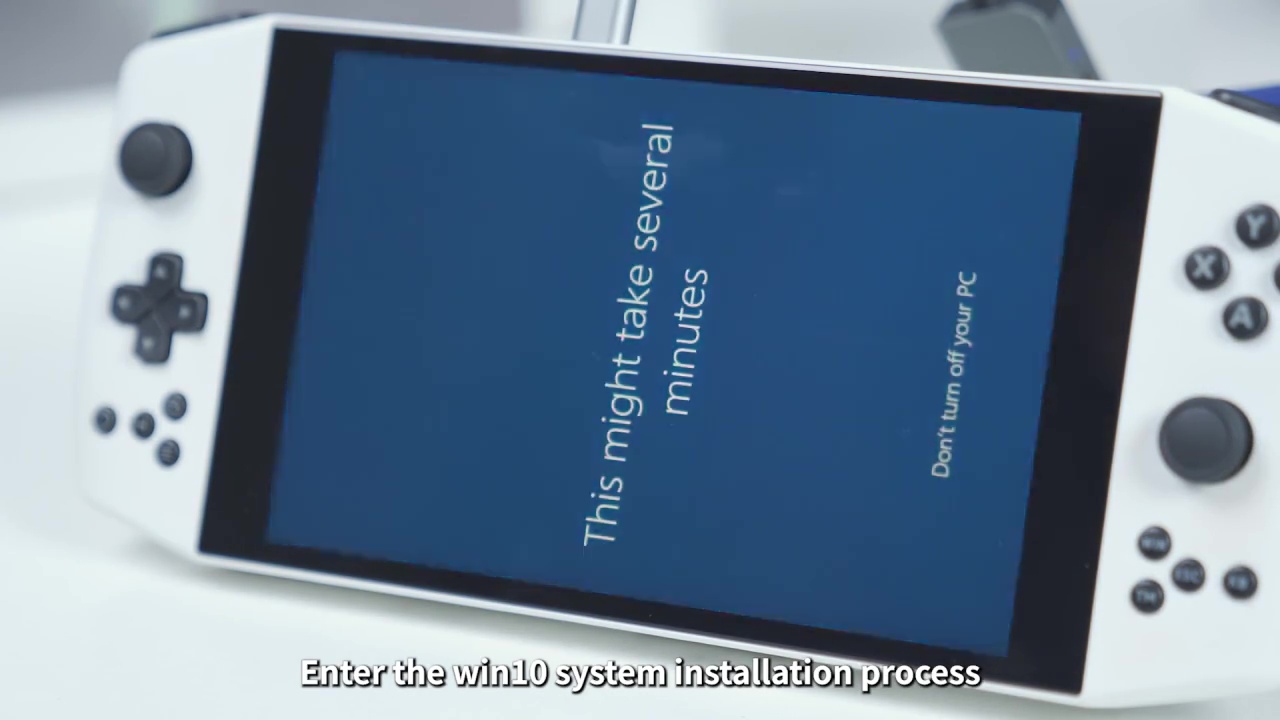
Your system will boot into your Windows installation, and begin to set up the OS. Some devices will display this portion in portrait as opposed to the expected landscape. This is okay, simply continue with the device in a portrait orientation. Go through the installation process entering your preferred settings.

Let the handheld finish setting up. When it is done it will boot into Windows. From here, if you need to, you can right-click and click on Display Settings. From here you can scroll down and change the Display Orientation to ‘Landscape’ to match the device. Congratulations you have successfully installed a fresh copy of Windows on your device.
Installing Drivers
The next step is to install all the drivers so that the device works properly. This is where the guide begins to separate further. Click on the anchor link below to find the guide for your device.
Anbernic WIN600
The Anbernic WIN600 has a relatively straightforward method to install the drivers. Once you’re up and running in Windows, head over to this link here to download the driver package. Download and extract the file. Inside you will find a folder called ‘driver’, within which each driver is numbered in their folder.
Go through each driver folder in order and right-click on ‘Install.bat’ and ‘Run as Administrator. There will be a brief Command Prompt pop-up and then it will disappear. It will look like nothing happened, but the drivers were installed. After you are done with them all, reboot the device.
Download and install the “Auto-Detect for Windows 11” driver updates from AMD and make sure you are on the latest version. Reboot the device again after installation. Once installed go into Settings > Display > GPU Scaling > ON. This will allow lower-resolution games to take up the full screen automatically.
Download and install the RivaTuner Statistics Server. Once installed, open it up and set “Framerate Limit” to 60. This will ensure that games don’t run over 60 frames per second and waste additional performance power.
Just like that, you’re done and ready to get gaming!
Ayaneo
This portion of the guide will cover all Ayaneo devices, there may be some differences between each device. They will be stated as and when needed.
On your device, download the requisite drivers for your handheld. They are available here. Each driver package is labelled for the device it is made for. Simply find and download ALL of the ones that apply to your device.

For each driver, except AMD drivers, unzip and follow the install process. For the AMD drivers, the Download link will take you to the AMD website. From here you can download Windows drivers to automatically detect which components you have and install the correct drivers.
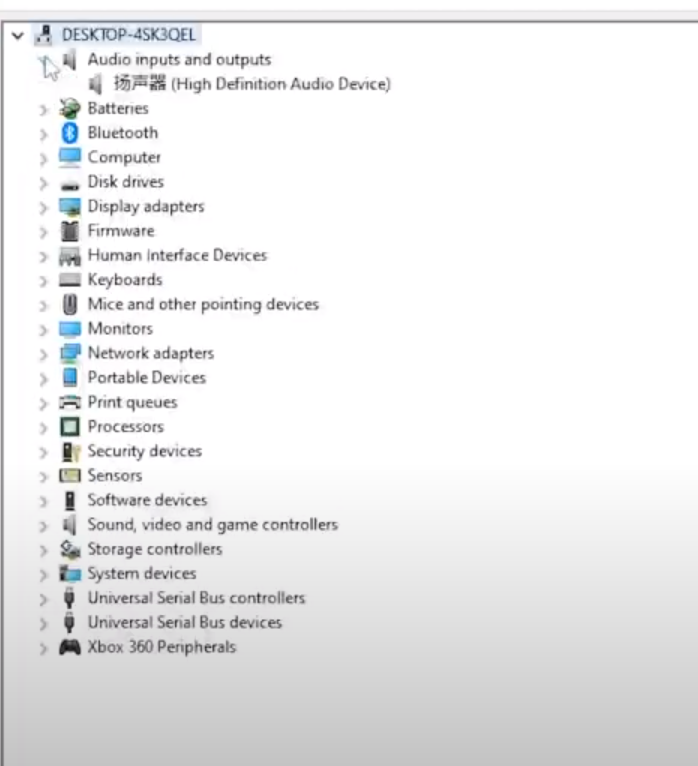
Once you have installed all of the drivers, to ensure that they are all correctly installed go into Device Manager and check under each category. If there aren’t any unknown devices then all of the drivers have been installed successfully. If not, then ensure that you have downloaded and installed the driver for that component. If there are still any issues reach out to DroiX customer support.
Once that is done and there are no unknown devices, you have finished the process and are free to game at your pleasure on your Ayaneo device.
ONEXPLAYER
This portion of the guide will cover all ONEXPLAYER devices, there may be some differences between each device. They will be stated as and when needed.
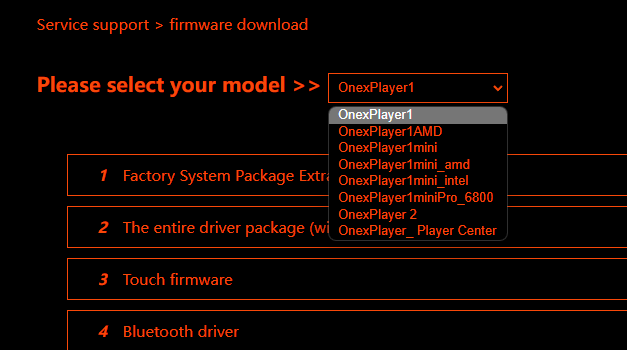
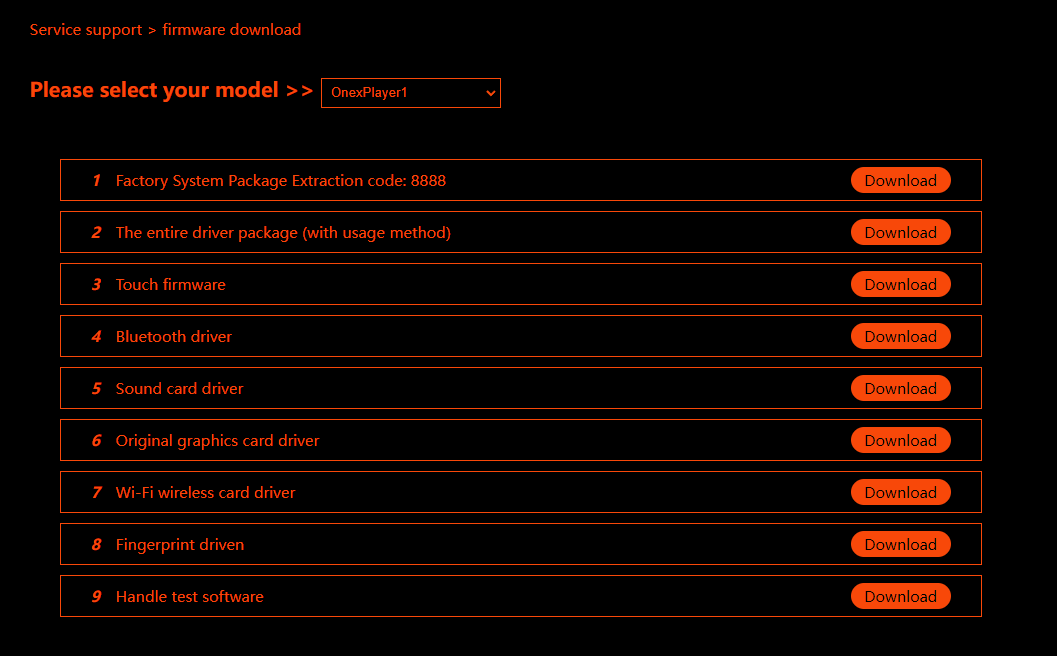
Once you’re into Windows on your handheld, head over to the drivers’ website here. Select your device from the drop-down menu. Download each piece of software for your device, these will download as .rar files so I recommend downloading WinRAR to open them.
Once expanded find Install.bat within each folder and install the driver. There may be a similar install file such as ‘Setup.exe’ depending on the driver and the device. Be sure to install all available drivers for your device.
Once you have successfully installed all drivers, the device is ready to use and you can get to gaming!
If all goes well you will have successfully installed a fresh copy of Windows onto your handheld gaming PC, with all drivers intact. You can get to gaming, productivity and more on your clean PC.
To take a look at other Windows-powered handhelds, click here.
To learn more about our other offerings and products take a look at other Knowledge Base articles here.

Questions & answers