In this article
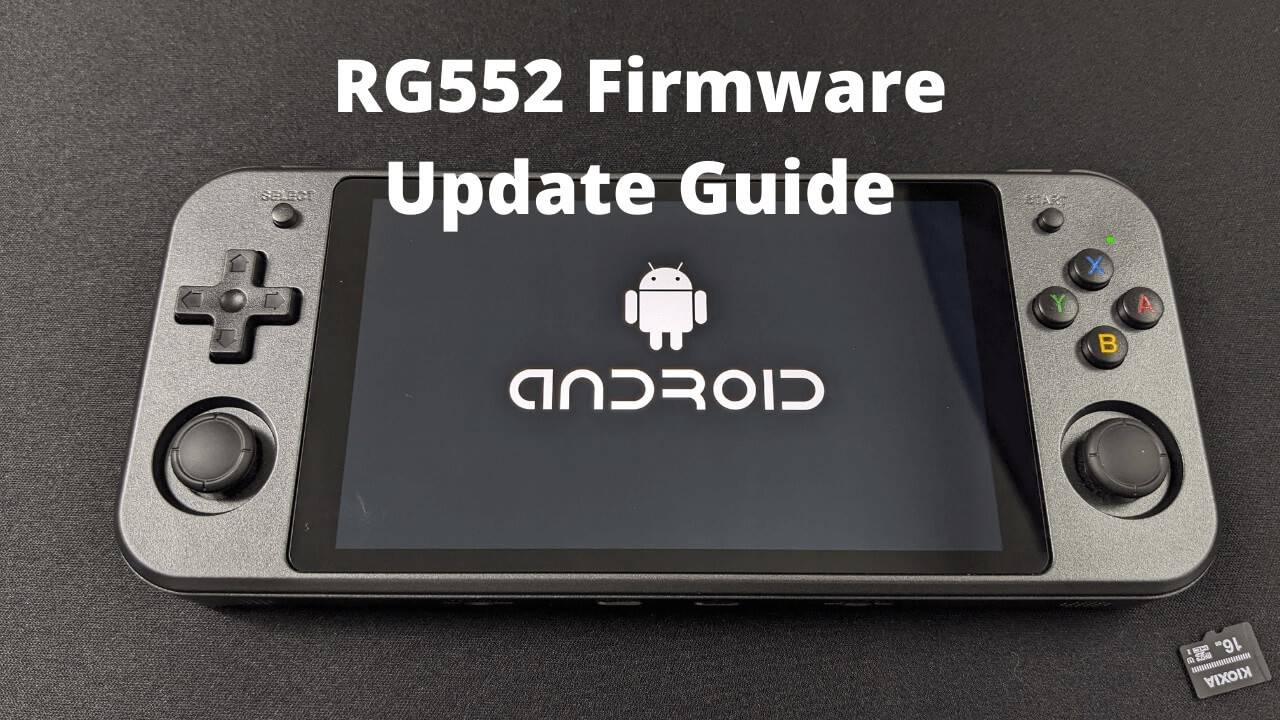
In this article we cover both the Android and Linux RG552 firmware update. Where to download the latest RG552 firmware update and a step by step guide on how to install the Linux OS and Android OS firmware for the RG552 from Anbernic.
RG552 Linux OS Firmware Update
The Linux operating system is located on the 16GB Micro SD Card. Updating the RG552 Linux OS is simply a matter of writing an image file to the 16GB Micro SD Card.
Downloading the files
Balena Etcher – https://www.balena.io/etcher/
Latest Linux OS firmware for Anbernic RG552 – RG552-EN-20211209.zip (December 9th 2021)
Download the image writing software Balena Etcher (available for Windows, MAC and Linux) and install it. Next extract the firmware update .zip file. You will see a firmware image file named anbernic-29-rockpro64-English-8g.img or similar depending on the firmware version.
Writing the firmware image
Insert the 16GB Micro SD Card into your PC and load the Balena Etcher software. Click on Flash from file button and locate & choose the RG552 firmware update .img file you extracted from the .zip file.
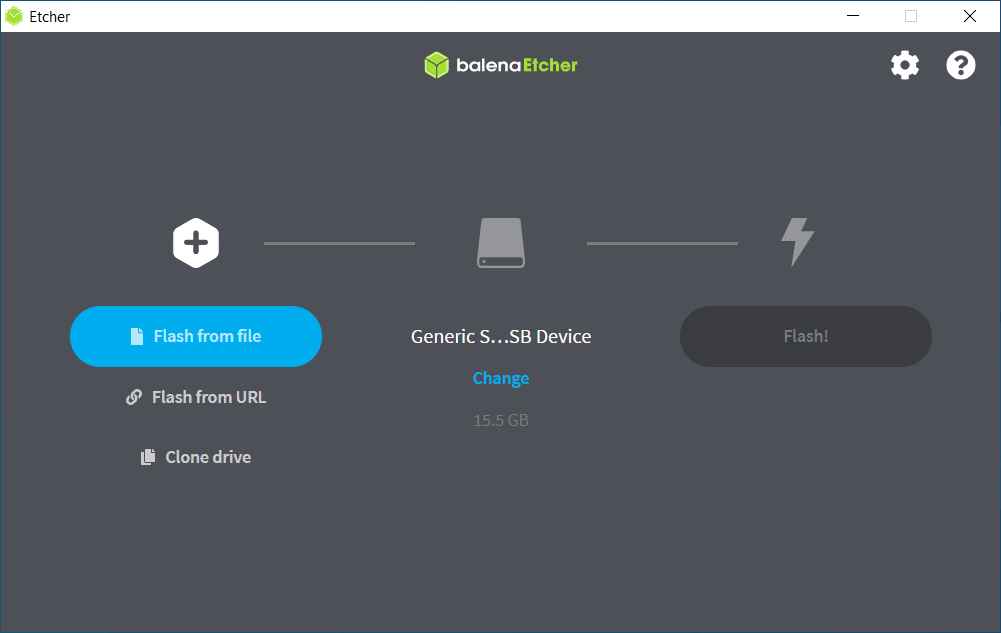
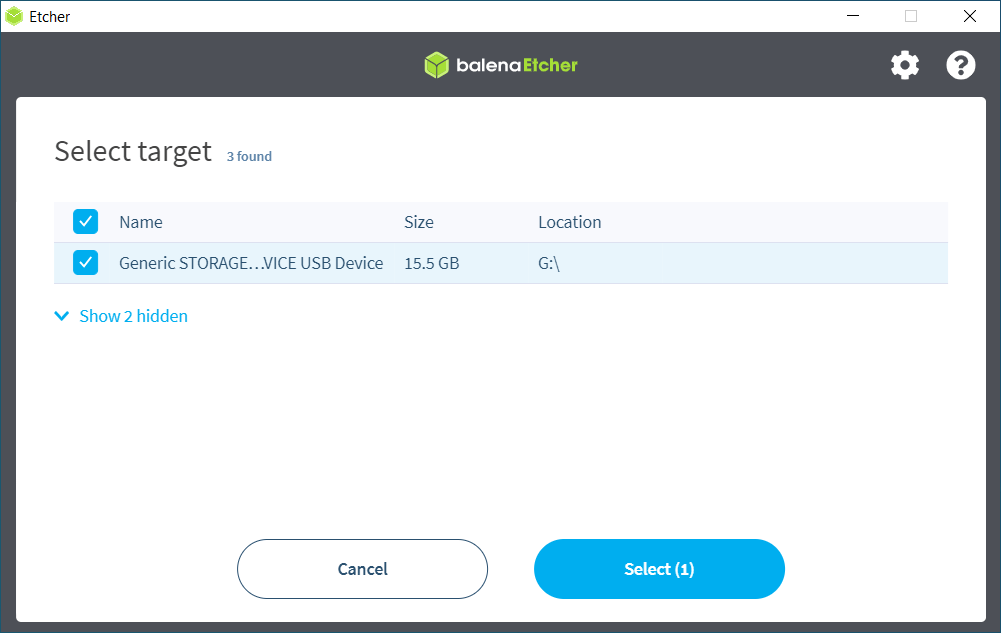
Click on the Change USB devices in the middle.

Confirm that you have chosen the 16GB Micro SD Card and not your hard drive or other storage devices.
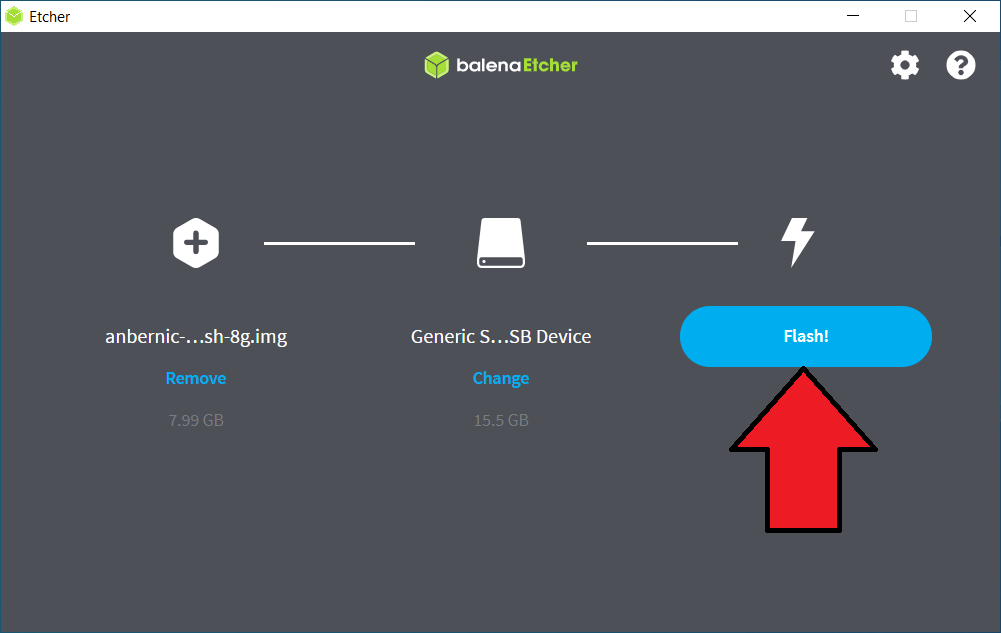
Click on Flash to start the image writing process to the Micro SD Card.
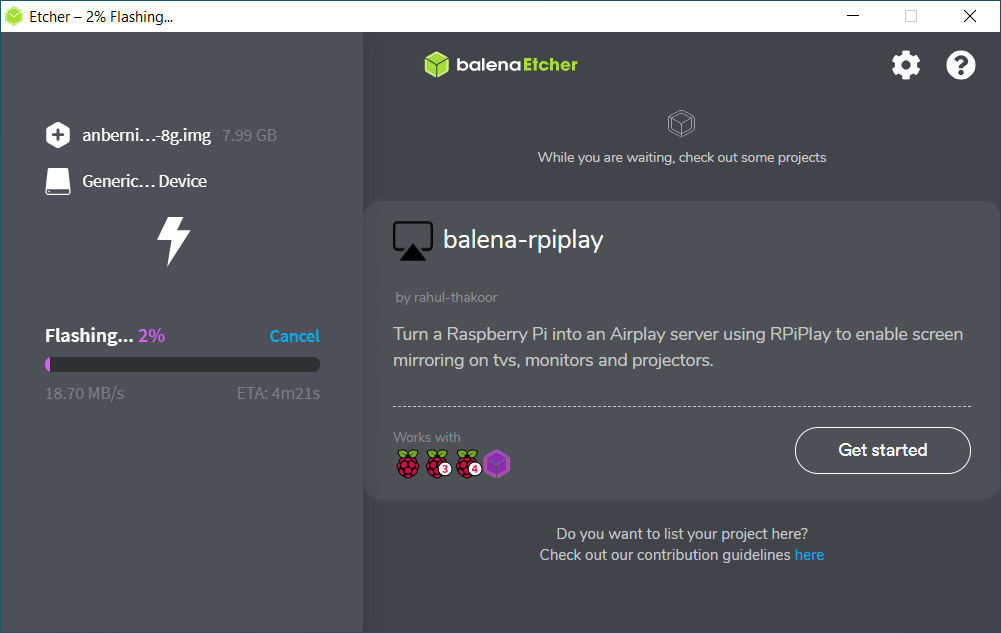
The process will take around 5 minutes depending on the speed of your Micro SD Card and PC. Do not close the software or remove the Micro SD Card during this process.
Once the process has completed, you can safely eject the Micro SD Card from your PC.

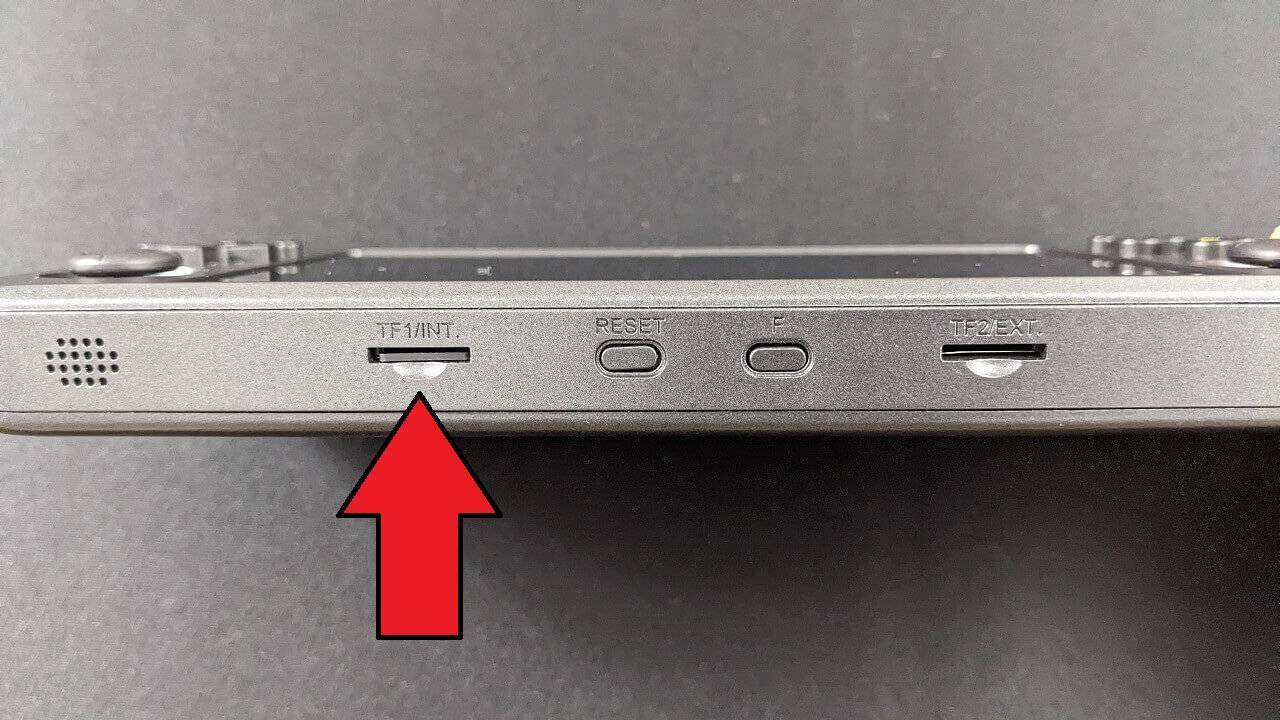
Insert the Micro SD Card it into the first slot (TF1) of your RG552
Switch on the RG552 and after a few moments it will boot to the latest version of Linux for RG552

Enjoy!
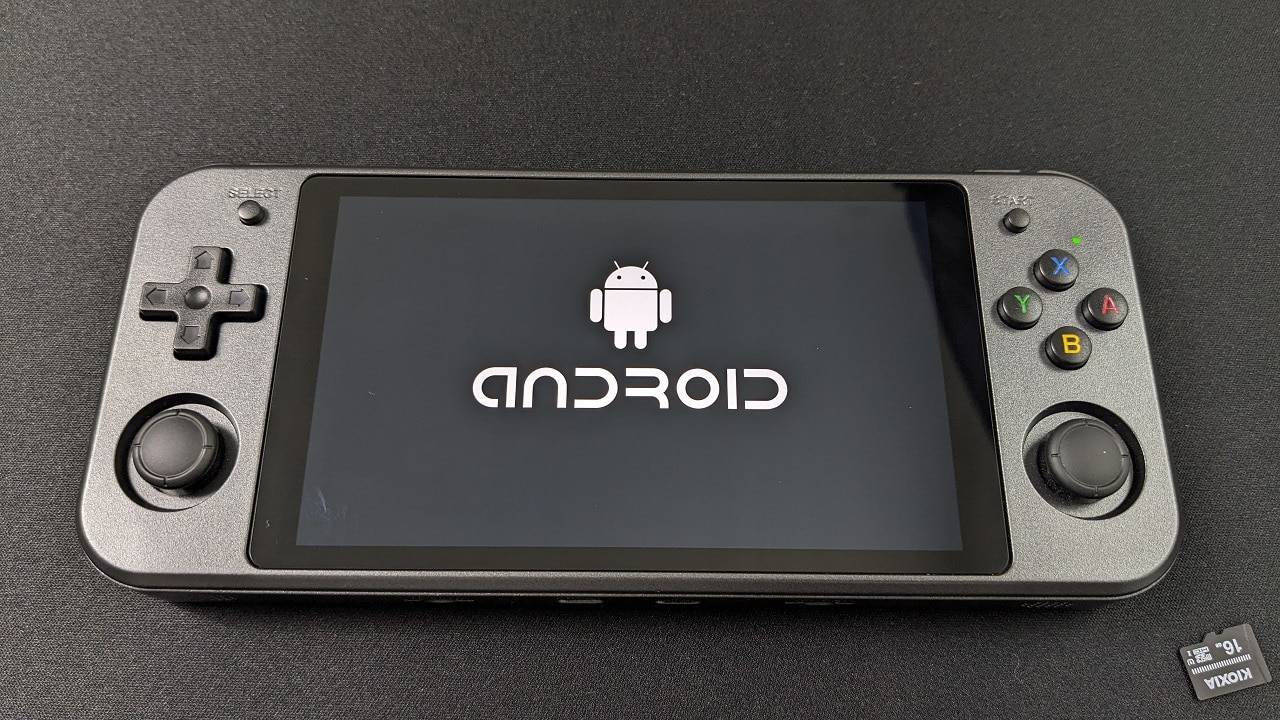
RG552 Android OS Firmware Update
NOTE: Updating the Android OS firmware will erase any additional apps or files you have on the internal storage. Please back up any important files before updating the Android OS firmware.
Downloading the files
Latest Android OS firmware for ANBERNIC RG552 – RG552-Android-v1.11e.zip (December 14th 2021)
OR
Android 11 for the ANBERNIC RG552 – https://go.droix.co.uk/RG552-ANDROID-11 (April 8th 2022)
Writing the firmware image
The Android OS is located on internal storage. You will need a 4GB to 32GB Micro SD Card in order to copy the update to the card. We had issues with the software formatting 128GB cards, so we recommend no larger than 32GB. Insert a blank Micro SD Card into your PC.
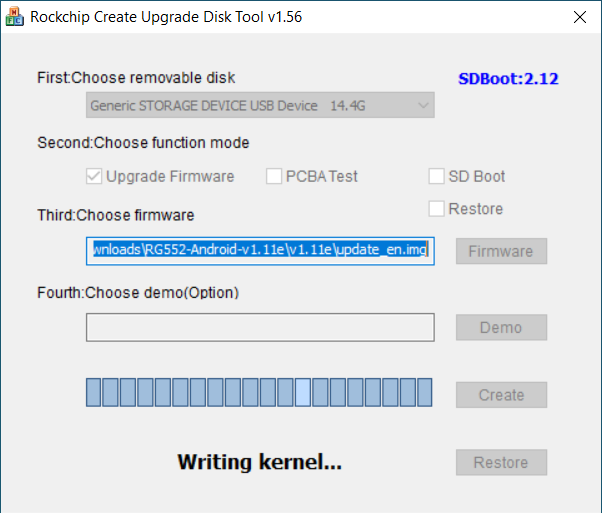
Extract the contents of the Android OS firmware update file to your PC. You will see a folder called SDDiskTool_v1.56, open this folder and load the SD_Firmware_Tool.exe program.

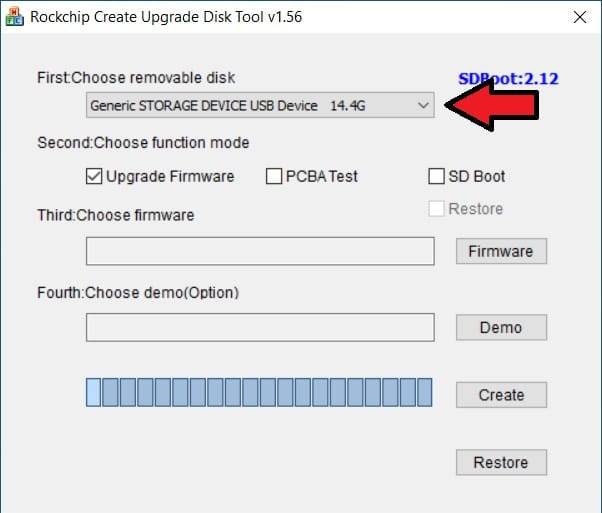
First confirm that the removable disk is the Micro SD Card that you want to write the firmware to.
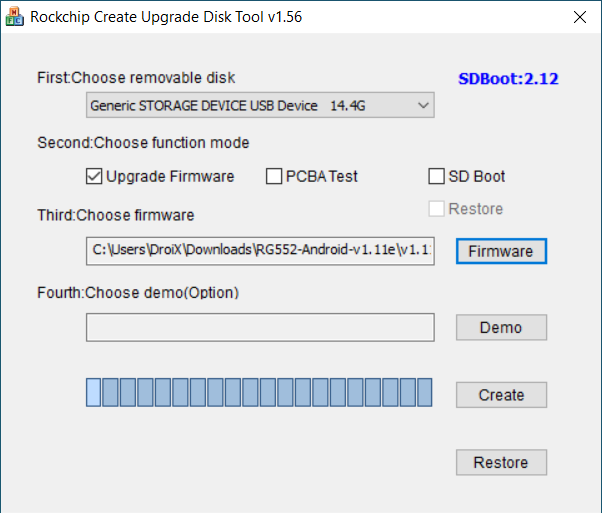
Then click on the Firmware button and choose the Android OS .img file you extracted. It will be named update_en.img or similar depending on the firmware version.

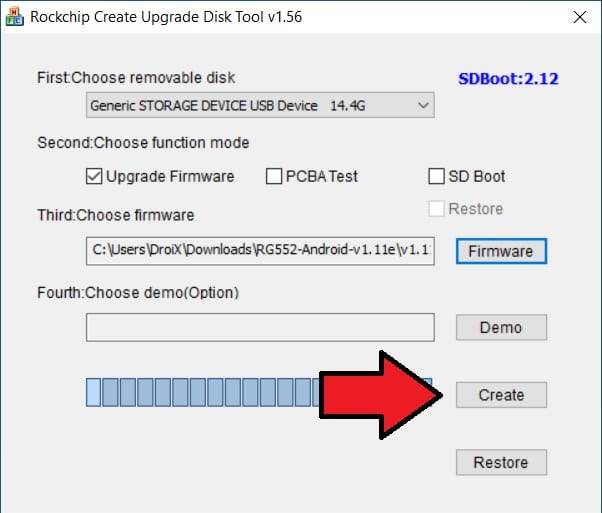
Check everything is correct set up, especially the disk to want to write to.
Click on the Create button to start the RG552 Android OS firmware image writing process.
It will take around 5 minutes to complete the writing process. Do not remove the Micro SD Card or stop the program during this process.
Once the process has completed, you can remove the Micro SD Card from your PC and insert it into the 1st slot (TF1) on your RG552.
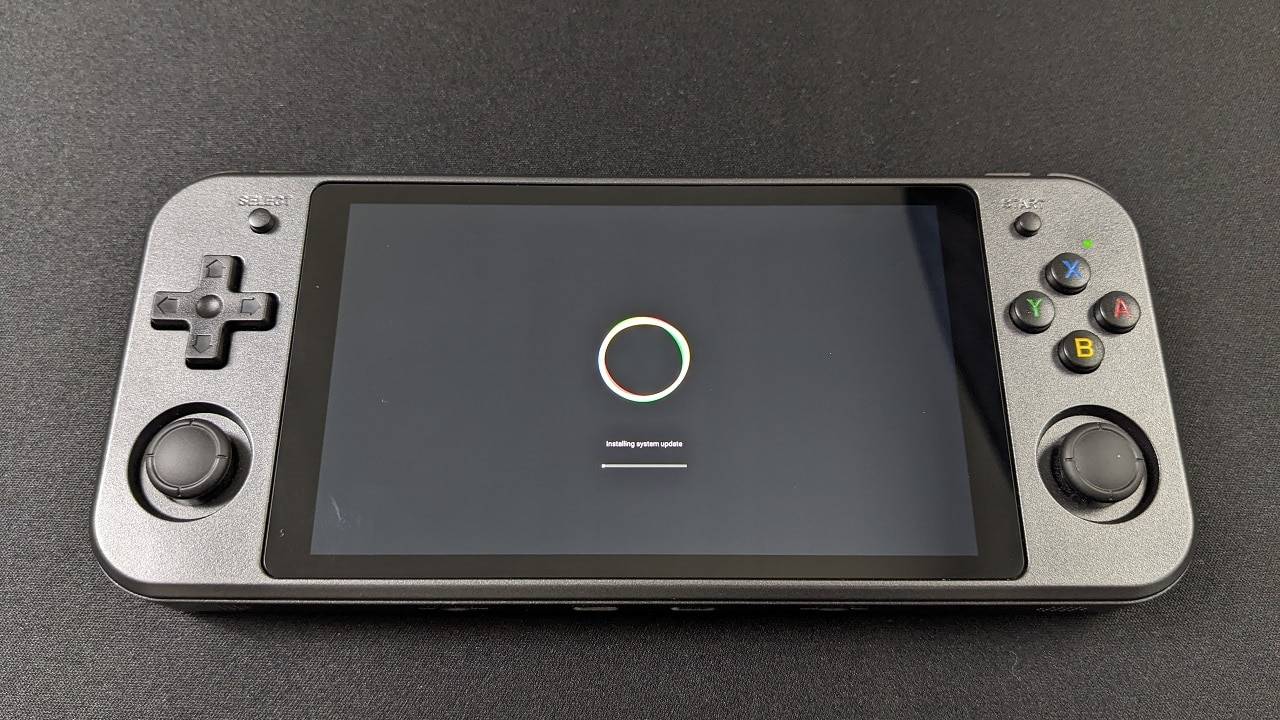
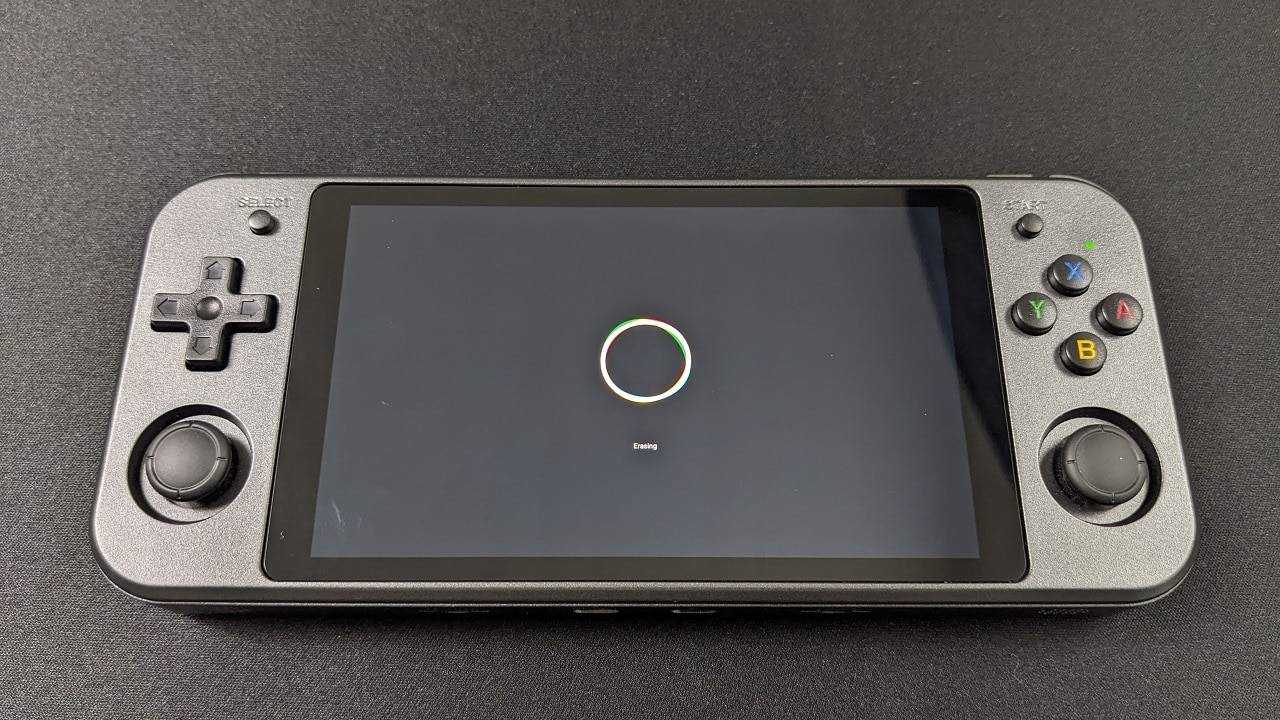
Switch on the RG552 and it will begin the Android OS update process, this should take around 10-15 minutes. It will show a progress bar for the first part, then an Erasing message which takes a while. Do not switch off the device or remove the Micro SD Card during this process.
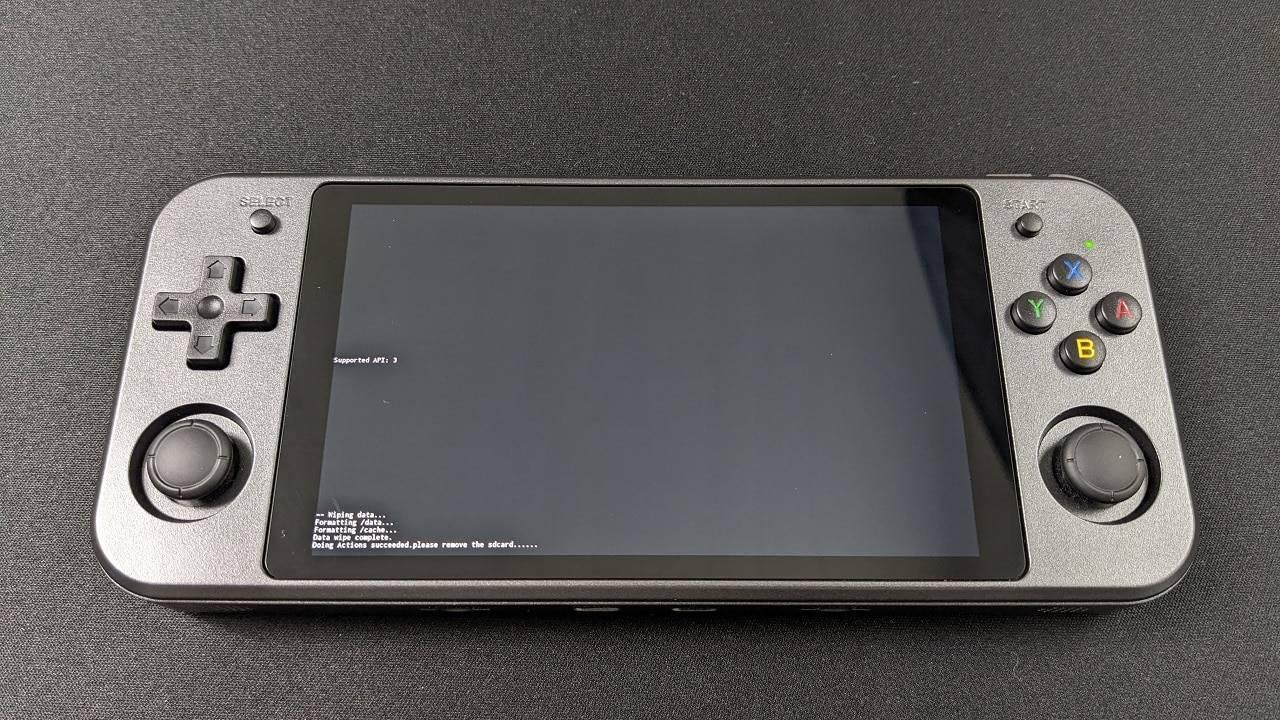
Once the update is complete you will see some text prompting you to remove the Micro SD Card. The device will automatically reboot once the card is removed.
The first boot of Android after an OS update will take longer than usual while it is finishing setting up. Do not switch off the device during this process.
After a minute or two you should be back on the main screen and the latest RG552 Android OS firmware is now installed.

Enjoy!
If you haven’t got your RG552 yet, then why not? You can learn more and buy the RG552 here, or browse or wide range of retro gaming handhelds here.
[azp_custom_product id=”13″]
Bringer of videos, text and images! AKA the social media guy at DROIX. Massive retro gaming fan and collector, with a far too large collection of consoles and computers from 1970's to modern. Contact me at [email protected]
Questions & comments
0Every question gets an answer. Ask before you buy — DaveC and the team reply within one working day, and answers stay public so they help the next reader too.