Files used in this guide
Changelog
- Source guide: How To Fix AYANEO Next Trigger Issues – Firmware Update
Older versions stay downloadable for rollbacks — every version keeps its own verified file.
Changelog
- Source guide: Getting Started with the AYANEO SLIDE
- Source guide: How To Fix AYANEO Next Trigger Issues – Firmware Update
- Source guide: How to Calibrate AYANEO Joysticks
- Source guide: How To Install and Update Windows 10 & 11
Older versions stay downloadable for rollbacks — every version keeps its own verified file.
We know that some of you have been having issues with the triggers and gamepads on your AYANEO Next. Just to rule out any software issues this is a guide to update and install the latest gamepad firmware for the AYANEO Next.
To start with, head to the AYANEO Downloads page and download the latest firmware. That would be version AN109 at the time of writing.
NOTE: AYANEO has released v110 of the driver, download it from here.
AYANEO Next Calibration
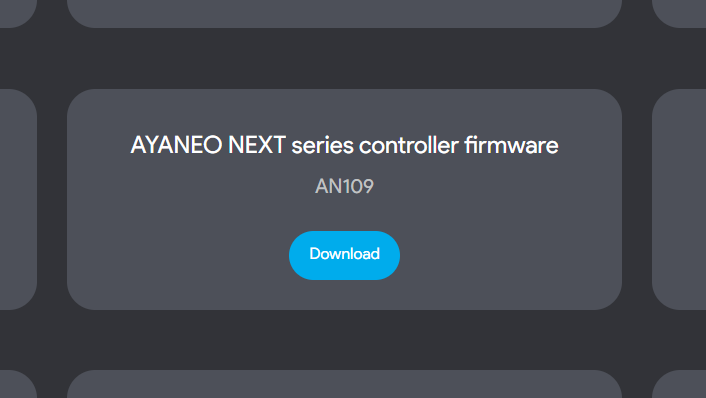
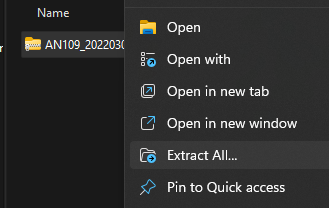
Click ‘Download’. This will download a ZIP file called ‘AN109_20220309.zip’. Find it, right-click and press ‘Extract All’ to extract the contents of the file.
Press ‘Extract’ and open the new folder. Inside you’ll find two files. An image file with the details of the upgrade and an EXE file. If you open the application now you won’t be able to install the update. You’ll see this window.
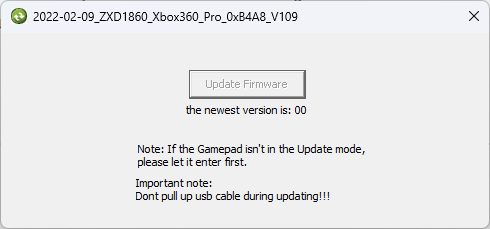
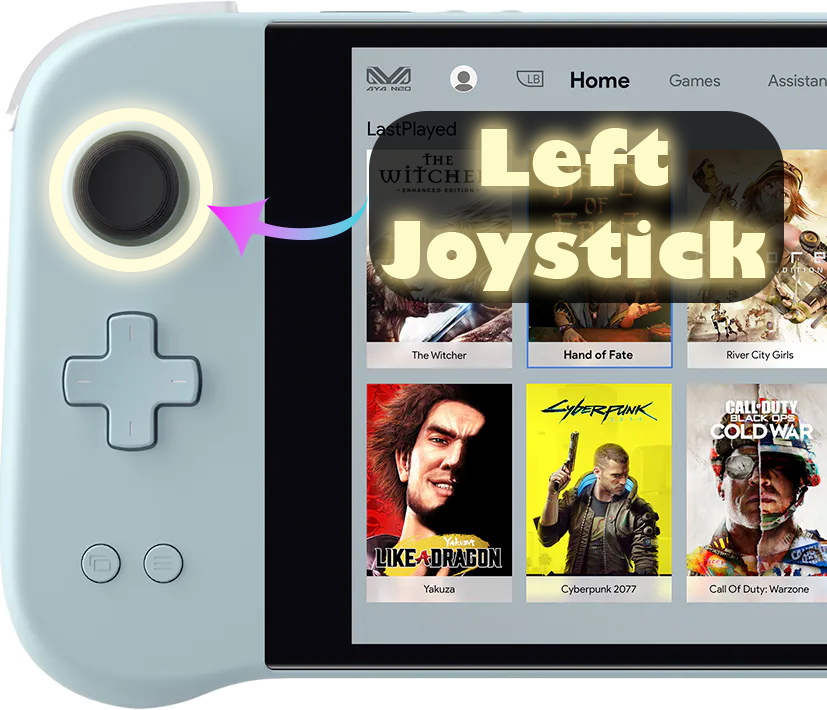
The ‘Update Firmware’ button is greyed out because the device is not in Update Mode. To get into update mode first power the device off, and leave it off for at least ten seconds. While off press down and hold the left joystick (LS) and hold the power button to turn on. Let the AYANEO Next power on.
Once booted, let go of the joystick and log in as usual. Navigate to the application again and if you’ve managed to get into Update Mode you’ll see that the button will no longer be greyed out. Feel free to click on Update Firmware and it will go ahead and update. If it isn’t greyed out, then you will need to repeat the process of putting the device in Update Mode until it works.
Once it’s done we can calibrate the device.
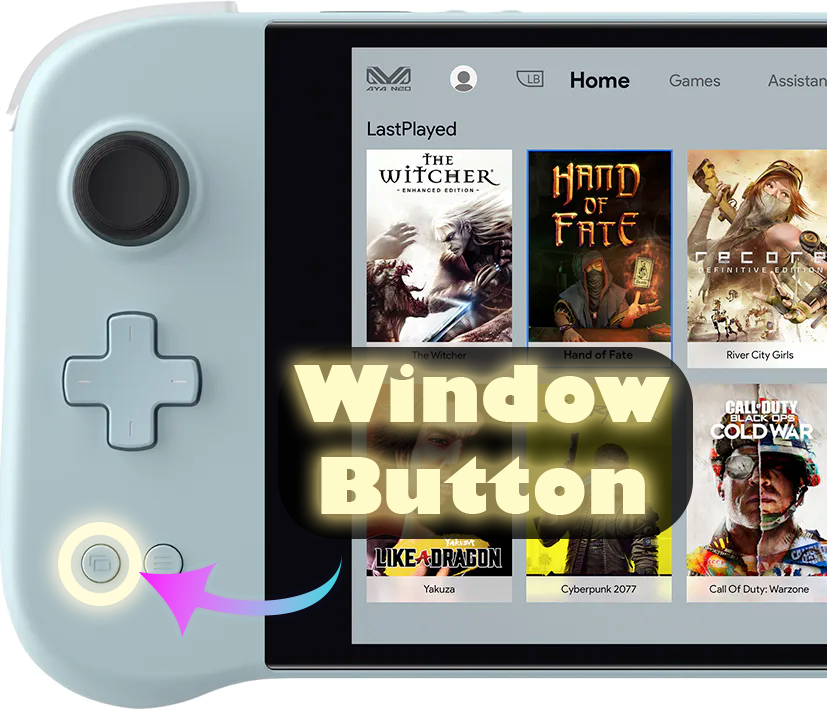
- Press and hold the Window Button and all four ABXY buttons down for approximately two seconds, until the device vibrates.
- Within ten seconds of the vibration rotate BOTH joysticks three times in either direction AND press down both triggers (LT & RT) three times. The device will vibrate again when calibration is complete.
For other methods to calibrate your AYANEO device see below.
NOTE: The gamepad will not work unless Aya Space is running. It can be downloaded from the AYANEO Downloads page.
Windows Calibration
If the above method doesn’t work, there is a calibration method built into Windows which is detailed below.
To calibrate within Windows we need to first open up Windows Run, if you have a keyboard attached this can be done be pressing Windows+R, if not open the start menu and search for ‘Run’.

Once open type in joy.cpl and click ‘OK’.

It will open this window, Windows will see your controller as an XBOX 360 controller, and that’s okay.

Click on ‘Properties’. It will open up this screen.

You can use this to test your controller.
- Z Axis is the Trigger buttons
- X Rotation is the Right Joysticks horizontal movement
- Y Rotation is the Right Joysticks vertical movement
- X-Axis / Y-Axis is the Left Joysticks movement
- The point of Video Hat is the D-Pad
- Buttons are all the buttons on your device: A, B, X, Y, LB, RB, LS, RS, LC and RC. They will light up when pressed.
If they all work fine then chances are you don’t need to calibrate your AYANEO device. But if you do, click over to ‘Settings’ and you’ll see this screen.

Click on ‘Calibrate’ to be taken through the calibration process.

Go through the process following the instructions to calibrate your controller. Once you’re done, you’ll be taken back to the Settings page, you can go over to the Test page to see how your work panned out. If you’re unhappy go back to Settings and click ‘Restore Default’. If you are then you can carry on and use your newly calibrated controller.
Gamepad-Tester.com
Gamepad Tester is a well-known website in the community, it offers an easy and accessible way to test your gamepad controllers. It even offers additional and more in-depth information than Windows. Head over to the site. You’ll be greeted with this screen.

Press any button to begin, and the testing interface will load.
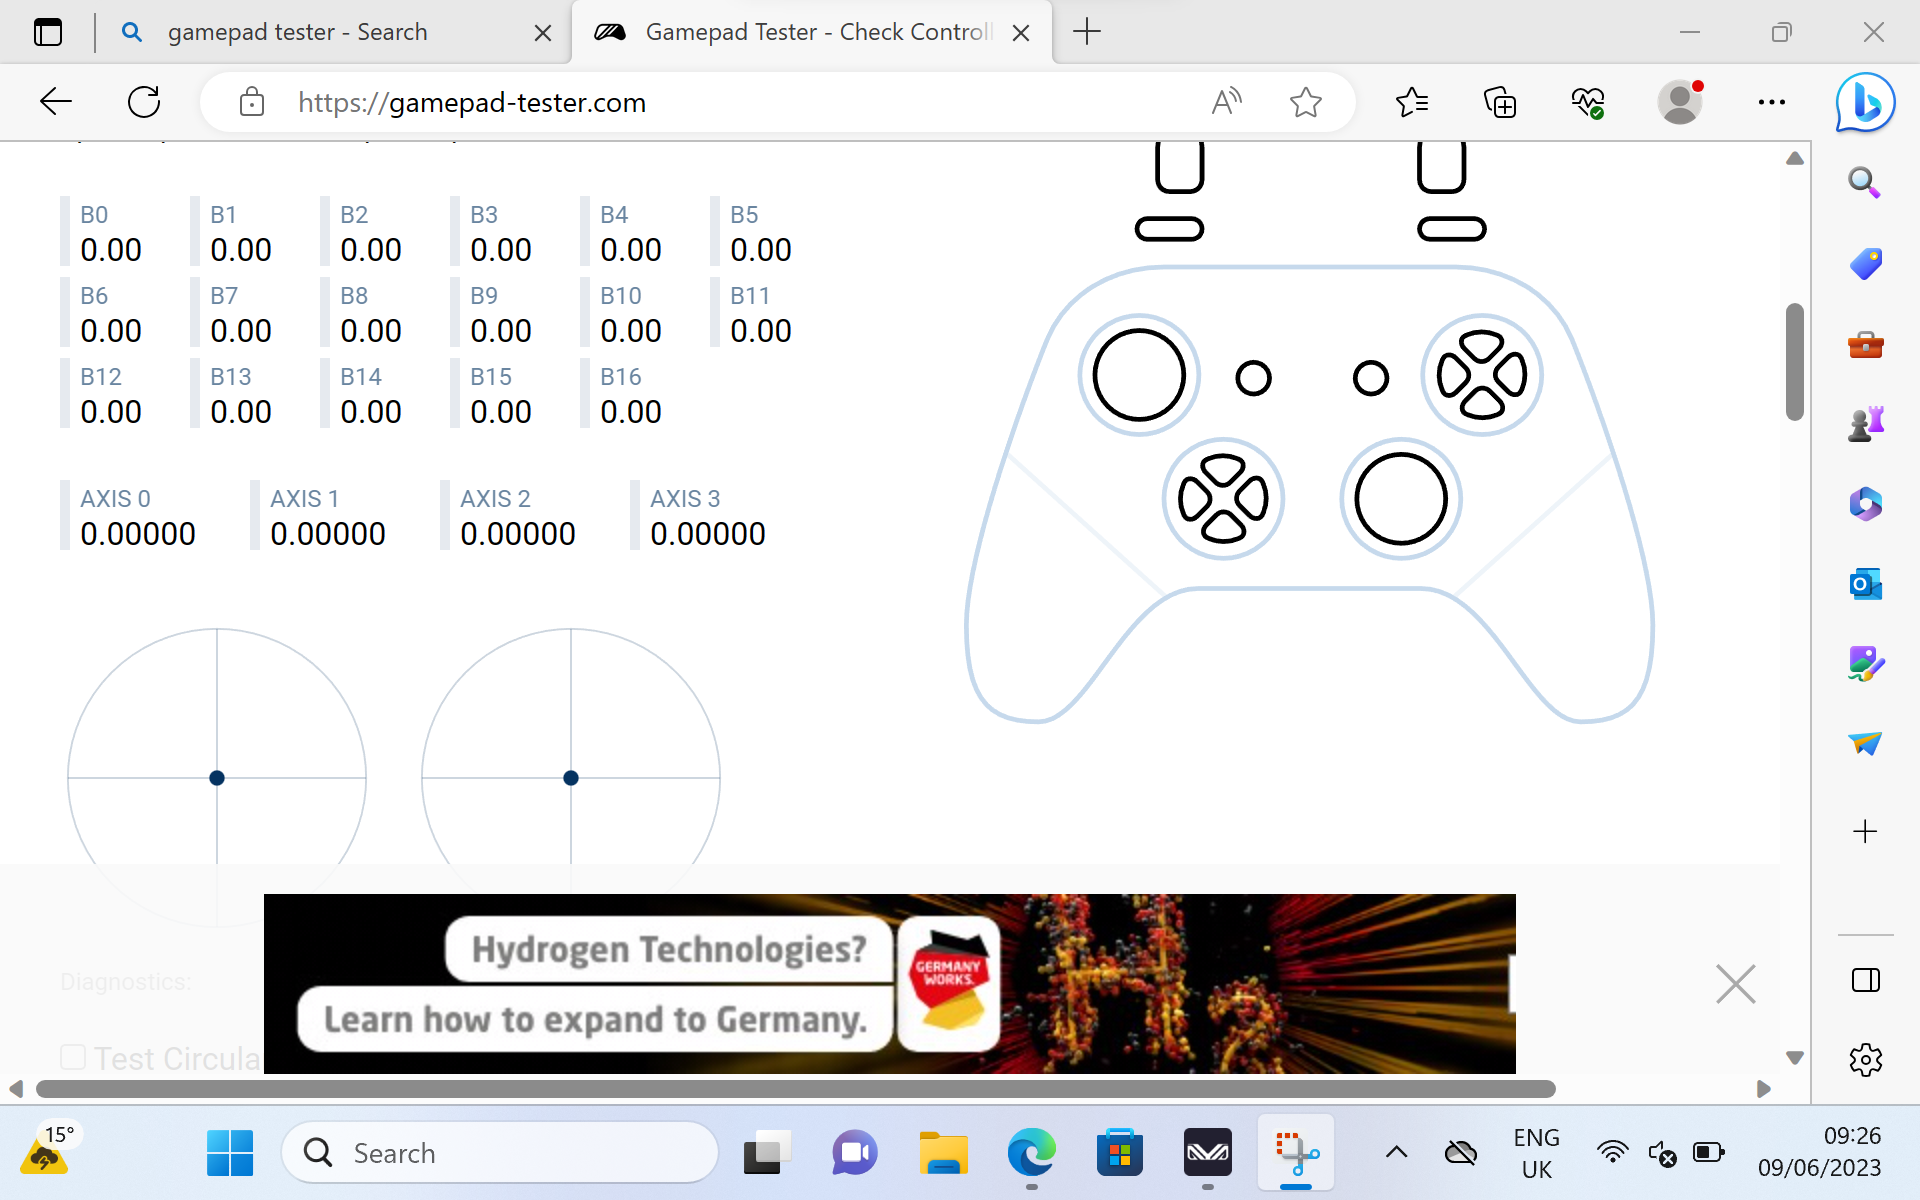
From here you can see precisely the angle and force that the joysticks, and triggers are receiving.

Questions & answers