This guide is applicable to the following MinisForum mini PC models:
If you are looking to upgrade your MinisForum mini PC, we at DroiX have put together a short guide to help you disassemble the unit and upgrade your device as soon as possible.
Step 1 – Remove the rear panel
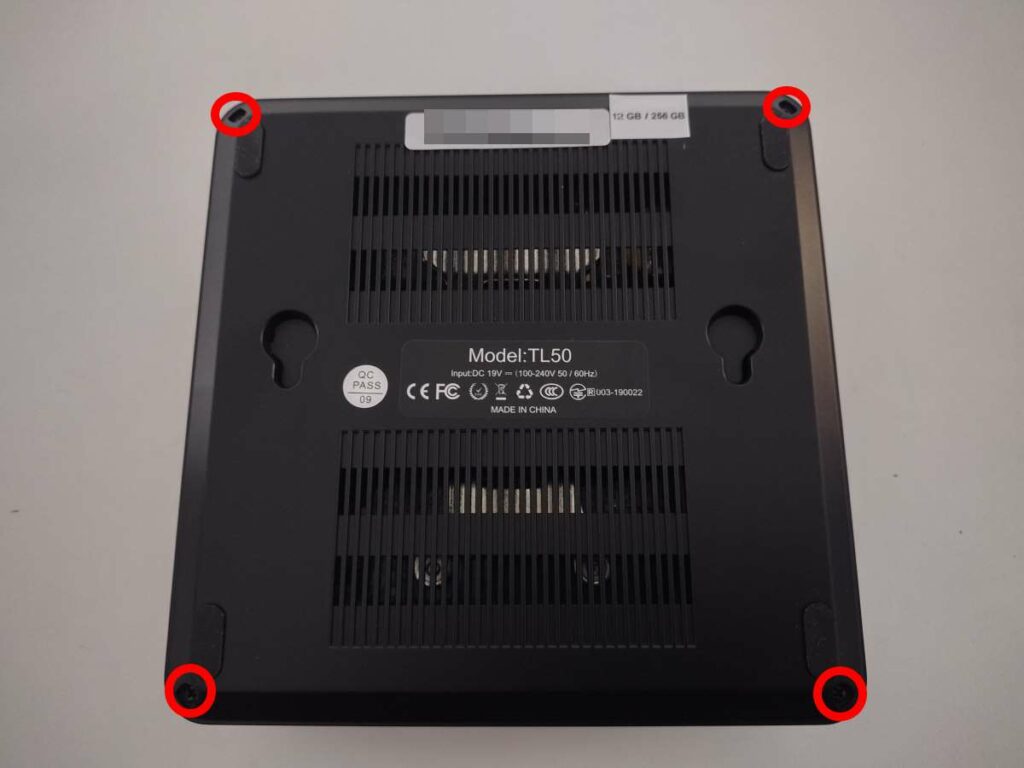
To access the mini PC, you will first need to remove the rear of the unit.
First, loosen the four screws located in the corners of the rear panel.
You will now be able to remove the rear panel. However, unlike many other mini PC models, this shell has a rear panel that is very securely fitted in place — even without the screws.
Our recommended method is to take a small prying tool such as a plastic spudger, and run it along the outer edge until you hear a “pop”, you can then lift the rear panel away.
Step 2 – Replacing Components
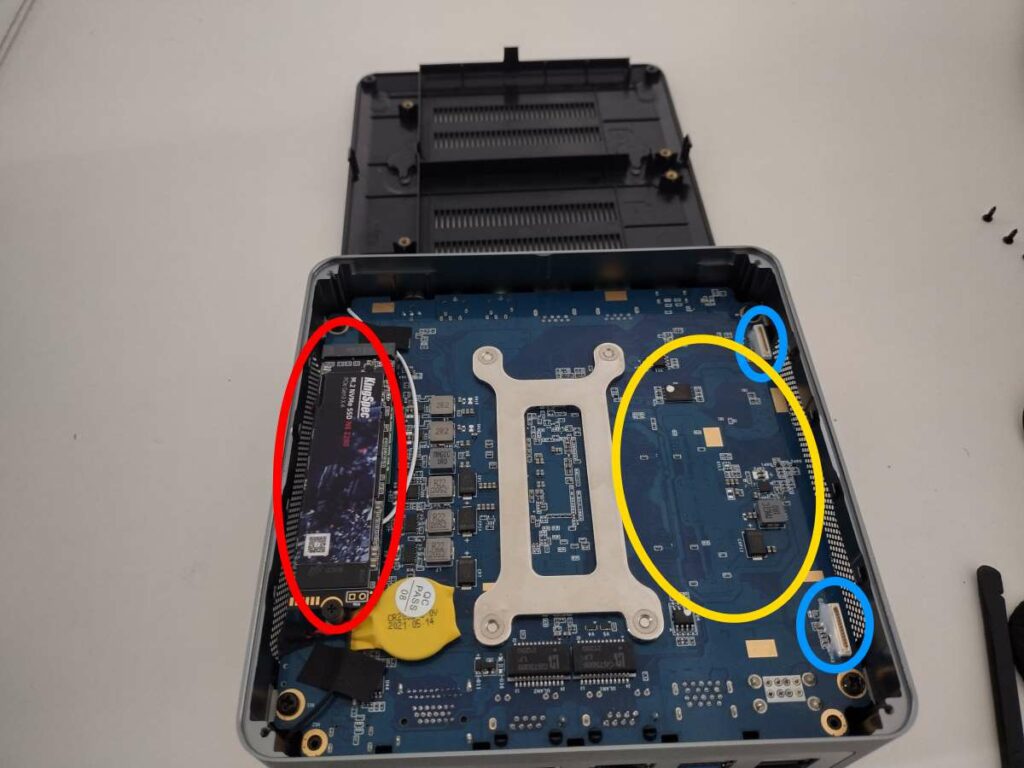
You will now be at the heart of the mini computer. From here, you can upgrade and replace the components as you wish.
The TL50 and HM80 share a shell and have a similar PCB. However, the TL50 does not have slots for RAM (the RAM is soldered directly onto the board).
On the HM50 and HM80, you would need to lightly pull the securing clips outward until the stick springs up by itself. You can then pull it out without resistance. There is a yellow circle indicating where the RAM would be in this case.
To replace the M.2 SSD (circled in red), loosen the screw at the end of the socket, and you can then insert/remove the M.2 SSD as you please.
The light blue circles indicates two SATA interfaces. Connect these using the cables that came with the device, and you can link up to two 2.5-inch SSDs or HDDs simultaneously.

Questions & answers 2
Für die Erweiterung mit einer 2,5-Zoll-SSDs, wie lautet das Adapterkabel bzw. wo kann ich dieses kaufe. Ich finde leider dieses nicht mehr. Vielen Dank für eine Antwort
Dies ist ein recht altes Modell, daher bin ich mir nicht ganz sicher, welches Kabel für dieses Modell geeignet ist. Wenn Sie den Mini-PC bei uns gekauft haben, wenden Sie sich bitte mit Ihrer Bestellnummer an [email protected], damit wir die Angelegenheit weiter untersuchen können. Danke.