If your RG350M is not booting or you are upgrading to a larger Micro SD Card you will need to reinstall the firmware. You can follow this guide for how to reinstall the original firmware.
IMPORTANT: Do NOT install RG350 firmware on a RG350M, it may not work. While it will not damage the device, you will need to reinstall the correct firmware below.
You will need:
Original RG350M firmware: You can download it from here. Once downloaded, extract the .img file with software such as 7zip, WinRAR, Zip etc.
Disk image writing software: You can use any software such as Win32 DiskImager or Etcher for example. In this guide we are using Imager as there are versions for all operating systems and its not just for installing Raspberry Pi images.
Imager for Windows
Imager for macOS
Imager for Ubuntu
Removing the Micro SD Card
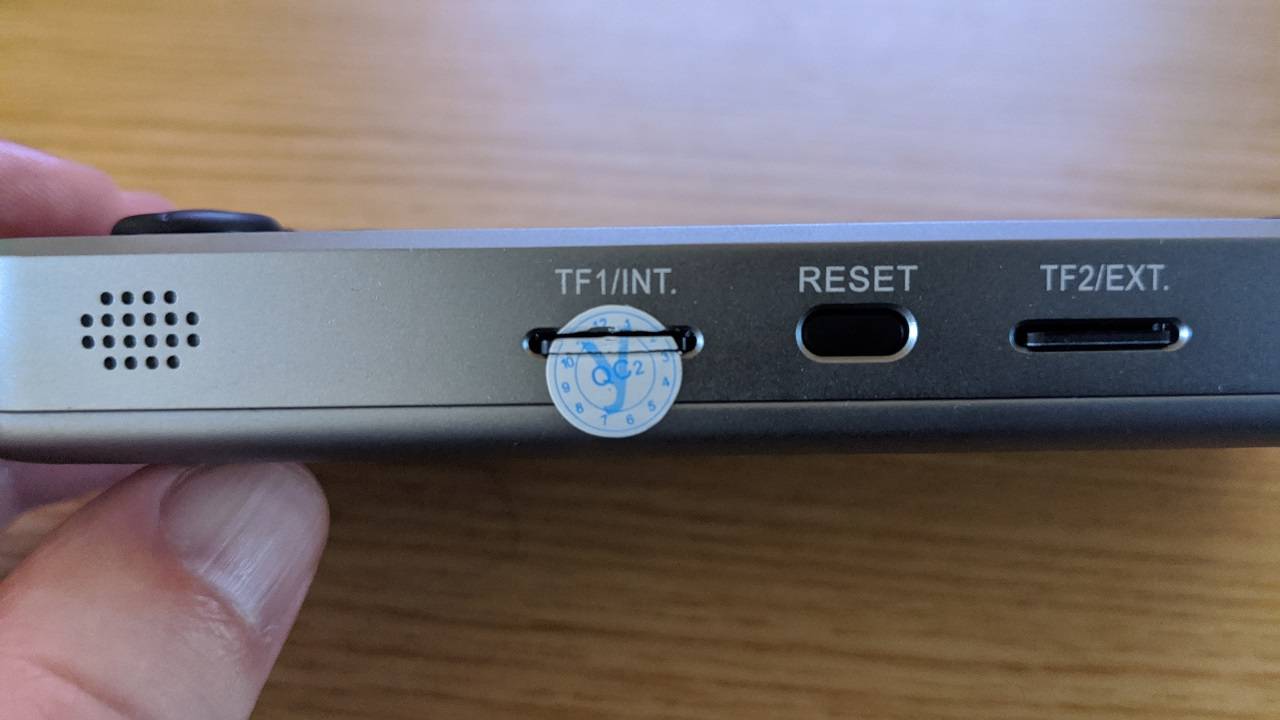
There may be a security sticker covering the Micro SD Card slot. You can use your fingernail or similar to break the seal either side of the Micro SD Card as shown in the below photo.
Gently press the Micro SD card and it should click and pop up. You can now remove the card.
Writing the Firmware to the Micro SD Card
Open the Imager software. Click on Choose OS.
Scroll down the list and choose: Use Custom – Select a custom .img from your computer.
Locate the downloaded firmware .img file on your PC and select it. Now click on Choose SD Card option and choose the correct drive for the Micro SD Card.
Once selected, confirm everything is correct such as the correct Micro SD Card drive. Then choose the Write option. The image file will now be written to the Micro SD Card.
Please do not shut down your device or remove the Micro SD Card until the process is completed. This may take some time depending on the size of the image file and the card speed.
Once the process has completed, you can close the software and safely eject the Micro SD Card from your PC.
You can now insert the Micro SD Card back in to the RG350M and switch it on.


