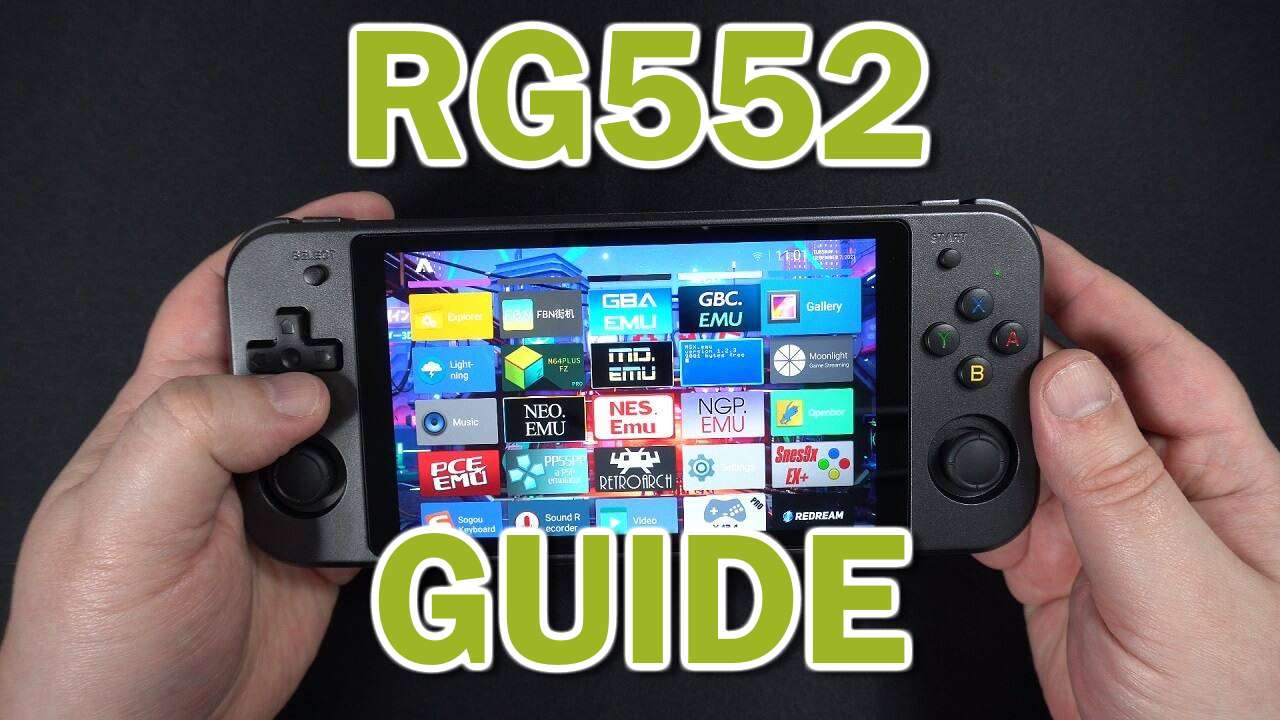
Just got your RG552 but aren’t sure how to get started? Maybe you’re unfamiliar with how Android works, or perhaps just new to retro gaming in general. Whatever the reason, we’ll be taking a look at a “fresh” RG552 unit and walking you through the various features of this wonderful retro gaming handheld.
Estimated reading time: 30 minutes
Introduction
Congratulations! Whatever the specifics, you’ve decided to take the plunge and purchase your very own ANBERNIC RG552! Many, many hours of gaming delights await you with this wonderfully versatile and portable handheld.
While the device is still new, the future is bright for this generation of retro gaming handhelds, as the performance bump means that more and more games are playable than ever before!
If you’re interested in an RG552 of your own, we encourage you to check out our RG552 review, or even buy one of your own at DroiX.
Now with that shameless self-promotion out of the way, let’s get started.
Charging The RG552
Depending on how long your device was sitting in a warehouse before it reached your hands, it may be running a little low on battery.
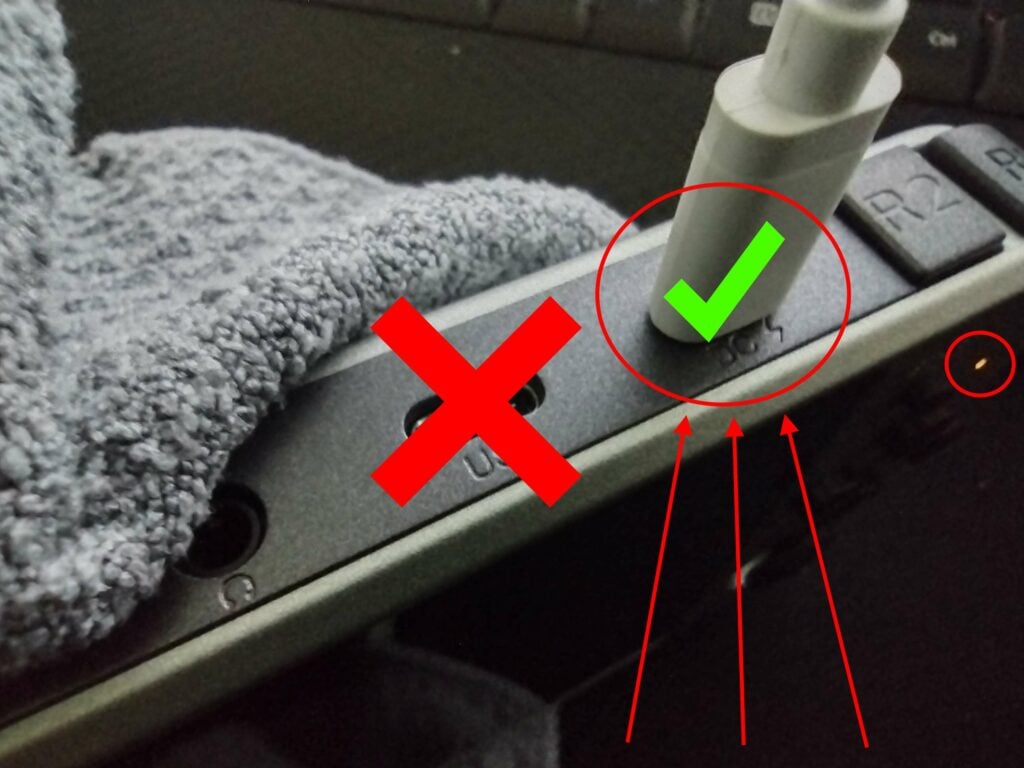
To charge the device, connect it to your charger of choice via the USB Type-C port labelled “DC“. While not mandatory, it is highly recommended you use the charger that comes with the unit if you are unsure of what kind of chargers are supported.
The other USB port is used for connecting miscellaneous peripherals.
Choosing the OS
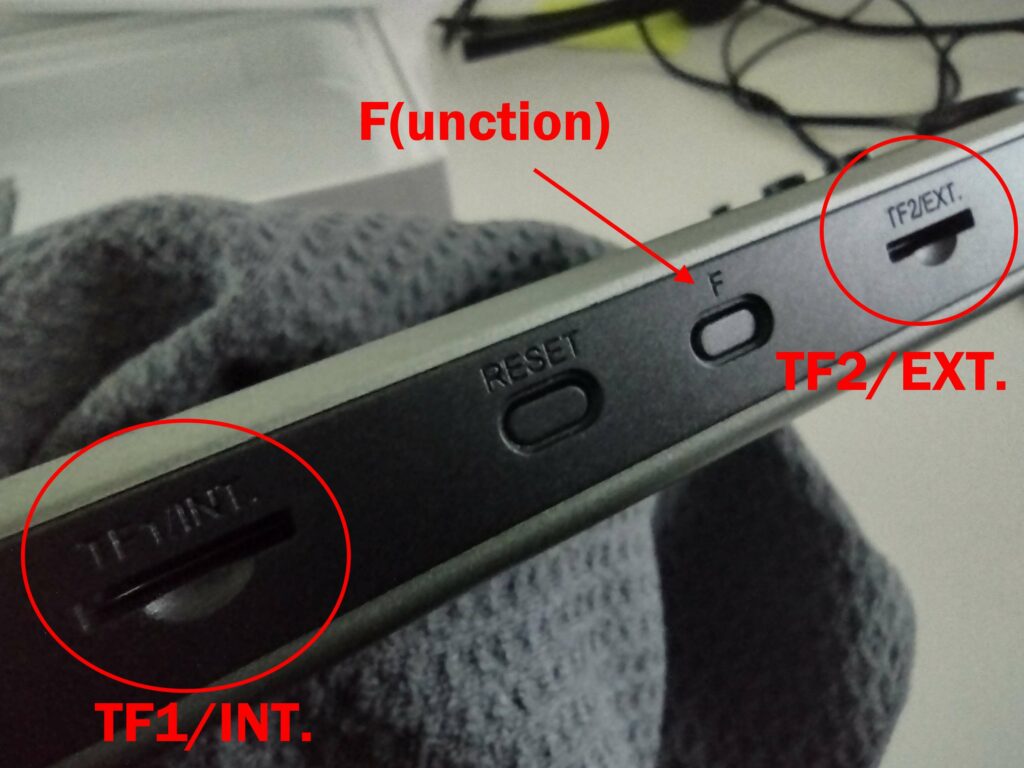
An awesome feature of the RG552 is the ability to to run not one, but TWO different types of operating systems. This is made possible via the SD card slots in the bottom of the device.
The left-most microSD card slot (TF1) can be used for storage and firmware. The right-most microSD card slot (TF2) is used for storage only.
The RG552 has two different operating systems to choose from initially, those being Android 7.1, and Batocera. Different operating systems have different performance in different emulators. At the time of writing (near launch), it is suggested that you use Android for “heavier” emulation (N64, Dreamcast, PSP, etc.), as these emulators are generally more optimized.
Adding Games
Adding games to the RG552 will, for the most part, require a PC or Laptop.
You will need to put games on your PC, then simply copy and paste them onto the microSD card.
Some emulators out there may require additional files (BIOS, etc.), so you might need to procure those as well.
Technically, you can download content. Either through the built-in web browser, or you can set up a cloud service (google drive, MEGA, etc.) and download from that.
But when you consider that the RG552 only supports 2.4GHz connections by default, that may take quite some time for large downloads. We would suggest just using the regular microSD card method for en-masse transfers.
Via USB
It is also possible to connect the RG552 to your PC via USB cable. You may need to install the Rockchip USB drivers first however.
Once installed on your PC, you should be able to connect the RG552 to it via a USB-C cable in the Type-C port labelled “USB”, and access its contents in the same way as you would a mobile phone.
During testing, we were only able to get this working through a USB Type-C-to-Type-C connection. We’re unsure of the specifics behind it at this point in time, but make of it what you will.
Android (7.1)
The Android operating system is run off of the internal 64GB eMMC storage. As such, to access it, all you need to do is power the device on.
Navigation
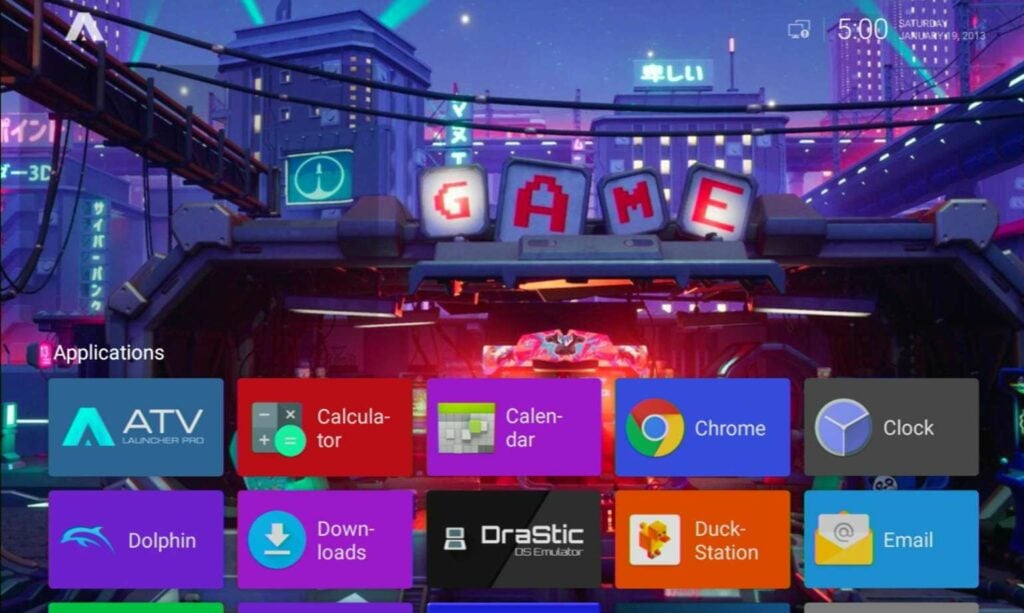
By default, navigation is performed through a combination of touch screen inputs and controller inputs.
- To move the cursor, you can use the left analog stick and the directional pad.
- You can select the highlighted icon/option by pressing the A Button, Y Button and START.
- To access the options for an app, press the SELECT button.
- To exit an app and return to the home screen, press the Function Key (the “F” button on the underside of the device).
Because the device uses a touch screen, you can also navigate through touch inputs. Tap icons to select them, press and hold to access contextual options, and swipe to scroll through menus.
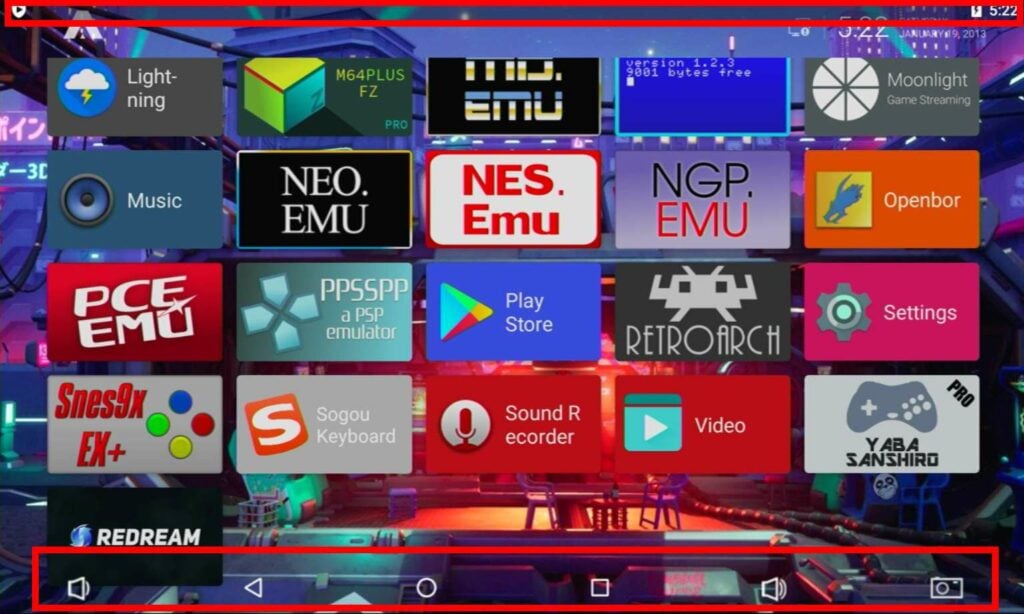
You can also access the common Android navigation bar by swiping up from the bottom of the screen, and pull down the notification drawer by swiping down from the top of the screen.
The navigation bar for the RG552 has three extra keys on top of the standard “Back”, “Home” and “Recents”. And these are keys for Volume Up, Volume Down, and Screenshotting.
Connecting to the Internet
If you have ever used an Android device before, you will probably immediately know how to connect the device to the internet. But for those who have not used one, or do not know, fear not! As the process is very simple.
There’s couple of different ways to do this, but the quickest would be the following:
First, swipe down and access the notifications drawer.
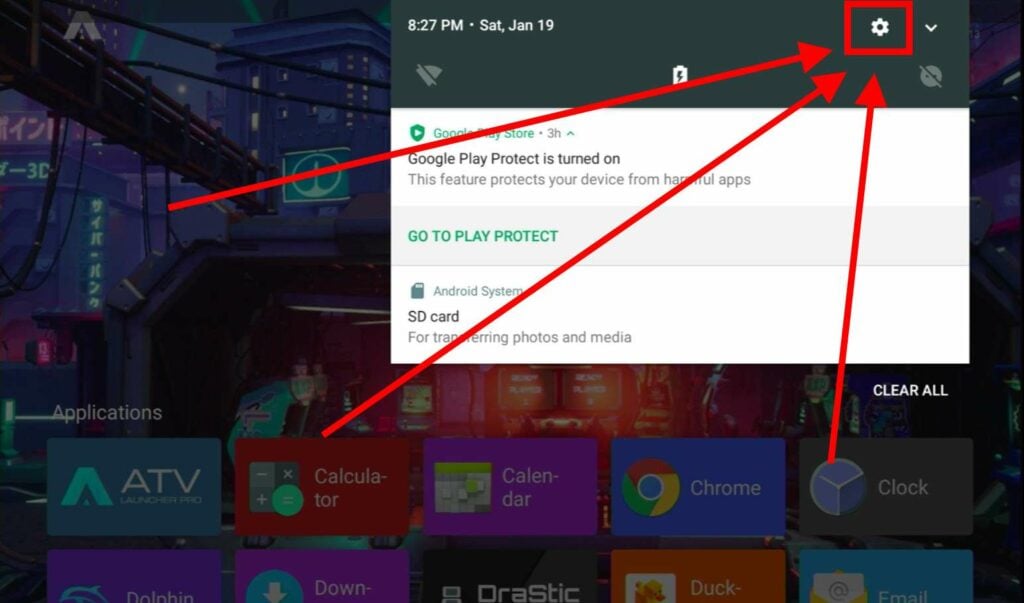
You’ll be taken to the full list of Android settings. There’s many things you can tinker with here, but for now, just select Wi-Fi.
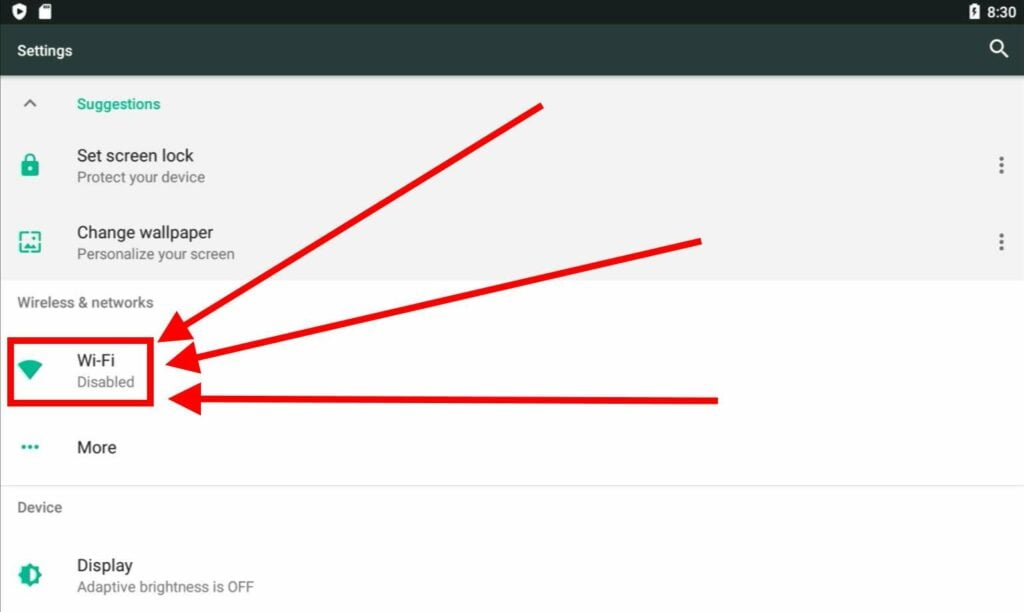
Now select your Wi-Fi connection from the list, input the password (if applicable), and you’re now connected to the internet!
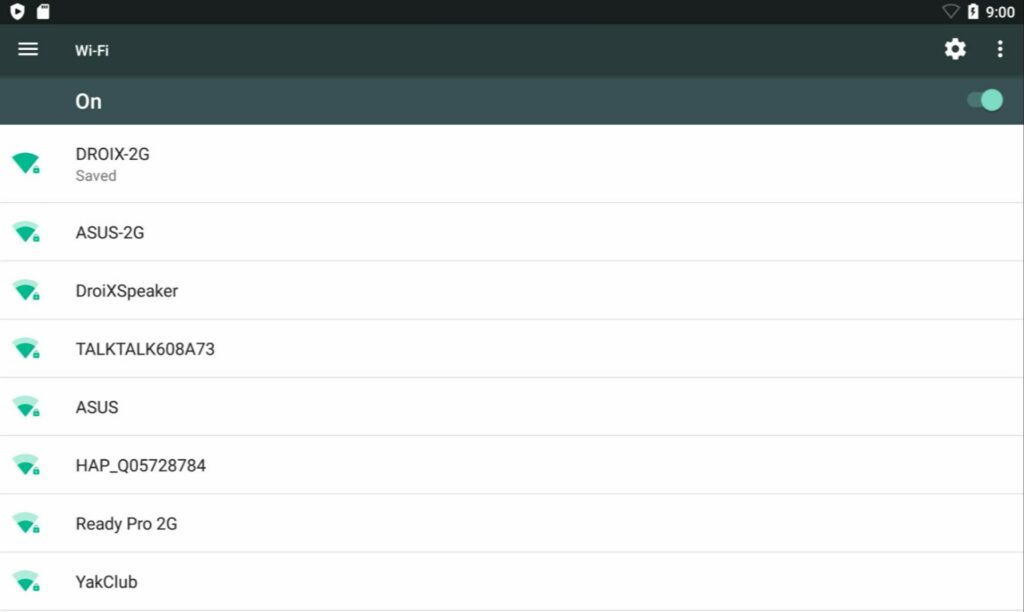
The RG552 by default will only connect to 2.4GHz connections. You’ll need a separate USB dongle in order to access 5GHz connections.
Play Store
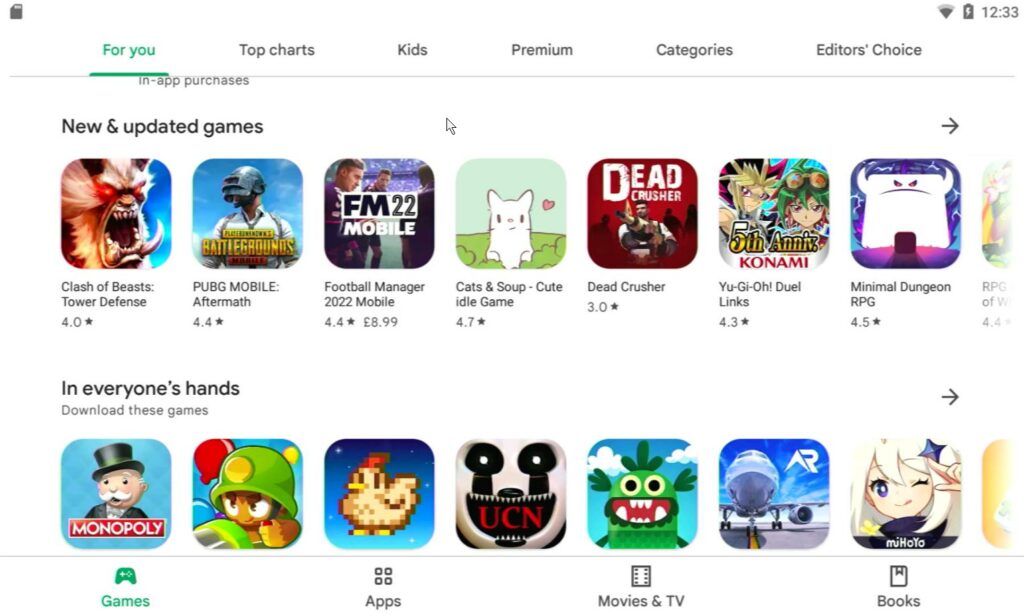
Now you’ve connected to the internet, you’ll be able to access the Google Play Store.
Through the Play Store, it is possible to download a variety of additional apps and emulators to really personalize the appearance and functionality of your device.
To access the play store, select it from the list of apps on the home screen. It should be a blue coloured icon with the Play Store logo. You’ll then be taken to the login page.
Enter your Google account credentials as instructed, and you’ll be good-to-go!

Alternative Launchers
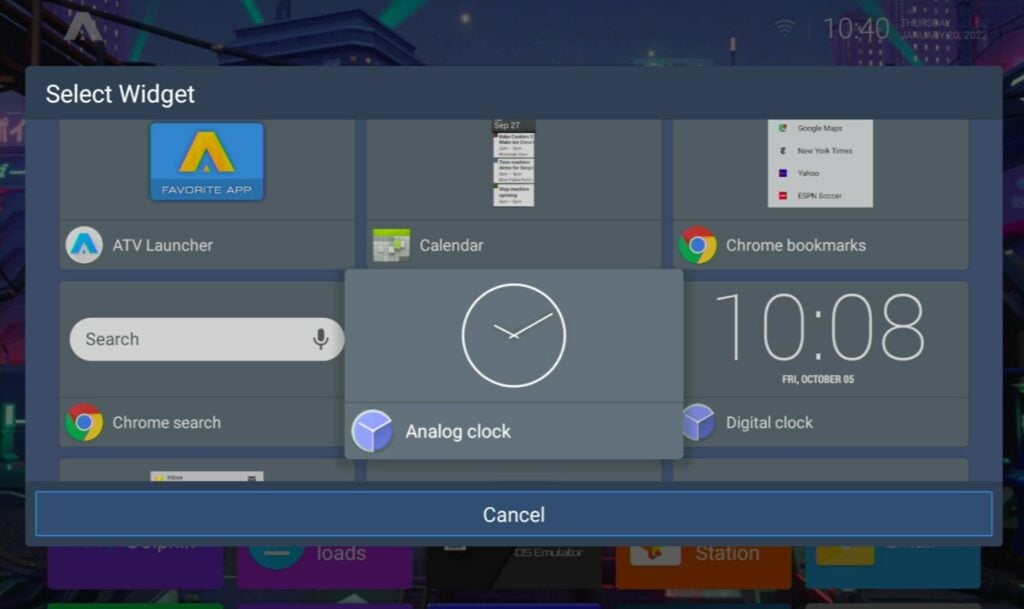
In the simplest terms, a launcher can be considered to be the user interface of the device. The launcher you use will dictate how your applications are organized and how you access them.
The default launcher that comes with the RG552 is some variation of ATV Launcher. All the apps on the device will be visible in a collection of coloured tiles.
To access the launcher-specific settings, press the SELECT button, or press and hold any icon on the screen (either with your finger, or the A/Y Buttons). You’ll then have the ability to move icons about, change their icons, switch the layout of the home page from horizontal to vertical, and more.
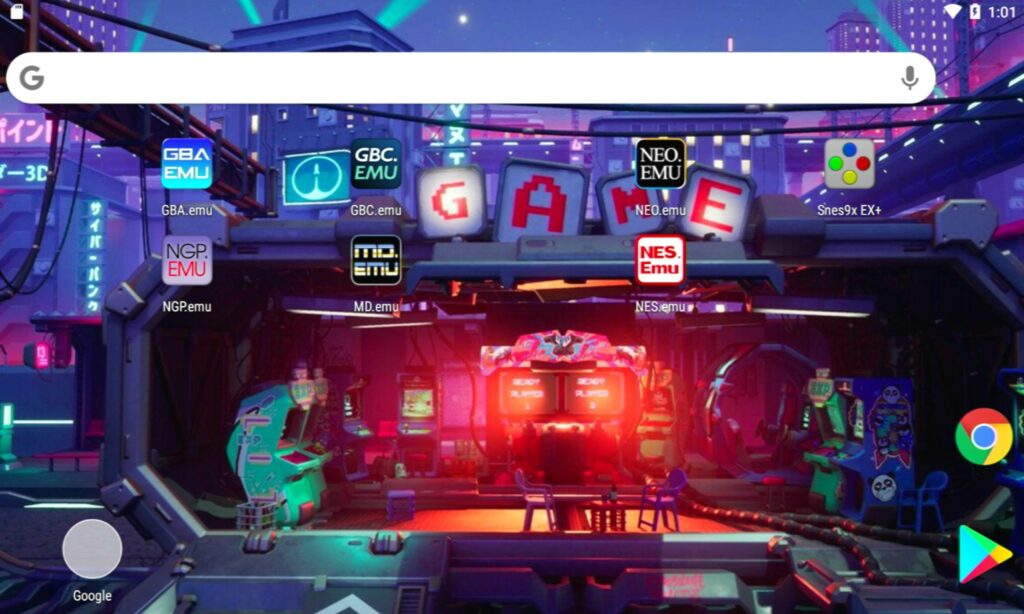
It’s also possible to install alternative launchers though the Google Play Store. If you don’t like ATV, then perhaps another one will suit you better.
Default Emulators
By default (as of January 2022), the RG552 comes pre-loaded with a suite of different emulators. In this section, we’ll go over using the emulators at a basic level. Tinkering with them is up to you, as it’s too large a scope to get into.
If you use the Play Store to download updated versions of these emulators, some instructions may also not apply. You can also add more emulators if you so wish.
Disclaimer: While most of these emulators are fairly straightforward to use, be prepared to do some playing around with settings and installations to find the setup that works best for you.
| Emulator | Platform |
|---|---|
| Dolphin | Gamecube Wii |
| DraStic | DS |
| DuckStation | Playstation 1 |
| FBN街机 | Arcade (Neo Geo, CPS1, CPS2, CAVE games, etc.) |
| GBA.emu | GameBoy Advance |
| GBC.emu | GameBoy Color |
| M64PLUS | N64 |
| MD.emu | Sega Mega Drive / Genesis |
| MSX.emu | MSX |
| NEO.emu | NeoGeo |
| NES.emu | NES |
| NGP.emu | NeoGeo Pocket |
| Openbor | Open Beats of Rage |
| PCE.emu | PC-Engine |
| PPSSPP | Playstation Portable |
| redream | Sega Dreamcast |
| RetroArch | Multiple |
| Snes9x EX+ | SNES |
| YabaSanhiro | Sega Saturn |
FIRST: SET UP YOUR microSD CARD
Different emulators have different requirements. Some use .iso files, some use .zip files, some use .rom files. Whatever emulator you’re using, ensure that you have the required files beforehand.
While not necessary, we highly, highly recommend you organize your microSD card into logical folders (i.e., all the GameBoy games go in one folder, all the PSP games go in a different folder). This will save you a lot of headaches down-the-line.
Also ensure that the microSD card is in FAT32 before loading it up. Android will only recognize FAT32 cards.
Many emulators and platforms will initially only look at the device’s internal storage for games. The SD card is classified as external storage.
When looking for a directory, go to the root of the device (usually just a single forward slash) and work your way down from there. Typically the full address will be something like
/storage/0000-0000/[your folders/files]
RetroArch
Before using RetroArch, you really should to the internet for the initial setup. (After it’s set up, a connection is no longer necessary).
Also, a preface: Emulators = Cores in the context of this section.
RetroArch is pretty much the “go-to” tool for emulation nowadays. Rather than act as an emulator itself, it acts as a wrapper for many individual emulators (called “cores”).
When you start up RetroArch, you’ll be met with a few different options. The first of which is the option to Load (a) Core. Without cores download, RetroArch is nothing but a fancy set of menus.
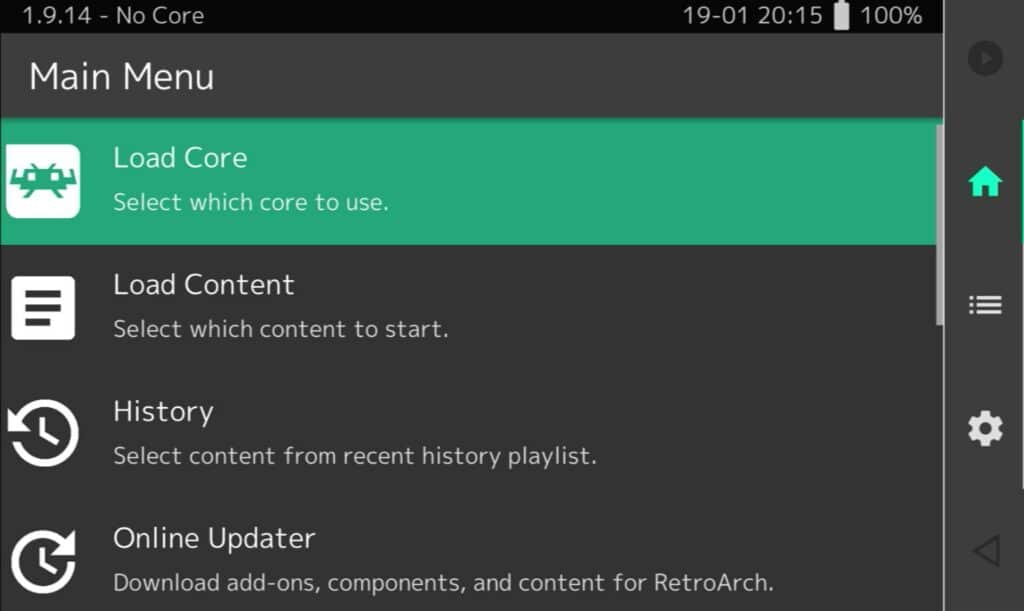
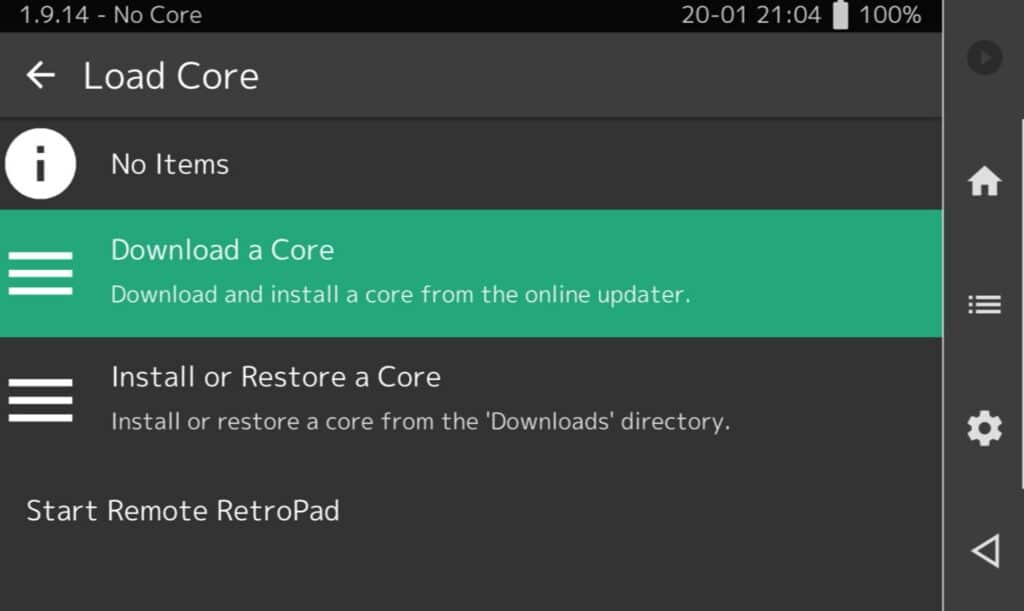
You’ll be presented wtih two options. You can either install a core from local storage, or download a core from RetroArch’s online repository. Do the latter.
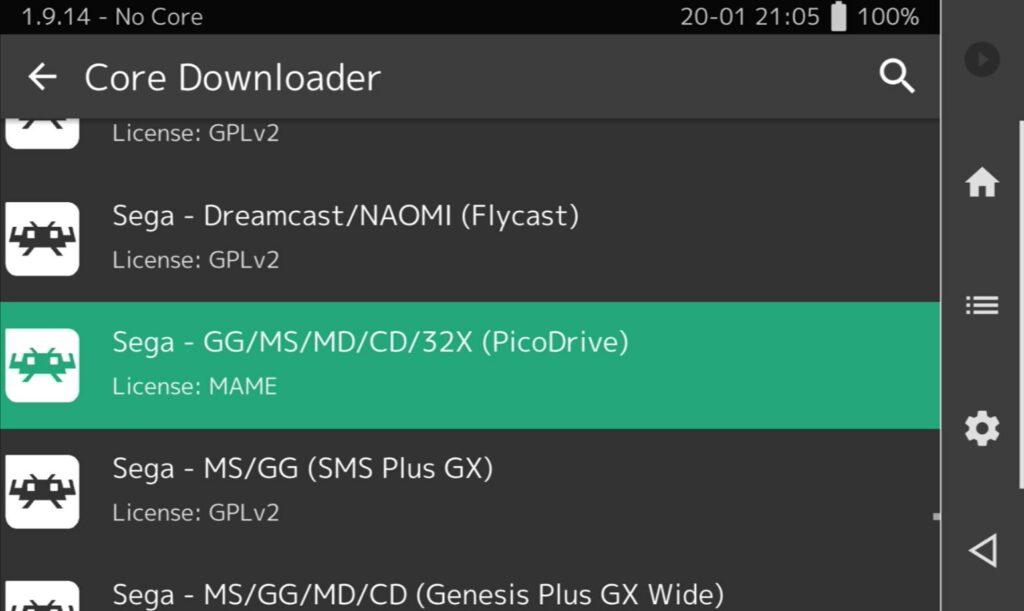
RetroArch has a ton of cores for a ton of different purposes. It is common that one platform will have multiple different cores, so try them out and see what works best for you, as they’re all free to use!
Once you’ve downloaded the core, select Load Core again and choose it from the list. You should see the title of the core at the top of the screen.
Now you need to Load Content (or in other words, find your game). Select the titular option and you’ll be taken to a list of shortcuts to various locations on the device.
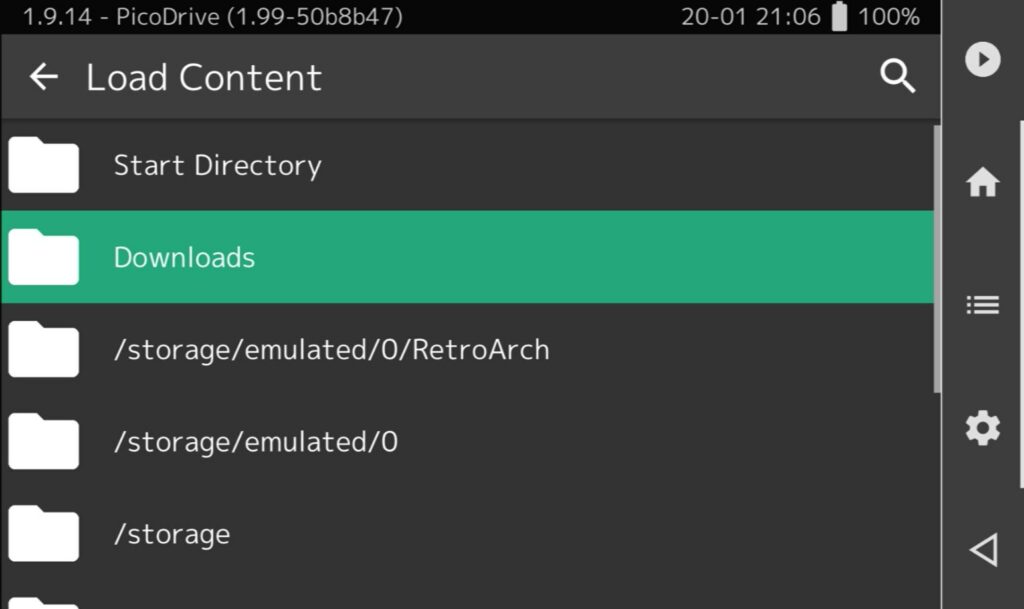
From this list, look for “/storage/0000-0000“. That is your microSD card, so select your game from there.
Now the game’s selected, just hit play content option, and your game will start up.
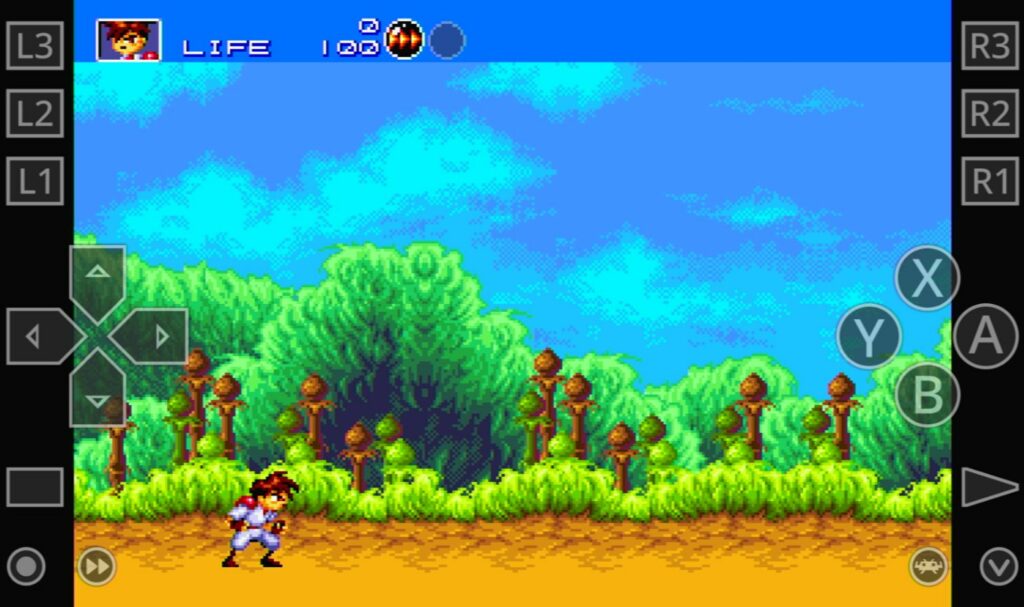
To open the menu again, you’ll need to tap the little Space Invader icon in the bottom right.
From this menu you can access tons of different options (or you can just use this as a forced-pause for games that don’t natively support it.
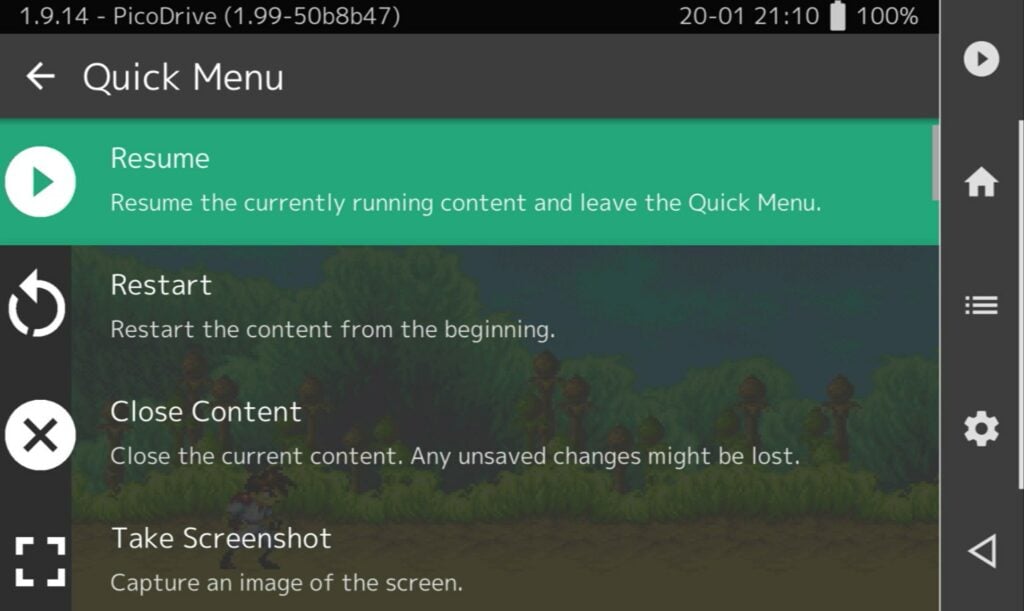
As I said earlier, RetroArch is very feature-rich and has support for a ton of things, such as filters, netplay and more. Take your time and look around the menus!
(We also have a guide on setting up RetroArch for the GPD WIN 3! It’s a different device, but you may still find it useful!)
Other Emulators



Many stand-alone emulators are also included on the RG552. Despite being for different platforms, the process for using any of these emulators is broadly the same.
- Point the emulator at the correct game folder/games, as well as any required files (BIOS, etc.)
- Run the game
So rather than go over every one with a fine-toothed comb (which would extend the length of this guide tenfold), we’ll look at how you get started with the Gameboy Colour emulator. You’ll then be able to apply these concepts to other emulators.
When you first start up GBC.emu, you’ll be met with a basic screen.
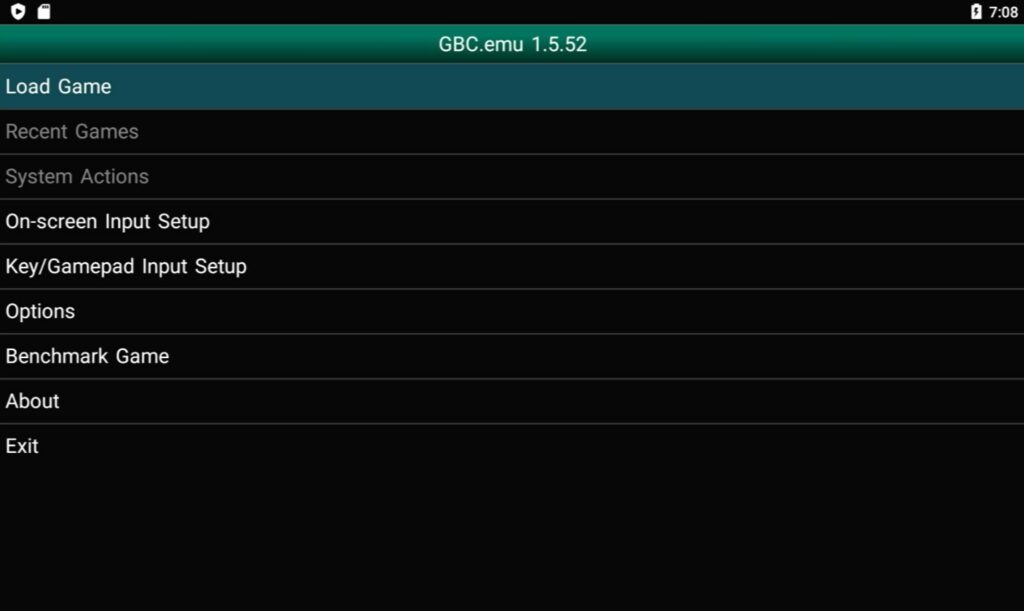
From here, you can do a number of things. Tweak the on-screen buttons, change the gamepad inputs, configure various emulation options, etc. We’re going to select Load Game.
When you first select Load Game, you’ll be taken to the device’s internal storage.
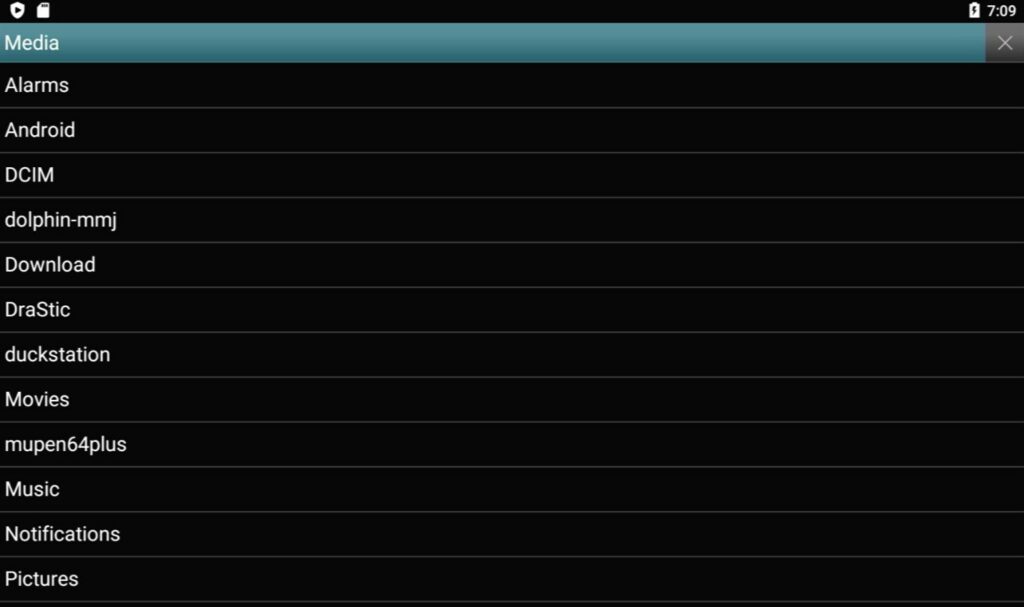
Your games will probably be on the microSD card, so we’re going to want to make our way over there. Select the Media header at the top of the list (either tap it, or highlight and press the A button).
You’ll then get a list of “File Locations”. There are four options here:
- Storage Media <- You were here before
- SD Card <- You want this one
- Root Filesystem <- Most emulators use this method
- Custom Path <- Nerds only
A cool thing about GBC.emu is that it has a shortcut to the microSD card currently inserted into the system, so select SD Card.
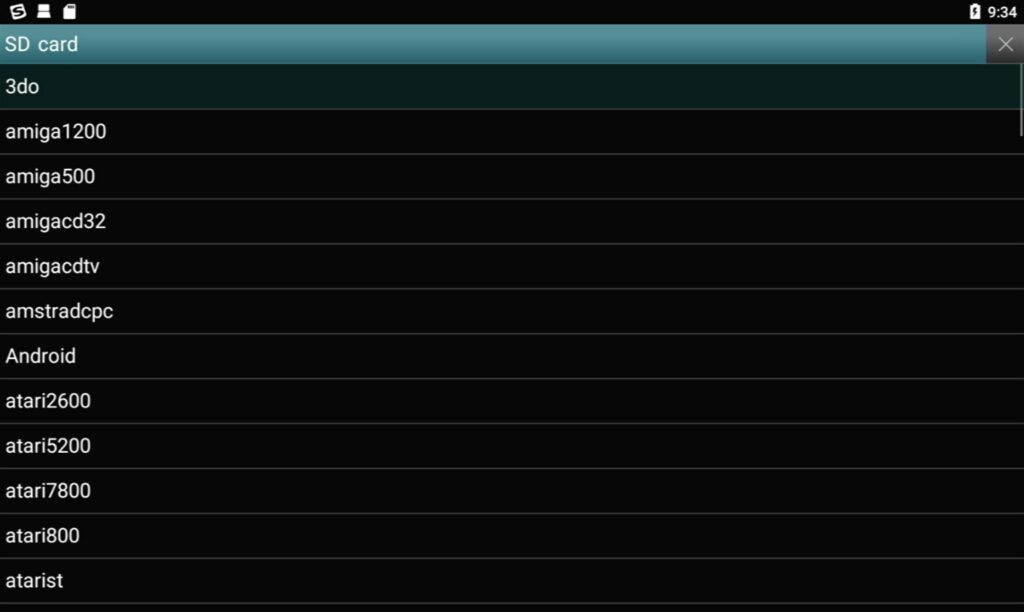
Now you can browse and select your games as usual.
Once you’re in the game, you may want to access save states, force pause, or something else of that nature. For GBC.emu, you can press the L2 button to bring up the menu.
Other emulators may not have a similar mapping, so you will need to press a specific button on the touch screen (usually in the corner). Or Swipe up from the bottom of the screen, and press the Back button.
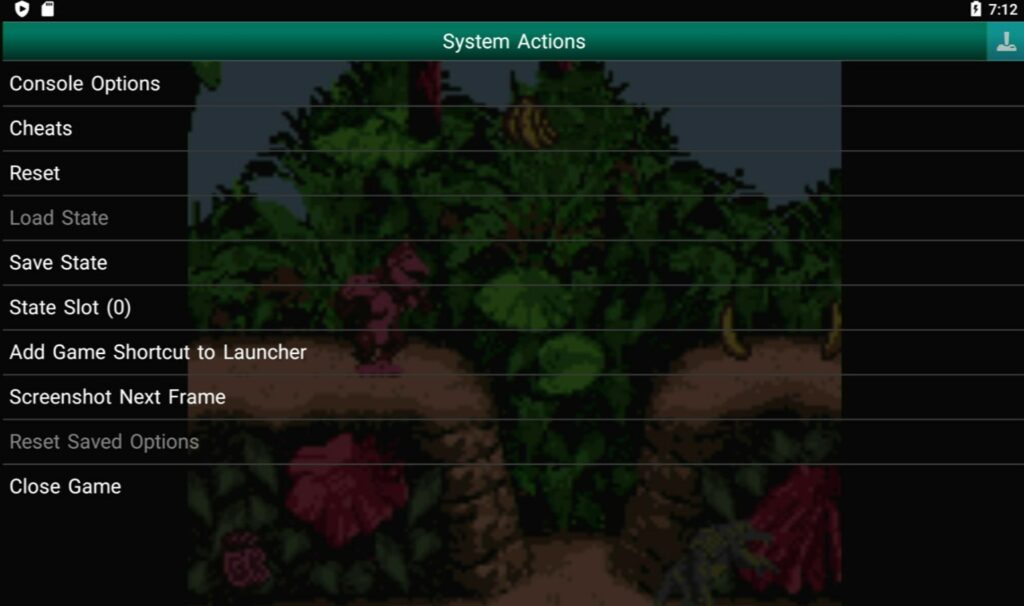
From there you can access a number of different options.
Congratulations! You’ve just been equipped with the knowledge to handle 90% of Android emulators!
Just about every emulator you can find will follow this same basic principle. The only differences will be where the buttons are located.
At the time of writing, it is common that more complex platforms such as PSP, N64, and Dreamcast, will generally run smoother through their standalone emulators instead of RetroArch, so you may prefer to use them in those instances.
OpenBOR
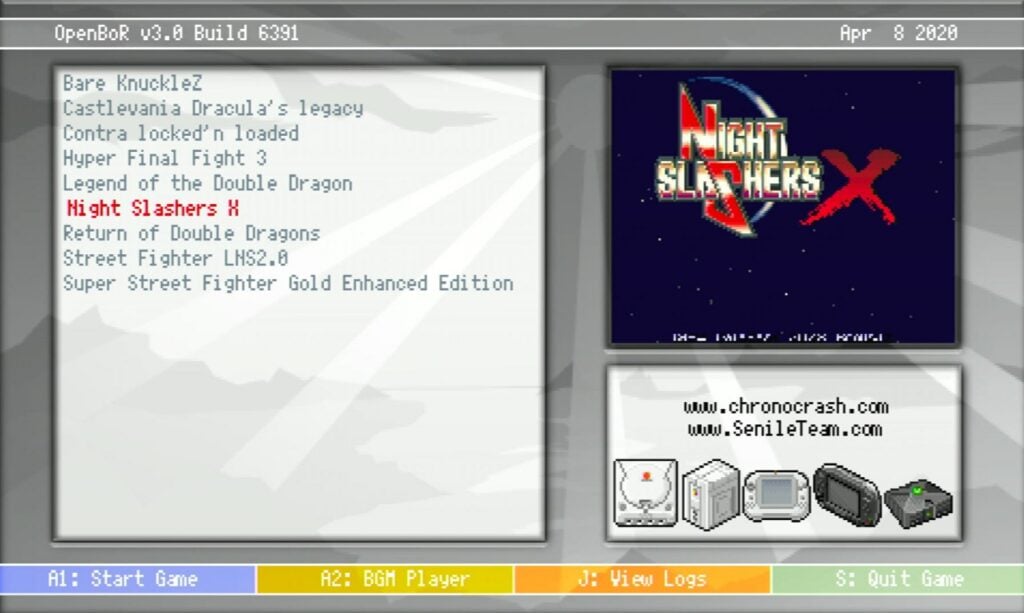
OpenBOR is not a console or handheld per-se. It is actually an engine. An open source project forked from a Streets of Rage fangame called Beats of Rage, OpenBOR is very similar to the popular freeware fighting game engine M.U.G.E.N. If you like side-scrolling beat-’em-ups, you’ll probably enjoy using this.
The full scope of using OpenBOR is beyond this guide. So we’ll leave you with the following cliff notes:
- OpenBOR looks for .pak files (games) on the internal storage, in the “/OpenBOR/Paks” folder.
- You’ll need to navigate using the touch screen controls. However, most games should allow you to re-map the controls to the RG552’s physical buttons.
Moonlight
Moonlight is an awesome application that allows you to stream PC games to your RG552.
However, because the RG552 only supports 2.4GHz Wi-Fi by default, your mileage may vary unless you insert a more powerful Wi-Fi dongle. Because games are technically being streamed and not played natively, a slow/unstable wireless connection will severely reduce the quality of your experience.
To learn more about Moonlight Game Streaming, check out the Moonlight website.
Side-Loading APKs on the RG552
Downloading an app is the process of transferring all the necessary files for an app from a server to your device. Just about everyone is familiar with this process, even if you don’t know all the details. Modern operating systems make this process simple and painless for even the most novice of users.
Sideloading however, is the process of downloading an app from somewhere on the internet, and installing it directly onto your device. Without going through a centralized distribution platform such as the Google Play Store.
To side-load an app, you’ll first need to get the .apk file from somewhere on the web. You can do this on the RG552 itself (via the web browser), or through a separate PC/Laptop.
Once you’ve downloaded the .apk file and it’s somewhere on your RG552, you’ll need to run it (like an .exe file on a computer).
Go into your device’s storage through the settings menu.
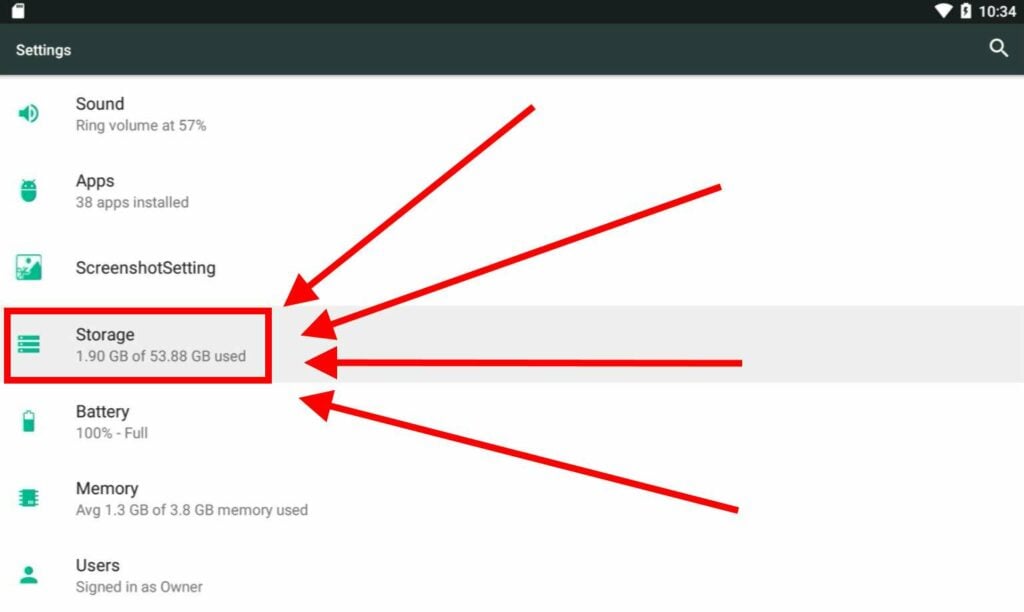
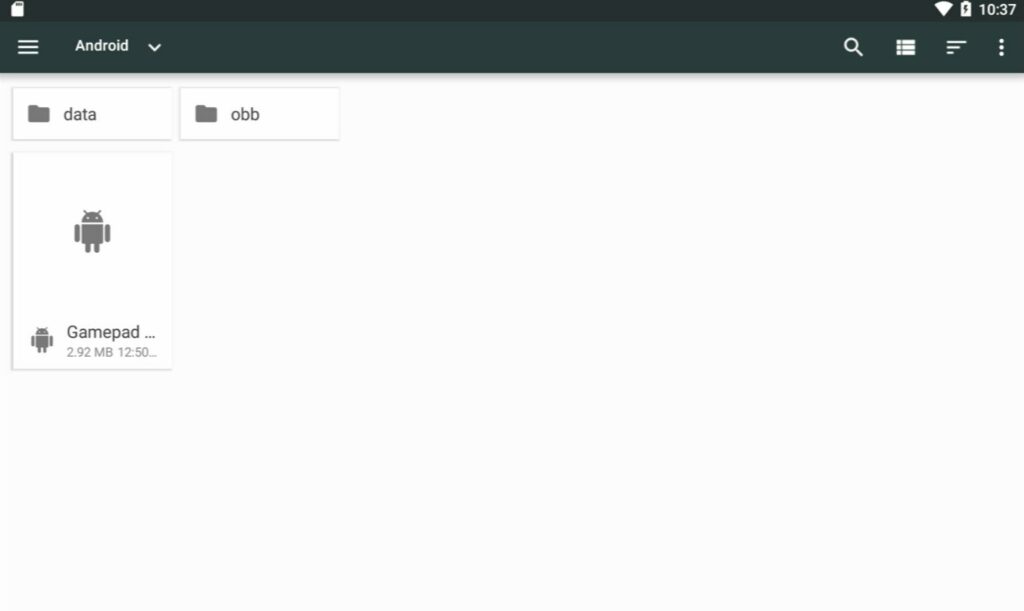
You can then choose what directory you’d like to browse. In the case of this example, we’ve downloaded the .apk file on a separate PC and have put it on a microSD card, so we select the SD card option.
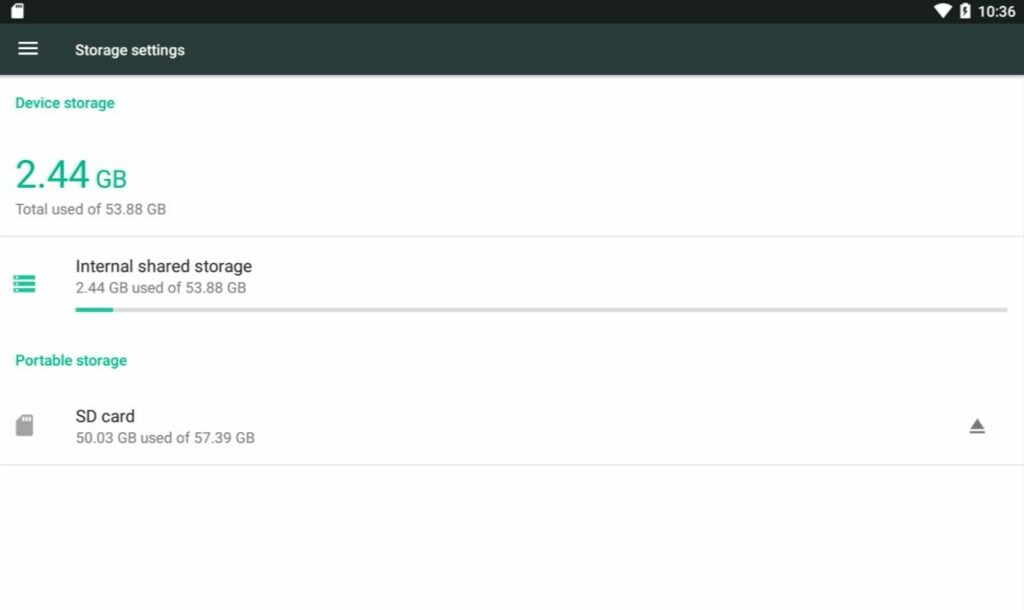
Once you navigate through your files/folders and find the .apk, you’ll just need to select it.
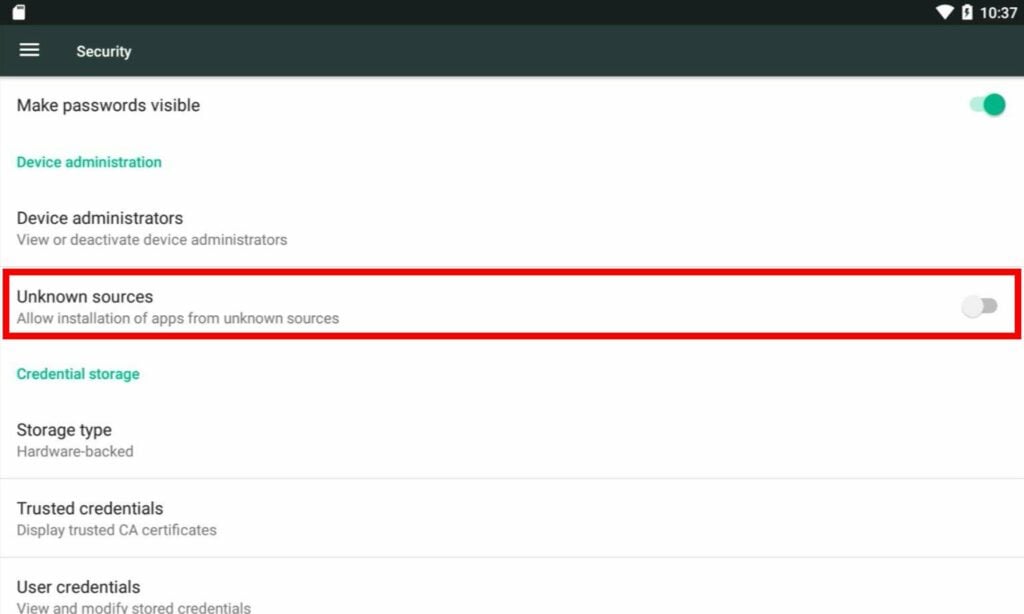
You will likely be blocked upon your first attempt. To fix this, just enable the installation of apps from unknown sources (a popup should appear that you can use to take a shortcut, but you can also just go to the Security section directly).
A great tennet of the Android operating system is its openness and customization. However, please ensure that you only side-load .apk files from trusted sources. Malicious .apk files can do all manner of awful things, ranging from stealing your personal details or even rendering your device inoperable.
Keymapping Software
If you’re looking to play touch screen games but don’t want to actually use the touchscreen, you might be interested in installing the Keymap update for the RG552. Recently released by ANBERNIC to the general public.
We’ve written a guide on how to install the RG552 keymapping update, so make sure to check it out!
Updating RG552 Android OS
Whenever ANBERNIC release a new firmware update for the RG552, it will likely be delivered through the form of a microSD card. The updating process is a bit more involved than a hands-off OTG update, so that’s why we’ve prepared a handy guide on how to update the RG552 Android OS.
Batocera (Linux-based)
Batocera is an alternative operating system built upon the Linux kernel. It is made of two key components:
- EmulationStation – Which acts as a “front-end” through which you organize and browse your game collection in.
- RetroArch – Which acts as a “back-end”, being used to manage the various emulators and their specific configurations.
Those who are familiar with ANBERNIC will immediately understand how this works, as it is very similar to EmuELEC, the operating system seen in their third generation handhelds.
To use Batocera, insert the 16GB microSD card that came with your system into the TF1 Slot.
Don’t be scared to tinker with the settings available. In the worst case scenario, you have to simply re-flash your card.
Navigation (EmulationStation)
EmulationStation is navigated solely through controller inputs. At the time of writing, the build of Batocera that comes with the device does not support touch screen inputs.
Home Screen
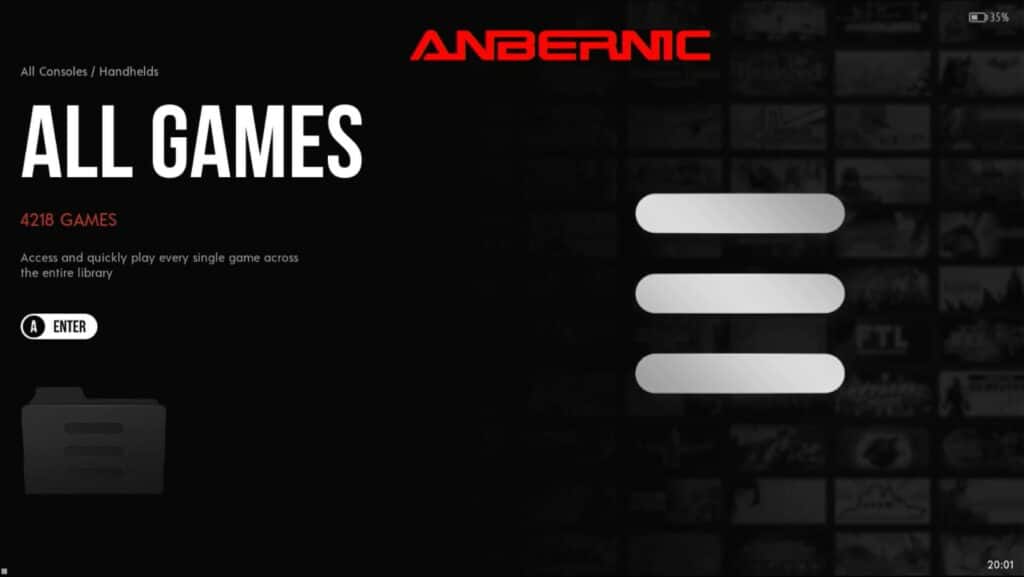
The Home Screen is what you’ll see immediately upon start-up. From here you can choose different categories.
What appears here exactly will depend on the theme you have installed, and the folders you have that contain content (blank folders won’t appear).
- To change your category, press up or down on the Directional Pad or Left Analog Stick. You can also use the L1, L2, R1 and R2 buttons to move around.
- Press the
- Press the A Button to open your selected category.
- Press the B Button to open a quick menu allowing you to jump to specific platform manufactuers (Sony, SEGA, etc.)
- Press Y Button to do a quick search for games.
- Press the X Button to select a random category.
- Press the START Button to open the main menu.
- From here you can access many configurations, such as the user interface for EmulationStation (visible categories, how categories appear, etc.), settings for games (filters, optimizations, etc.), and more.
- You can even scrape for metadata (provided you’re connected to the internet).
- Press the SELECT Button to open the quick access menu.
- From here you can easily access some essential options, such as restarting and shutting down the system.
- It is recommended you shut down the system using this software-based method.
Game List
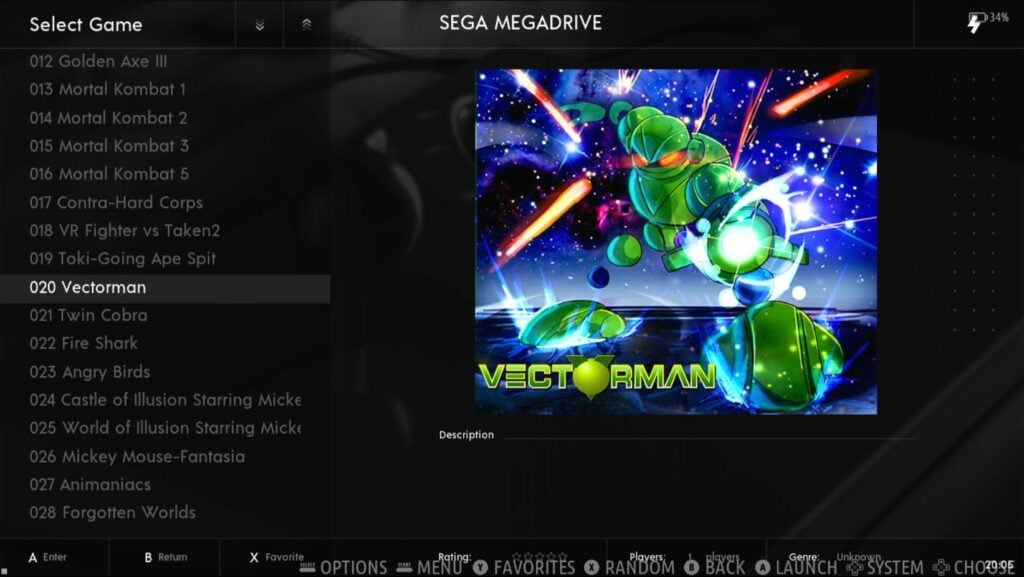
Selecting a category will take you to the game list. From here you can choose games to play.
- Pressing the A Button will start the selected game.
- The B button will take you back to the Home screen
- Pressing the X Button will select a random game in the list.
- Pressing the Y Button will mark a game as a favourite. Favourite titles can be accessed in their own category.
- The L1 Button will move your cursor up 10 places. The R1 Button will move your cursor down 10 places.
- The L2 and R2 Buttons will quickly jump between categories without you needing to return to the home screen.
- The SELECT button opens up a context menu with a number of options (“jump to”, “edit metadata”, etc.)
- The START button opens up the main menu, just like on the home screen.
Default Emulators
Most of the platforms on the device will use RetroArch and its cores for their Emulation. There is however a small number who use their own emulators.
The full number of emulators/compatible on Batocera is too much for us to list, so we’d advise checking out the Batocera Wiki’s Systems page. Though please be aware that just because an emulator is present does not mean that it will run well.
PSP (PPSSPP)
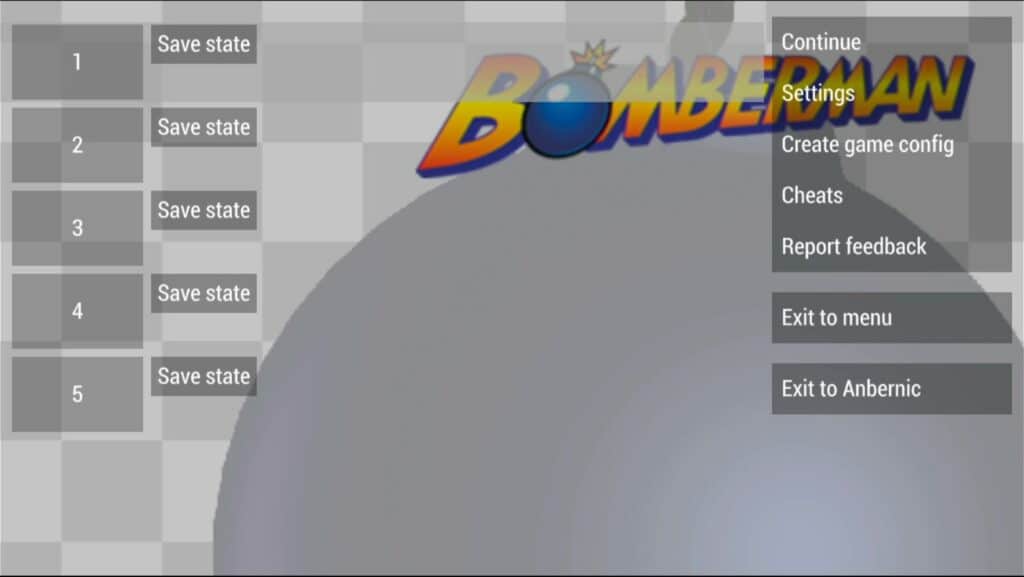
The PSP emulation in Batocera makes use of PPSSPP, the “de-facto” PSP emulator on every device at the time of writing.
By holding the Function Key and pressing the following keys, you can achieve these results.
| F Key + … | Function |
|---|---|
| START | Exit Game (back to EmulationStation) |
| B | Open the PPSSPP Menu |
| D-Pad Left/Right | Volume Up/Down |
| L3/R3 | Brightness Up/Down |
At the time of writing, it appears that the hardware volume keys do not work in the PSP emulator, so you’ll need to use the software options instead.
OpenBOR (Open Beats Of Rage)
Open BOR also runs off of its own emulator. There’s not a lot to it however.
Hold the Function Key and press start to exit the emulator and immediately return to EmulationStation.
You can also adjust the brightness by holding the Function Key and pressing L3/R3
Understanding RetroArch in Batocera
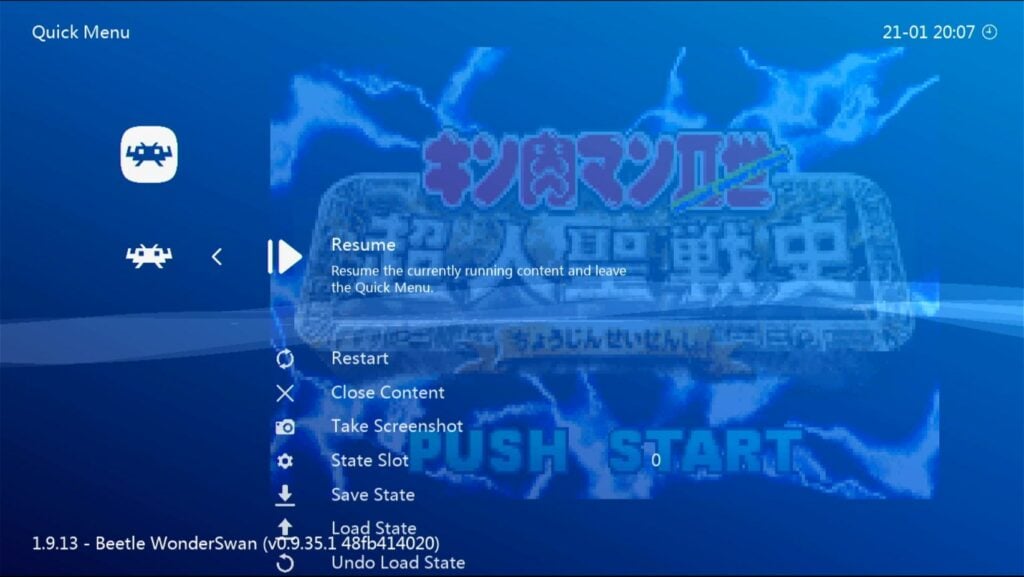
While RetroArch is accessible, it is slightly more “locked down” to the end user than the RetroArch you’ll see in Android and other custom firmware.
The average user isn’t intended to, and doesn’t really -need- to tinker with it, but the options are there for those so inclined. Check out the Batocera wiki for more information for more advanced users.
Also see the below table of the default shortcuts for RetroArch-based emulators in Batocera.
| F Key + … | Function |
|---|---|
| D-Pad Left/Right | Change Save State Slot |
| R1 | Save State |
| L1 | Load State |
| START | Exit Game (back to EmulationStation) |
| B | Open RetroArch Menu |
| L2 | Fast-Forward (Toggle) |
| R2 | Show/Hide FPS Counter |
| D-Pad Up/Down | Volume Up/Down (Software) |
| L3/R3 | Brightness Up/Down |
The RG552, Batocera & SSH
It’s possible to tinker with Batocera and RG552’s contents while the device is running, wirelessly.
To do this, you’ll need to access the system remotely. This can be done using a FTP client like WinSCP from a PC or laptop.
Ensure that your RG552 is connected to the internet, and then make a note of the IP address.
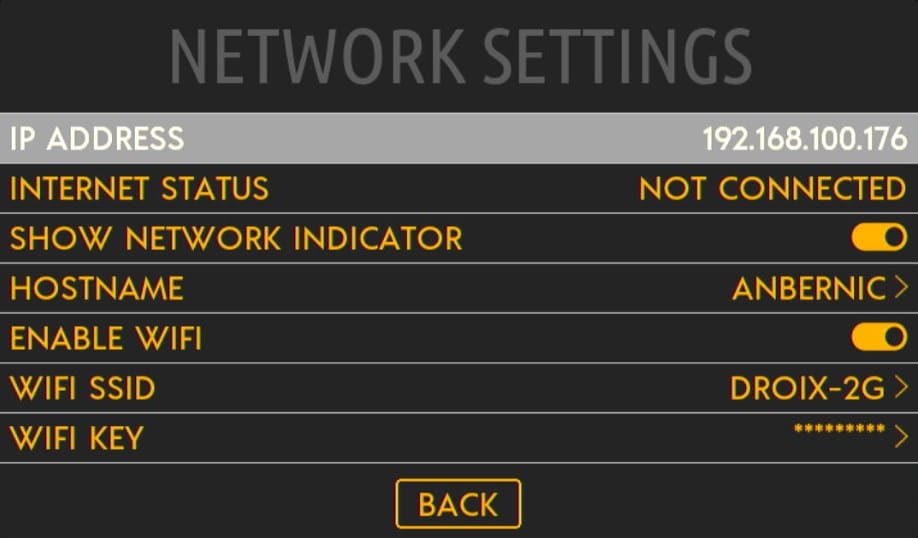
Alongside this IP address, the credentials to SSH into the RG552 are as follows.
RG552 SSH Credentials
- IP ADDRESS: [device’s IP address]
- Username: root
- Password: linux
RG552 Linux Firmware Update
Whenever ANBERNIC release an update to the Batocera distribution they provide, it’ll be through a microSD card, much like the updates for the Android System.
We’ve made a guide on how to update the RG552 Linux OS, so make sure to check it out!
RG552 Custom Firmware
At the time of publishing, the device is still very early in its life. But already a few developers of custom firmware are stepping up to the plate.
Because Android in and of itself is already home to a bevy of feature-rich, optimized emulators. It’s unlikely the scene will be as diverse in the long-run as it was for the third generation of ANBERNIC handhelds.
Nonetheless, we’ve gathered a collection of all the RG552 custom firmware available (that we’re currently aware of). Give it a look!
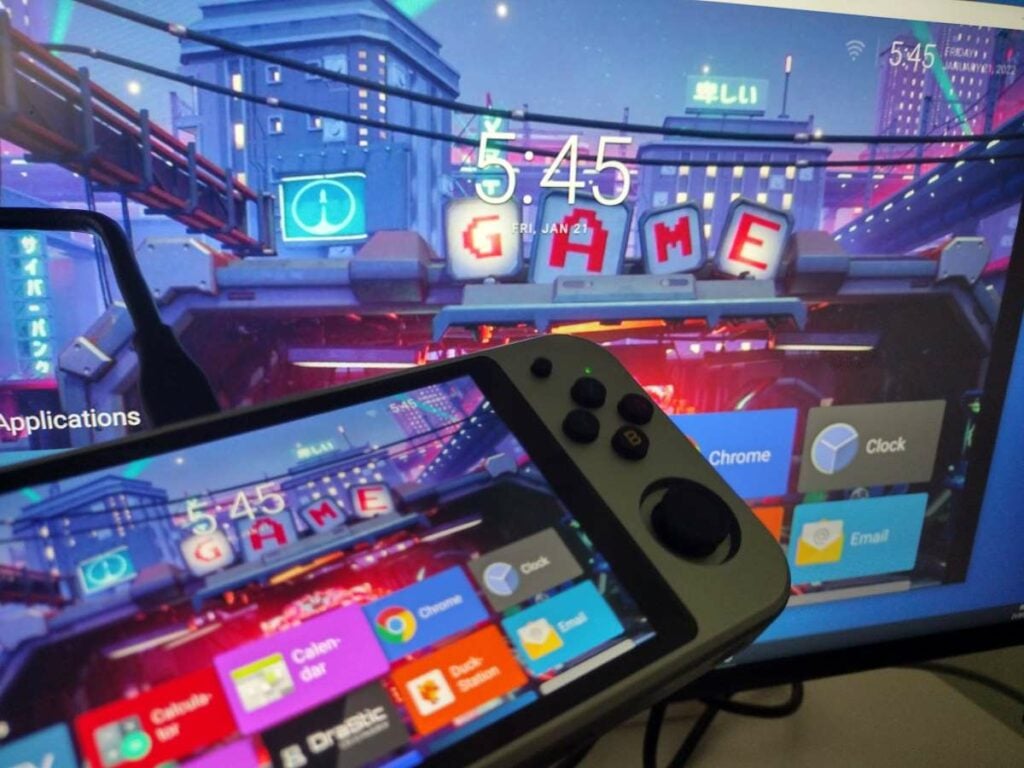
RG552 HDMI Output
Much to our surprise, the HDMI output that you could find in the second generation of ANBERNIC handhelds makes a return in the RG552.
The HDMI output is present on the top of the unit. There’s nothing special required to get it working fortunately. Just plug-and-play!
The HDMI output on the device is Mini-HDMI. To connect to most inputs, you’ll need a HDMI-to-mini-HDMI cable.
As a warning, the HDMI output on Batocera and Linux-based operating systems in general can be very buggy depending on the specific firmware you use. For the best results, ensure the HDMI cable is already inserted when you power the system up into these operating systems.
It’s basically flawless on Android however.
Miscellaneous Troubleshooting
Android keeps telling me my card is “damaged”!
The Android OS that comes with the unit will only read formatted in FAT32. Ensure that the card is in that format before loading it up with games and inserting it into the system.
My RG552 won’t turn on!
Charge the device in the DC port. Not the USB port. The DC port is on the right-most side of the device (when the screen is facing you).
Use the charger and cable that came with the device. If they don’t work, try different combinations of chargers and cables you have available (mobile phone chargers, etc.).
Finally try holding the power button for an extended period of time (about 15 or so seconds), and then attempt to charge the unit again.
Then if that still does not work, contact the seller immediately because it sounds like you have a broken unit on your hands.
(Also – even if you have the device tucked away in a drawer or something, make sure to give it a charge every couple of months to ensure the battery stays healthy. This goes for many lithium battery-powered devices, not just the RG552).
RetroArch Looks… different?
If you’re coming from the third generation of ANBERNIC handhelds, RetroArch may look or feel slightly different from what you’re used to.
This will likely be because these installations of RetroArch are using different menu interfaces. Such as rgui and ozone. With some tinkering, it’s possible to change how they look, but we’d advise leaving any settings relating to the appearance of RetroArch itself as-they-are, otherwise there can be unintended side effects (loss of mapping, etc.)
Where is my Wi-FI connection?
By default, the RG552’s Wi-Fi chip only supports 2.4GHz connections. If your router does not currently support that band, the connection will not appear.
The vast majority of routers and access points now are dual-band and thus this should not be an issue, but it is something to be aware of.
My RG552 screen is black after I removed the HDMI cable! (Batocera)
This is due to some miscellaneous issue with the firmware (beyond our expertise). If you boot the system with the HDMI cable connected, the screen will remain black and output to the connected display.
However, if you remove the HDMI cable while the device is still on, the screen will remain black instead of switching back on like you’d expect.
As of now the only fix for this is to restart the system with the HDMI cable disconnected.
RG552 HDMI output won’t work! (Batocera)
If the system is booted into Batocera without the HDMI cable connected, the port will not be functional.
Again, chalk it down to the firmware.
Ensure that the HDMI cable is connected from the start if you wish to use the HDMI output in Batocera (and vice versa).
How To Fix RG552 Batocera/Linux Audio Lag
Update to the latest version of the Batocera firmware. We have a whole guide on how to update to the newer versions of the RG552 firmware here.
Thank you for reading! This RG552 “getting started” guide is not quite finalized and may see small updates in the future. If you have any further questions, please feel free to let us know!
[azp_custom_product id=”13″]


