In this article
With the GPD Win 3 firmly on the way as of now (or perhaps in the hands already of a few who pledged to GPD’s Kickstarter early), some may be wondering: “How can I make the GPD WIN 3 Faster or Can I make this thing run even better?“. The short answer is – yes! The long answer? Read on… You can see the full review GPD Win 3 Review should you want to see the unboxing and first look.
In short, the primary way you’ll be increasing the performance of the GPD Win 3 is via a simple tweak in the BIOS. This tweak is changing the TDP of the device.
Disclaimer: The modifications described in this article can have a lasting effect on the lifetime and stability of your device. We at DroiX are not responsible for any damage or instability caused as a result of these modifications. Proceed at your own risk.
So what is “TDP”?
To understand why changing the TDP of the GPD Win 3 can improve performance, first we must understand what “TDP” even is – as well as the potential repercussions. of adjusting it.
TDP is an acronym that stands for “Thermal Design Power“. The precise definition of this is up for debate, and will vary between differing vendors (i.e., Intel vs AMD); consider it an approximation of the maximum power a component can draw during use.
To note, TDP does not directly correlate with performance across different components, as it is a measure of power consumption – not a benchmark of processing power.
Many devices nowadays come with a fixed TDP – meaning no matter what, they will not draw more power at any one time than what is specified by the manufacturer. Some devices come with a configurable TDP (or: cTDP). This allows you to control the amount of power a component consumes, and by effect, change how it performs too.
Performance or efficiency?

Increasing the TDP of a component will mean that the maximum amount of power it will be allowed to draw is greater at any given time. This means that the component will run faster than normal when required to do so.
However, this does come at the cost of heat generation and stability. While you can increase the maximum power draw, the component may not be as stable when it draws additional power beyond the normal maximum. Additionally, increased power consumption will correlate with increased heat (which can also affect the stability of the device).
Additionally, for devices that run on battery, a higher TDP will correlate with reduced battery life, so be aware of this when opting to increase the TDP value.
Conversely, decreasing the TDP of a component acts as a way of increasing energy and heat efficiency. The component will not draw as much power as usual when under load – which will save you on energy costs in the long run.
This will mean that the component may experience a “bottleneck” when performing particularly intensive tasks, as it is not taking in the amount of power necessary to perform the required calculations. This will also help improve the battery life of the Win 3 somewhat.
Changing the TDP of the GPD Win 3
Fortunately, changing the TDP of the GPD Win 3 is a straightforward process. All you will need to do is access the BIOS.
To access the BIOS, press F7 as the device is powering on. Once this is done, select “Enter Setup” from the list of bootable devices that appear.
By default the window between “powering on” and “starting Windows 10” is a paltry 1 second, so it can be difficult to hit this window. Fortunately, there is an alternative way.
Accessing the Startup Options on the GPD Win 3
Starting Windows successfully, immediately open the Start menu and select the “Power” option. From the list that appears, select restart while holding down the left SHIFT key.
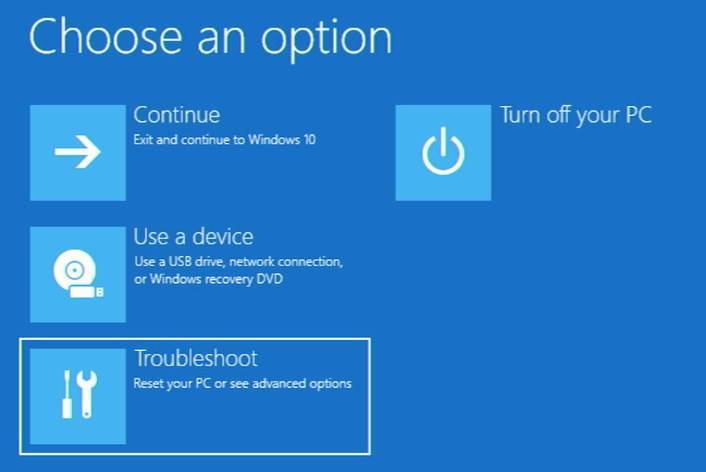
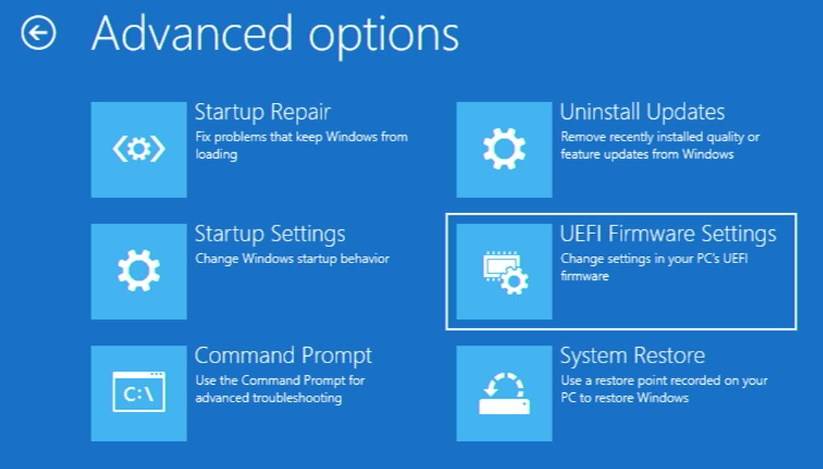
This will bring you into the Startup options menu. Then, select “Troubleshoot”, and select “Advanced options” to be bought into the Advanced Startup options menu.
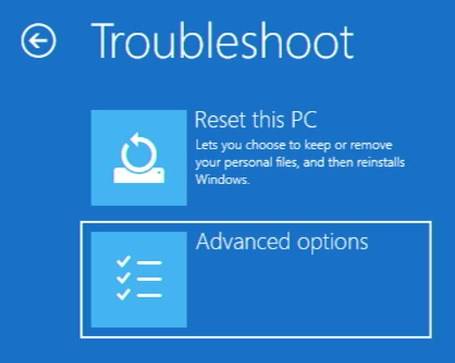
From here, select “UEFI Firmware Settings”, and then select “Restart”. You’ll then be taken into the BIOS.
Press the right directional key on our attached keyboard to reach the “Setting” section.
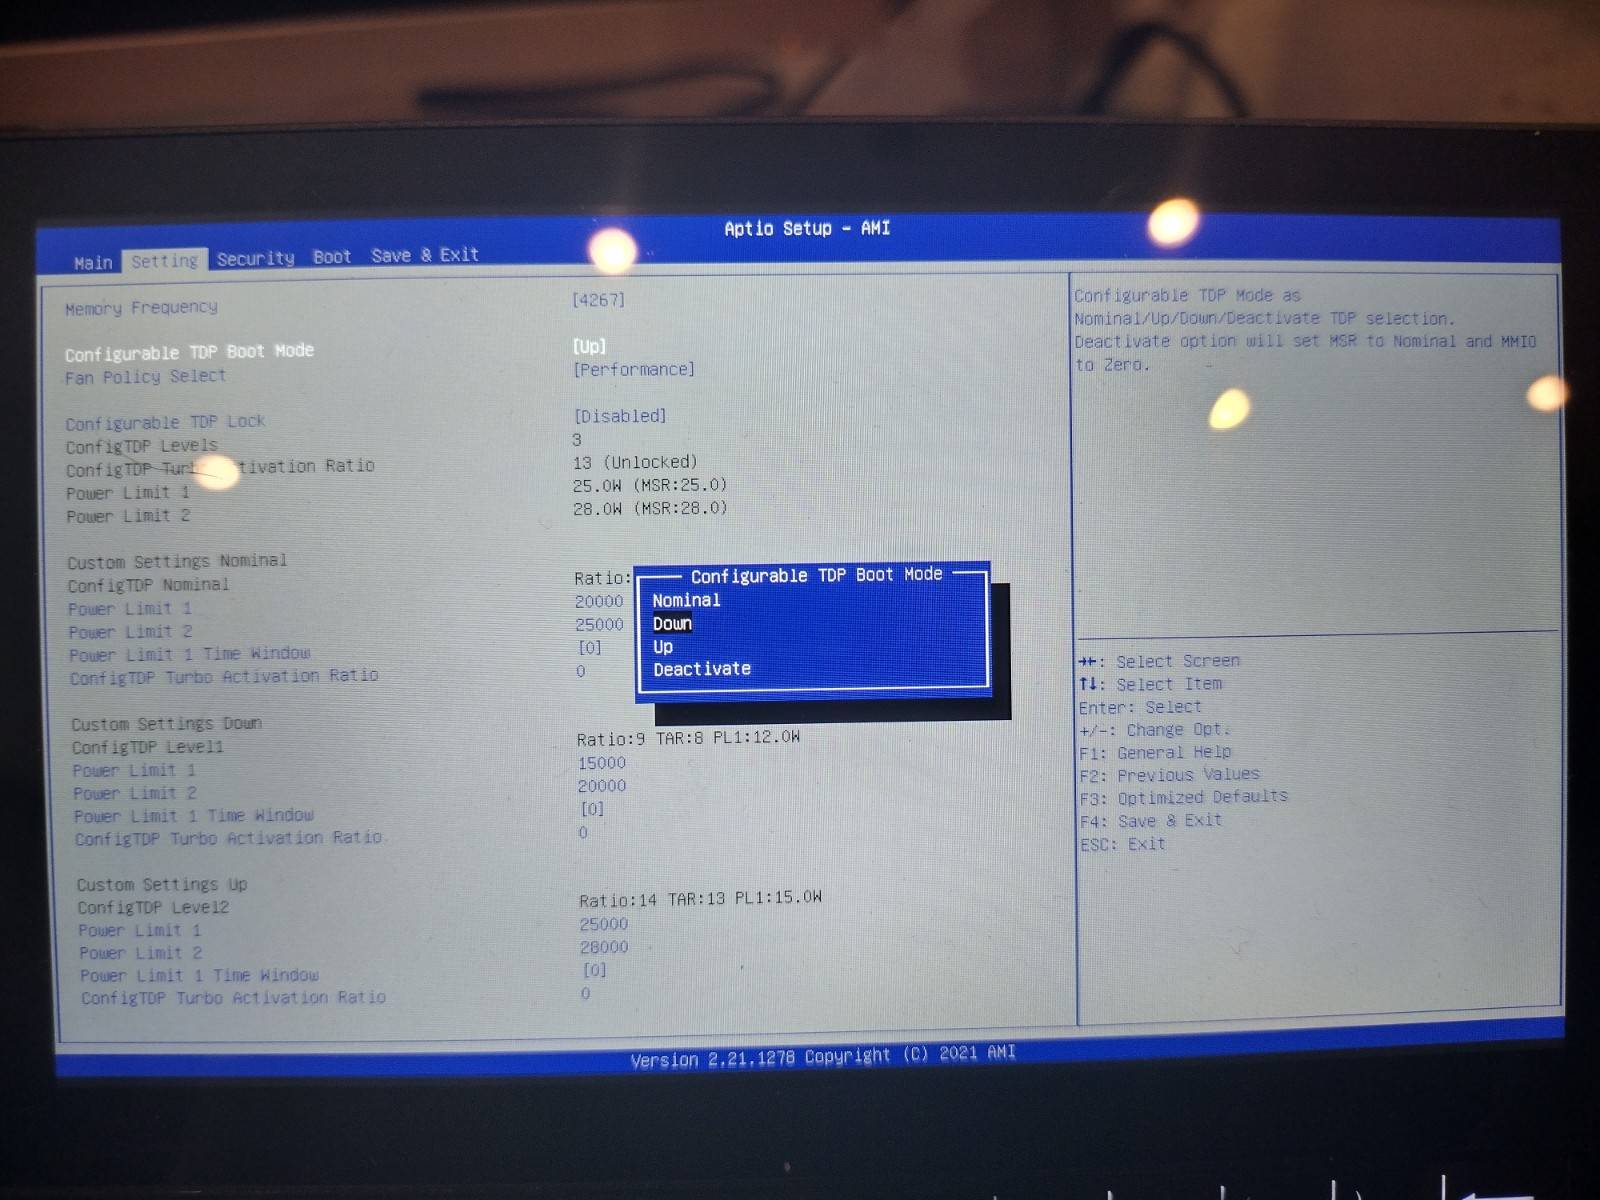
Press the down arrow key until the “Configurable TDP Boot Mode” is highlighted, press the enter key, and you will have one of three options to choose from:
- “Up” – High-performance mode. (TDP: 25w)
- “Nominal” – Normal mode. (TDP: 20w)
- “Down” – Energy-saving mode. (TDP: 15w)
Select the one that you want, then press the enter key.
Now you’ve selected your TDP, press the right arrow key until you reach the “Save & Exit” section. Select Save Changes & Exit.
Your GPD will now boot into Windows as normal. The effects of increasing the TDP will not be immediately apparent until you start playing games, at which point you will notice that the WIN 3 is capable of handling titles at better framerates and graphics settings than before!
Conclusion
We hope you’ve found this guide for how to make your GPD WIN 3 faster. To summarize the effects of the changes you can make:
- Increasing the TDP of the GPD Win 3 will improve your gaming performance, but will make the device consume battery faster, and run hotter; a useful change if you are playing intensive games.
- Decreasing the TDP of the GPD Win 3 will reduce your gaming performance, but the device will consume less battery, and run cooler. If you are playing less-intensive/older games, or are simply on-the-go and require more battery life, you may prefer this option.
That’s all for now. If you’re interested in purchasing the GPD Win 3 yourself, check out our main site via the below links for our range of GPD Win 3 models and accessories on offer.
Until next time!
Bringer of videos, text and images! AKA the social media guy at DROIX. Massive retro gaming fan and collector, with a far too large collection of consoles and computers from 1970's to modern. Contact me at [email protected]
Questions & comments
0Every question gets an answer. Ask before you buy — DaveC and the team reply within one working day, and answers stay public so they help the next reader too.