
Are you tired of dealing with the Android interface on your RG552, when you just want to play games? Do you miss the simple, controller-friendly interface of the RG351MP? Then why not try Pegasus for the RG552, a new front-end that makes retro gaming on Android handhelds more comfortable than ever before.
What IS Pegasus?
To understand what Pegasus is, first we must understand the concept of a front-end.
In simple terms, a front-end is a program that is used to manage other programs. With the end-goal being to reduce the amount of “menu-surfing” required in order to use the device what you bought it for: good old-fashioned gaming.
Pegasus abstracts the gamepad-unfriendly interface of Android for a more controller-centric one. Depending on the theme you use, this can be very similar to EmulationStation.
In general, you should try Pegasus if:
- You do not like the Android user interface, but don’t want to not-use Android.
- You’ve curated (or are planning to curate) a collection of games with their associated metadata (box art, etc.).
- You’re looking to browse your collection by game, and not by emulator-into-game.
Some wonderful fans have put together a useful tool for installing Pegasus onto the RG552 and other similar devices in a streamlined manner, so in this guide, we’re going to go over how you use this tool, and take a short look at Pegasus in general.
Installing Pegasus
Footnote: Ensure that you’re connected to the internet throughout the entirety of this process.
Enable App Installation via Unknown Sources
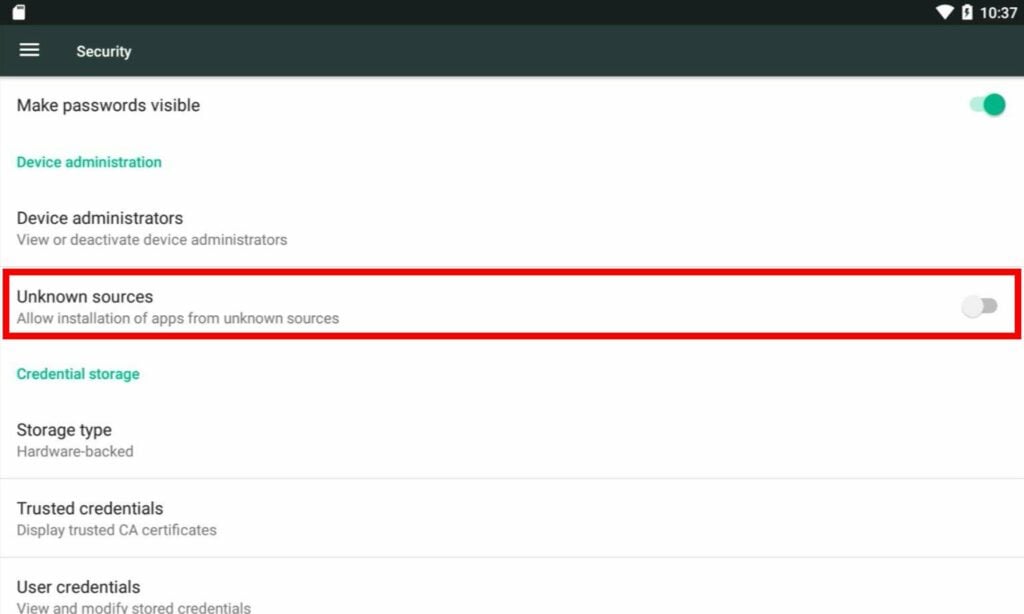
To install Pegsus, you will first need to enable the installation of apps via unknown sources. This allows you to install apps without the need of the Google Play Store.
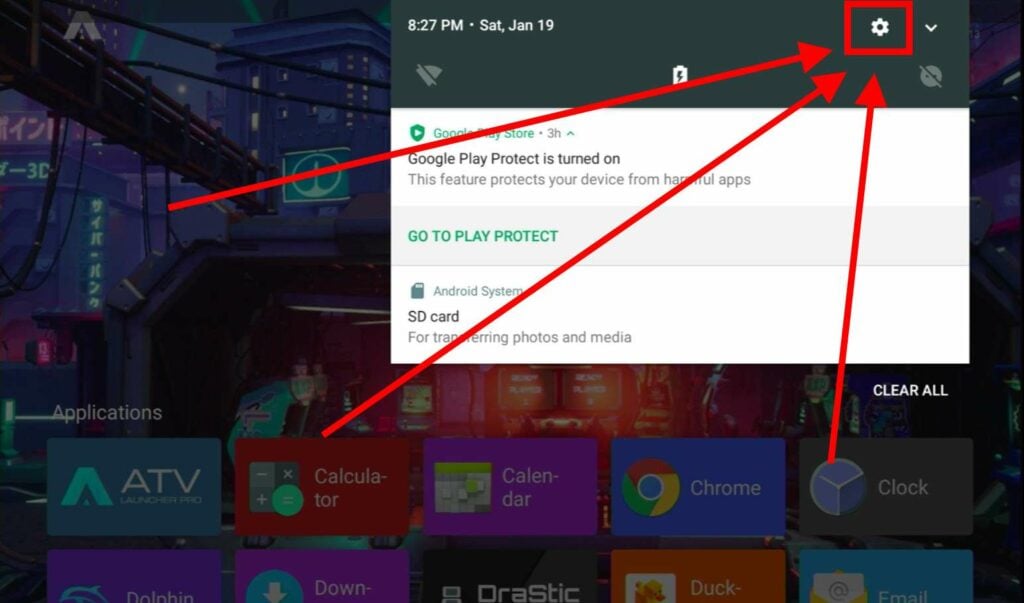
First – open the settings menu in Android.
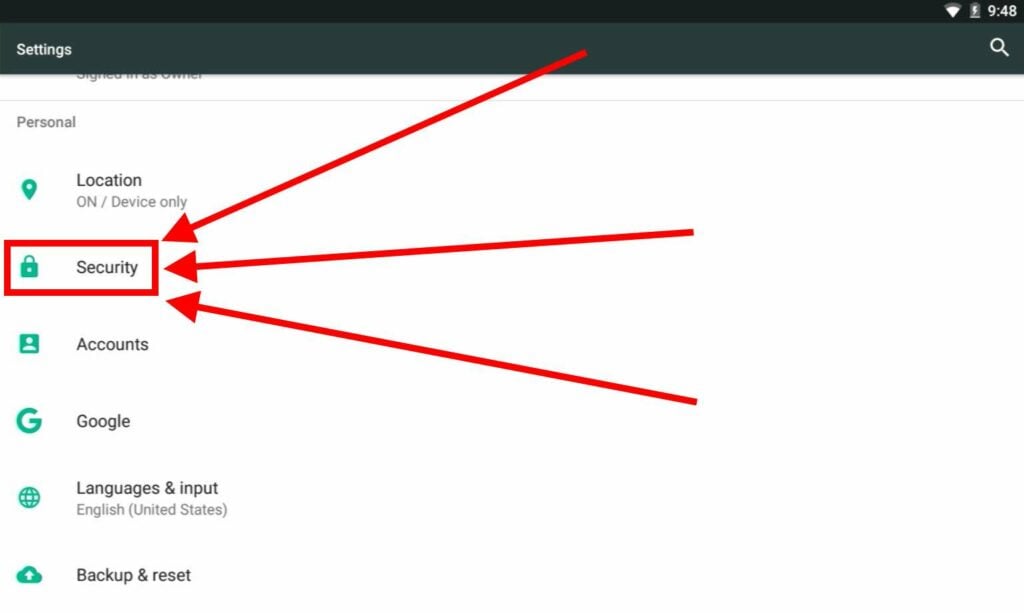
From the list of categories present, select Security.
Finally, if it is disabled, enable the Unknown Sources toggle.
Install Termux
Before you can install Pegasus, you must first install Termux,. Termux is a Terminal emulator built for Android. It can be downloaded in one of three ways.
- Through the Google Play Store.
- Through F-Droid.
- and by the .apk file itself (via F-Droid)
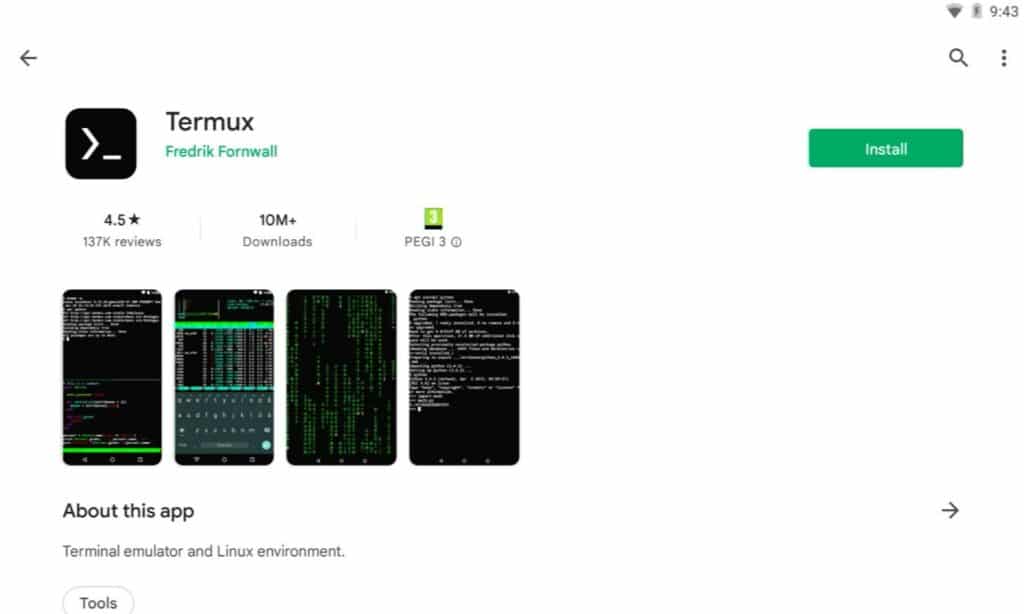
Once you’ve got Termux installed – you’ll need to start it just like any other app.
Actually Installing Pegasus
Thanks to the work of some wonderful fans, it’s possible to install Pegasus through a single terminal command.
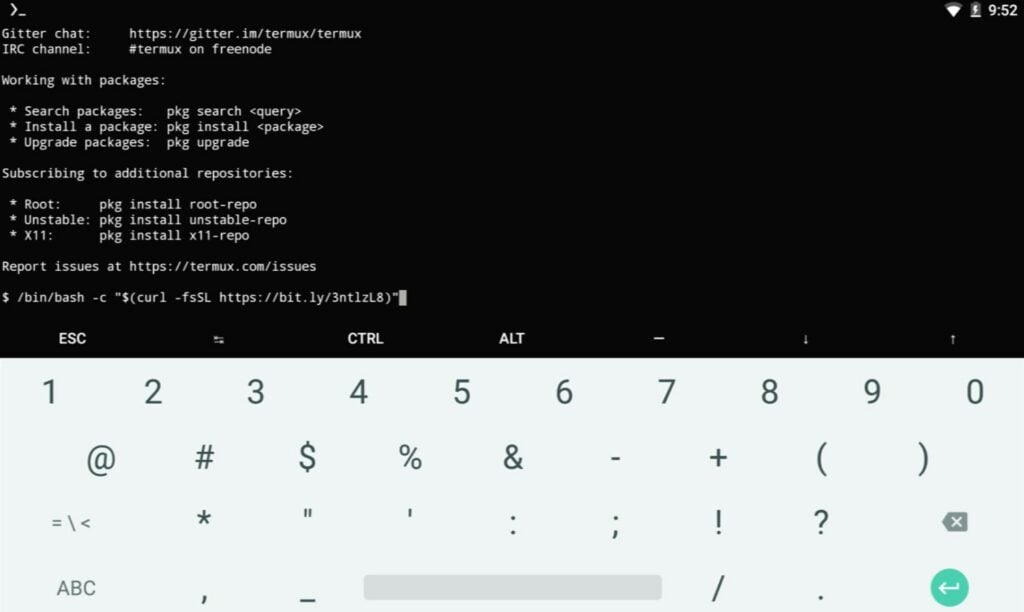
Type the following text into the termial:
/bin/bash -c "$(curl -fsSL https://bit.ly/3ntlzL8)"
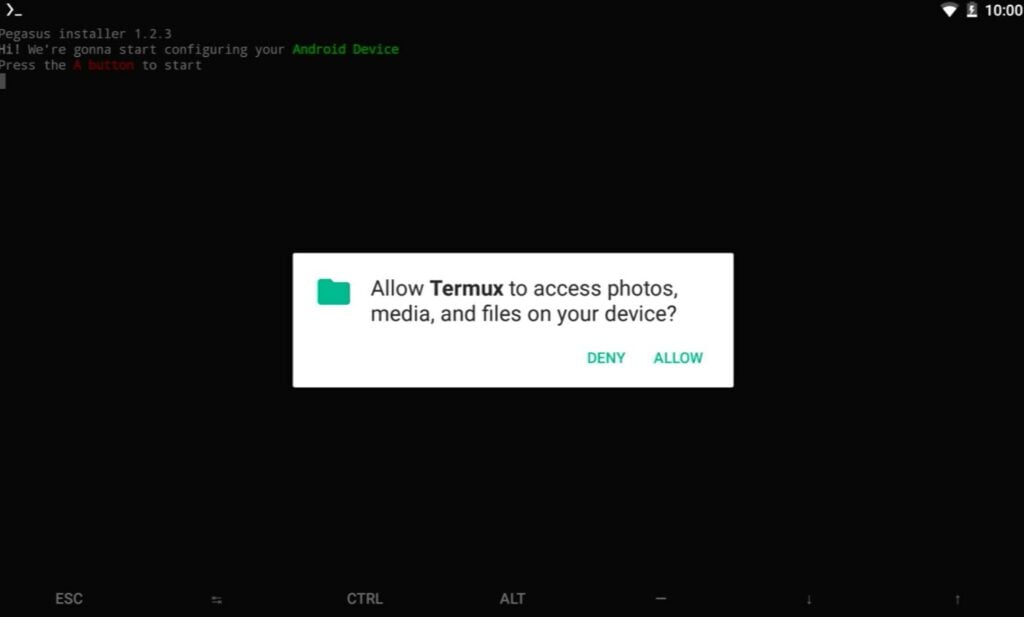
If you’re typed it correctly, a prompt will appear asking for storage access permissions. Allow it.
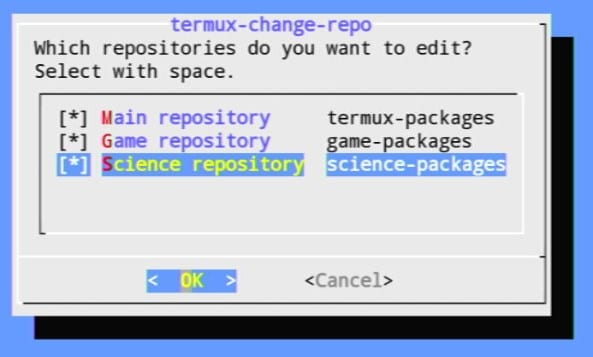
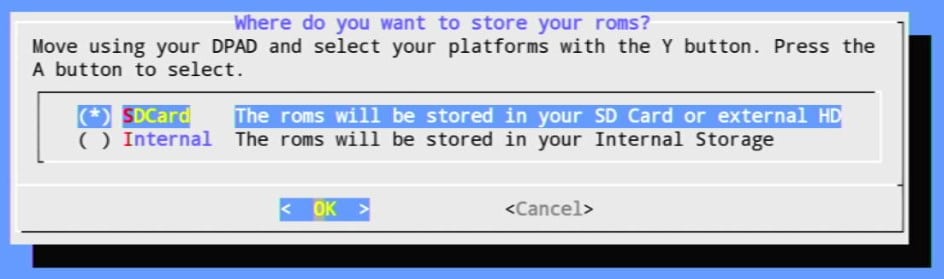
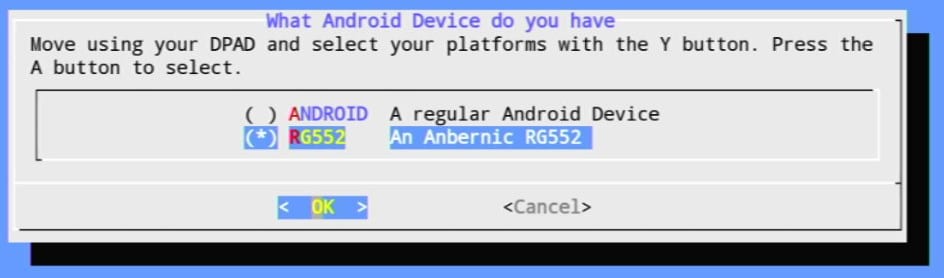
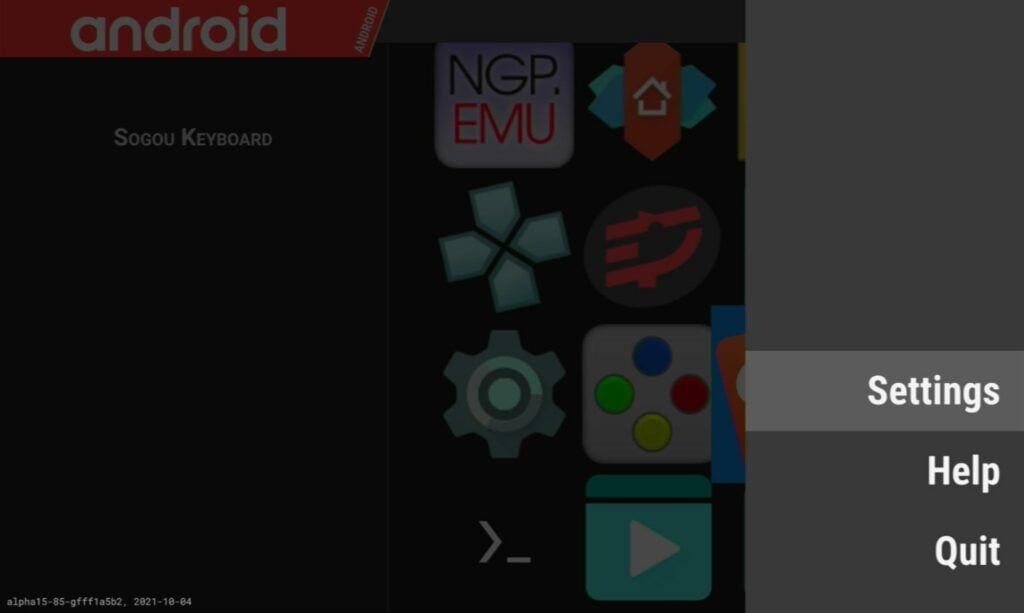
You’ll then need to install some missing repositories. Press the A button, and you’ll be shown a configuration screen. Use the Y Button to select different options, and the A Button to confirm them (it presses “OK”). Make sure your selection matches the following two images.
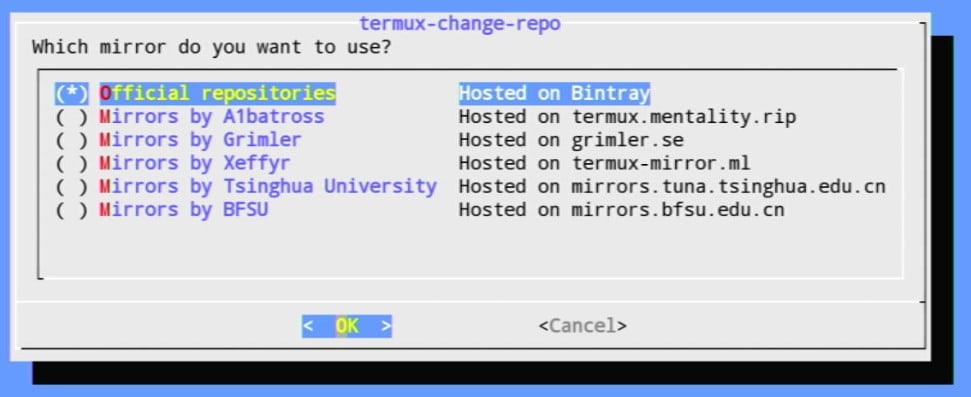
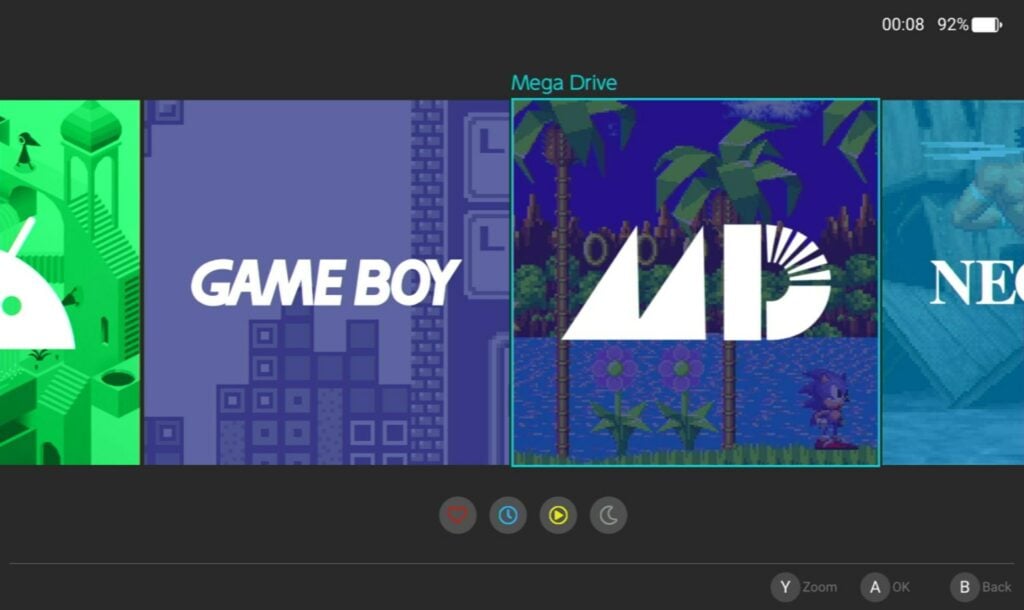
Once selected, just wait for a while. Eventually you’ll get thrust into more configuration screens. For the first screen, it is up to you. For the second, make sure to match the image.
Once done, wait a bit more. You’ll then be prompted to finally install Pegasus.

You can start using Pegasus straight away after it is installed. Pegasus can be set as the device’s launcher if you wish – further pushing the Android elements of the device to the background.
Using Pegasus
With Pegasus installed, you’re well on your way to enjoying a streamlined retro gaming experience. But first you’ll need to do some additional configuration.
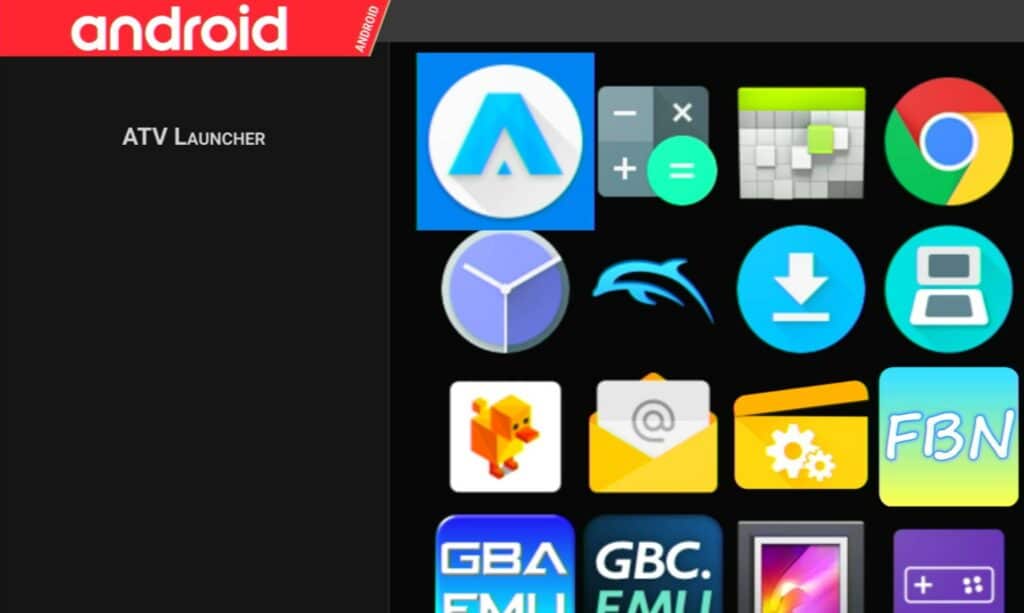
When you start using Pegasus, you’ll be met with a list of all the installed apps on the device, and you can pick-and-choose from them via. Right now, it’s not really all that different to the regular ATV Launcher.
Changing The Theme
To change this, you’ll need to hit the start button (or swipe from the right side of the screen). This will open up a small menu. Choose Settings.
The first thing you’ll probably want to do is change the theme. The default theme is Pegasus Grid. However, Pegasus comes with two more themes – these being RP Epic Noir and RP Switch. This is mostly down to preference though, so if you don’t like either, you’re welcome to stick with the default theme.
These themes have slightly different ways of navigating, so take a moment to get used to the one of your choice.
The main way you can really make it your own is through game collections and metadata.
Working With Metadata
Something you may have noticed is that Pegasus is only launching emulators, and when you’re in the emulator, you need to select the game.
You may also notice that there’s no way to access a list of games for the emulators from the frontend itself.
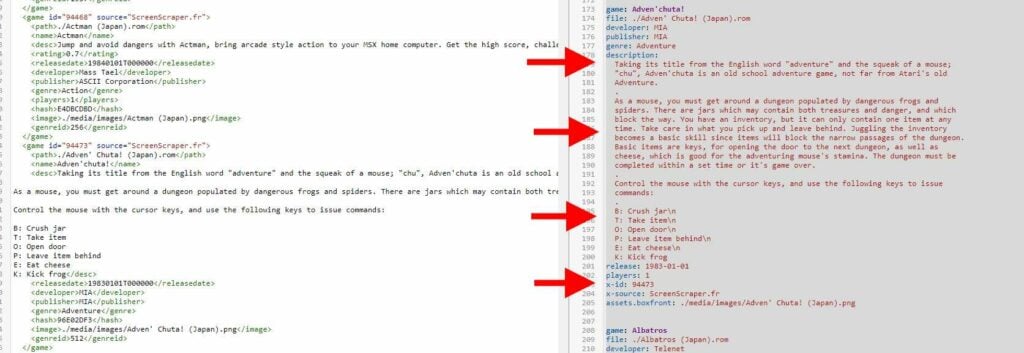
This can be tedious in the long run, but fortunately Pegasus has a way around this, and it’s through the use of a file called metadata.pegasus.txt.
This file:
- Lets Pegasus know that the directory it is in contains game files.
- Shows Pegasus how to handle these game files (what emulator to use, and what file formats to detect)
- Tells Pegasus about these game files (what their real name is, where their box art files are, etc.)
- Tells Pegasus how to launch the emulator DIRECTLY into a chosen game (through launch commands).
The problem is, different apps in Android have different launch commands. Plus, your average user isn’t going to know how to even find these launch commands.
Fortunately, there exists an online tool to generate the launch commands you need. Options exist for most popular emulators and RetroArch cores – but if your emulator isn’t on the list, you’ll need to make your own.
If you happen to have already collected and prepared your box arts and descriptions (perhaps you’re copying over your metadata from 351ELEC or something similar), then another tool exists to convert the entries in the metadata file from one format to a format readable by Pegasus.
Additionally, there also exists a handy desktop application for manually tweaking the metadata file without the need to open a text editor.
The full specifics of how metadata works on Pegasus can be found on their wiki.
But the shorthand of it is:
- You will need one metadata.pegasus.txt file for each emulator you intend to use.
- This metadata.pegasus.txt will be composed of a header section that contains emulator/platform information, and a section composed of entries for each game
- The latter is not mandatory, but recommended.
- You can convert existing metadata (i.e., gamelist.xml), or manually input metadata.
Adding Game Directories
Once you have your metadata.pegasus.txt files, you’ll need to place them in the game directory, and then point Pegasus at it.
Open up the settings in the Pegasus Interface and scroll down, you’ll see an option to “Set game directories…“.
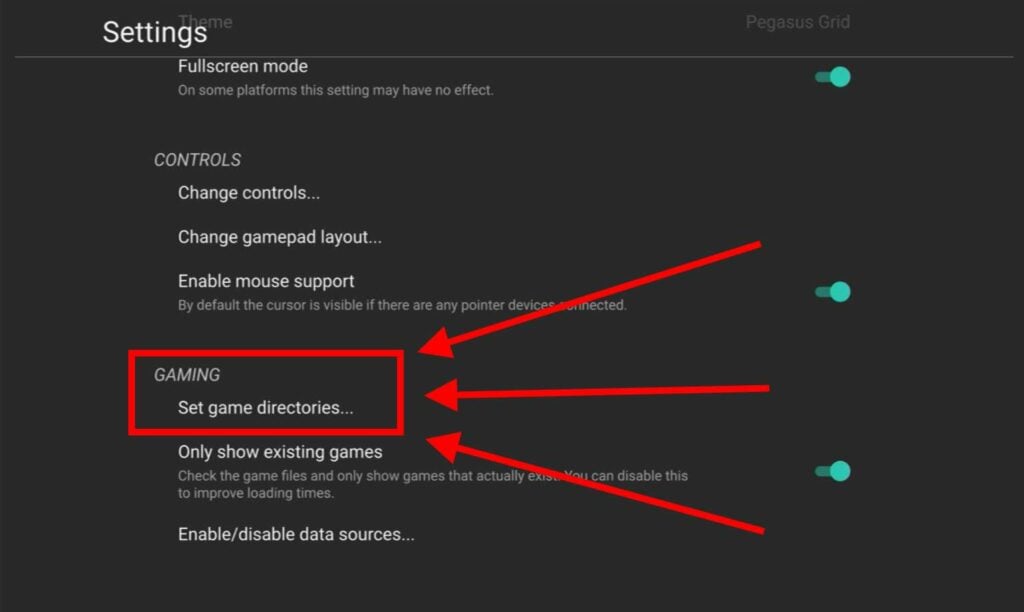
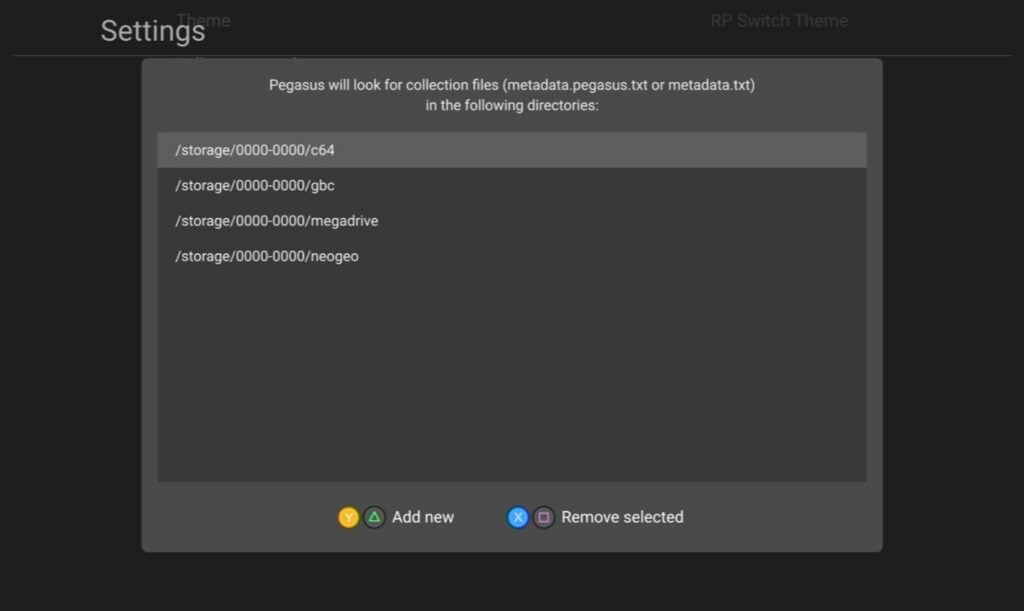
Select it, and you’ll be met with a list of existing game directories. For you, it will be empty. Hold the Y button to add a new directory, or hold the X button to delete any existing ones.
Note: We found the deletion to be rather buggy as it would not fully confirm the deletion sometimes. Tapping A while holding X can help here.
Now you need to find the metadata.pegasus.txt files you’ve copied into the game directories.
In our case, our games and metadata files are on an external microSD card. So we will need to go up a layer by selecting the two dots at the top of the list.
Keep doing this until you hit the very top level of the device. Then navigate to the following:
/storage/XXXX-XXXX
“XXXX-XXXX” will be a series of four random numbers and letters. This will be your microSD card
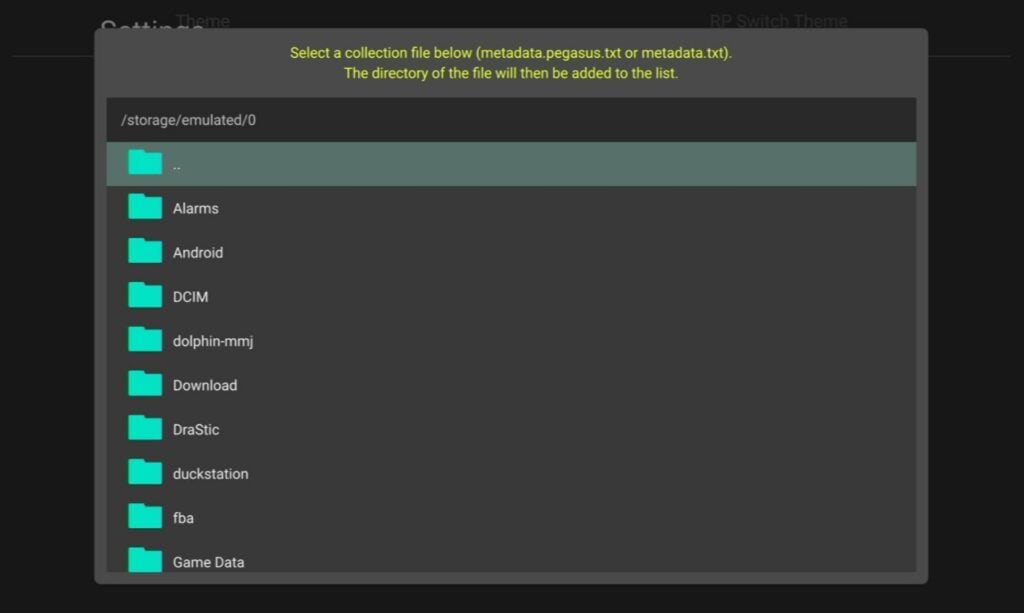
Once you’re in your microSD card, go find your metadata files. You’ll need to repeat this process for each one (fortunately the file selector remembers where you last were).
Now you’ve set up your game directories, you’ll need to restart Pegasus for them to take effect.
You’re now basically ready to start using Pegasus! As it can be annoying having to prepare the metadata files, we suggest that you do not use Pegasus until you’re mostly satisfied with the emulator/game collecton on the unit.
We hope you’ve found this guide to be helpful. If you’re experiencing any bugs with Pegasus, we’d advise that you contact the developers on their web page.
And if you’re interested in buying an RG552 of your own, we encourage you to check out our RG552 review first, as well as our RG552 Getting Started Guide!
