Files used in this guide
Changelog
- Standalone EC firmware (New EC, V0.25) for the ONEXPLAYER F1 Pro — separate from the combined BIOS+EC flash. Apply per the F1 Pro BIOS/EC update guide.
Older versions stay downloadable for rollbacks — every version keeps its own verified file.
Versions (2)
- Combined BIOS + EC flash (BIOS V1.07e, EC V0.25) for the AI 365 and AI 370 variants. Windows flash utility; installation tutorial included in the archive.
- Combined BIOS + EC flash (BIOS V1.05b, EC V0.25) for the AMD Ryzen 7 8840U variant. Windows flash utility.
Older versions stay downloadable for rollbacks — every version keeps its own verified file.
A new BIOS firmware update for the ONEXPLAYER F1 Pro has been released. It fixes an issue with some devices automatically shutting down at at 30% battery,
PLEASE NOTE: There are two different firmwares; one for the 8840U and one for HX 365/370 models. Do NOT attempt to install the incorrect firmware version for your device. We have step by step guides for the different firmwares below. We do not accept responsibility if something goes wrong.
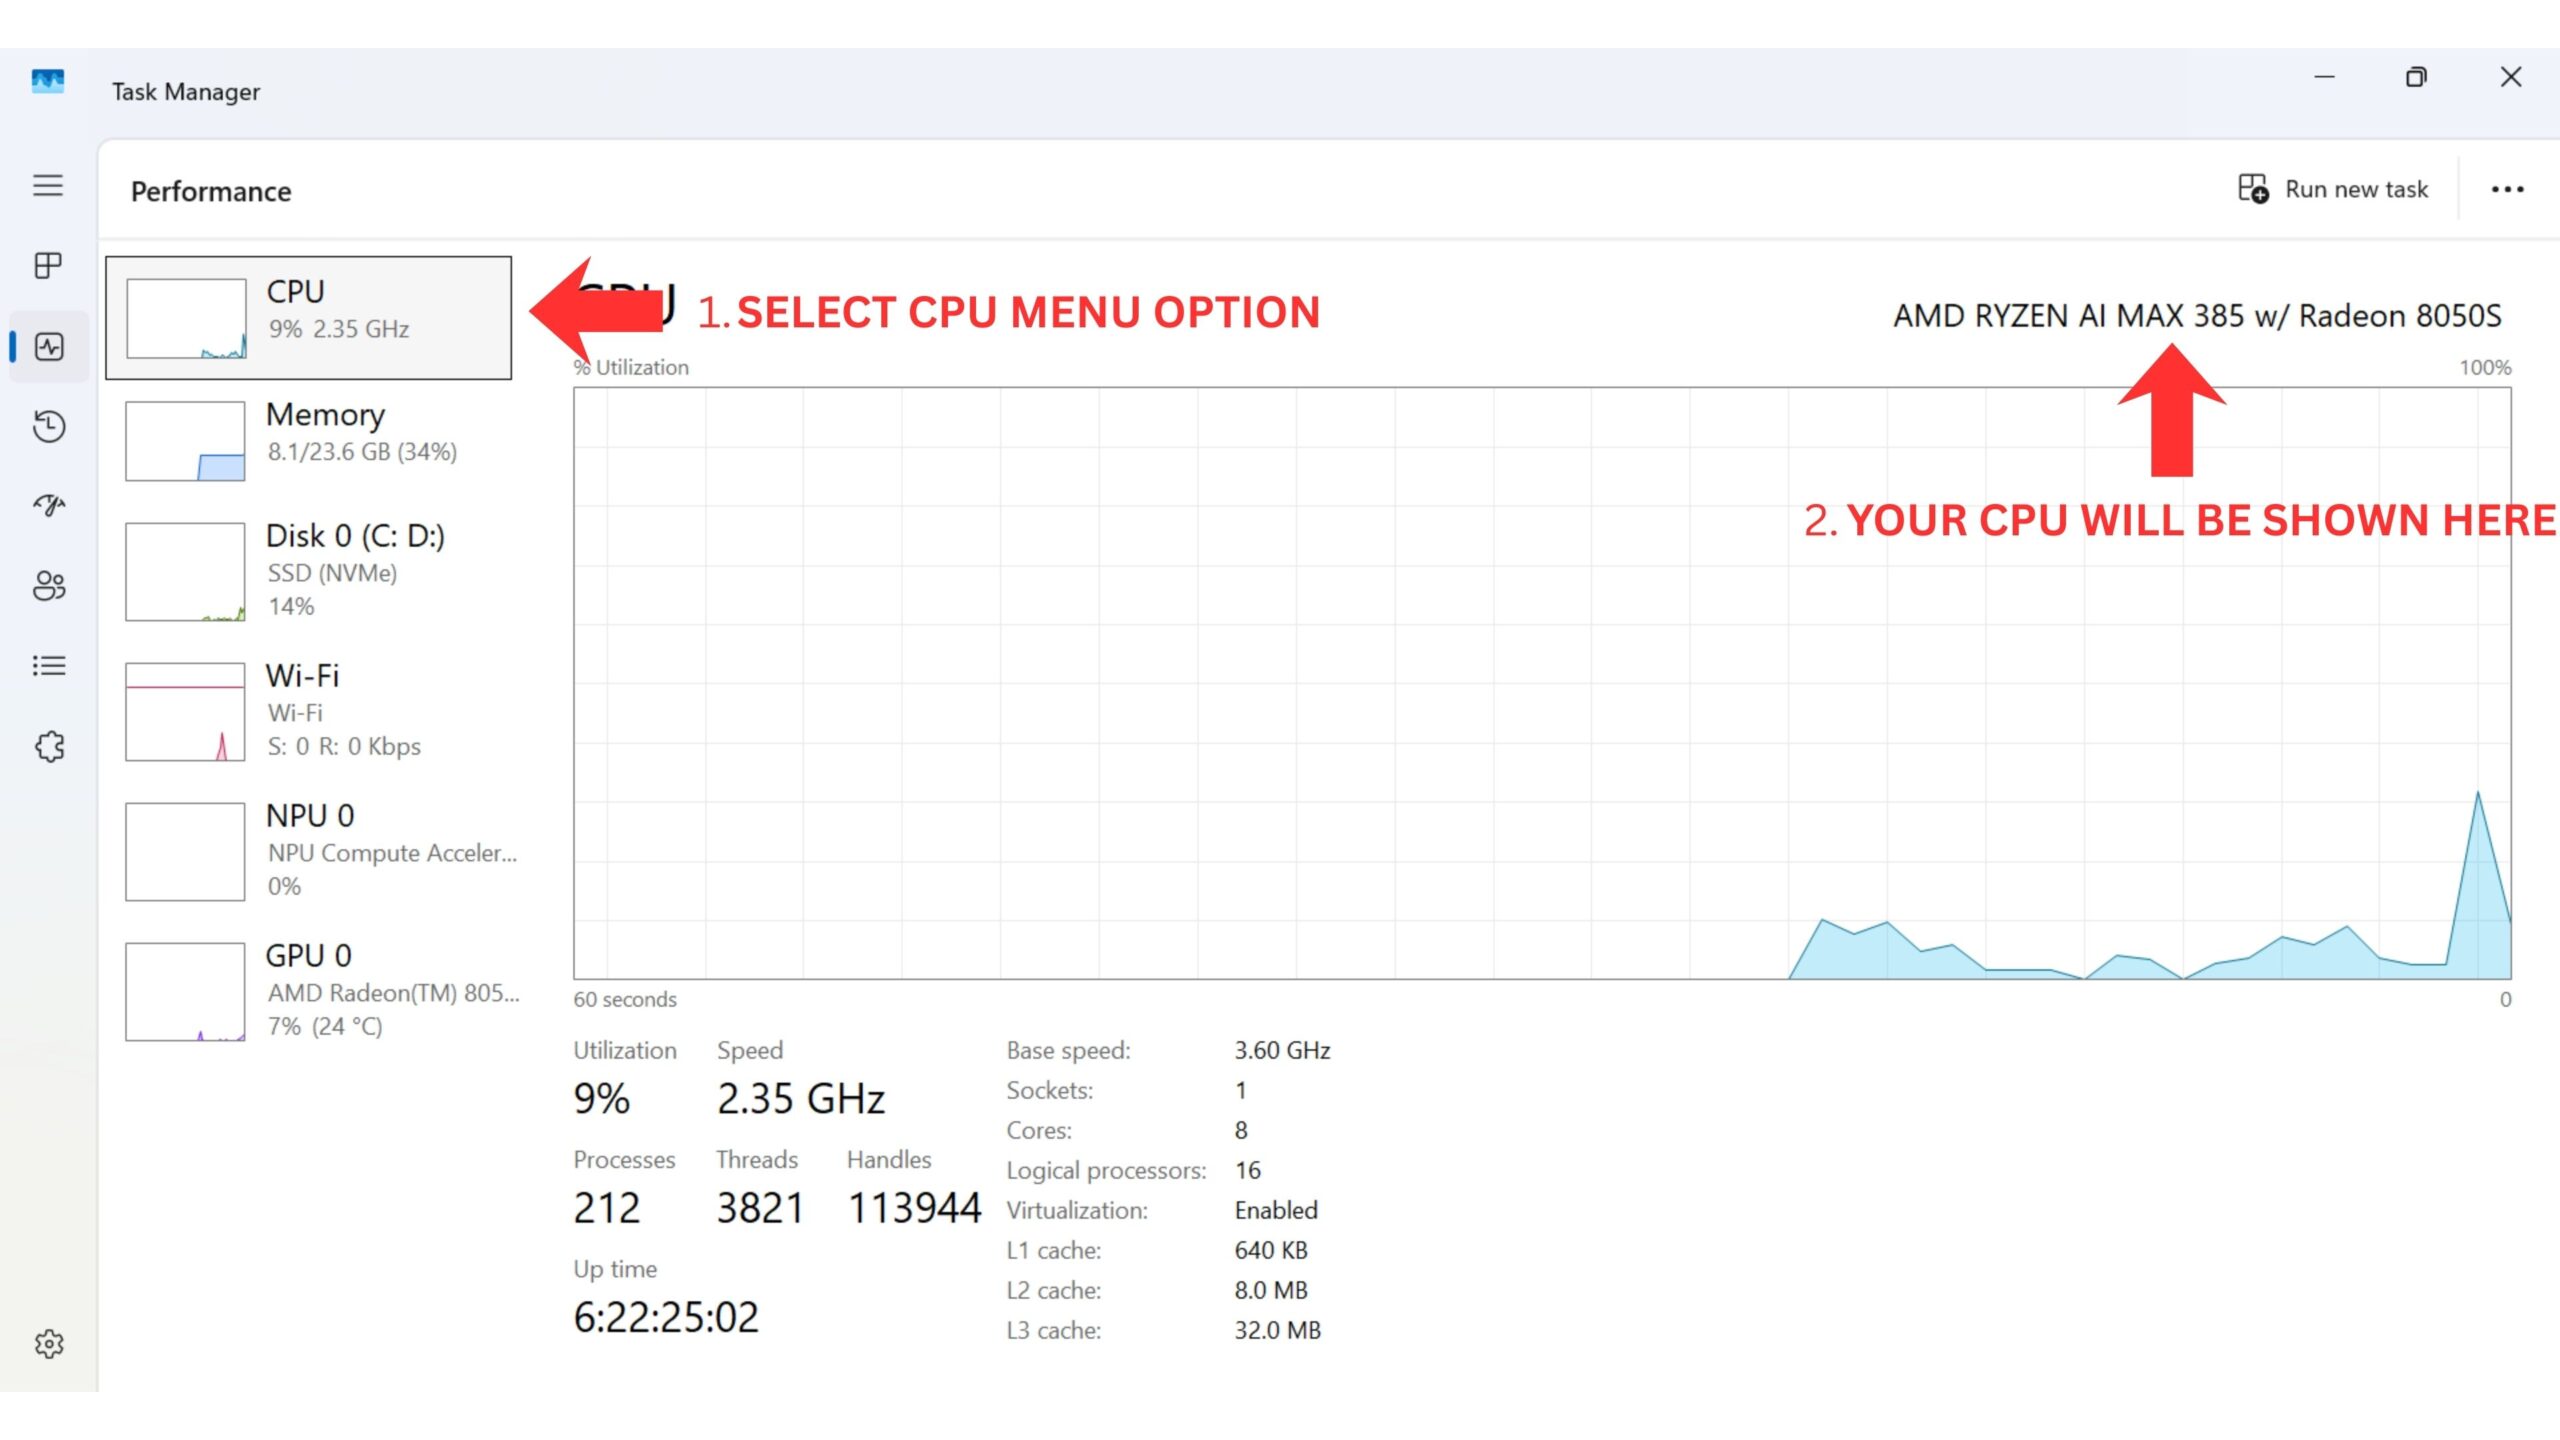
Ways to identify your CPU on your device:
- To access Task Manager, right click on the Windows Start icon and choose Task Manager from the list. Alternatively you can type Task Manager in the Windows Search Bar.
- You can find your CPU model in Windows quickly through Settings (About your PC), or the System Information app (msinfo32), all showing the processor’s name and spec.
Using Settings (Easiest for Windows 10/11)
Click the Start Menu (Windows icon) and type about.
Select About your PC from the results.
Look under “Device specifications” for the Processor entry, which lists your CPU model (e.g., Intel Core i7-10750H).
For both devices please ensure the charger is connected at all times during the BIOS and EC firmware update process. Do NOT remove the charge cable.
ONEXPLAYER ONEXFLY F1 PRO 8840U Model
Due to the software updating the BIOS, your Anti-vrius may falsly identify files as being a virus. Please disable any anti-virus software as this may cause files to be quarantineed and potentially cause a failed BIOS or EC firmware update.
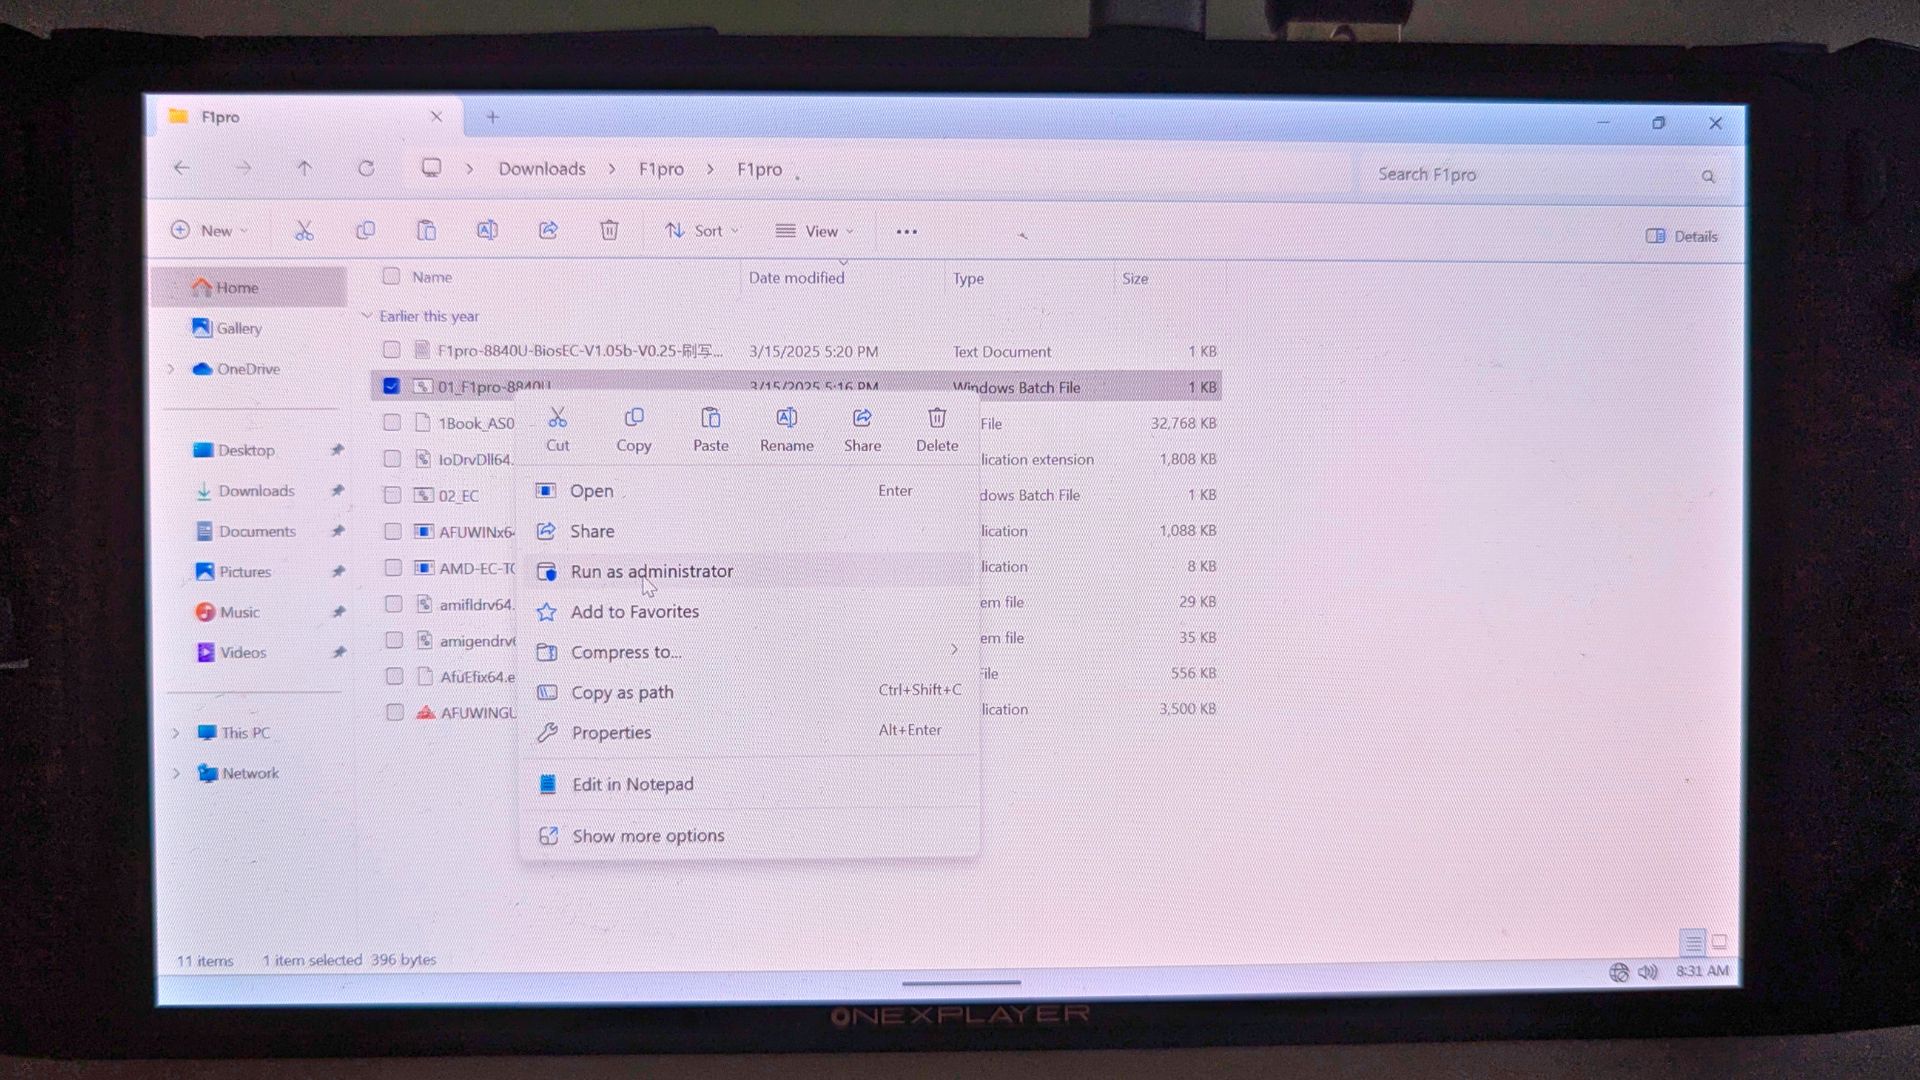
This firmware is for the ONEXPLAYER F1 Pro 8840U model. You can download the V1.05b-V0.25 BIOS and EC firmware here.
Extract the files to your PC, it should look similar to this

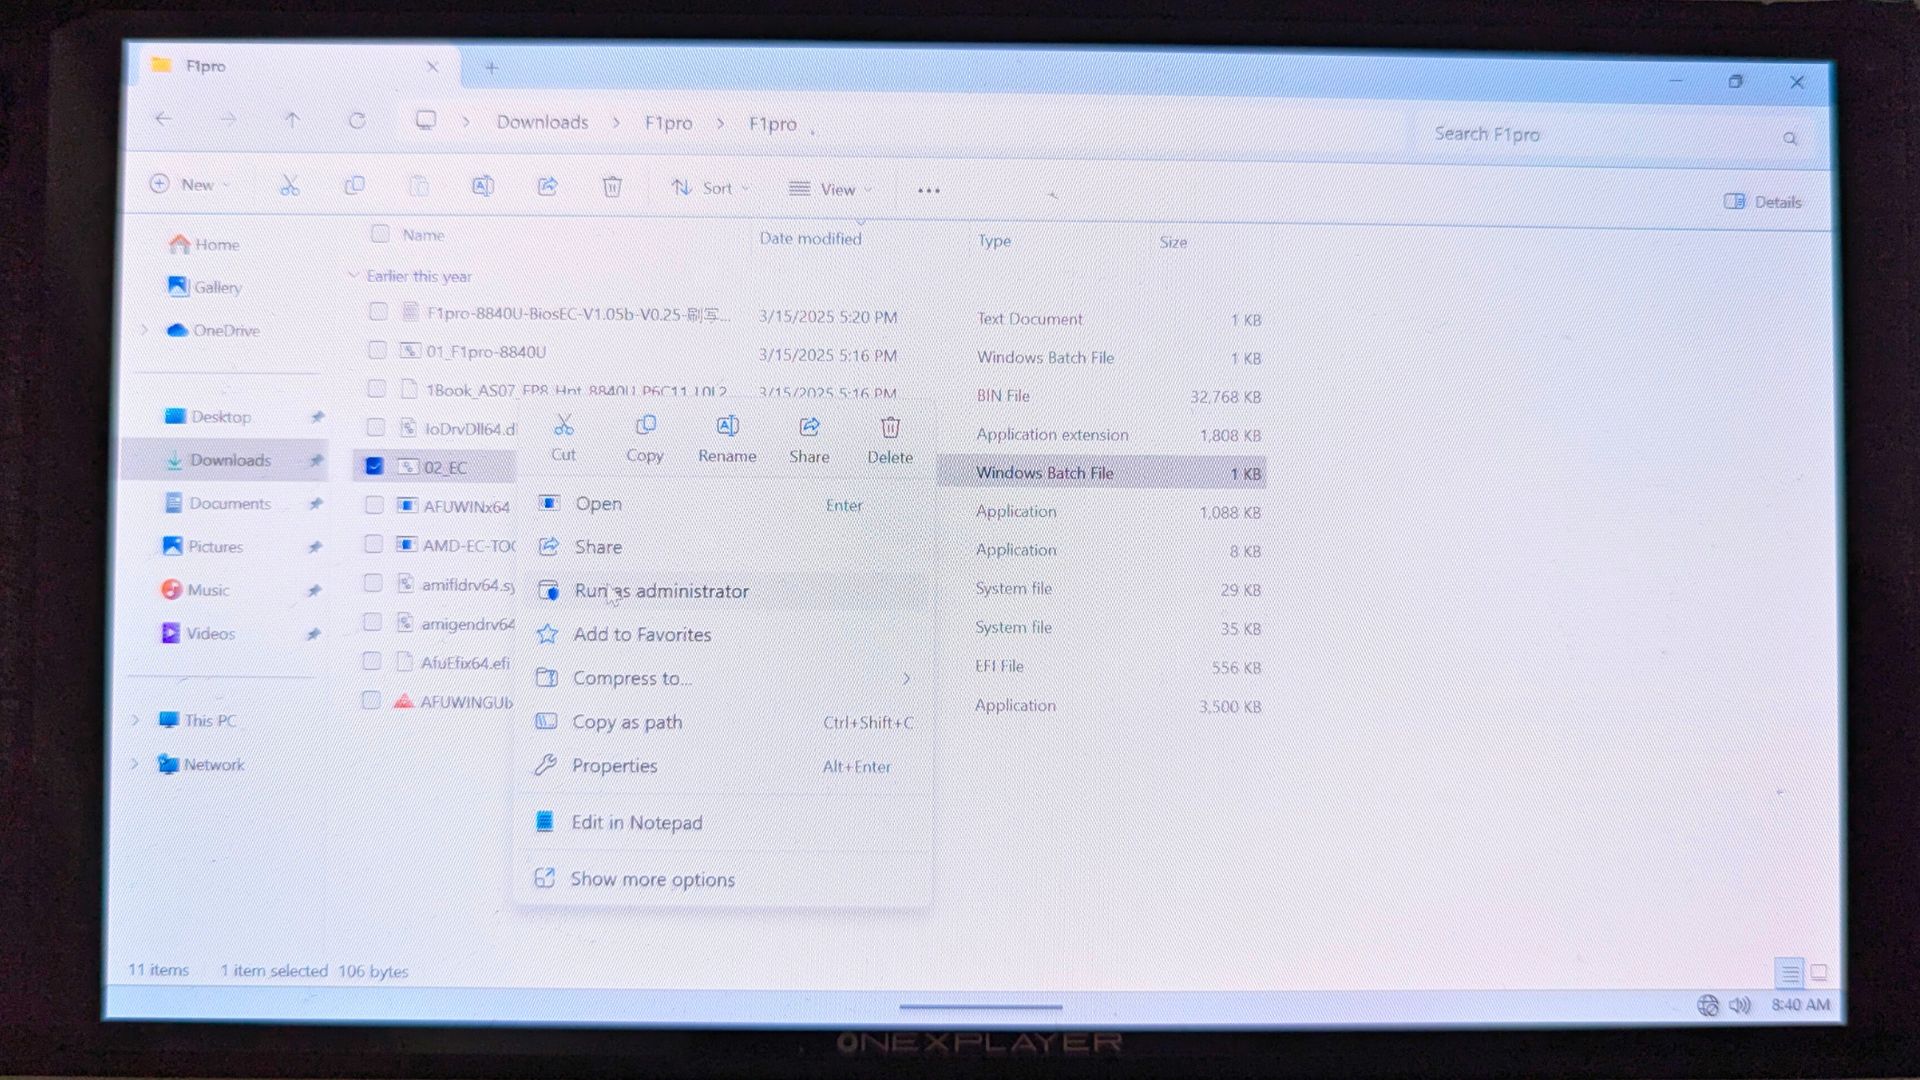
Right click on the 01_F1pro-8840U.bat file and choose Run as administrator. Choose Yes to any prompts.
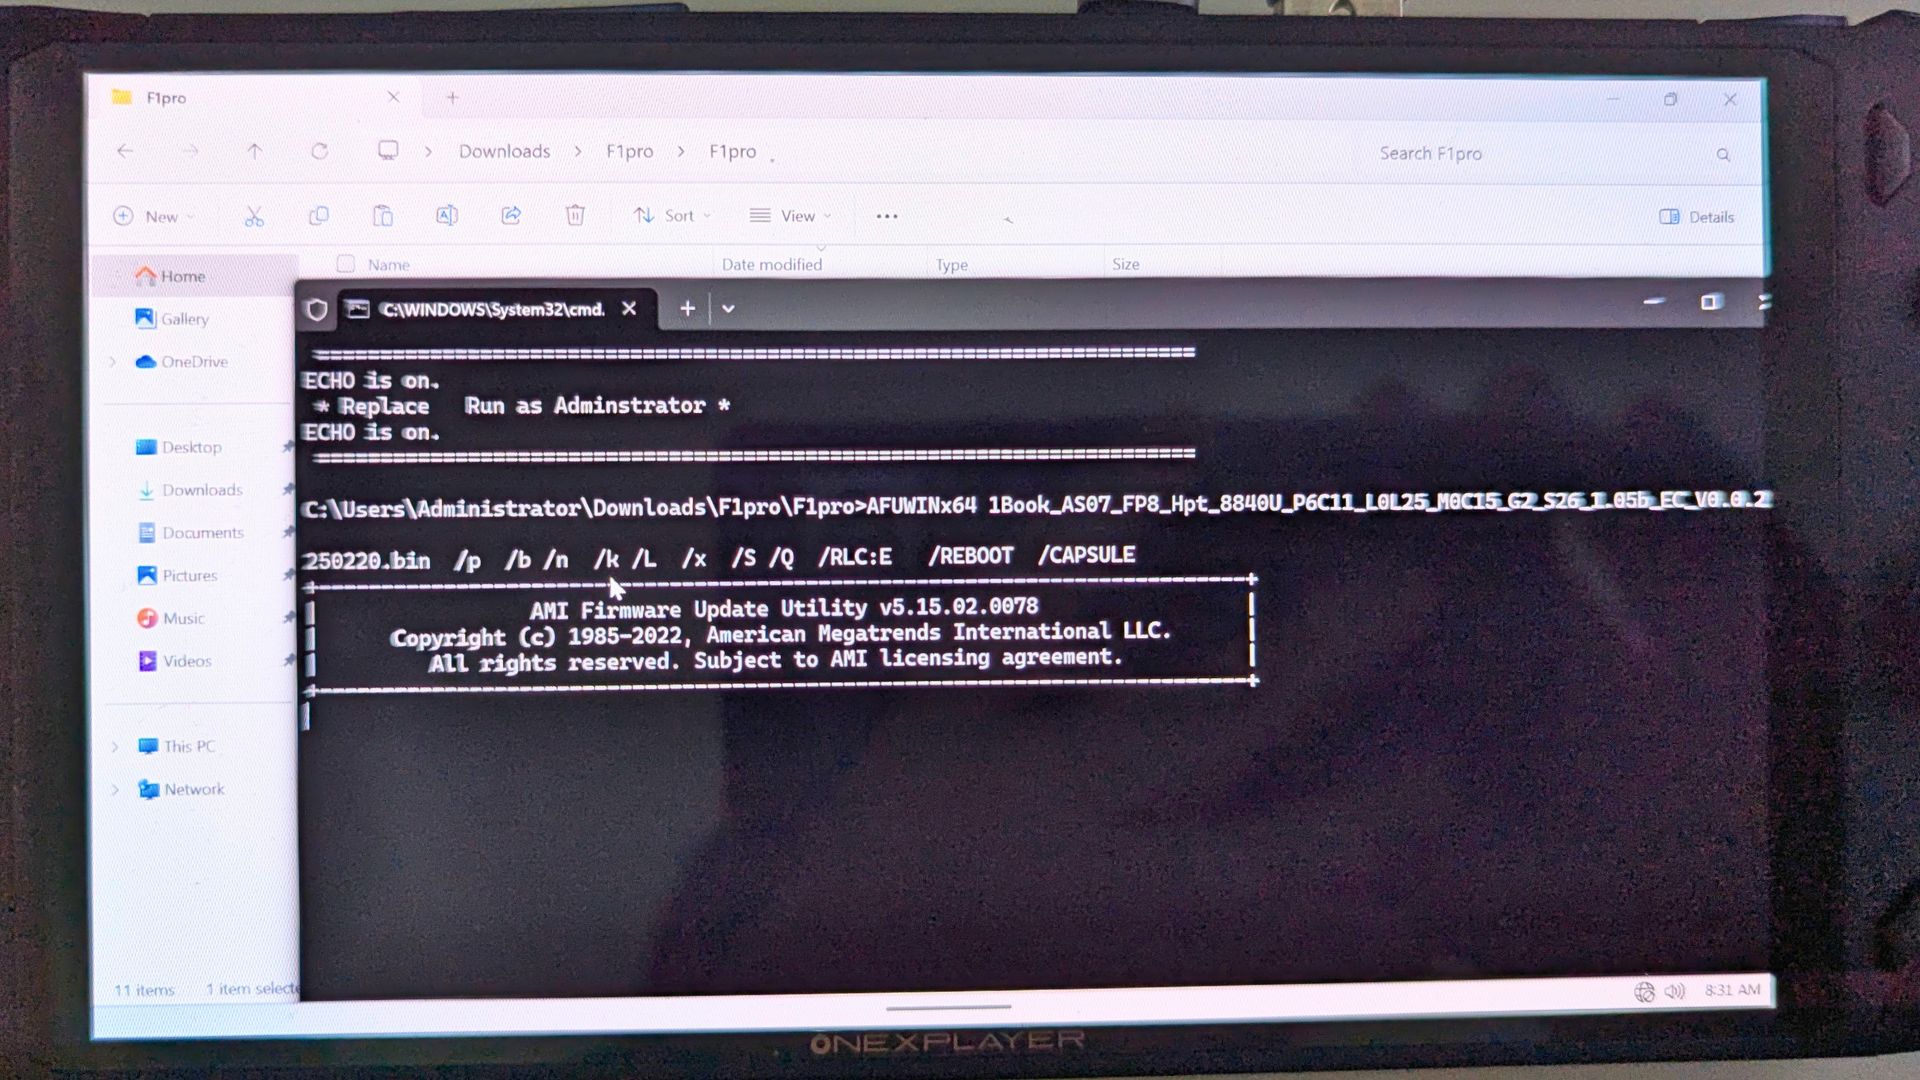
A command prompt window will appear to notify of the progress. After a few moments the device will reboot.
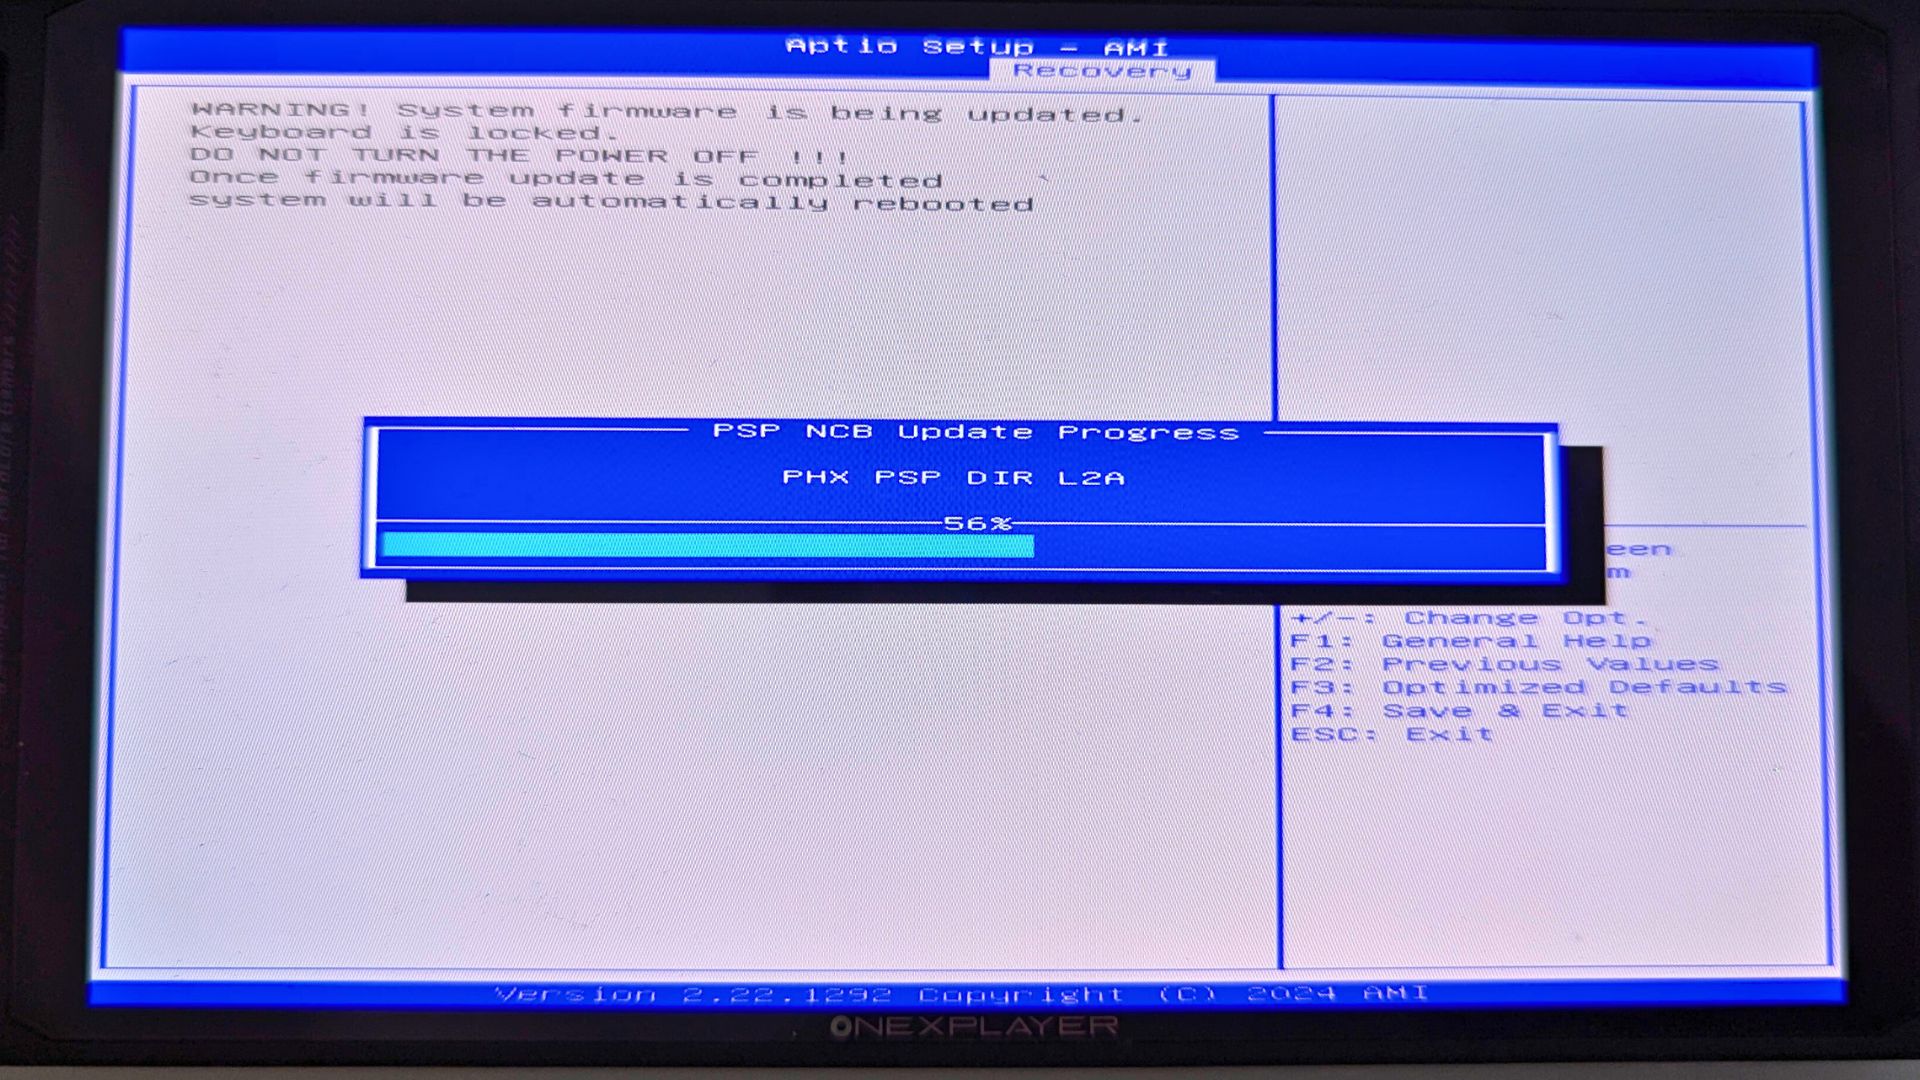
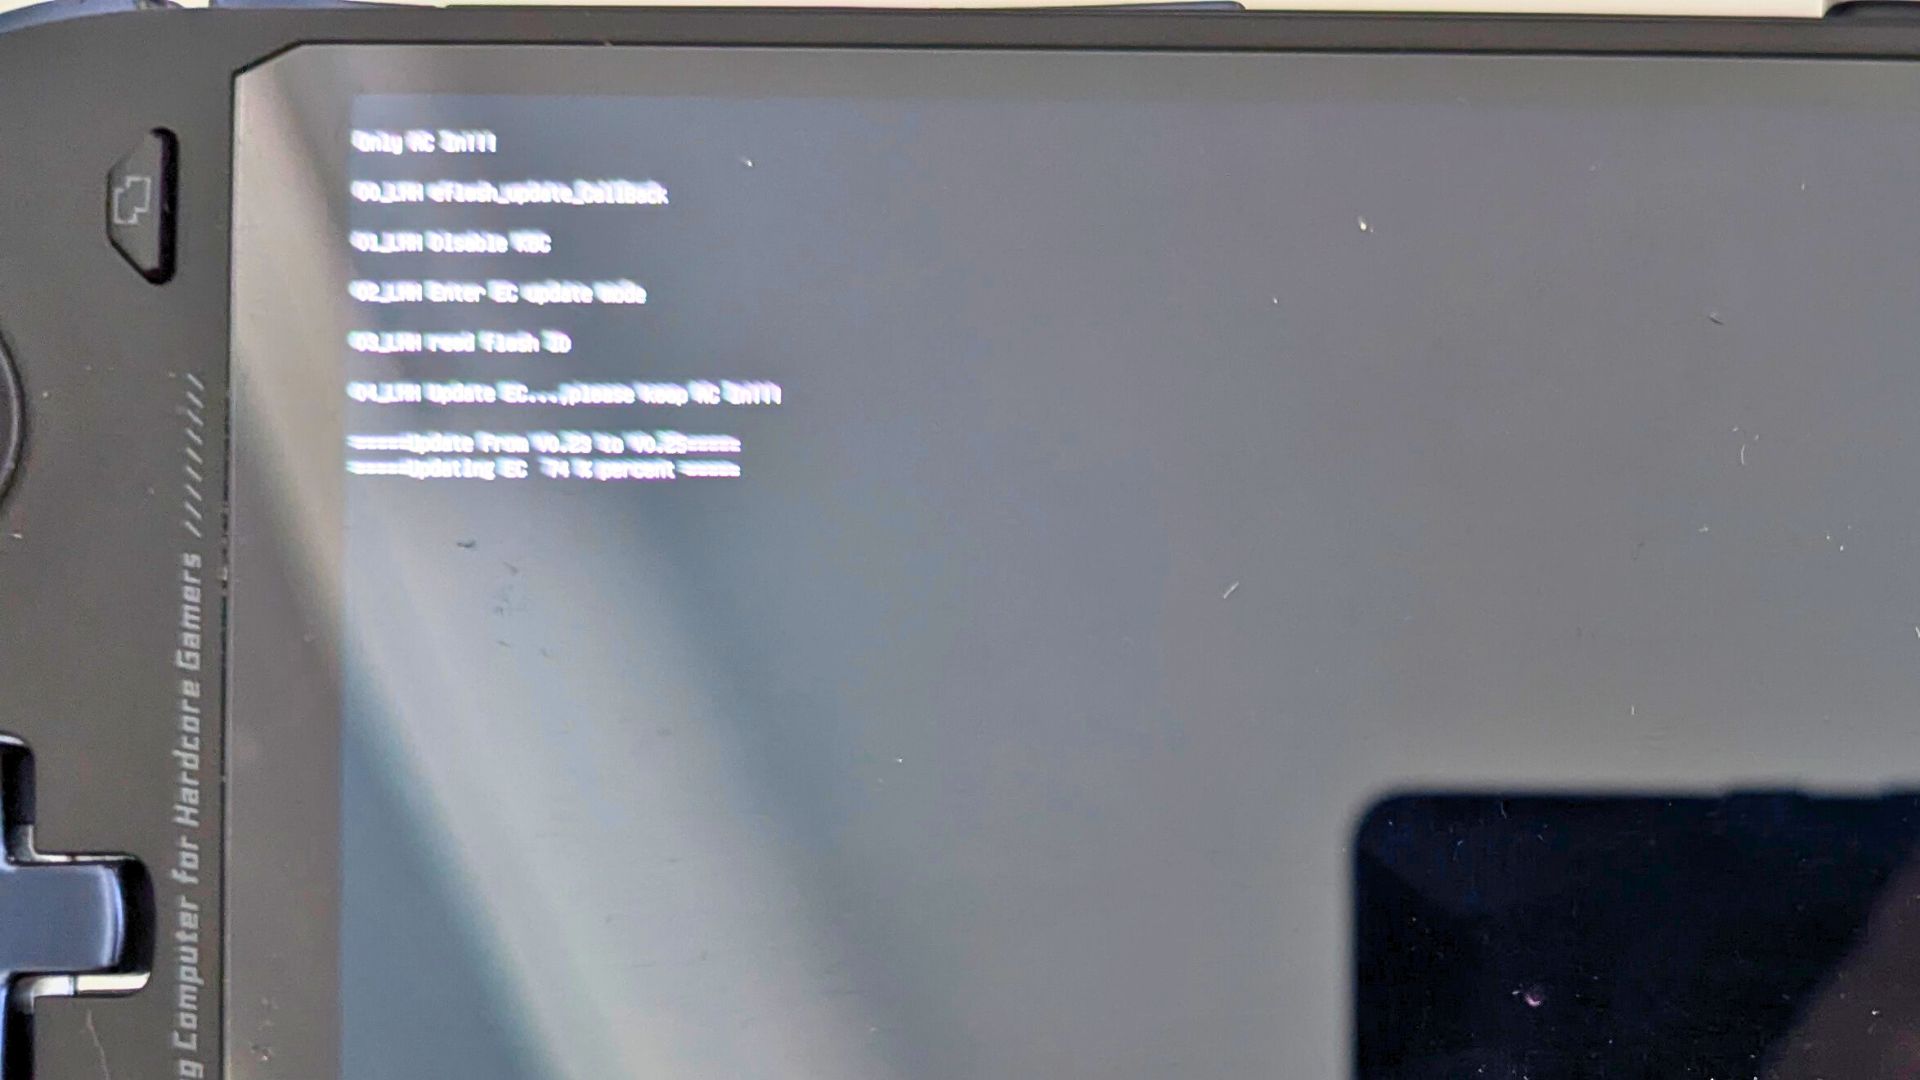
The BIOS upgrade screen will display and inform you of the progress of the BIOS update. This process will take around 5 minutes.
One completed the device will restart and boot after a few moments. Do not switch off the device during this period. Let it boot to Windows. Once back into Windows, right click on the 02_EC.bat and select Run as administrator.
After a moment or two, Windows will reboot and enter the EC update process.
This process will take a few minutes to complete and show the progress of the update. Do NOT switch off the device during this process.
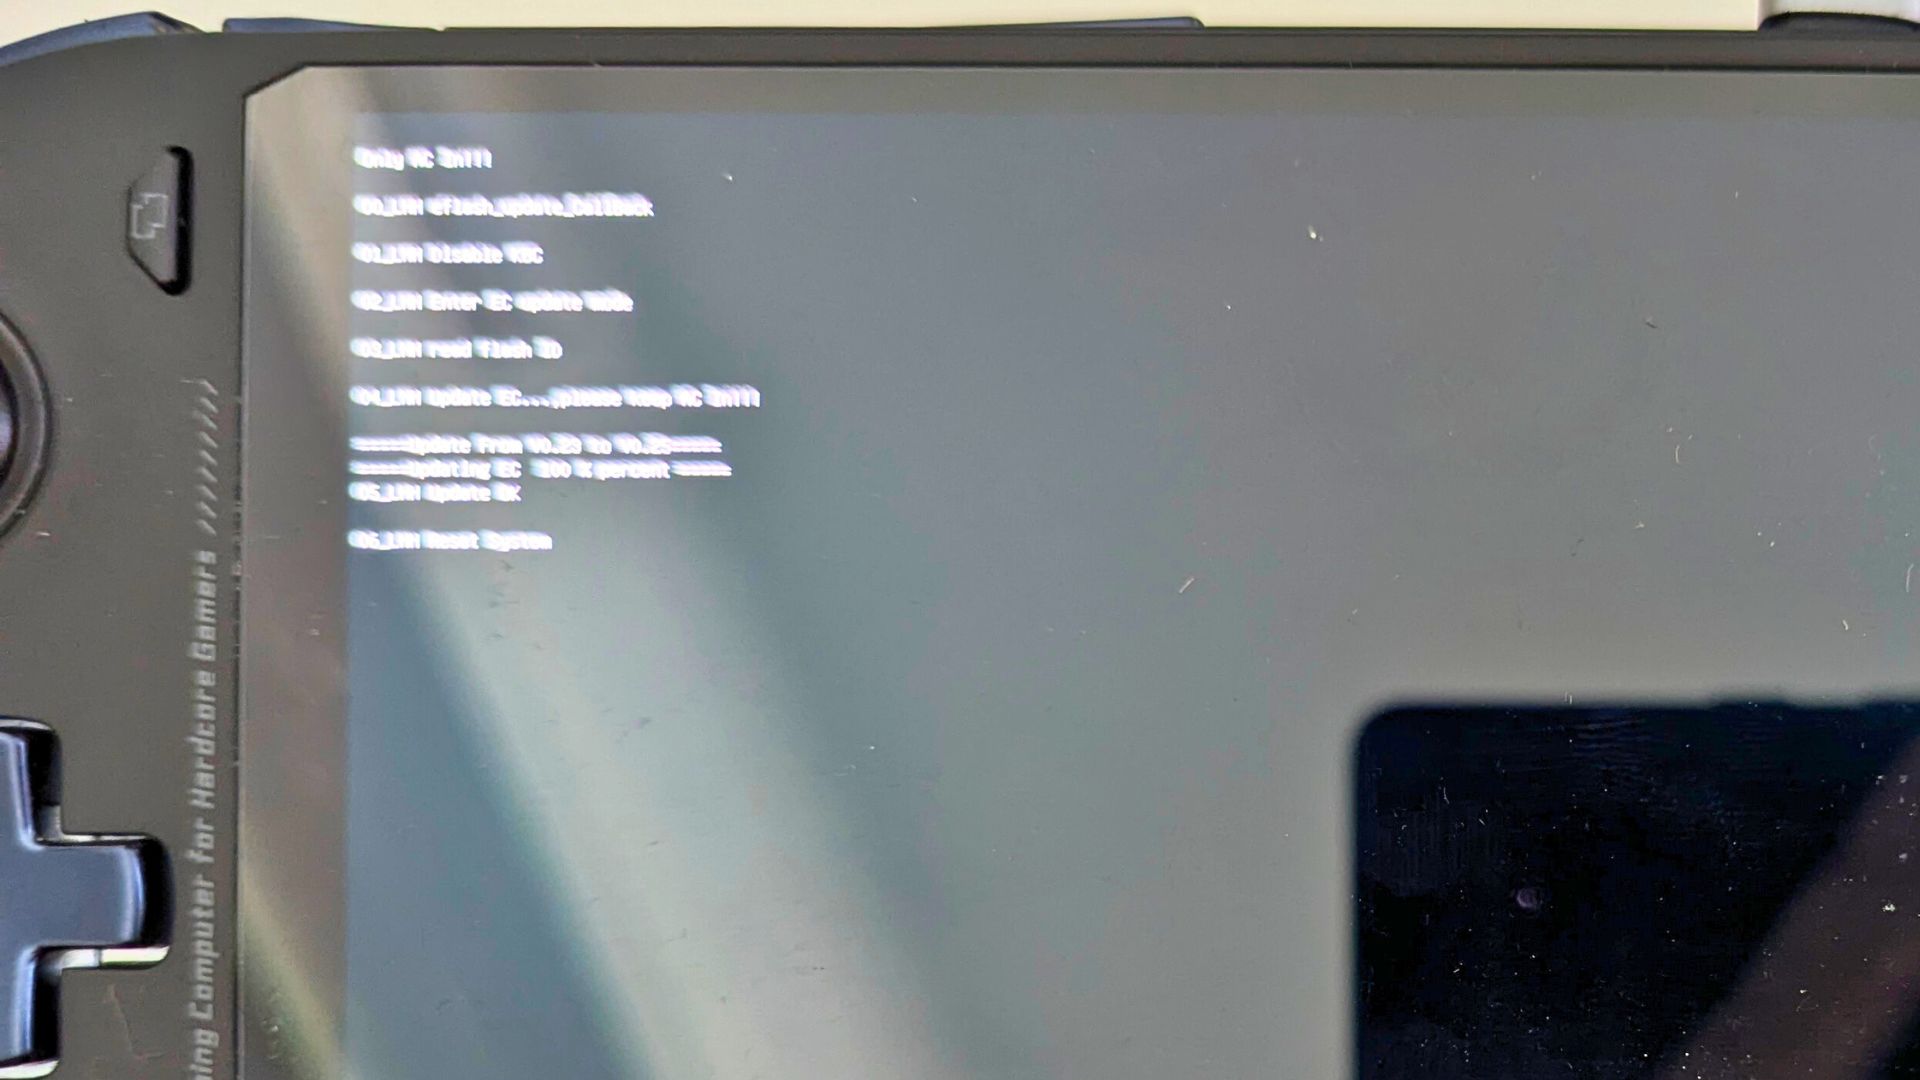
Once completed, the device will take a few moments to shutdown.
Press the Power button for a couple of seconds to switch it back on. It will now boot back in to Windows.
Once booted you will now need to perform 1-3 cycles of charging and discharging. Charge the device fully while it’s turned off, then turn it on, unplug the charger, and play a video or game to fully discharge the battery. Repeat for a second and third cycle. This is to ensure the battery is properly calibrated.
Once the power cycle is completed you can continue to use your device. Don’t forget to re-enabled your anti-virus software.
ONEXPLAYER ONEXFLY F1 PRO HX 365 & HX 370 Models
This firmware is for the ONEXPLAYER F1 Pro HX 365 and HX 370 models. You can download the v0.25 update from here.
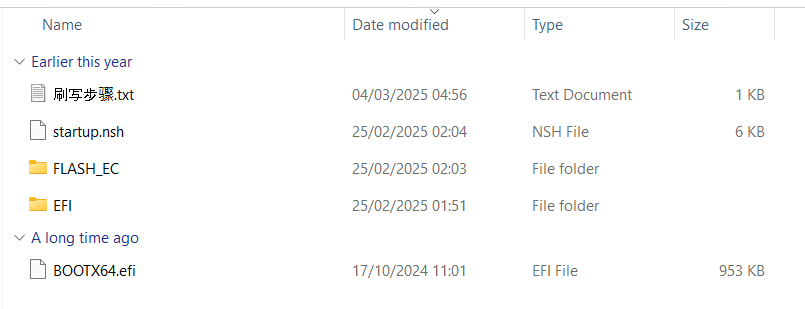
Extract the files to your PC and copy all the contents to a freshly formatted FAT32 USB drive.
Ensure your ONEXPLAYER is charged and keep the charge cable connected to ensure there is no power failure during the update process.
Plug in your USB drive to the USB port on the top of the device. For ease of use we recommend connecting a keyboard to access and navigate the BIOS.
Power on the ONEXPLAYER F1 Pro and press the DEL key on the keyboard a few times until the BIOS Main menu appears.

Press the Left or Right keys to navigate to the Save & Exit menu. Scroll down to the Boot Override option and select the USB drive, it should be the second option. Press the Enter key to begin the update process.

The first stage will prepare the firmware update, it will pause for a short period, you can press a key other than ESC to continue or wait until the timer counts down.

The second stage will show some progress bars a few times.

Once completed the device will either power off or you will be prompted to power down.
Once powered off, disconnect the charge cable and switch back on the ONEXPLAYER F1 Pro.
After a few moments it will boot back into Windows. Restart Windows to update the EC firmware.
Once Windows has loaded, shutdown the device and connect the charge cable. The power LED will be orange to indicate charging, once the LED switches off, leave it charging for an additional 30 minutes.
After the 30 minutes, you can continue using your ONEXPLAYER F1 Pro
Questions & answers