In this article
We’ve all been there. Downloading apps, movies, games, and so on, until we’re met with the dreaded error message. “Insufficient space on drive X”, and you’re stuck laboring for hours deciding on what precious files to keep, and what files to delete.
If you find yourself in this situation often, you might figure that it’s time to upgrade the storage on your device. Fortunately, the CK1 Mini PC supports just this! Via the means of a 2.5″ drive – be it Solid State (SSD) or Hard Disk (HDD), the CK1’s storage can be expanded far beyond the storage it initially comes with. And in this guide, we’re going to show you just how to do that.
How To Open the CK1
To start with, remove the two screws located in the back of the device (circled in red):
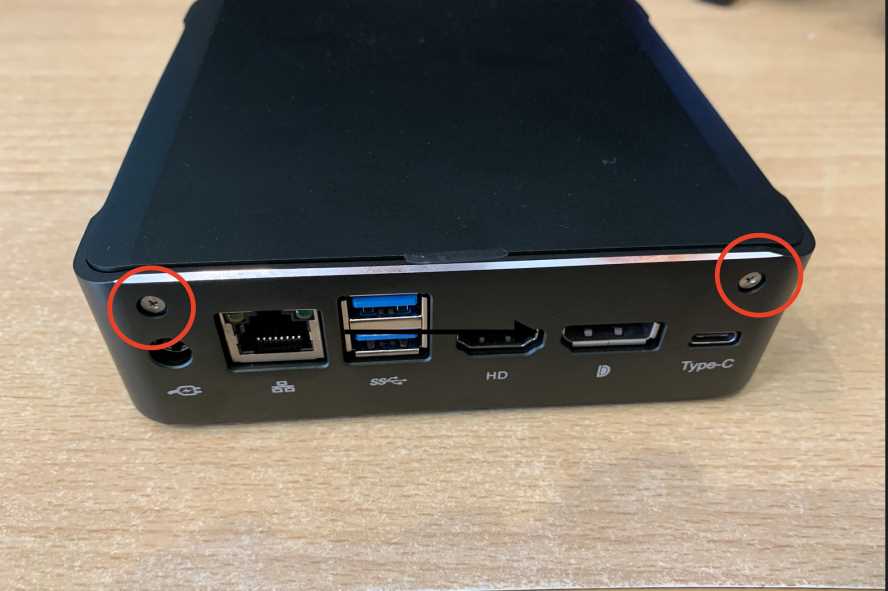
(Put these somewhere safe! You wouldn’t want to lose them!)
Now the screws are removed, lift up the lid to separate it from the case, until eventually you’re left with this:
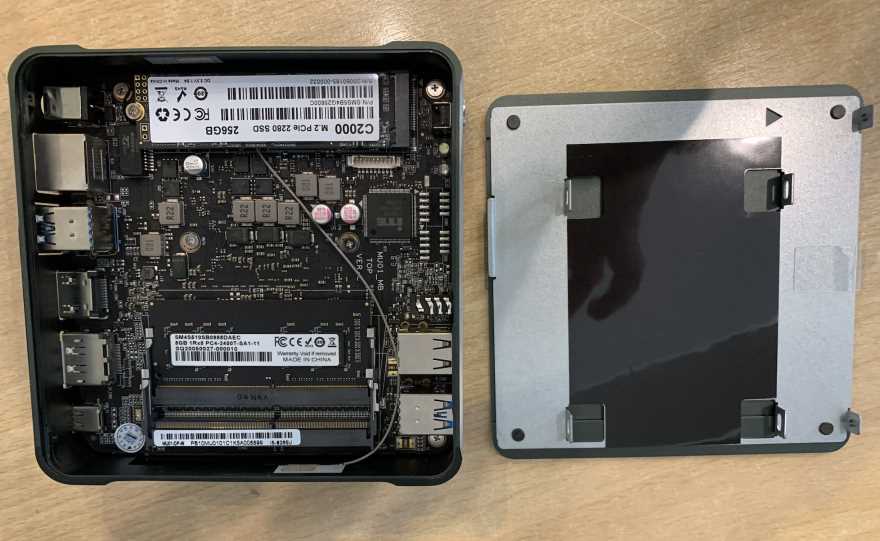
Now that the device is open, we can move onto the next step.
Installing The HDD/SSD
Remember those screws you got with the CK1? Remember the strange cable? They’ll probably have been located somewhere in the box. Make sure you have those and your chosen SSD/HDD handy.
If you didn’t receive them, and you bought the device from us – contact us with your order number, and we can help!
Now you have all the necessary omponents, line up the screw holes on your chosen drive with the screw holes of the drive bay inside the lid of the CK1, like so (if it doesn’t fit, you probably don’t have a 2.5″ drive):
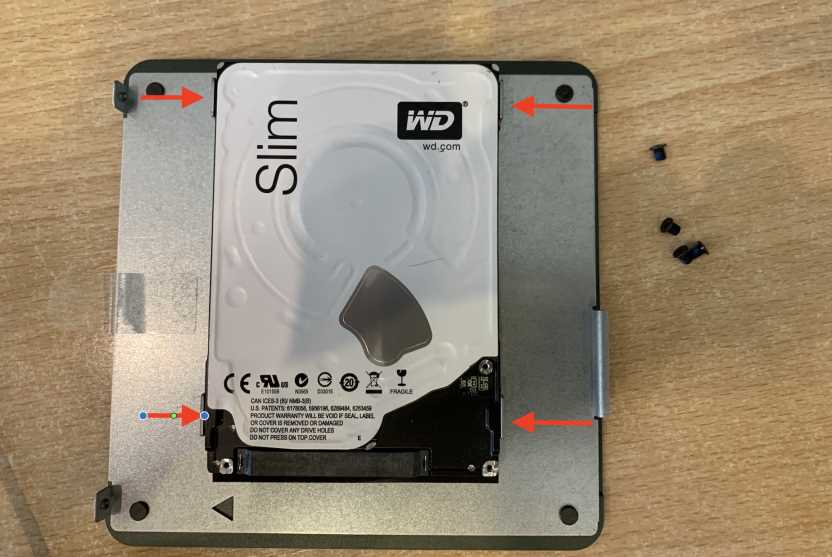
Once lined up, insert the screws and tighten them (make sure they’re tight, but not too tight, otherwise they might be a pain to remove if you ever decide to change the drive later on!)
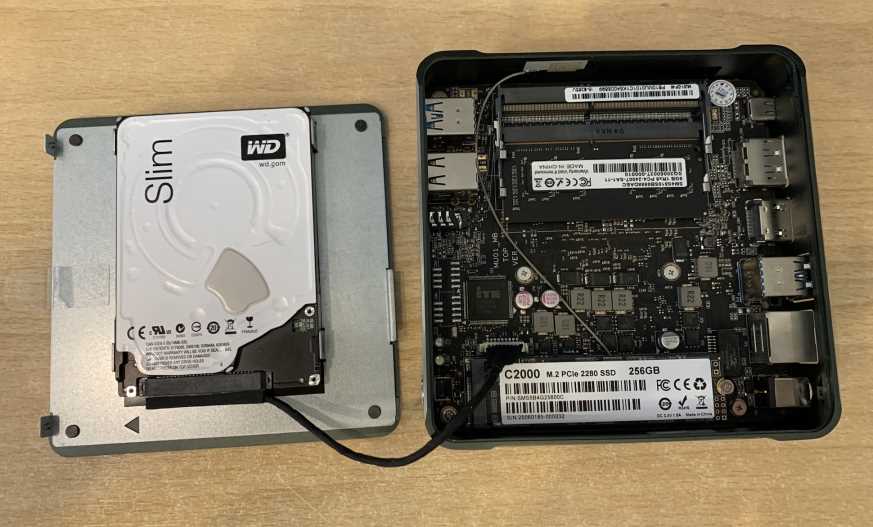
Now the drive is securely fastened, take the cable (which is a SATA cable) from earlier and connect the smaller end to the CK1 (the place you connect it is located just above the M.2 SSD:
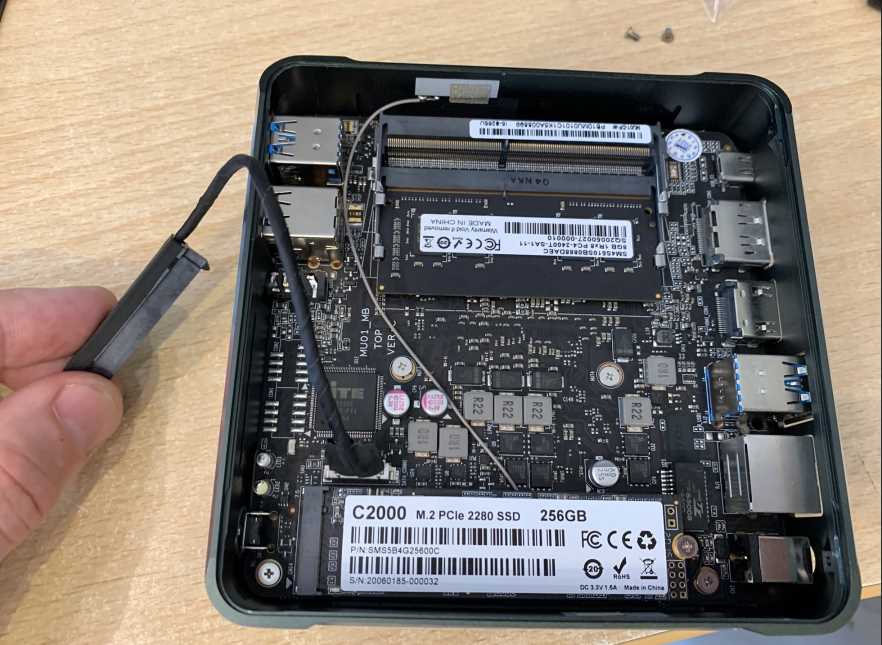
Then connect the larger end of the SATA to the drive, like so:
The device is now connected on the physical level! All that’s left to do is close it up, turn it on, and format the drive.
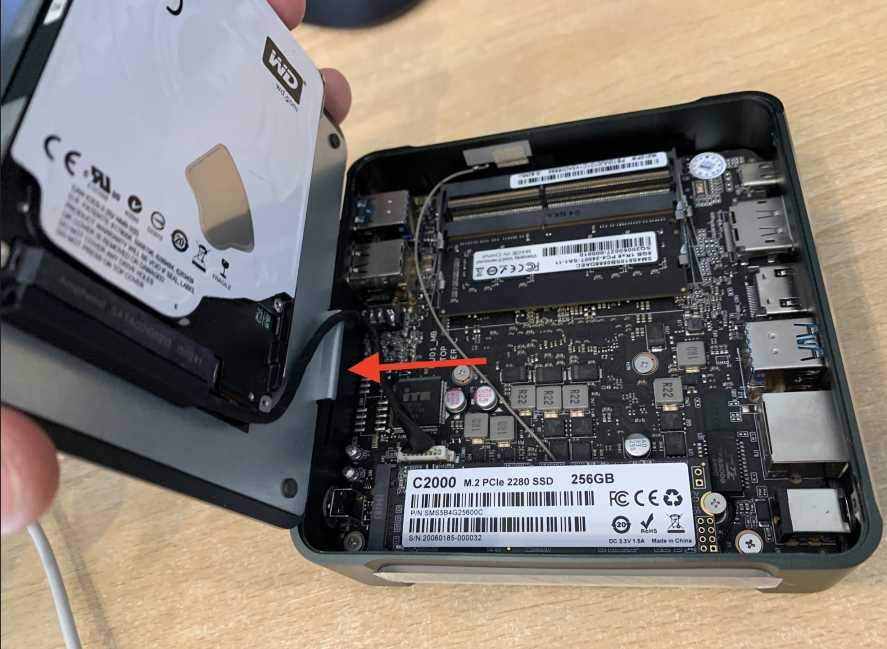
To close the CK1, place the lid on the device, and make sure that the ends of the cable are on the same side. This just ensures that everything is aligned correctly. See the below picture for reference:
Fasten the external case screws again, and you’re good to go! Here’s a photo if you forgot where they go:

Congratulations! Your new drive is installed and almost ready to go! Now it’s just a matter of formatting it in Windows (if it’s not already formatted).
Formatting Your Newly Connected Drive
Now you’ve connected your drive, there’s a good chance it probably hasn’t been formatted. Meaning the CK1 can’t access its contents, despite being aware of its existence.
NOTE: Formatting a drive will wipe out all data on it. Please be sure that all sensitive data is backed up beforehand if you are not using a brand new drive.
To fix this, you’l need to press the Windows Button on your connected keyboard, or just open the search bar on the bottom right of the screen, and input “Computer Management”.

Then select “Disk Management” (if you can’t see it, click the little icon next to the right-facing arrow).

Now you should be able to see all the connected drives and partitions that Windows 10 is aware of.
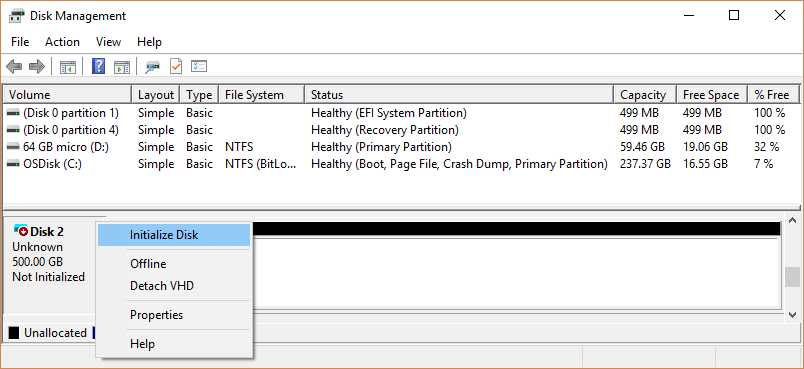
If your drive is not formatted, it should appear as “not initialized”. So right click it, and select “Initialize Disk”, and follow the on-screen prompts to prepare the drive (if you’re unsure what to select, leave all the settings on the default selection).
Once initialized, your new drive is ready to go!

Questions & answers