This guide will show how to install the GPD WIN MAX 2 2025 4G module. The 4G module comes with the module itself and a new back plate to replace the original one. It is important to note that you will need to transfer the back buttons parts to the new backplate, this is not shown in the video and we have included it below the video:
GPD WIN MAX 2 2025 4G Module Install video
New Back Panel parts transfer
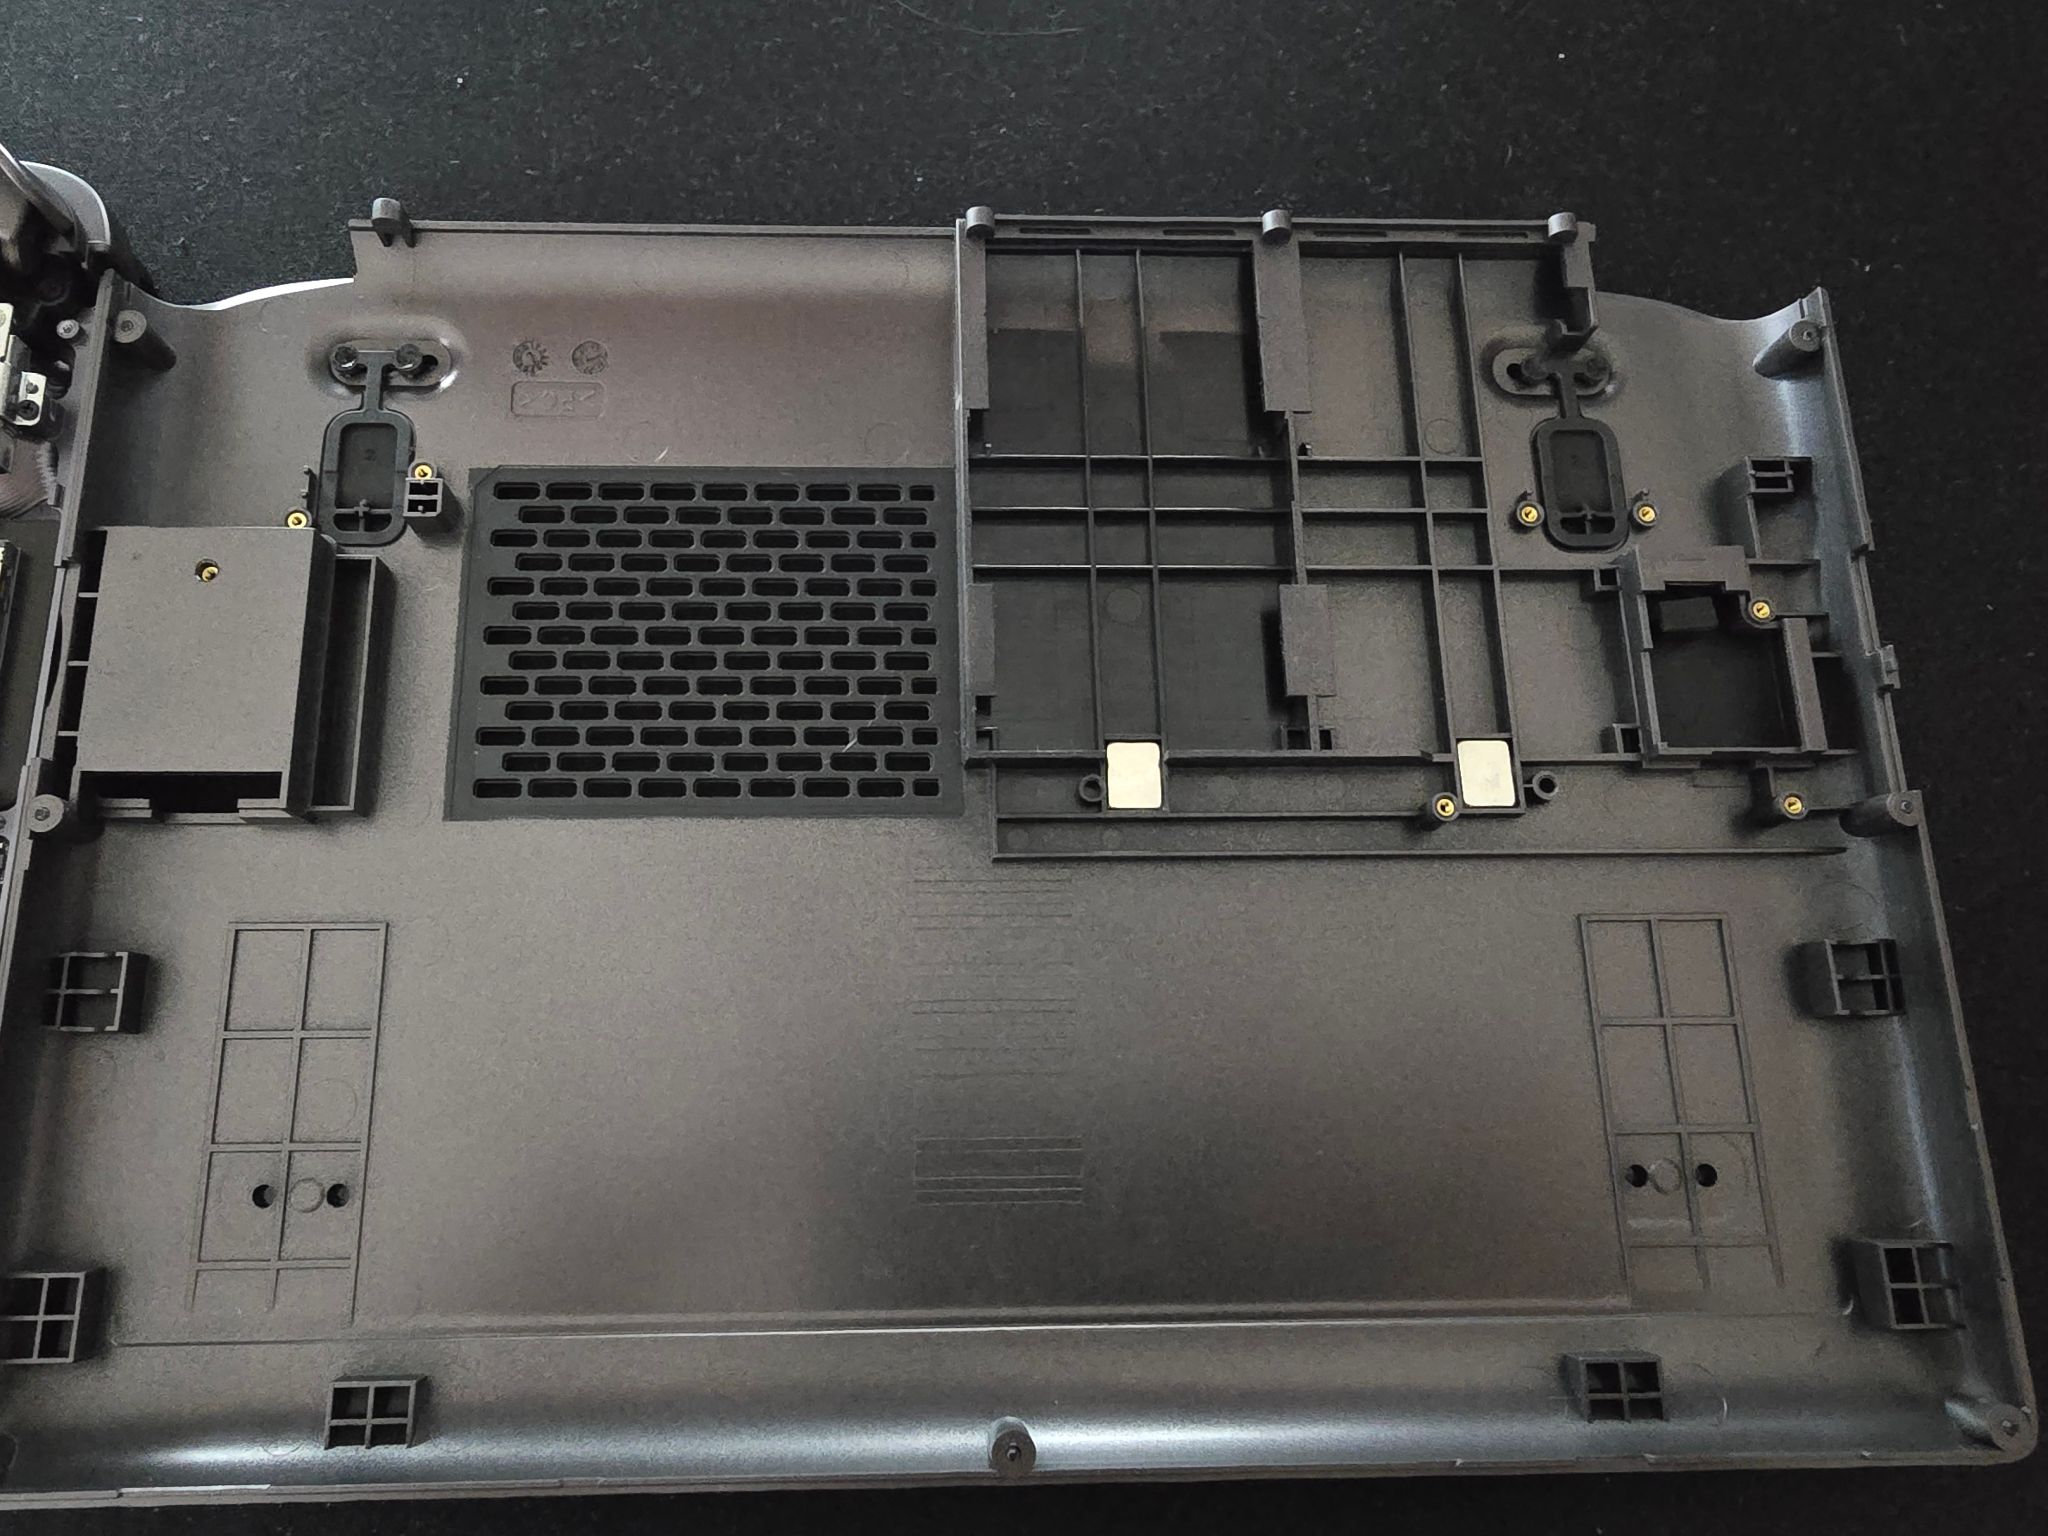
When receiving your bew GPD WIN MAX 2 2025 4G module and new back plate, it will require you to make a few adjustments. Upon receiving your back plate it will look like this:
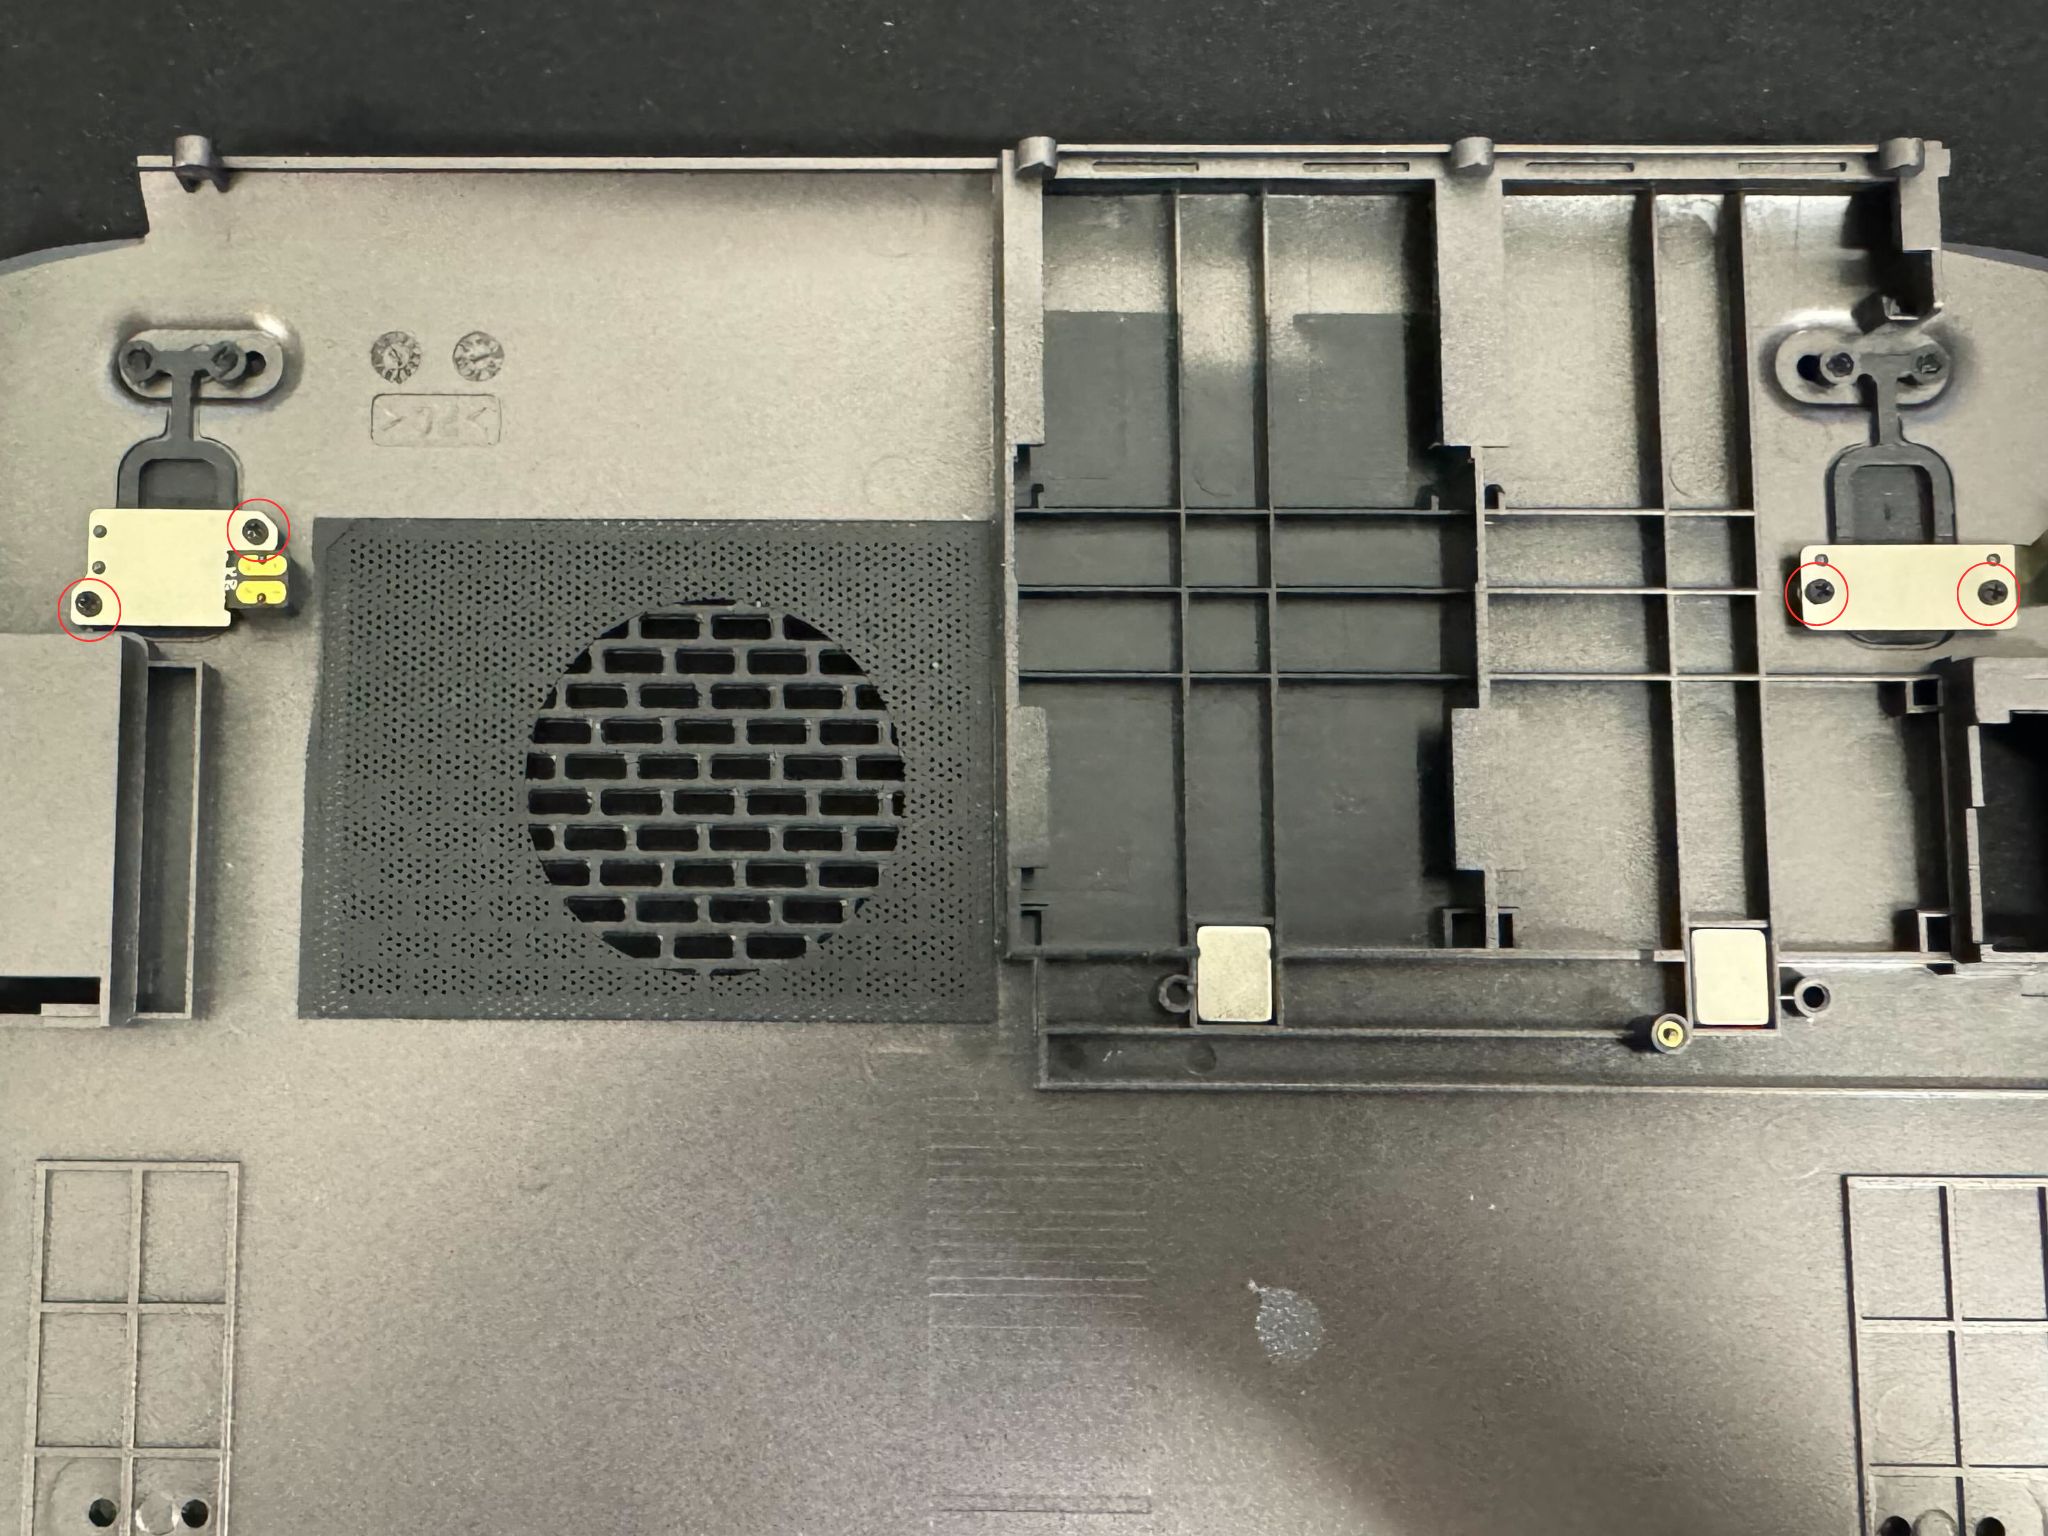
When removing the old Win Max 2 back plate you will find two silver plates located in the picture below. We need to move the plates from the old to the new back plate.
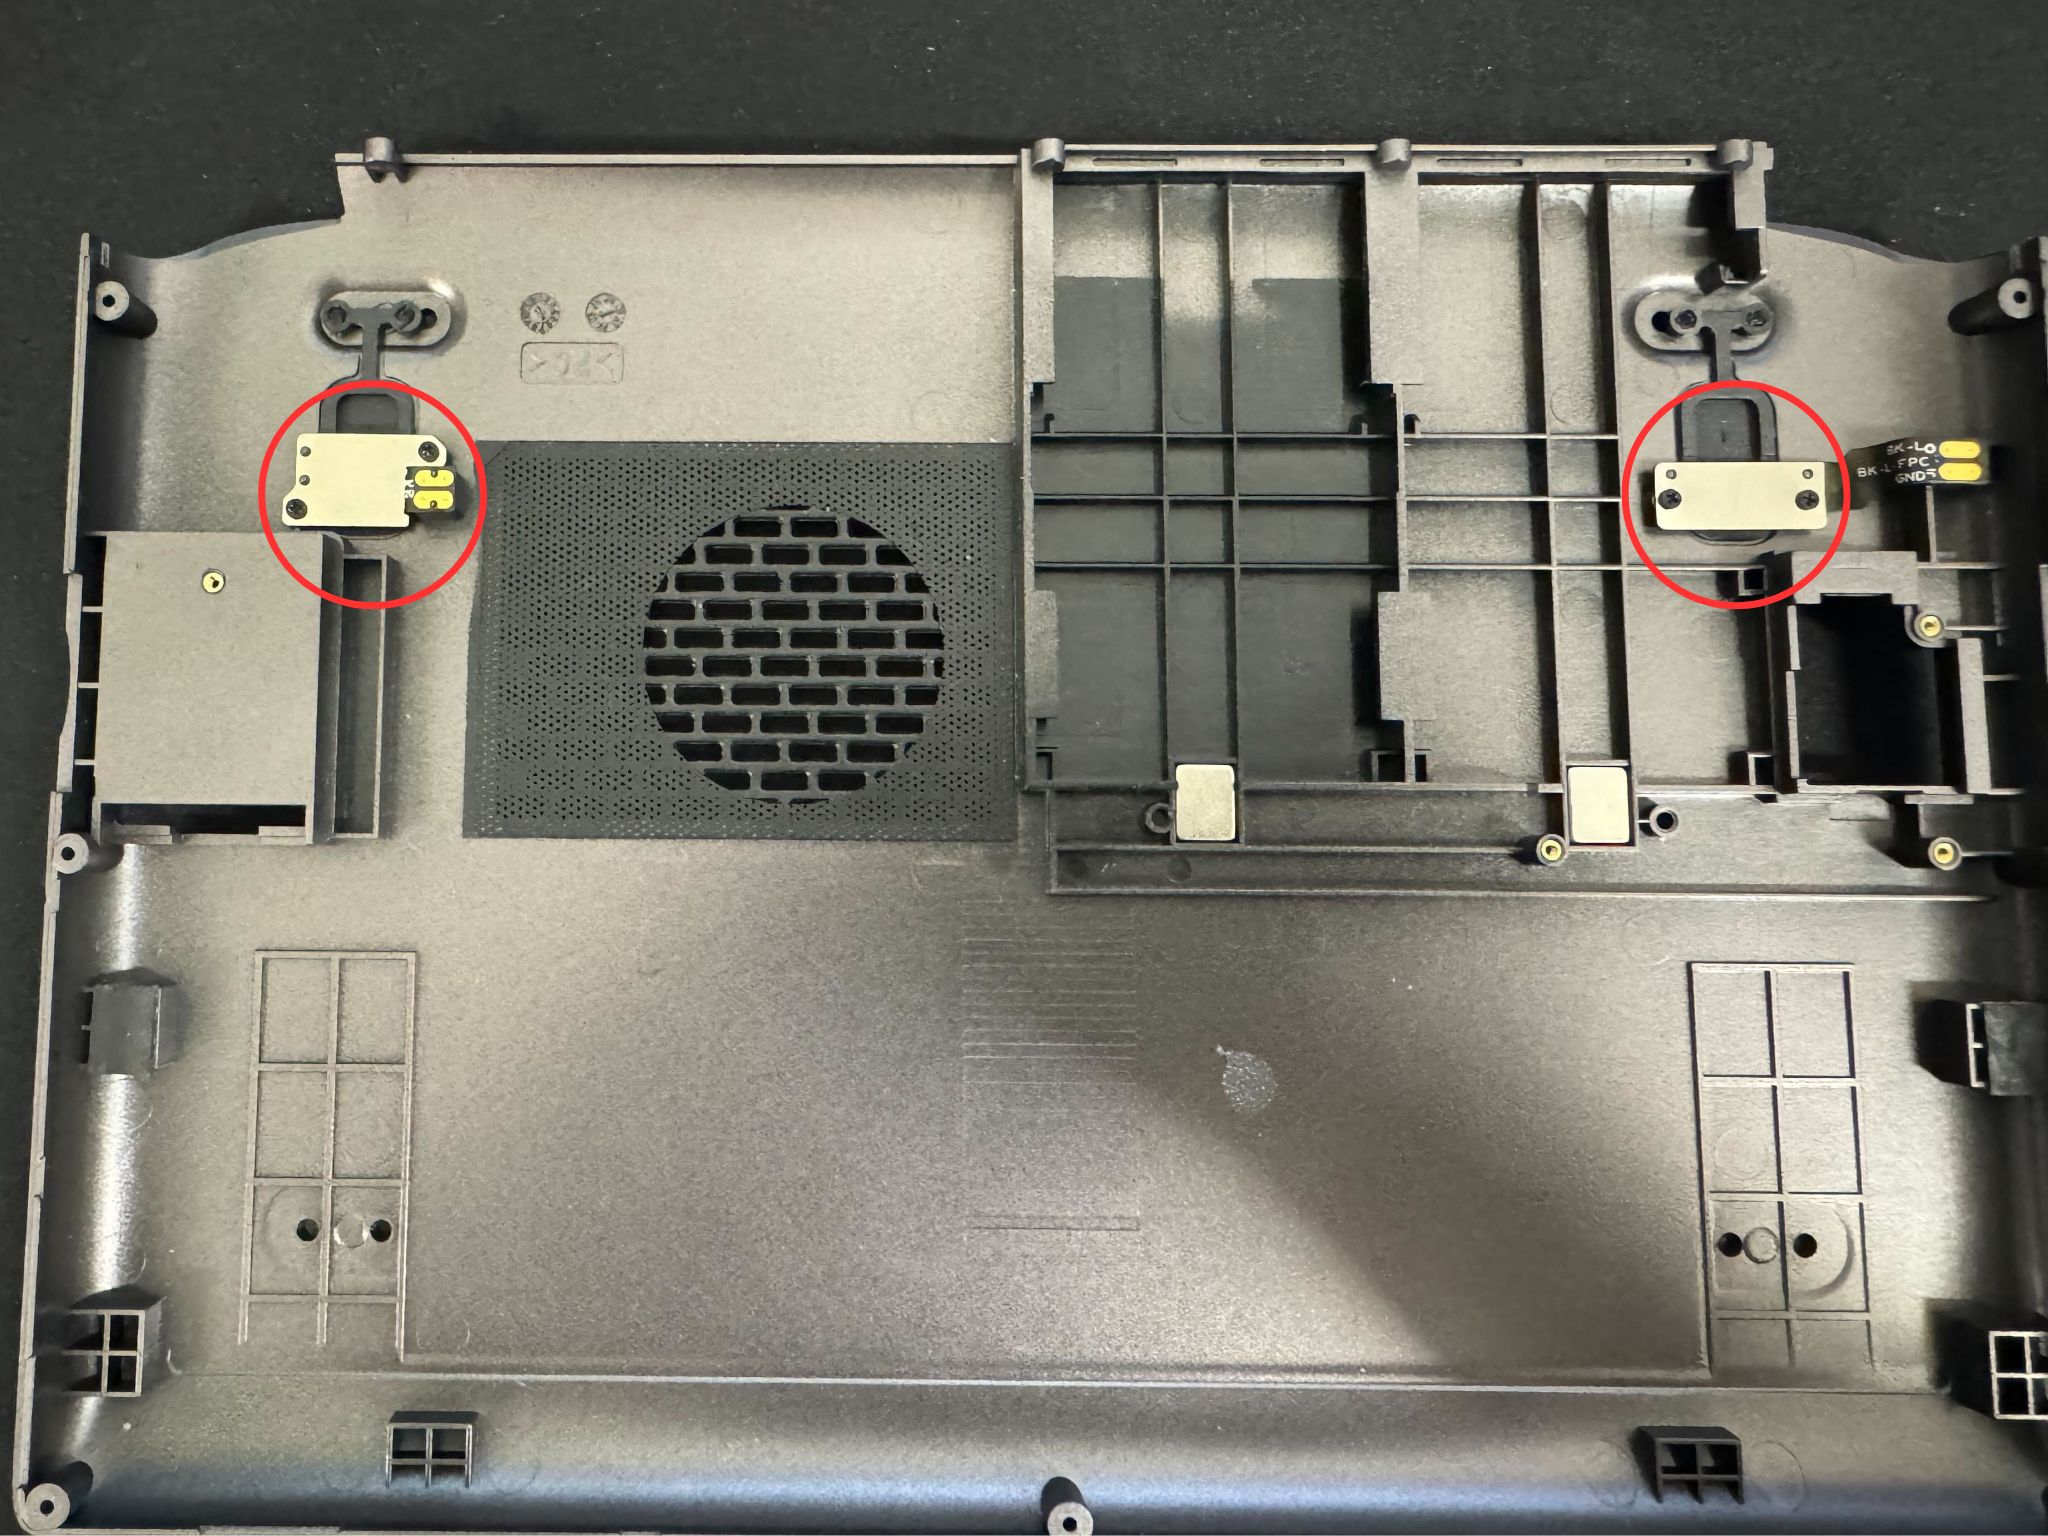
The silver plates can be disassembled by removing the 4 screws highlighted in red below. Please be aware that the silver plates are attached to the ribbon cable which can be damaged easily.
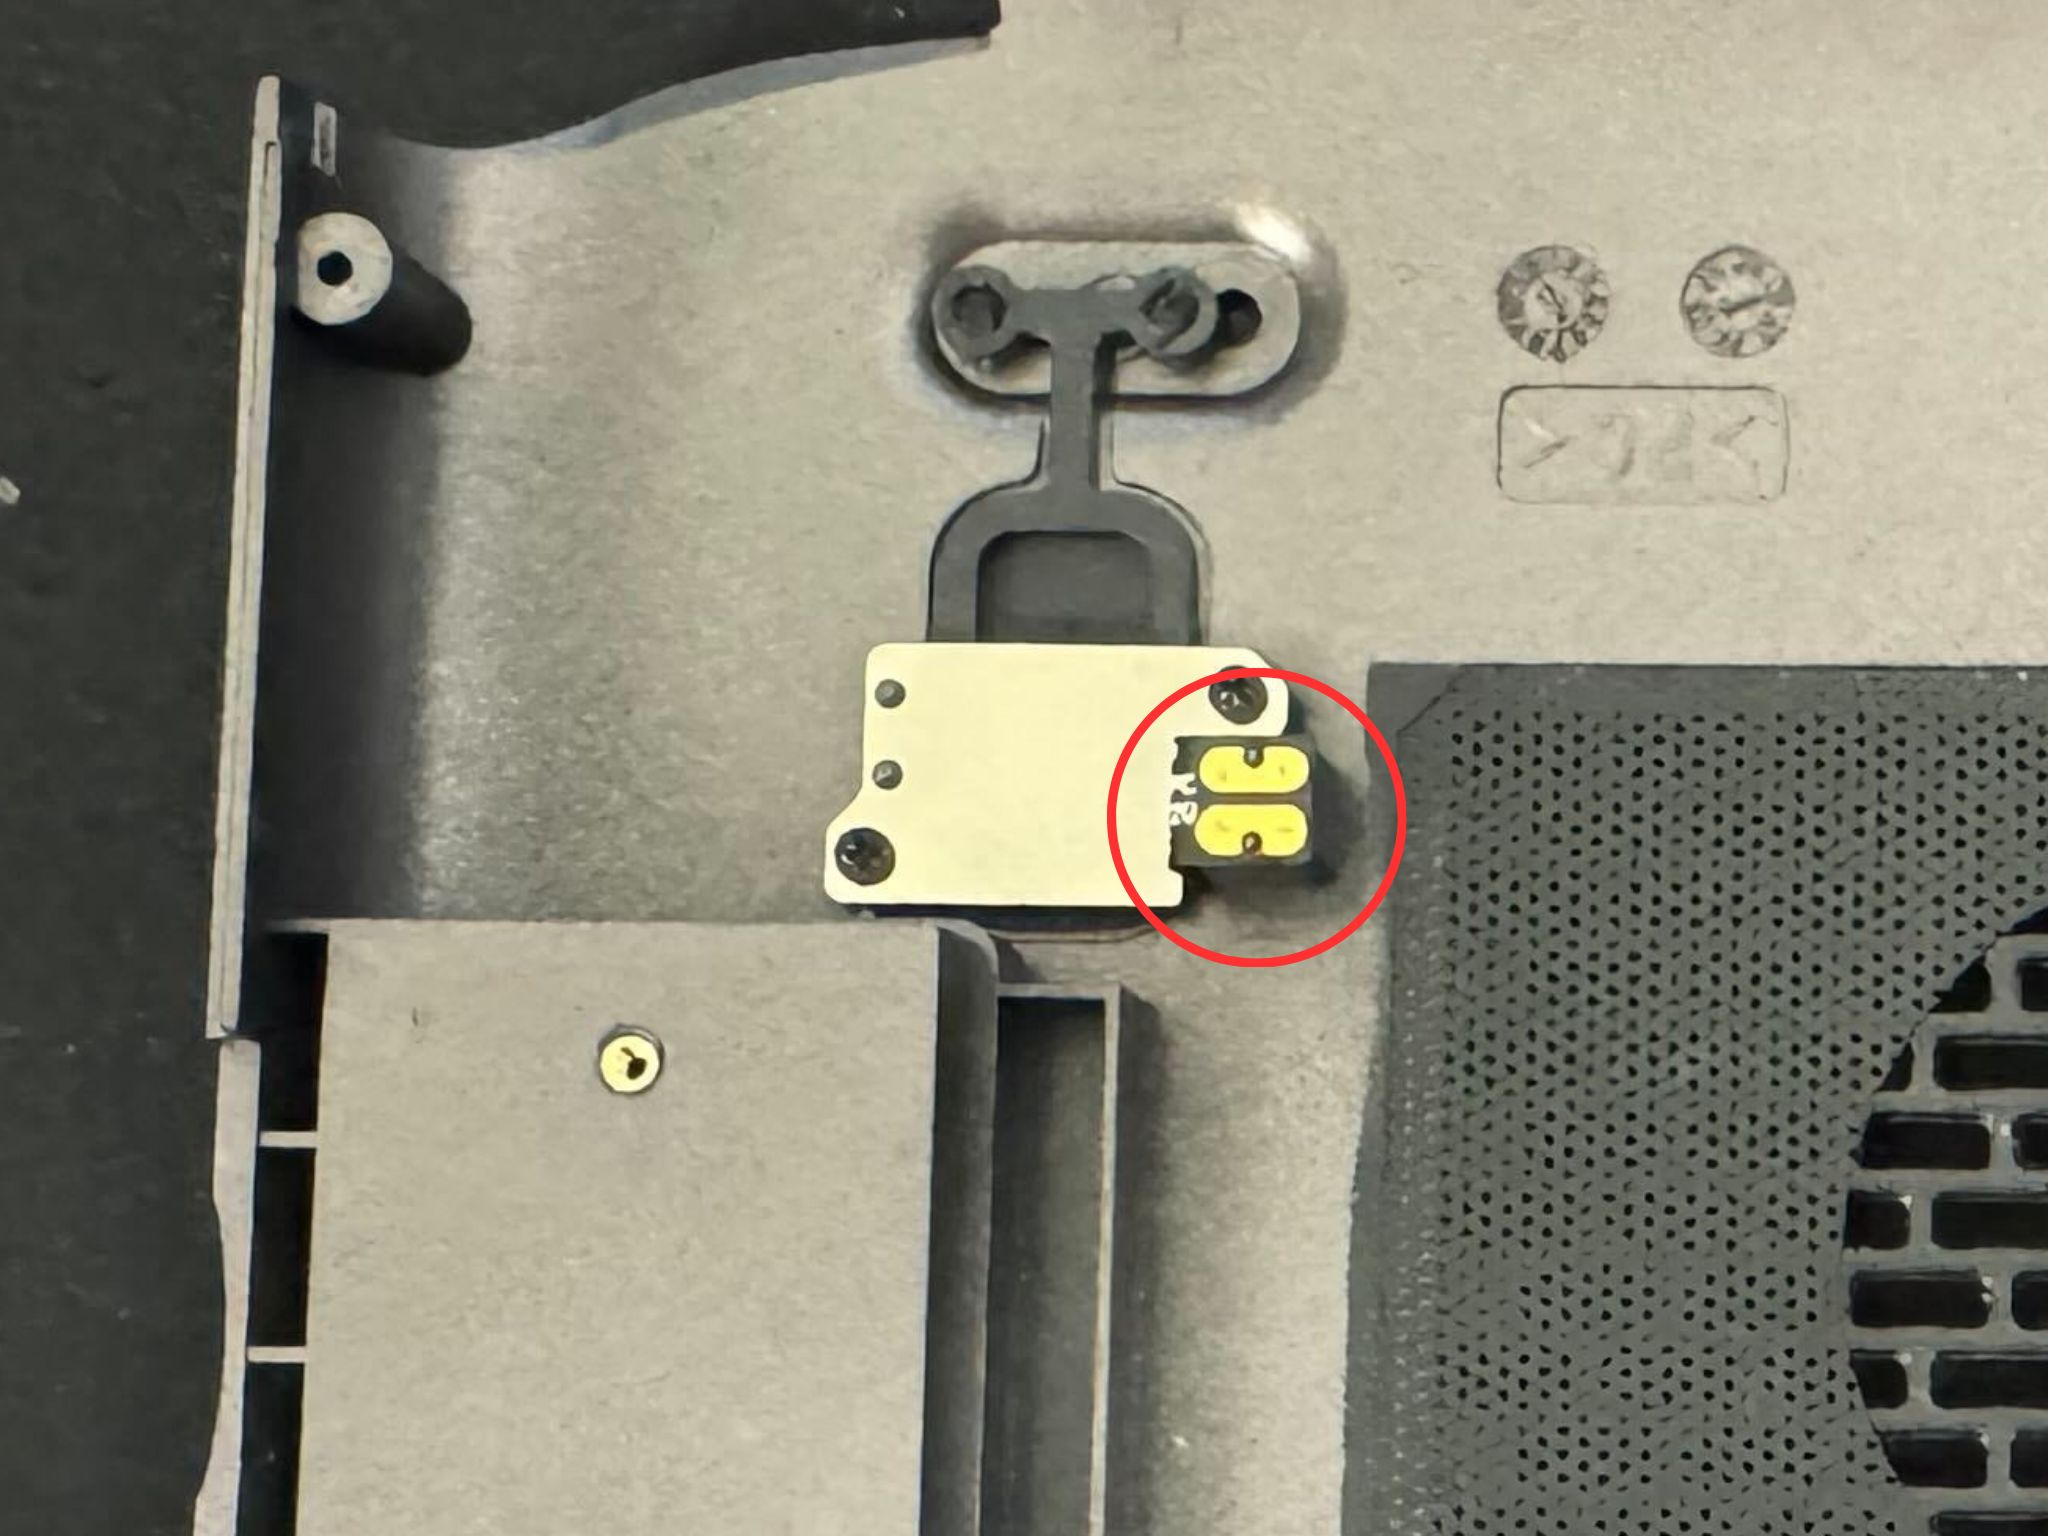
The golden connectors in the picture below, are stuck down to a small metal plate. This whole assembly is glued down and can easily be removed with a little bit of heat to loosen the glue. The glue isn’t strong but using a small amount of heat can make removing the ribbon cable safer.
After you have removed them from the old device, please install them on the new shell. This will enable your back buttons to function again.
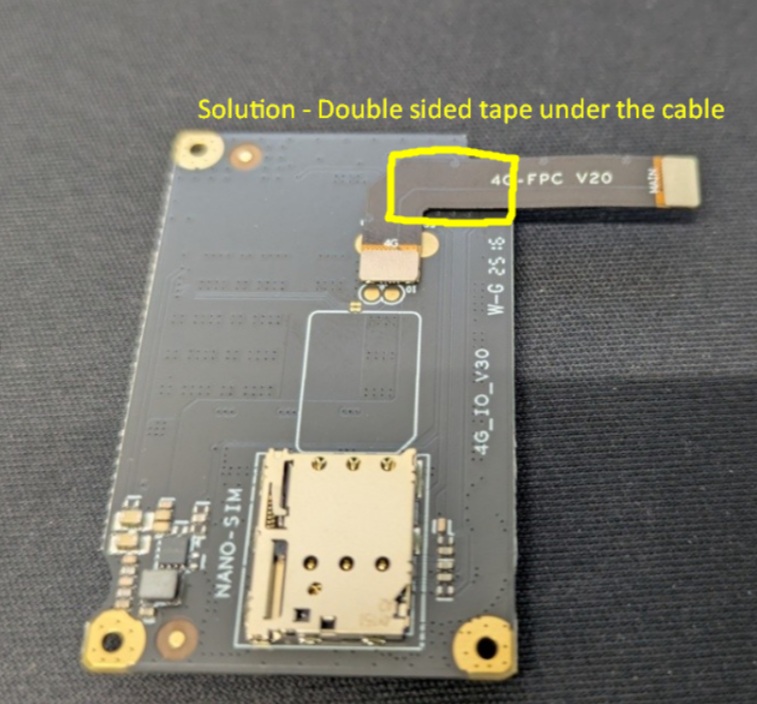
Add some electrical tape to help secure the ribbon cable
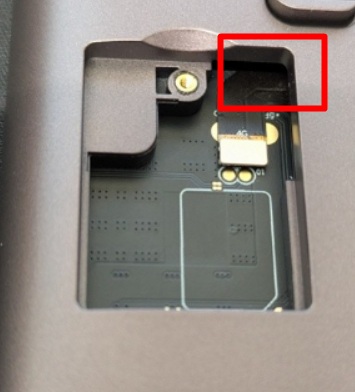
We recommend adding some double sided tape under the cable as indicated in the first image below. This will help keep the ribbon cable secure. If you have already installed the module and do not want to open it, you can apply some tape as indicated in the second image below.