In this article
Whether you have just received your GPD Win 3 or a seasoned handheld gaming PC pro. Our GPD Win 3 how to blog post covers everything you need to know about using your GPD Win 3. Topics include updating the firmware, resetting Windows, increasing performance and much more!
GPD Win 3 Video Playlist
Below you can find a playlist of all our GPD Win 3 videos including unboxing, review, benchmarks, and guides.
What is the difference between GPD Win 3 1135G7, 1165G7 and 1195G7?
The only difference between the GPD models are the processor used in the device. The new GPD Win 3 1195G7 is the latest model.
| 1135G7 | 1165G7 | 1195G7 | |
| PROCESSOR | 11th Gen Intel Core i5-1135G7 | 11th Gen Intel Core i7-1165G7 | 11th Gen Intel Core i7-1195G7 |
| MAX SPEED | 4.2 GHz | 4.7 GHz | 5.0 GHz |
| GPU | Intel Iris Xe Graphics | Intel Iris Xe Graphics | Intel Iris Xe Graphics |
| EXECUTION UNITS | 80 | 96 | 96 |
| MAX SPEED | 1.3Ghz | 1.3Ghz | 1.4Ghz |
How to update GPD Win 3 Firmware
You can update the GPD Win 3 BIOS very easily. First of all you will need to download and extract the firmware update to your Win 3. You can download the latest GPD Win 3 firmware here.
Once you have it extracted, double click on the executable file and the updater software will display. After a few checks for system versions, you will be prompted to update.
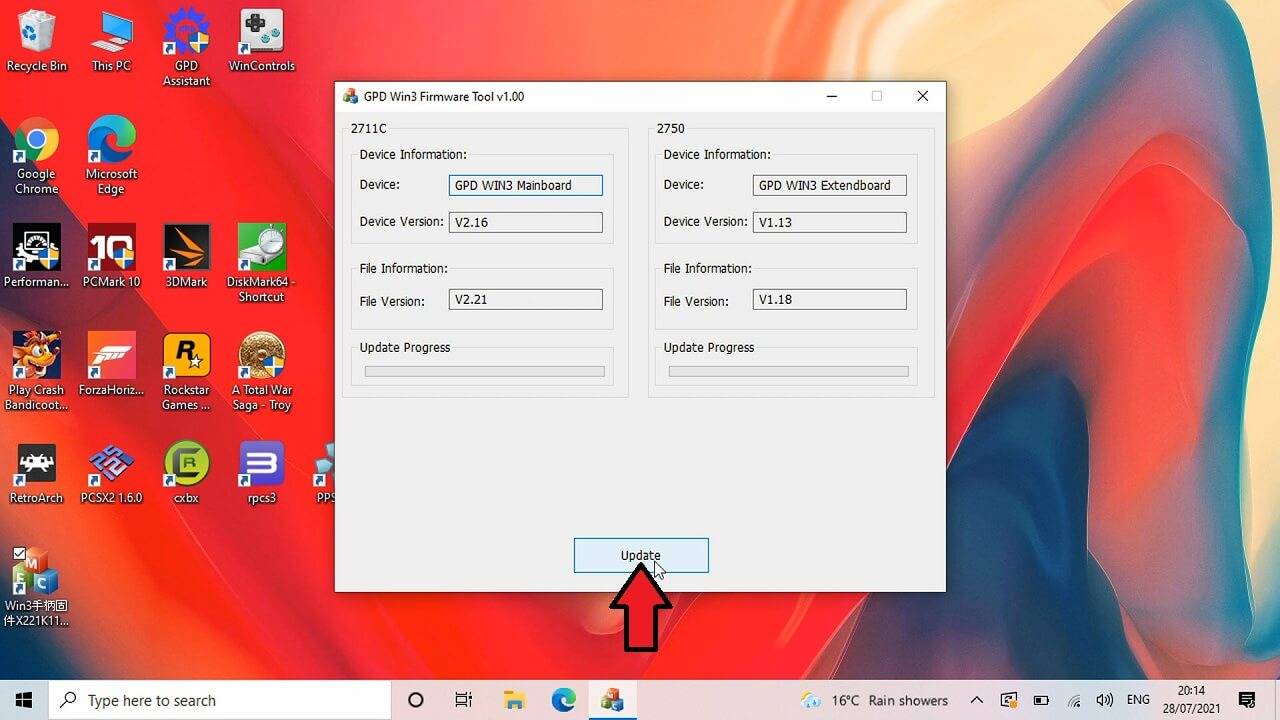
Click the update button and it will start the update process. During this time, do not switch off the Win 3 or close the software.
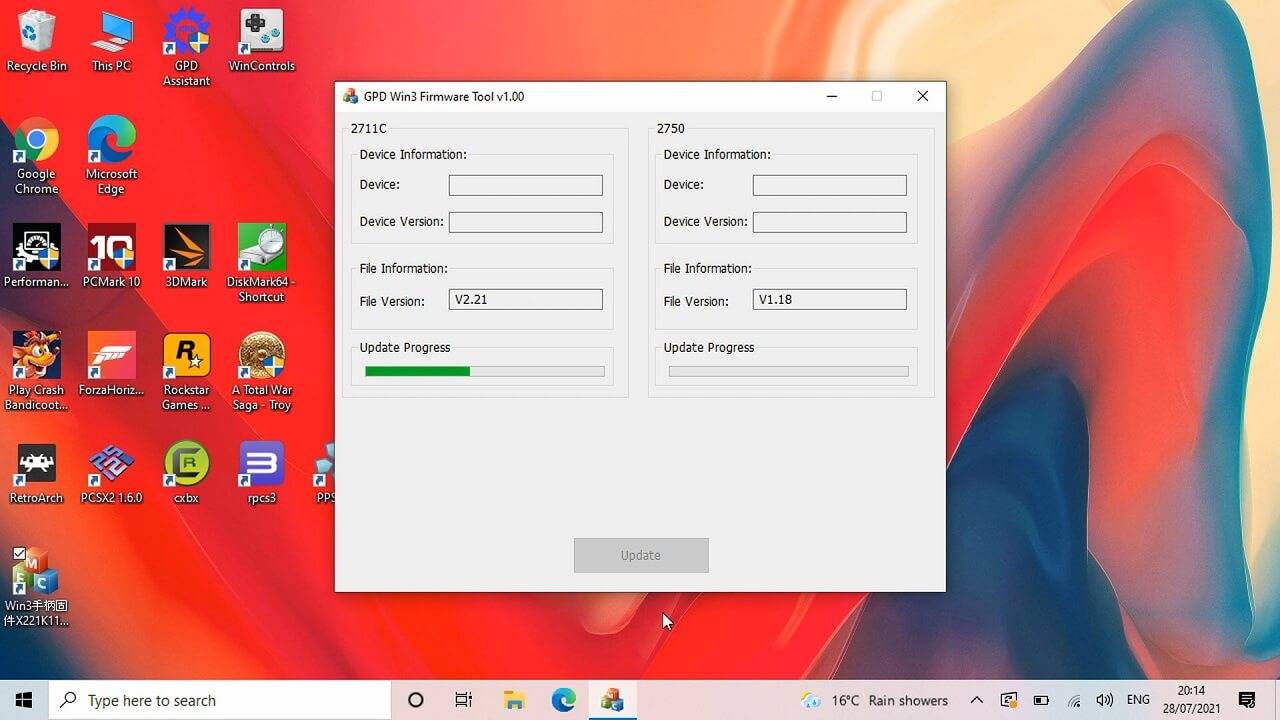
After a few moments you will be notified that the update is complete with confirmations in green text.

You can now close the software and reboot the GPD Win 3 to apply the update.
How to reset Windows on GPD Win 3
If you have the original Windows install on your GPD Win 3, you can quickly reset Windows back to when you first received it. Before factory resetting Windows, please ensure your GPD Win 3 is fully charged.
There are two ways to do this. The first is to simply press the F7 button on the keyboard just after you power on the GPD Win 3. This can however be tricky to do as there is a one second timeframe to press the button and you may miss it.
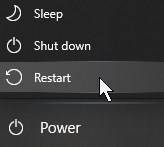
The second method is if you still have access to Windows. On the Windows desktop, open up the Windows Menu, then select the Power icon. Now, hold down the Shift key and select the Reset option. You’ll then be taken into the advanced start-up settings menu.

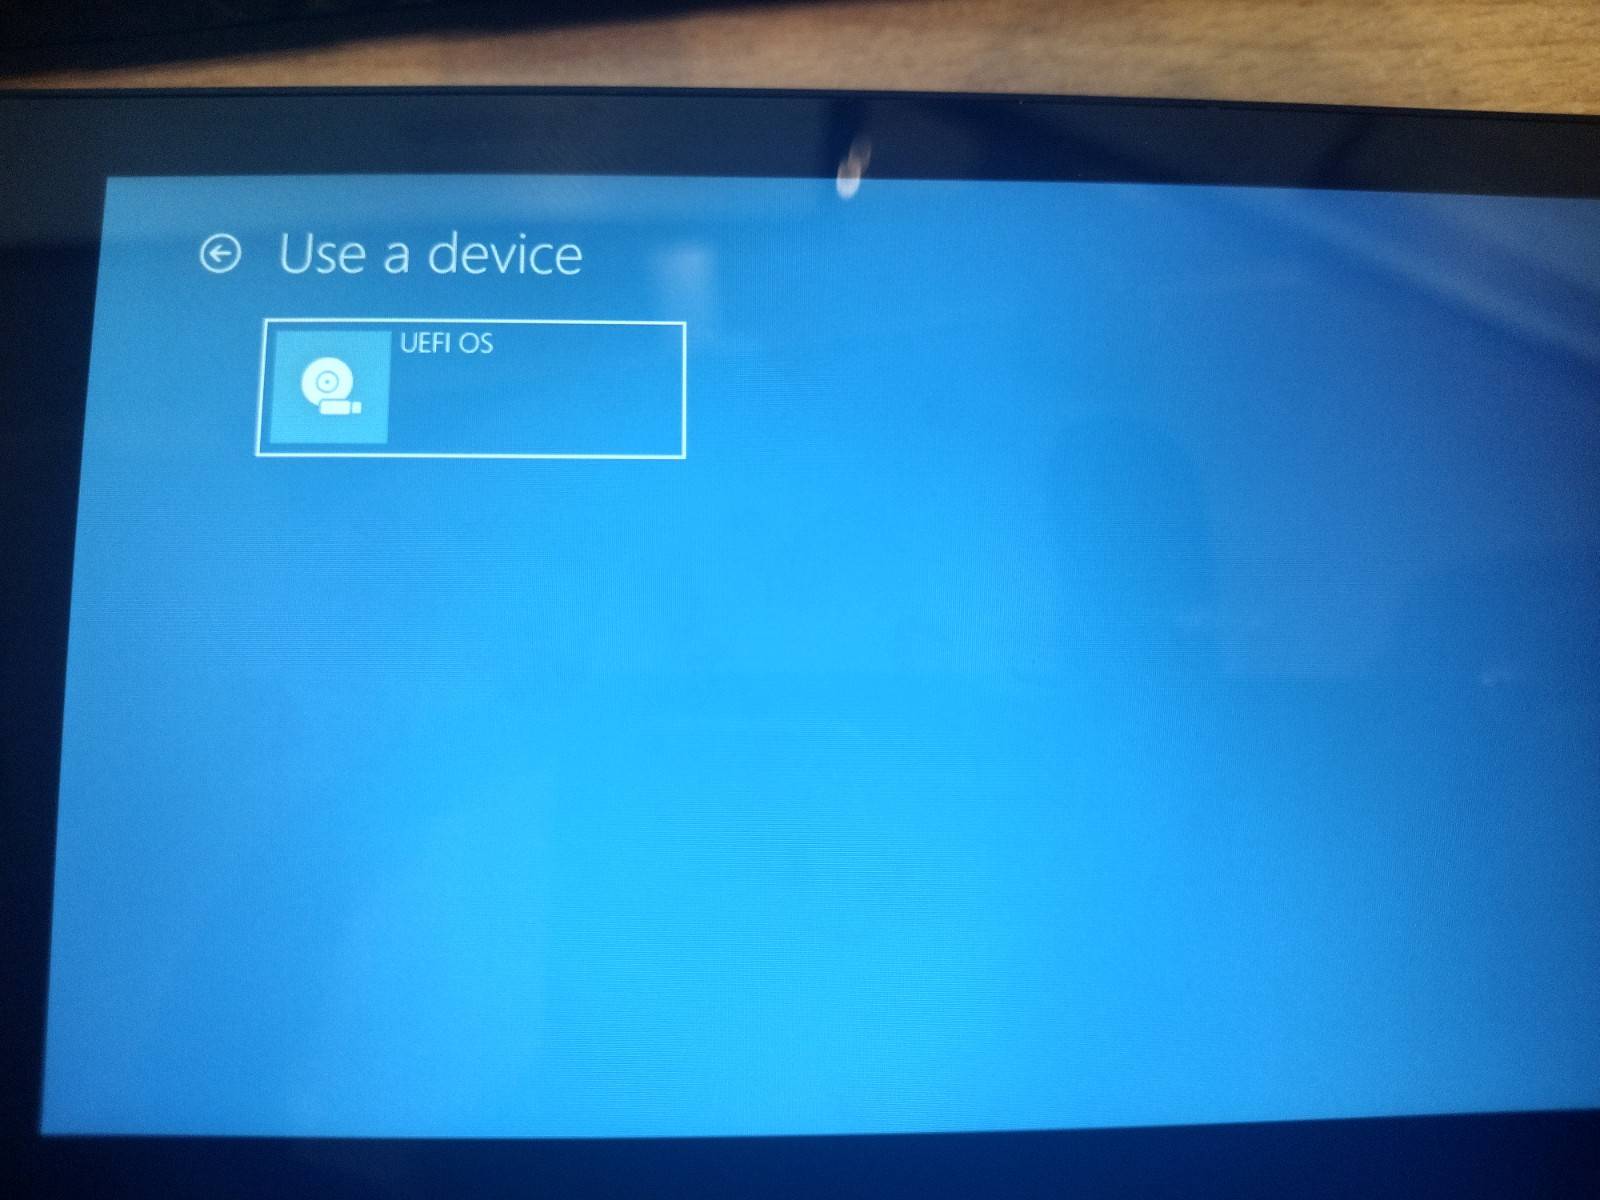
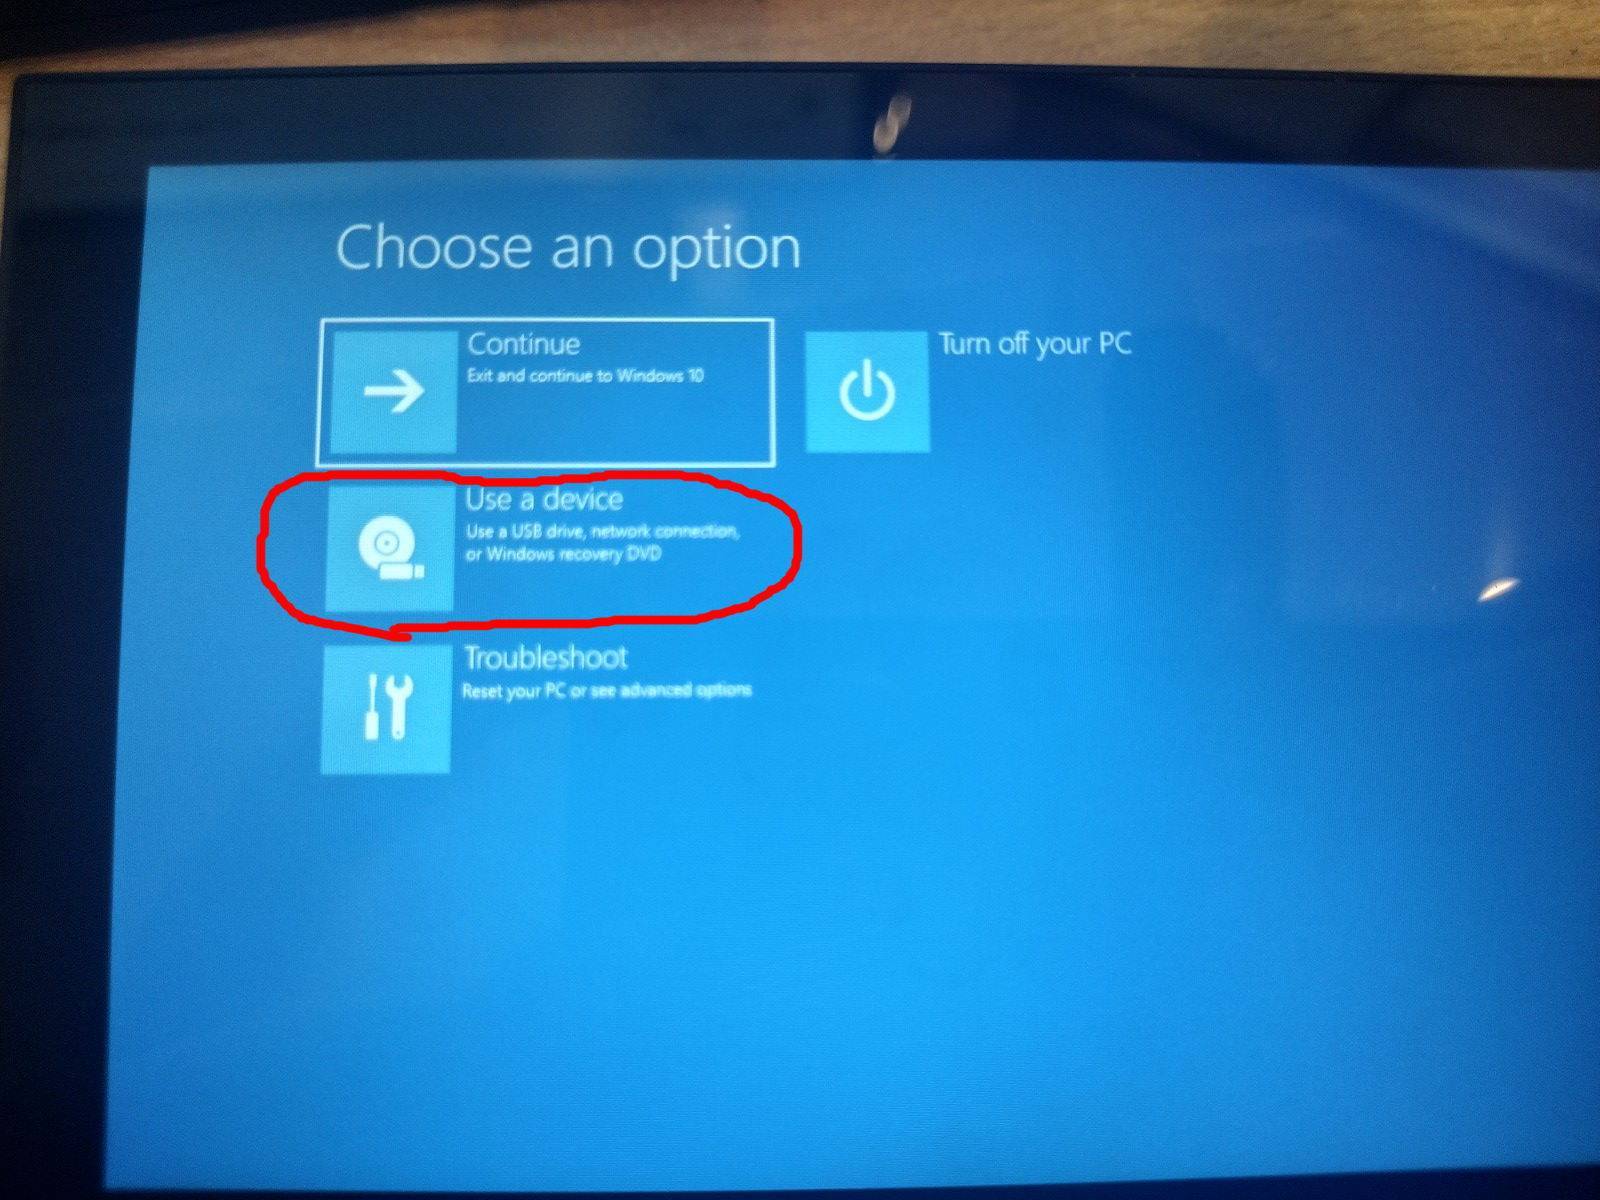
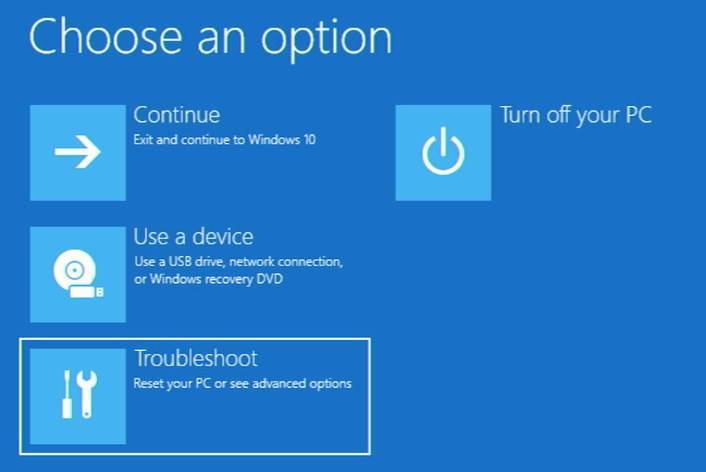
From here, select Use a device

Then select UEFI OS. The system will then boot into the recovery partition.
Press Start and the process will begin. The process typically takes about 15 minutes. After which, your GPD Win 3 will automatically reboot into a fresh installation of Windows, with all prior data wiped.
How to reinstall Windows on GPD Win 3
So you tried a factory reset, but that didn’t fix your issue? The next step in troubleshooting your Win 3 would be to re-flash the firmware for the device. (Or in other words: reinstall Windows on the GPD Win 3).You will need:
- A 16GB (or greater) USB Flash Drive
- A PC capable of downloading files
DISCLAIMER: This will remove all data from the GPD Win 3. Back up any data or files that you do not wish to lose.
Prepare a bootable USB
The first step is to prepare the USB stick to be used for reinstallation. This is done through formatting your USB drive.
How you do this does not particularly matter (you can use Window’s built-in file formatting system, or a third-party application), however, it is important that you make sure that two parameters are correct:
- The partition must be called WINPE
- The partition must be in the NTFS file format.
If either one of these parameters is not met, the USB will not be bootable.
Download the Files for the GPD Win 3
First you’ll need to download the actual firmware. You have two choices here:
- You can download the firmware as-is the way GPD provide it. Here’s the link: https://go.droix.co.uk/GPD-WIN-3-FW-FILES
- Or you can download a pre-made image file by us. Here’s the link: https://go.droix.co.uk/GPD-WIN-3-FW-IMG
Copy the files
If you downloaded the firmware files as-is, all you need to do here is copy the firmware files over to the root of the USB drive. If you downloaded the pre-made image, you can skip to Flash the USB section below.
First, extract the zip file you have downloaded. You can either use the native tools in Windows, or you can download a third-party tool (we suggest 7zip).
Once you have extracted all the files, right click -> copy, then navigate to the USB drive and right click -> paste. (You can also CTRL+C -> CTRL+V, or cut and paste instead; whichever you prefer!)
Once copied over, the USB stick’s contents should look something like this:
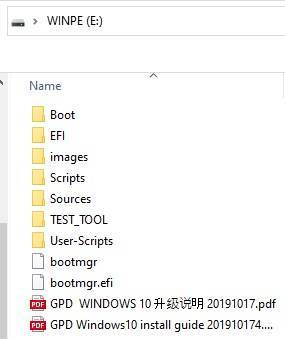
It does not matter if the PDF’s are present or not. Your USB is now ready for re-flashing. You can skip to Boot into the USB on the GPD Win 3 below.
Flash the USB
If you’ve downloaded the image file we prepared, you’ll also need to download a USB flashing tool. We personally prefer Win32 Disk Imager, but there are alternatives you can pick from such as Rufus, or ApplePi Baker (for Macintosh users).
Win32 Disk Imager is a lightweight, powerful, and easy-to-use tool for both creating and writing .img files from USB.
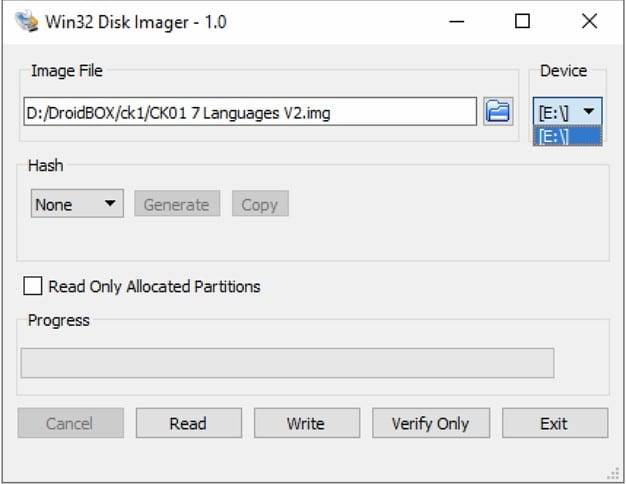
Make sure your USB drive is inserted, and you have the image file downloaded.
Under Device, select the drive letter that corresponds to the USB drive. If there is only one Hard Drive/Solid State Drive in your computer, the USB will probably automatically be assigned the drive letter D:\ , but make sure to check!
Under Image File, navigate to the image you downloaded previously. It doesn’t really matter where its saved, as long as you can find it (and it won’t be moved during this process)
Then, click Write, and the process will begin. This will probably take around 30 to 60 minutes depending on the speed of your computer and the connected USB ports (you can use the PC for other things in the meantime, just make sure not to disconnect the USB drive, add/remove any files to the USB drive or close the application!).
When the bar is filled and you get the popup informing you that the imaging is complete, it’s safe to remove the USB drive.
Boot into the USB on the GPD Win 3
Finally, you must boot into the USB you have made in either of the two previous steps.
To do this, insert the USB into the USB port at the top of the GPD Win 3. Then power on the device and repeatedly press the F7 key to access the boot menu.
We find that this is inconsistent however due to the speed at which the device boots up (making it difficult to hit within the timeframe). If you can’t do this, you can instead enter Windows, open the start menu, then hold the SHIFT key while selecting Restart.
Hold shift while selecting Restart to access the Windows 10 Advanced Boot options.
Select Use a Device from the menu that appears, and then select the device that corresponds to the USB you have used. For example: if you have used a Kingston USB, it might be called something like “Kingston DataTraveller”.
The re-installation process will now proceed automatically. You’ll be met with a command line interface on a blue background like this, as the system performs the necessary steps to wipe your device and reinstall Windows.
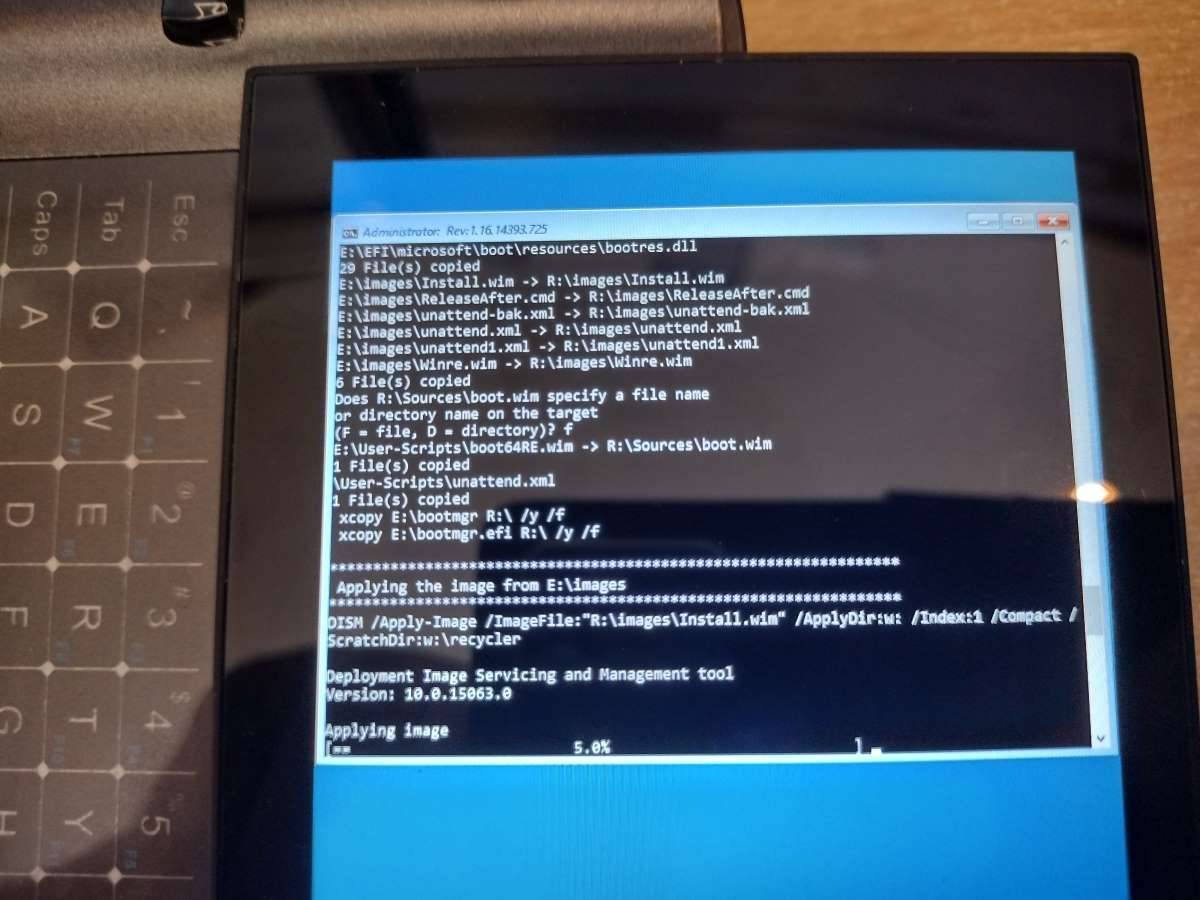
If you see something like this, you’re good. Make sure it has enough charge and leave it be.
Once completed, the system will reboot automatically into a fresh install of Windows (it will not turn off after installation)!
Now your system has been re-flashed. Enjoy your fresh install of Windows!
How to install RetroArch on GPD Win 3
You can watch our video guide on how to install RetroArch for retro gaming on the GPD Win 3, or if you prefer a text and image based version just below.
First you will need to download the RetroArch software.
Open your browser and go to retroarch.com. You will see the Download menu option, choose this and scroll down a little.
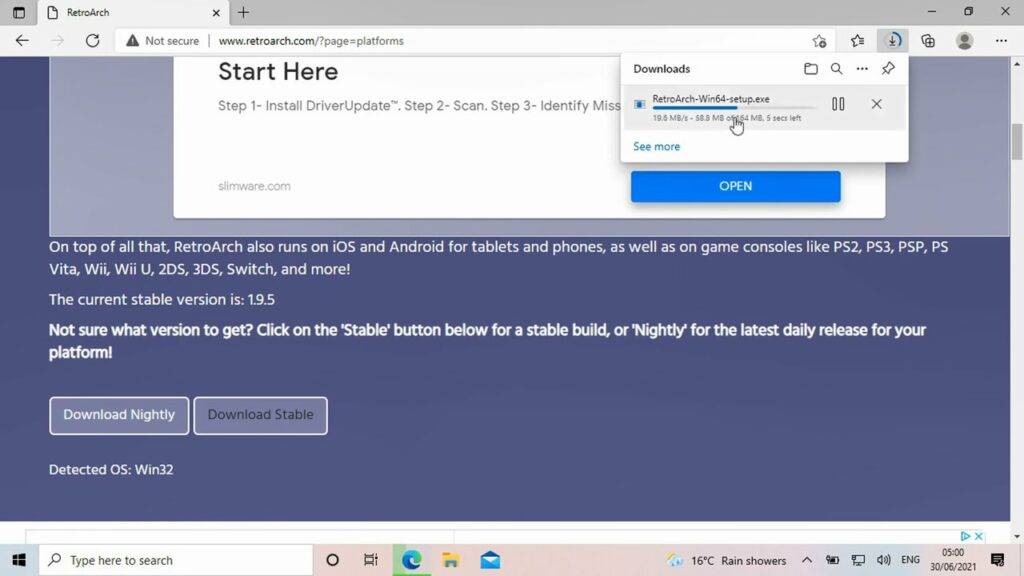
You will see an option to download Nightly which is the very latest version, but may have some bugs. Or Stable, which can be a slightly older version but should have no bugs. We recommend downloading the Stable version.
Once RetroArch has downloaded, click on the download to start the install.
Follow the prompts to proceed to install. You can optionally install DirectX if you already have it installed.
Setting up ROM Folders
Once the software is installed you can go ahead with setting up your ROM folders.
Make a new folder called ROMS and enter into it.
Next create a new folder for the system your ROMs are for, in this example we are using Genesis games.
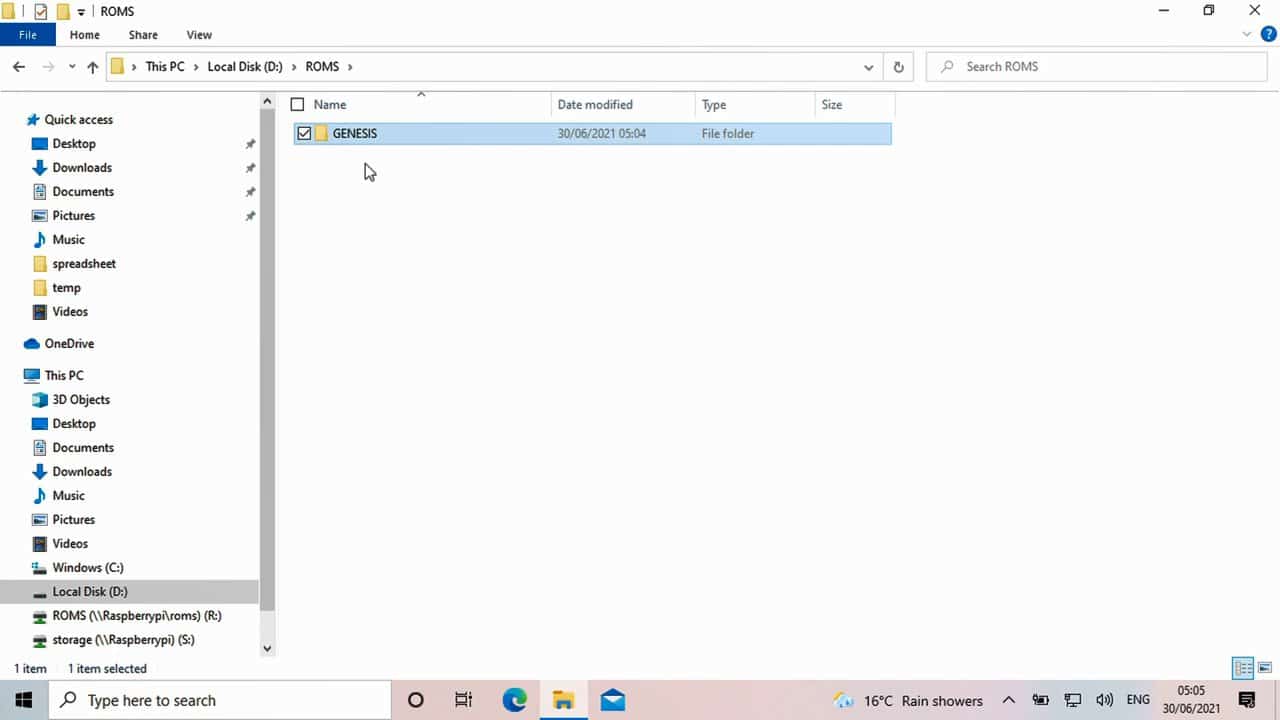
You can now copy your Genesis games to that folder. Repeat the process for any other systems and games you may have.
Loading RetroArch
When you are ready you can load the Win 3 RetroArch software.
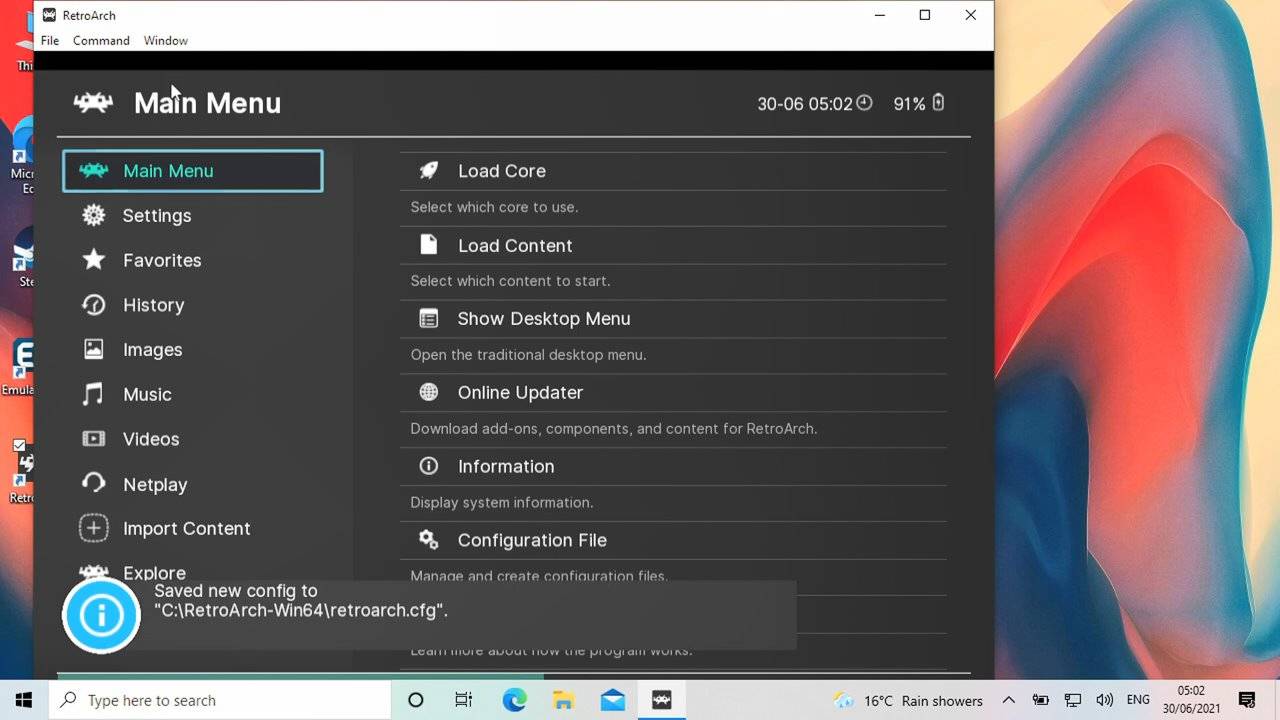
You can use the Win 3 controls to navigate the menus.
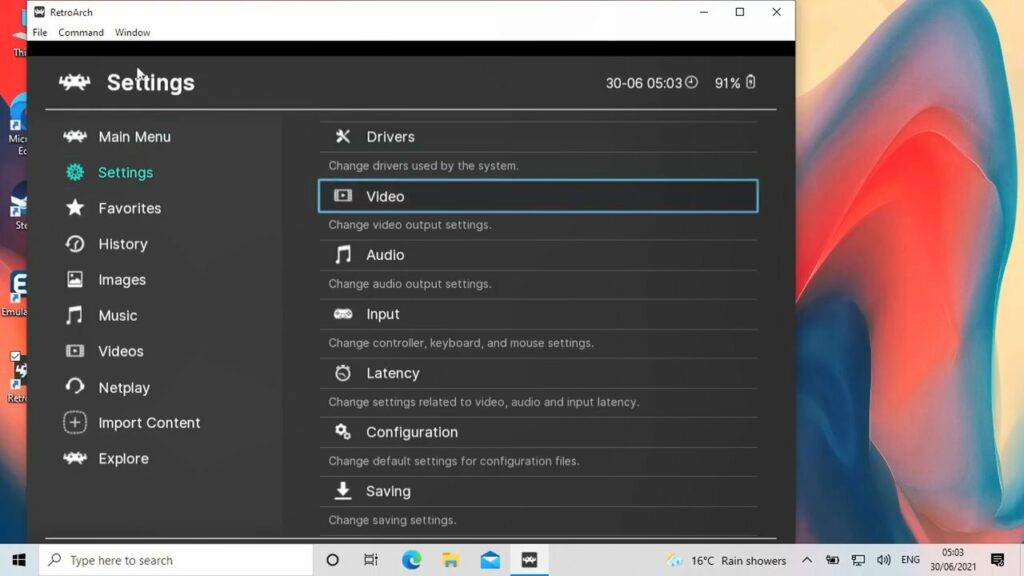
How to go full-screen in RetroArch
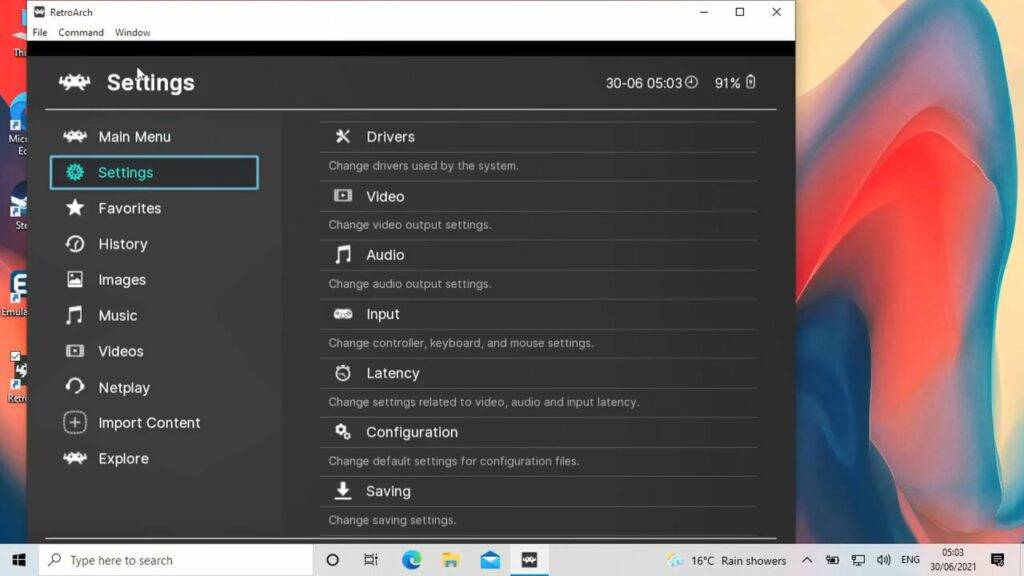
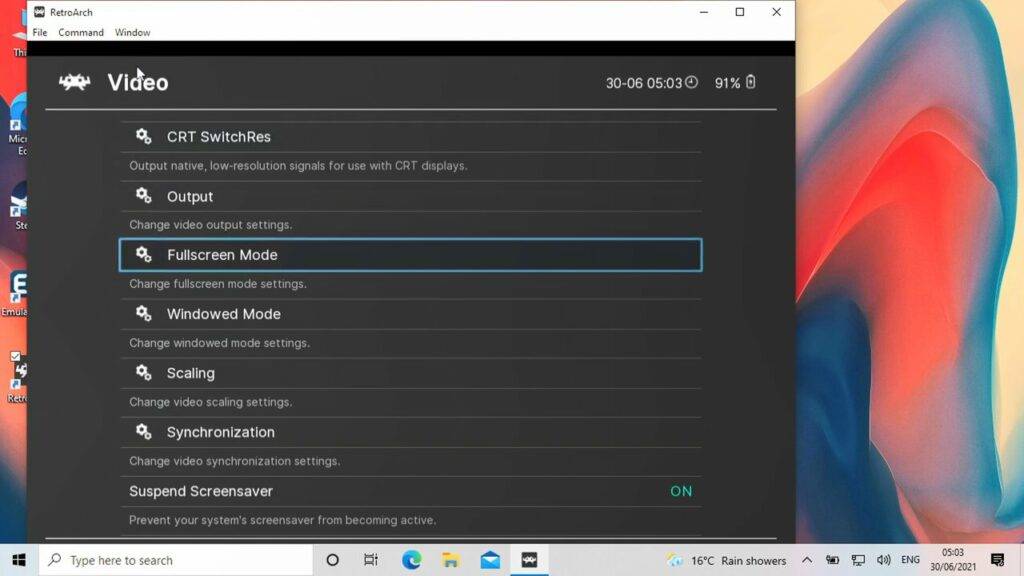
Firstly, you can make the Window full screen by going to Settings…. Then Video…. And then Fullscreen Mode. Then select Start In Fullscreen Mode and change it to ON. The software will restart and now be in full screen.
Installing RetroArch Cores
Next we want to install the emulators, known as Cores in RetroArch, for the systems you have games for.
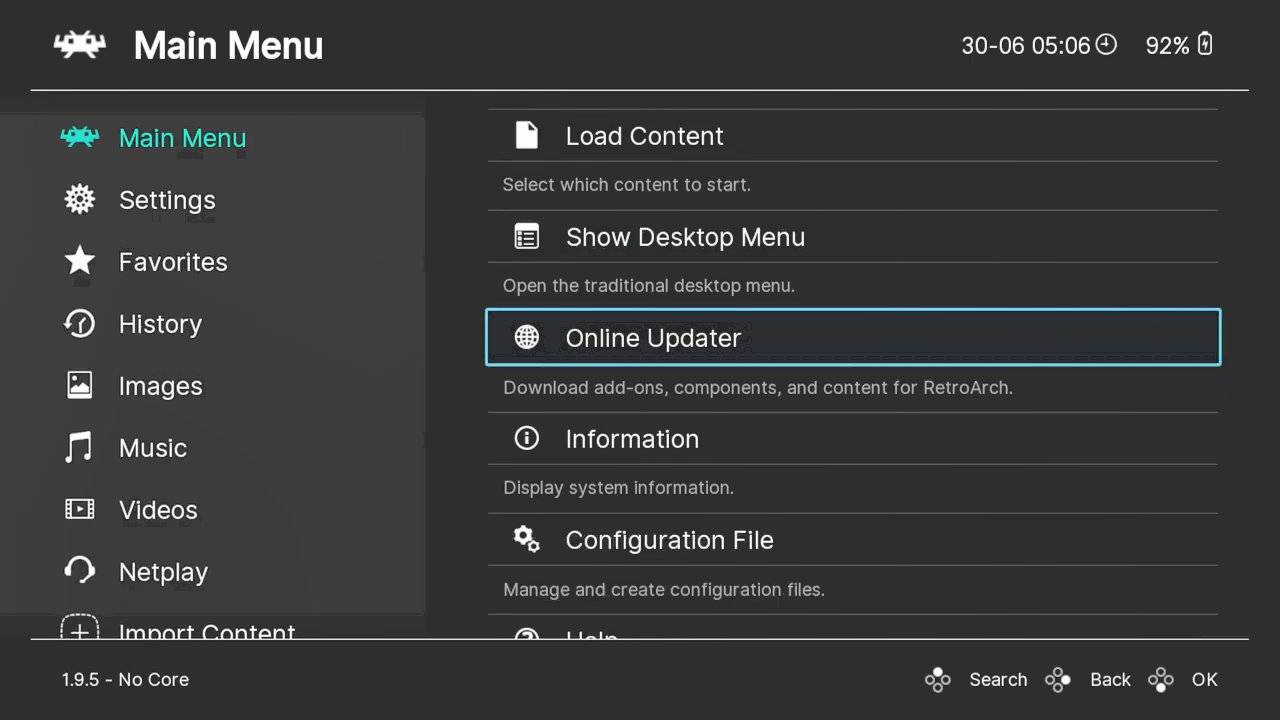
Choose Main Menu…. then Online Updater… then Core Downloader…. This will give you a list of all of the supported gaming systems and Cores available to download.
Navigate the list to your system, in this example we are downloading SEGA Genesis.
There may be multiple cores available for your system. Pick one and give it a try, you can always download and try another later.
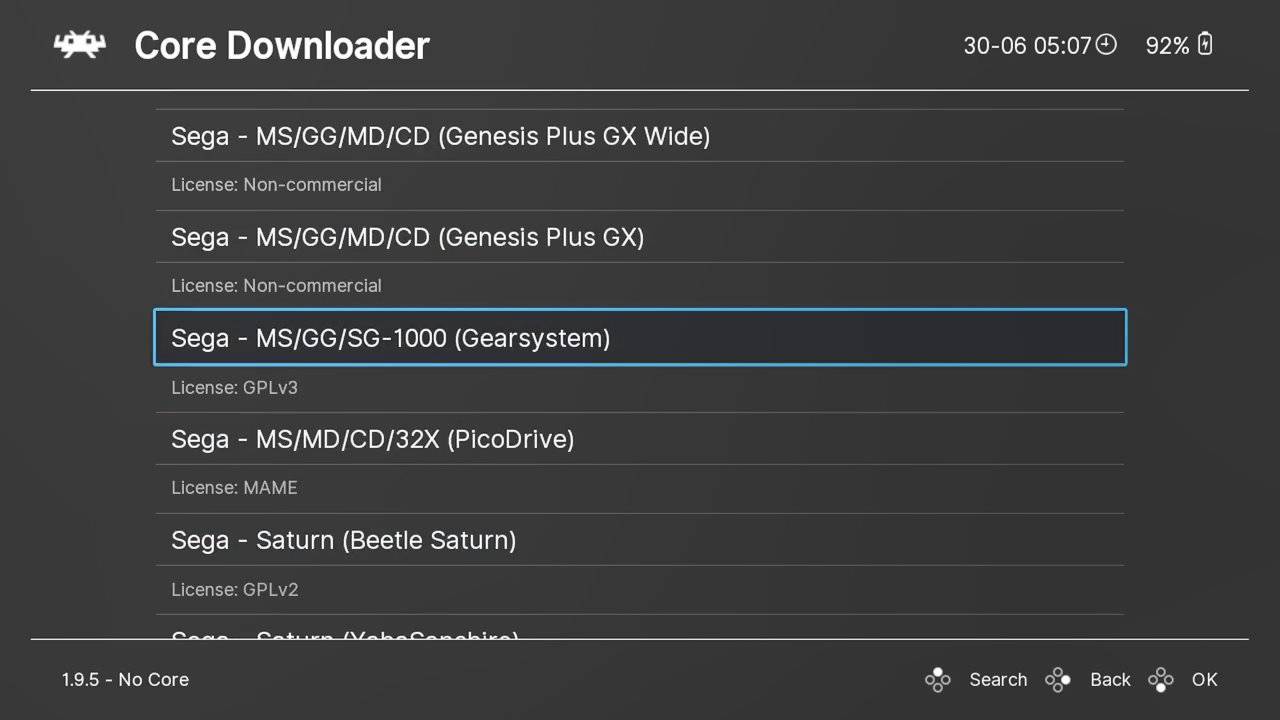
Download any cores that you need for the systems you have games for.
Scanning for your games
Next we need to add your games to the software so that you can access them without using any frontends.
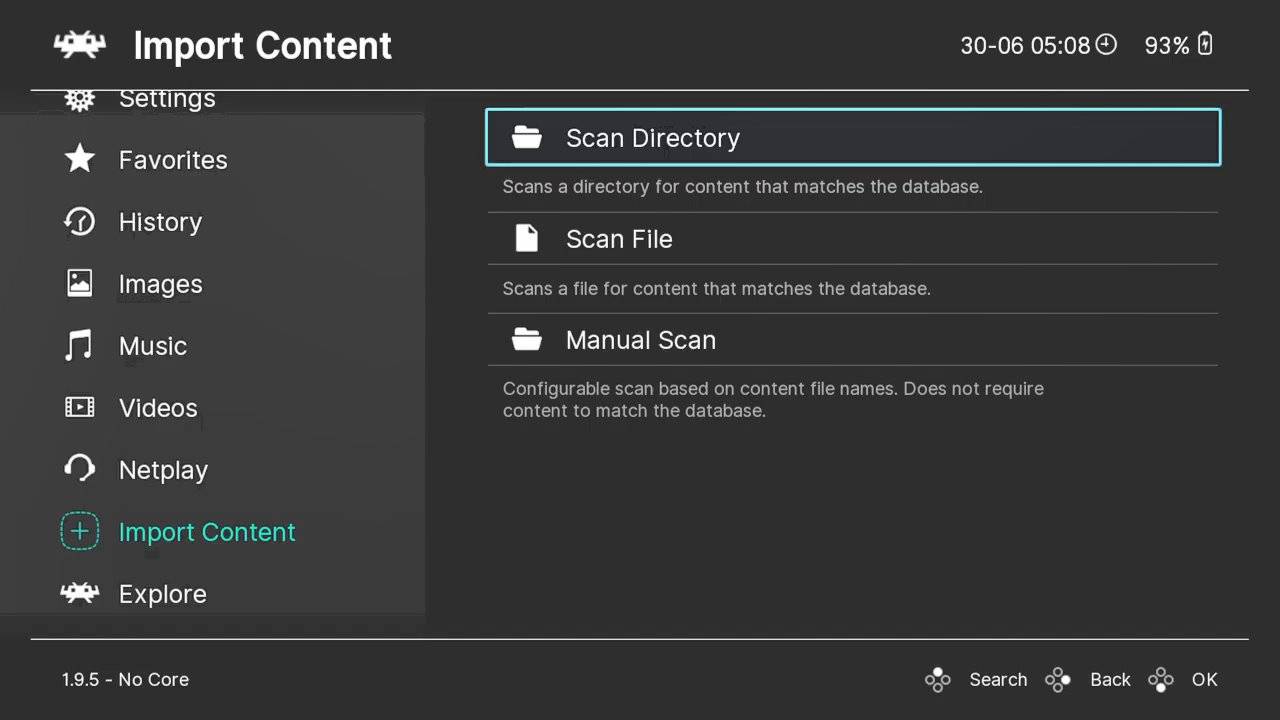
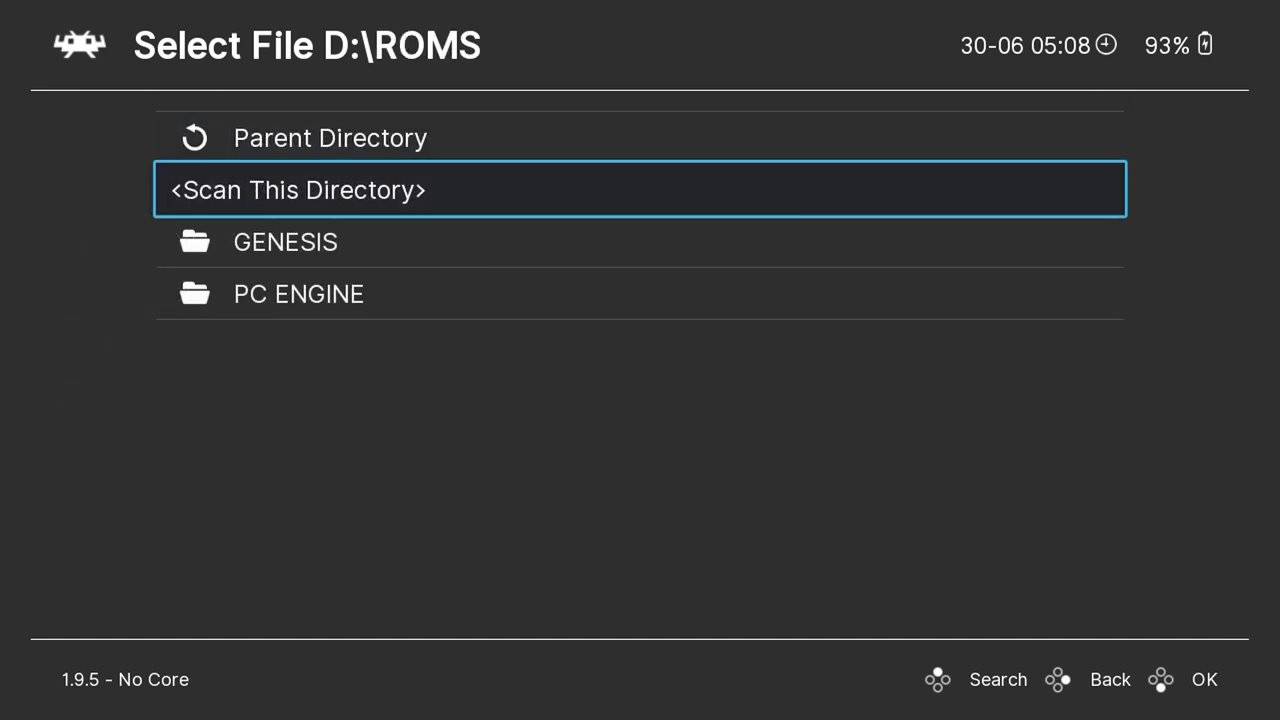
From the main menu, scroll down to Import Content…. Then Scan Directory. This will bring up a list of your drives and folders. Navigate to your ROMs folder created earlier.
Then choose the Scan This Directory option.
It will now proceed to scan the folders for recognised games and add them. Depending on how many games you have, this may take a few seconds to far longer. A progress bar will show to indicate the time.
Loading a game
Once it has completed, return back to the main menu.
Scroll down the menu and below Explore you will now see any new Systems that were found in the scan. Choose a system and it will now show any games it found.
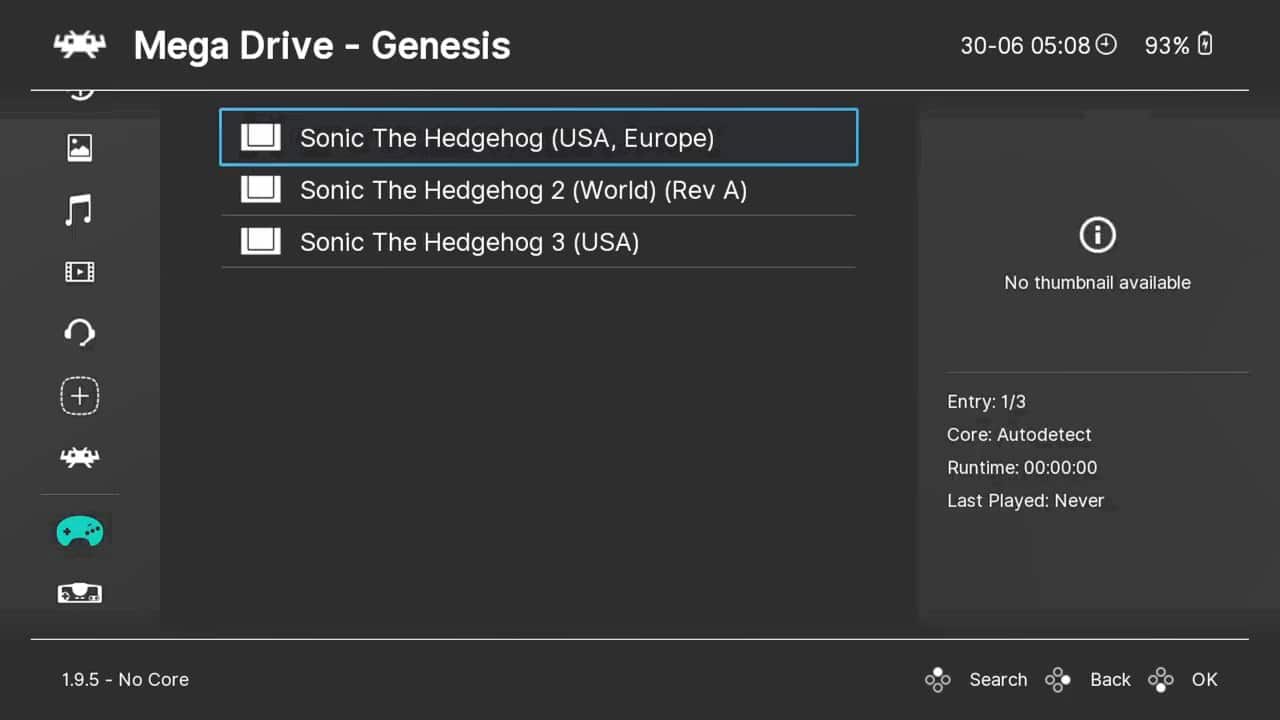
Choose a game and it will display a new menu. Select Run and it will then display a list of available Cores which can run the game. Select a Core and then Run to start the game.
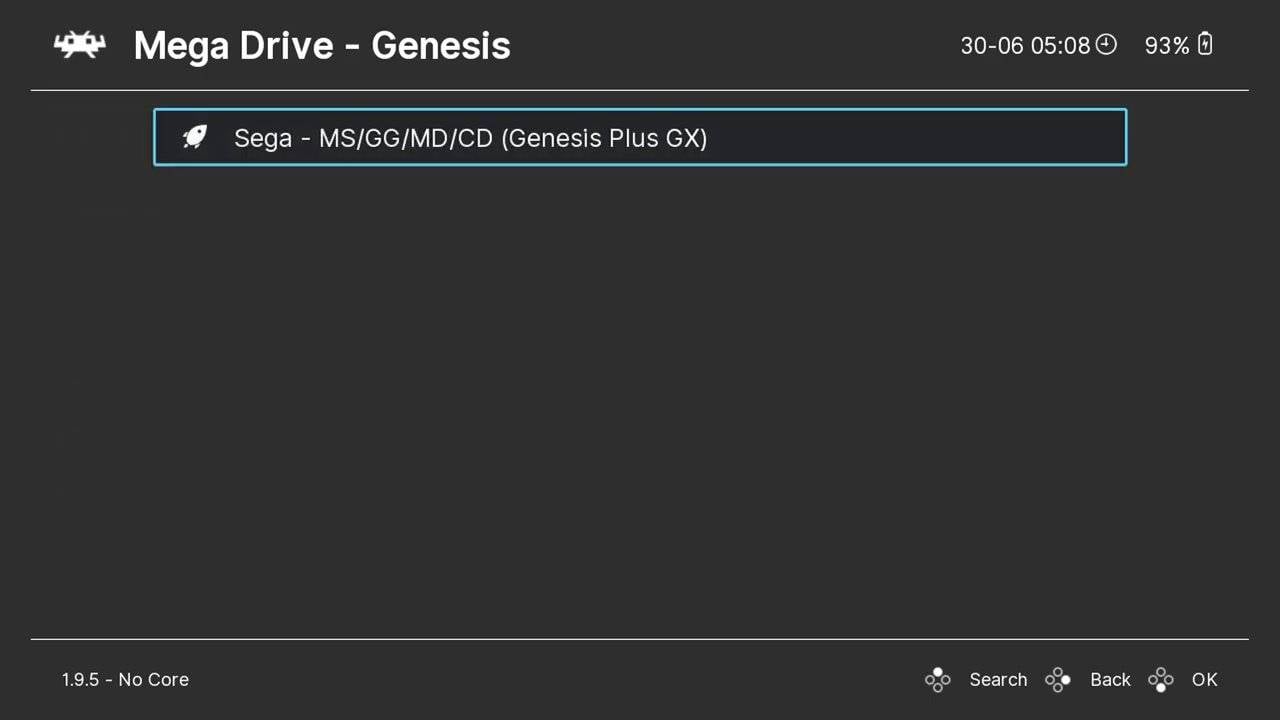
You can set up Core Association with systems to skip having to choose one.
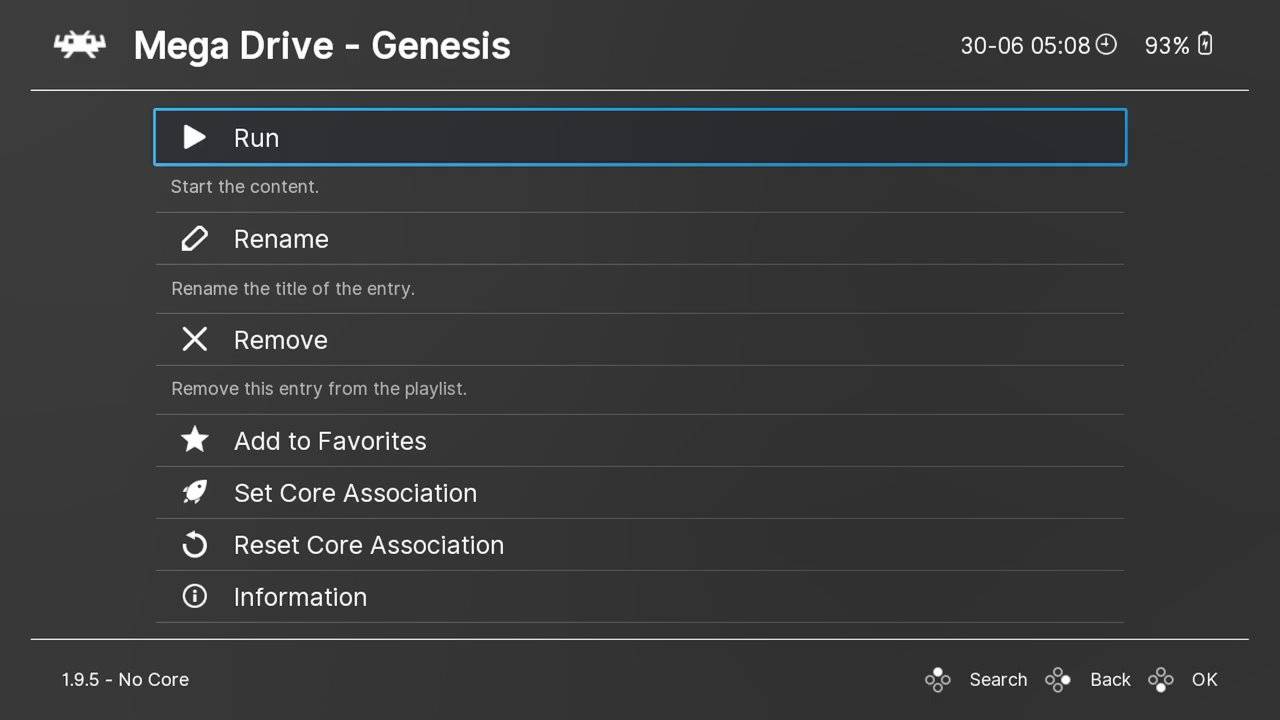
Select Run to start the emulator and enjoy some Retro Gaming!
How to extend the GPD Win 3 Battery Life?
There are a few steps you can take to help extend the battery life on GPD Win 3. Some of these may decrease system performance when used. So if you notice games running slower than before for example, you can revert the changes.
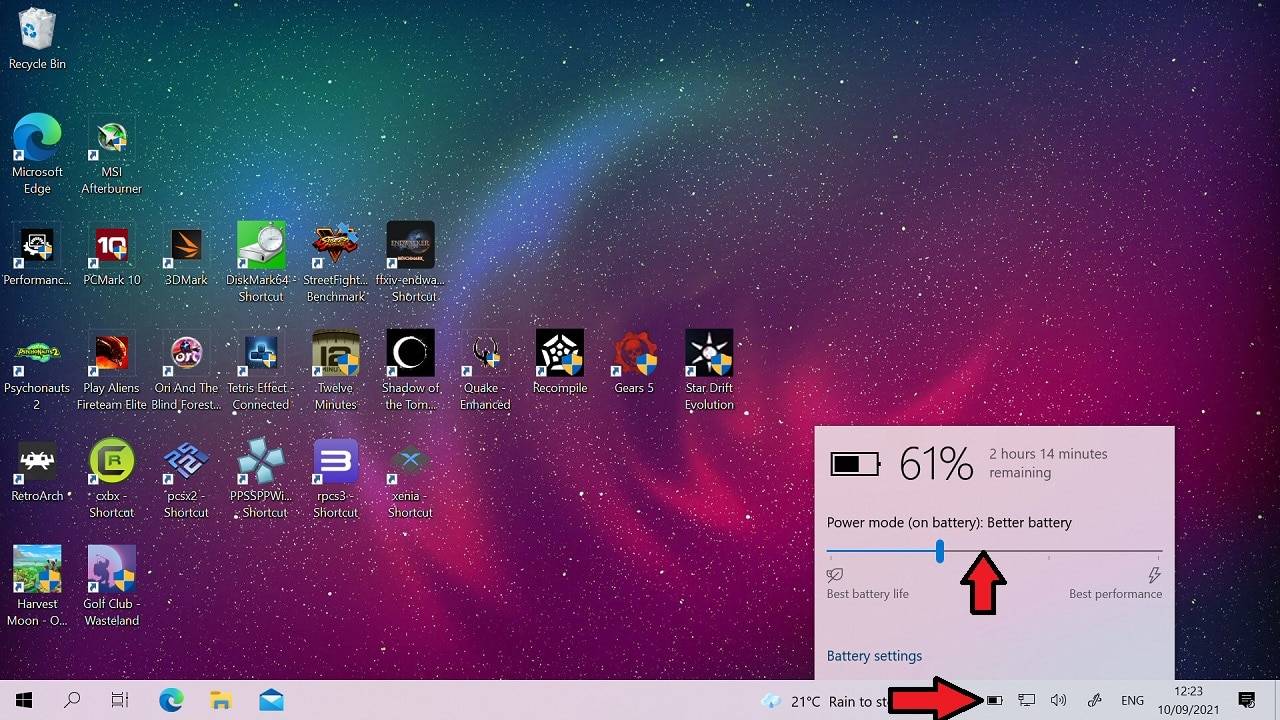
Windows Power Mode
The quickest and easiest way to extend the battery life is through Windows Power Mode. Click on the battery icon on the task bar and you can move the slider from left to right from Battery Saver to Best Performance.
Switch off WiFi and Bluetooth
If you are not online or using any Bluetooth peripherals then switching of WiFi and Bluetooth are great for extending battery life.
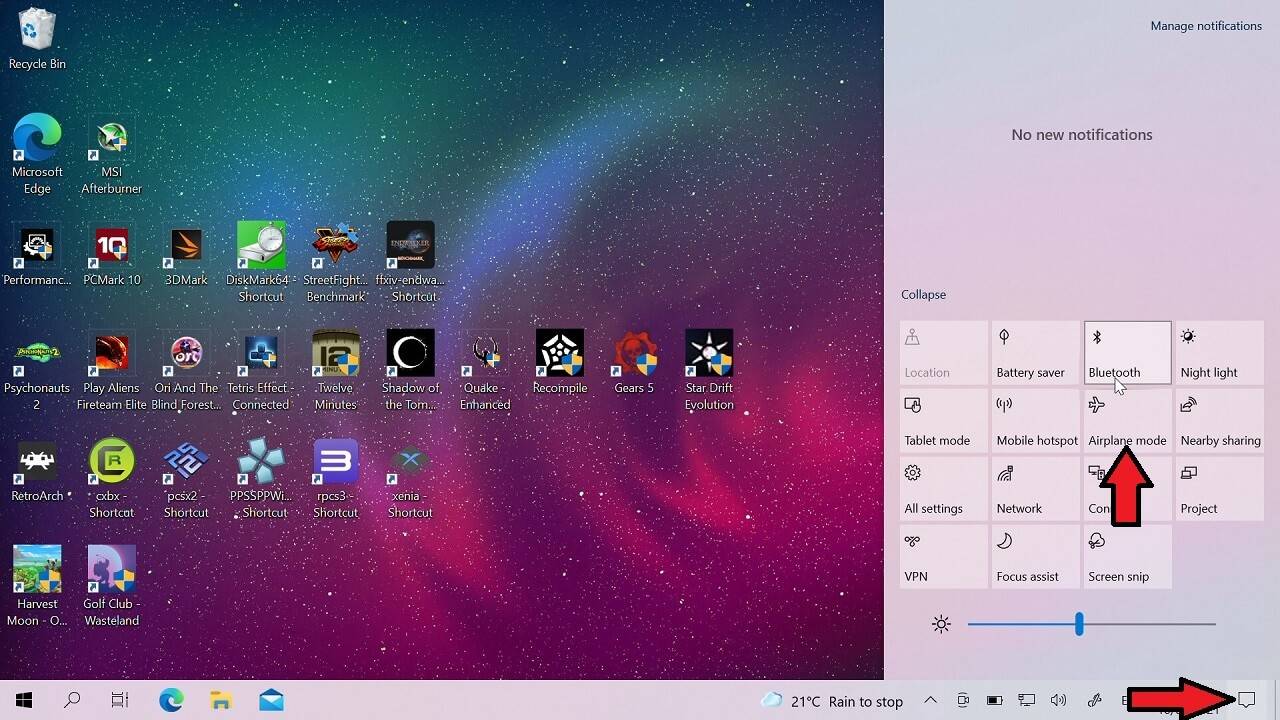
Airplane Mode
To quickly and easily switch off everything you can simply put the Win 3 into Airplane Mode.
-

Click the notification icon. And then click on the Airplane Mode to enable/disable it. This will switch off both WiFi and Bluetooth.
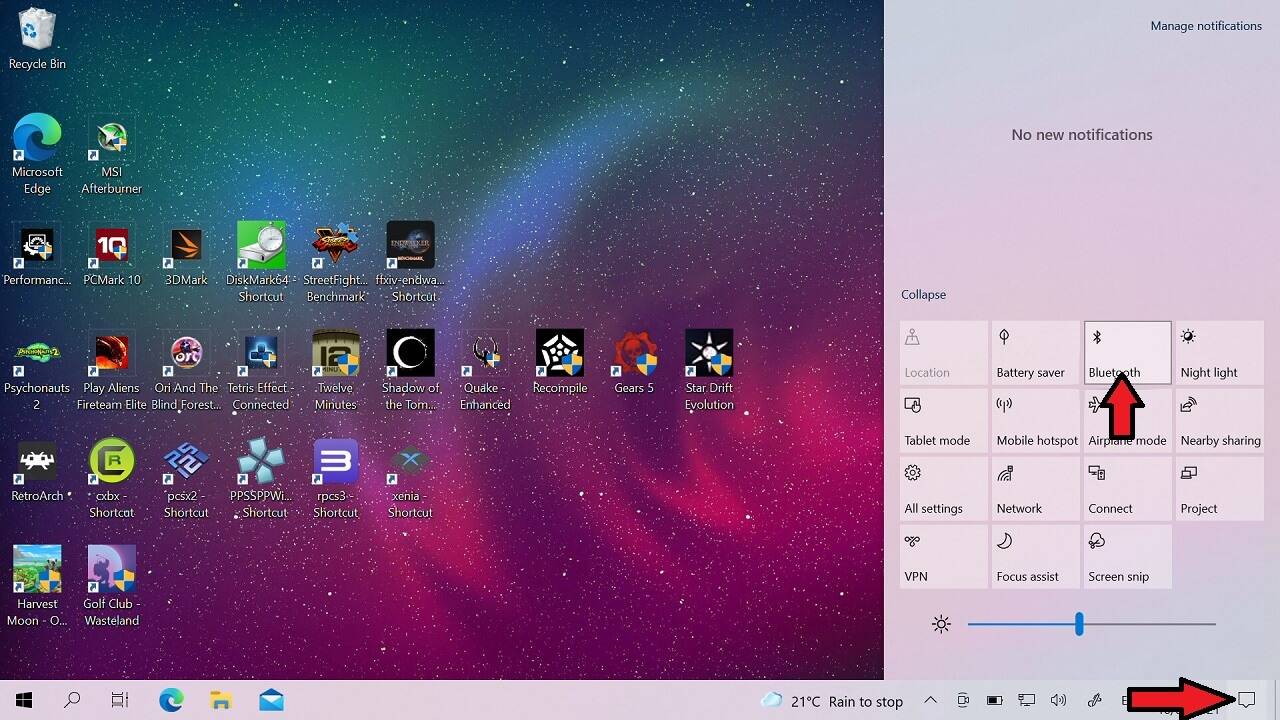
Switch off Bluetooth
-
Click the notification icon. And then click on the Bluetooth icon to switch it off/on.
Switch off WiFi
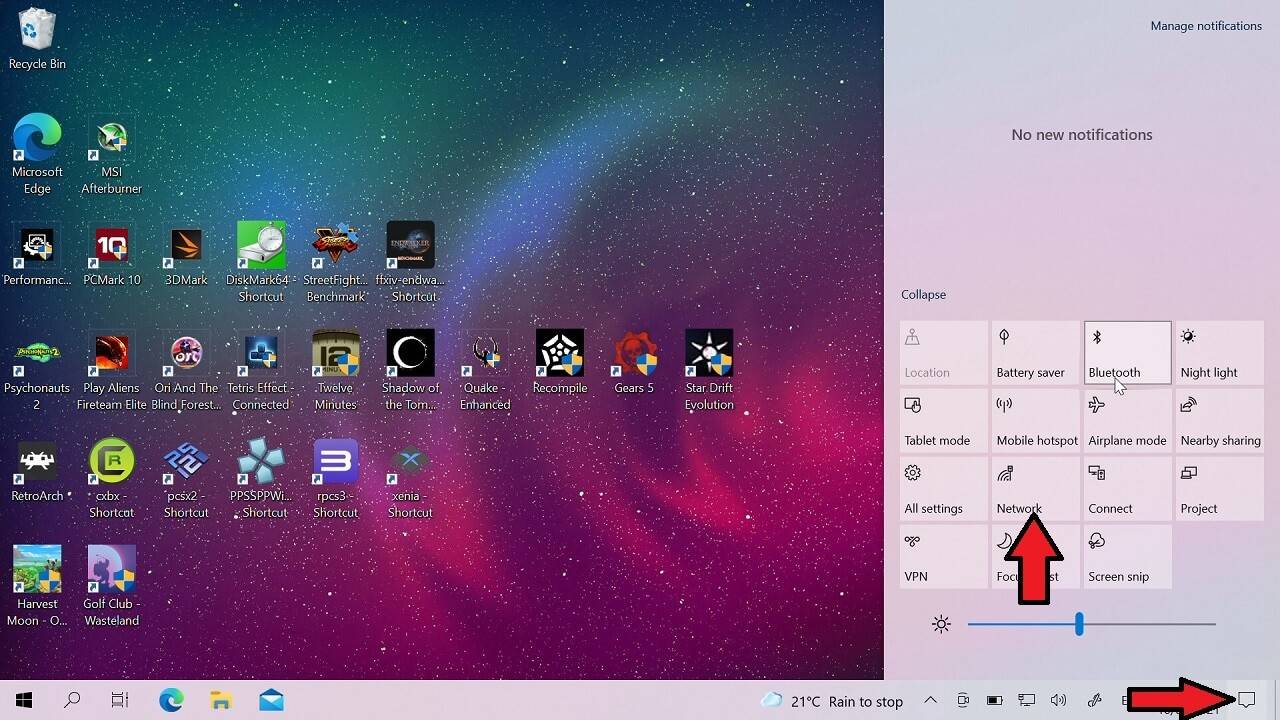
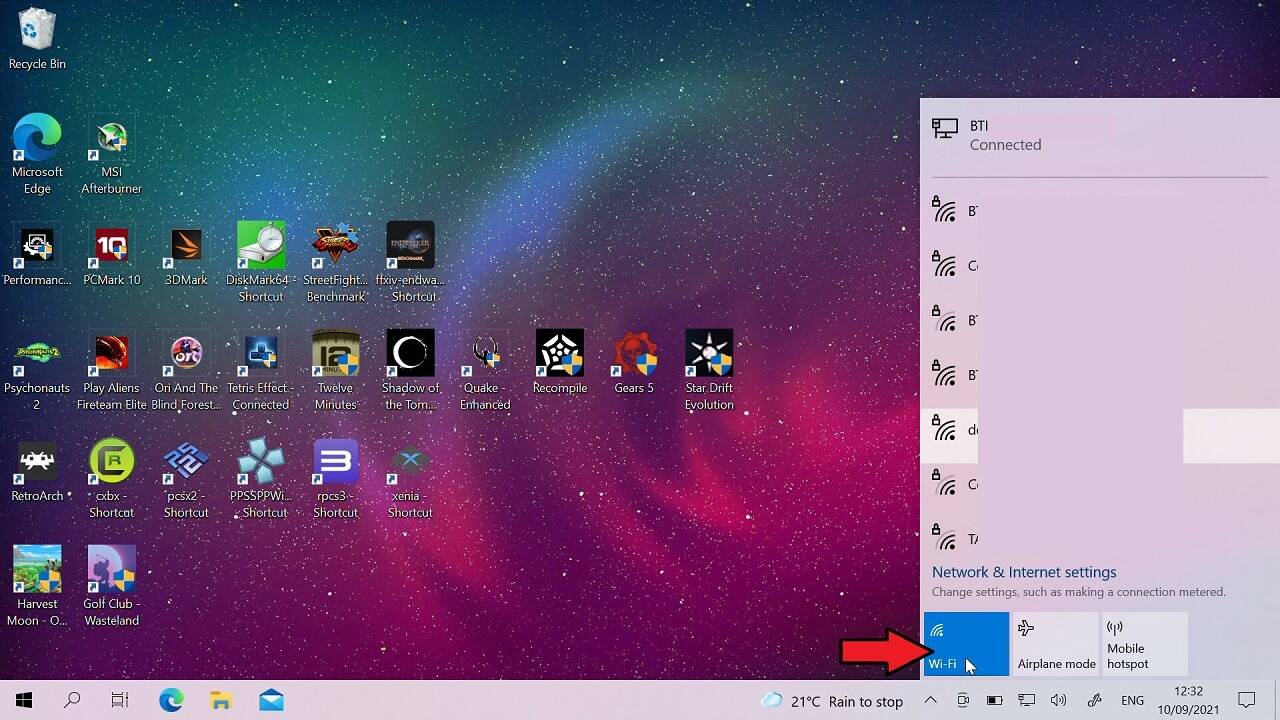
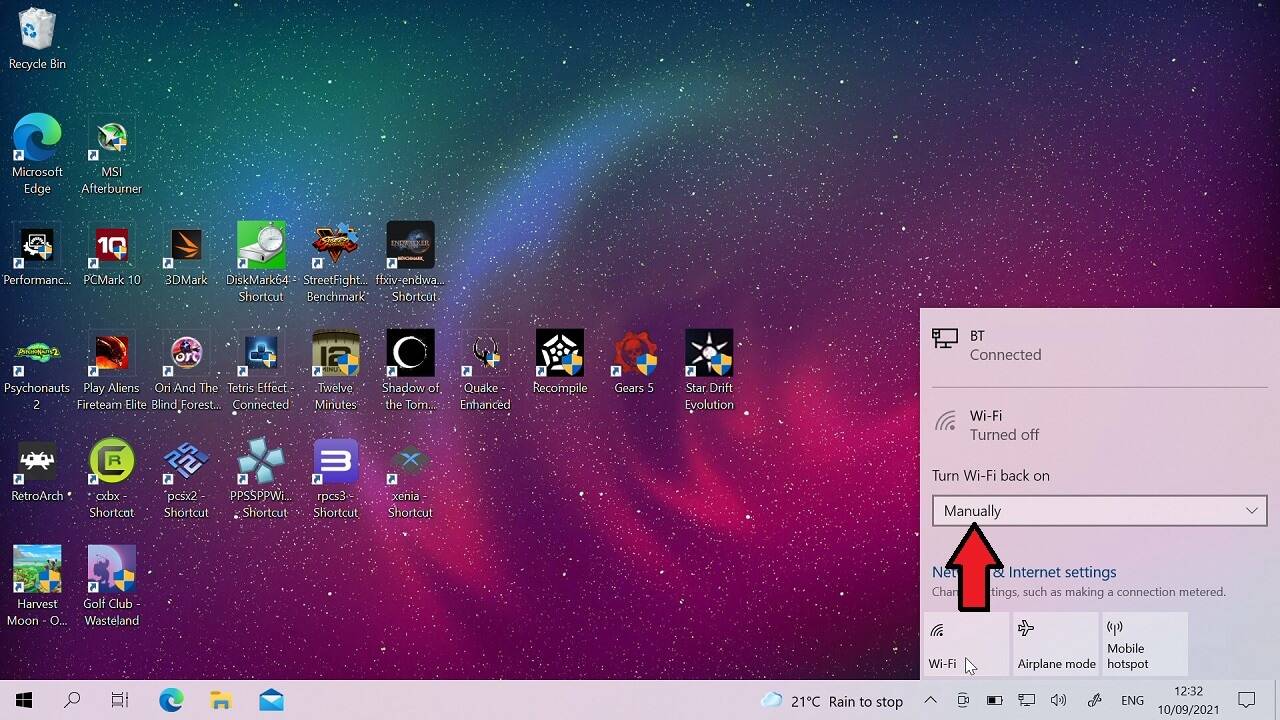
Click on the notification icon, then choose Network. Click on WiFi to disable it. You can set when to re-enable WiFi from the following menu.
Change the screen brightness
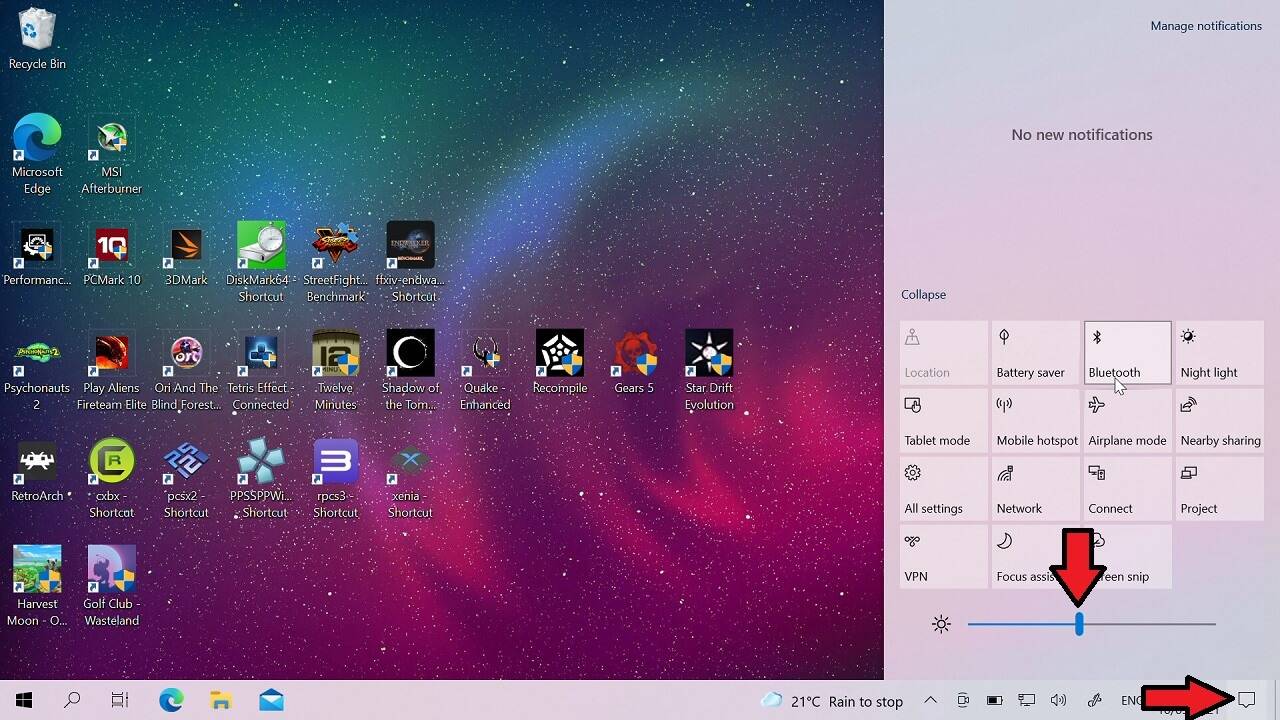
Click the notification icon. You can move the screen brightness slider from left to right to decrease and increase the brightness.
Lowering the GPD Win 3 TDP
You can lower the Win 3 TDP to reduce the devices power usage and heat generated at the cost of overall performance. This is covered in full detail below.
How to Change the GPD Win 3 TDP
You can read more information about what is Thermal Design Power (TDP) and the pros and cons of using it on our blog post here.
In short, increasing or decreasing the TDP will increase or decrease the available amount of power to the GPD Win 3. This means you can increase the performance for more demanding games at the cost of using more battery power and heat generation. Decreasing it will reduce battery usage and also keep cooler, but at the cost of lower performance.
Changing the TDP on the Win 3 is relatively straightforward compared to when using Windows software to make custom changes. There are three TDP settings built in to the GPD Win 3 which can be changed in the BIOS menu.
Accessing the GPD Win 3 BIOS menu
There are two ways to do this. The first is to simply press the F7 button on the keyboard just after you power on the GPD Win 3. This can however be tricky to do as there is a one second timeframe to press the button and you may miss it.
The second way is to access the BIOS via the Windows Boot Menu. When you are logged into Windows, go to Start Menu and then navigate to the Power icon. Hold the Shift key and choose the Restart option.
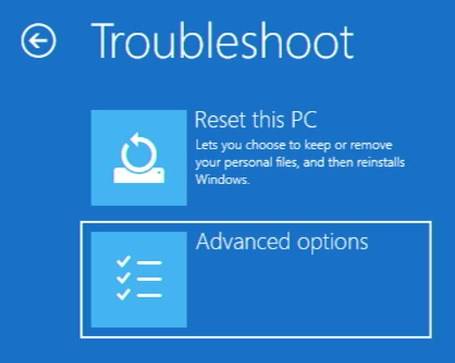
You will reboot into the Windows boot screen. Choose Troubleshoot.
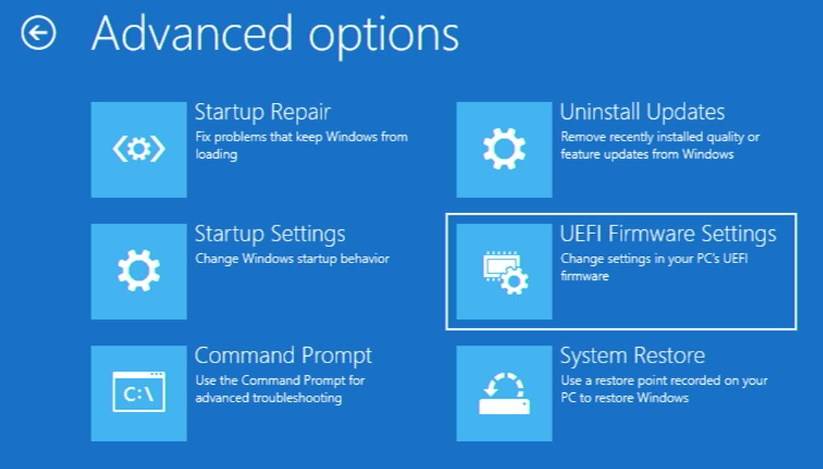
Then Advanced Options.
Choose UEFI Firmware Settings and you will be taken to the BIOS menus.
GPD Win 3 BIOS Menu
Press the Right direction keyboard key to go to Settings. Scroll down the menu to Configurable TDP Boot Mode. Pressing the Enter key will bring up three menu options:
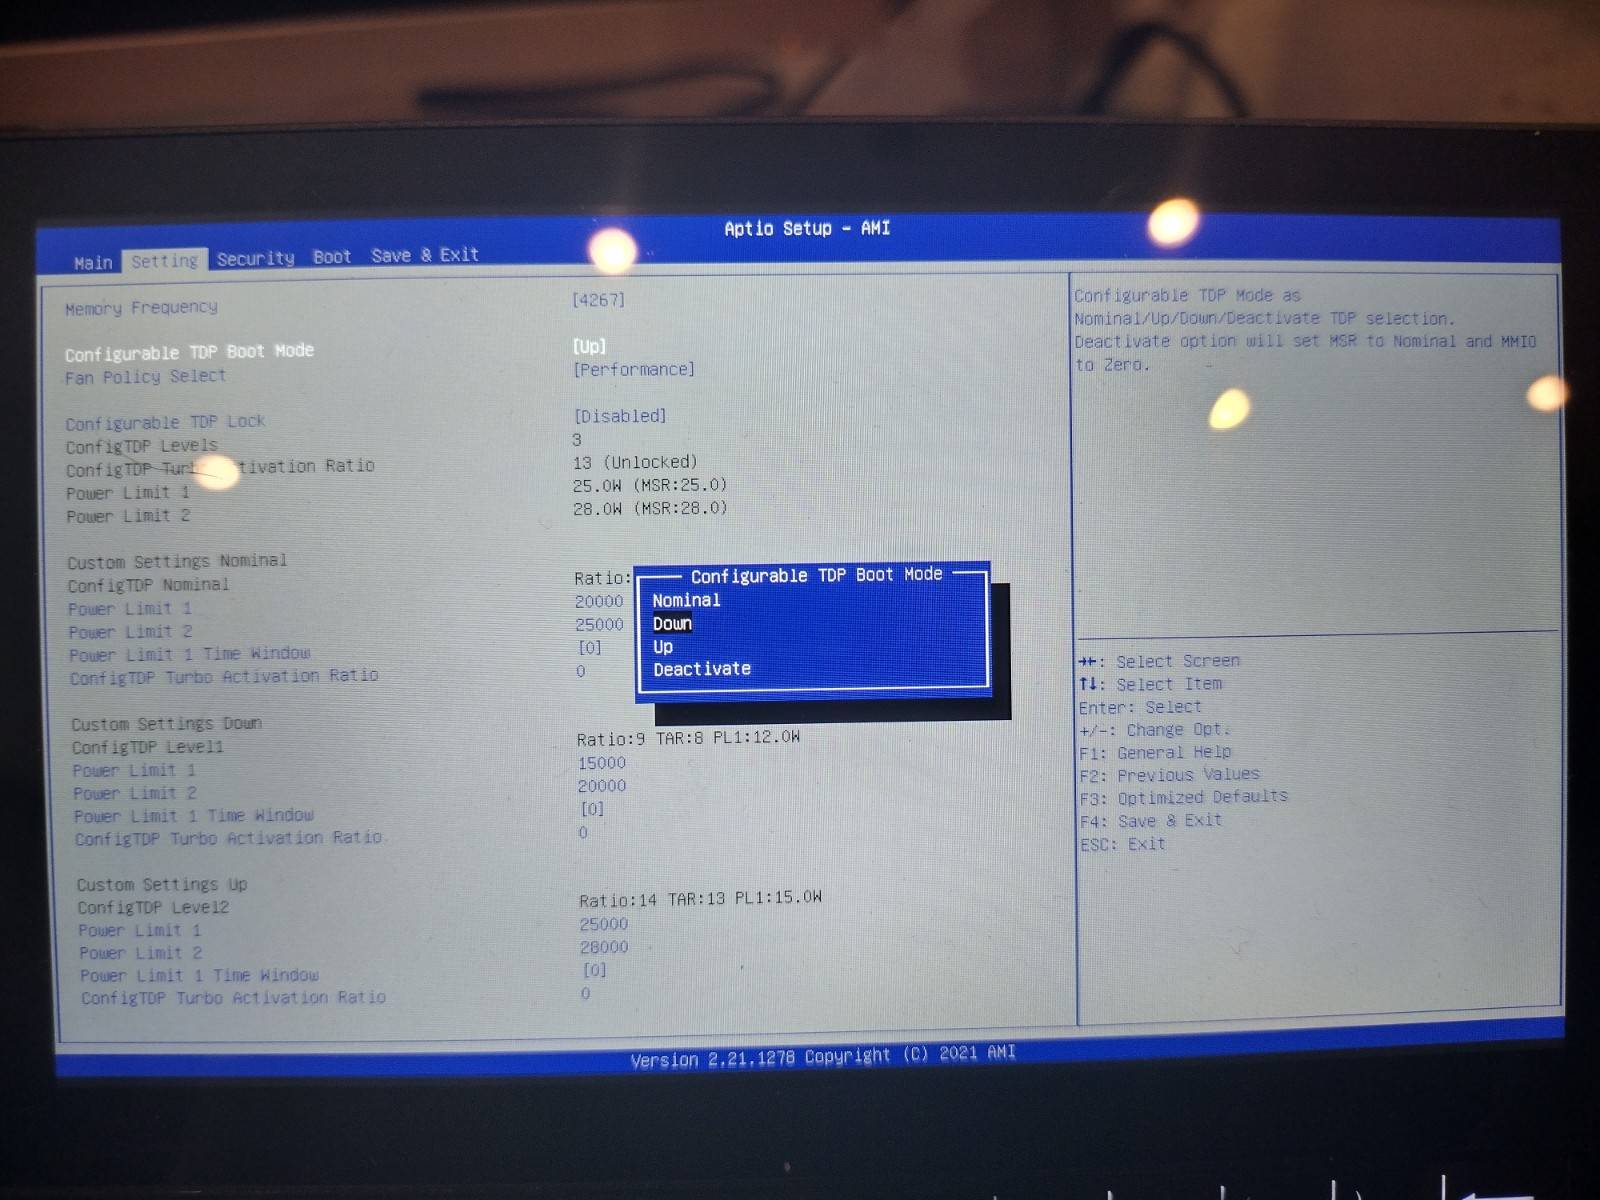
- Up – High-performance mode. (TDP: 25w)
- Nominal – Normal mode. (TDP: 20w)
- Down – Energy-saving mode. (TDP: 15w)
Use the direction keys to choose the TDP that you want and then press Enter to select it. By default it is set to Normal, if you want higher performance then choose Up, if you want lower performance with more battery life then choose Down.
You can press the Right direction key to navigate to the Save & Exit menu. Choose Save Changes & Exit. This will apply the changes and reboot the GPD Win 3.
Turn your GPD Win 3 in to a desktop PC
With a few additions, including some you probably already have, you can easily transform your GPD Win 3 to a desktop PC.
The easiest and most efficient way to do this is with the GPD Win 3 docking station. The official GPD dock, as well as keeping your Win 3 secure on your desk, also allows you to charge and use the additional USB 3.0 ports, Ethernet and HDMI Output.
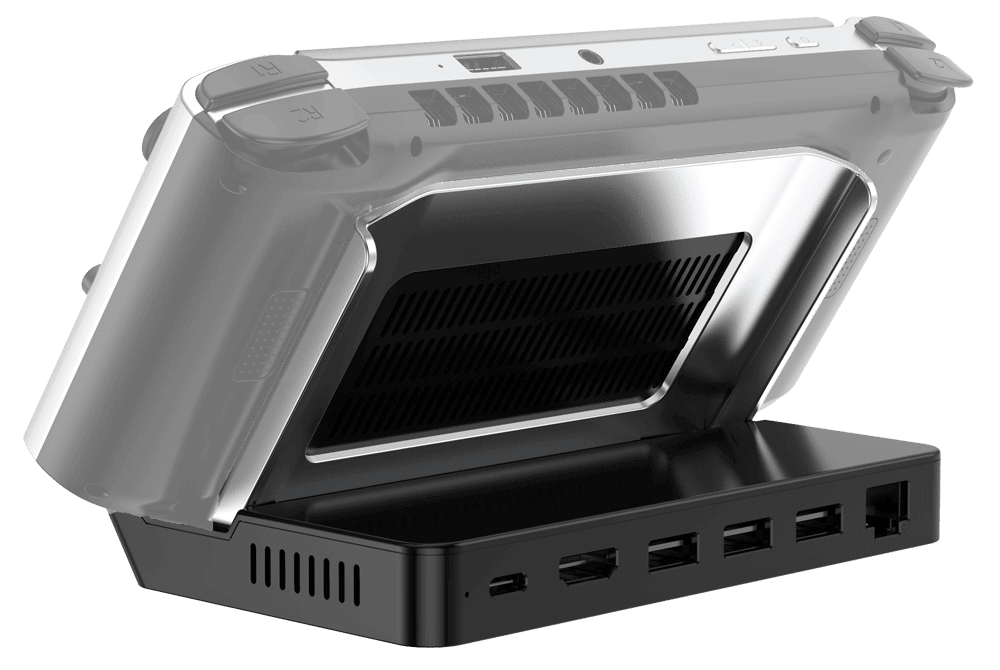
You probably already have a spare USB mouse and keyboard which can be connected to the GPD Win 3 docking station. If you have Ethernet access, then you can also connect this for fast and stable data transfer. By using the HDMI port on the docking station, you can connect it to a TV or monitor for easy viewing or as a second display. It is extremely useful if you want to do some work and even better for playing games on a larger screen while at home. You can find out more details and buy the GPD Win 3 docking station here.
Where to buy the GPD Win 3?
You can buy the GPD Win 3 from DroiX who are official sellers. DroiX provide a full warranty and customer service. And because it is shipped from UK, there are no hidden customs fees or long delivery times.
Downloads
In this section you’ll find a selection of downloads that you may find to be of use for your GPD WIN 3.
GPD WIN 3 Firmware
Below you will find a button to download the stock GPD WIN 3 Windows 10 firmware. Useful for if you wish to start completely fresh.
GPD WIN 3 Drivers
Click the button below to download the drivers for the GPD WIN 3. This is for those who prefer to to use a Windows installation of their own rather than an OEM version.
GPD WIN 3 Rumble Fix
If your GPD WIN 3 is experiencing an issue where the rumble is constantly active, and/or the keyboard is not working. GPD have released a small update that may potentially fix the issue. You can find out more in our Knowledge Base post on the GPD WIN 3 rumble and keyboard fix.
Bringer of videos, text and images! AKA the social media guy at DROIX. Massive retro gaming fan and collector, with a far too large collection of consoles and computers from 1970's to modern. Contact me at [email protected]
Questions & comments
3Every question gets an answer. Ask before you buy — DaveC and the team reply within one working day, and answers stay public so they help the next reader too.
All I see are
UEFI OS (Which is Win10 restore menu)
Windows Boot Manager (Which is 11)
Fedora OS (Which Nobara OS right now)
Set up (Which goes into Bios)
So yes no option to boot from USB
Nope I'm hitting f7 and it brings up a boot menu but no usb option, so I don't know what all I'm doing wrong.
Try renaming the USB to "WINPE" and try in the boot menu again. Also try "GPD". If this does not work please contact our customer service via the contact us page and we will be happy to help.