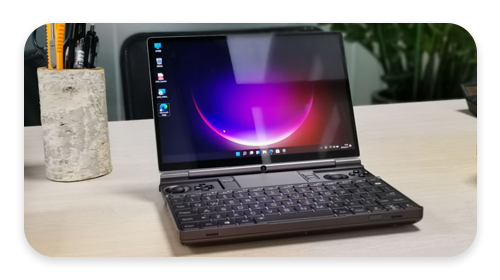
Først og fremst, hvorfor vil du lære hvordan du installerer SteamOS på AYANEO? AYANEO leveres allerede med Windows og AYA Space companion-appen som lar deg kontrollere alle aspekter av enheten.
Men la oss innse det, Windows er rett og slett ikke designet for en PC-spillhåndholdt. Selv med den massive overhalingen av Windows 11, mangler UX når du bruker en liten skjerm. Windows er veldig lite og nesten umulig å bruke.
Viktig: Husk at HoloISO er under aktiv utvikling per mai 2022, og at du kanskje ikke alltid får full funksjonalitet, og at du kanskje må lete på Internett etter noen arch linux-terminalkommandoer for å fikse dem, så ha det litt gøy og ikke gjør dette før du drar på ferie.
Eller kanskje du er som meg og liker en strømlinjeformet opplevelse, akkurat som Steam Deck eller Nintendo Switch. AYANEO er kraftige håndholdte spill-PC-er som, når de er finjustert, kan ha fantastisk ytelse.
I denne "slags" veiledningen tar vi en titt på hvordan jeg installerte SteamOS på AYANEO, og hvordan du kan oppnå samme UX som Steam Deck. (Med noen forbehold)
Merk: Siden HoloISO er under aktiv utvikling, kan installasjonsmetodene endres når du prøver denne veiledningen, så se alltid den offisielle GitHub-siden før du fortsetter.
Merknad 2: Mens SteamOS (når det er installert) gir en flott brukeropplevelse, har HoloISO sine røtter i Arch Linux (som er kjent for å være veldig stabilt), noe som betyr at du må bruke terminalen for å installere og konfigurere AYANEO Steam Deck
Hva du trenger
Merk: Du trenger en RJ45 Ethernet-kabel siden basiskjernen som følger med HoloISO ikke støtter wi-fi-kortet (per mai 2022)
- 1 * AYANEO PC-spillhåndholdt (AYANEO 2021 / AYANEO 2021 PRO / AYANEO Next / AYANEO Next Pro)
- 1* Min. 4 GB USB-minnepinne
- 1* USB C-adapter (du trenger Ethernet-tilkobling)
- 1* RJ45 Ethernet-kabel som går fra ruteren til AYANEO
- Tid og vilje til å lære/bruke terminalen 🙂
For denne opplæringen vil vi bruke HoloISO, en gaffel av SteamOS (som, med ordene til hovedutvikleren, theVakhovskeIsTaken på spørsmål om HoloISO er offisiell? "Nei, men det kan like gjerne være 99% av veien dit.").
De har tatt SteamOS 3.0 og fått det til å starte opp og kjøre utrolig bra på en rekke enheter.
HoloISO på AYANEO har mange fungerende funksjoner, for eksempel FSR, forhåndsbufring av skygger, skrivebordsmodus og mange flere. Selv om de innebygde TDP-kontrollene ikke fungerer.
Så gå til HoloISO github-siden og vis utvikleren litt kjærlighet 🙂 Mens du er der, kan du laste ned den nyeste iso og følge instruksjonene på siden for å brenne den på en USB-minnepinne.
Slik installerer du SteamOS på AYANEO
- Koble tastaturet og RJ45 Ethernet-kabelen til AYANEO
- Trykk på F7 for å gå inn i UEFI BIOS og Deaktiver Secure Boot -> Lagre endringene og start på nytt mens du trykker på F7, og velg deretter USB-stasjonen for å starte opp HoloISO-installasjonen.
- Gå gjennom installasjonsoppsettet for HoloISO
- Før vi går videre til å installere Arch Linux-kjernen, kan du gå til Innstillinger i Game Deck-modus og prøve å installere alle tilgjengelige oppdateringer
- Omstart
Gå nå til skrivebordsmodus, og nå må vi installere den offisielle Arch linux for å få Wi-Fi-funksjonalitet.
Slik installerer du Arch linux på AYANEO (Credit to: kenobi00 at Reddit)
- Åpne Konsole og begynn å skrive
- sudo pacman -Sy nano | Dette vil installere nano-editoren
- sudo nano /etc/pacman.d/mirrorlist
- Kommenter ut (legg til # foran den første "Server"-linjen)
- Legg til en ny linje med Server = og hent en server fra din region fra Arch Mirrorlist
- Trykk CTRL+X for å lagre endringene
- sudo nano /etc/pacman.conf
- Bla nedover og kommenter ut (legg til # foran) [Jupiter] og de to neste linjene, og [Holo] og de to neste linjene.
- Trykk CTRL+X for å lagre endringene
- Skriv inn "reboot", og når omstarten er fullført
- sudo pacman -Syu
- Dette vil oppdatere systemet og viktigst av alt - laste ned den offisielle Arch linux-kjernen
- Det kan hende at det mislykkes første gang, så bare kjør kommandoen på nytt
- Nå må du fjerne kommentarene fra trinn 3 og 4
- Bare gå tilbake og fjern kommentarene i disse linjene, og lagre filene
Nå skal vi få AYANEO til å starte opp med Arch Linux.
- sudo nano /etc/default/grub
- Legg til følgende linje: GRUB_DISABLE_SUBMENU=y
- Legg til følgende linje: GRUB_DEFAULT="3″
- Valgfritt: Du kan redusere "GRUB_TIMEOUT" fra 5 til 1, slik at du får en raskere oppstartssekvens
- Trykk CTRL+X for å lagre endringene
- sudo grub-mkconfig -o /boot/grub/grub/grub.cfg
- omstart
Når enheten nå starter opp, skal standard arch linux velges automatisk, og wi-fi skal fungere 🙂
Nå må vi installere ShadowBlips aya-neo-fixer (Credit: ShadowBlip - Give the dev some love)
yay -S aya-neo-fixes
La oss nå få av/på-knappen til å fungere for å avbryte og gjenoppta
- cd /etc/systemd
- sudo mkdir login.conf.d
- cd login.conf.d
- sudo nano power_button.conf
- Legg til følgende linje:
- [Logg inn]
- HandlePowerKey=suspend
- Legg til følgende linje:
- Trykk CTRL+X for å lagre endringene
Hvis du har kommet så langt, har du sannsynligvis en "stort sett" fungerende AYANEO med SteamOS, og du kan begynne å spille noen spill.


