A neat feature of the GT king is its ability to run not one, but two operating systems. That’s why we at DroiX are putting together an easy guide on how to install CoreELEC on your Beelink GT King (or GT King Pro!).
What IS CoreELEC?
CoreELEC is an alternative operating system developed by Team CoreELEC.
It is intended to be a “Just Enough OS” distribution designed for the use of Kodi on android boxes. While Kodi can also be used on the Android operating system, there is a degree of overhead in terms of storage and memory usage.
CoreELEC alleviates that and provides an experience that is fully focused on turning your Android device into a home entertainment center.
With that in mind: If you use your device for anything other than Kodi, don’t bother trying this.
CoreELEC is a non-destructive operating system, so no eMMC flashing is necessary. Making it safe to try out and set up compared to the typical perrils of installing new firmware on Android devices.
Installing CoreELEC on the Beelink GT King
Before Starting
Before you begin the installation process, you will need the following:
- A PC or Laptop
- A microSD card at least 4GB in size (or a full-sized SD card for the GT King Pro)
- You will also need a USB card reader if your system does not have one built-in.
- The latest version of CoreELEC (for your device)
- Mirror [CoreELEC v19.4]
- USB imaging software. We highly recommend Rufus, but you can use other options.
Prepare your microSD card
Note: Depending on the batch it came from, your GT King may already have a pre-loaded microSD card (full-sized SD card for the GT King Pro).
The version of CoreELEC you download will likely come in the .img.gz format. This is jus another type of compressed file, so extract it first using software like 7zip, or the equivalent for your operating system.
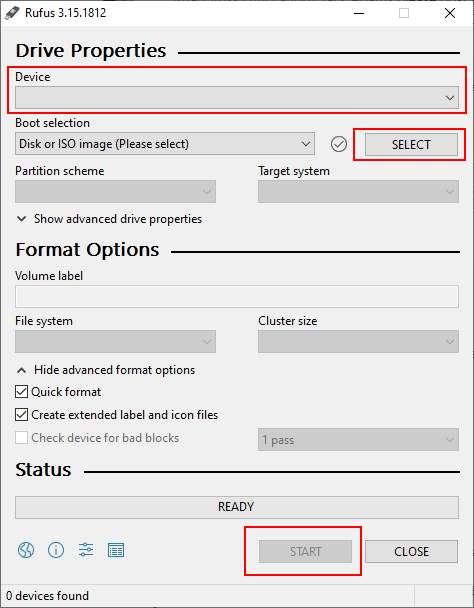
Once you have extracted the image file from the compressed file, you’ll need to insert your SD into your computer, and start up Rufus.

First, ensure that the chosen Device matches your SD card. Be very careful here as if you choose the wrong device, it may result in a loss of data.
Second, select the image file you extracted earlier.
Finally, hit Ready when you ‘re ready to begin the flashing process. Do not disconnect the SD card or close Rufus during this process, otherwise you will need to start again.
Once finished, you can safely close Rufus, and you are almost ready to begin using CoreELEC.
Copying The Device Tree
There is one final step you must perform before CoreELEC will run, and that is to copy the correct device tree to the root of the microSD card.
You should see a storage location called “COREELEC” on your computer now. If you do not, you may need to assign it a drive letter first.
In this location will be a few files and folders. Most namely the folder called device_tree. Open this folder.
You now need to copy the file called “g12b_s922x_beelink_gt_king.dtb” onto the root of the SD card, then rename it to dtb.img.

Once this is done, you have finished setting up the microSD card, and can now use it with your device.
How To Start CoreELEC
The first boot of CoreELEC is a little different from the subsequent booting sequences.
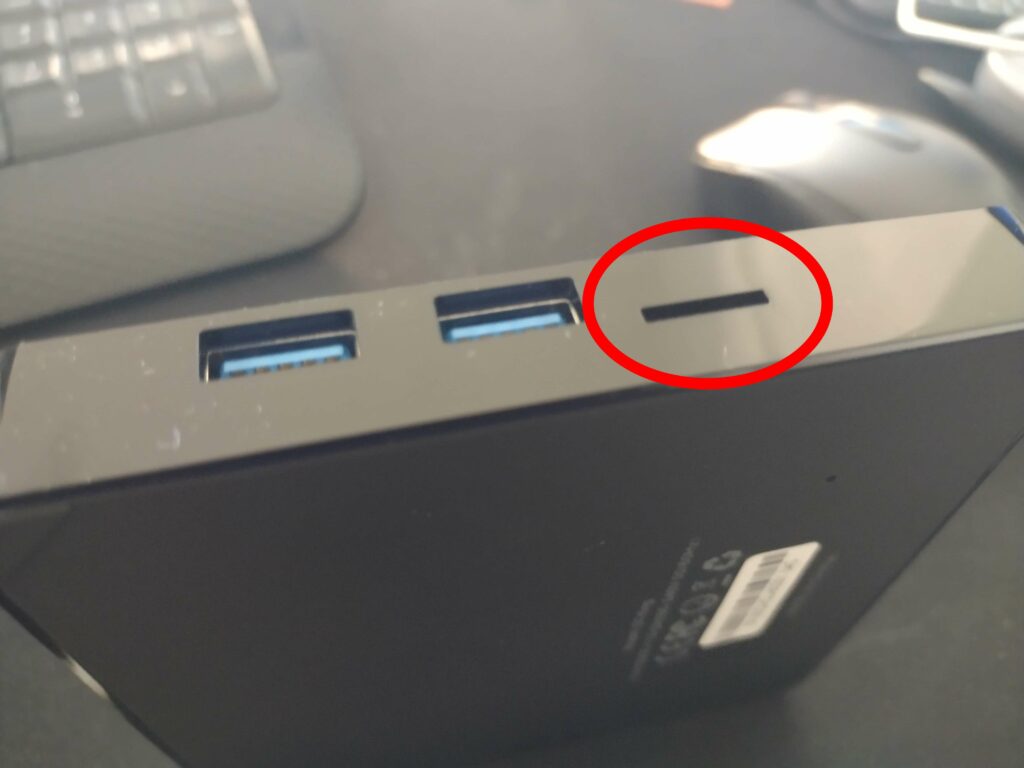
First, insert the SD card into the unit. This will typically be on the side of the device.

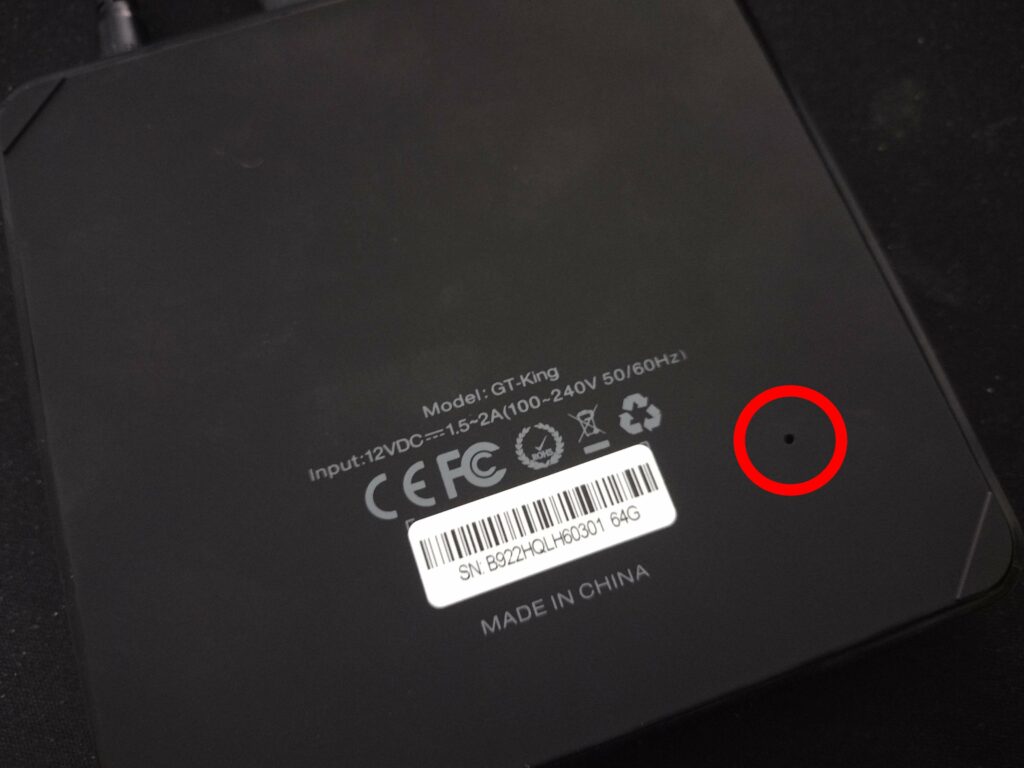
Second, locate the reset button on the device. It should be in a small pin-sized hole that you will need a toothpick, paperclip, or similar to access. Ensure that this button is being pressed down.

Third (and finally), power on the device.
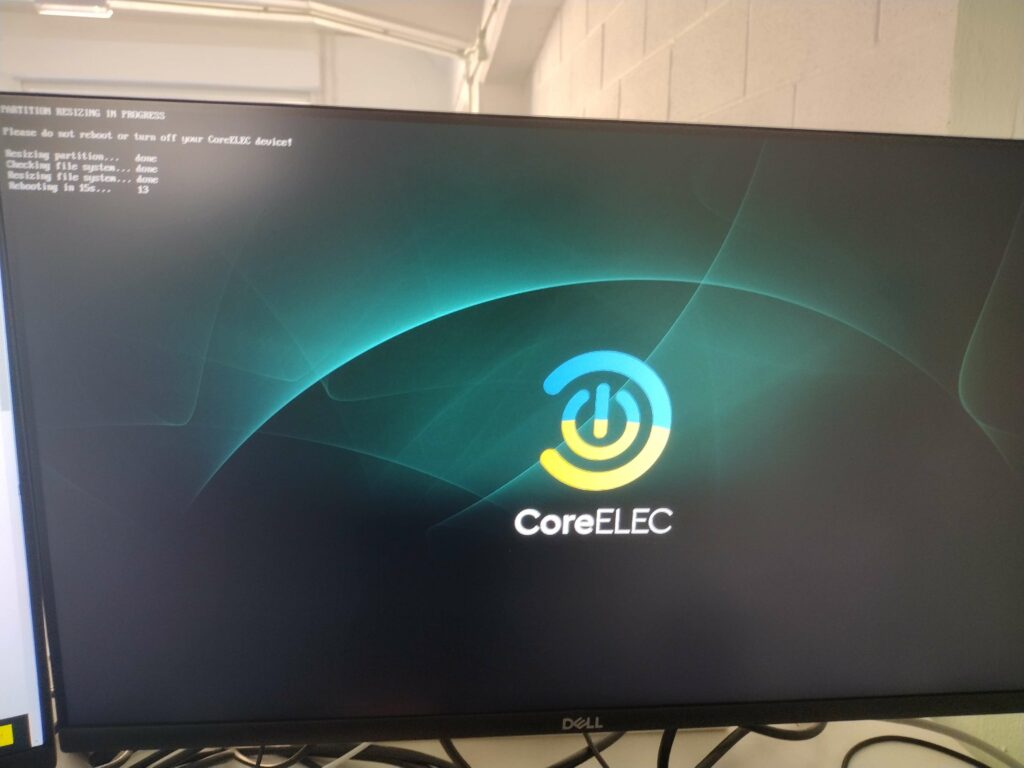
If successful, the device will boot into CoreELEC. A couple of preliminary operations will be carried out first, so do not turn off the device until it is finished.

CoreELEC is now set up and ready to go. You only need to hold the reset button for the first time you start CoreELEC. Afterwards, you can simply insert or remove the SD card before you boot the device in order to switch between the two operating systems.
Afterword
With this installation, you’re now ready to begin using CoreELEC on your Beelink GT King (or GT King Pro).
Do note that this will not come pre-loaded with any add-ons, wizards, or additional software at all.
For tips on how to use Kodi, check out various guide websites such as SEO Michael, and check out our collection of Kodi blogposts for guides on how to maximize your media consumption methods.
Additionally, if you are interested in purchasing a Beelink GT King of your very own, you can buy the Beelink GT King from DroiX, as well as the Beelink GT King Pro.

