Files used in this guide
Changelog
- Source guide: Using a VPN in LibreELEC
Older versions stay downloadable for rollbacks — every version keeps its own verified file.
Want to use your VPN connection within the LibreELEC operating system, but not sure how to?
Krypton (LibreELEC 8.x)
- Boot into LibreELEC.

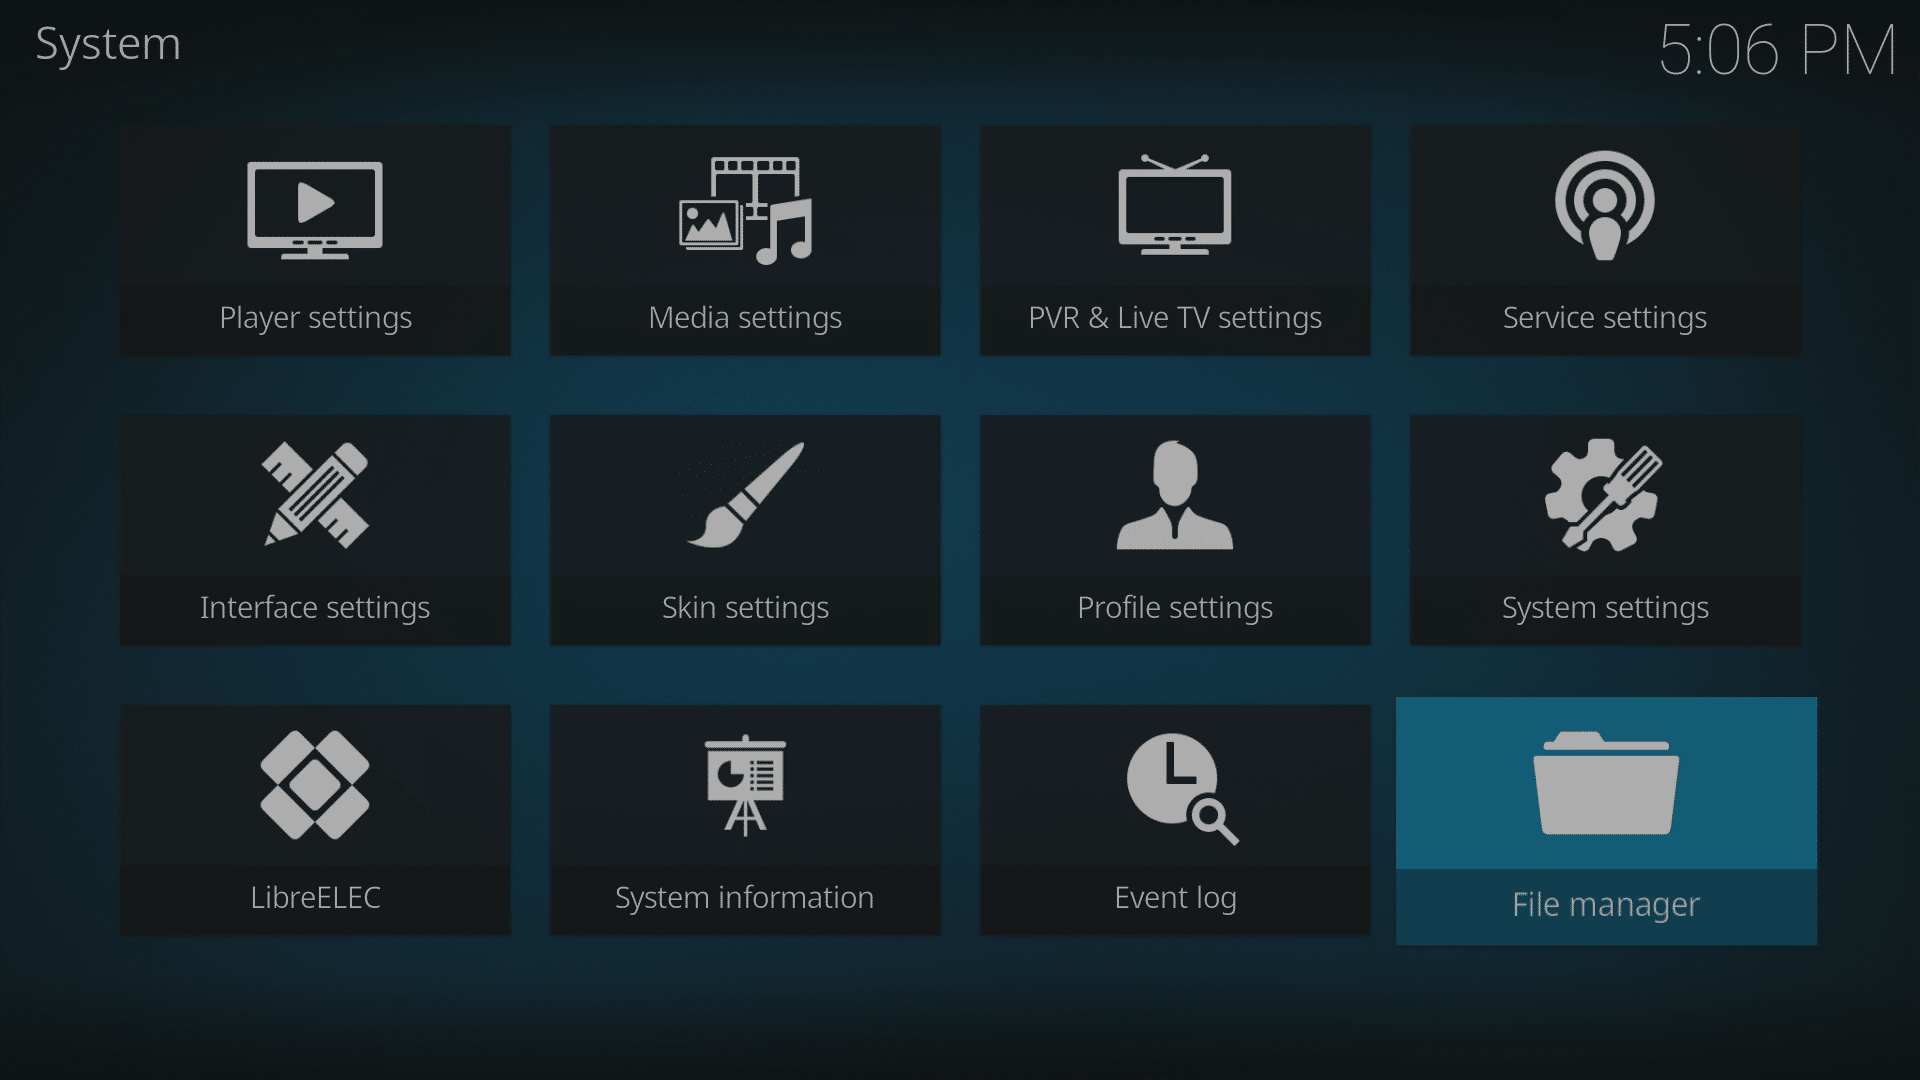
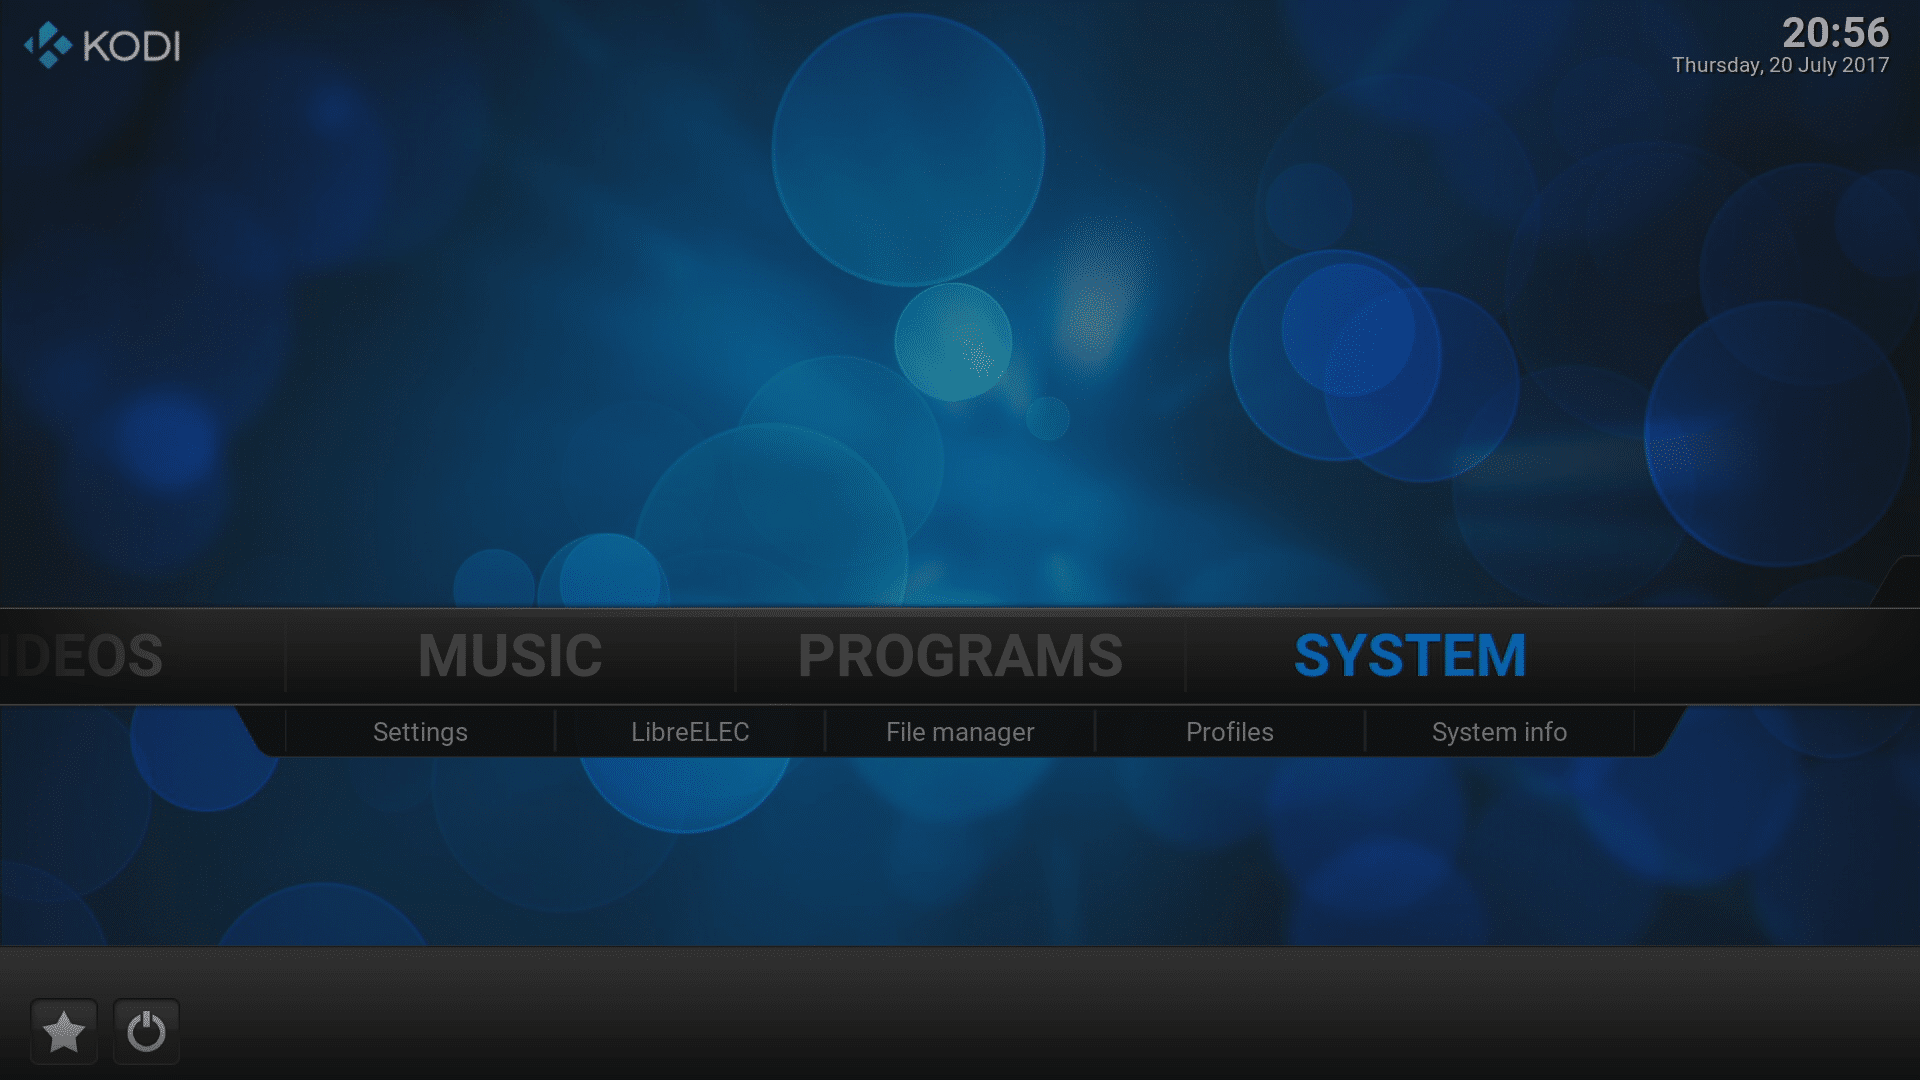
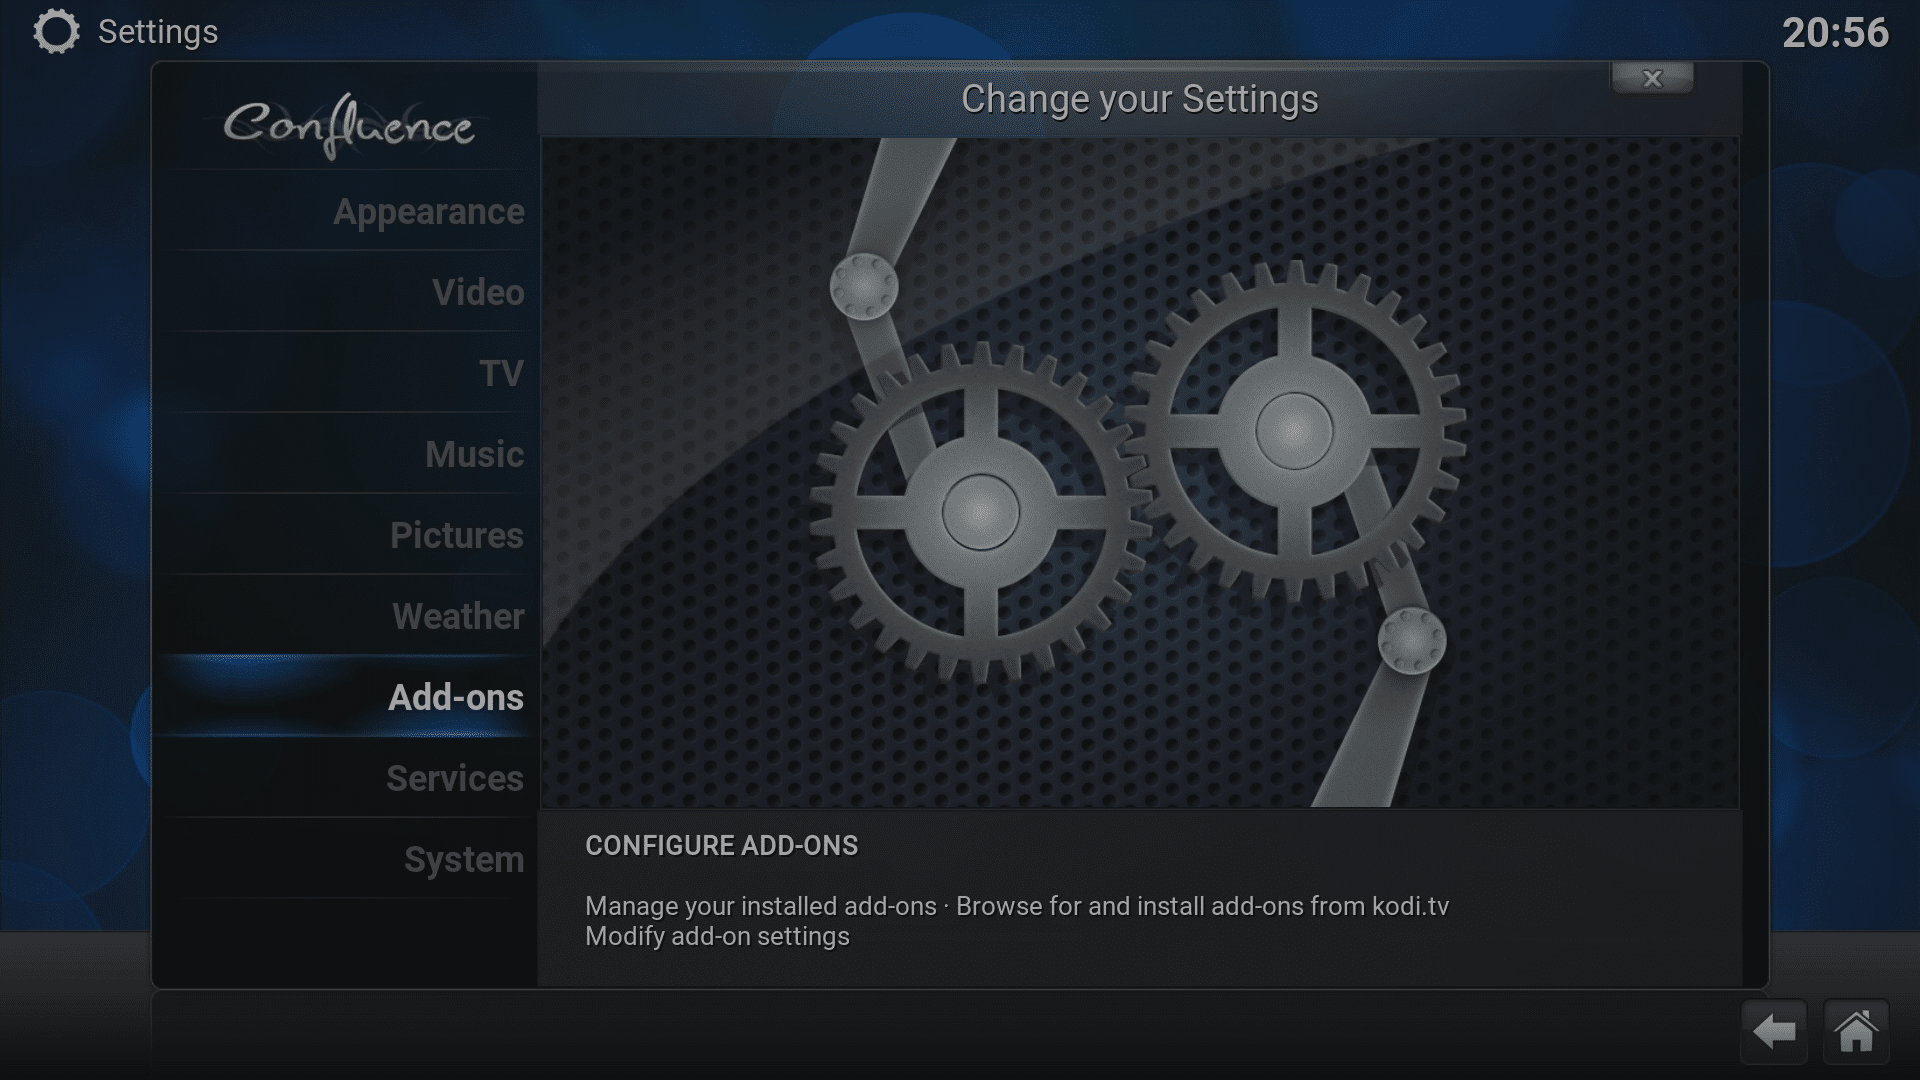
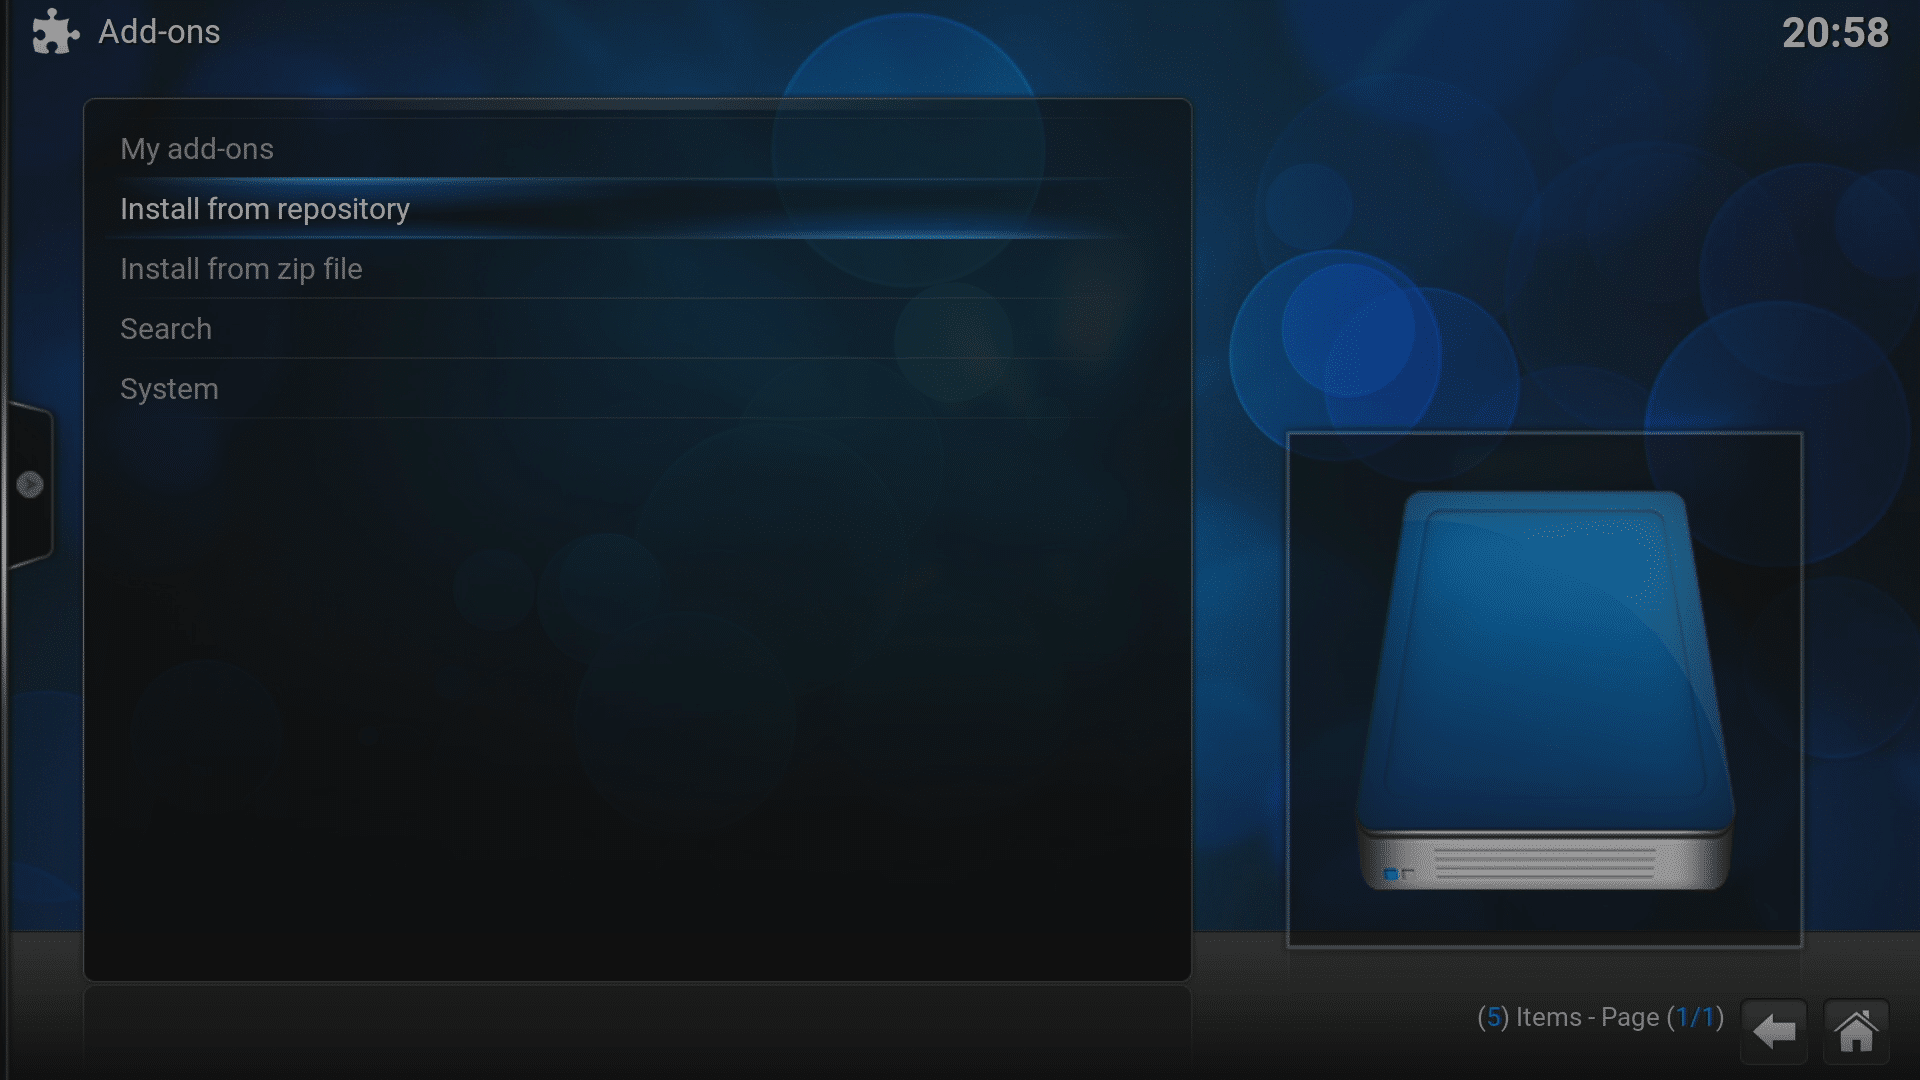
- Click the System icon at the top (a cog above “Movies”).

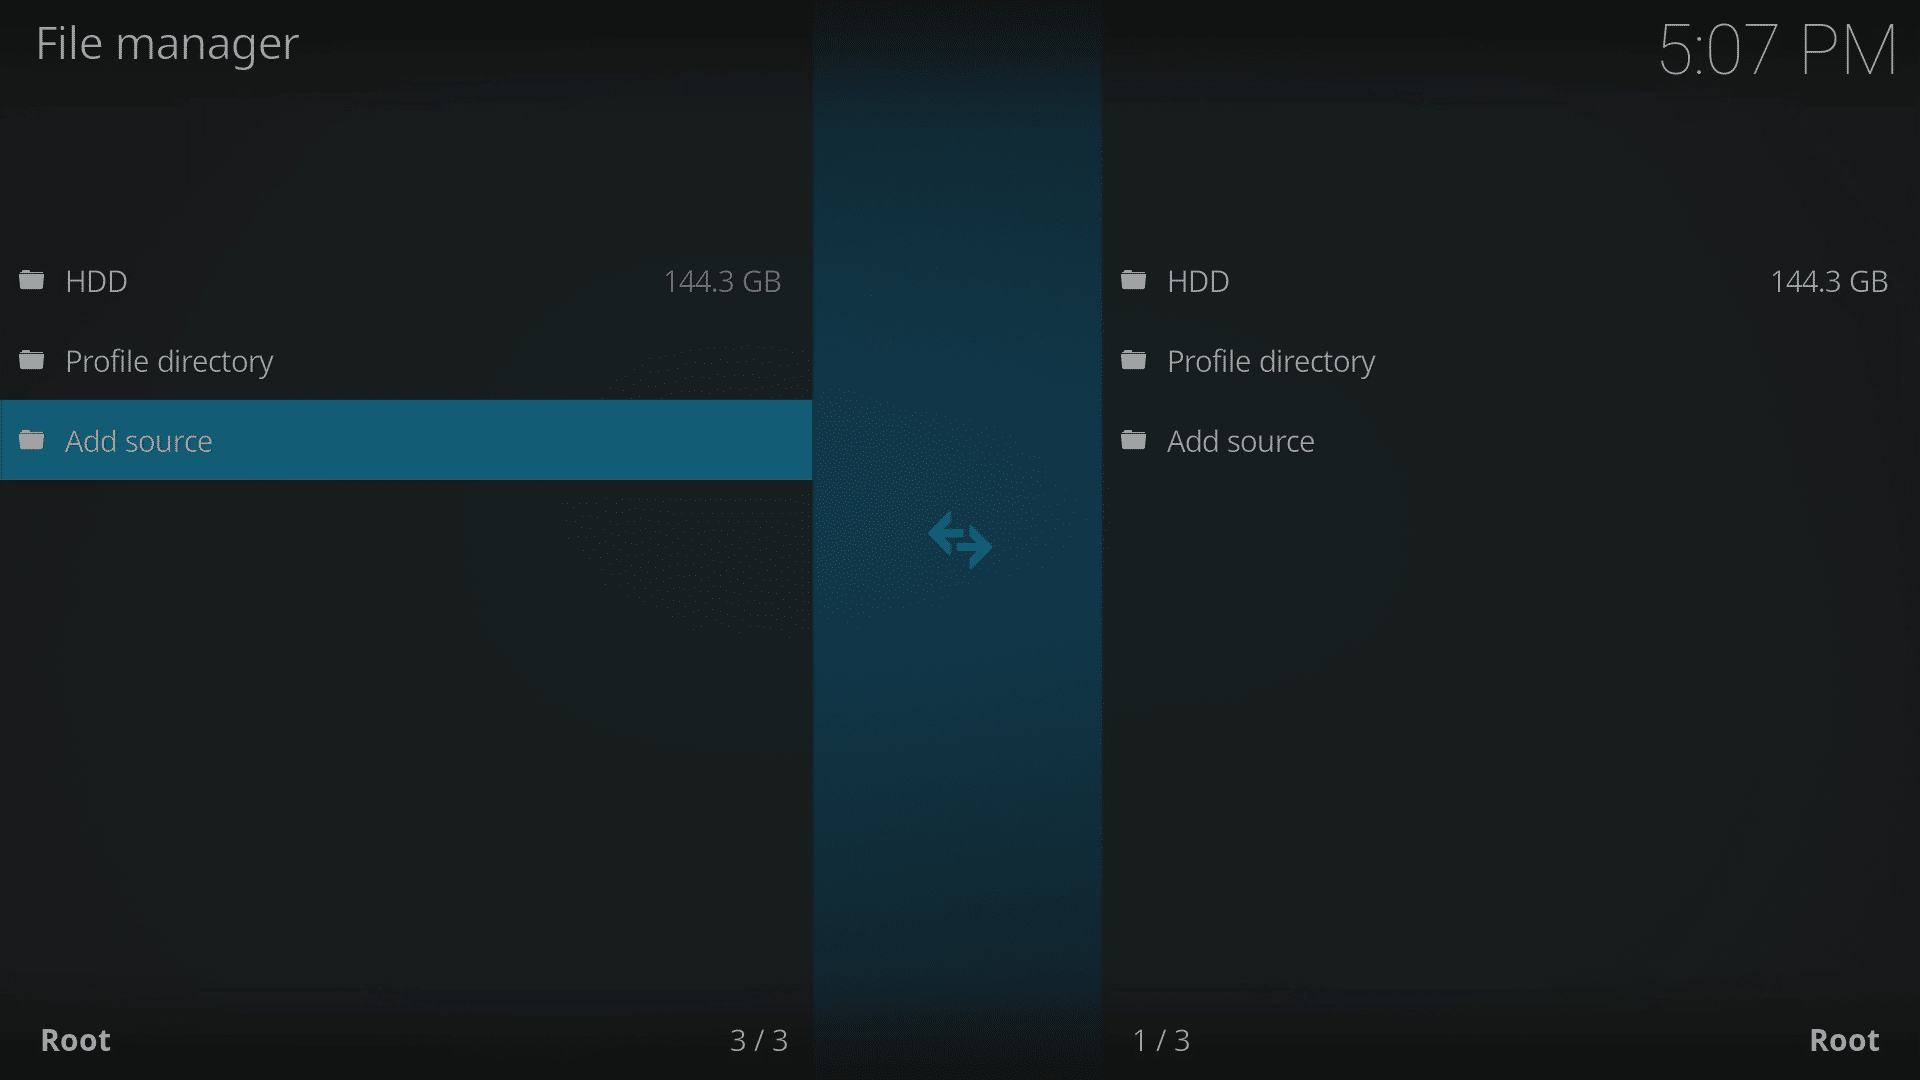
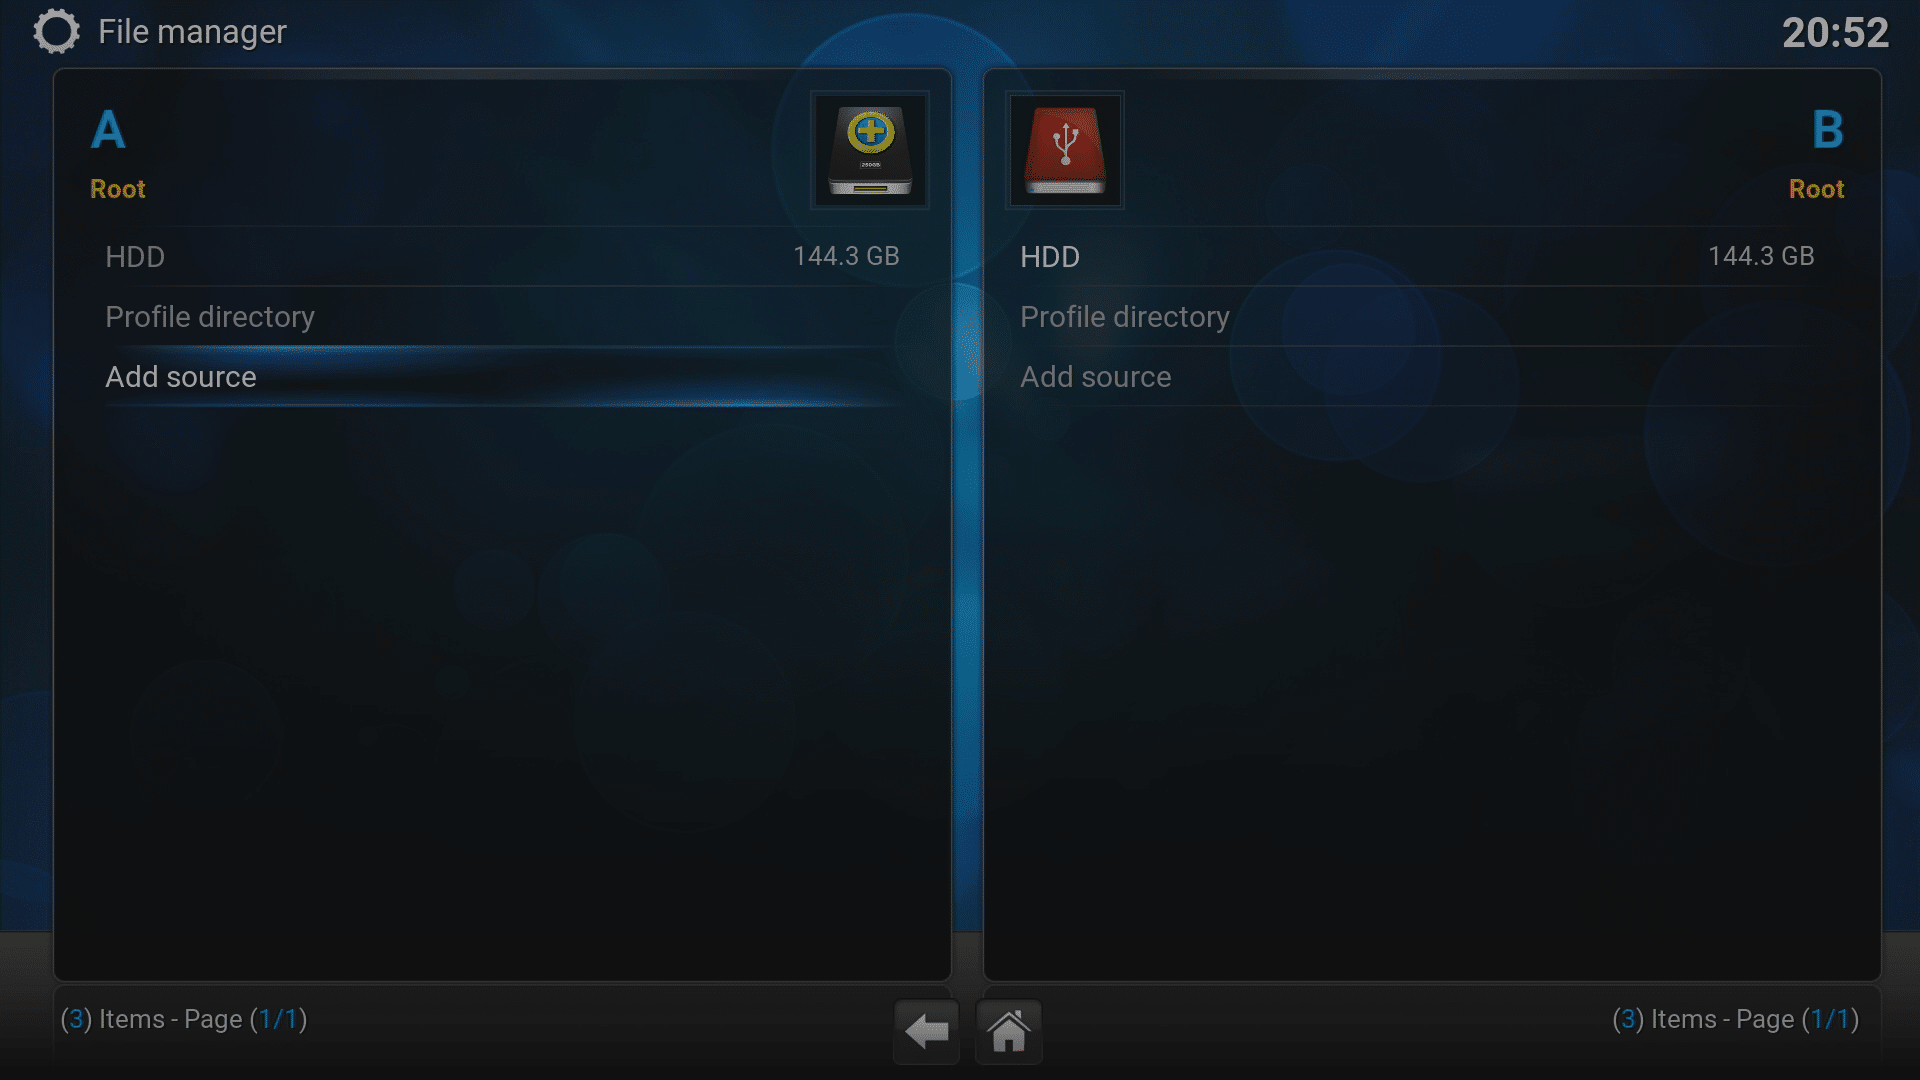
- Select the “File manager” entry then “Add Source”.
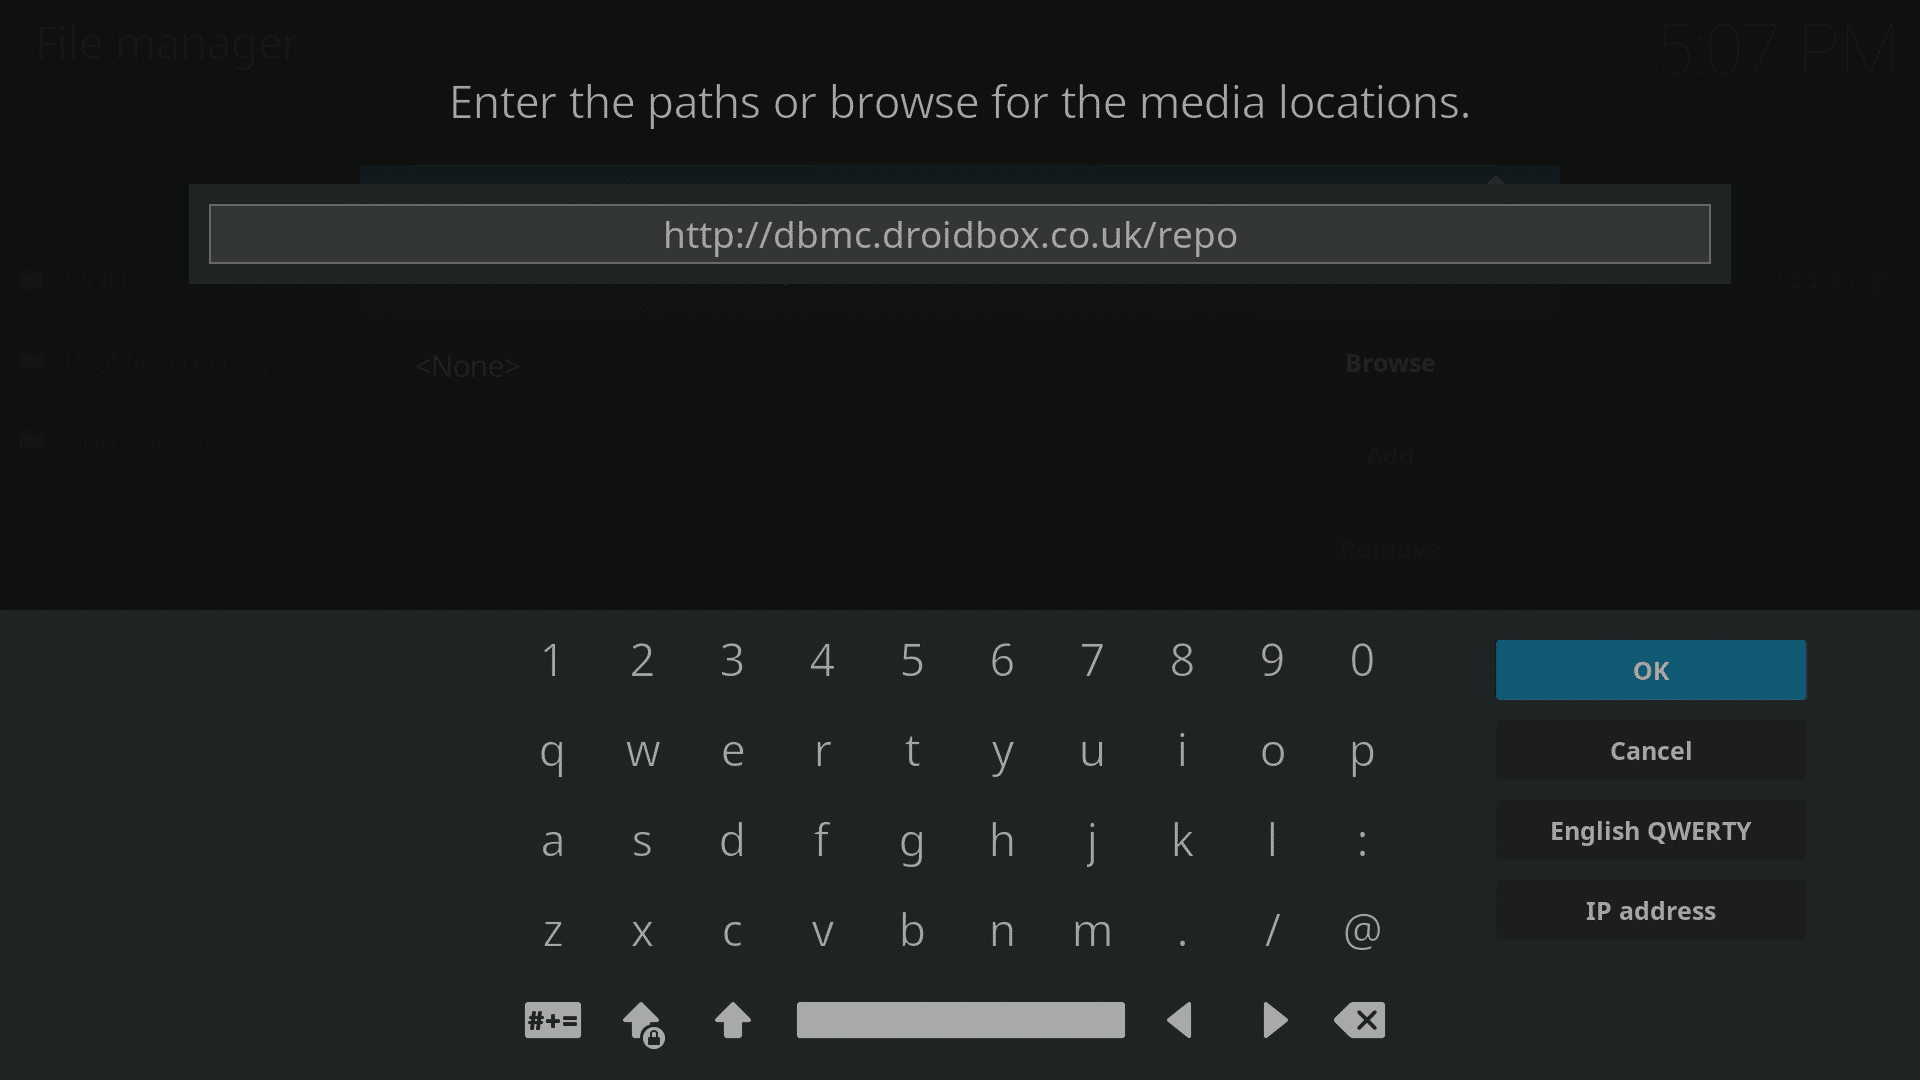
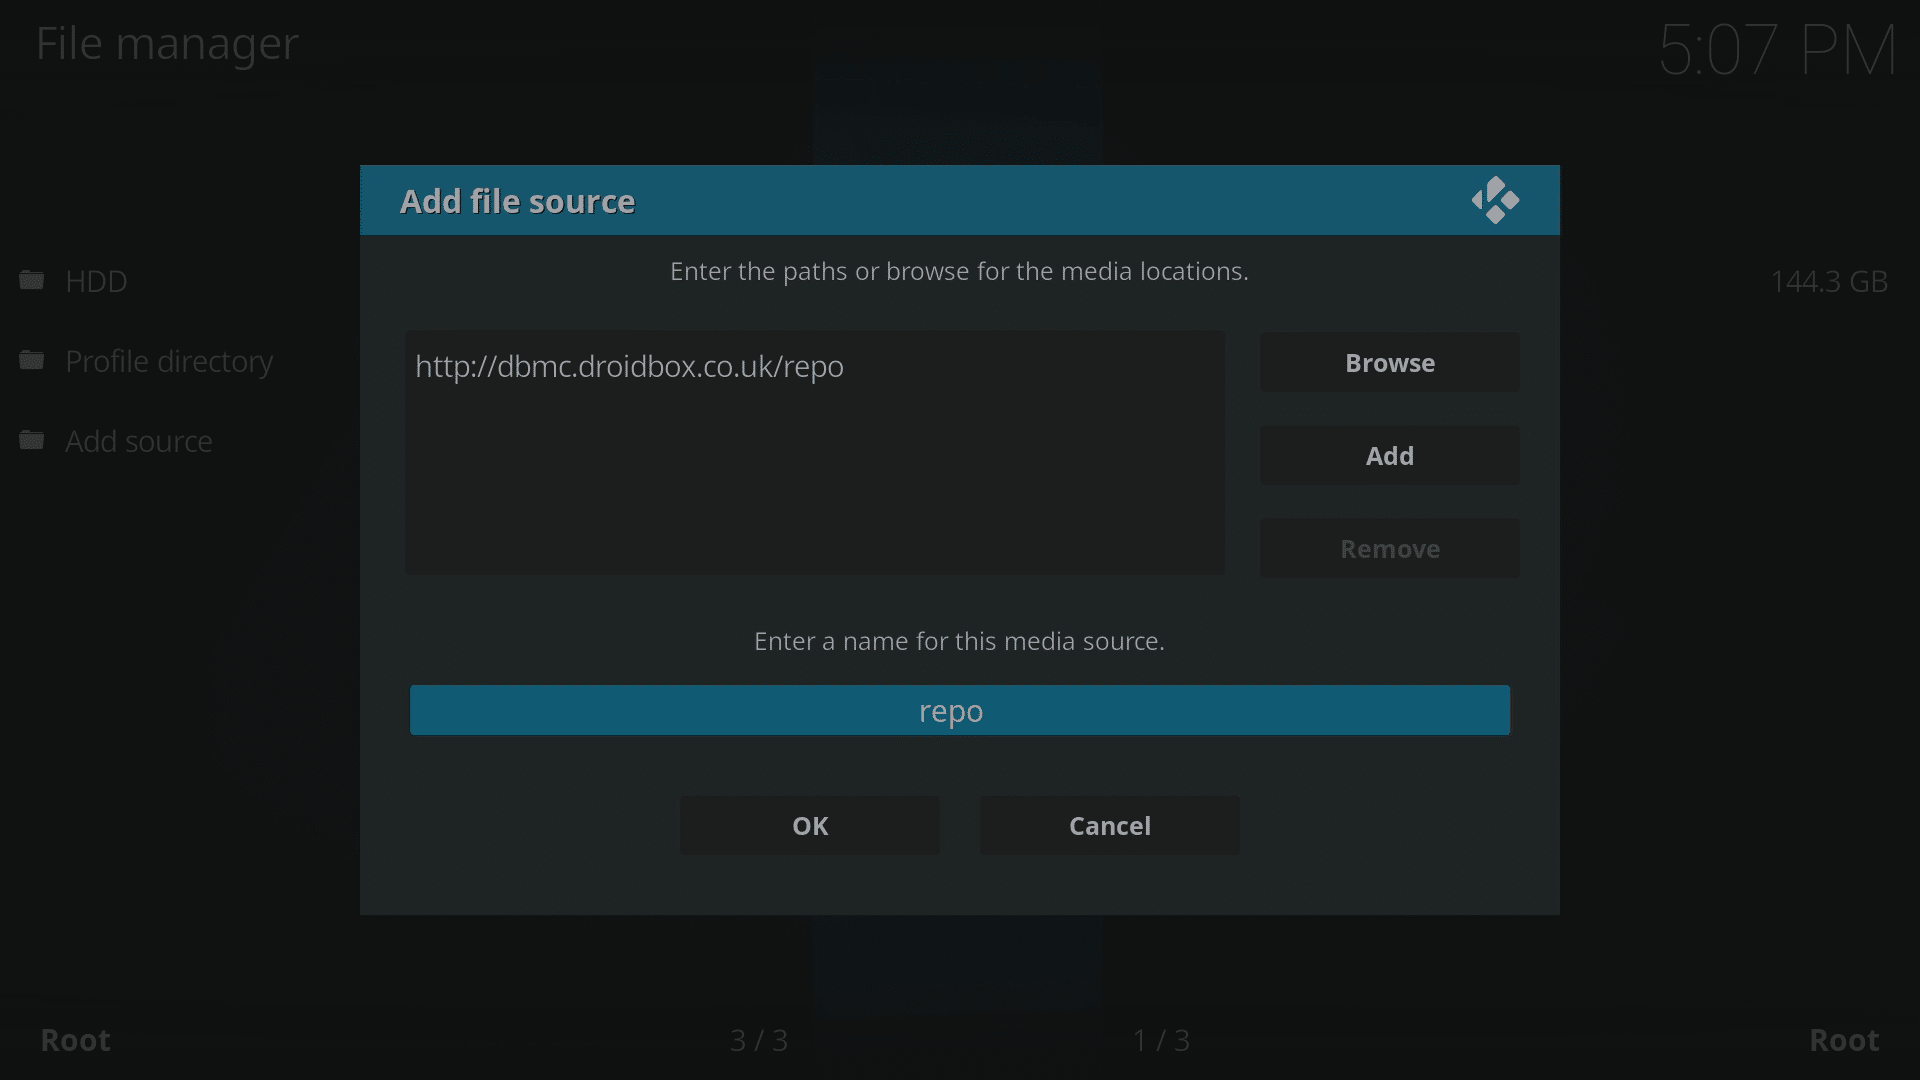
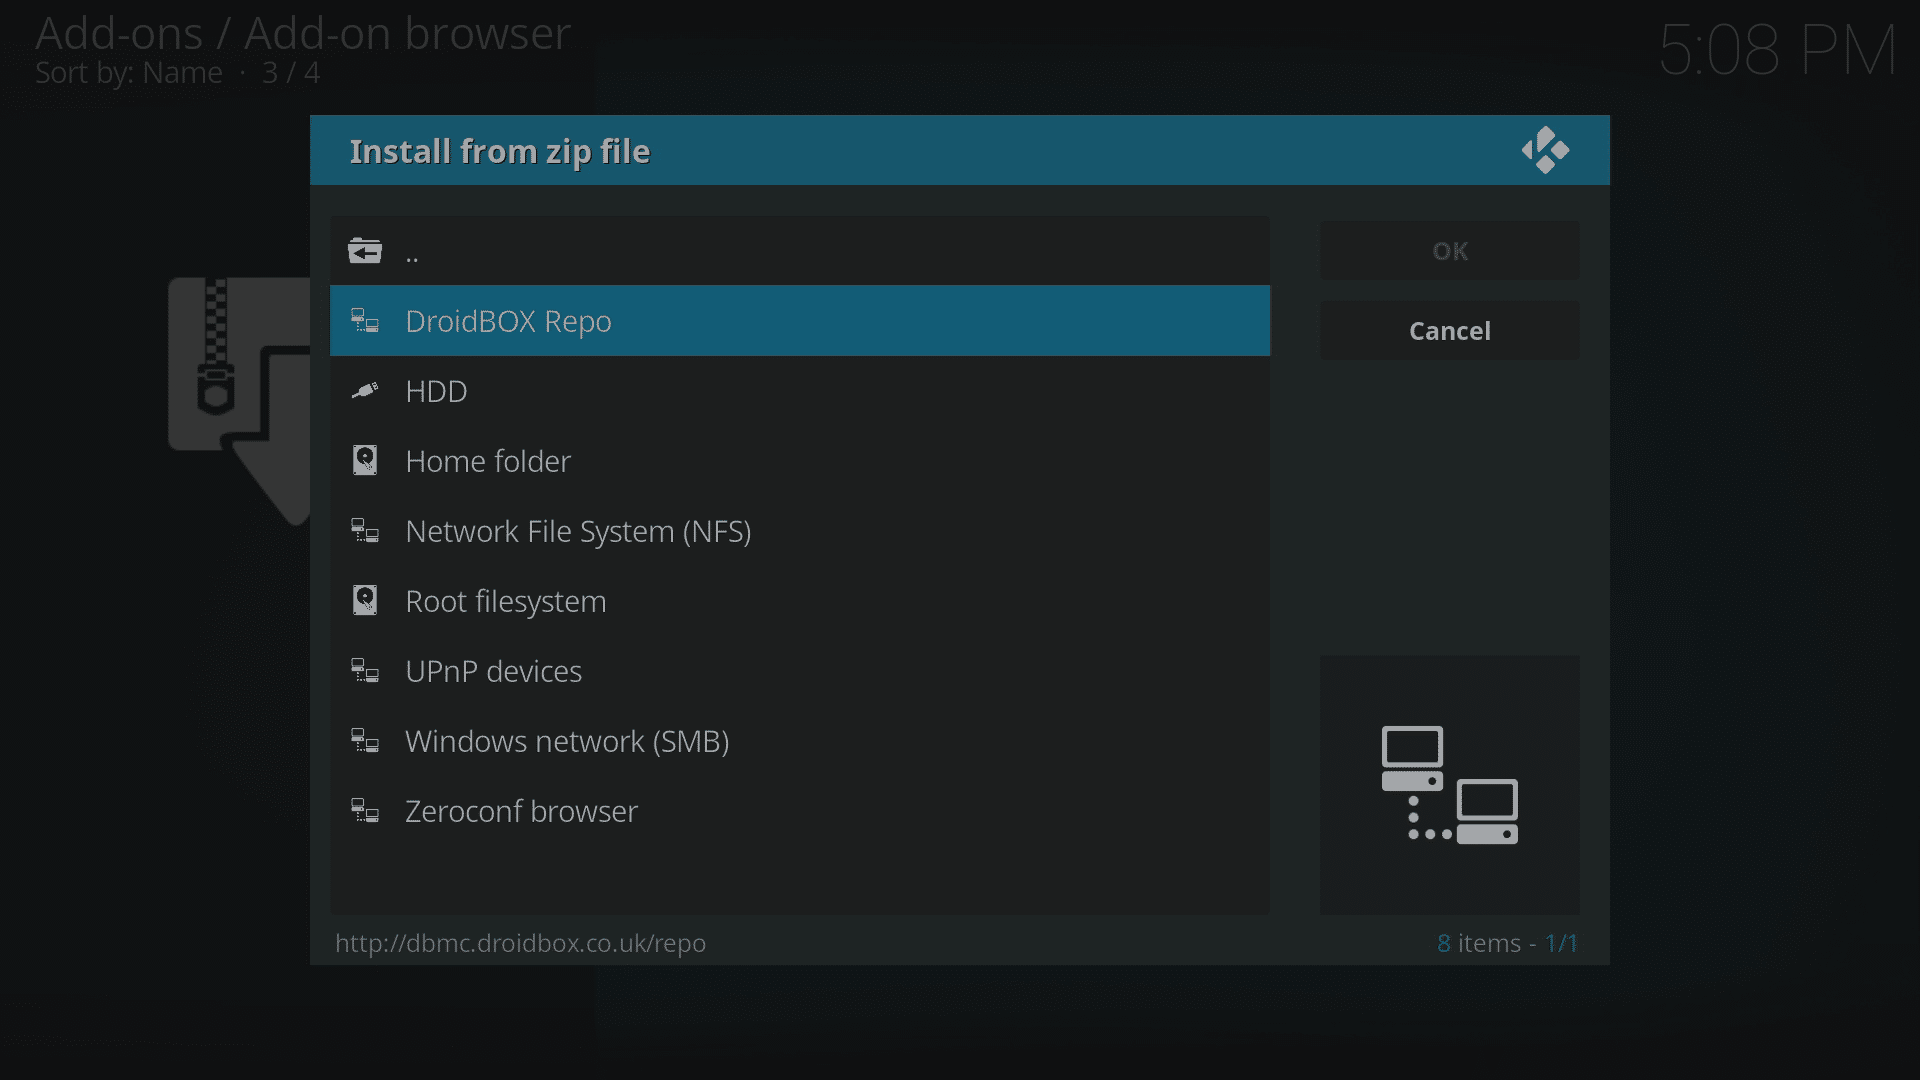
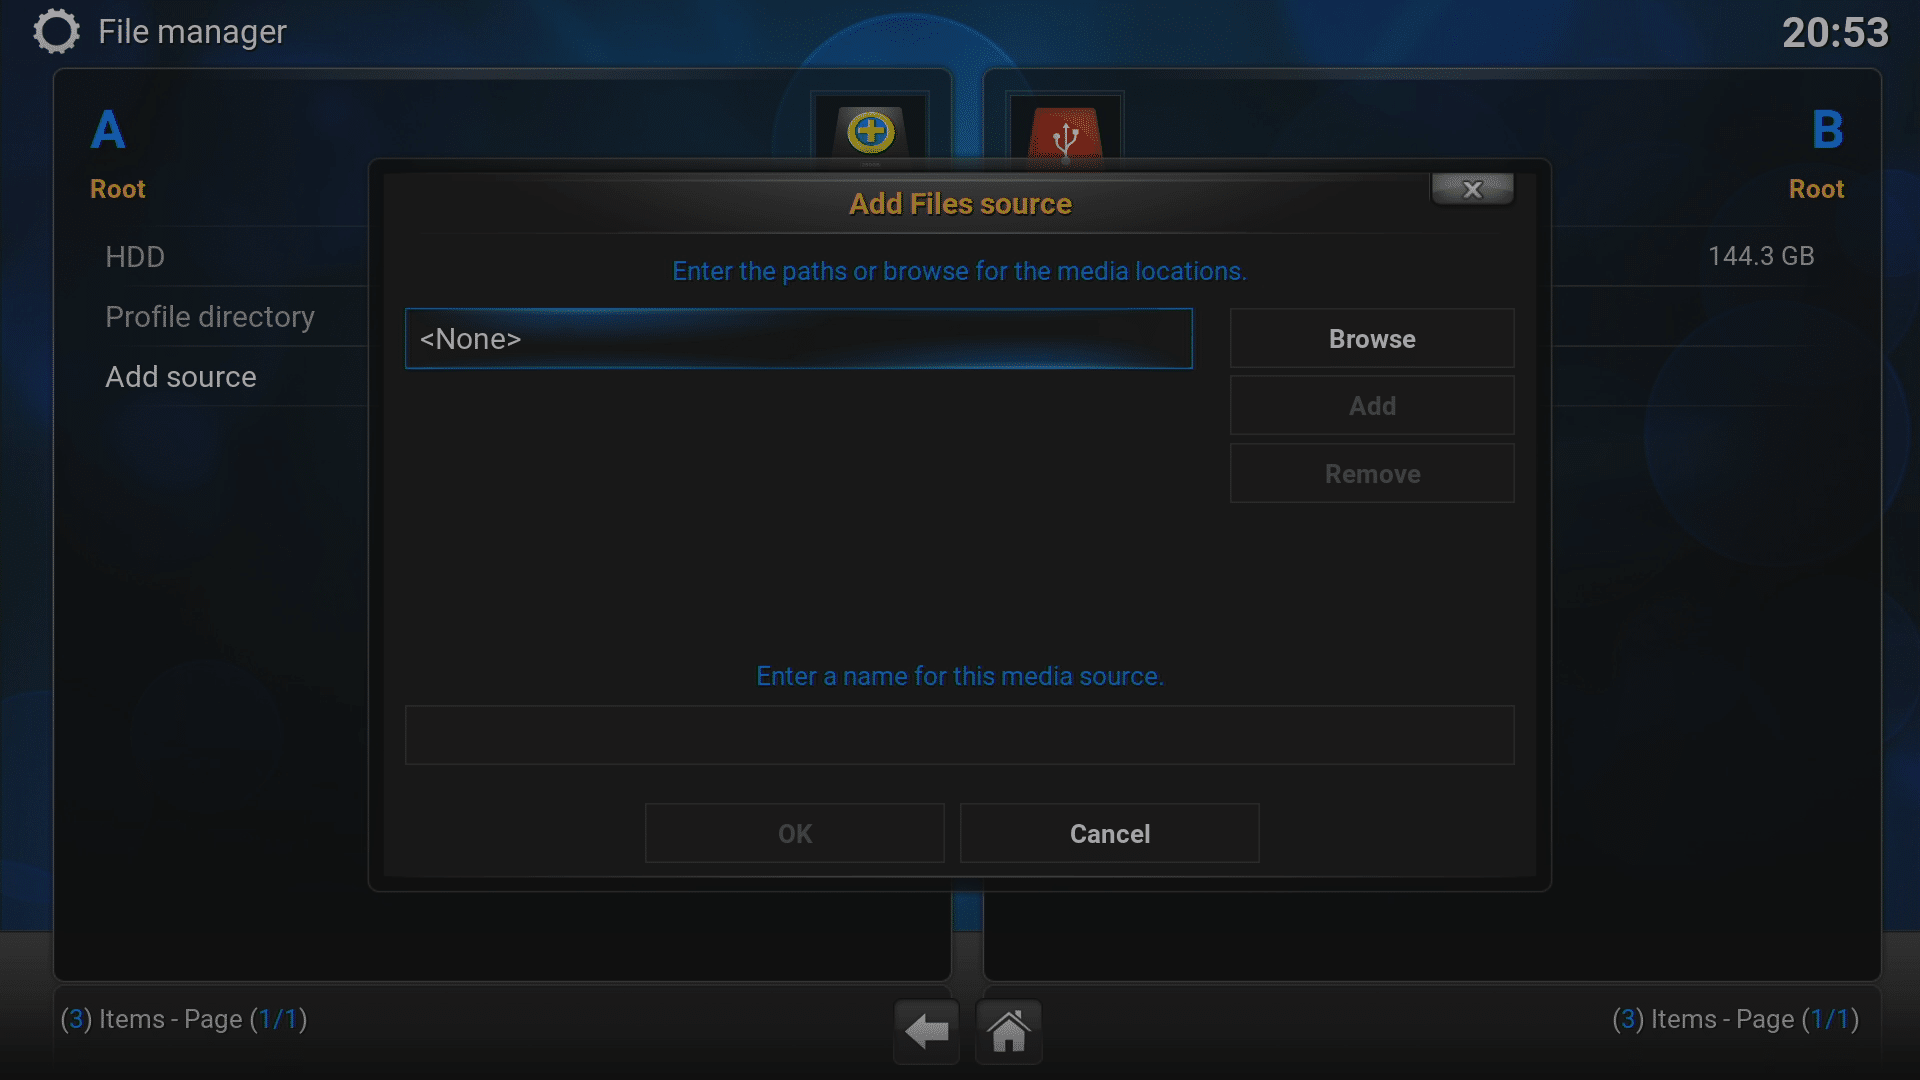
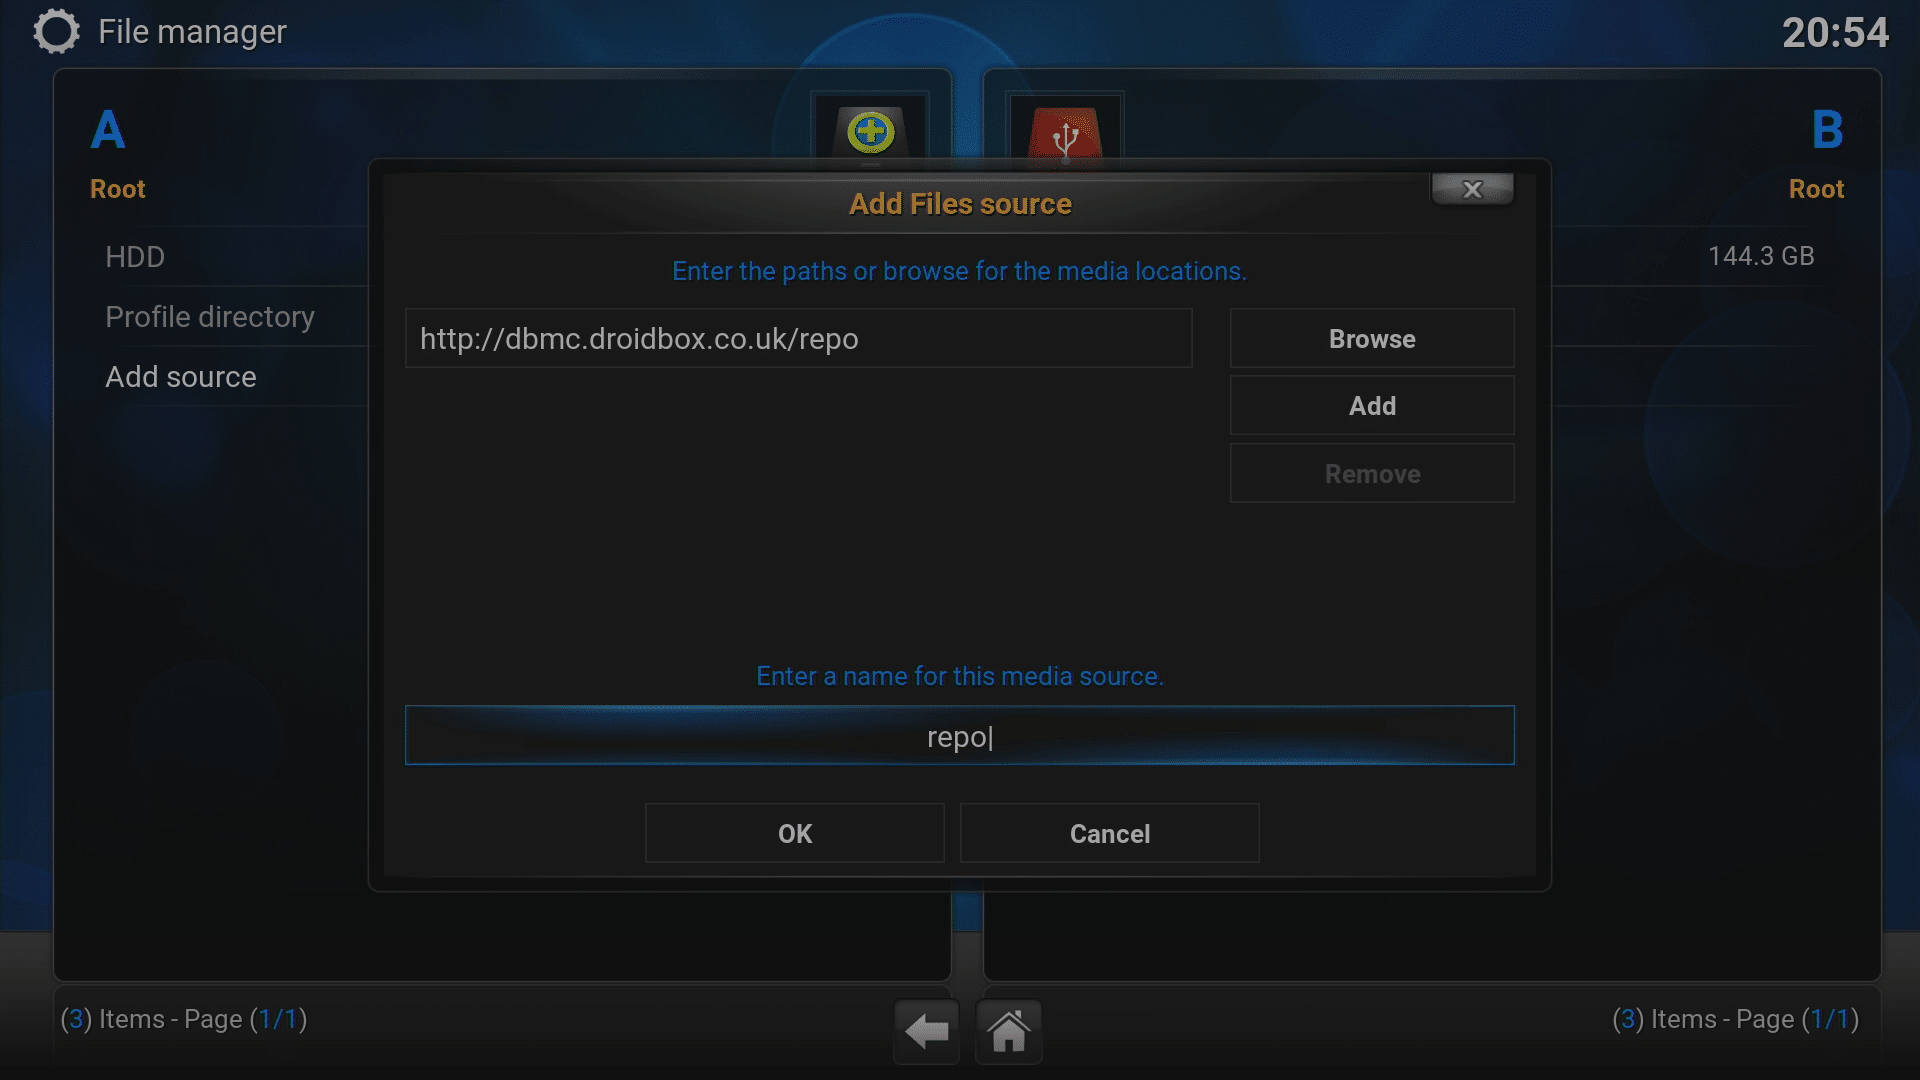
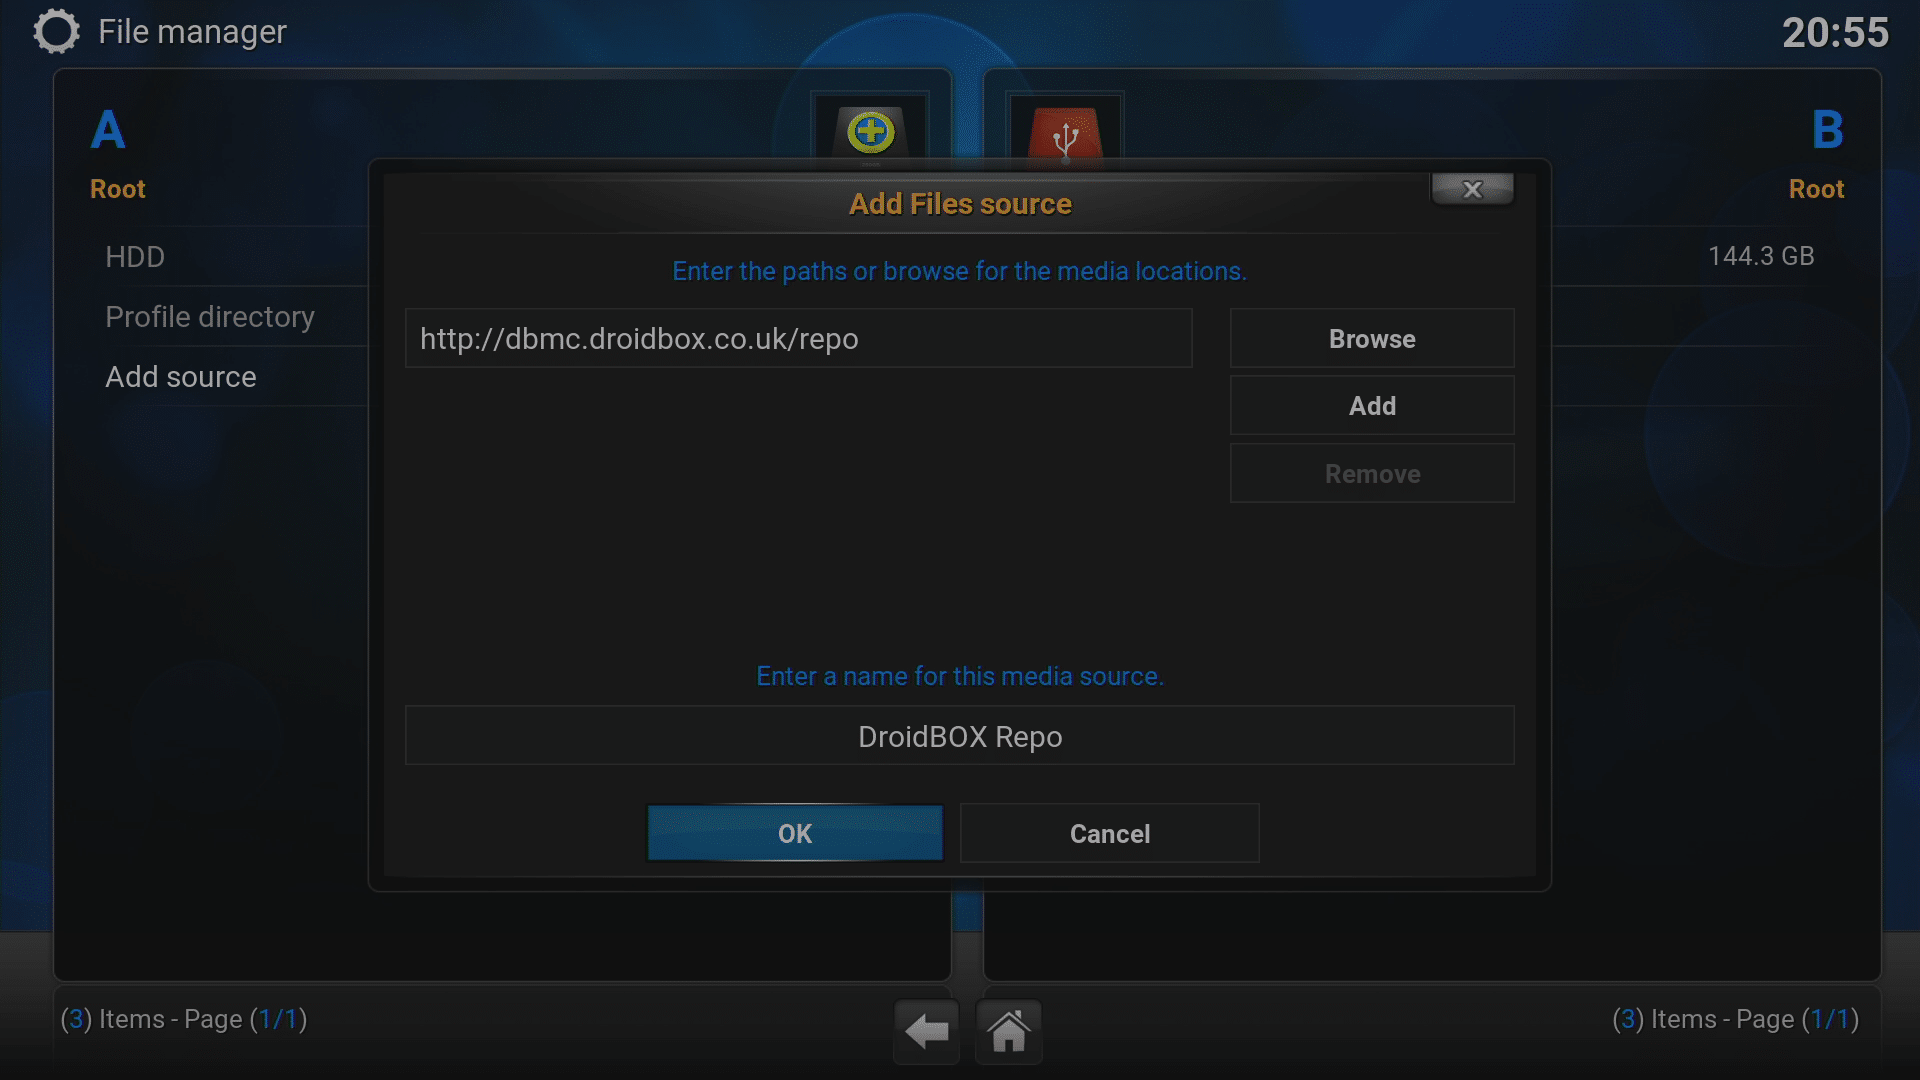
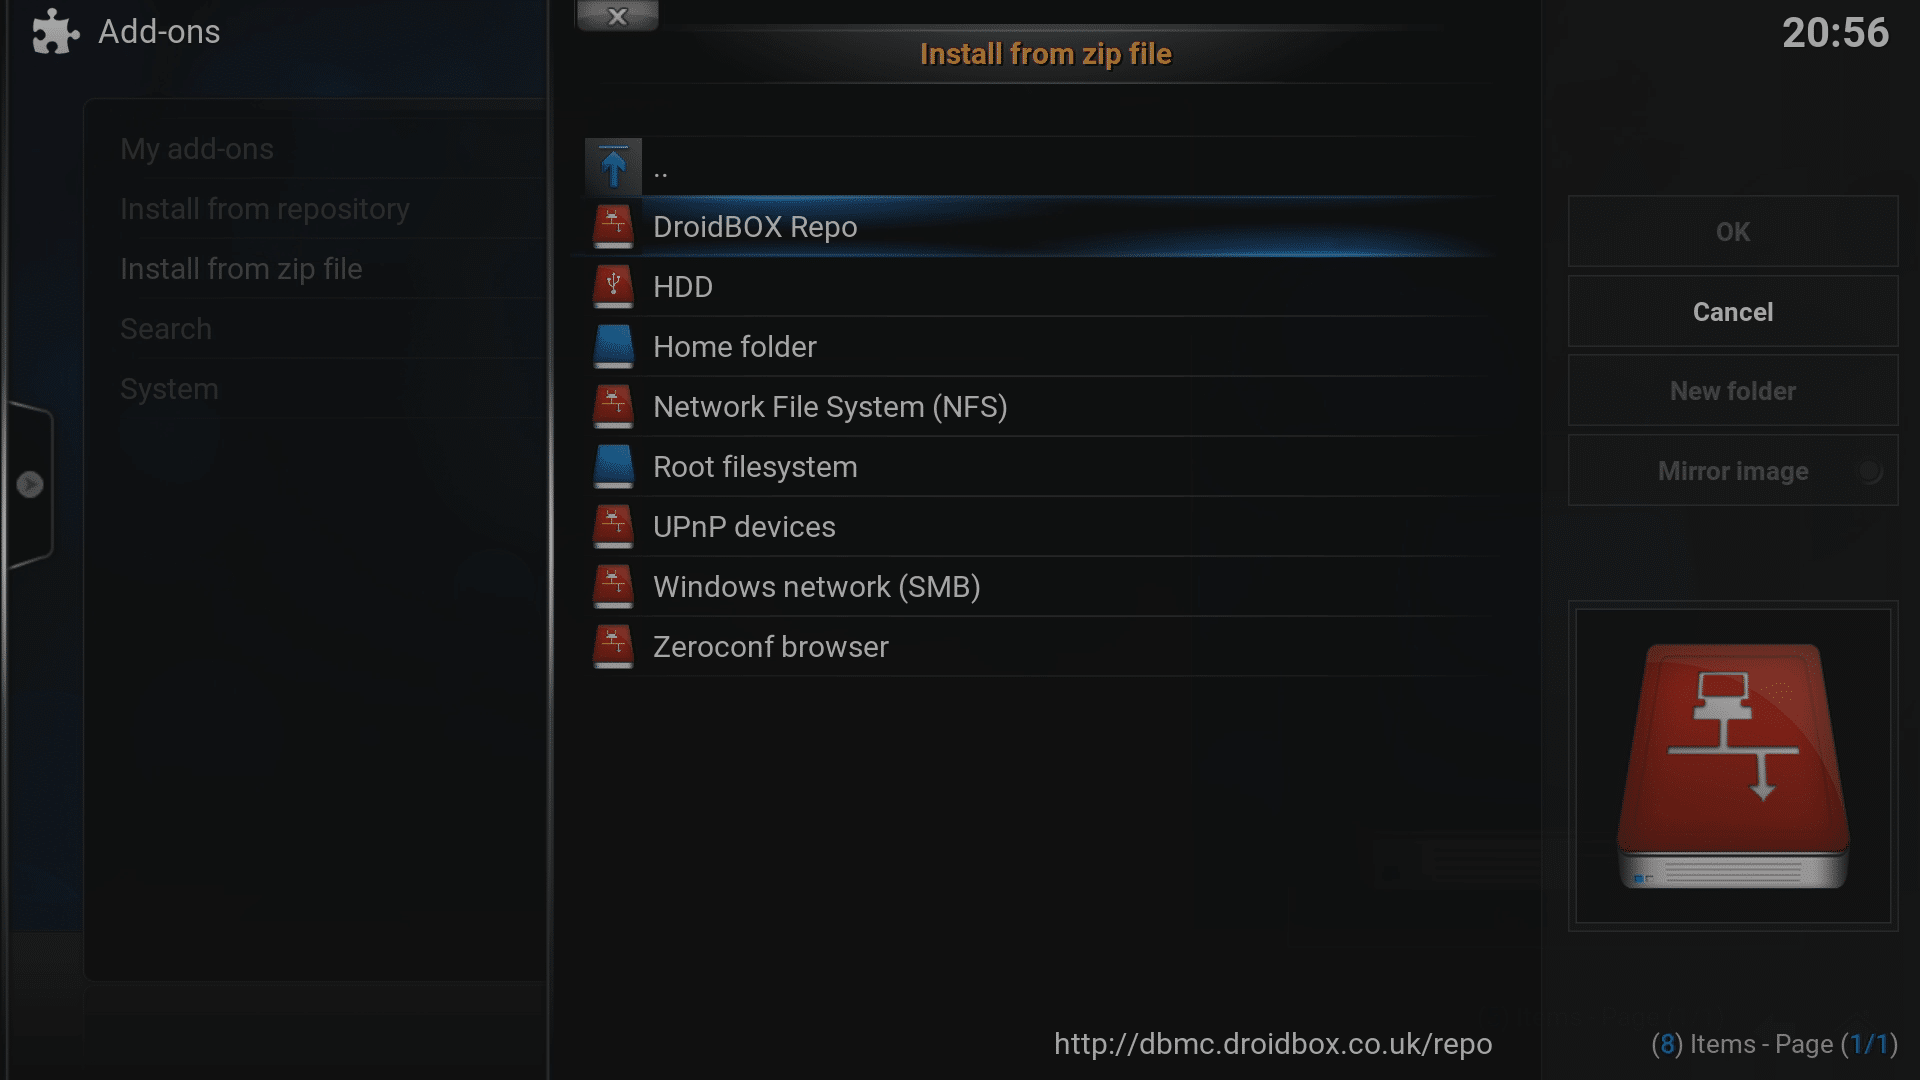
- Click the top box, type in http://dbmc.droidbox.co.uk/repo for the address, then click OK.
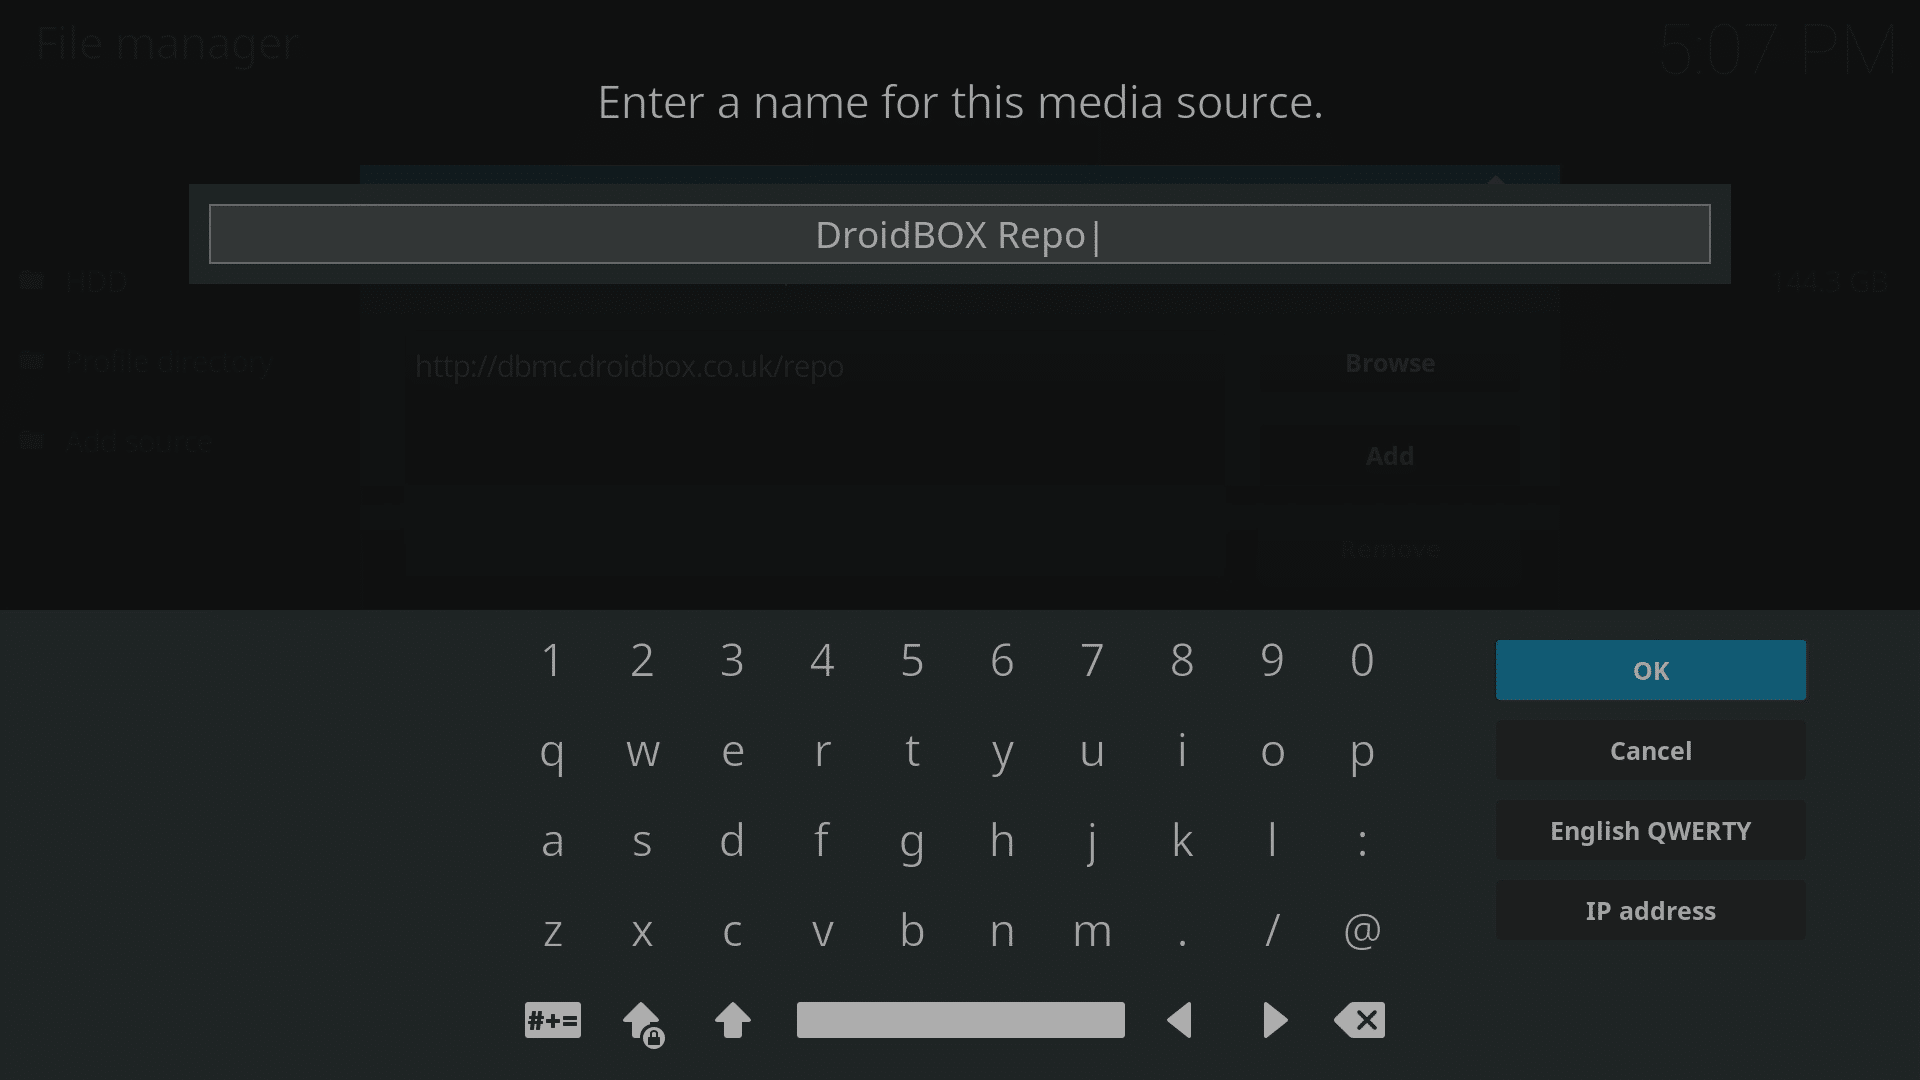
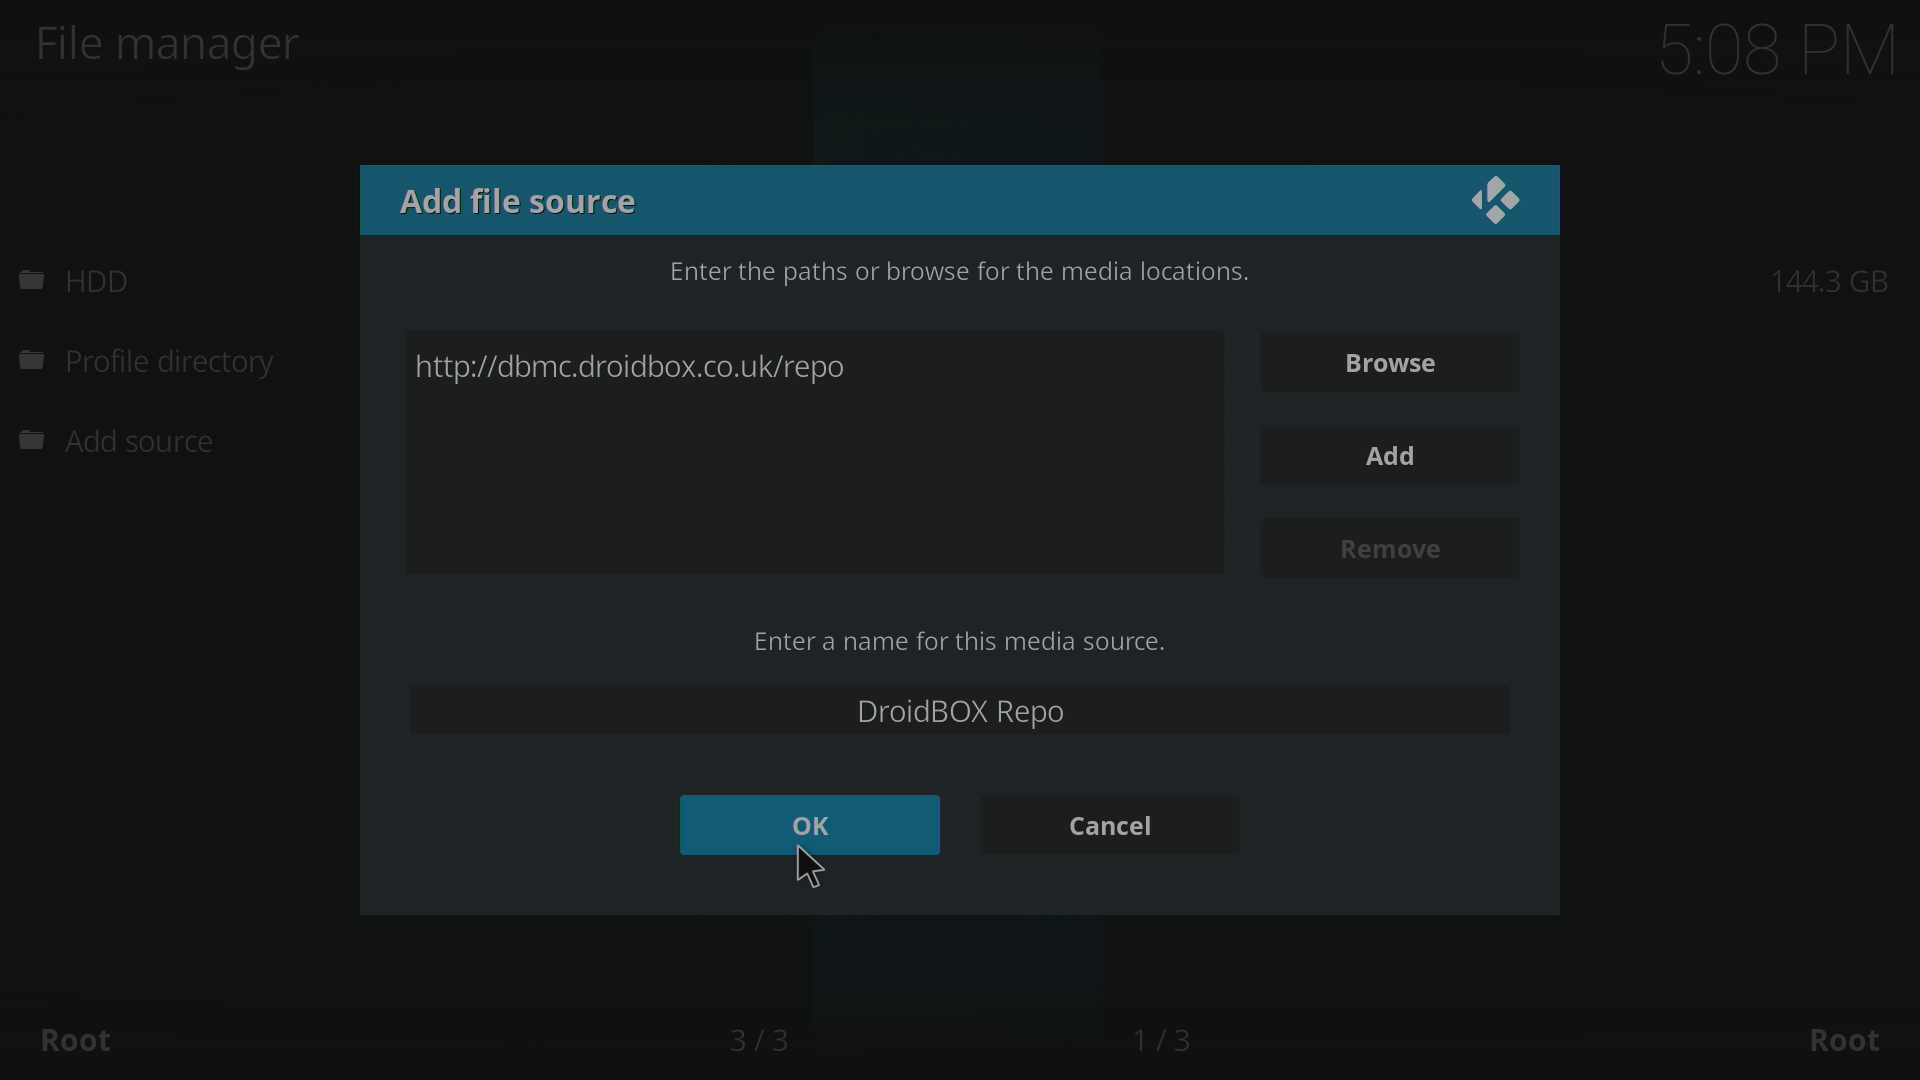
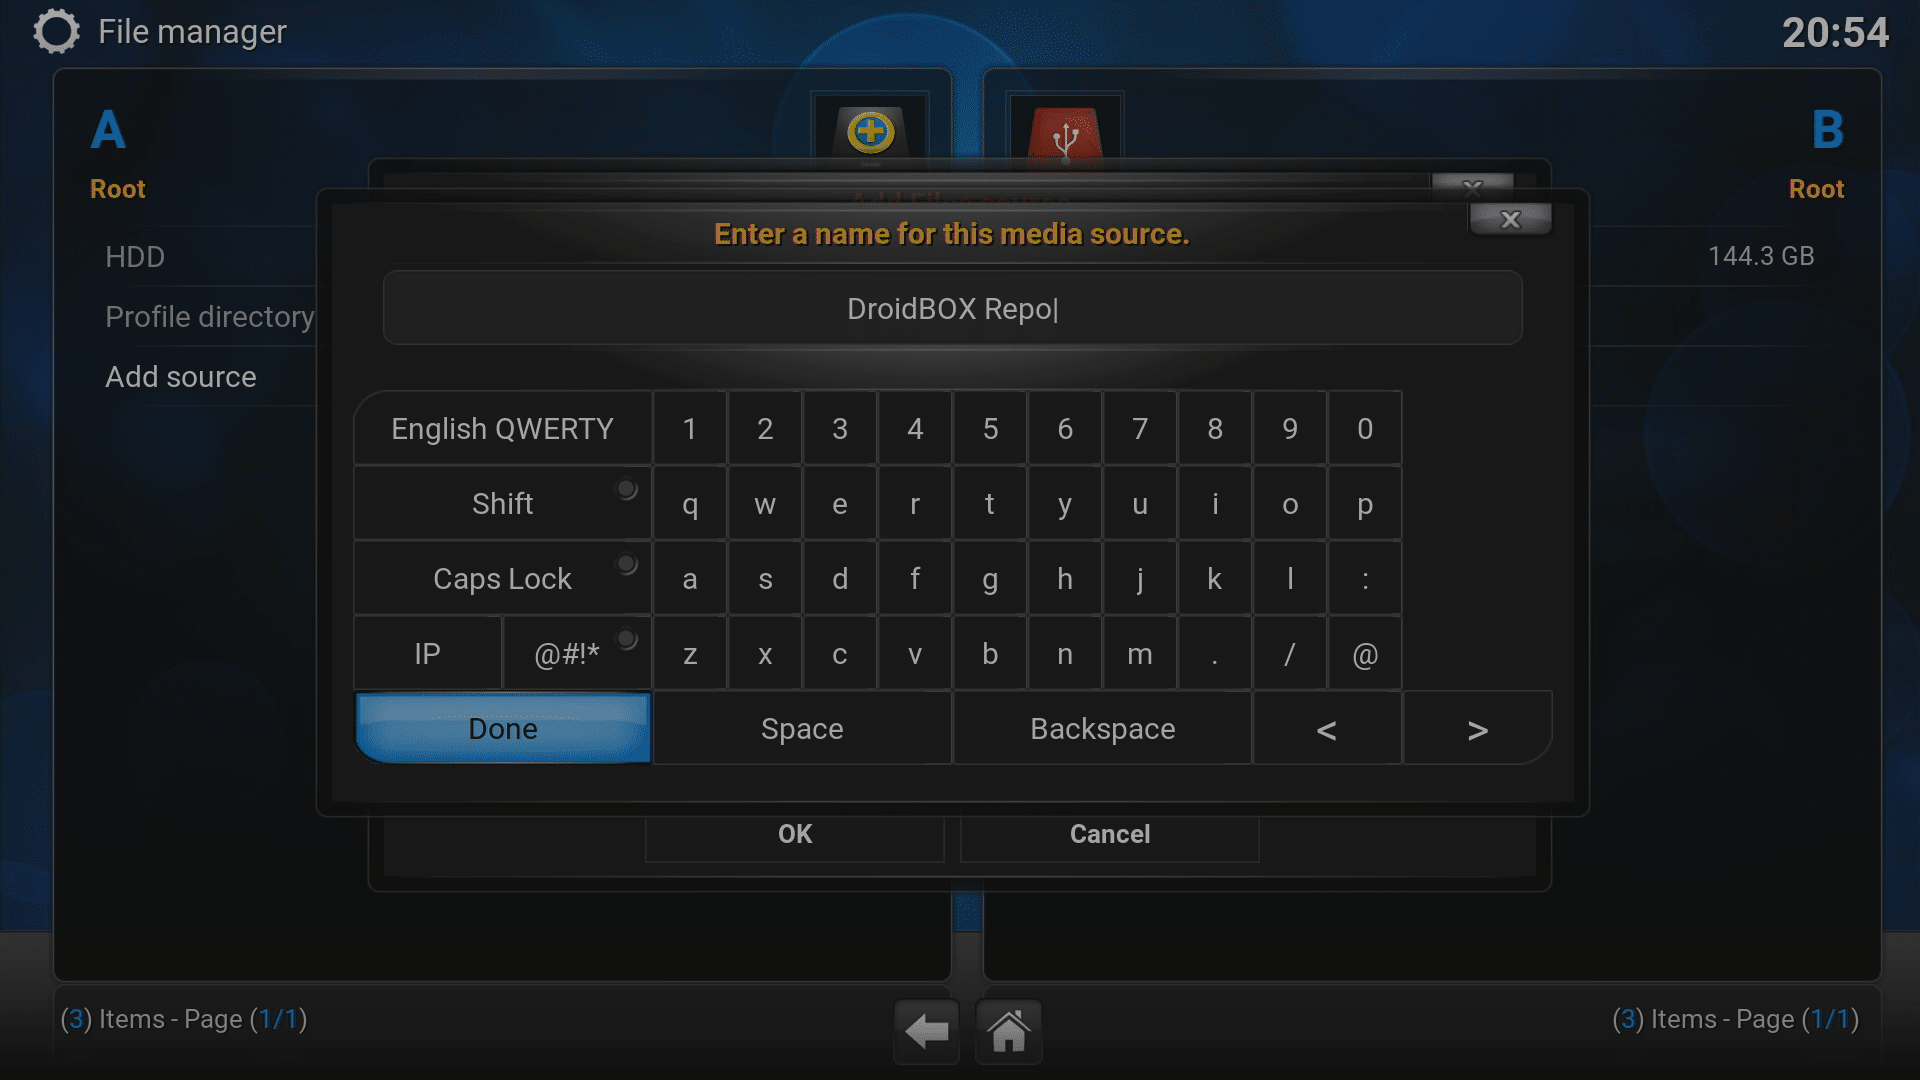
- Select the 2nd box and label it (anything you like) then click OK again.
- Click OK in the last window, and now head to Kodi’s homescreen and click the Add-ons menu.
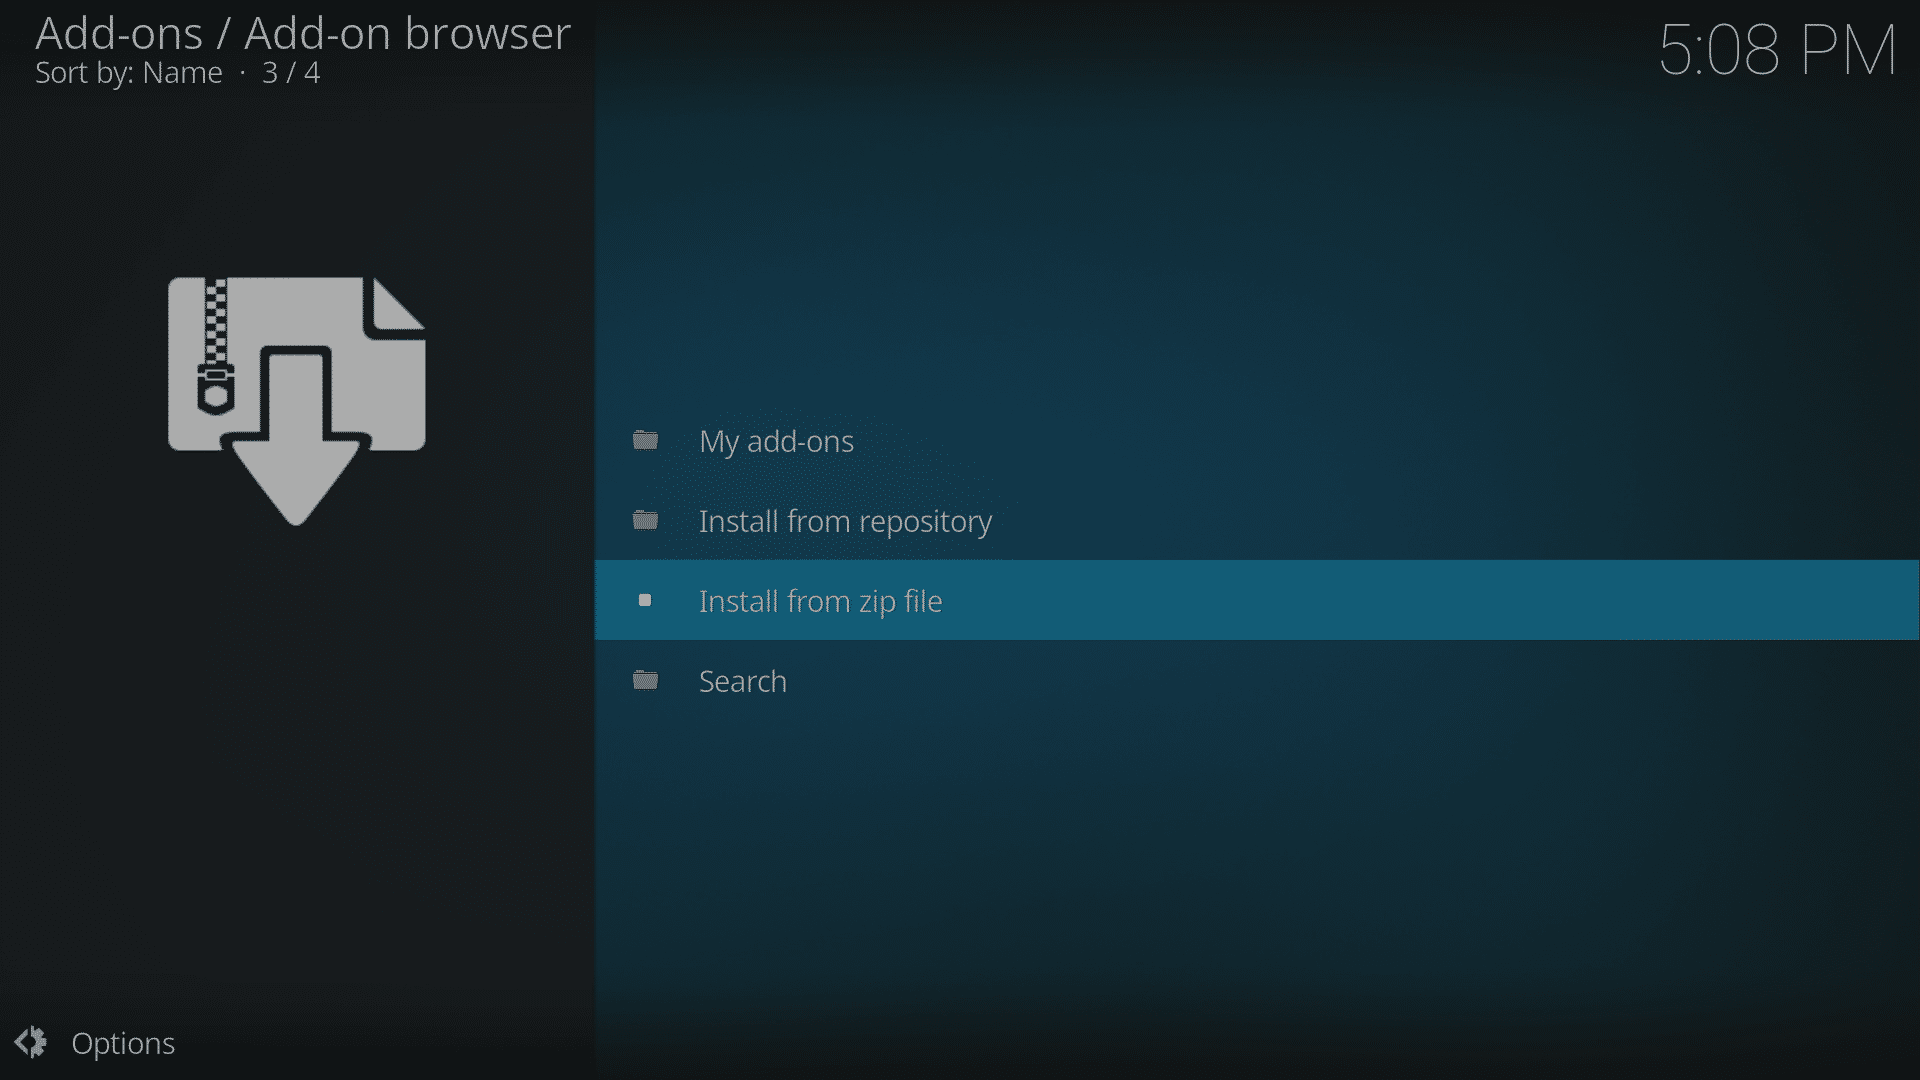
- Now click the Add-on Browser icon (an open cardboard box, top left of the screen).
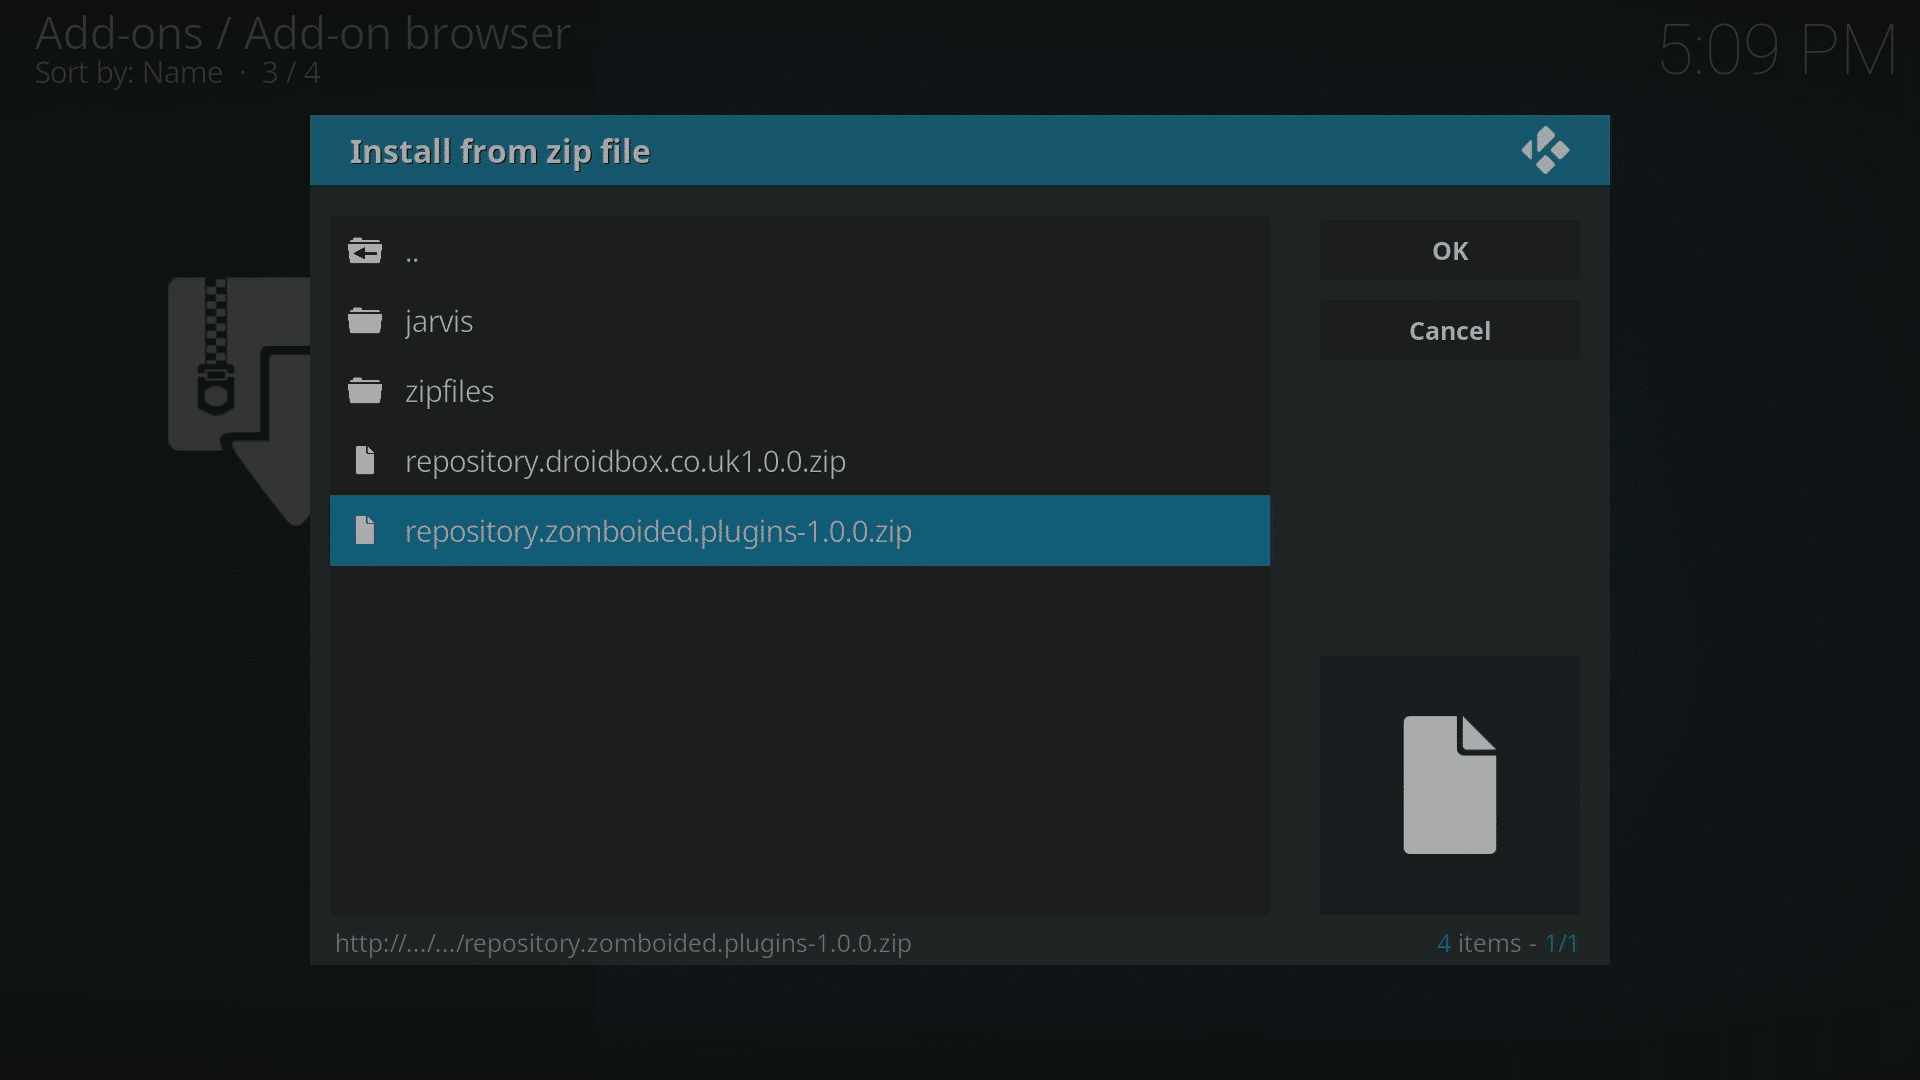
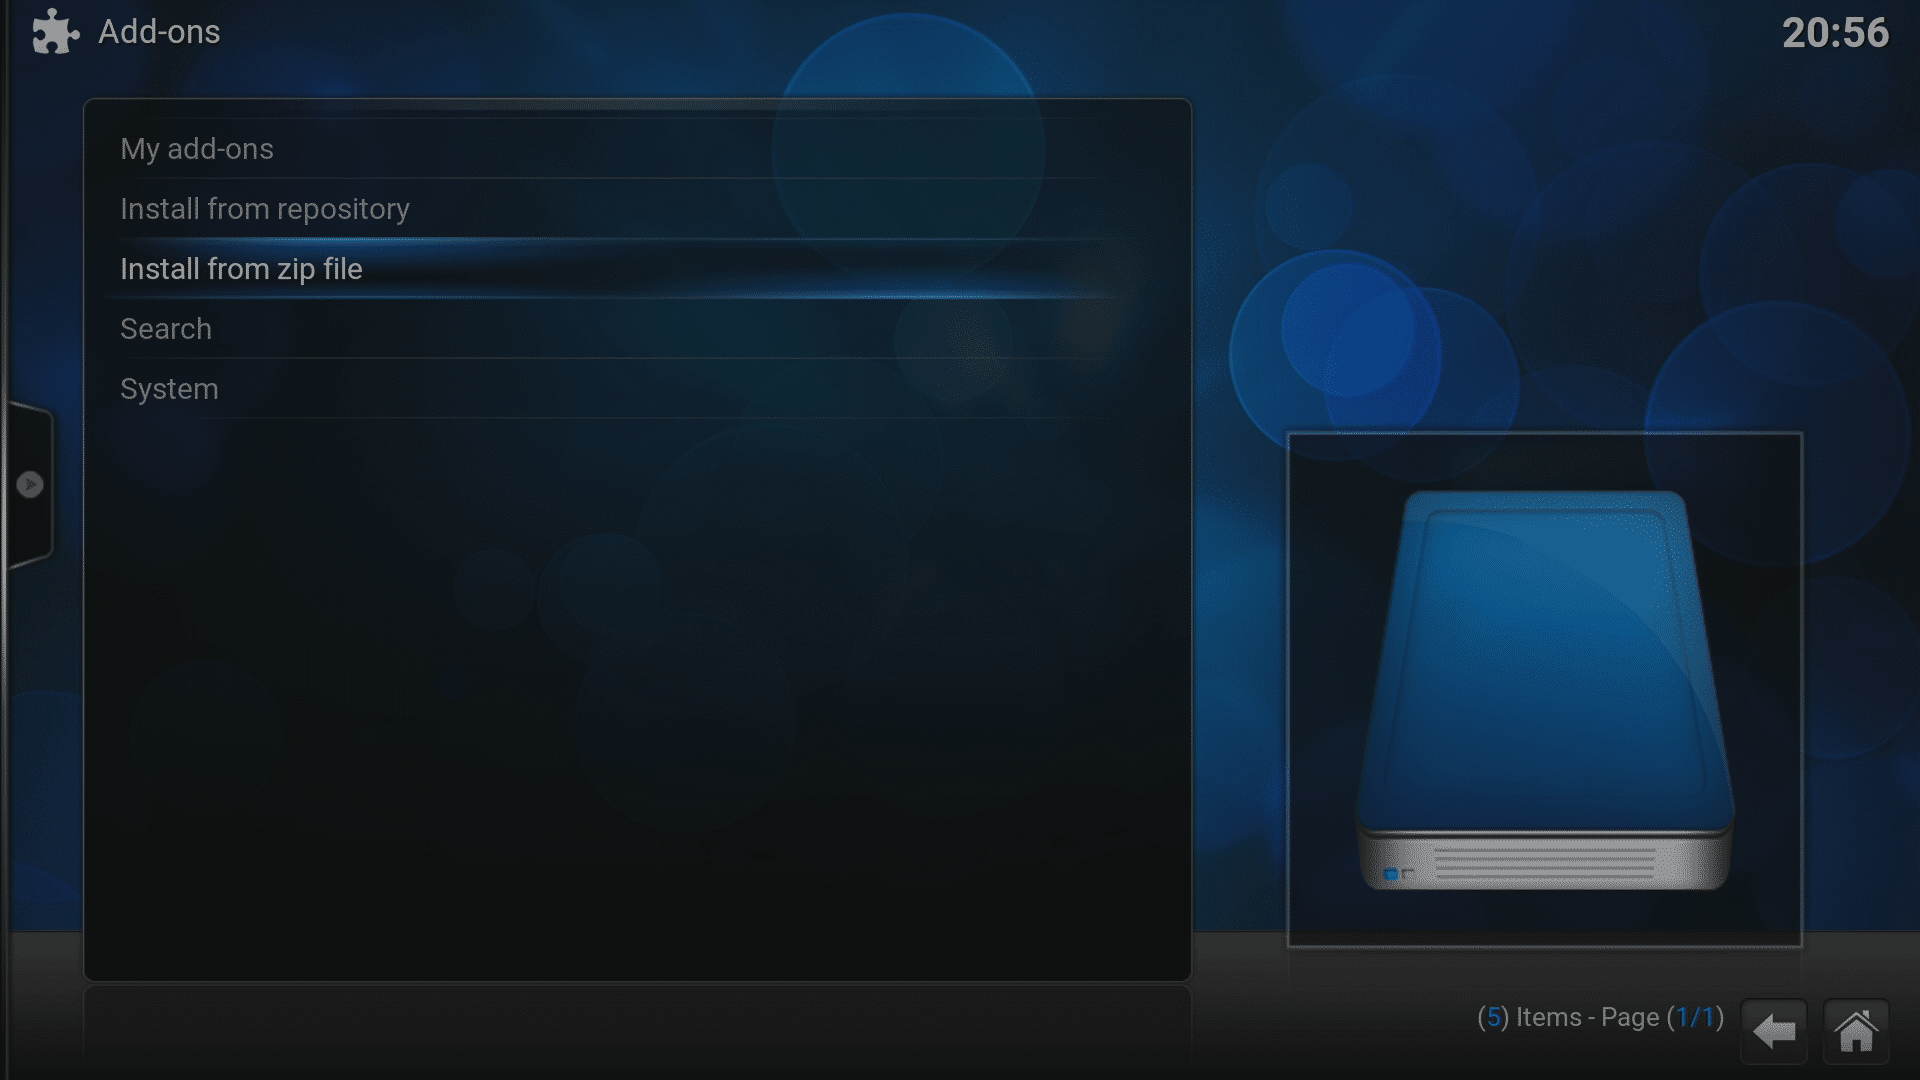
- Select “Install from zip file”.
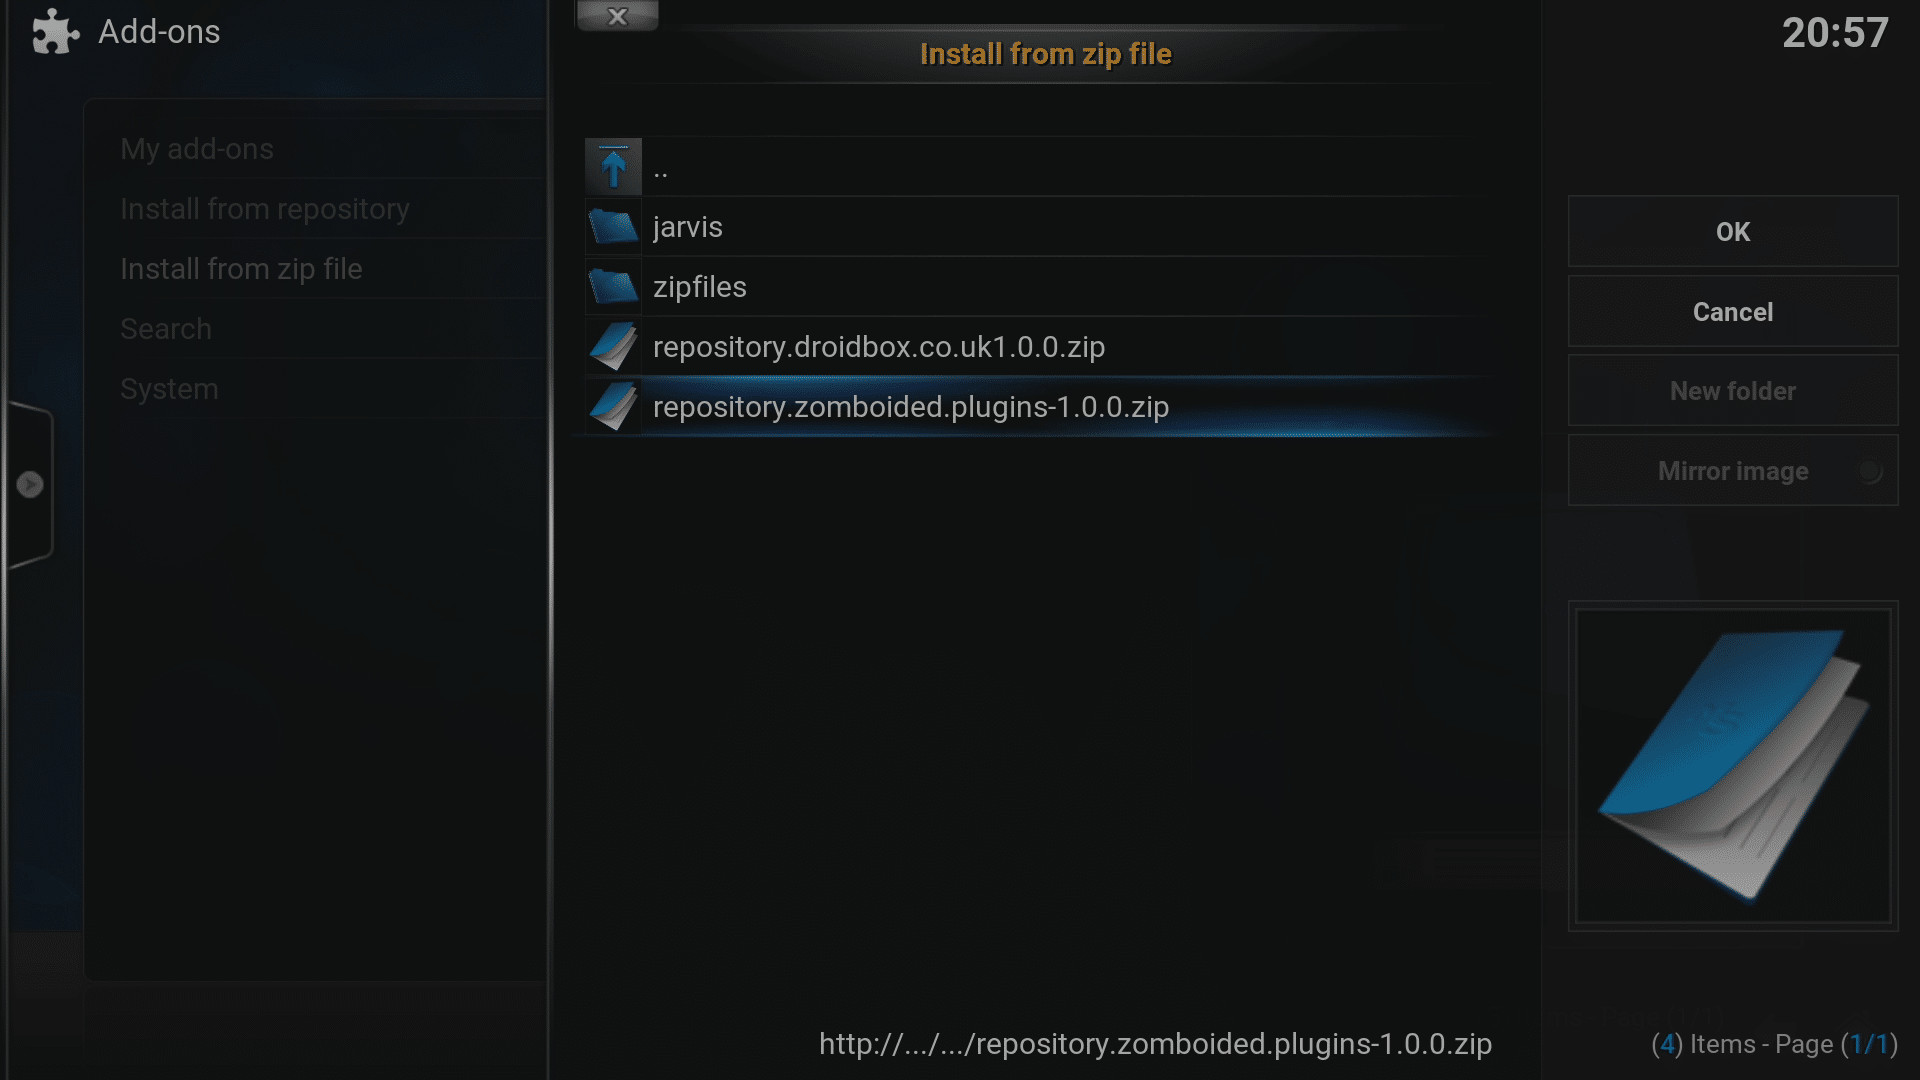
- Click on the entry with the label you created a moment ago.
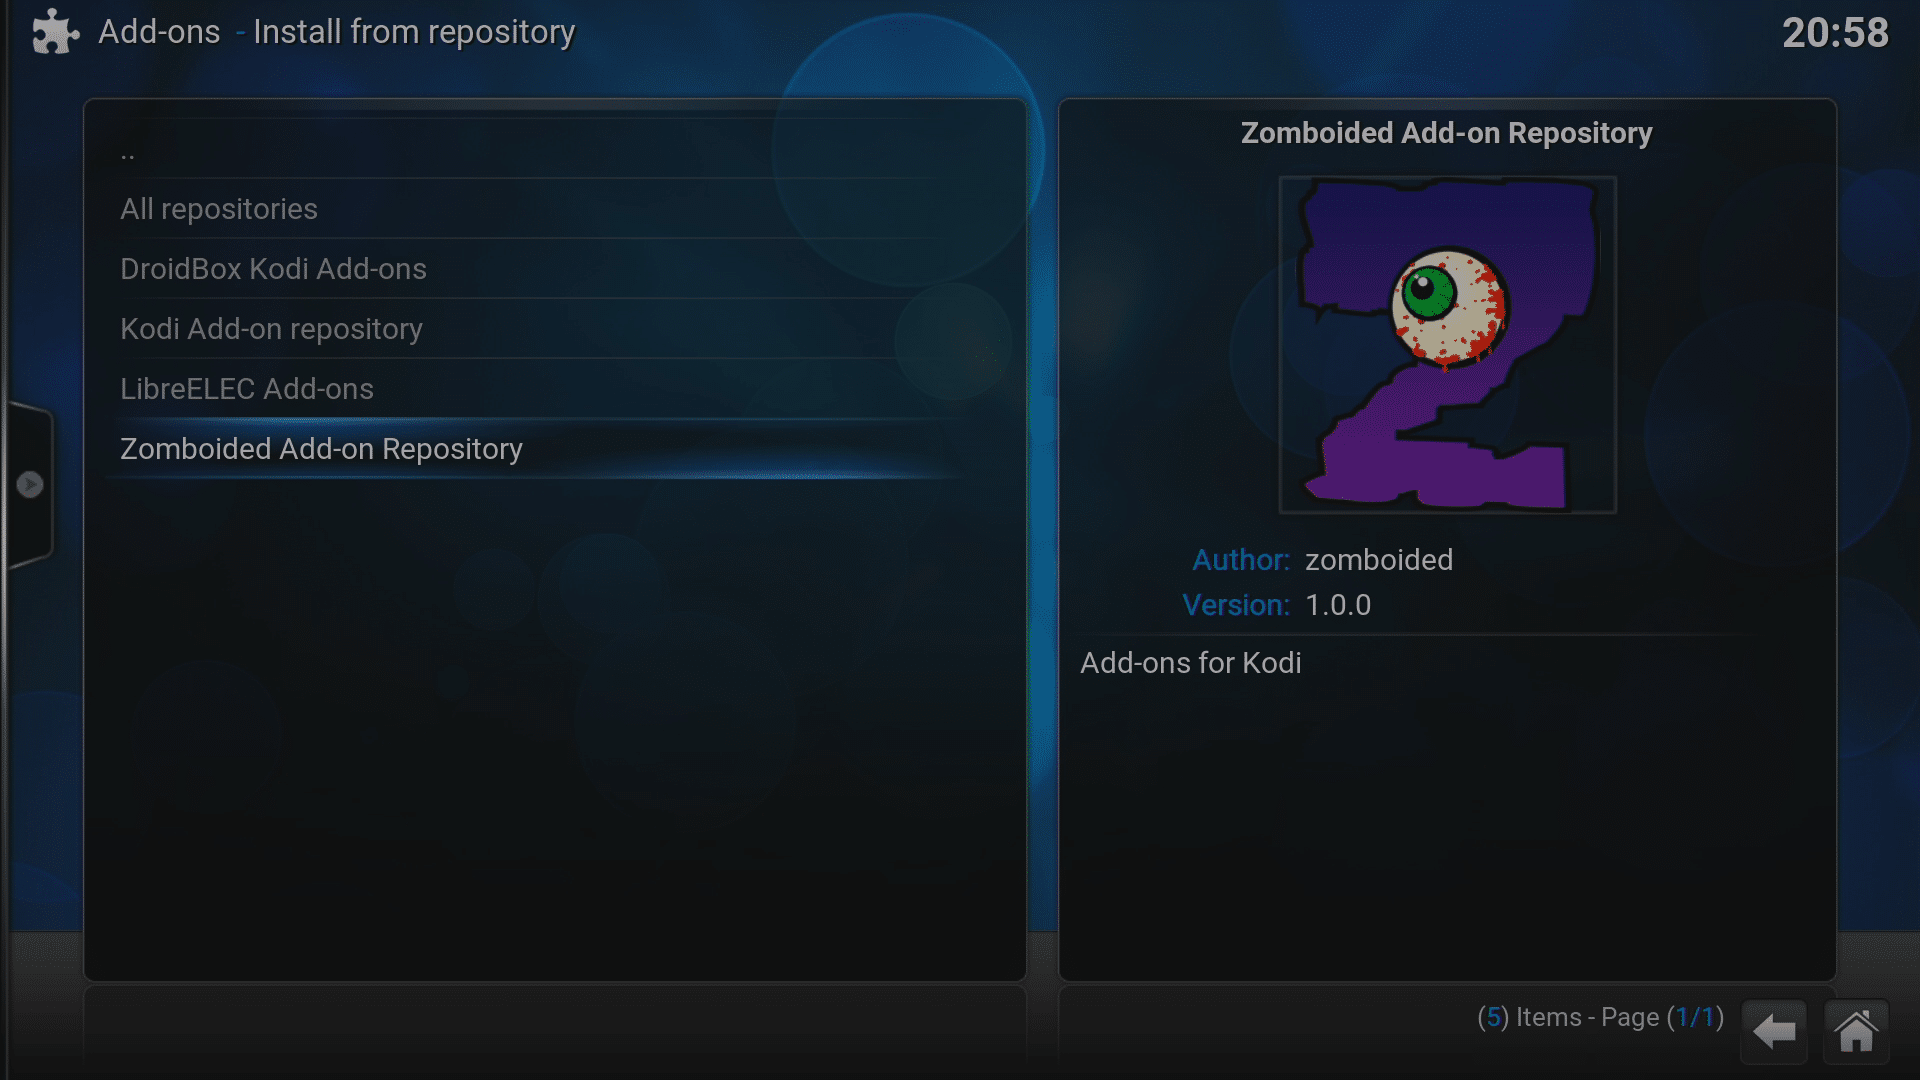
- Click on repository.zomboided.plugins-1.0.0.zip ,wait a few moments for the process to complete, a notification will likely appear.
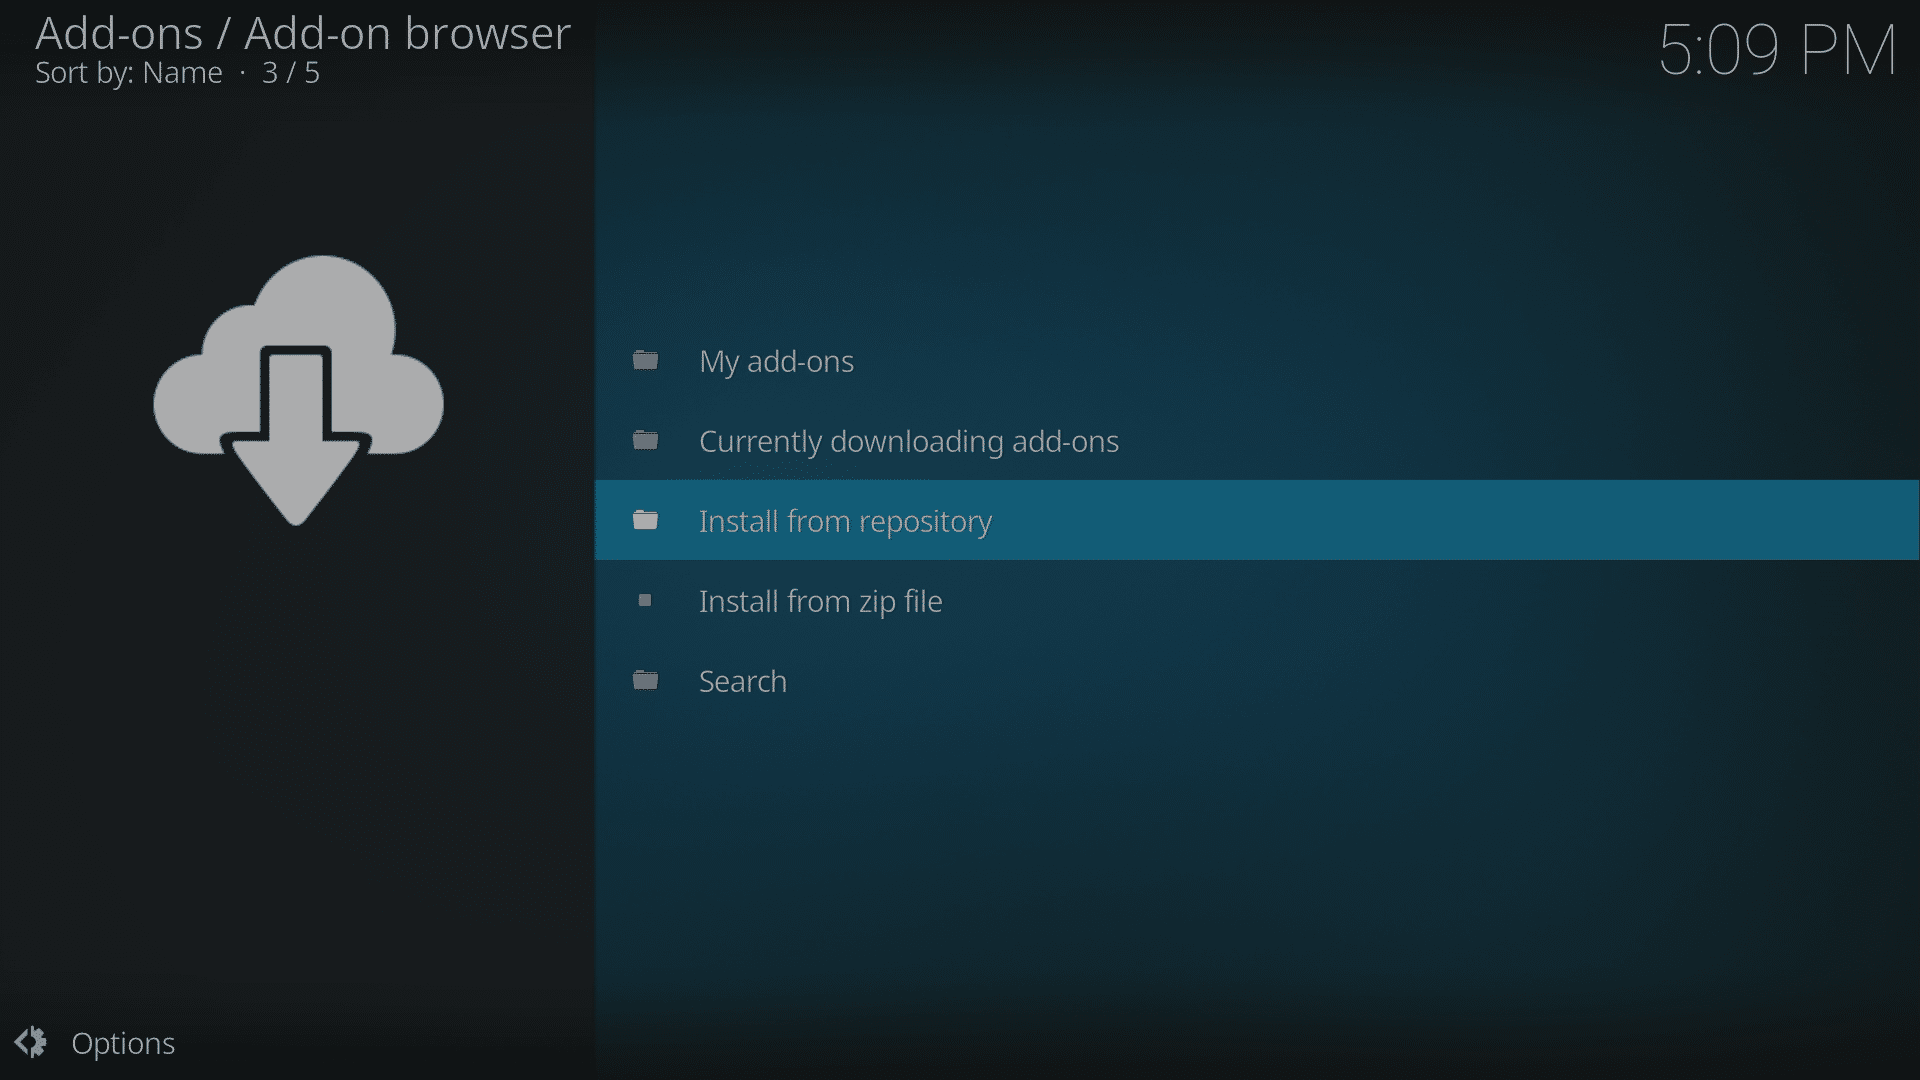
- Now click on “Install from repository”, then the Zomboided entry.
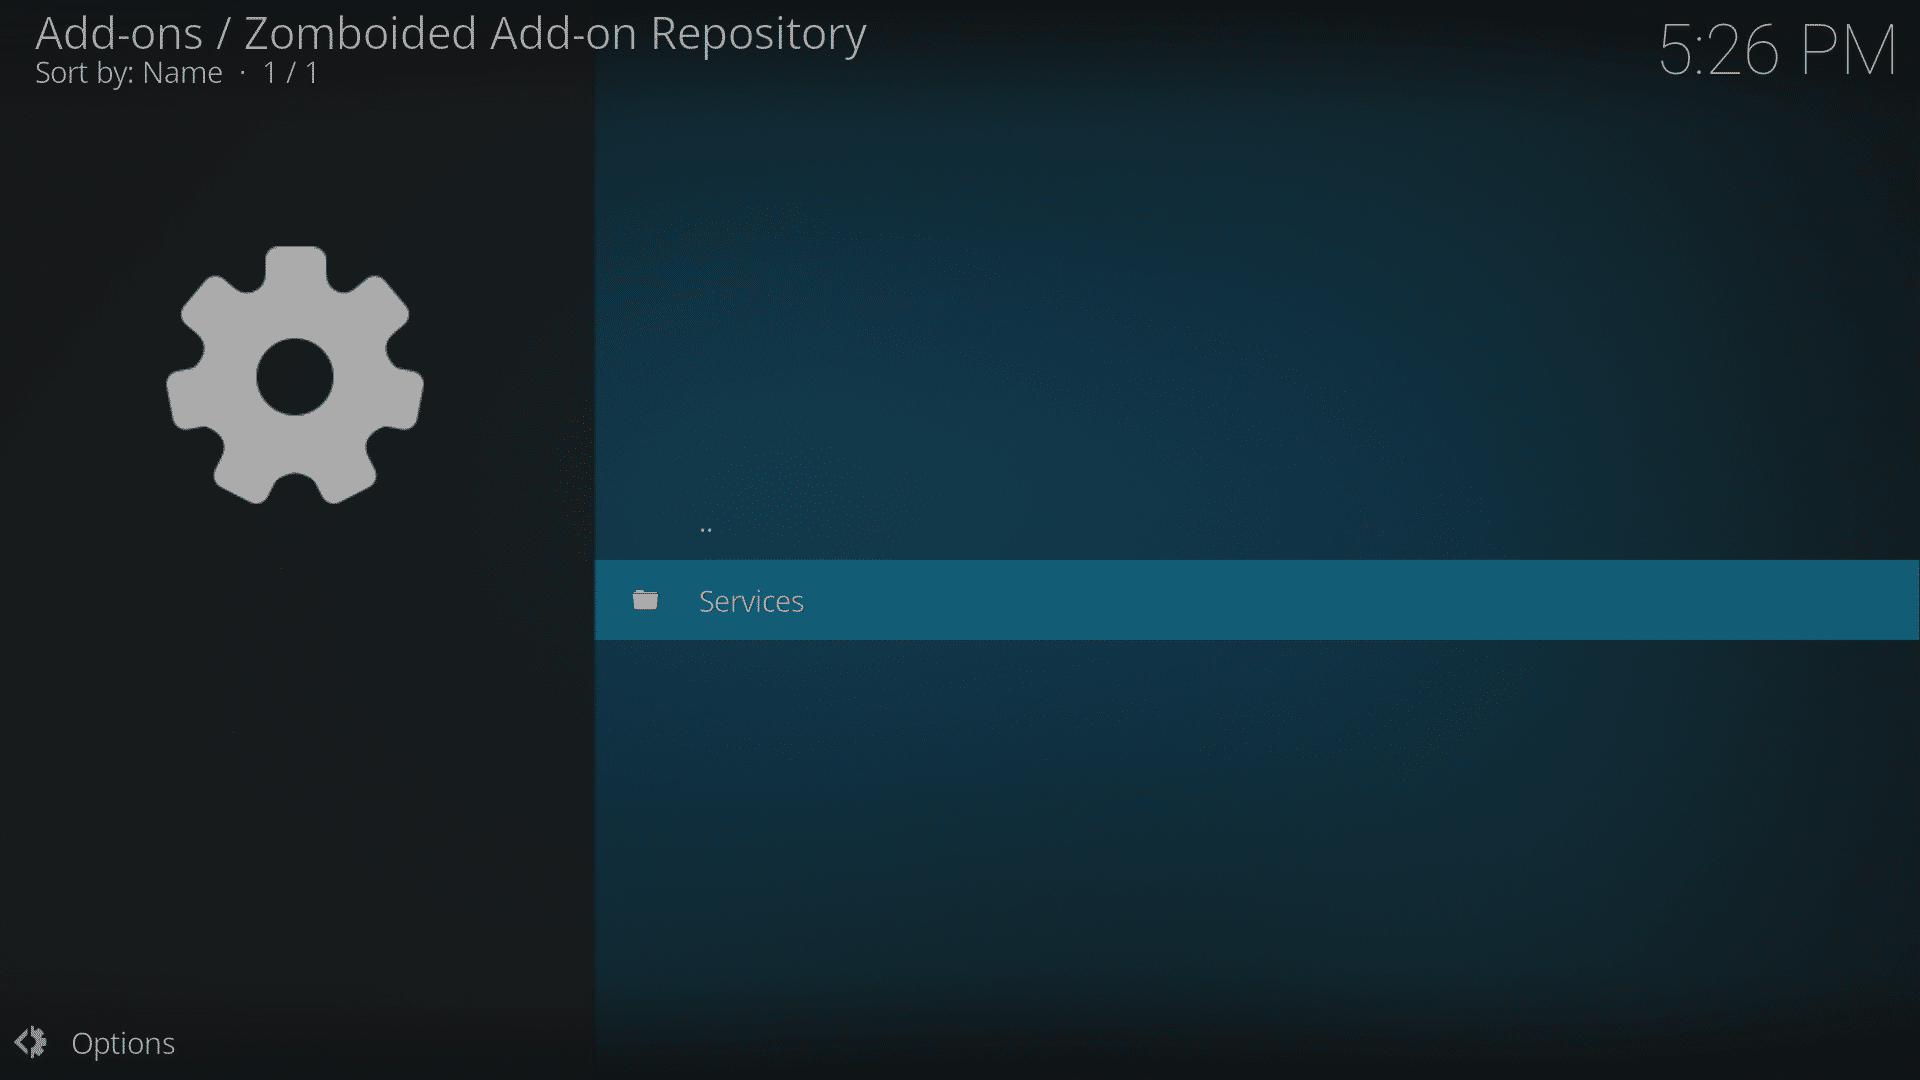
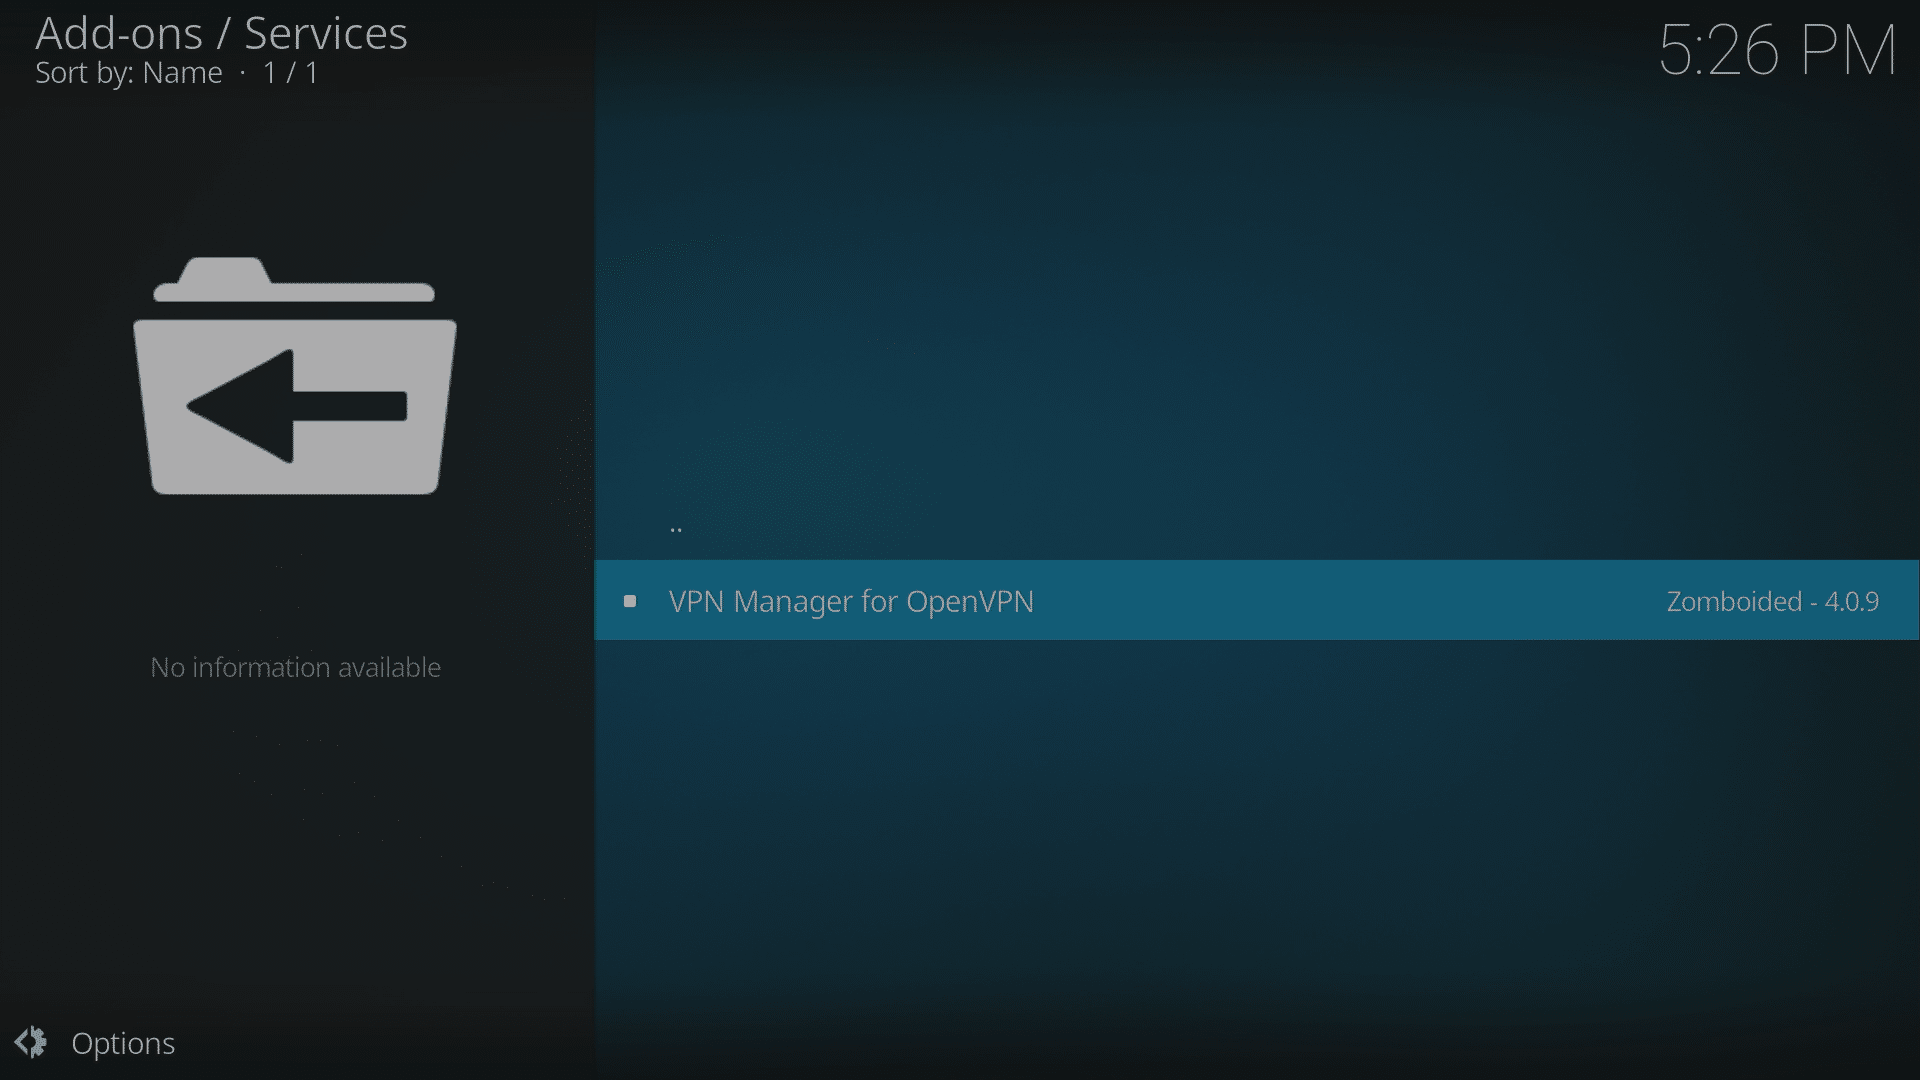
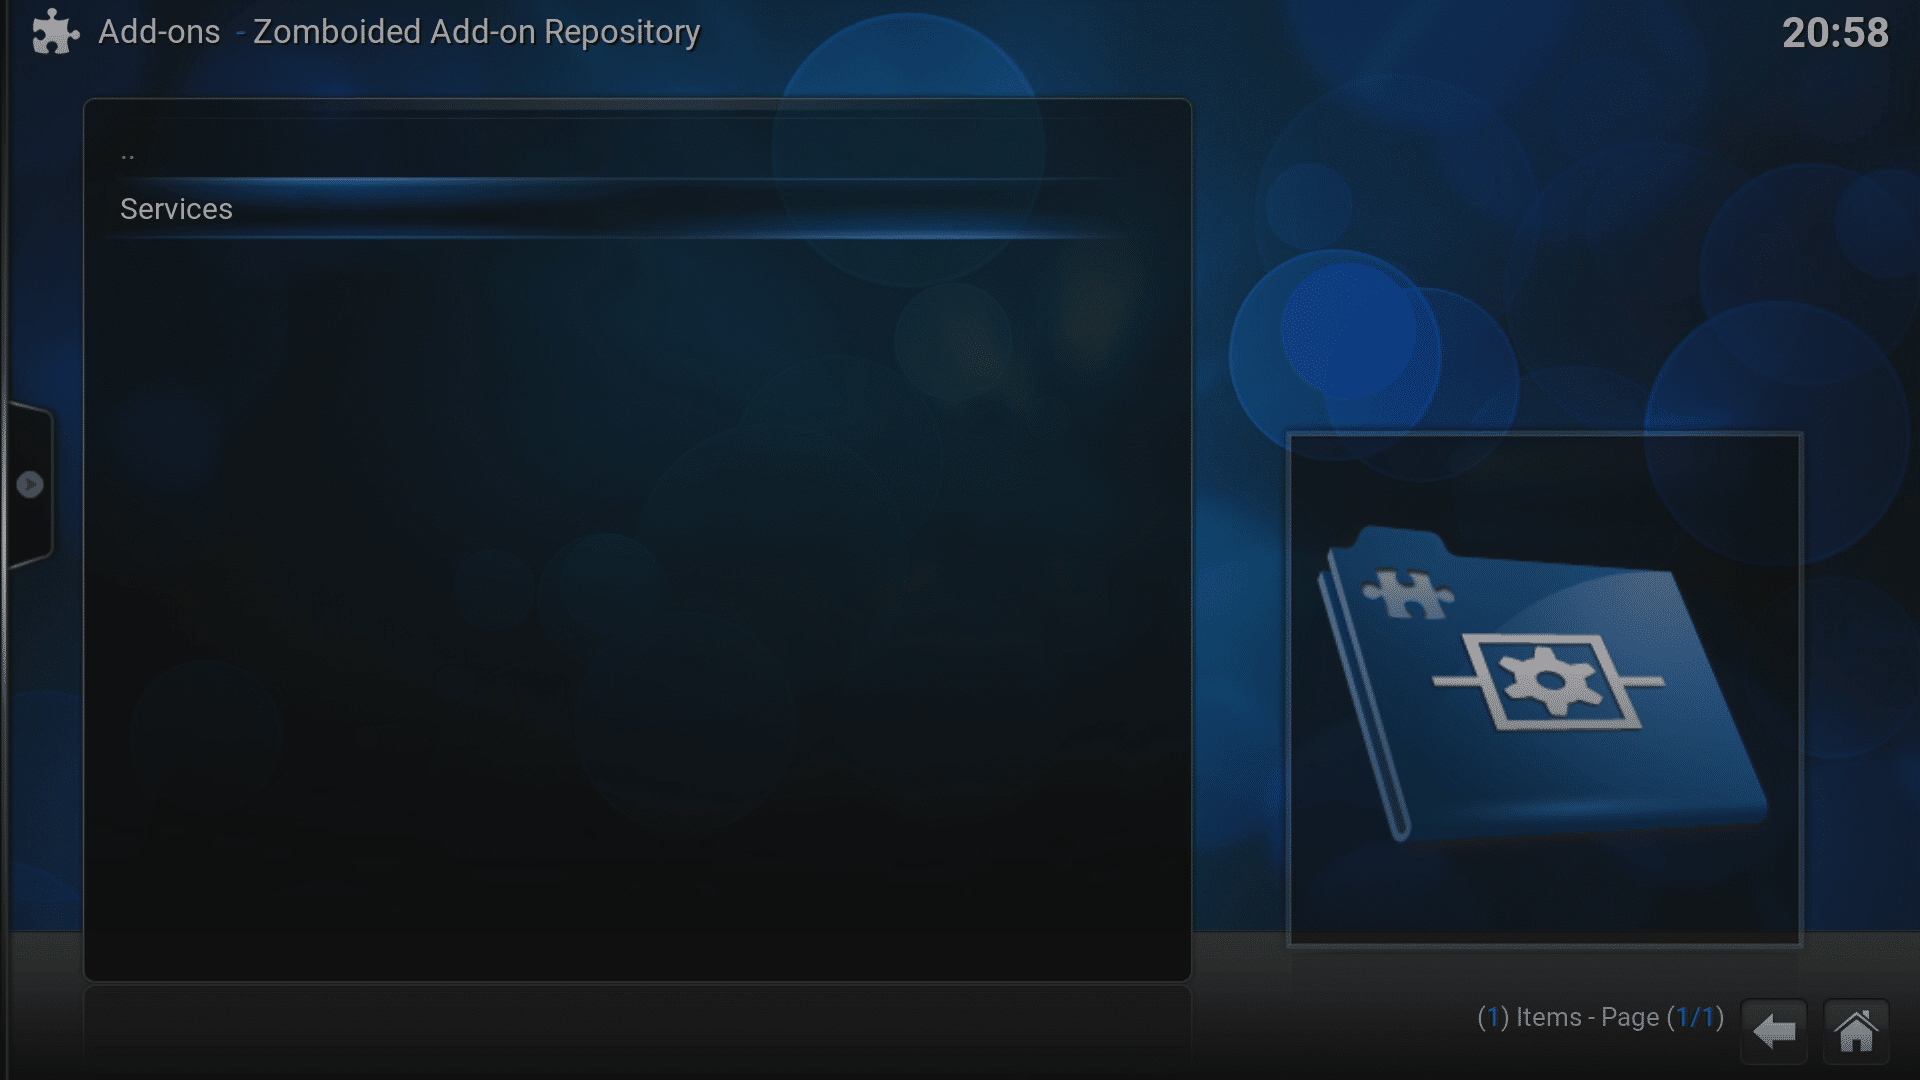
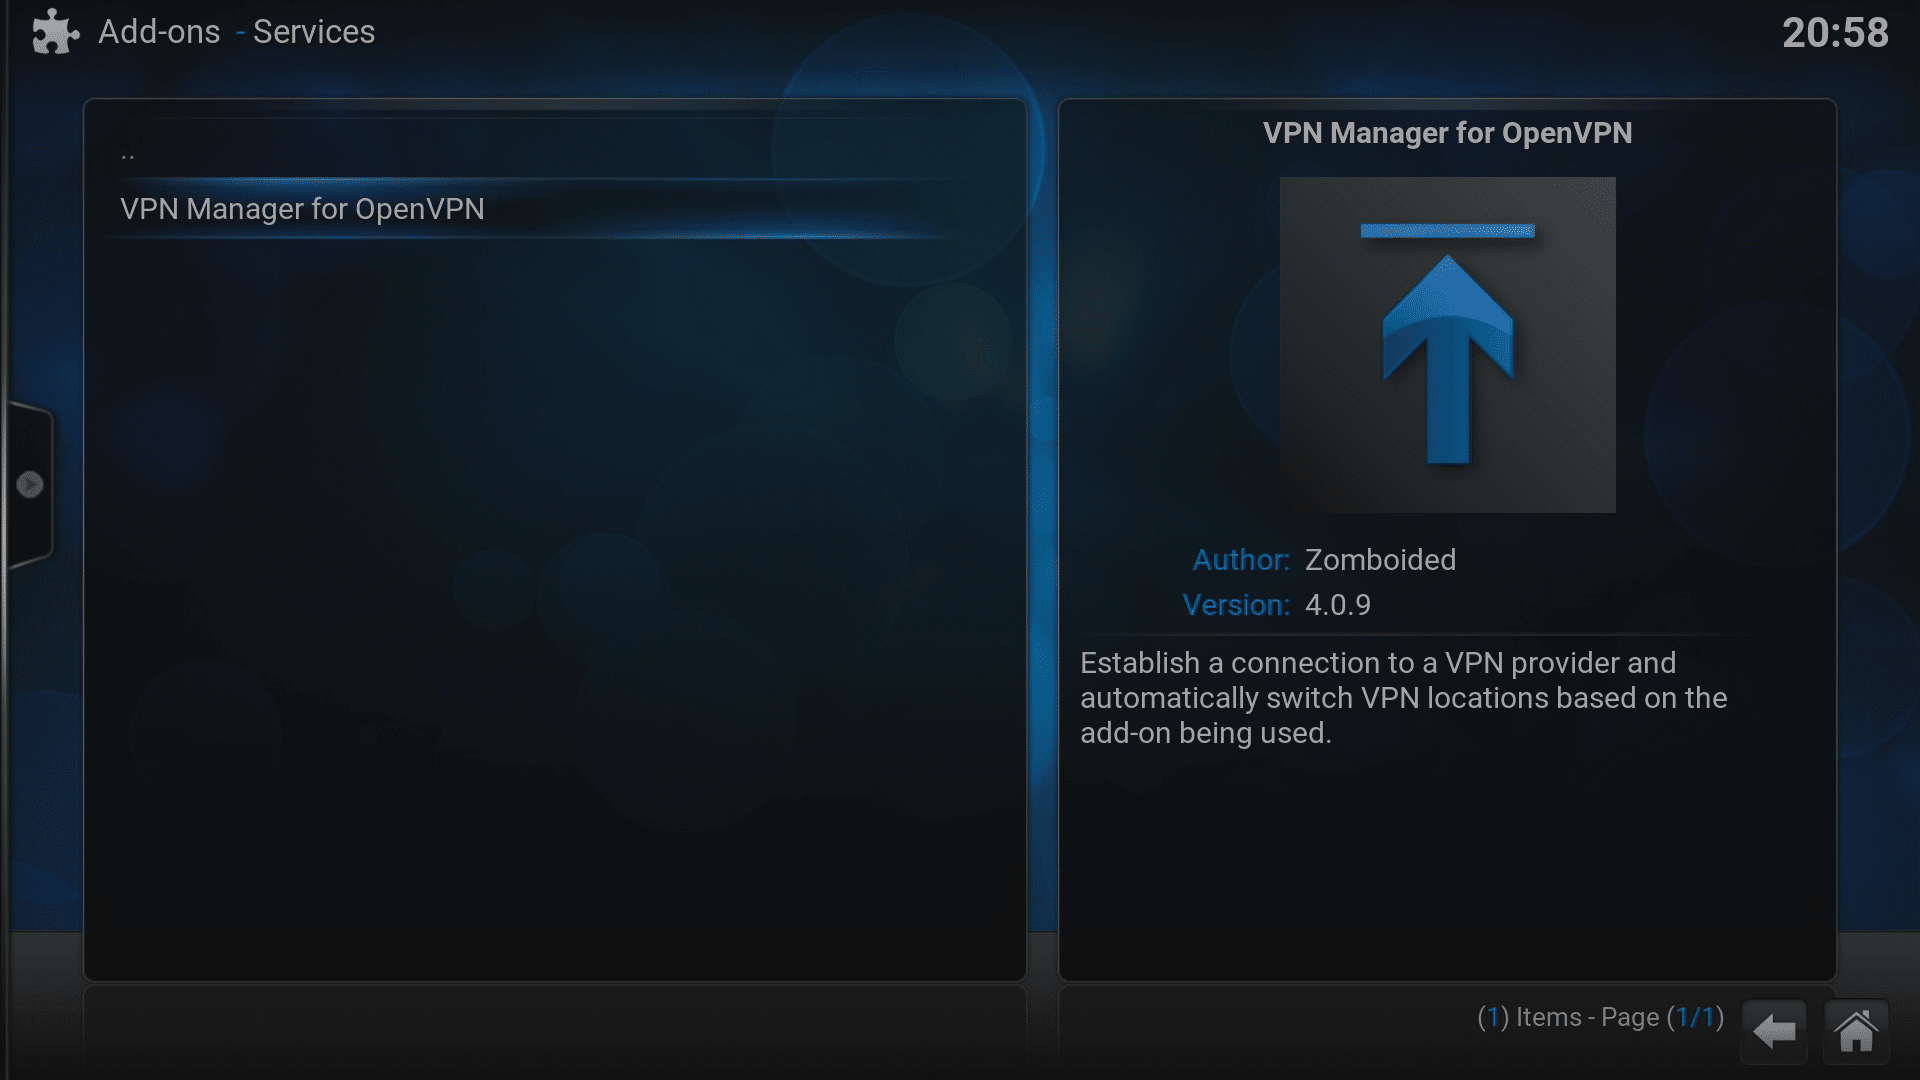
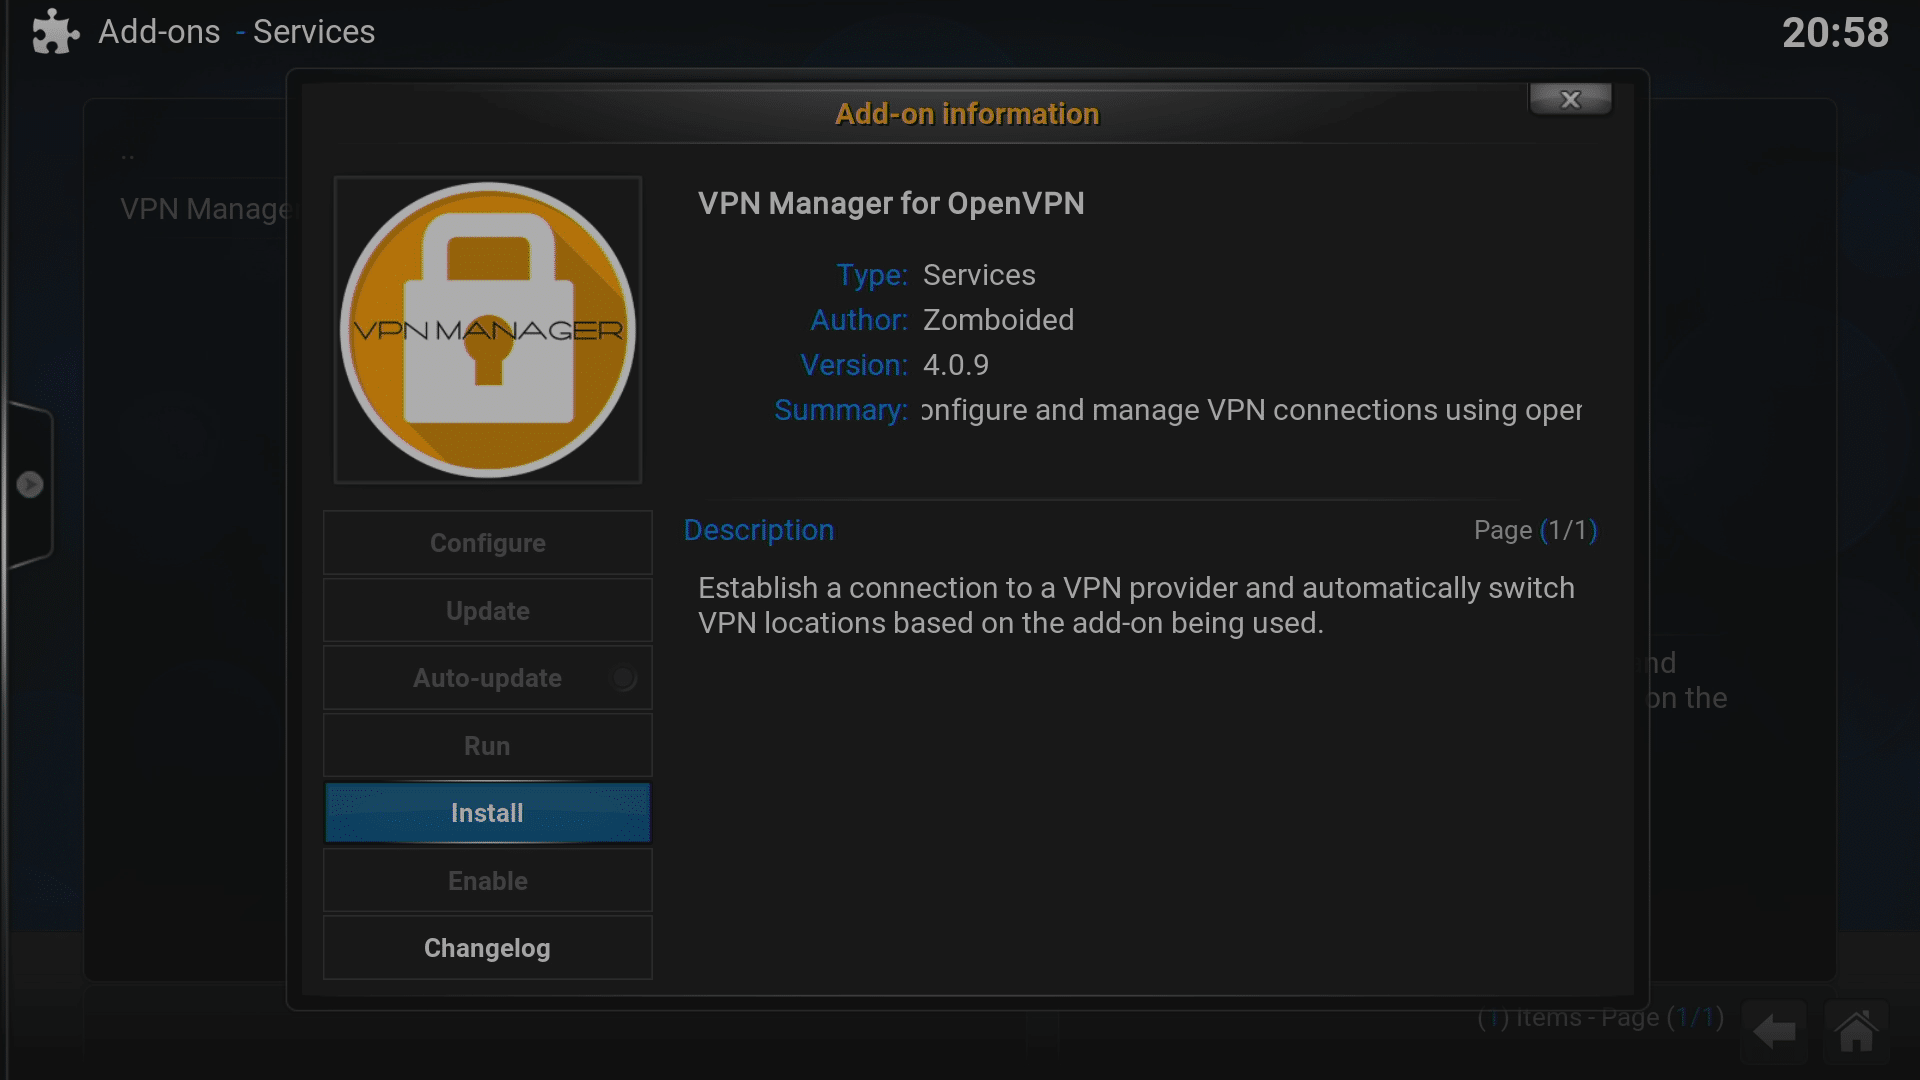
- Click “Services” and select the VPN Manager for OpenVPN entry, then click the Install button.
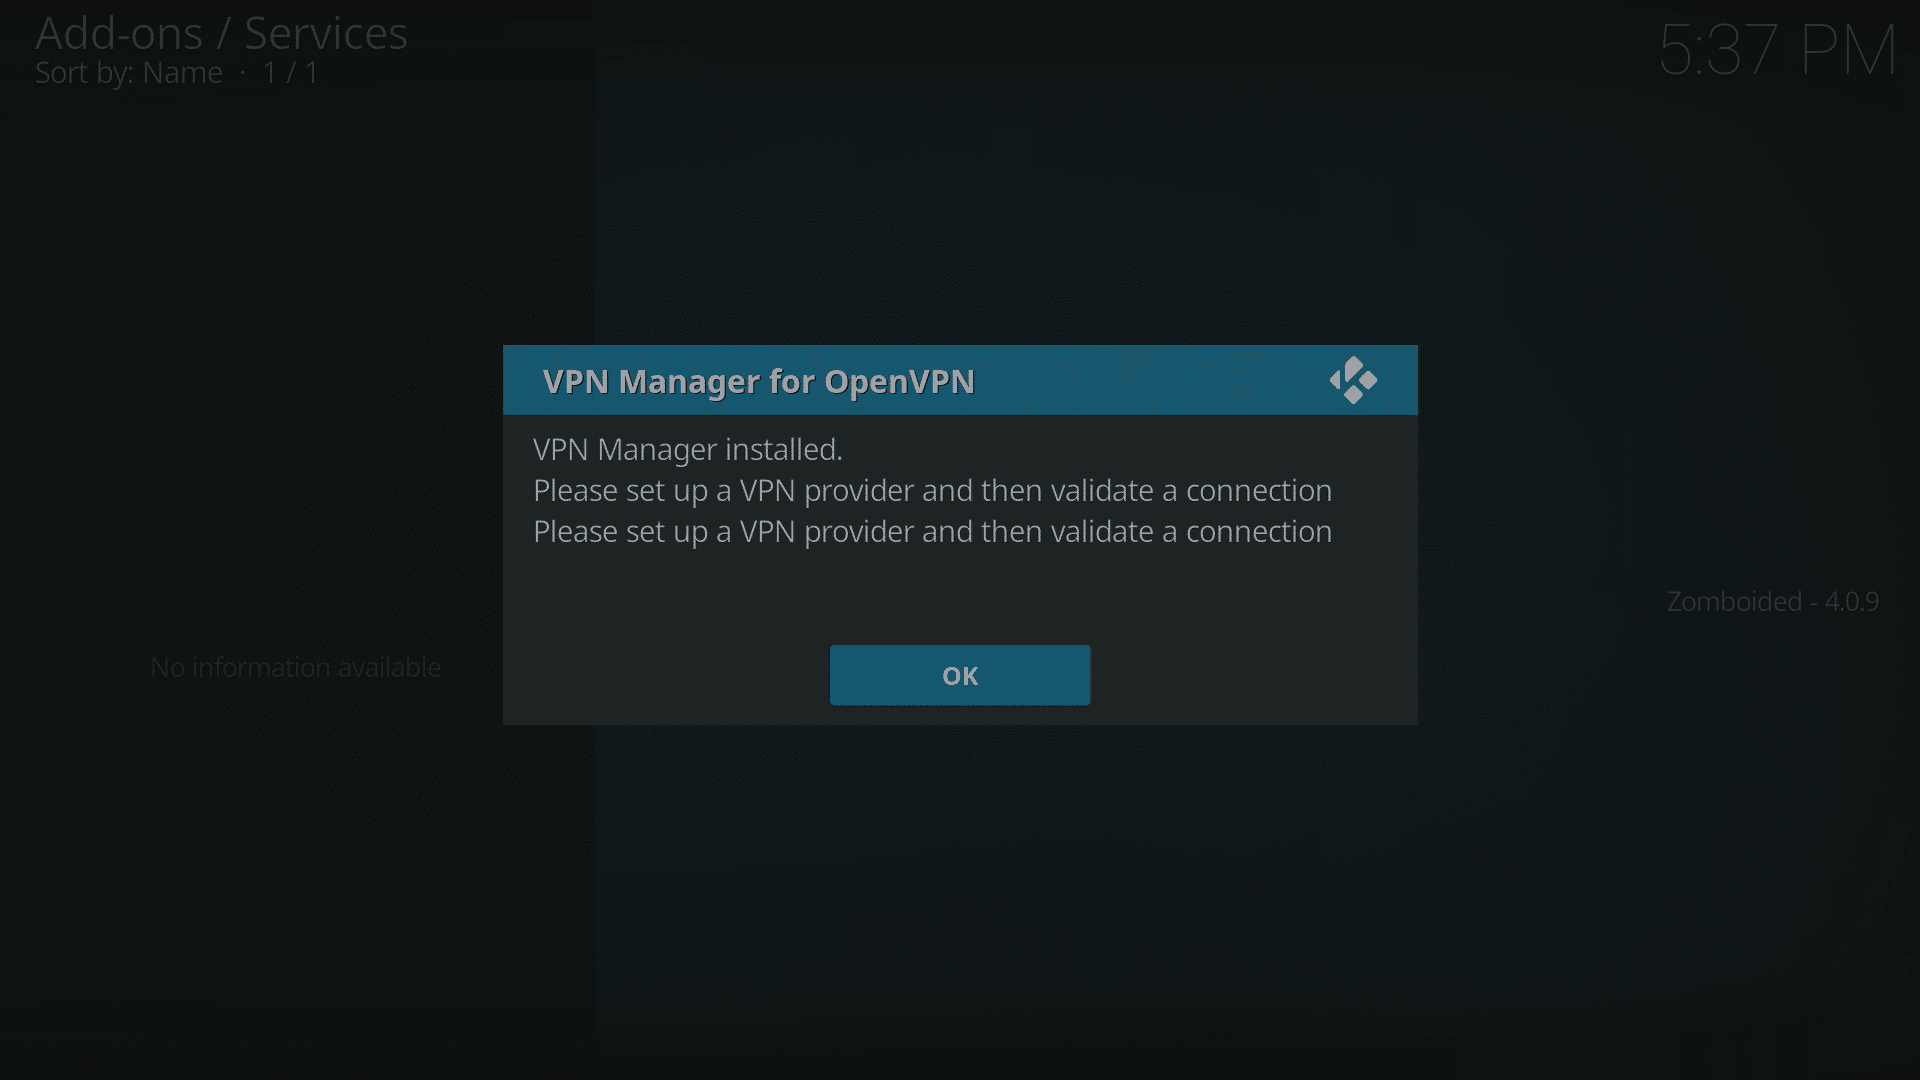
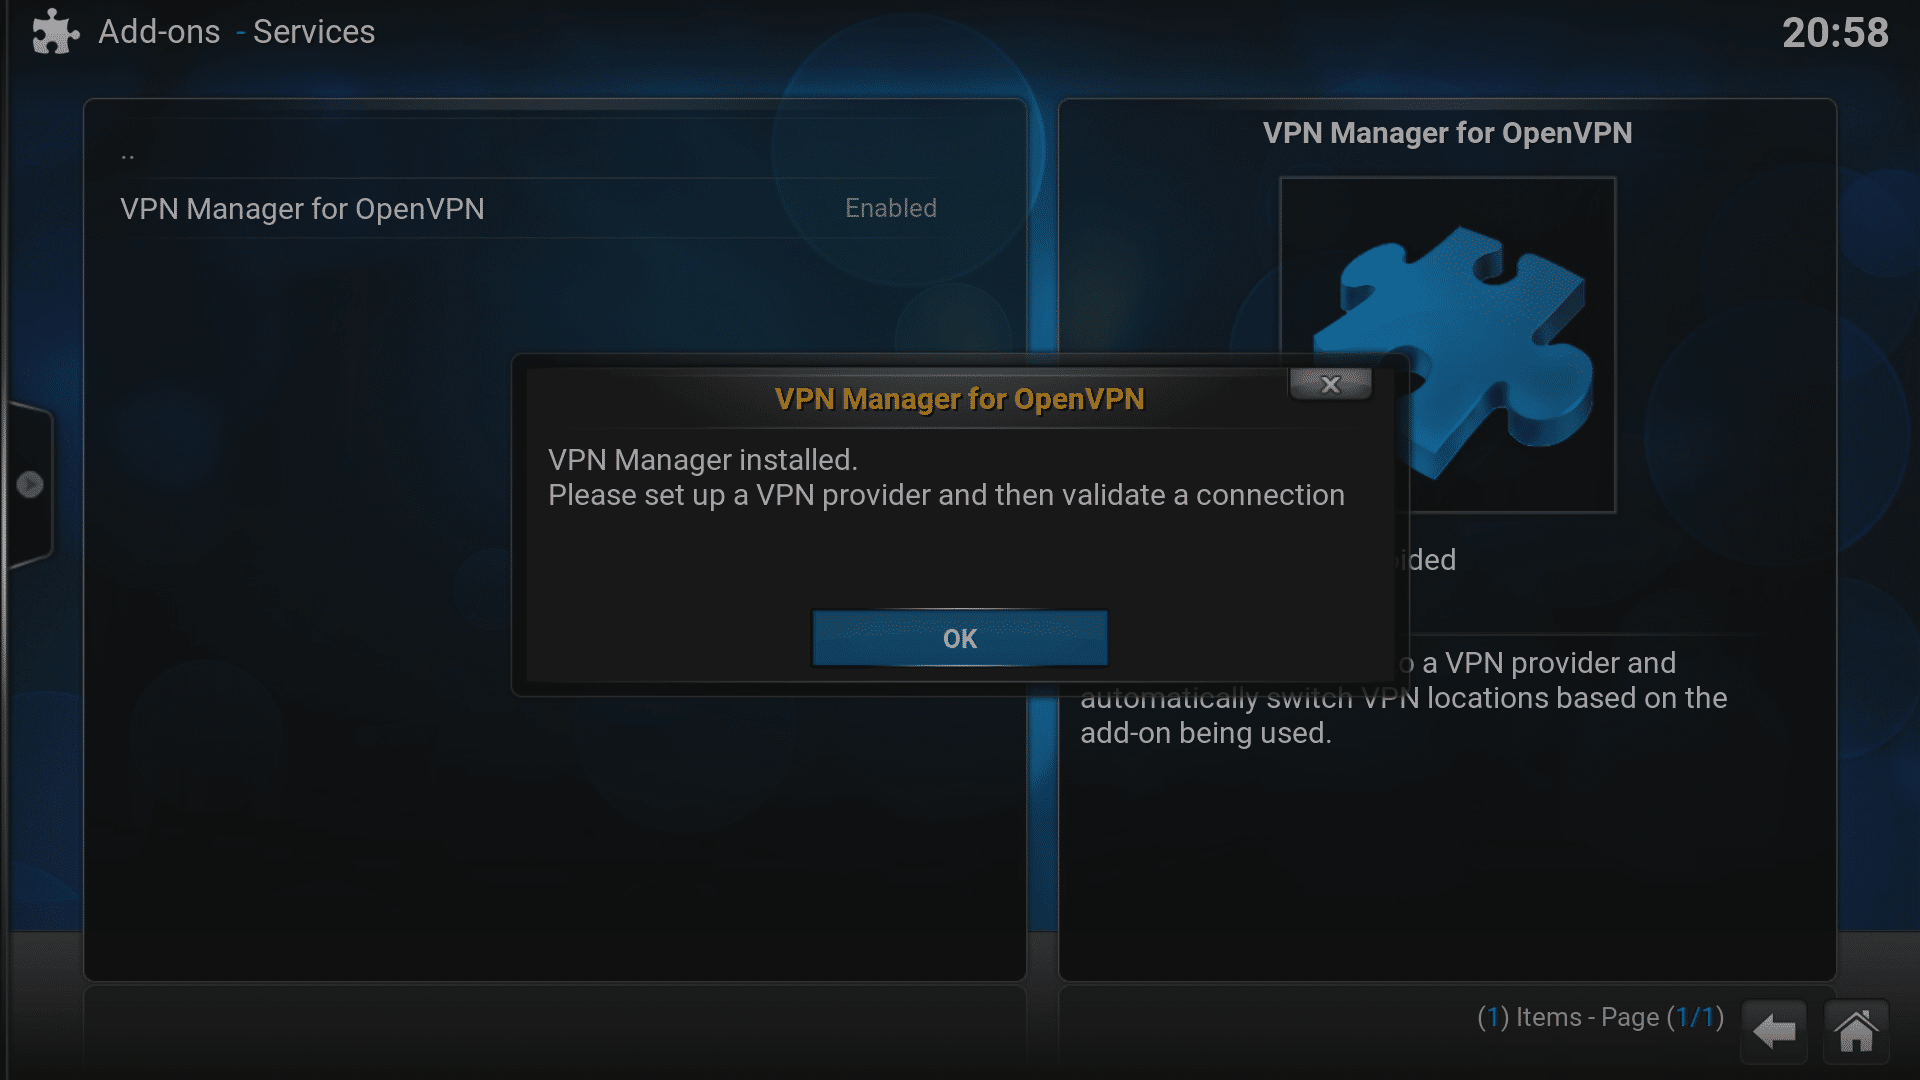
- Once complete, a pop up message and a notification will appear confirming the installation, click OK.
- You can now skip down to the “Installed? Let’s Configure!” section below


Jarvis (LibreELEC 7.x, OpenELEC 6.x)
- Turn the device on and ensure you are not in Android!
- Click the “File manager” entry under the System menu on the far right (if using the default skin)
- Select “Add Source”
- Click the top box, type in http://dbmc.droidbox.co.uk/repo for the address, then click Done.
- Select the 2nd box and label it (anything you like) then click Done again.
- Click OK in the last window, and now head to Kodi’s homescreen and click the System menu itself.
- Now click the Add-ons entry and select “Install from zip file”.
- Click on the entry with the label you created a moment ago.
- Click on repository.zomboided.plugins-1.0.0.zip .
- Wait a few moments for the process to complete, a notification will likely appear, now click on “Install from repository”, then the Zomboided entry.
- Click “Services”
- Select the VPN Manager entry, then click the Install button.
- Once complete, a pop up message will appear confirming the installation, click OK and the configuration screen will appear.


Installed? Let’s Configure!
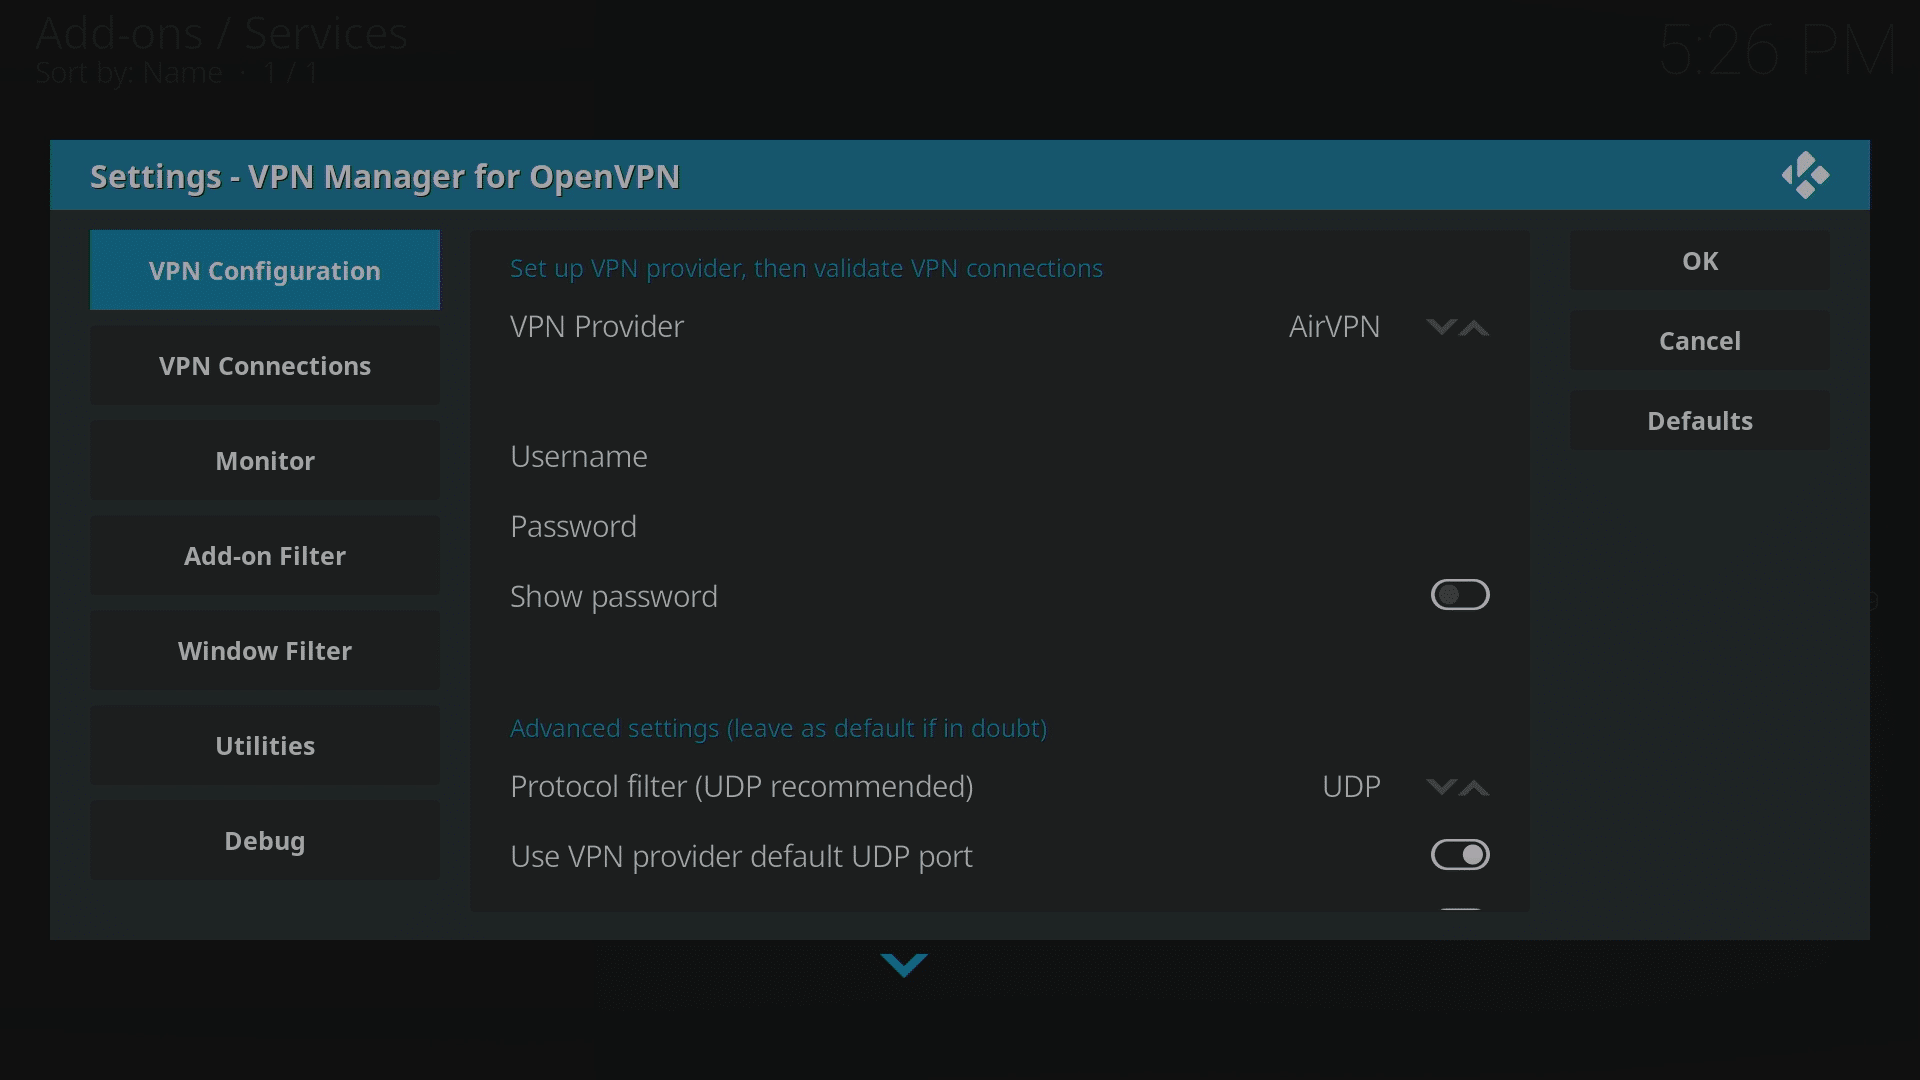
In this example we will be using IPVanish , but there are also options for: AirVPN, BTGuard, Celo, CyberGhost, ExpressVPN, Hide.Me, Hide My Ass, HideIPVPN, Invisible Browsing VPN, IVPN, LimeVPN, LiquidVPN, NordVPN, Perfect Privacy, Private Internet Access (PIA), PrivateVPN, proXPN, PureVPN, RA4W VPN, SaferVPN, SecureVPN.to, Smart DNS Proxy, tigerVPN, TorGuard, TotalVPN, VanishVPN, VPN.ac, VPN.ht, VPN Unlimited, VPNArea, VPNSecure, VyprVPN, WiTopia, Windscribe or you can create all the settings manually for VPN companies not listed.
Jarvis users (LibreELEC 7.x and OpenELEC) will find the different areas of this configuration are arranged horizontally, rather than vertically. The actual options and settings to configure remain the same.
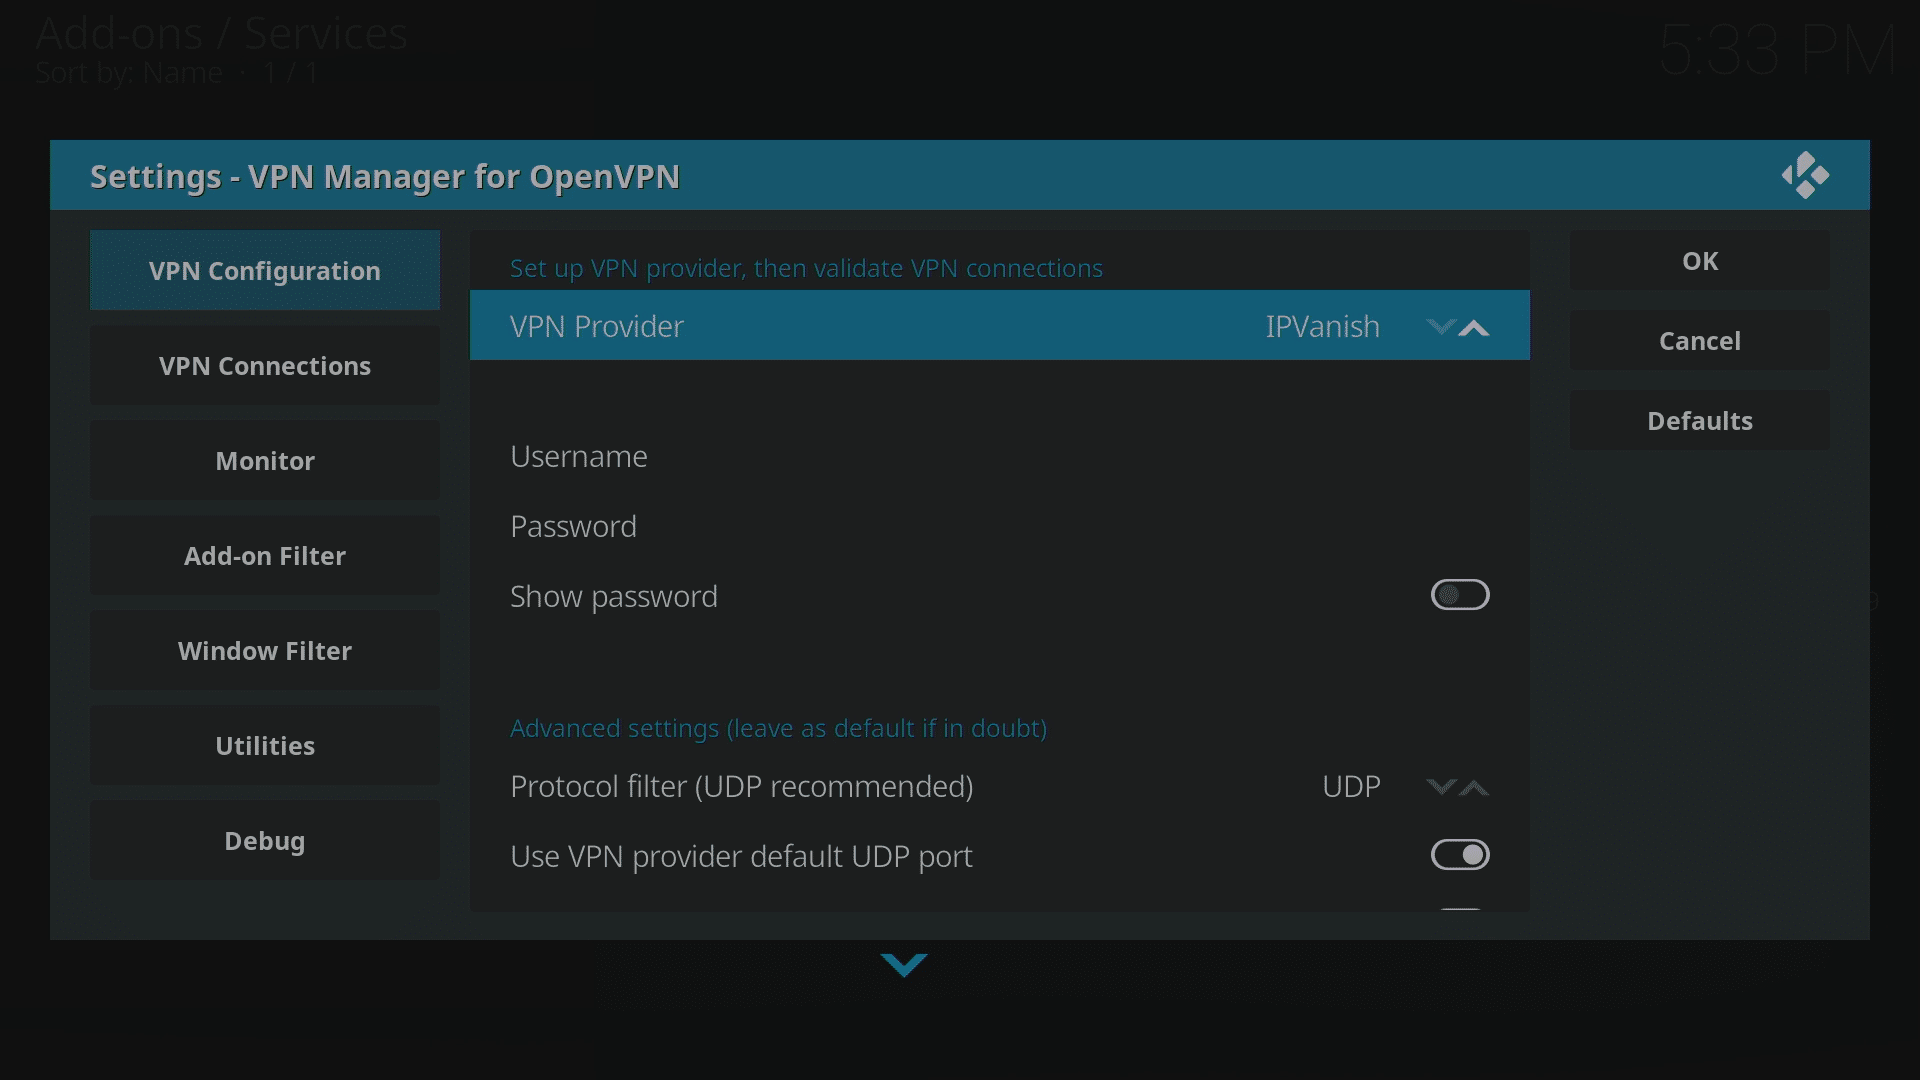
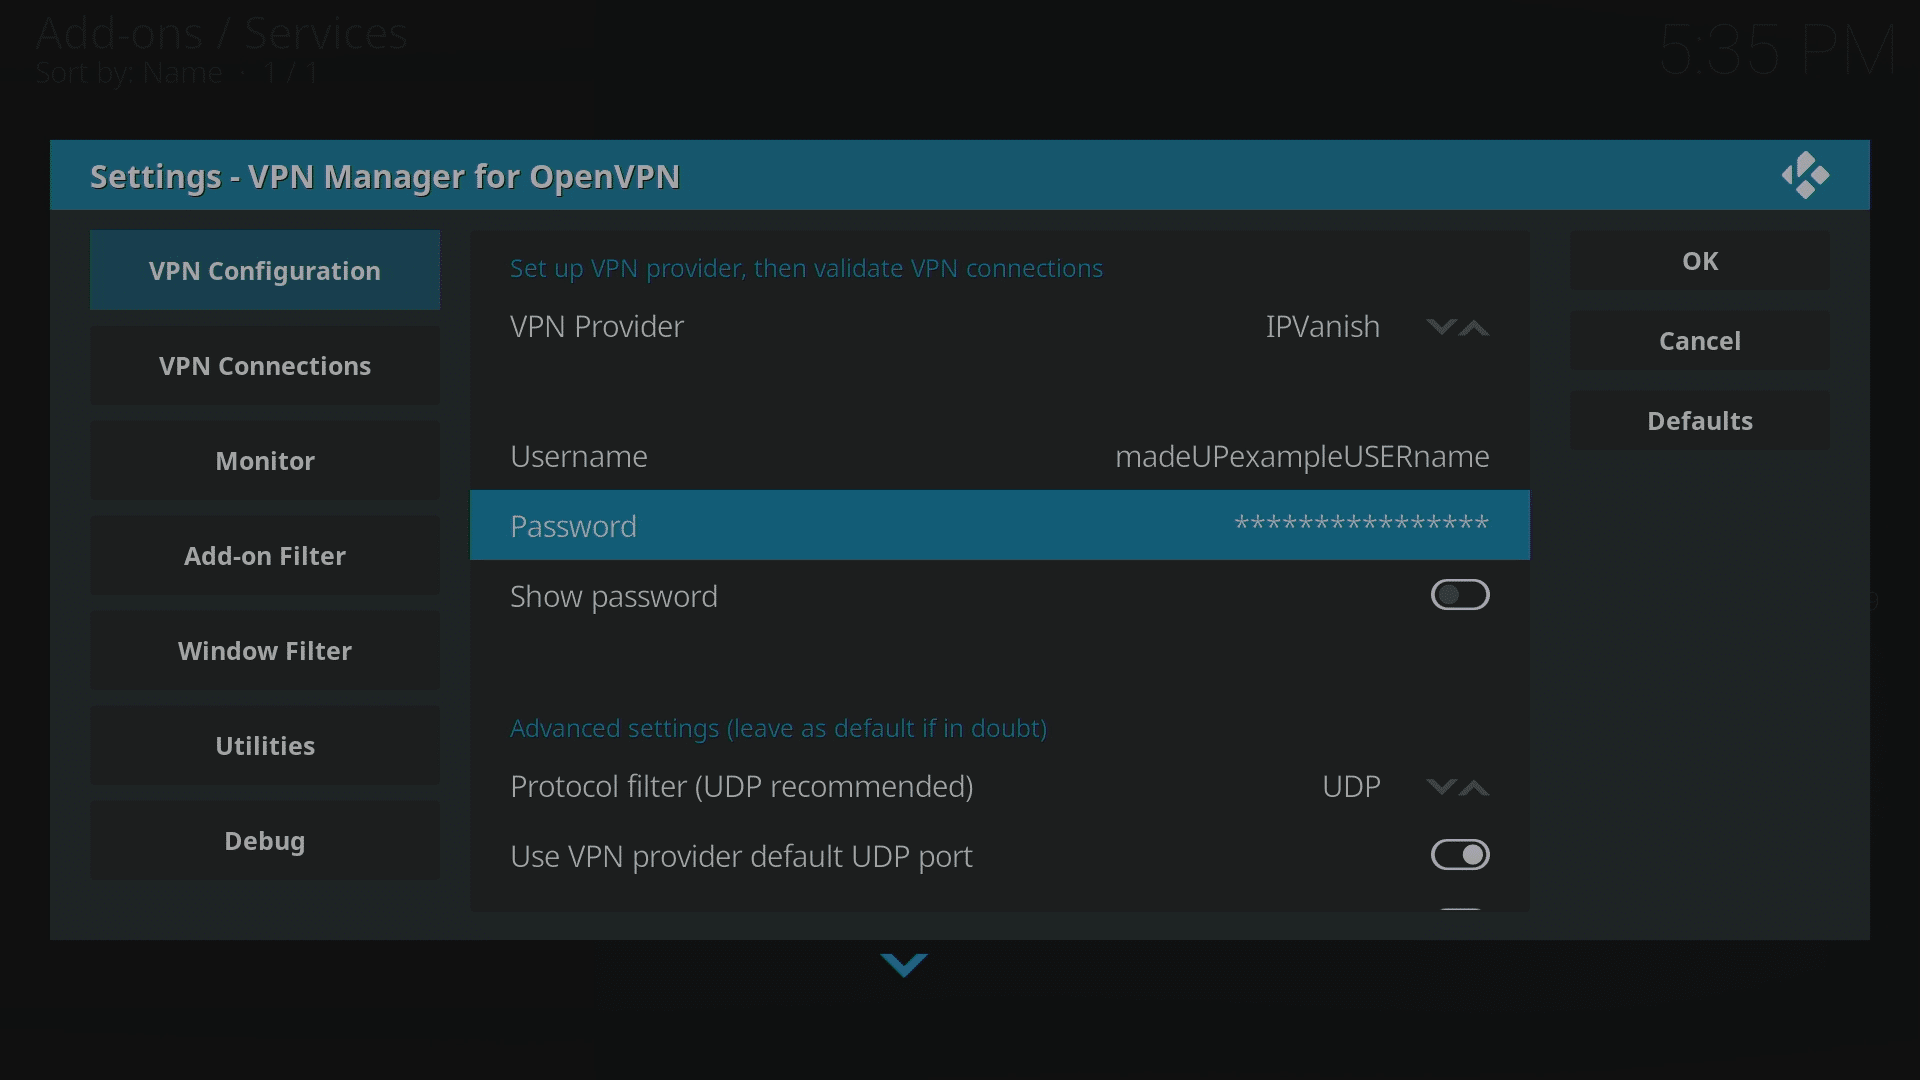
- Change the VPN Provider to IPVanish by clicking the up arrow at the end of the line. (More screenshots coming soon)
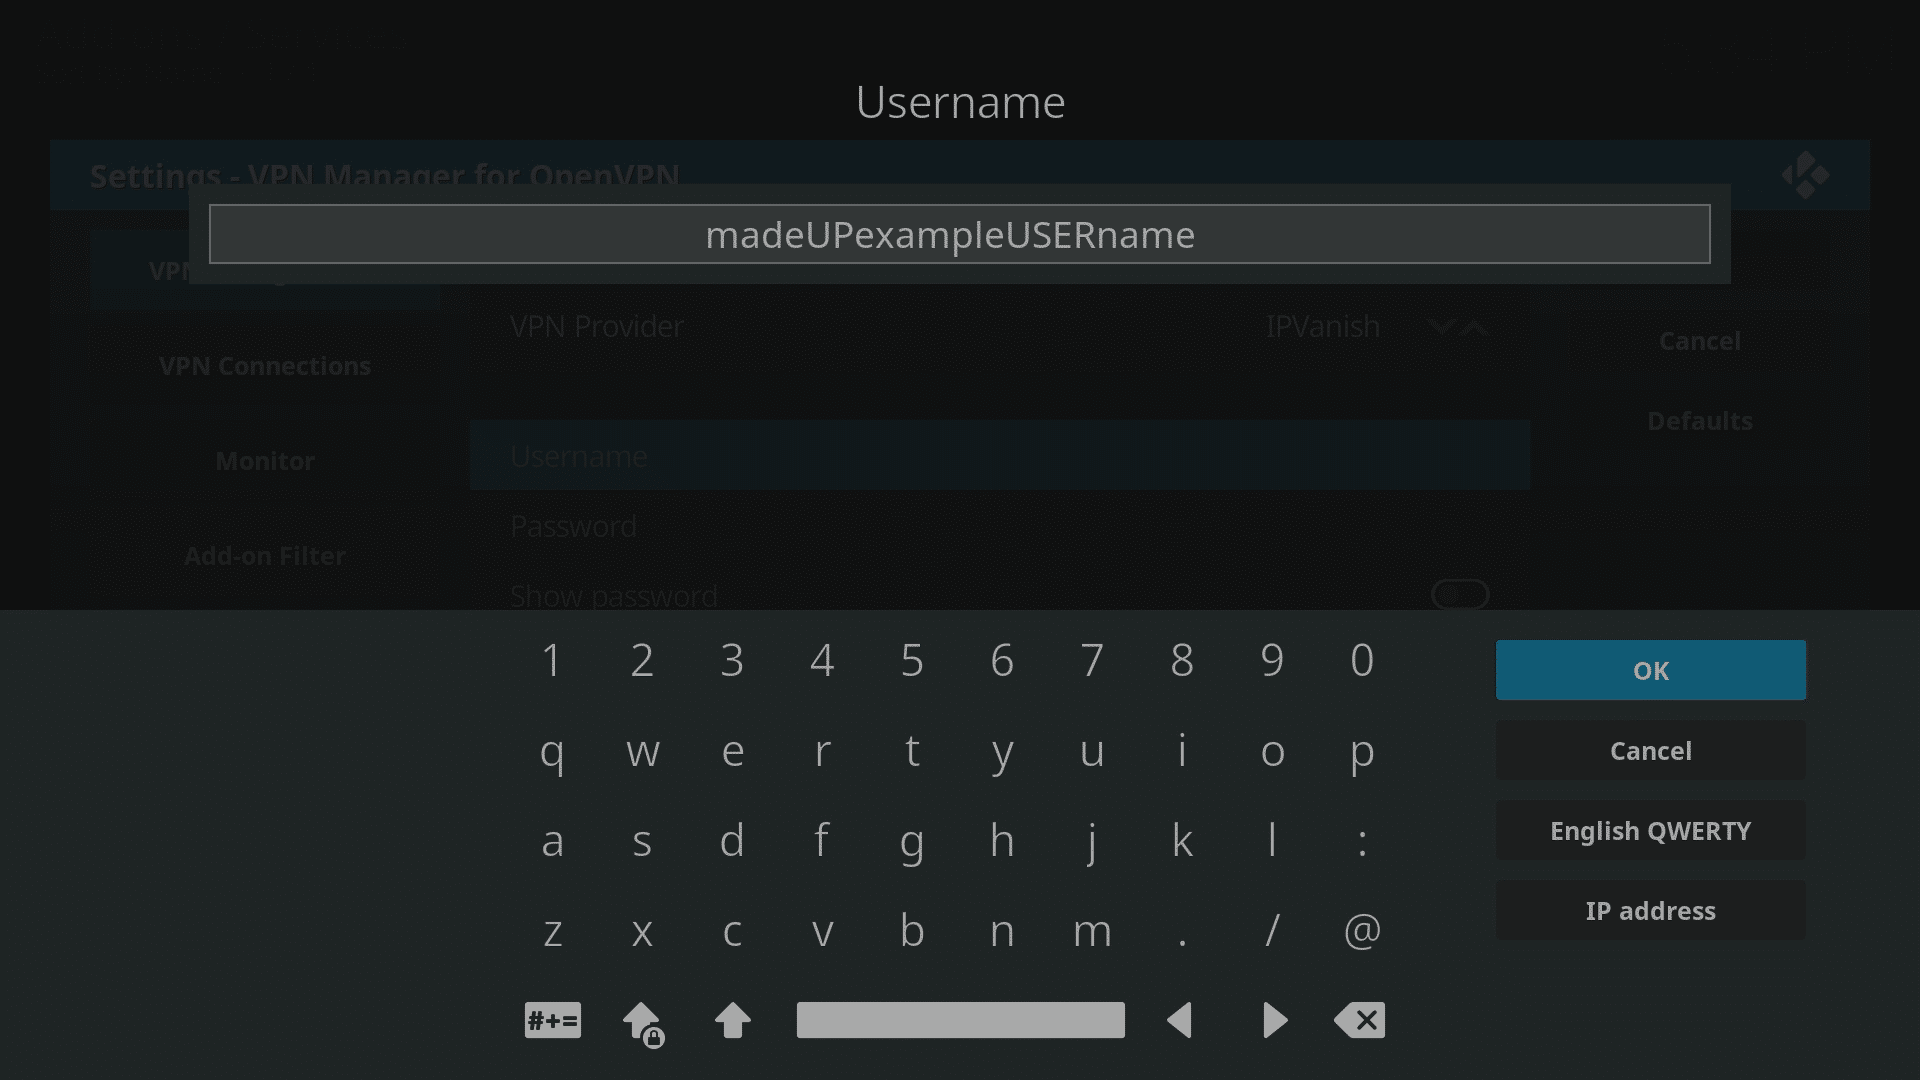
- Enter your IPVanish username (not e-mail address) and password.
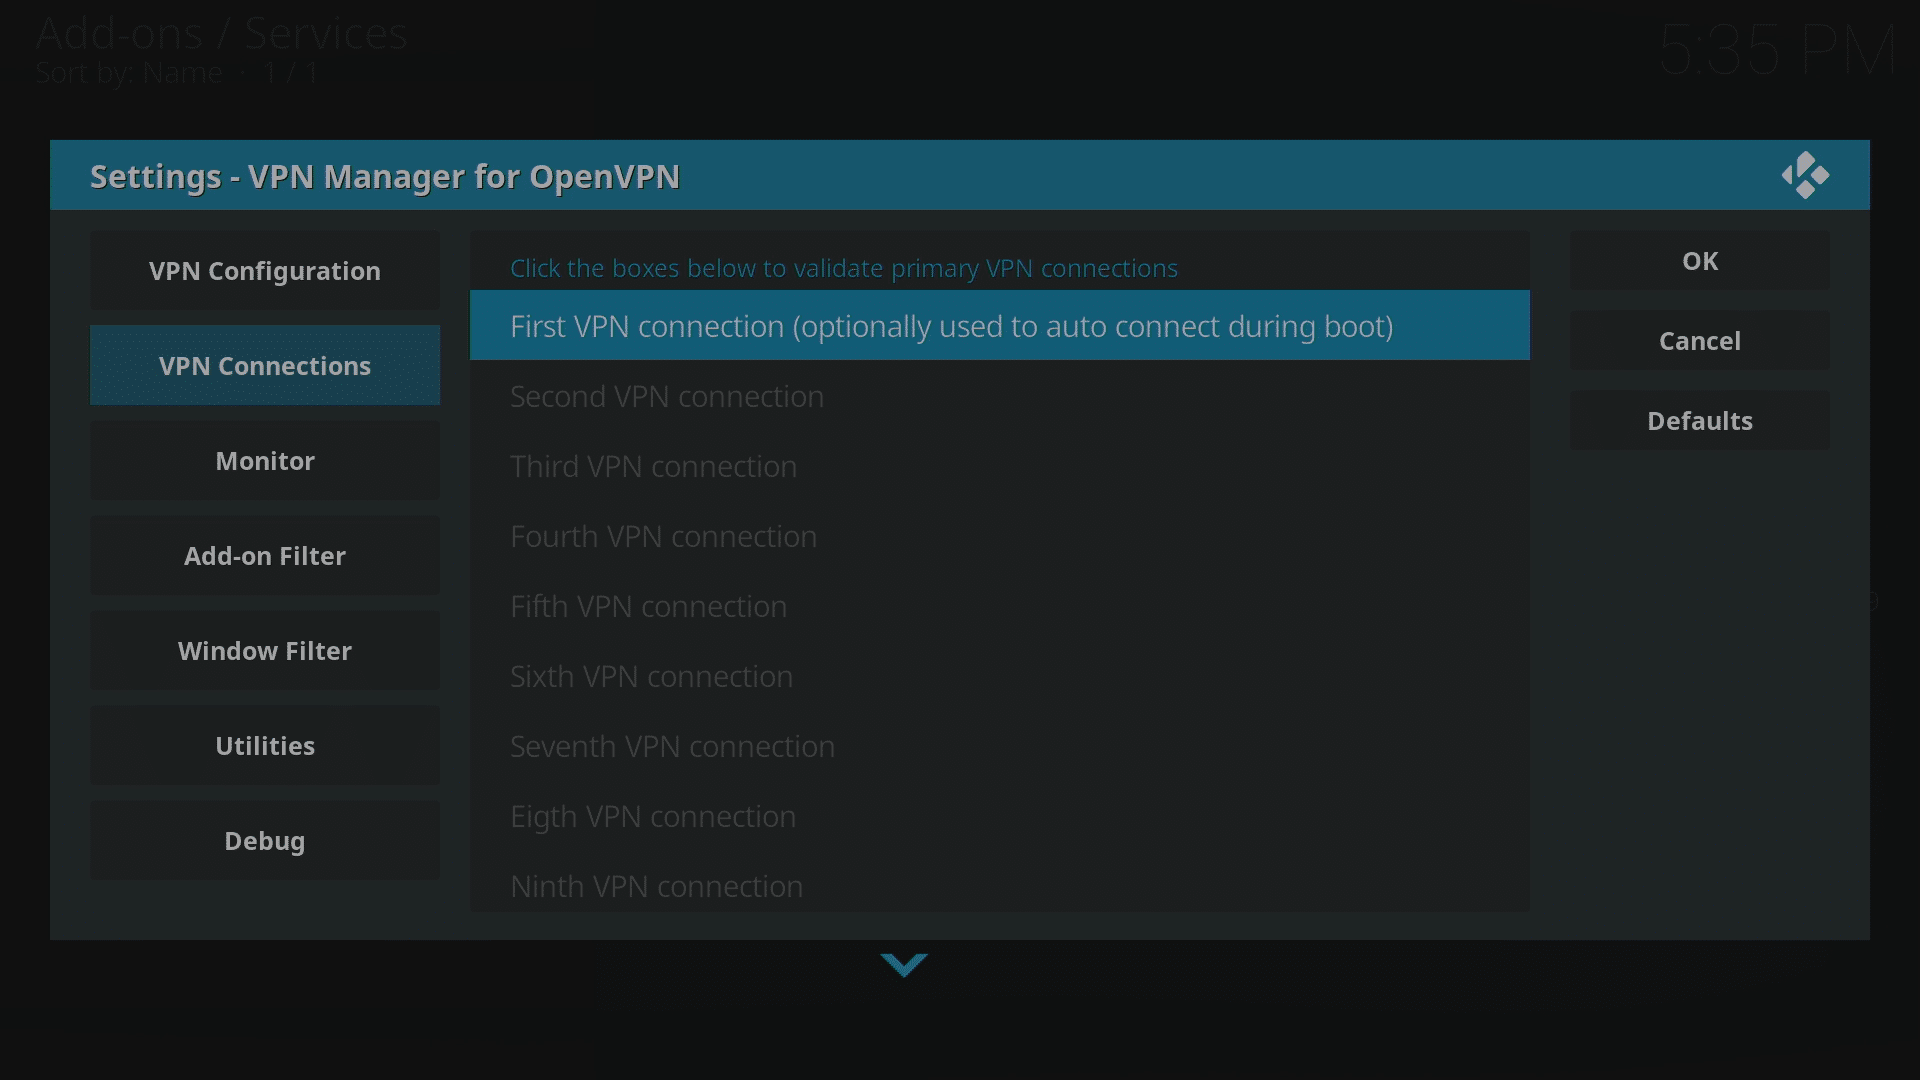
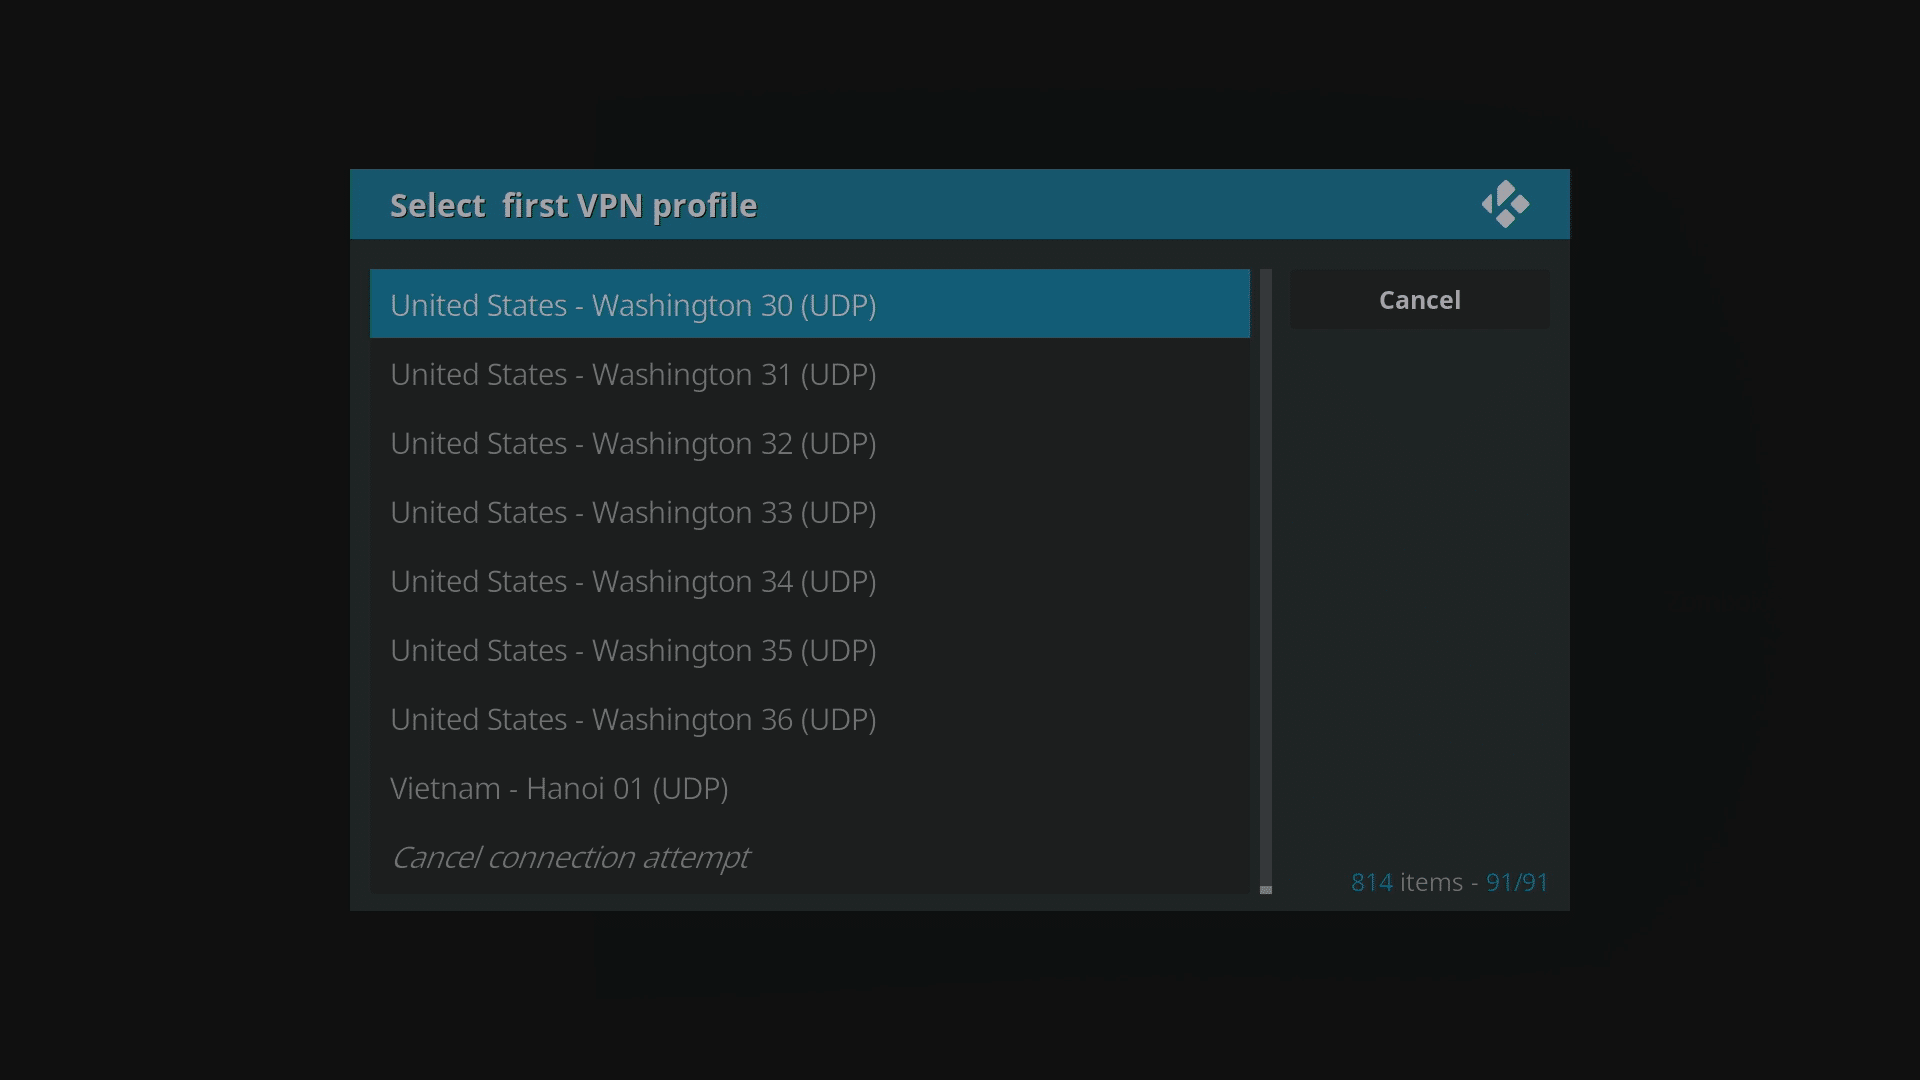
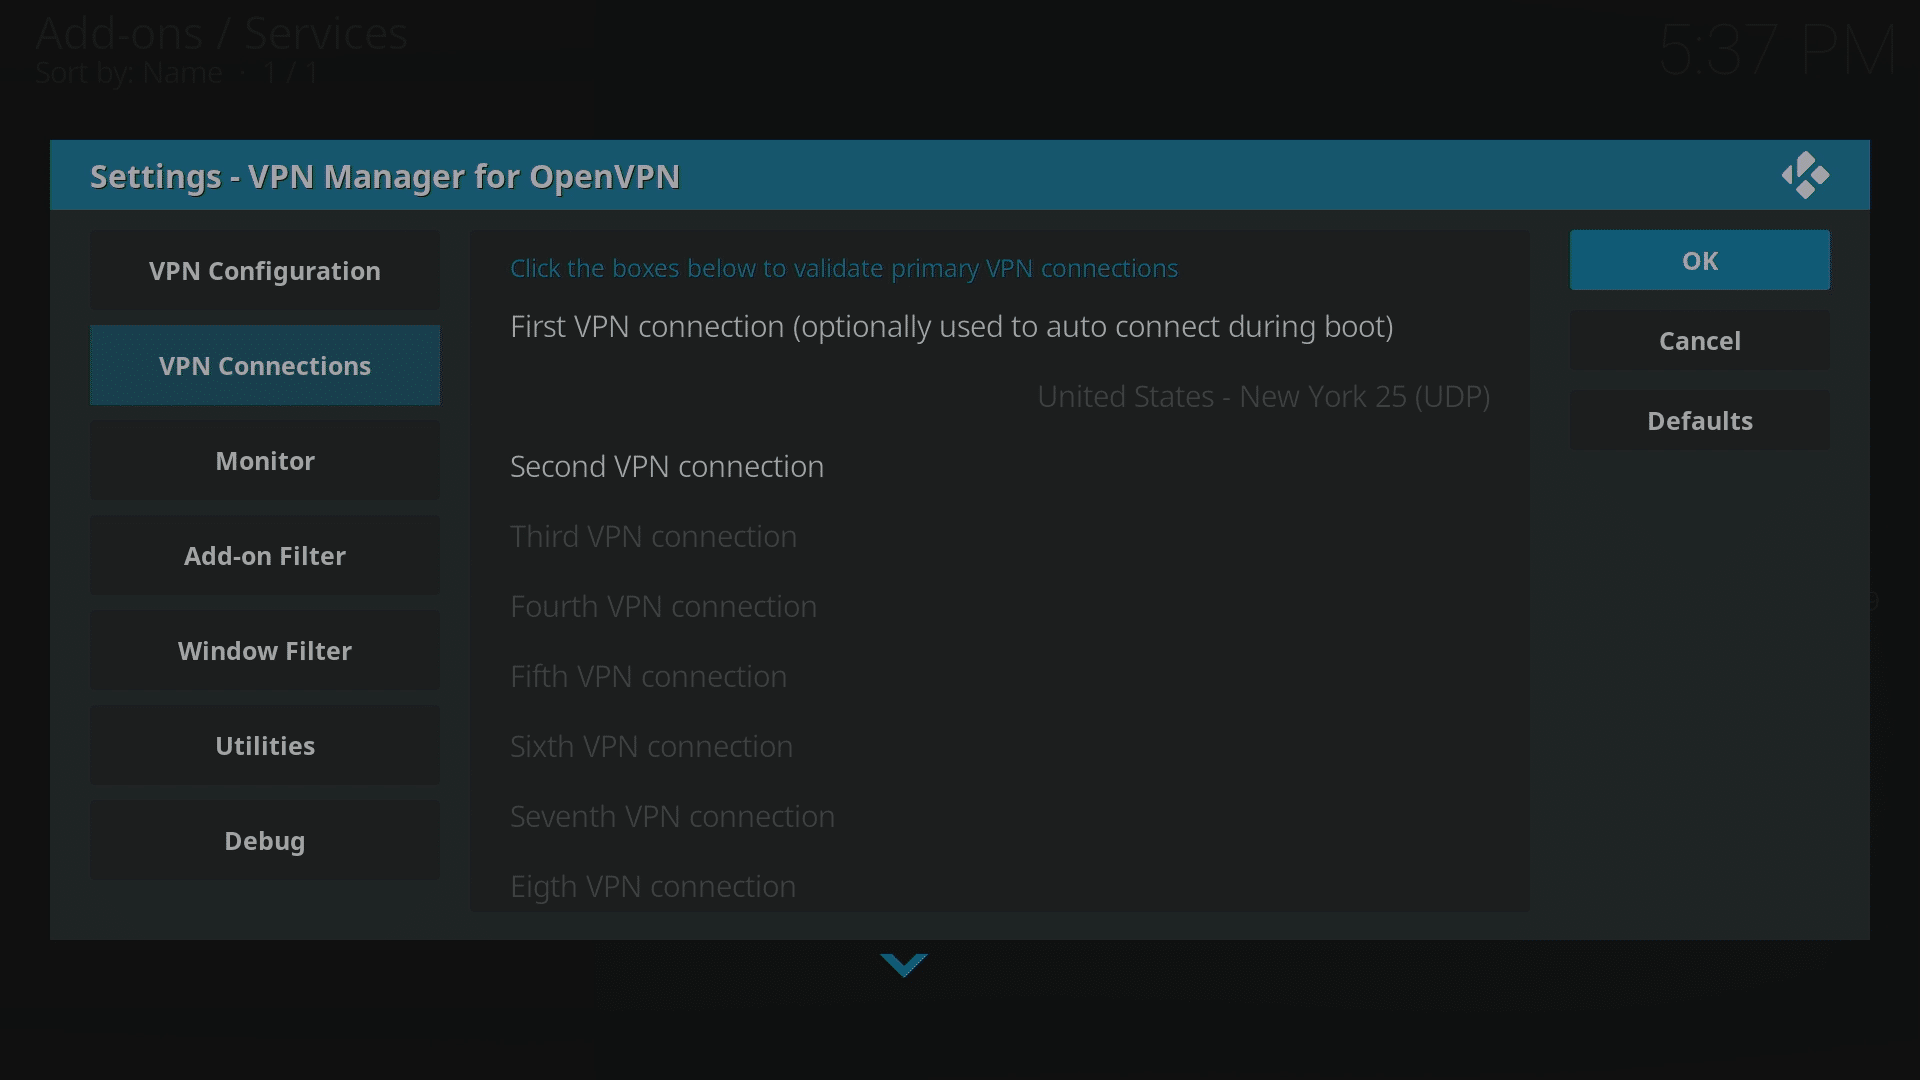
- Now head to the VPN Connections area and click on the “First VPN Connection” entry. The first time will take a little longer whilst data is collected and the account is confirmed with IPVanish.
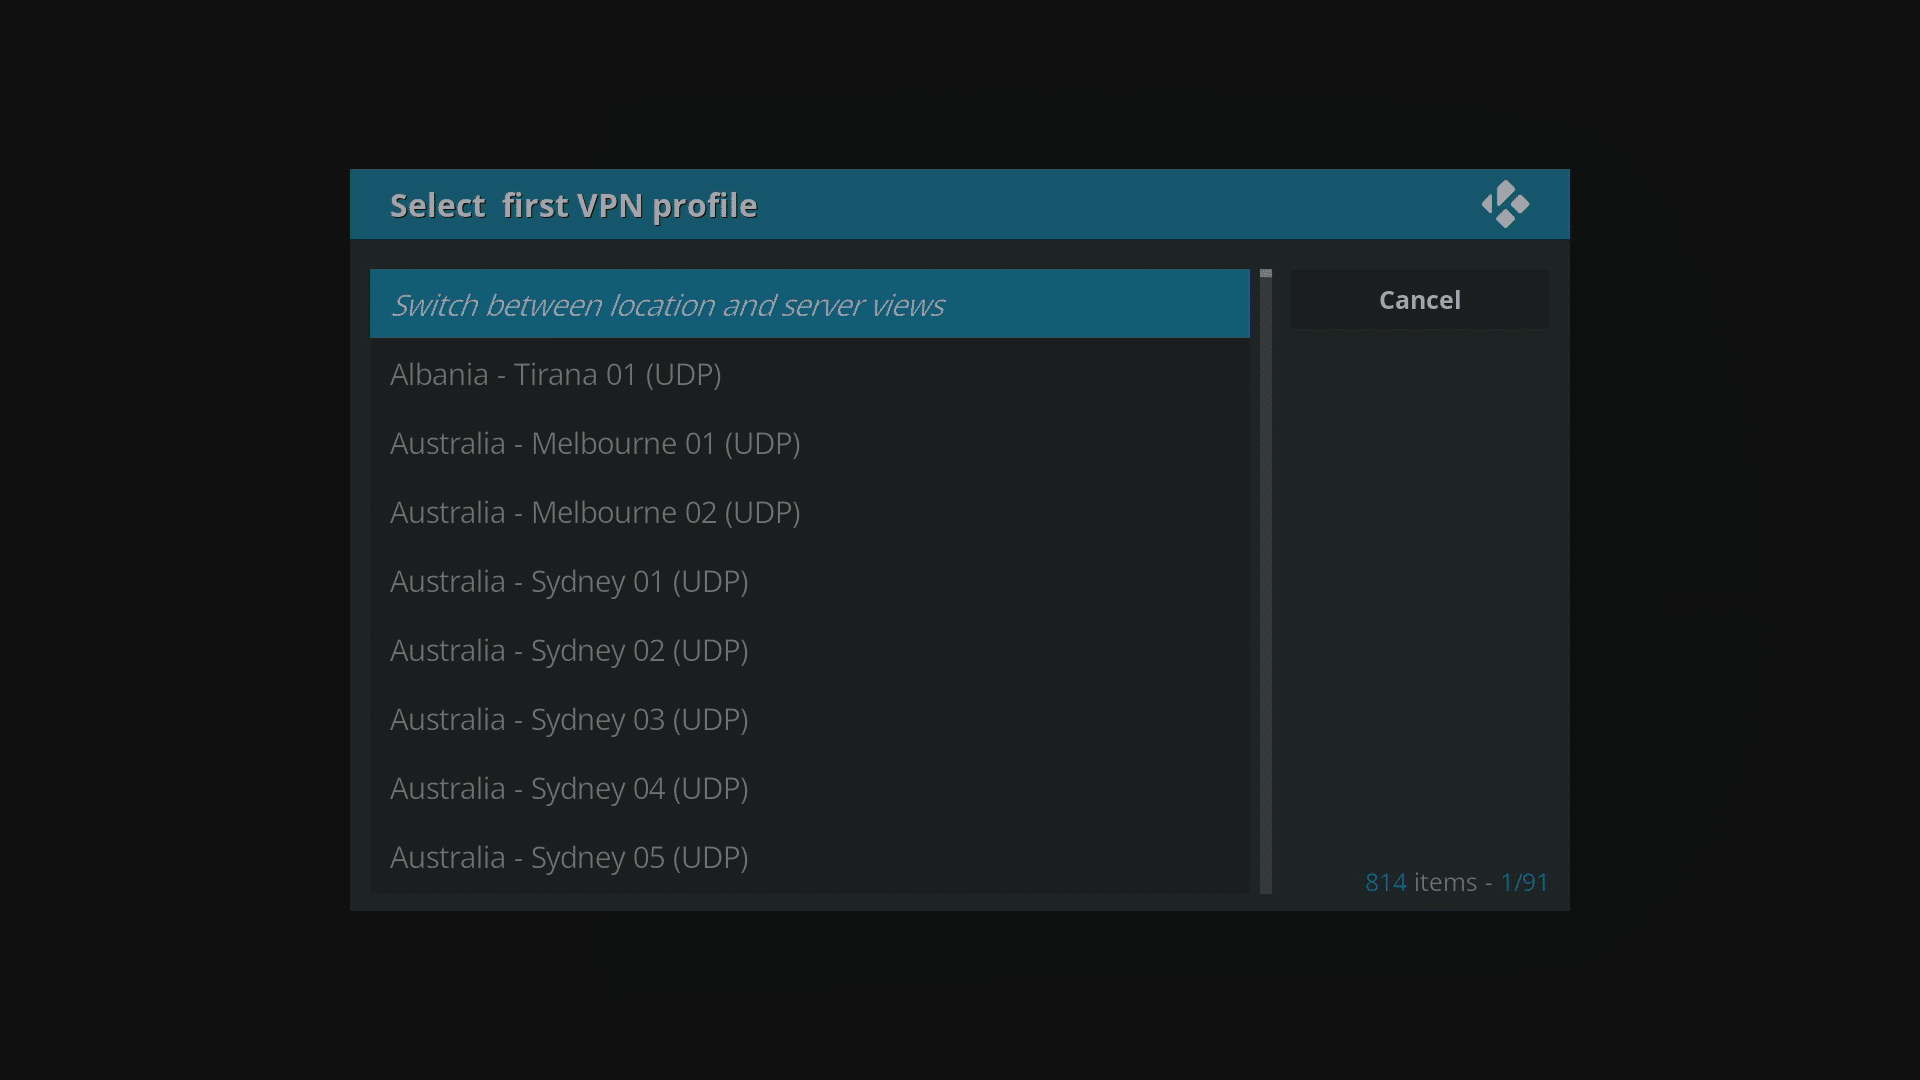
- Select the country and city you want your server to be based in. Don’t forget you can tap the Up arrow on your remote a couple of times to jump to the end of the list, and if you have Page Down on your keyboard, you can skip down the list quickly.
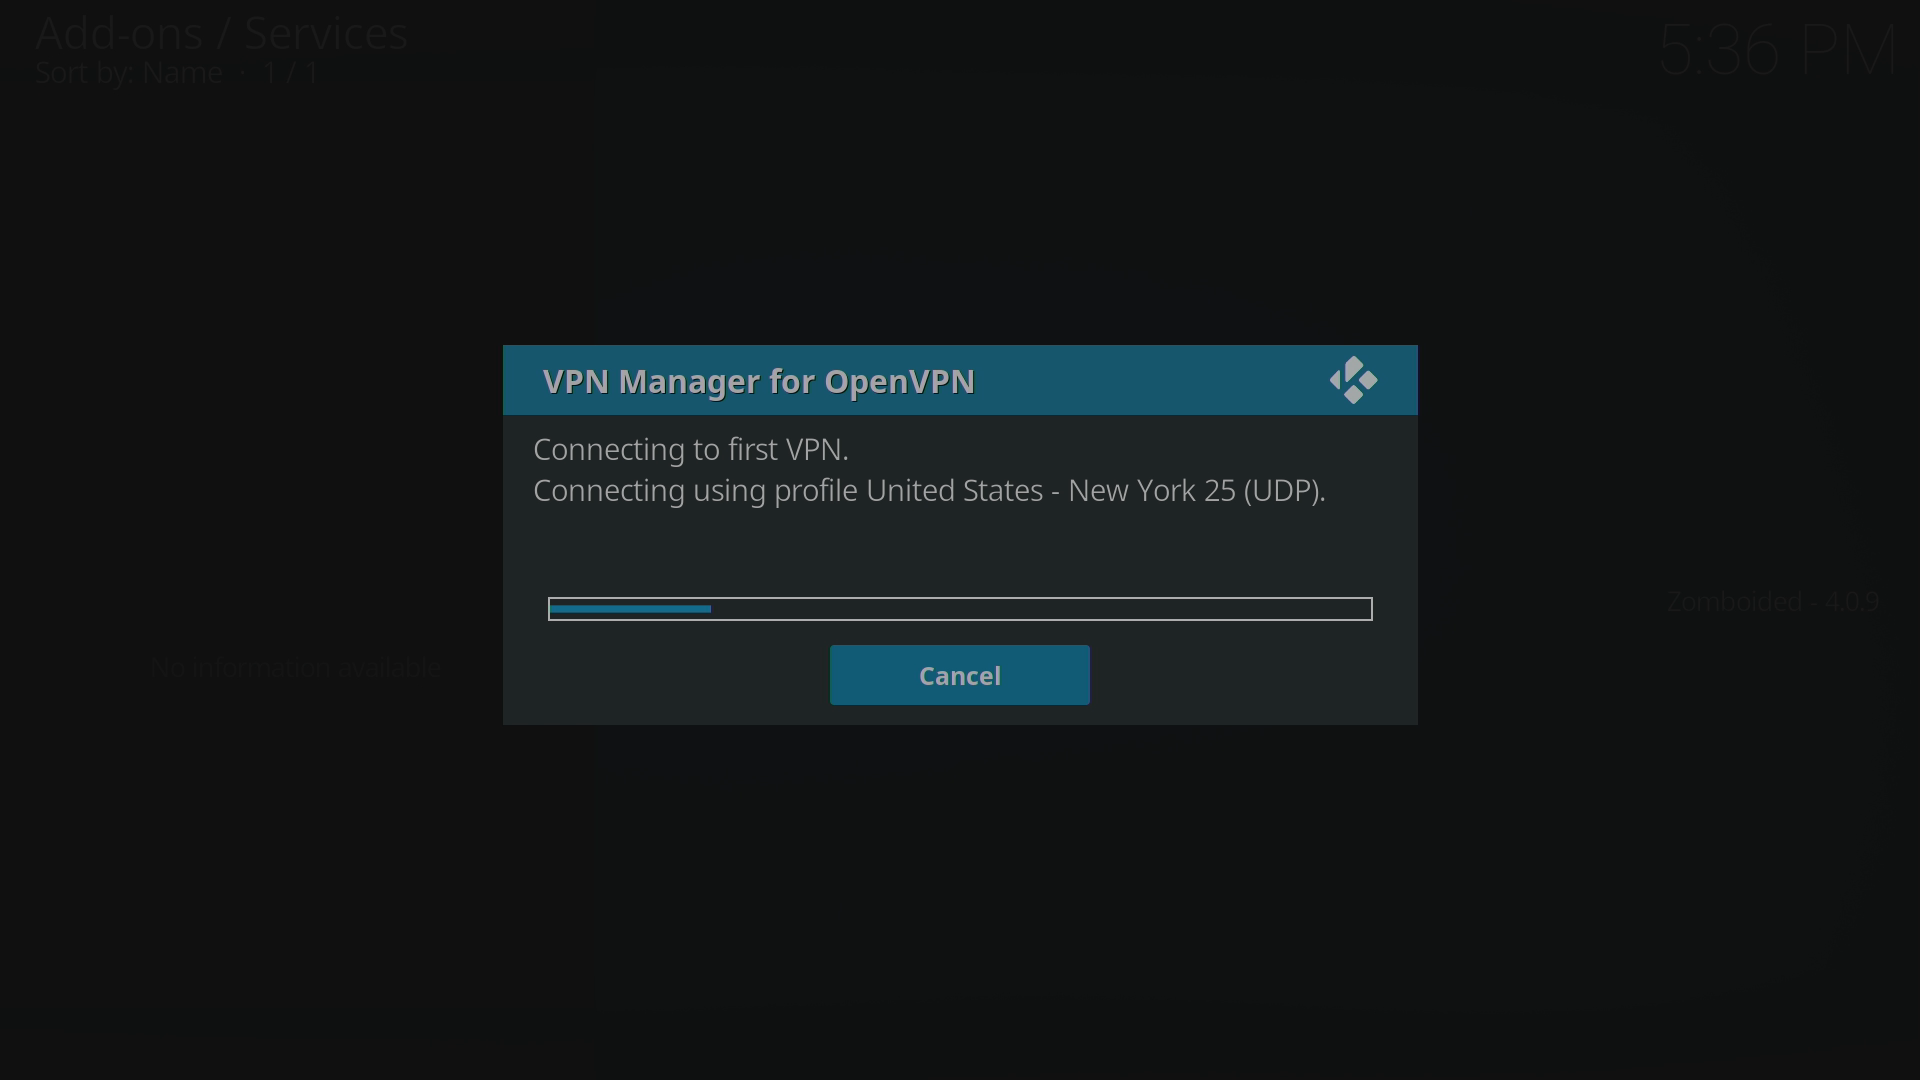
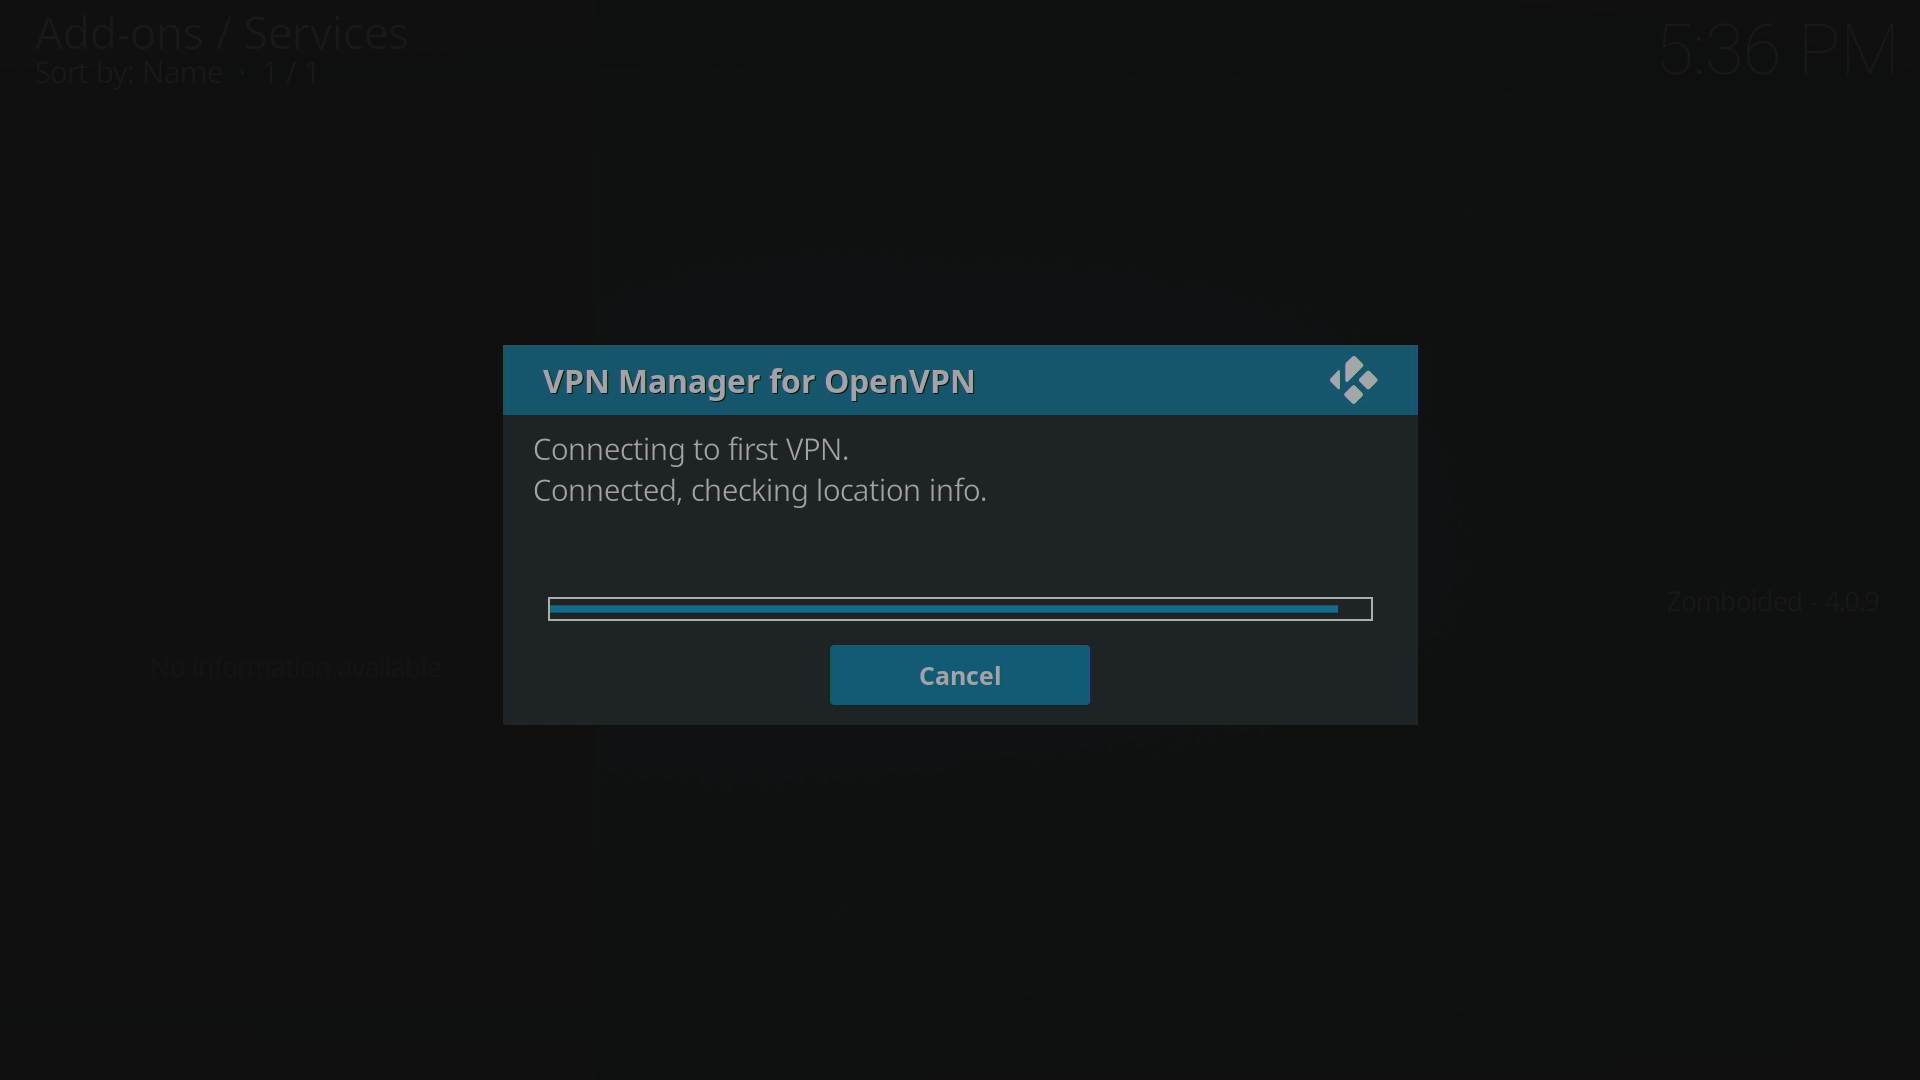
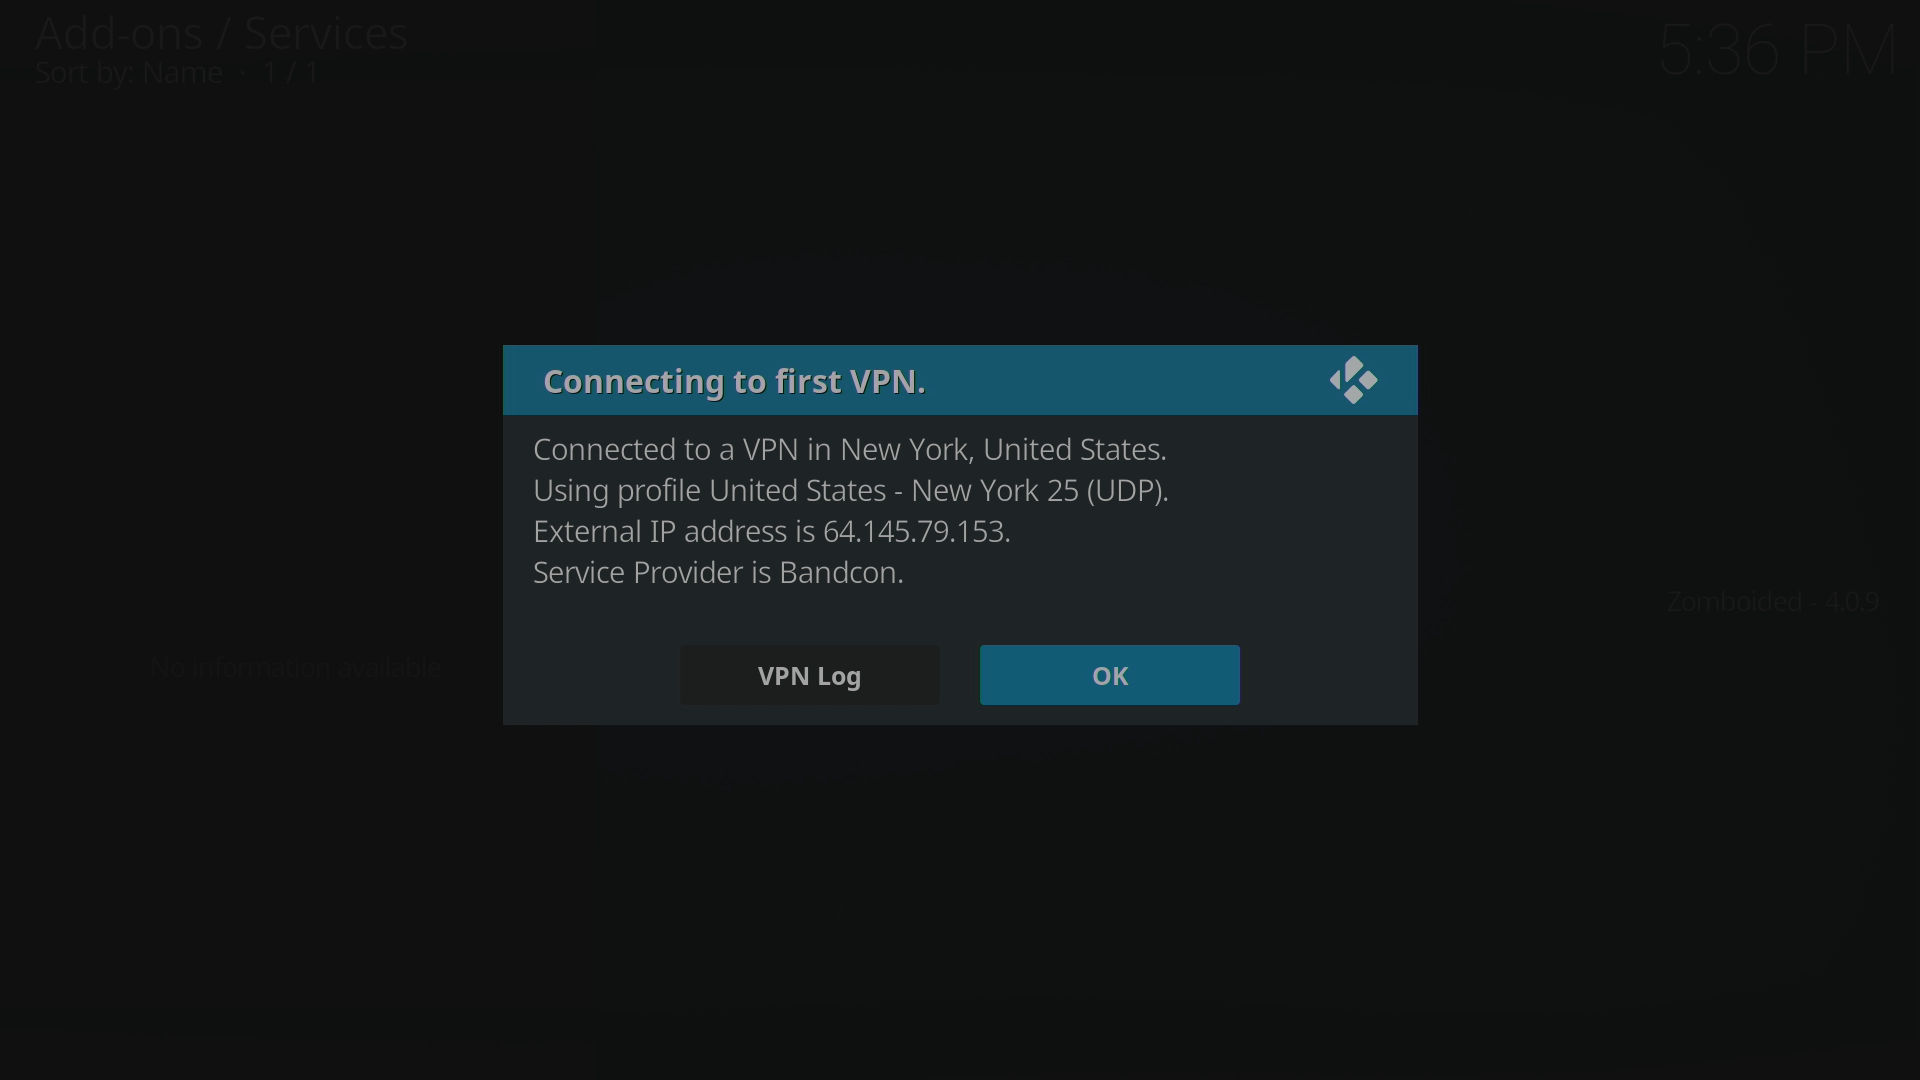
- A connection will now be set up, with details confirmed. Click the OK button and you will now find your data from with LibreELEC is not snooped upon, and geo-locked services in your home country will once again be available.


If the repository is offline, you can download the ZIP file you need from here. You can then copy it to your device (see https://droix.net/copying-files-to-and-from-libreelecs-storage for details). Instead of selecting the DroiX repository when “Install(ing) via ZIP”, click the “HOME FOLDER” entry, then to whichever folder you pasted into. Click the ZIP file and continue from the “Now click on Install from Repo” step above.
The steps above should work for any LibreELEC installation, unless a service has been disabled. Please note only some DroiX devices come with LibreELEC, those currently on sale are the DroiX T8-S Plus v2 and the iMXQpro v2. Previous models featuring LibreELEC or OpenELEC include the DroiX T8-S, T8-S Plus v1 and the DroiX T8 Mini.
If you have an older device using OpenELEC, the steps above will still work, however there is an alternative approach you can follow at https://droix.net/using-a-vpn-in-openelec .

Questions & answers