
This guide is your comprehensive resource on reflashing firmware for your AYN Odin and AYN Odin 2 devices. Whether you’re aiming to improve performance, fix bugs, or explore new features, our step-by-step instructions will lead you through the process with ease and precision.
Before We Start
Before you begin reflashing your Android Gaming Handheld, it’s essential to ensure you have all the necessary tools listed below. We will provide links to the required firmware & software later in the guide, so there’s no need to search for them right now.
You will need:
- Windows device
- AYN Odin 2
- USB-C cable
- QPST Tool software
- Firmware
Download AYN Odin Firmware
| Model | Download Link |
| Odin 2 | Download, Alternate Link |
Odin 2 Instructions
The instructions provided by AYN can be hard to understand at times. That’s why we’re going to walk you through the entire process step-by-step!
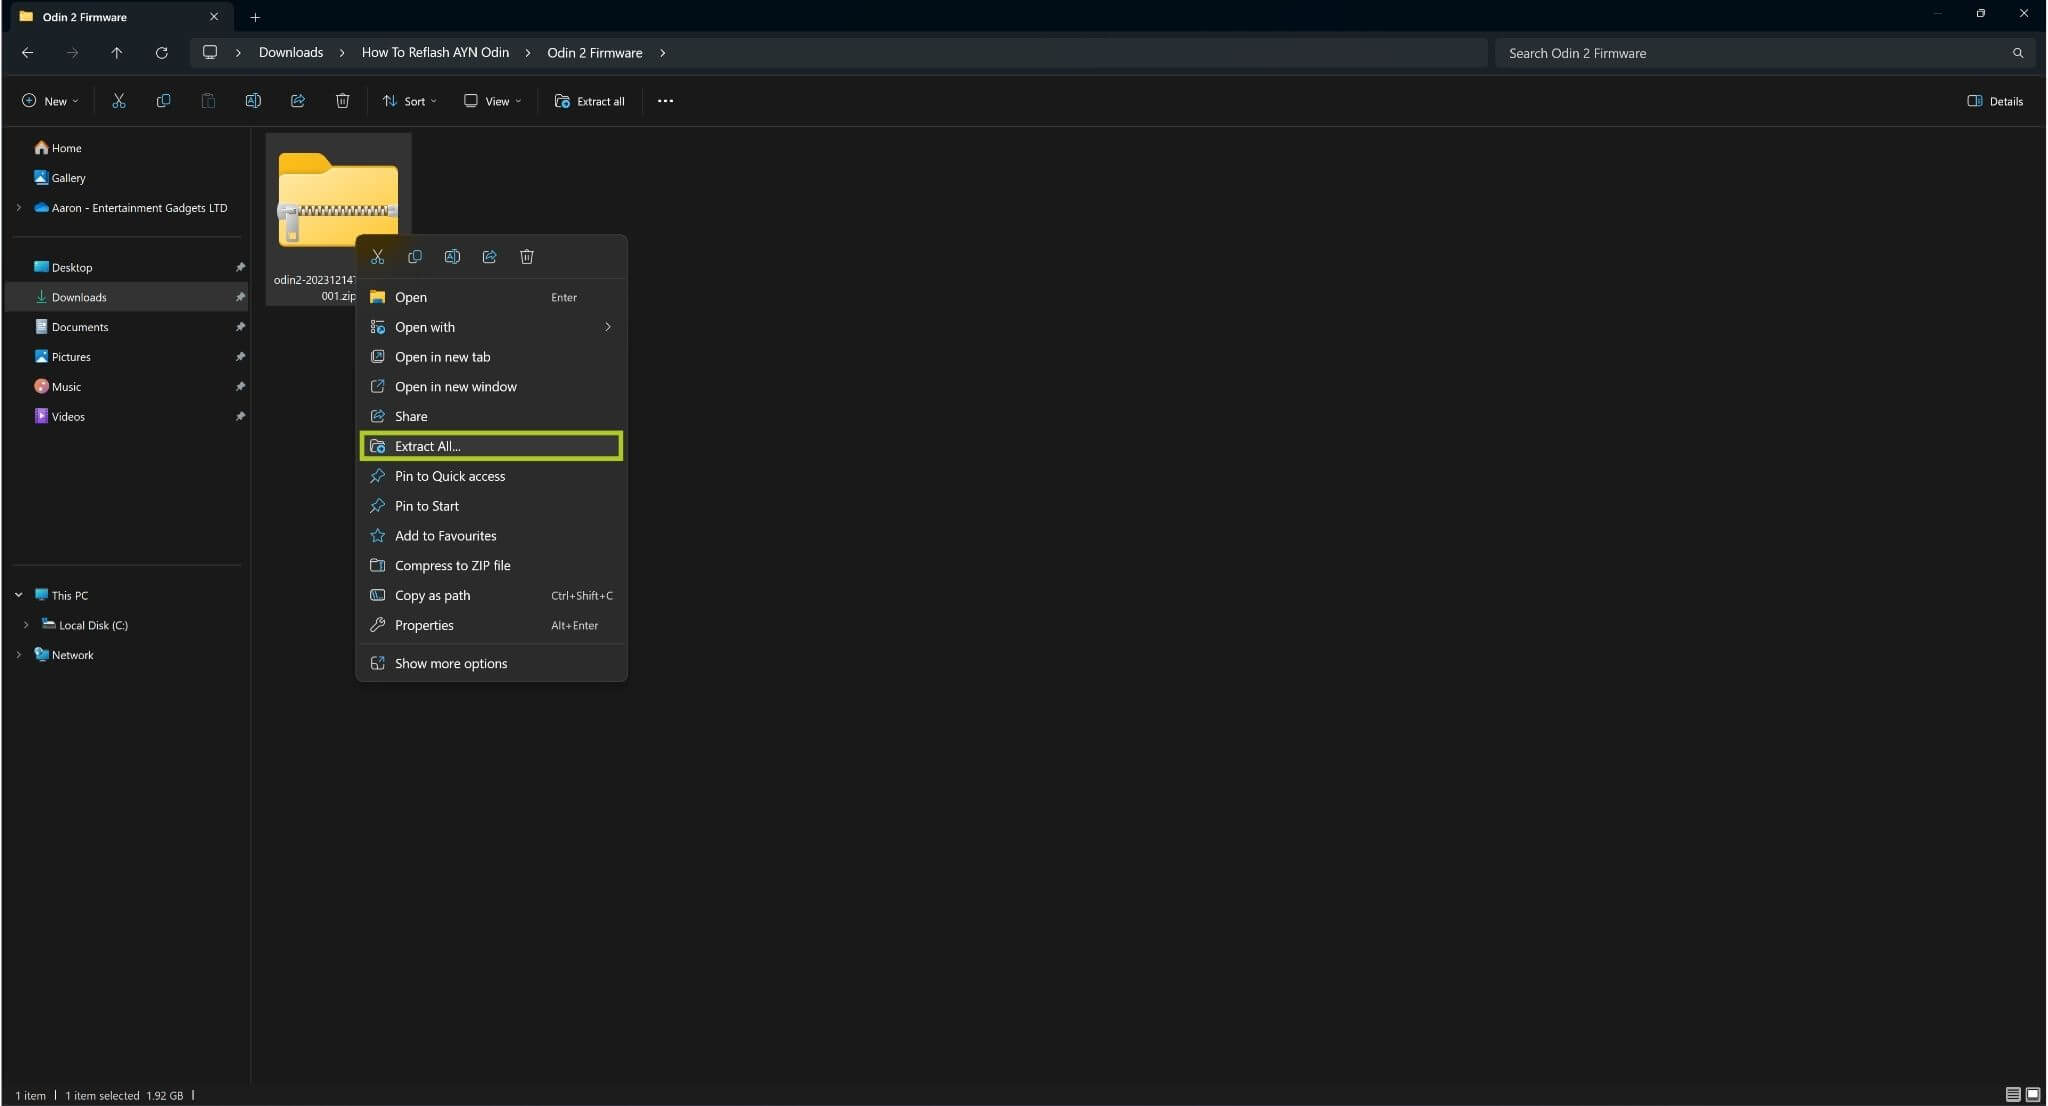
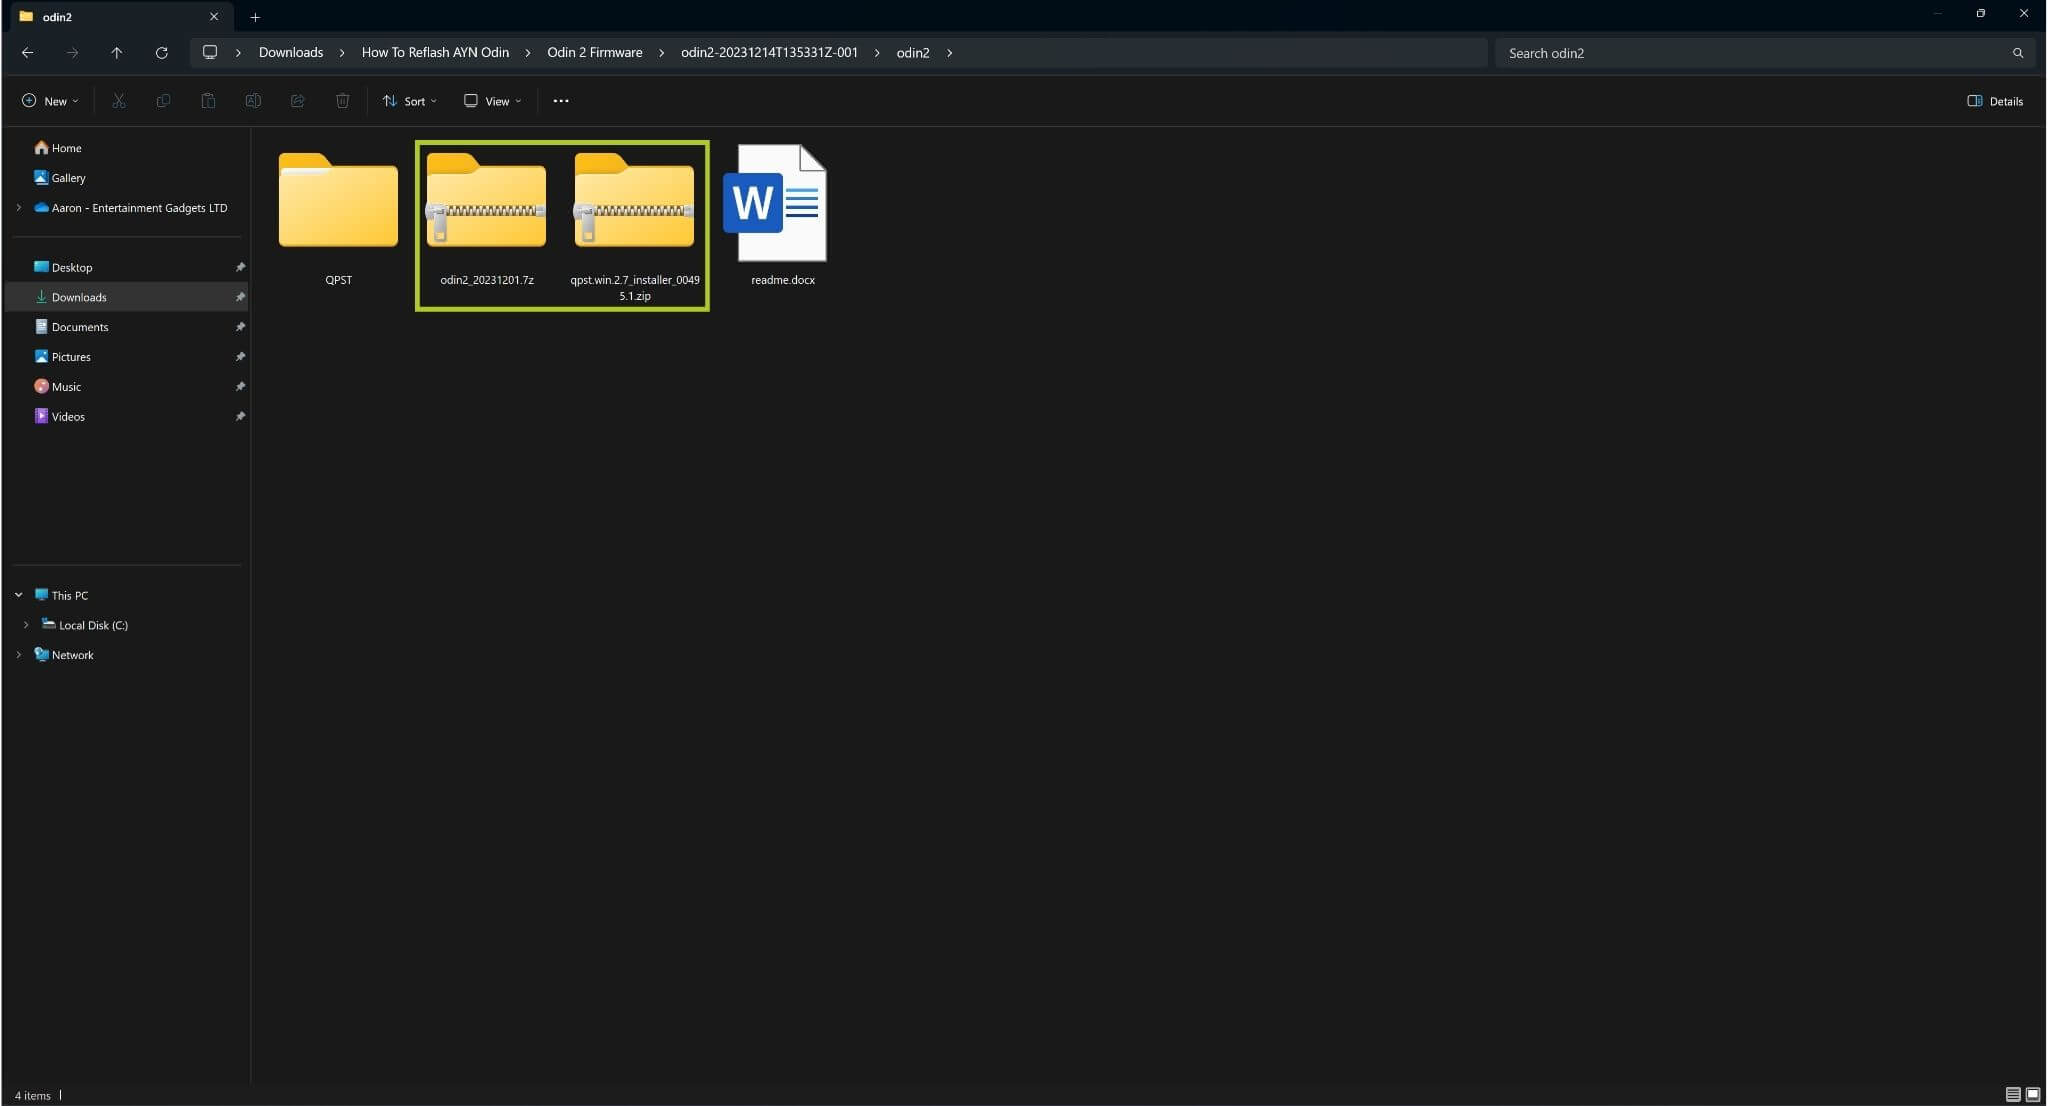
On your Windows device, Extract the downloaded zip file (refer to Image 1 below). Open the extracted folder and then Extract all compressed folders within (see Images 2 & 3 below).

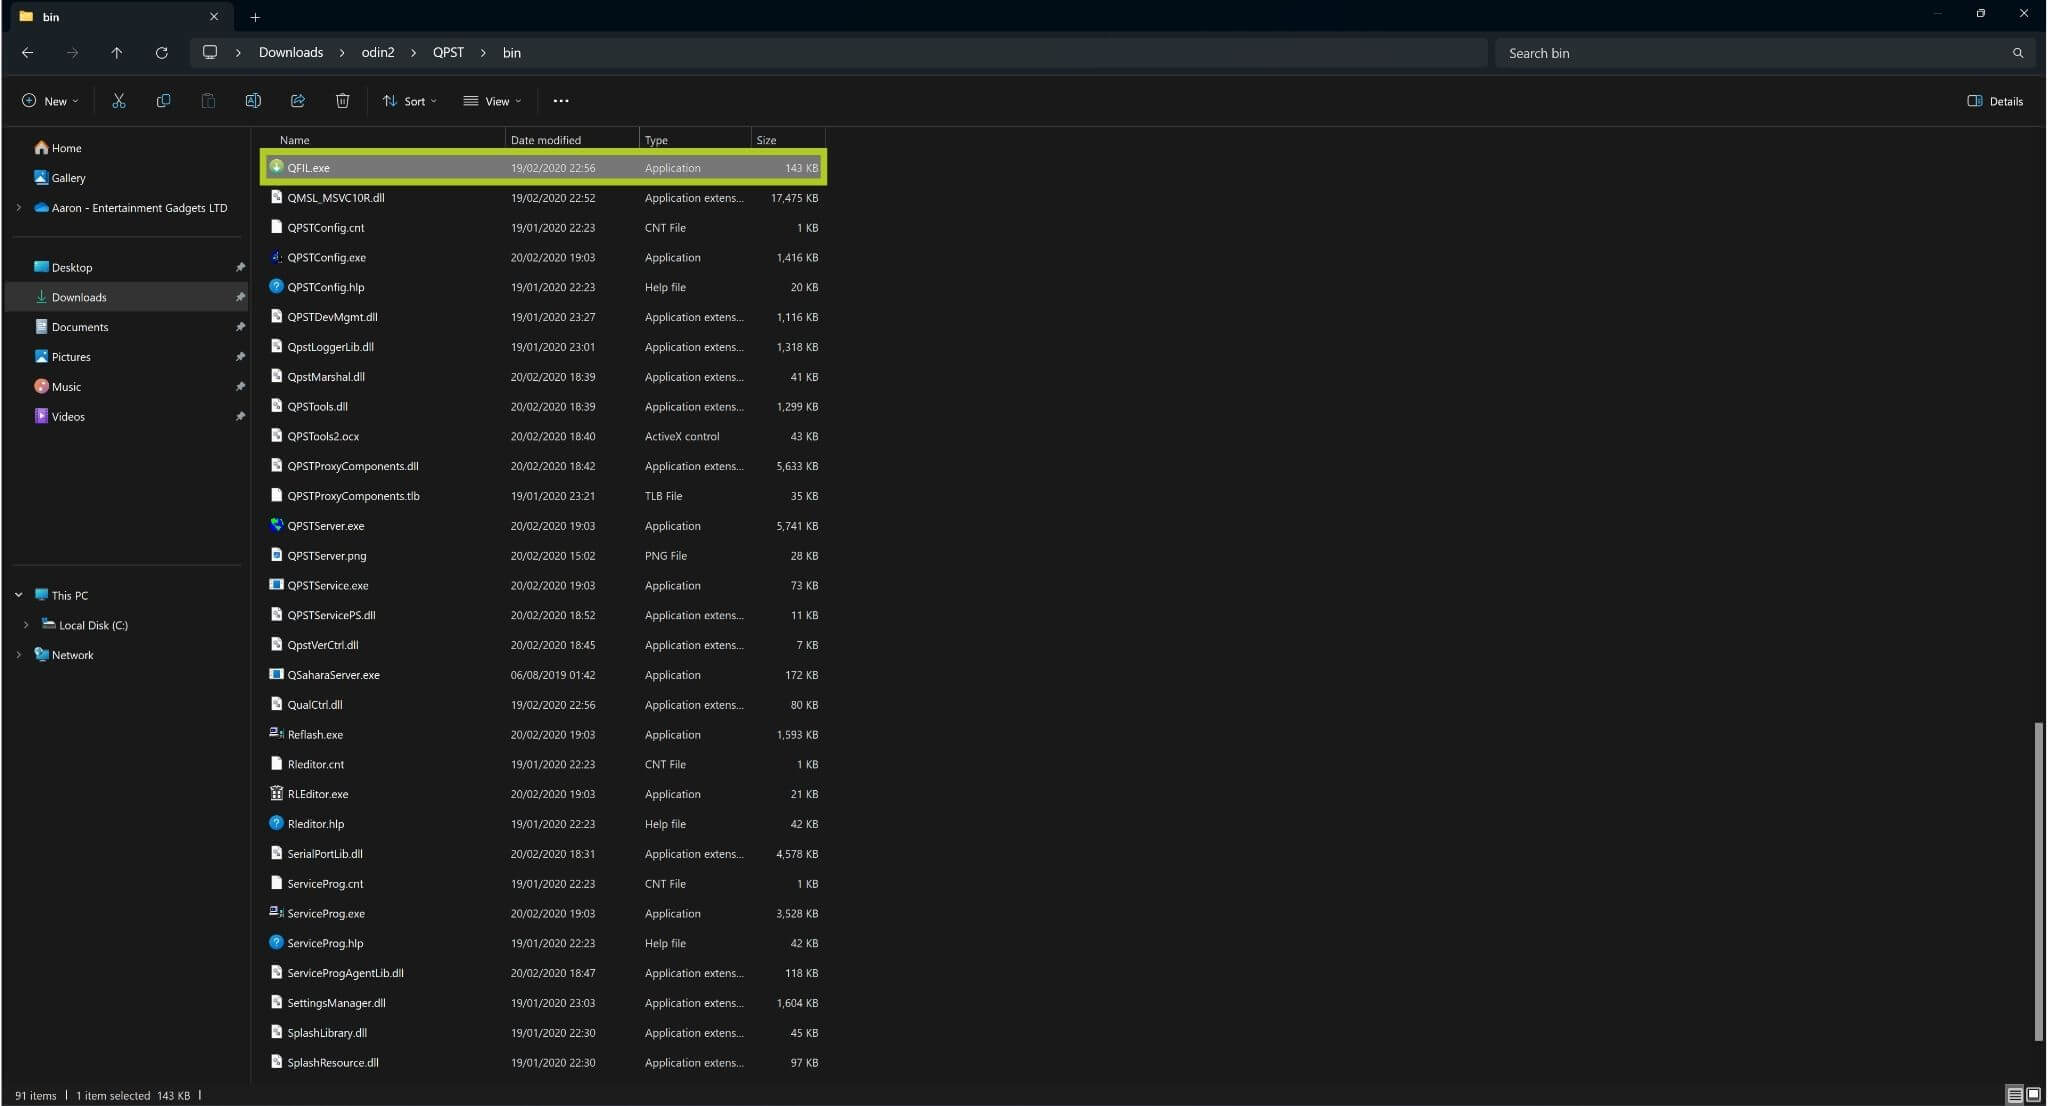
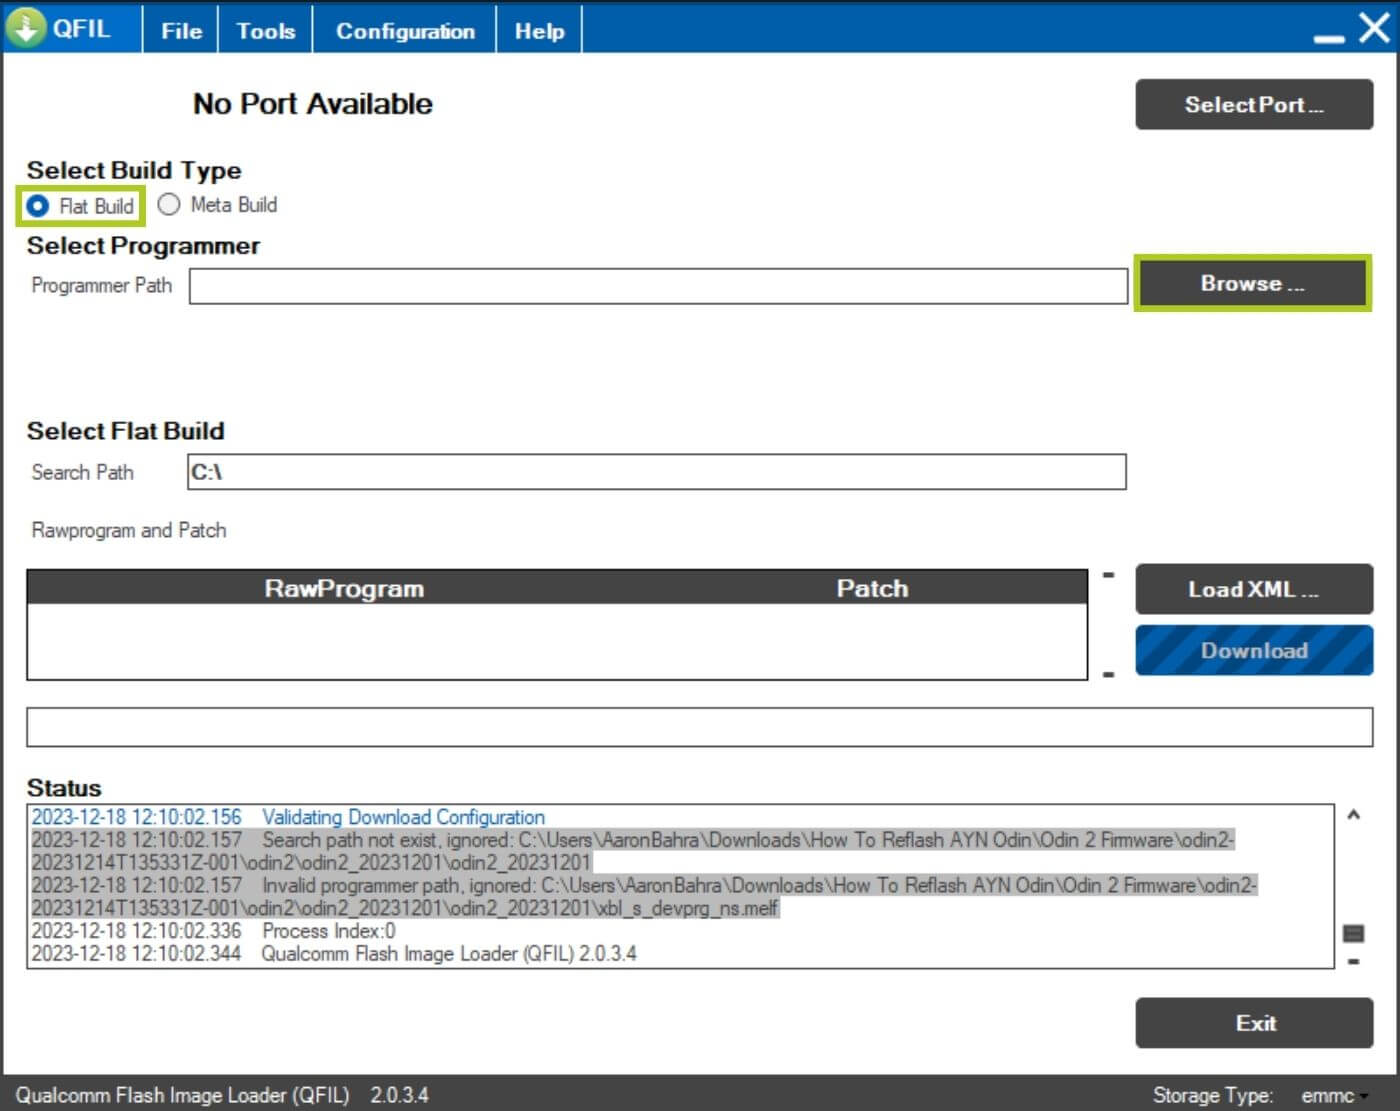
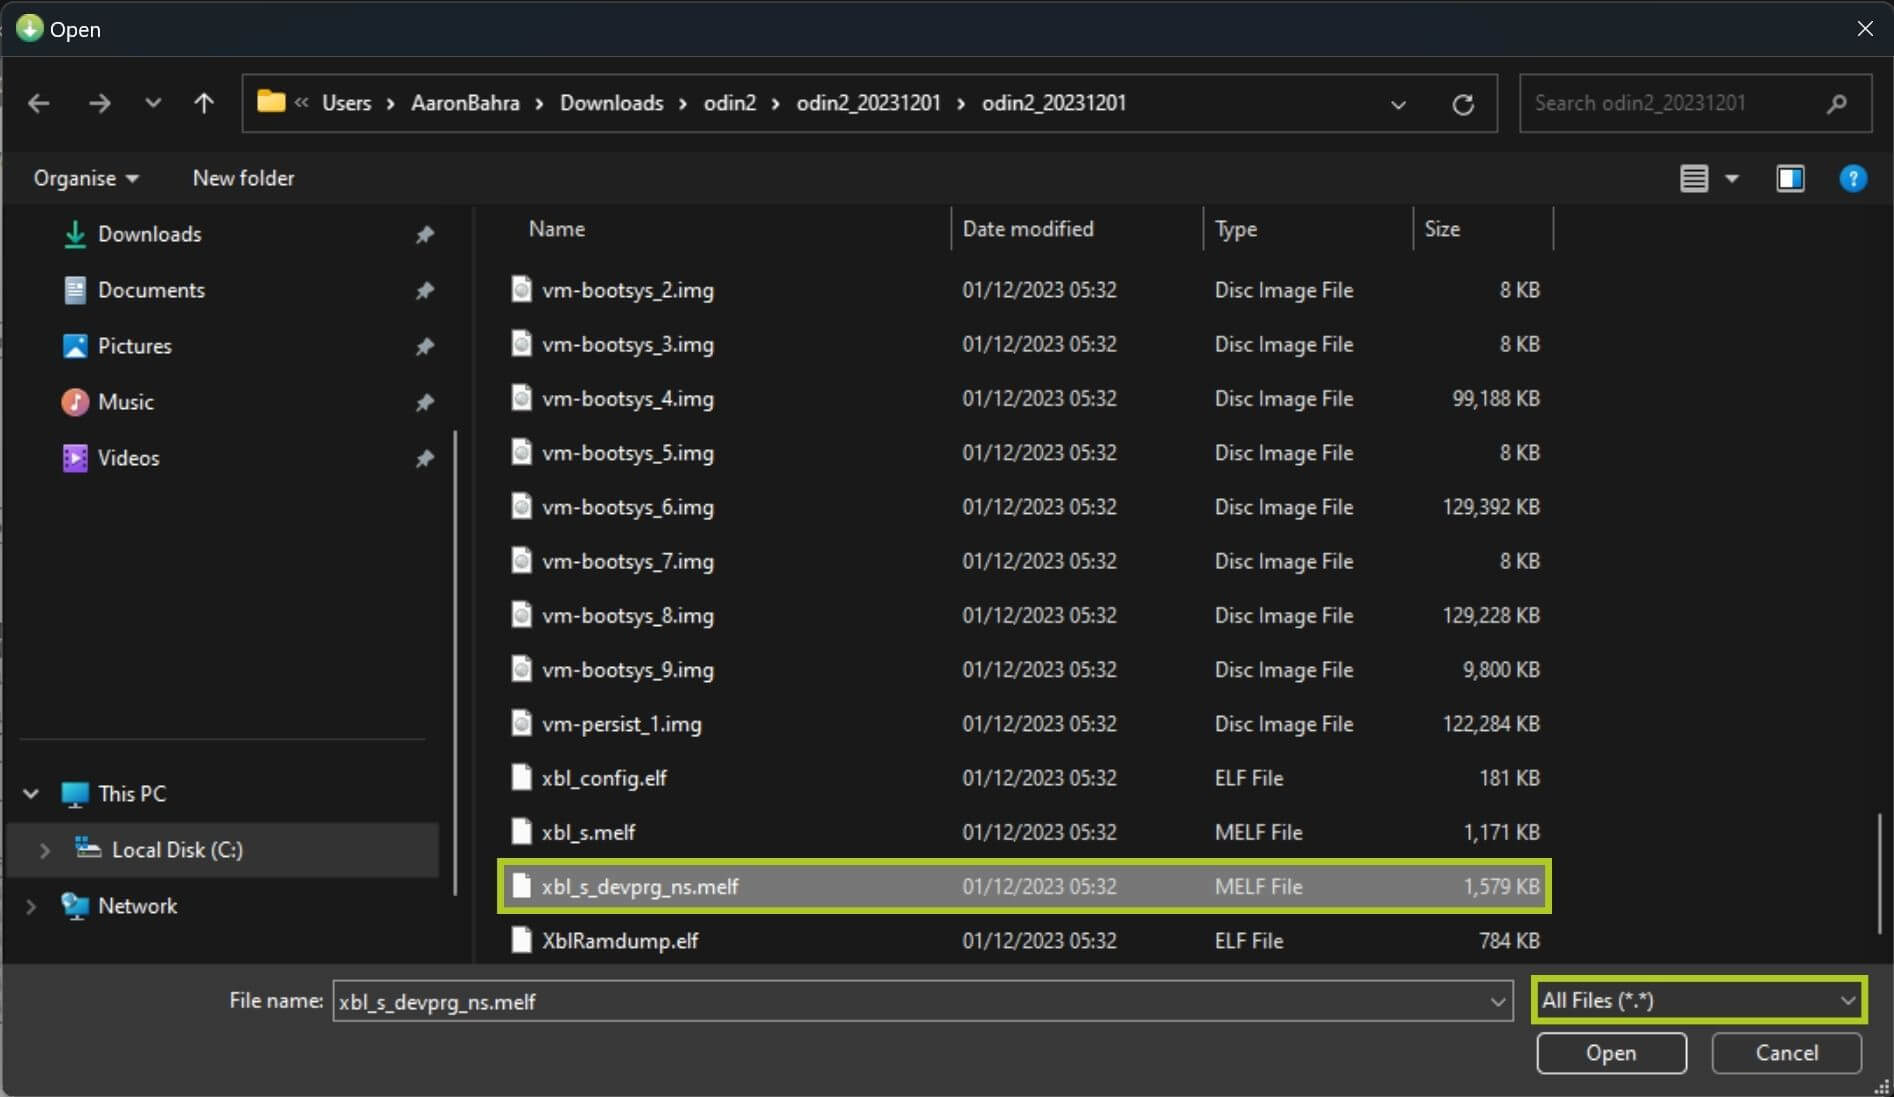
Navigate to QPST\bin and run QFIL.exe (see Image 4 below). A program window will open, from here, ensure the Flat Build option is selected – then click Browse… and open the xbl_s_devprg_ns.melf file located in odin2\odin2_20231201 (shown in Images 5 & 6 below).
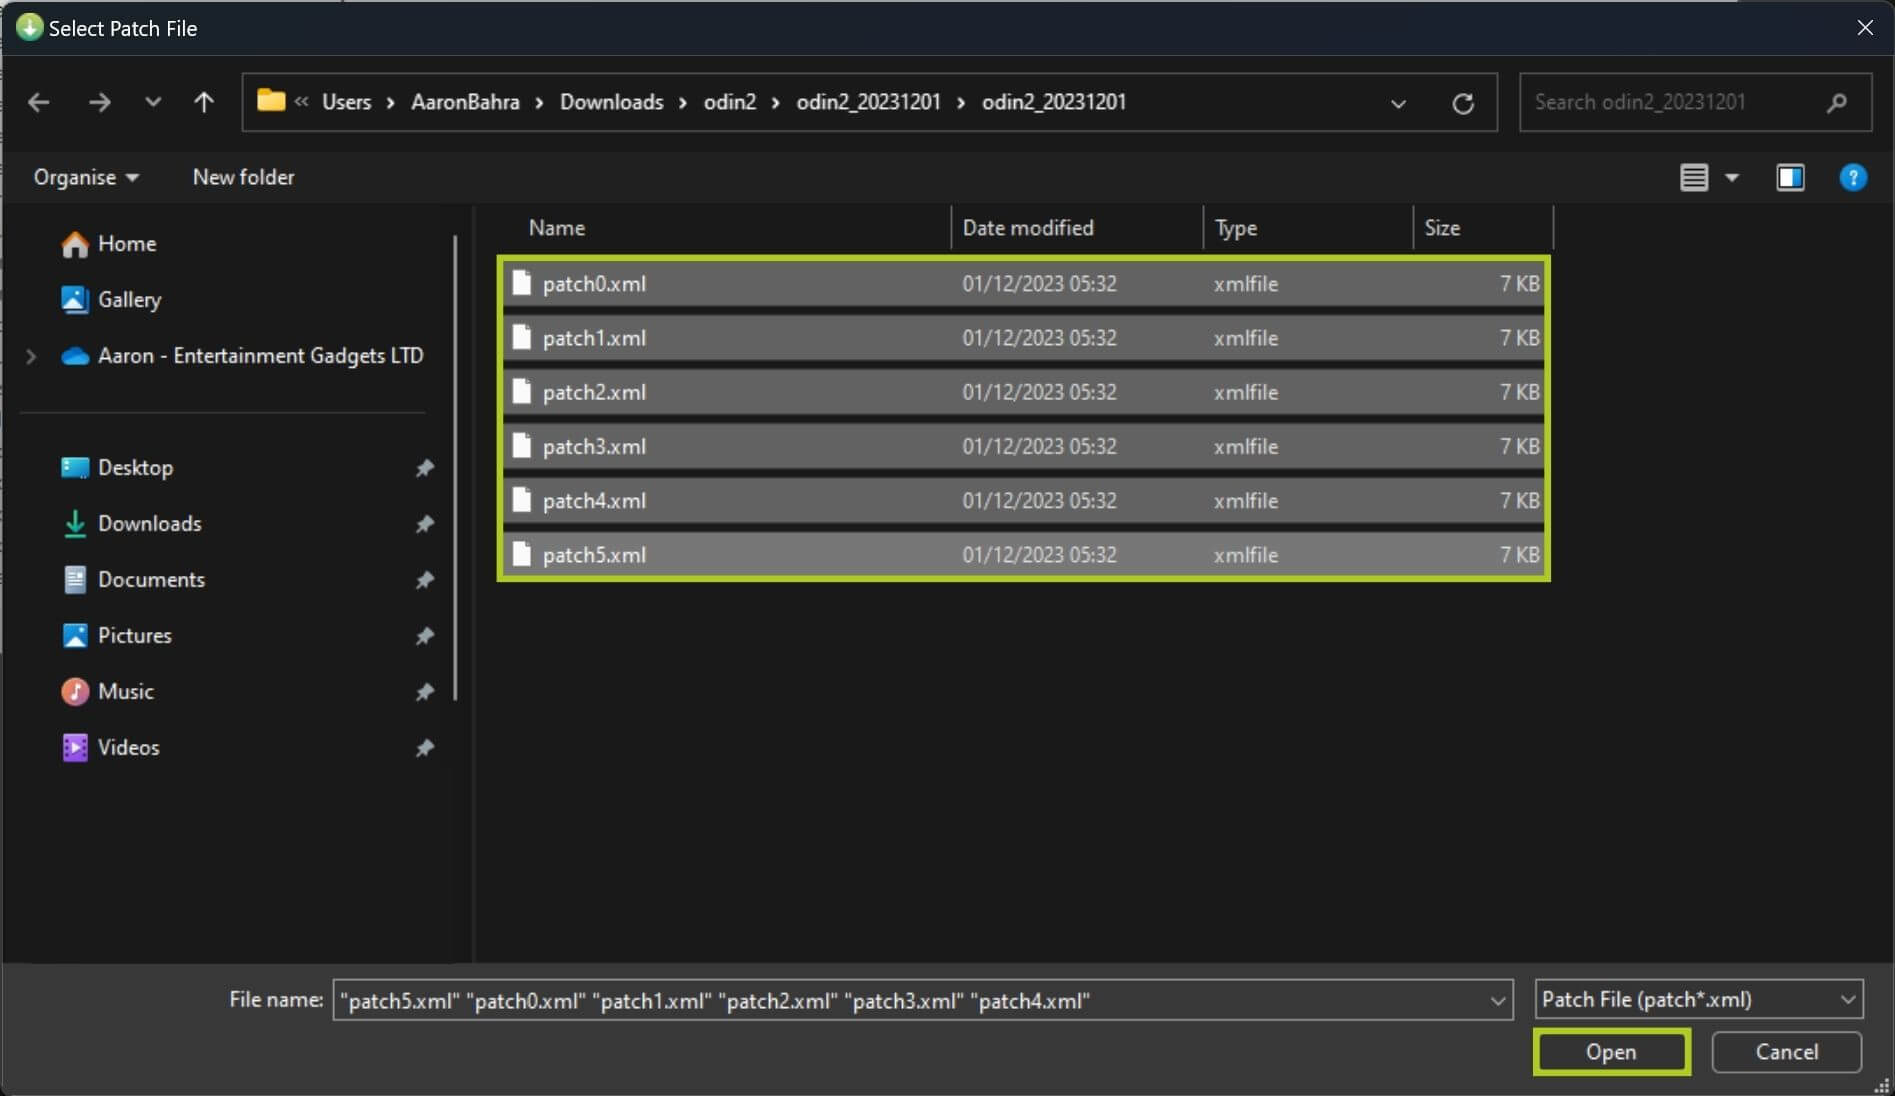
Select Load XML… and open all of the raw program XLM files located in odin2\odin2_20231201 by holding the Ctrl key and clicking on the respective files (see Images 7 & 8 below). Another window will be displayed immediately afterwards – open all patch XML files from the same location (refer to Image 9 below).


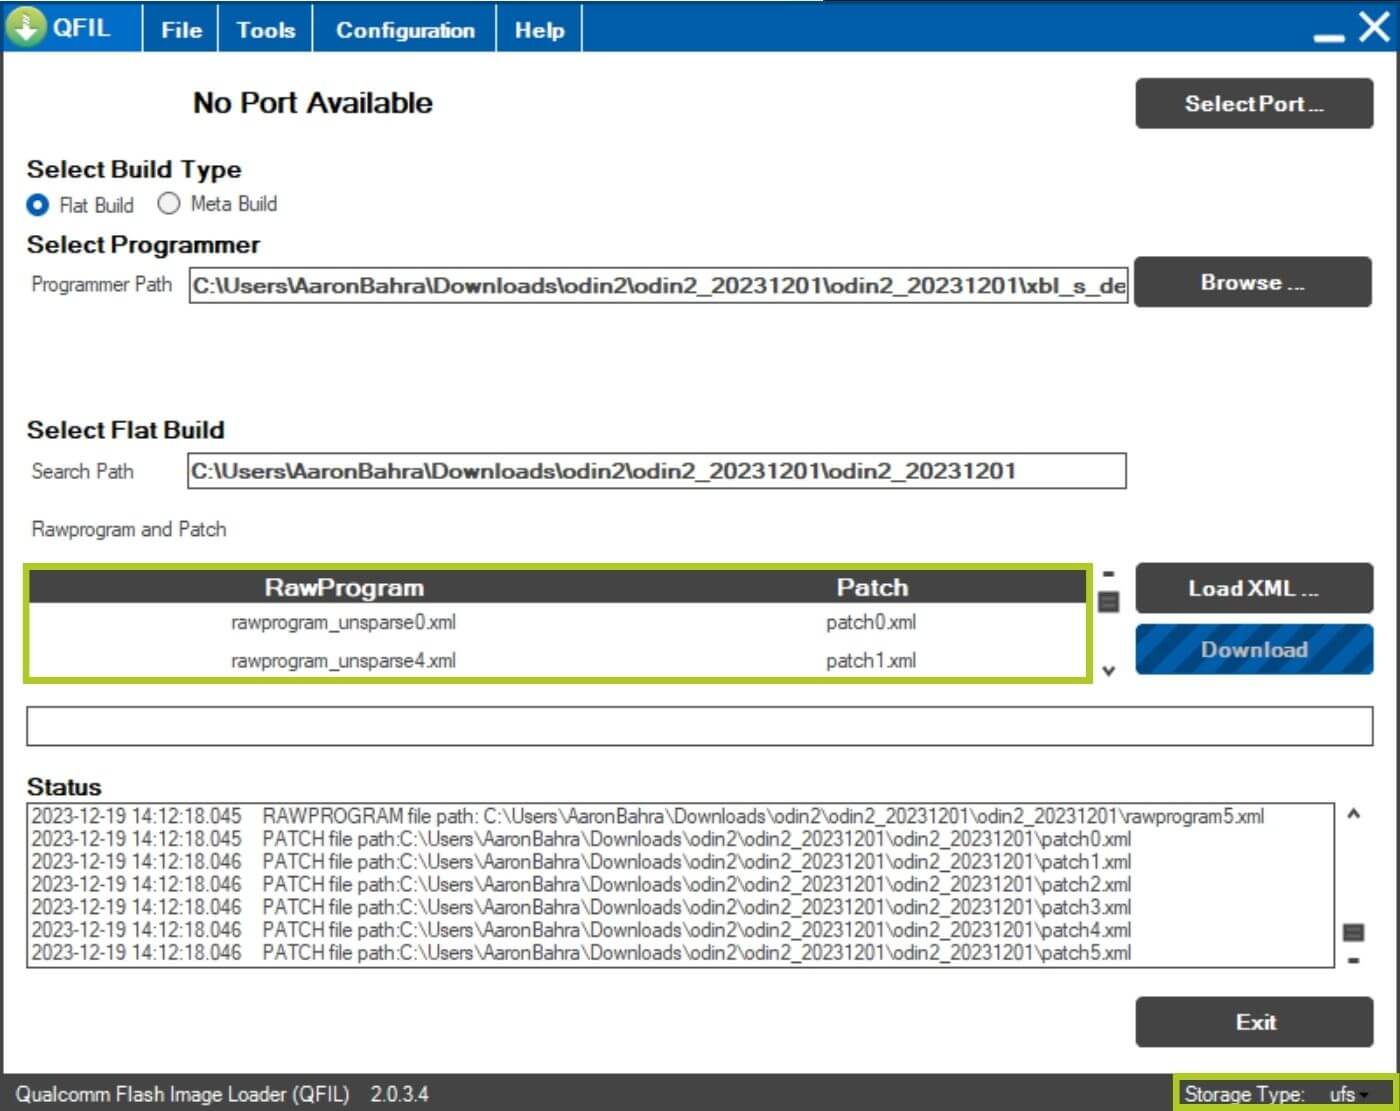
You should be able to see the RawProgram and Patch files loaded in (see Image 10 below). Before proceeding, ensure that the Storage Type is set to UFS – to change simply click the Storage type located at the bottom right and select UFS (refer to Images 10 & 11 below).

Ensure your device is powered down and connect it to the computer. At this point, you should see that there is still No Port Available in QFIL (Image 12 below). We recommend you open Device Manager so you can check if the port is correctly recognised once we power the device (Image 13 below) – as you may need to update drivers if it’s not recognised here.
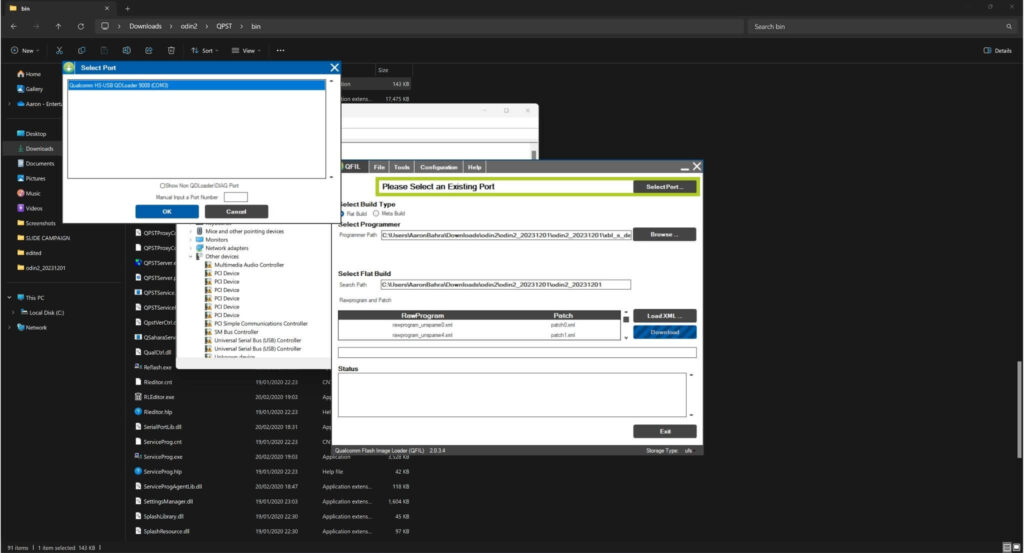
Press and hold the volume- and power buttons. This will go into the Odin 2 bootloader. Select Emergency Mode, and the Device Manager should recognise the correct port (Qualcomm HS-USB QDLoader 9008).


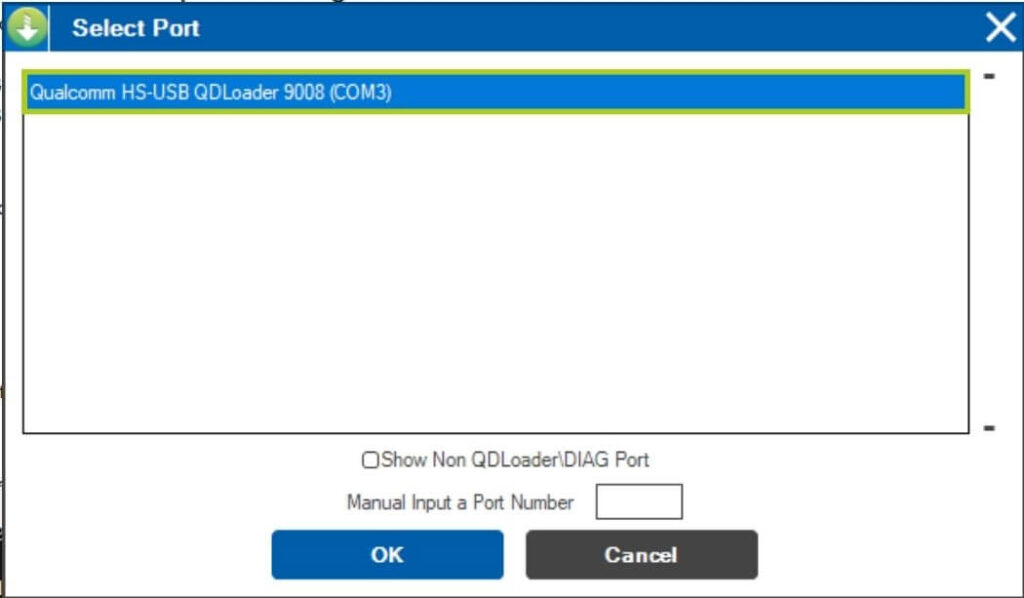
In the QFIL program, you will also be asked to select an Existing Port. Click on Select Port… and choose the correct port (Qualcomm HS-USB QDLoader 9008) and press OK (refer to Images 14 & 15 below). Sometimes the port may be automatically recognised and selected, if this is the case simply proceed to the next step.
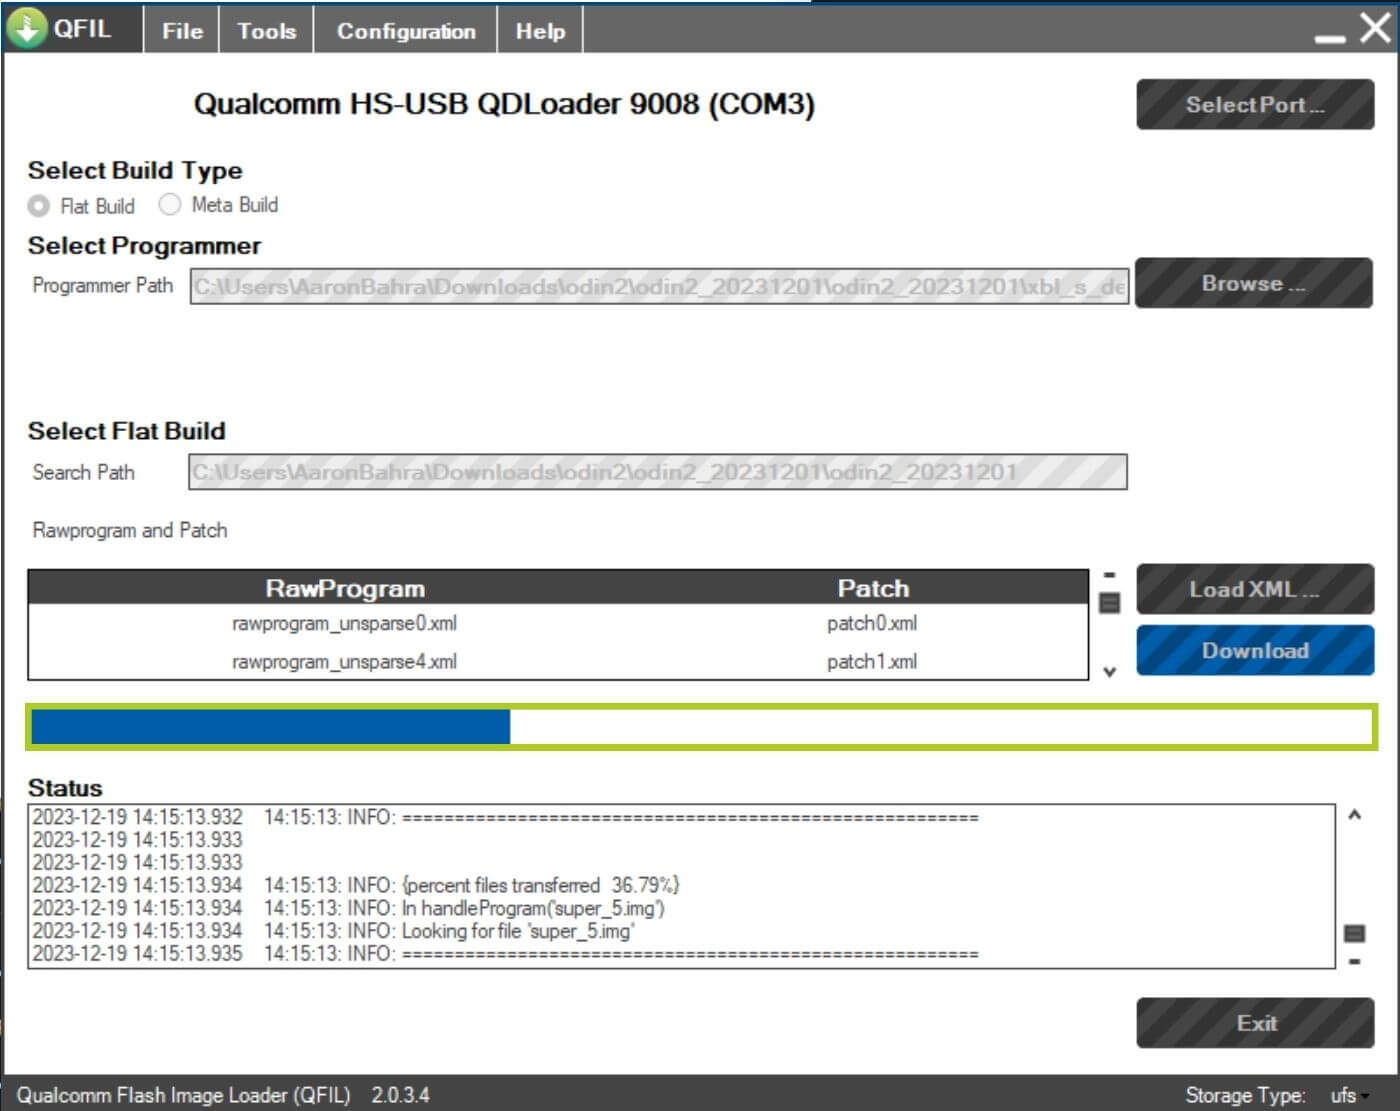
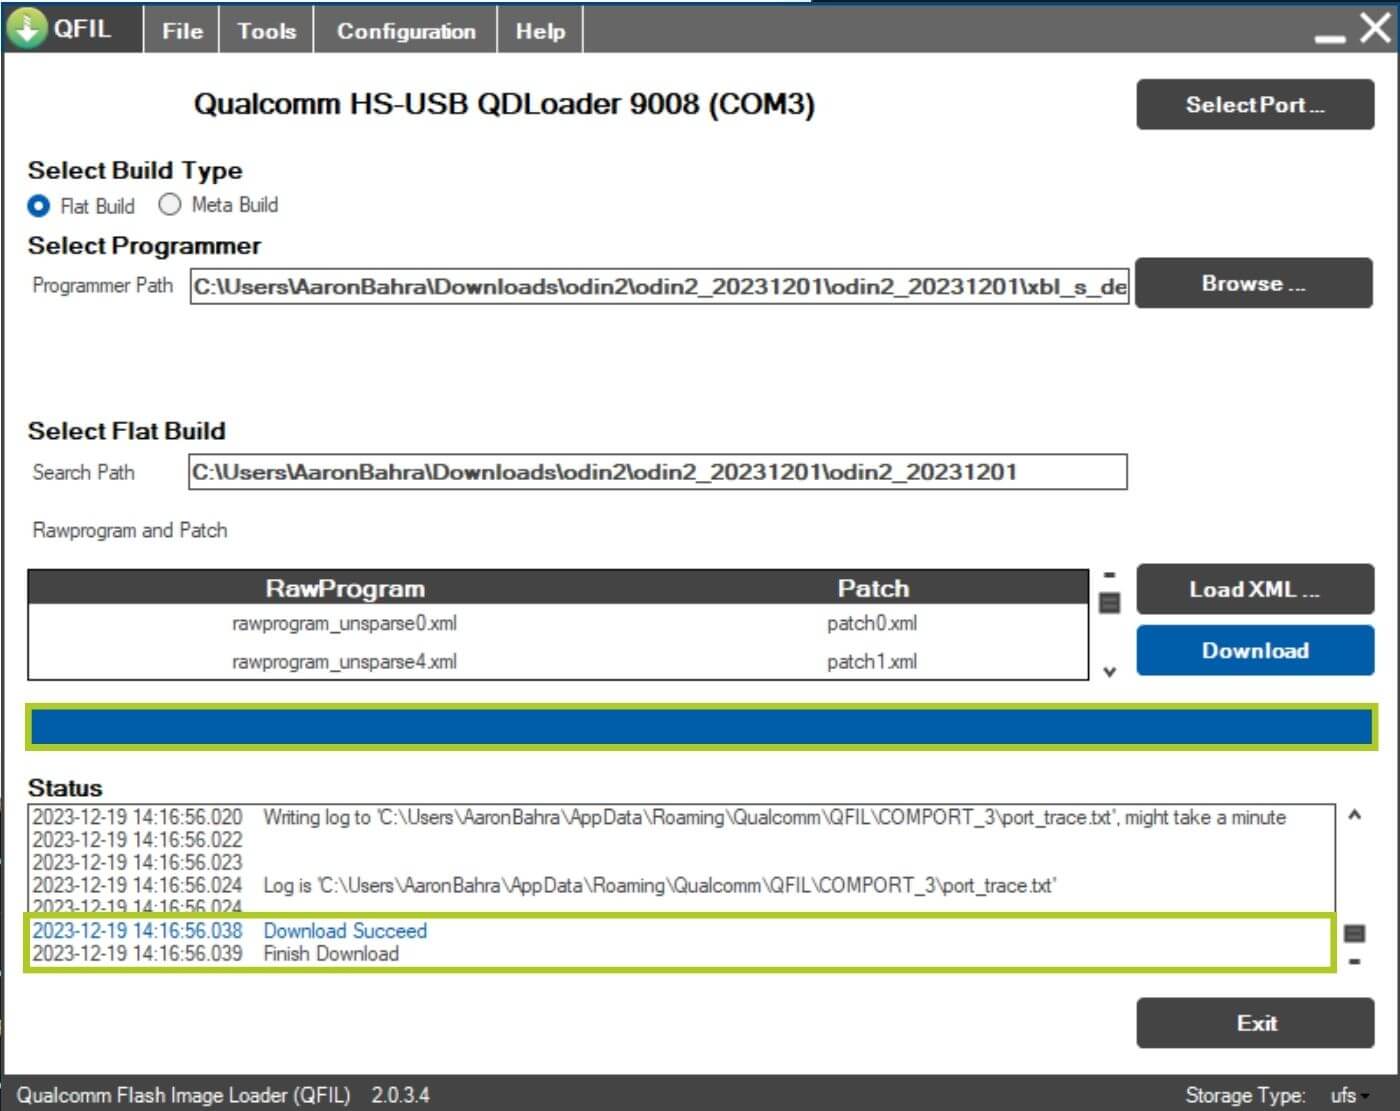
With the correct port selected, press Download to begin the firmware reflashing (Image 16 below). You will see a blue bar indicative of the progress – during this time, do not disconnect your device or you may risk rendering the device inoperable. Once complete, you will see Finish Download displayed in the Status box (see Image 18 below). Afterwards, you can simply need to exit the program and boot your Android Gaming Console.

Troubleshooting Odin 2
We encountered a few issues whilst trying to install these drivers with the provided instructions, so we made a guide and are covering potential issues.
Emergency Mode
When entering the handheld bootloader and selecting Emergency Mode, it’s best to press Download in QFIL as quickly as possible. Spending too much time here has been known to cause issues.
Disabling Driver Signature
Disable your driver’s signature in the boot menu by pressing F7 whilst restarting your PC. From here select:
- Troubleshoot
- Advanced
- Startup Settings
- Restart
Doing this will cause your PC to reboot with the driver signature disabled until the next time you reboot your device. From here, we recommend updating the drivers and then performing the reflashing whilst the driver signatures are disabled.
Driver Update
If your port is not being recognized, update its driver through the Device Manager. First, download the required port driver from the link provided below.
| Drivers | Download Link |
| Qualcomm HS-USB QDLoader 9008 | Download |
Download, and extract the CAB file. Open Device Manager and add/update the drivers by clicking on either the specific device or Action, and then Update Driver. Search for the drivers locally and install them.
Download AYN Odin Firmware
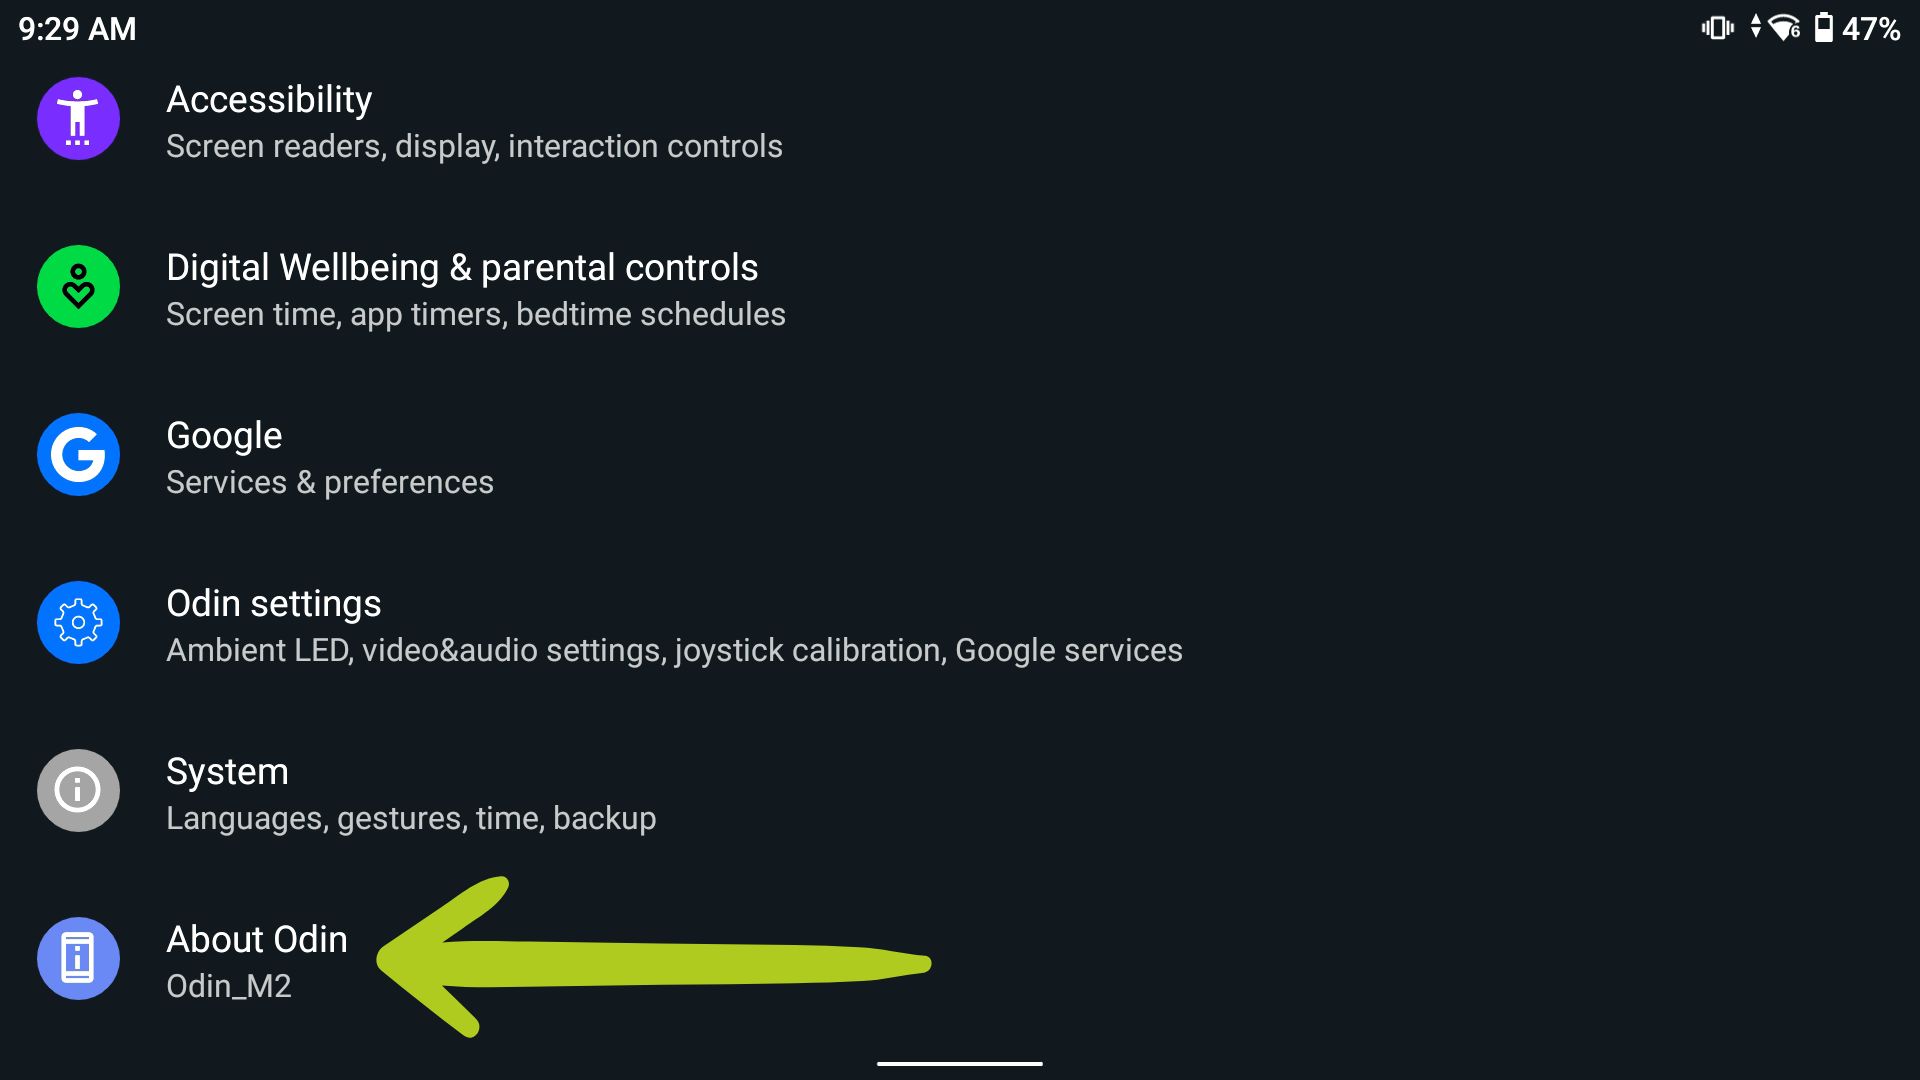
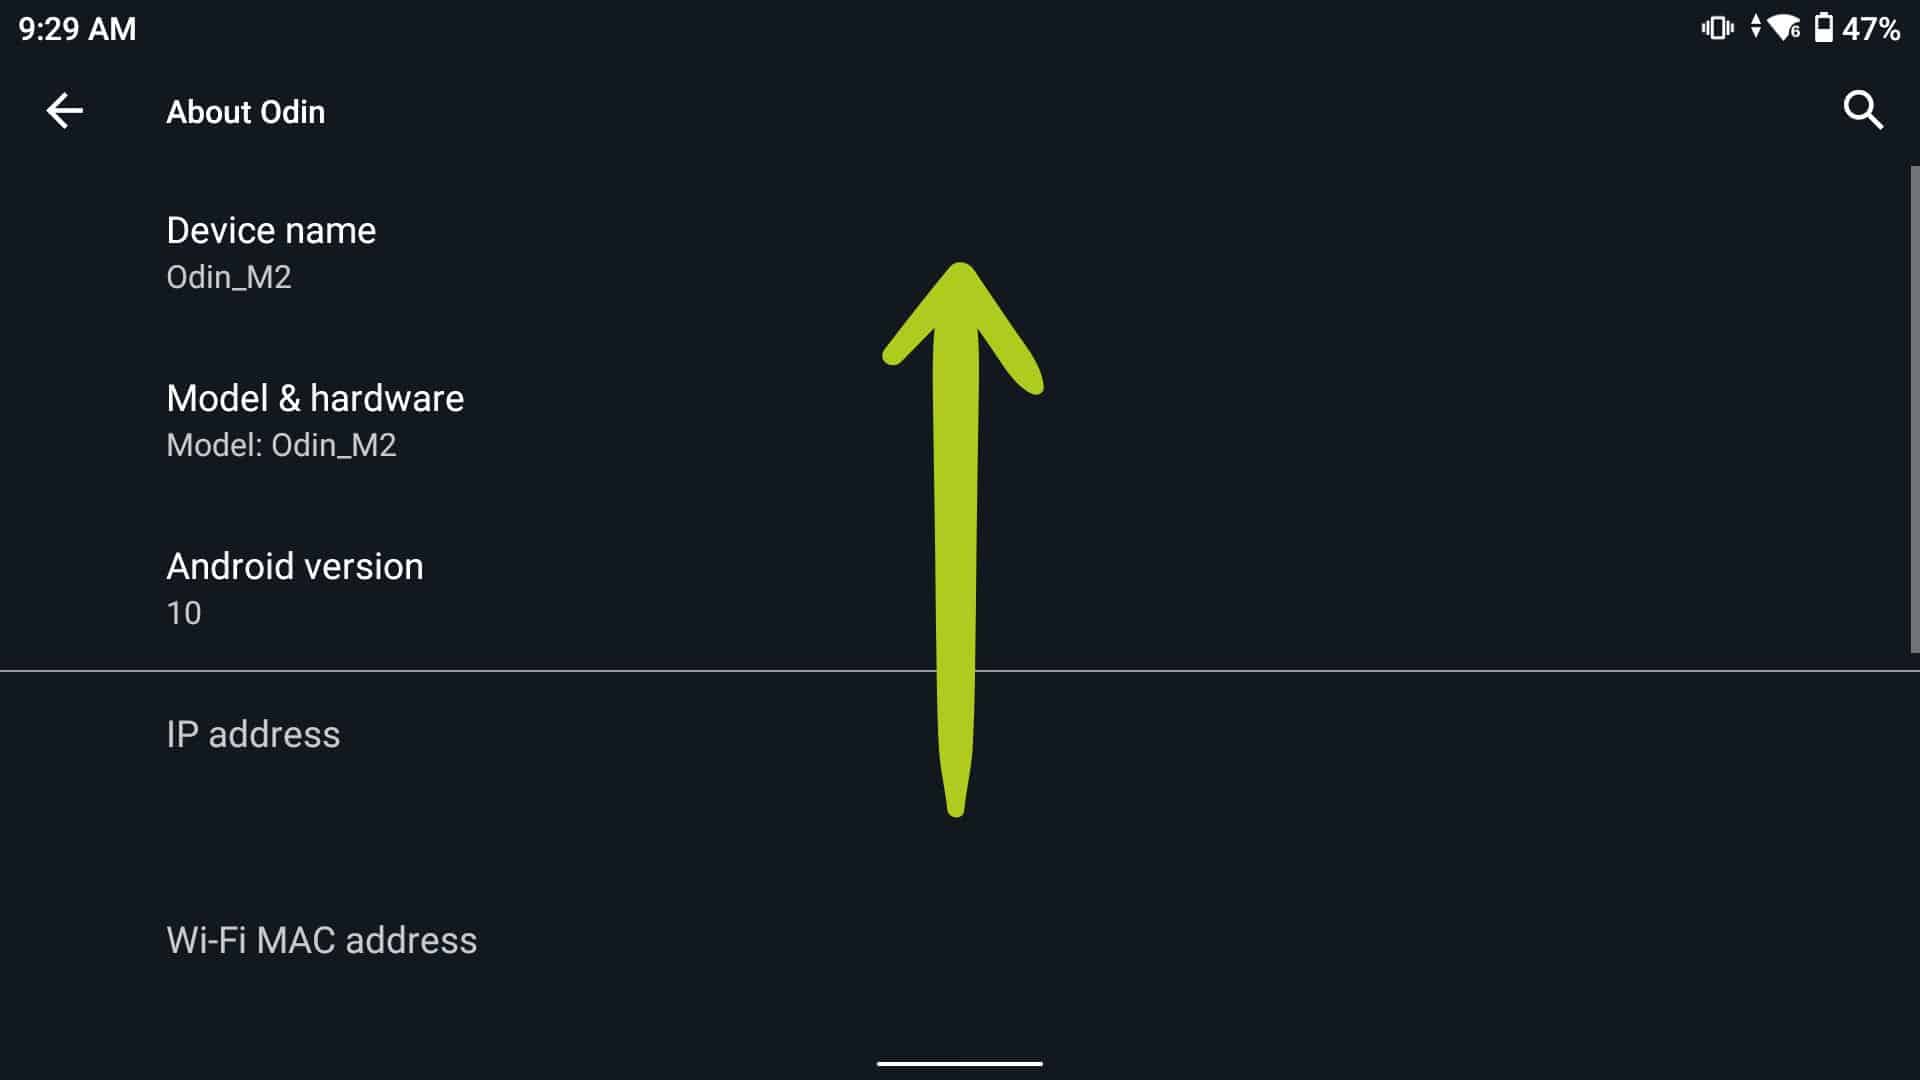
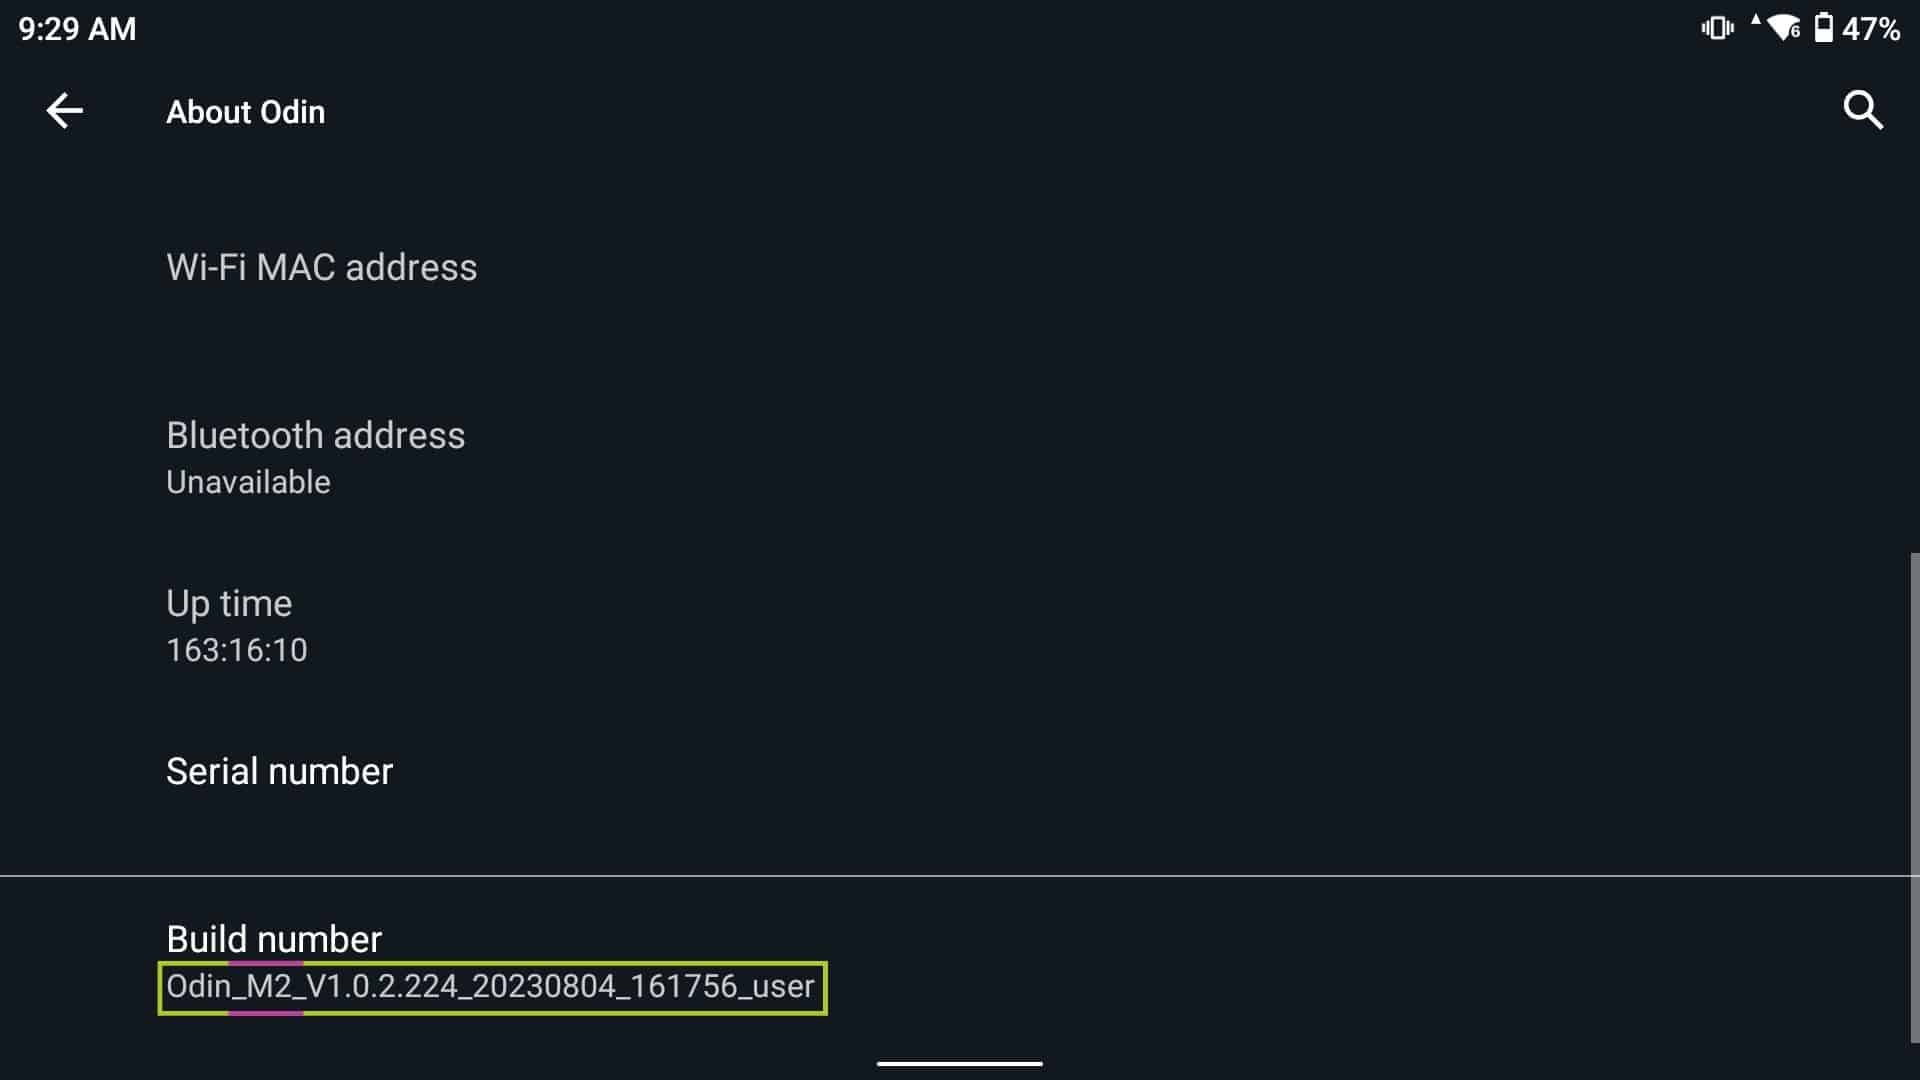
When downloading firmware for the AYN Odin 1, ensure you’re downloading the correct version, according to your device’s build number. The Build Number will display which version you need to download, either M0 or M2. To check, whilst on your device:
- Go to Settings
- Select About Odin
- Navigate to Build Number
- Check Build Number

Download the correct firmware, respective to your build number and then move to the section regarding whichever device you intend to flash.
| Model | Download Link |
| Odin Base/Pro M0 | N/A |
| Odin Base/Pro M2 | N/A |
Note: We will update this article with Odin 1 Instructions.
