Keymapping, a transformative technology in the gaming world, offers a seamless way to bridge the gap between traditional gamepad-based gaming and the ever-evolving realm of touch-based mobile games. By assigning onscreen controls and actions to specific buttons and joysticks on a gamepad, screen mapping ensures a more tactile and responsive gaming experience, especially crucial for genres where precision and speed are core to the gameplay.
Our comprehensive guide delves into the nuances of button mapping, offering an in-depth exploration of various key mapping software available for Android devices.
Advantages of Key Mapping
With key mapping, you can key map a physical controller to gain the upper hand in games such as Call of Duty, or Wild Rift instead of being restricted to the touchscreen controls – which can be unreliable and hinder your reaction time. This technique, often called touchscreen mapping, is rapidly becoming a game-changer in mobile gaming, enabling a more immersive and comfortable gaming experience on Android gaming handhelds, phones, and tablets.
AYANEO
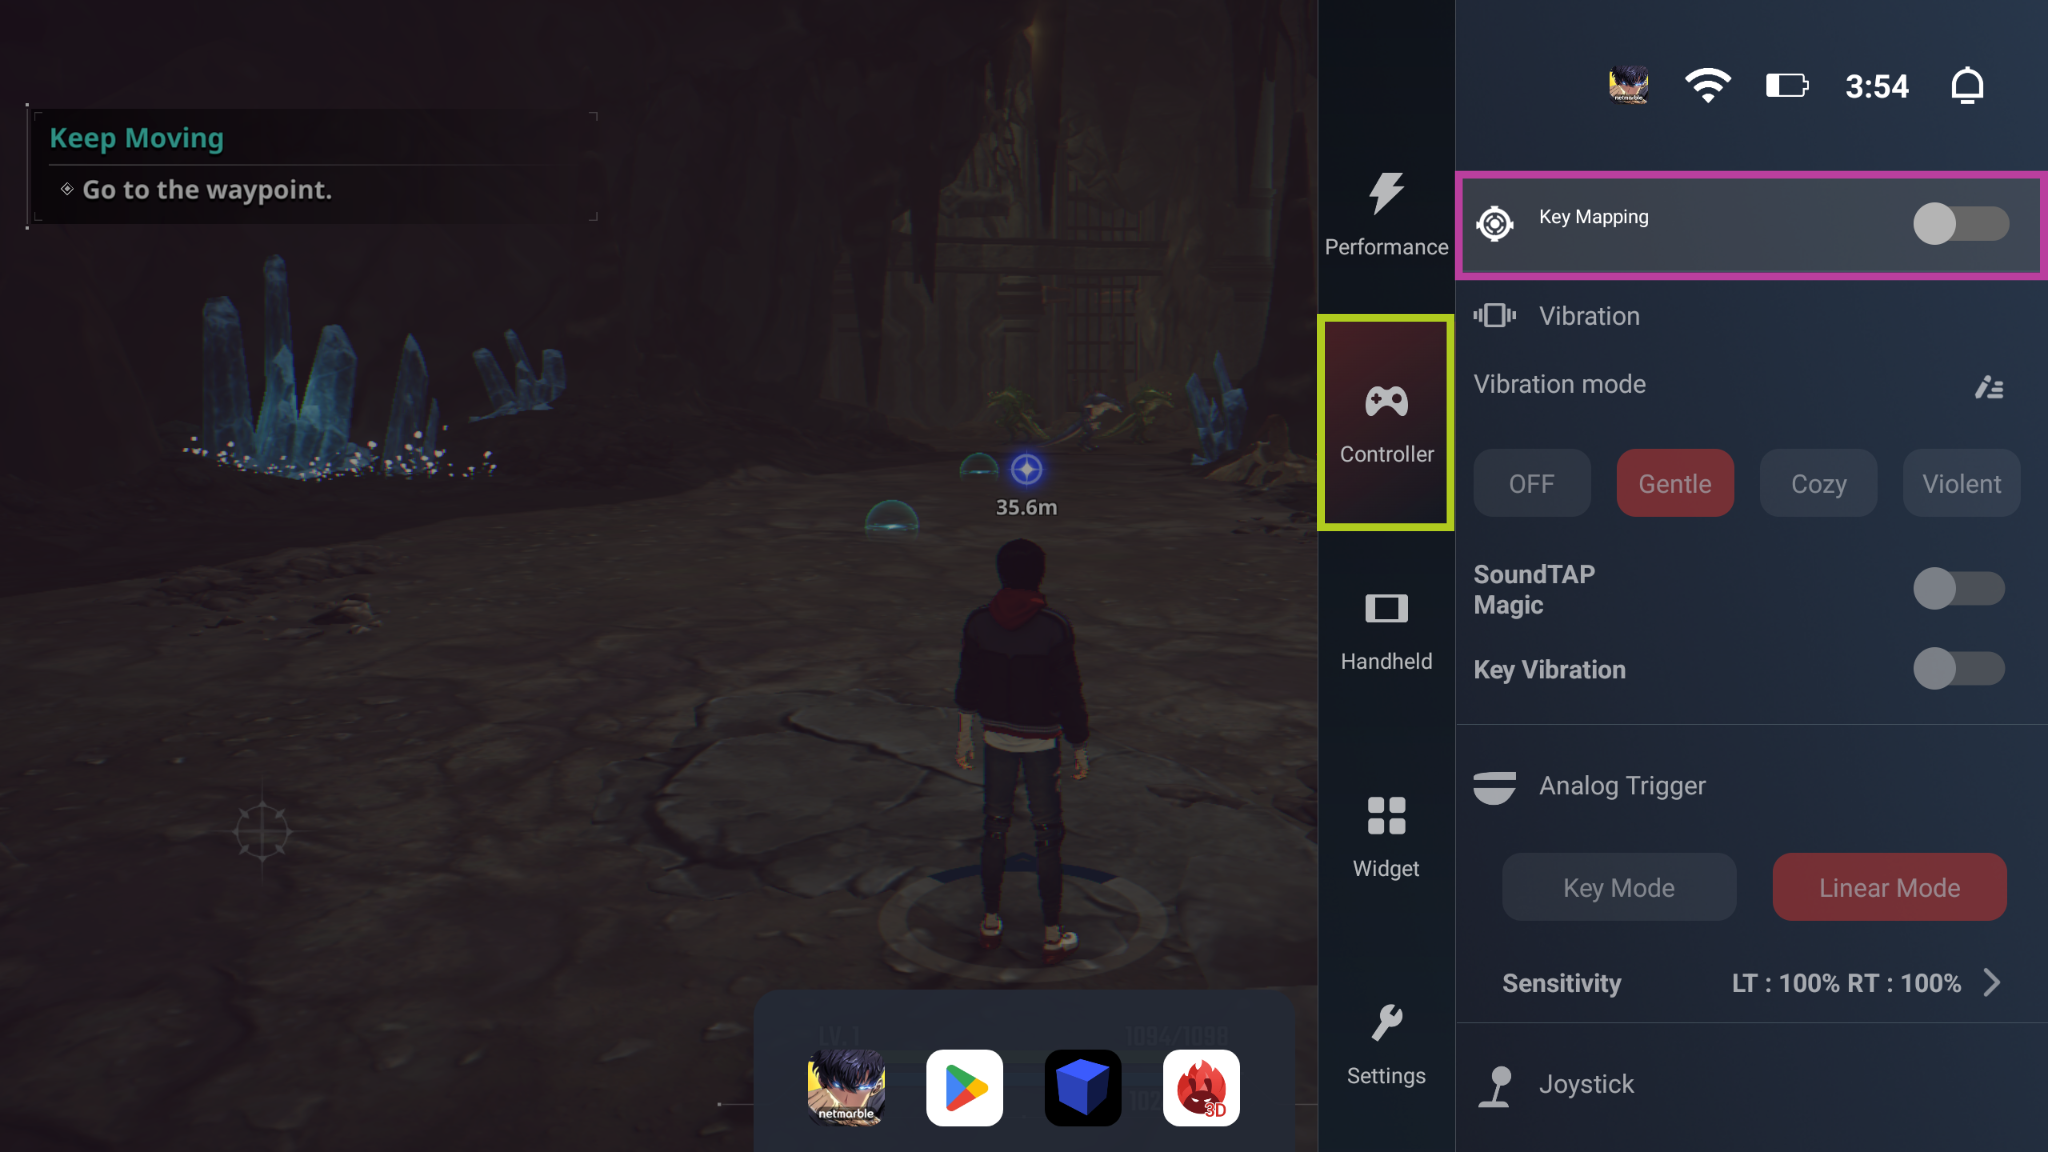
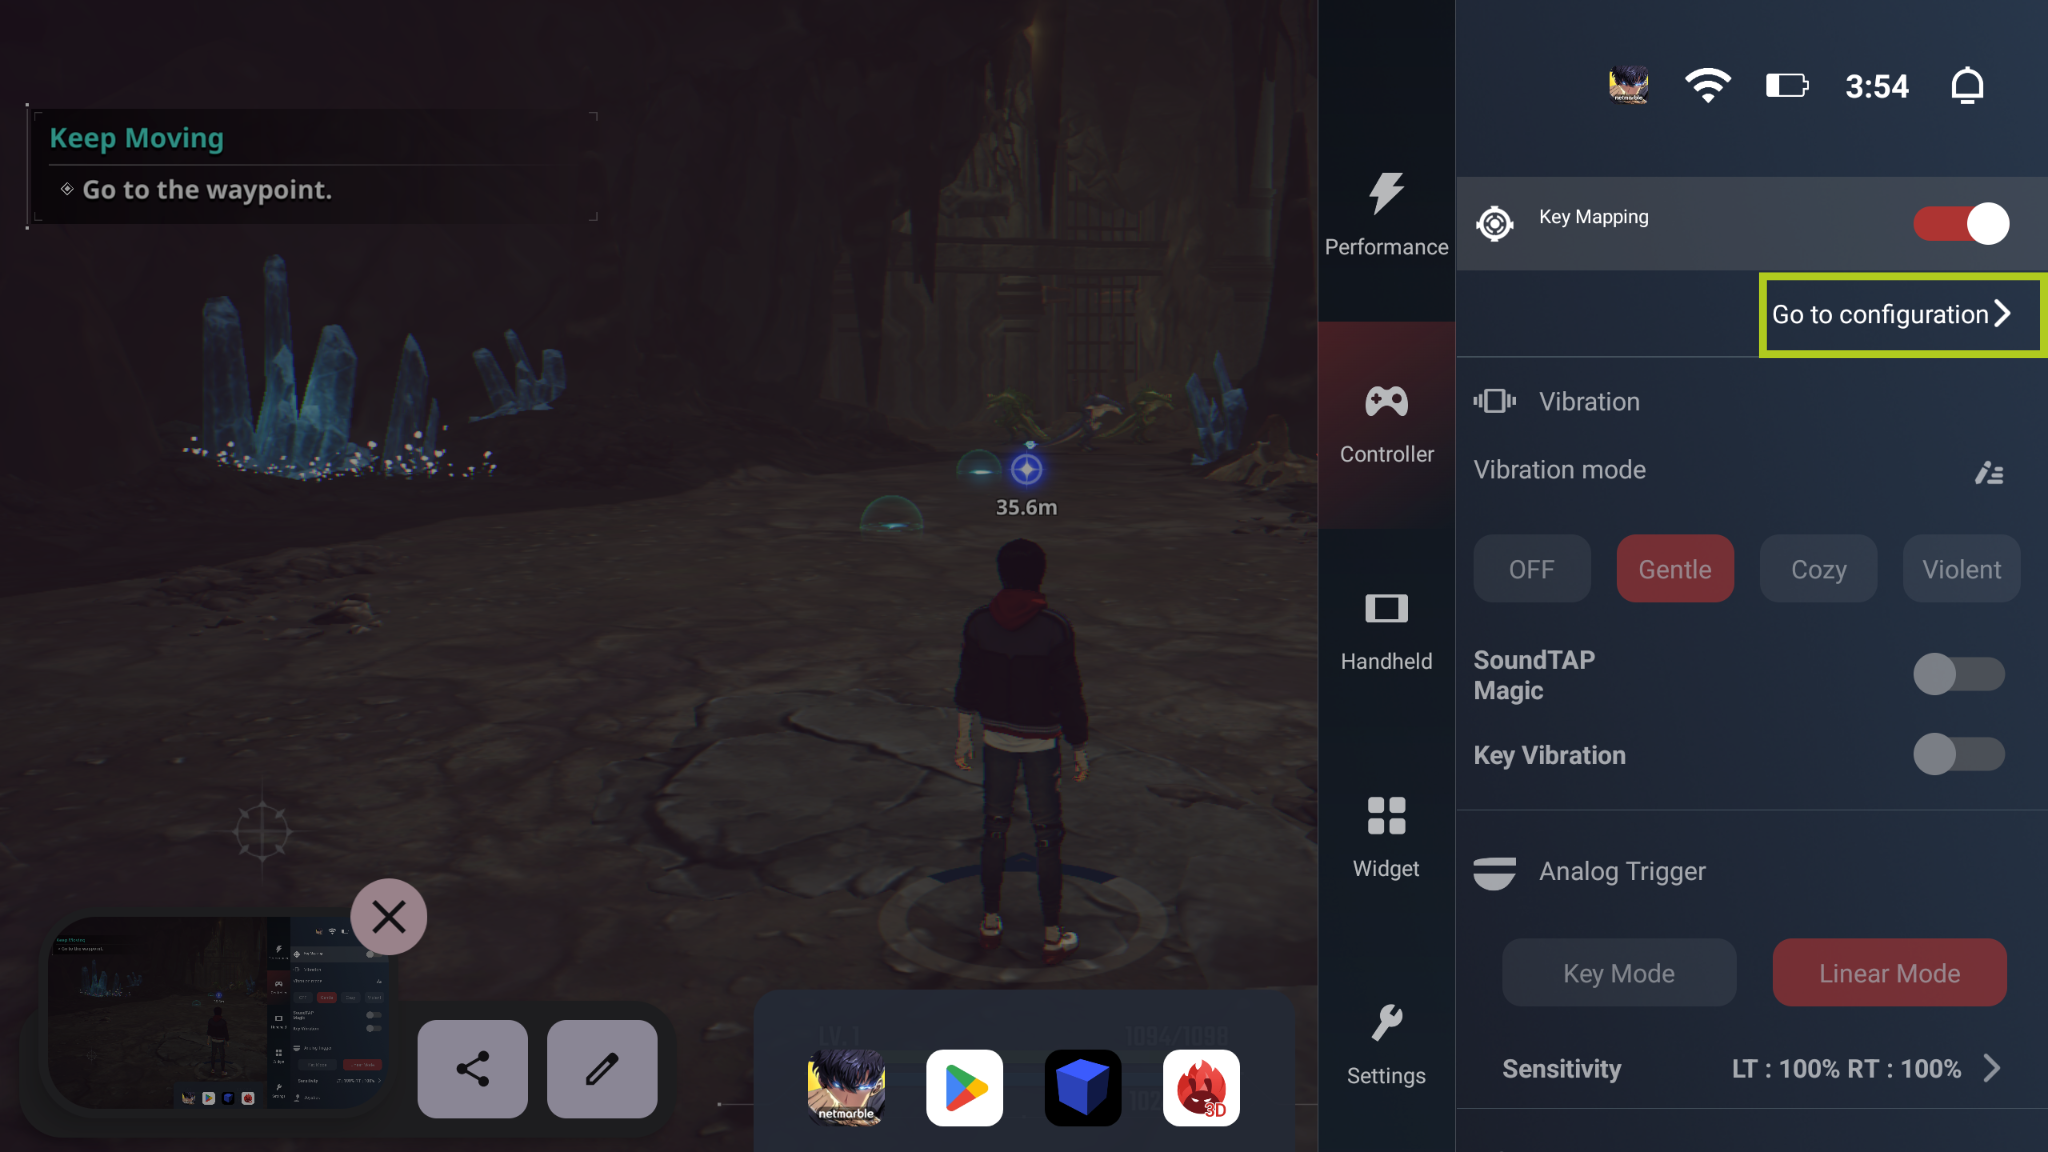
Screen Mapping for Android AYANEO products, such as the Pocket S, can be accessed from the AYASpace Overlay, simply launch a game, and Start any game and open the AYASpace Overlay. To access the AYASpace Overlay, click the dedicate AYASpace button on the AYANEO handheld console. From here navigate to the Controller tab, and turn on Key Mapping. After this, select ‘Go to Configuration’ which will open up an overlay where you can configure the Screen mapping as you would like.
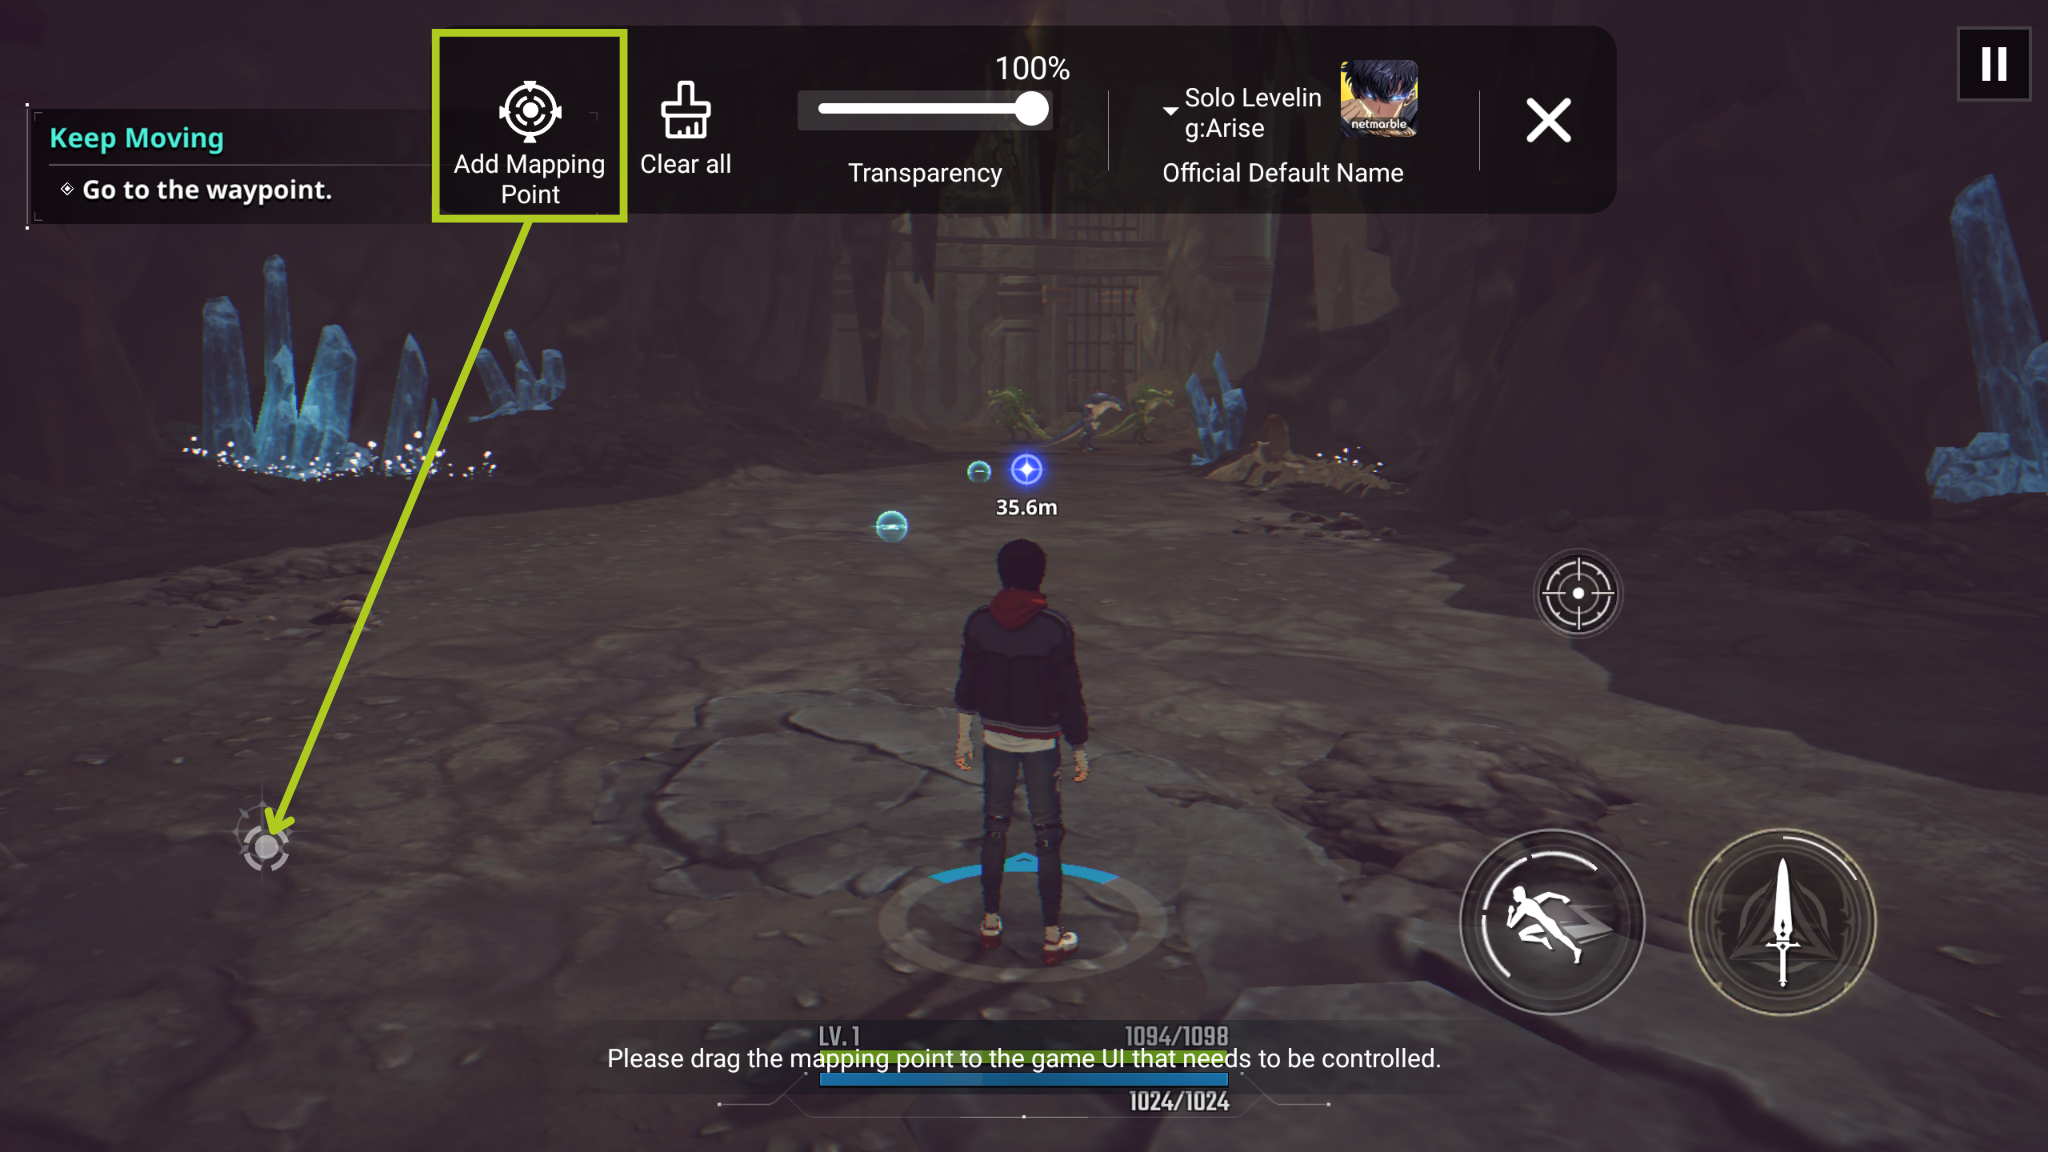
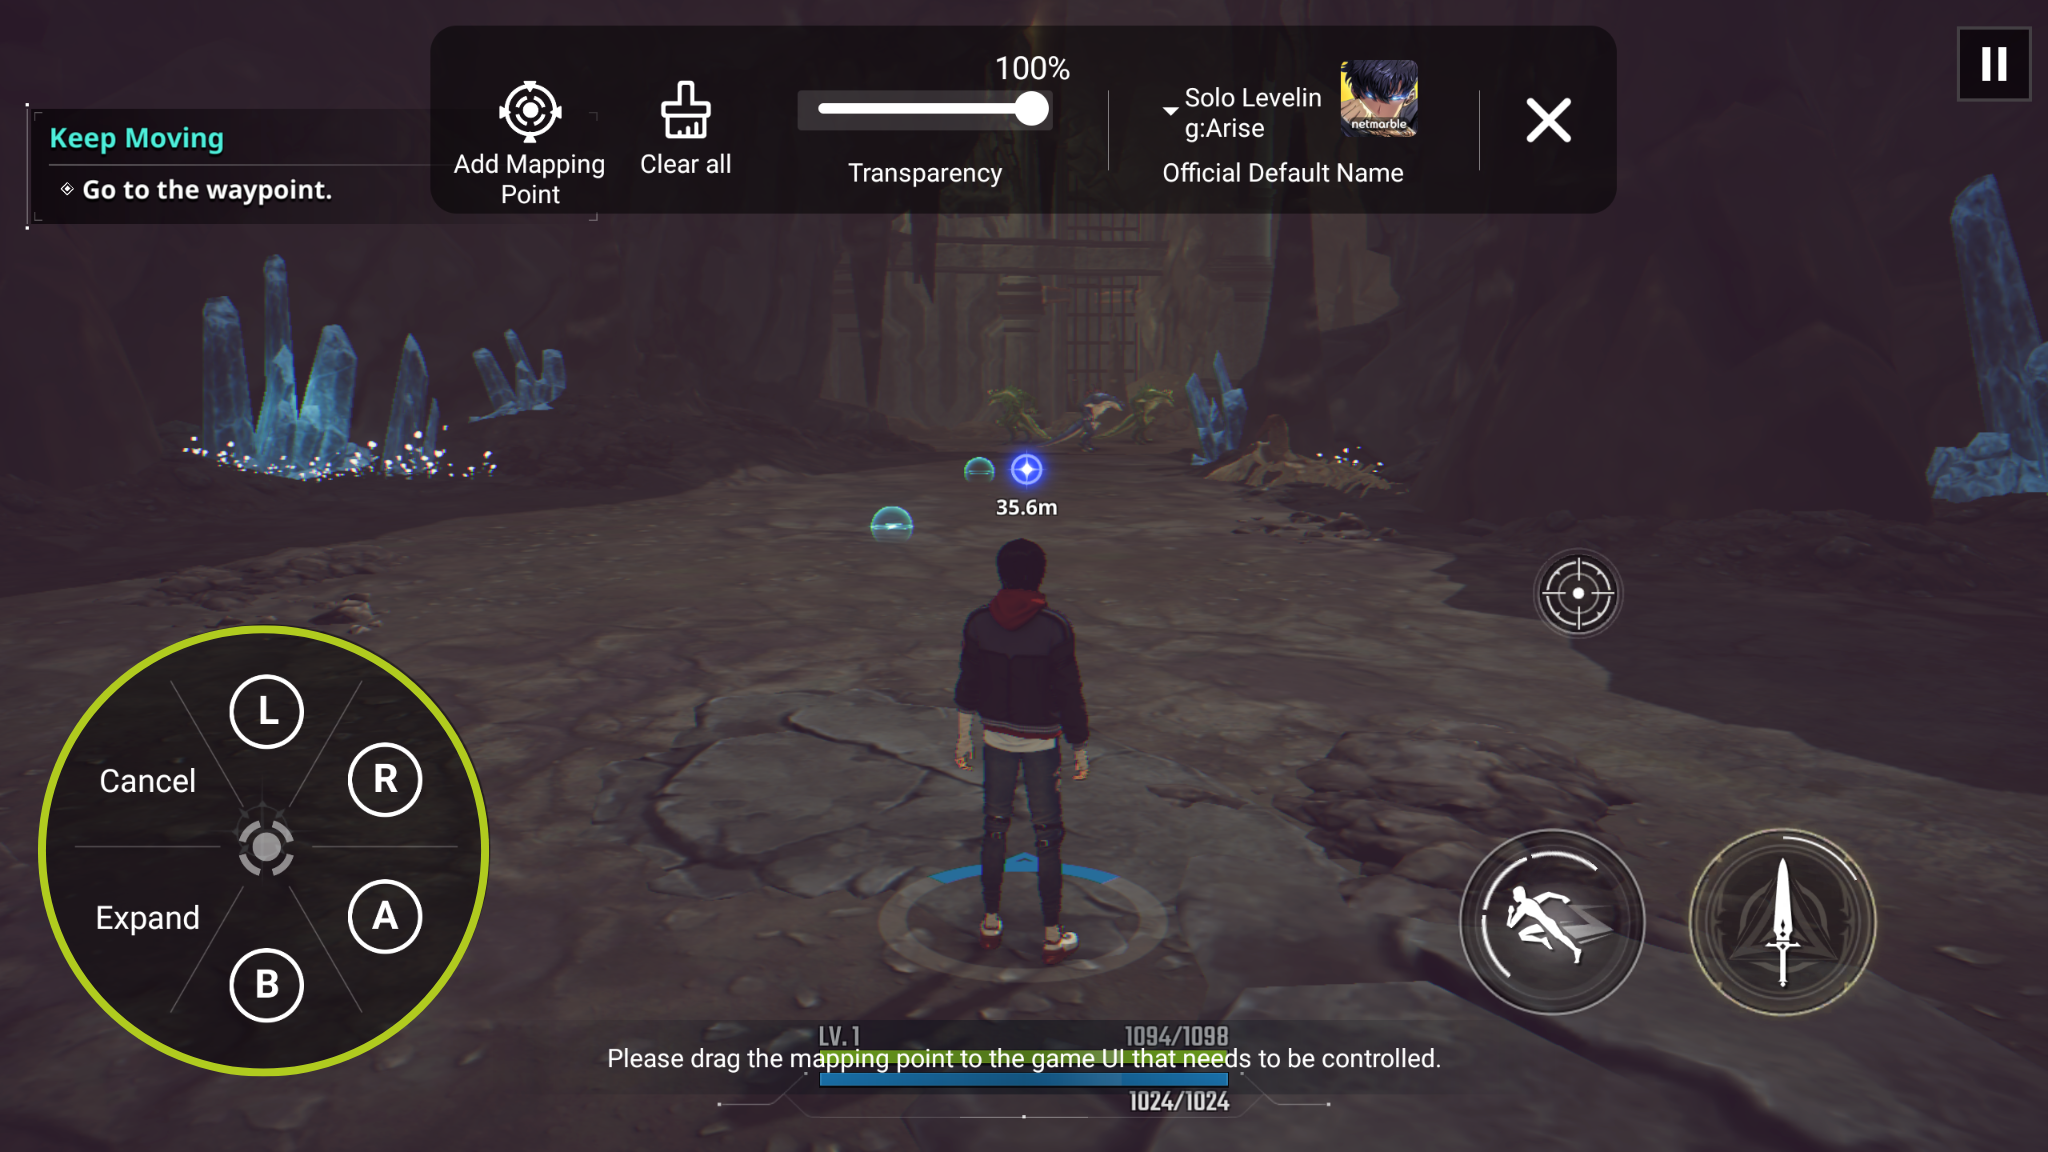
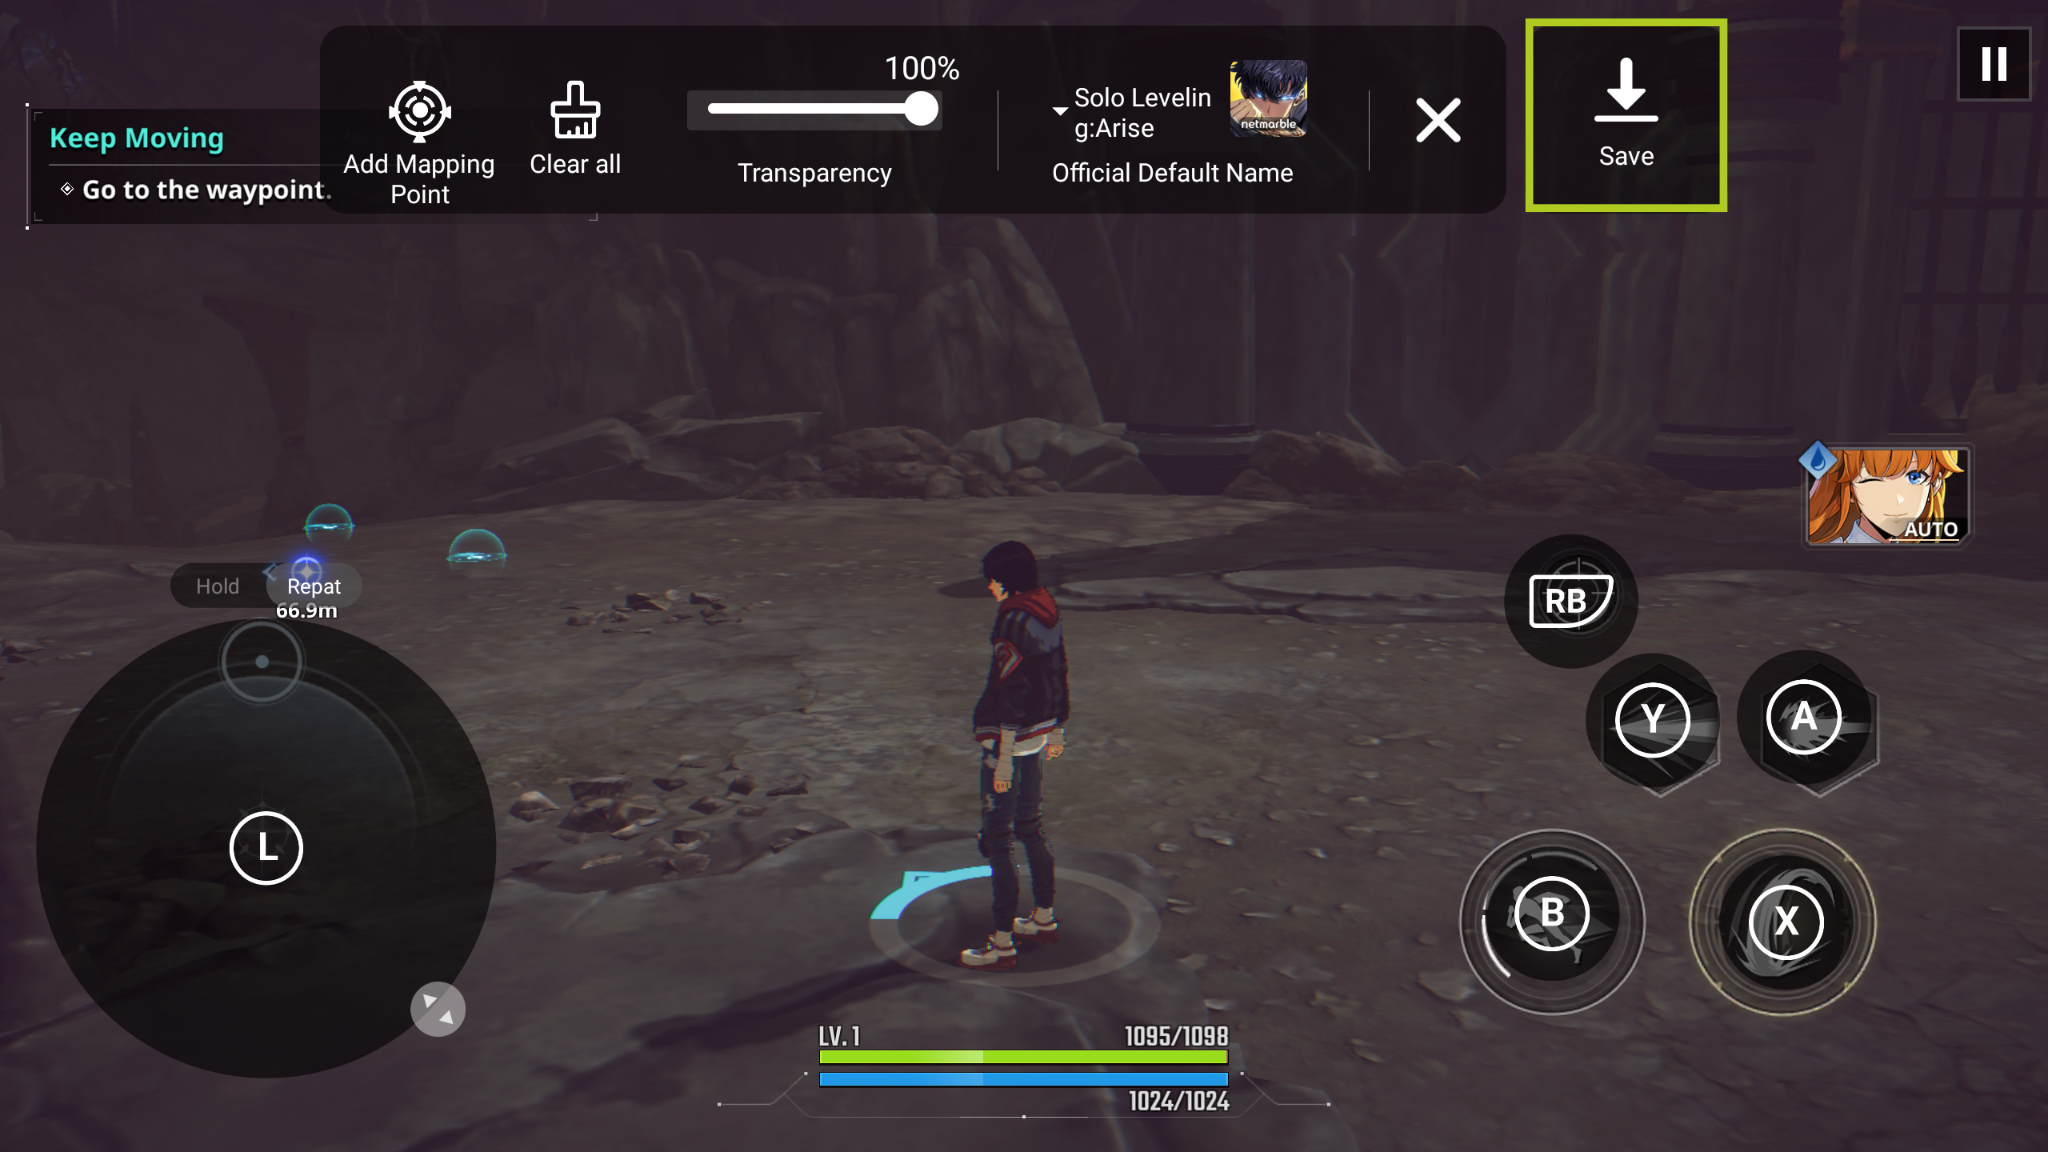
From here, you can drag and drop from ‘Add Mapping Point’ to however many on-screen inputs you require. After adding a mapping point, you will need to select which physical button will trigger this input. In the example below, we will be setting up player movement, so we mapped the digital joystick that controls player movement to ‘L’ (the left analogue stick). Repeat the process for each button/input you require for your game. After mapping each button you want to use, simply select ‘Save,’ and you should be all set to go.
Anbernic
This section delves into Anbernic Retro Gaming Handhelds, highlighting how devices like the RG ARC-D can benefit from key mapping right out of the box. We’ll explore Anbernic’s built-in touchscreen mapping software, guiding you on how to access and use this feature.
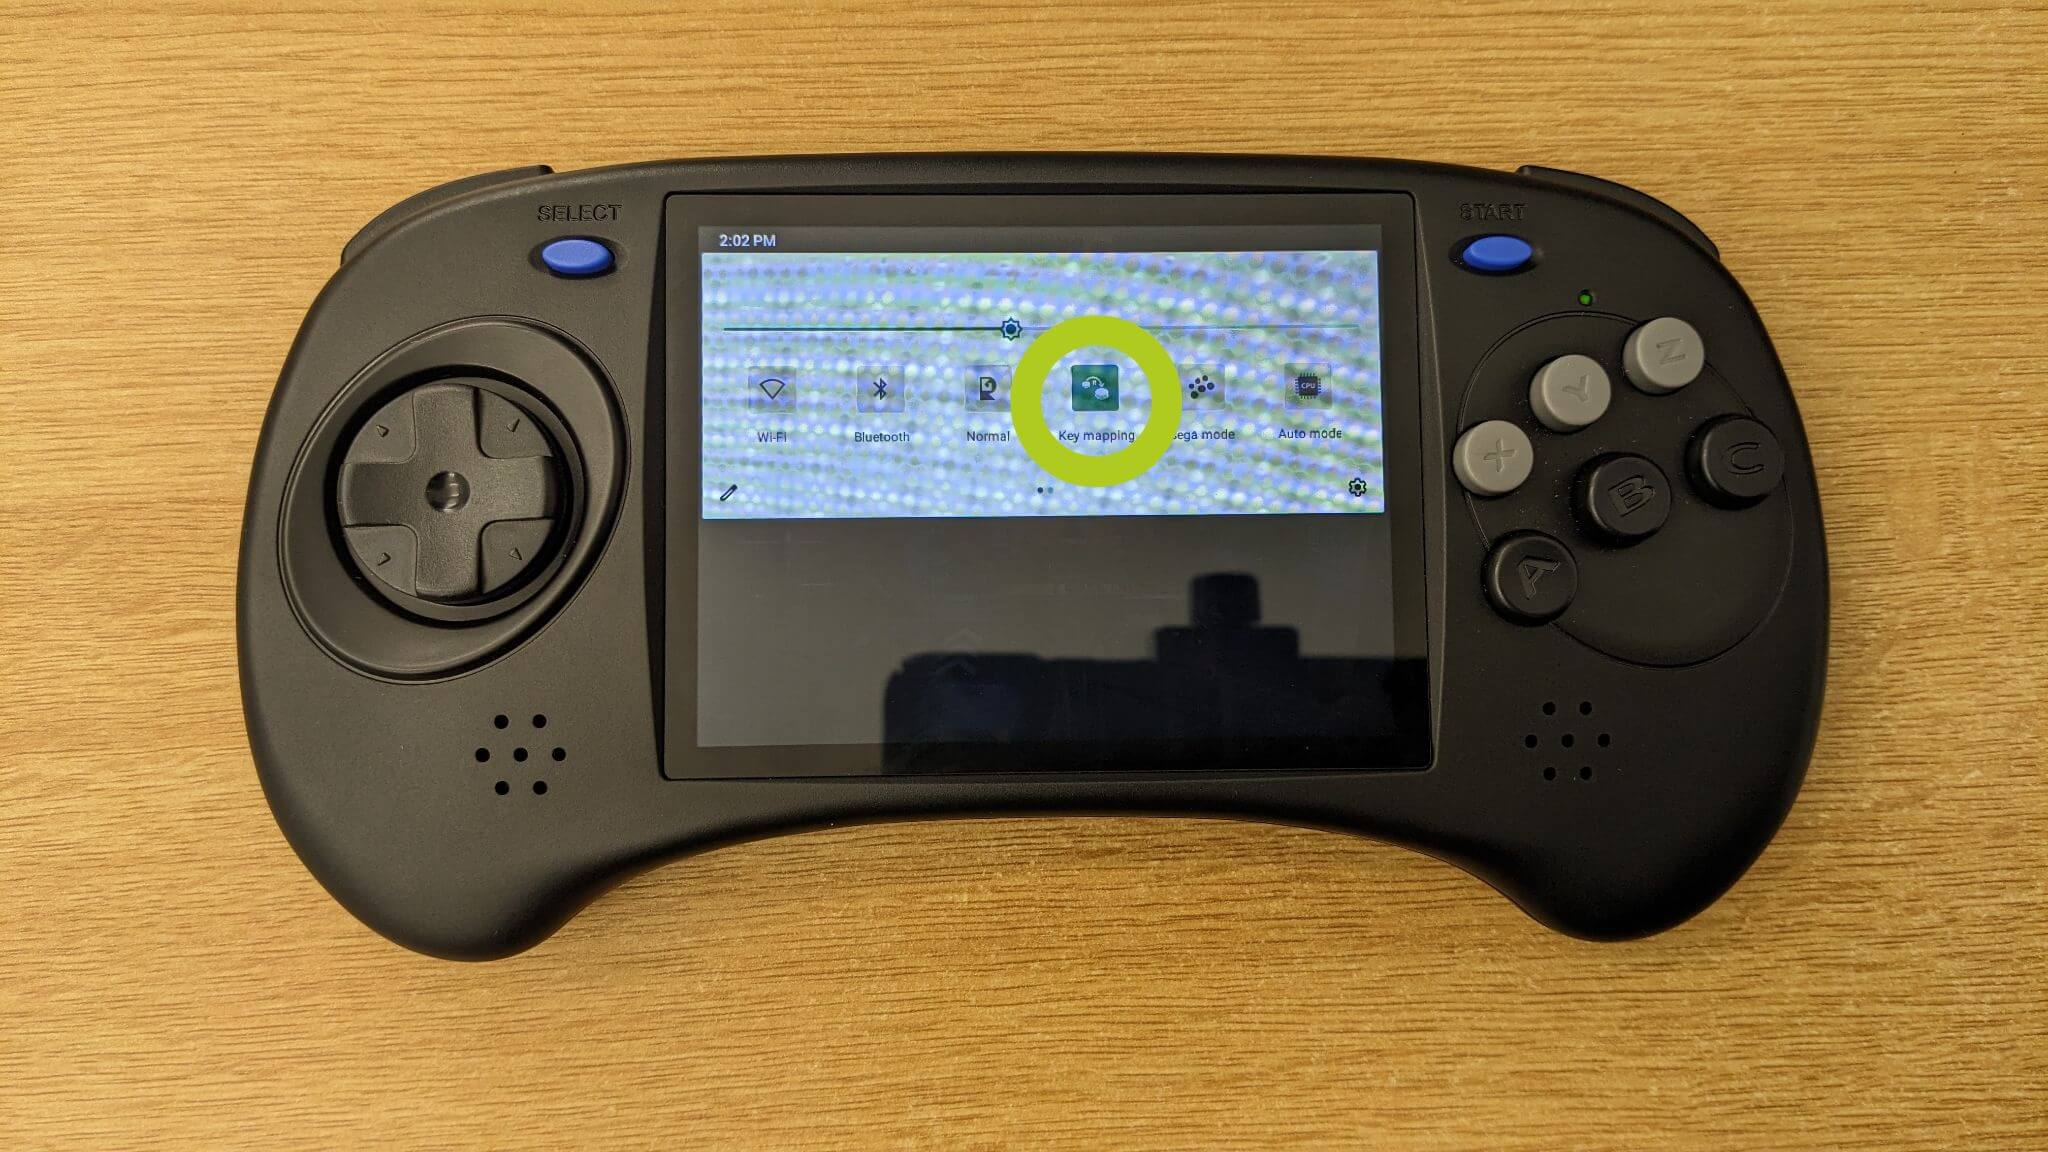
Swipe down from the top of the device’s screen to access the Control Panel, just like you would on a smartphone (see Image 1 below). From here, select the Key Mapper (shown in Image 2 below), which will open the key mapping overlay required to configure your inputs.

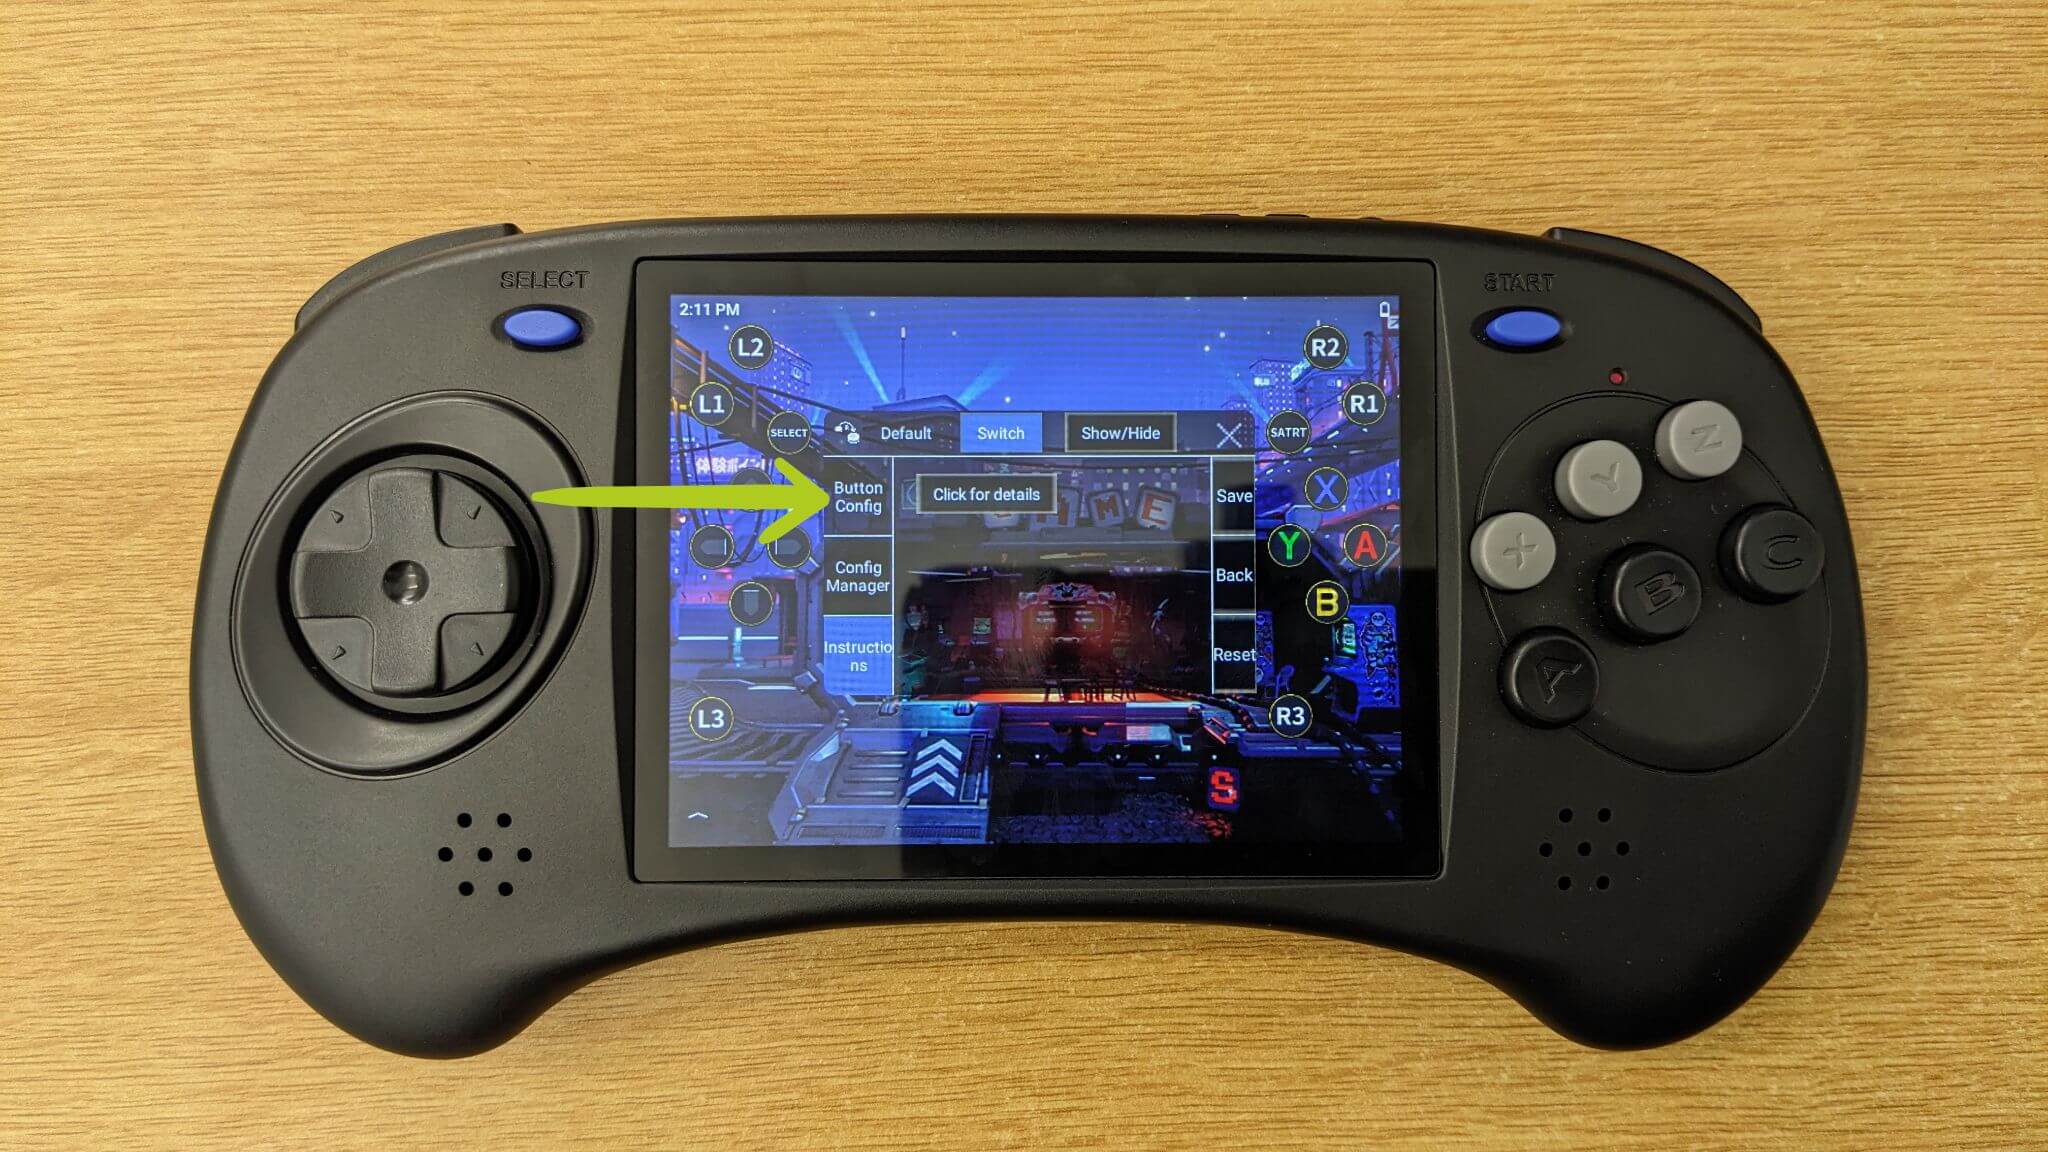
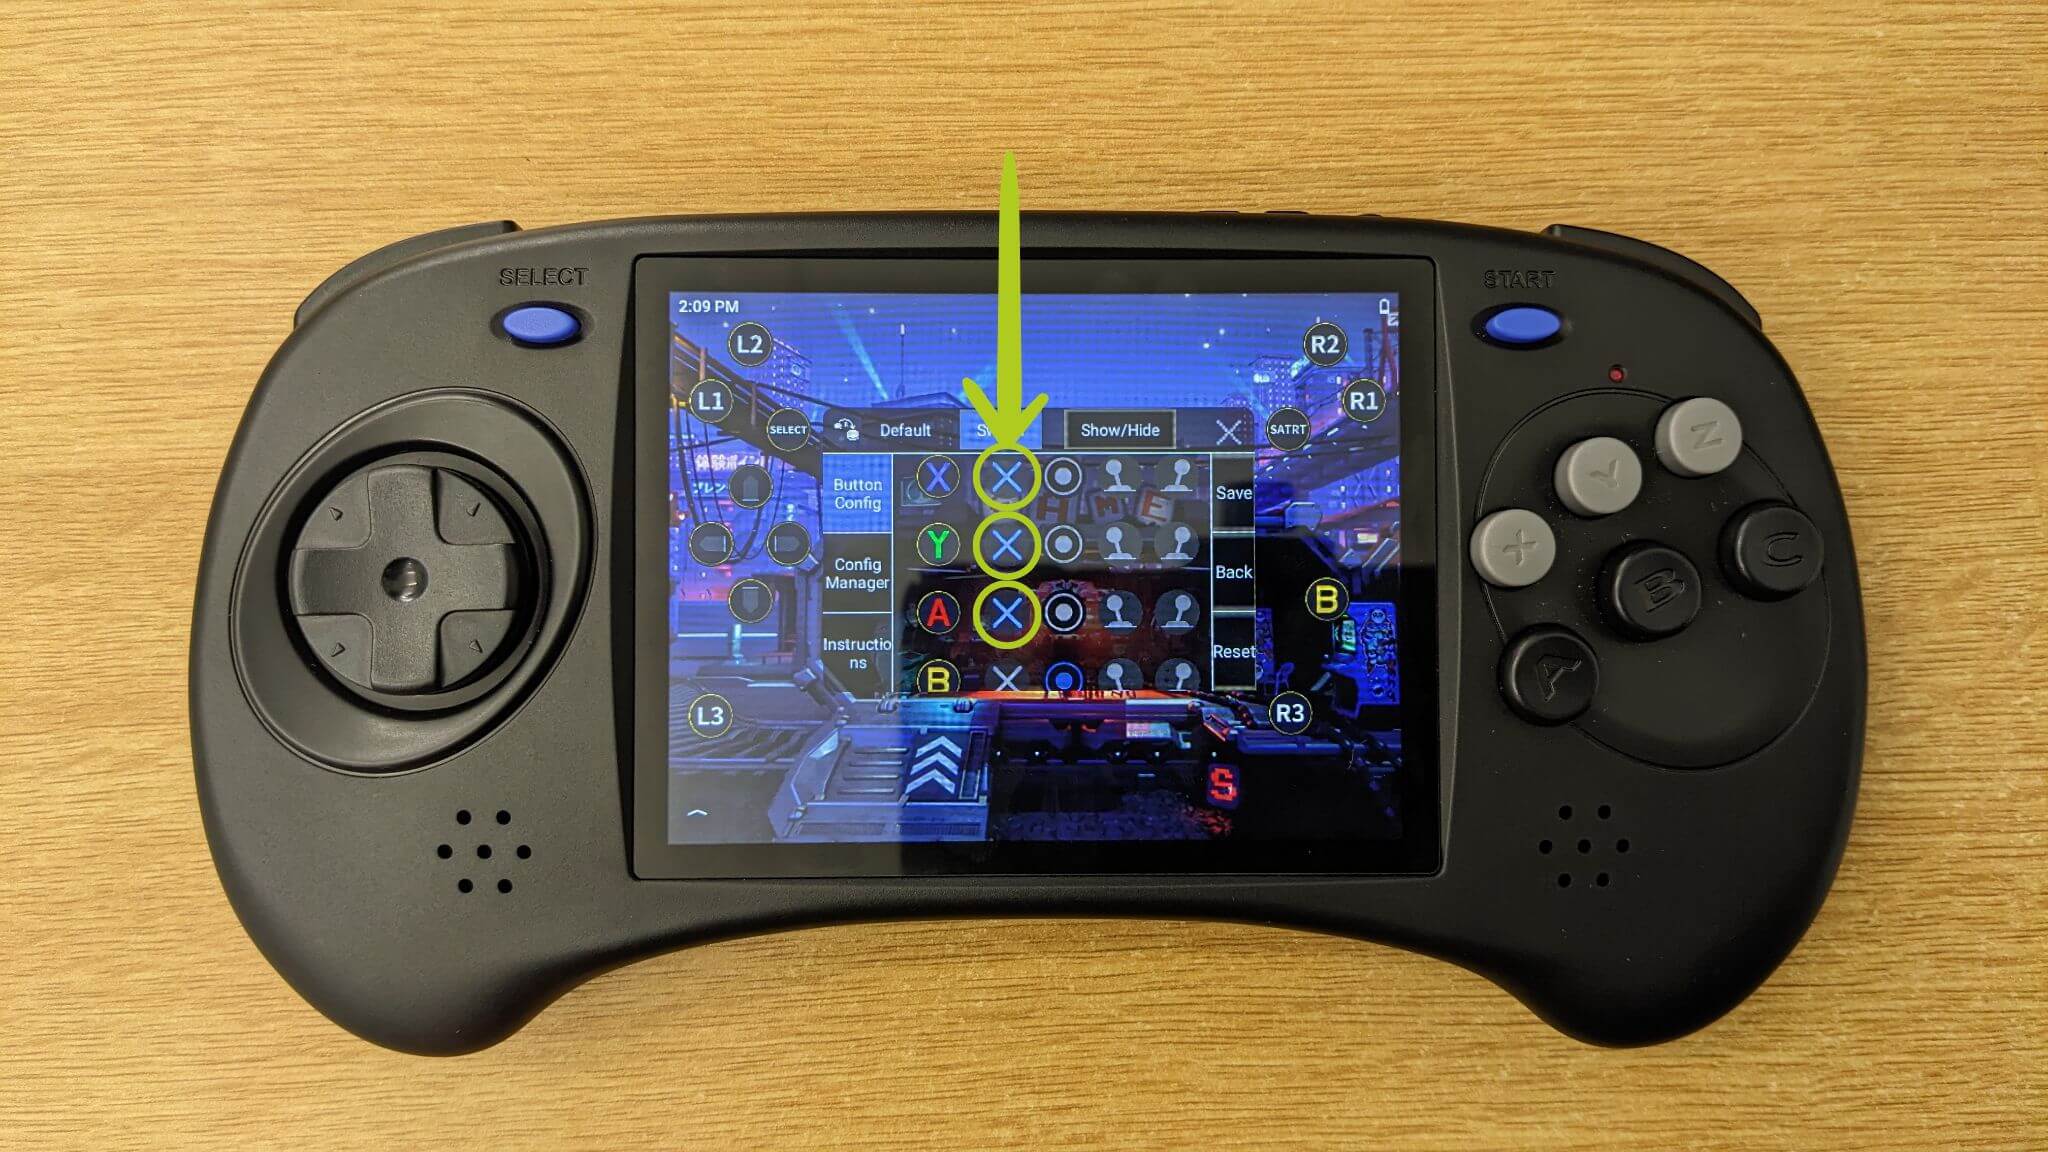
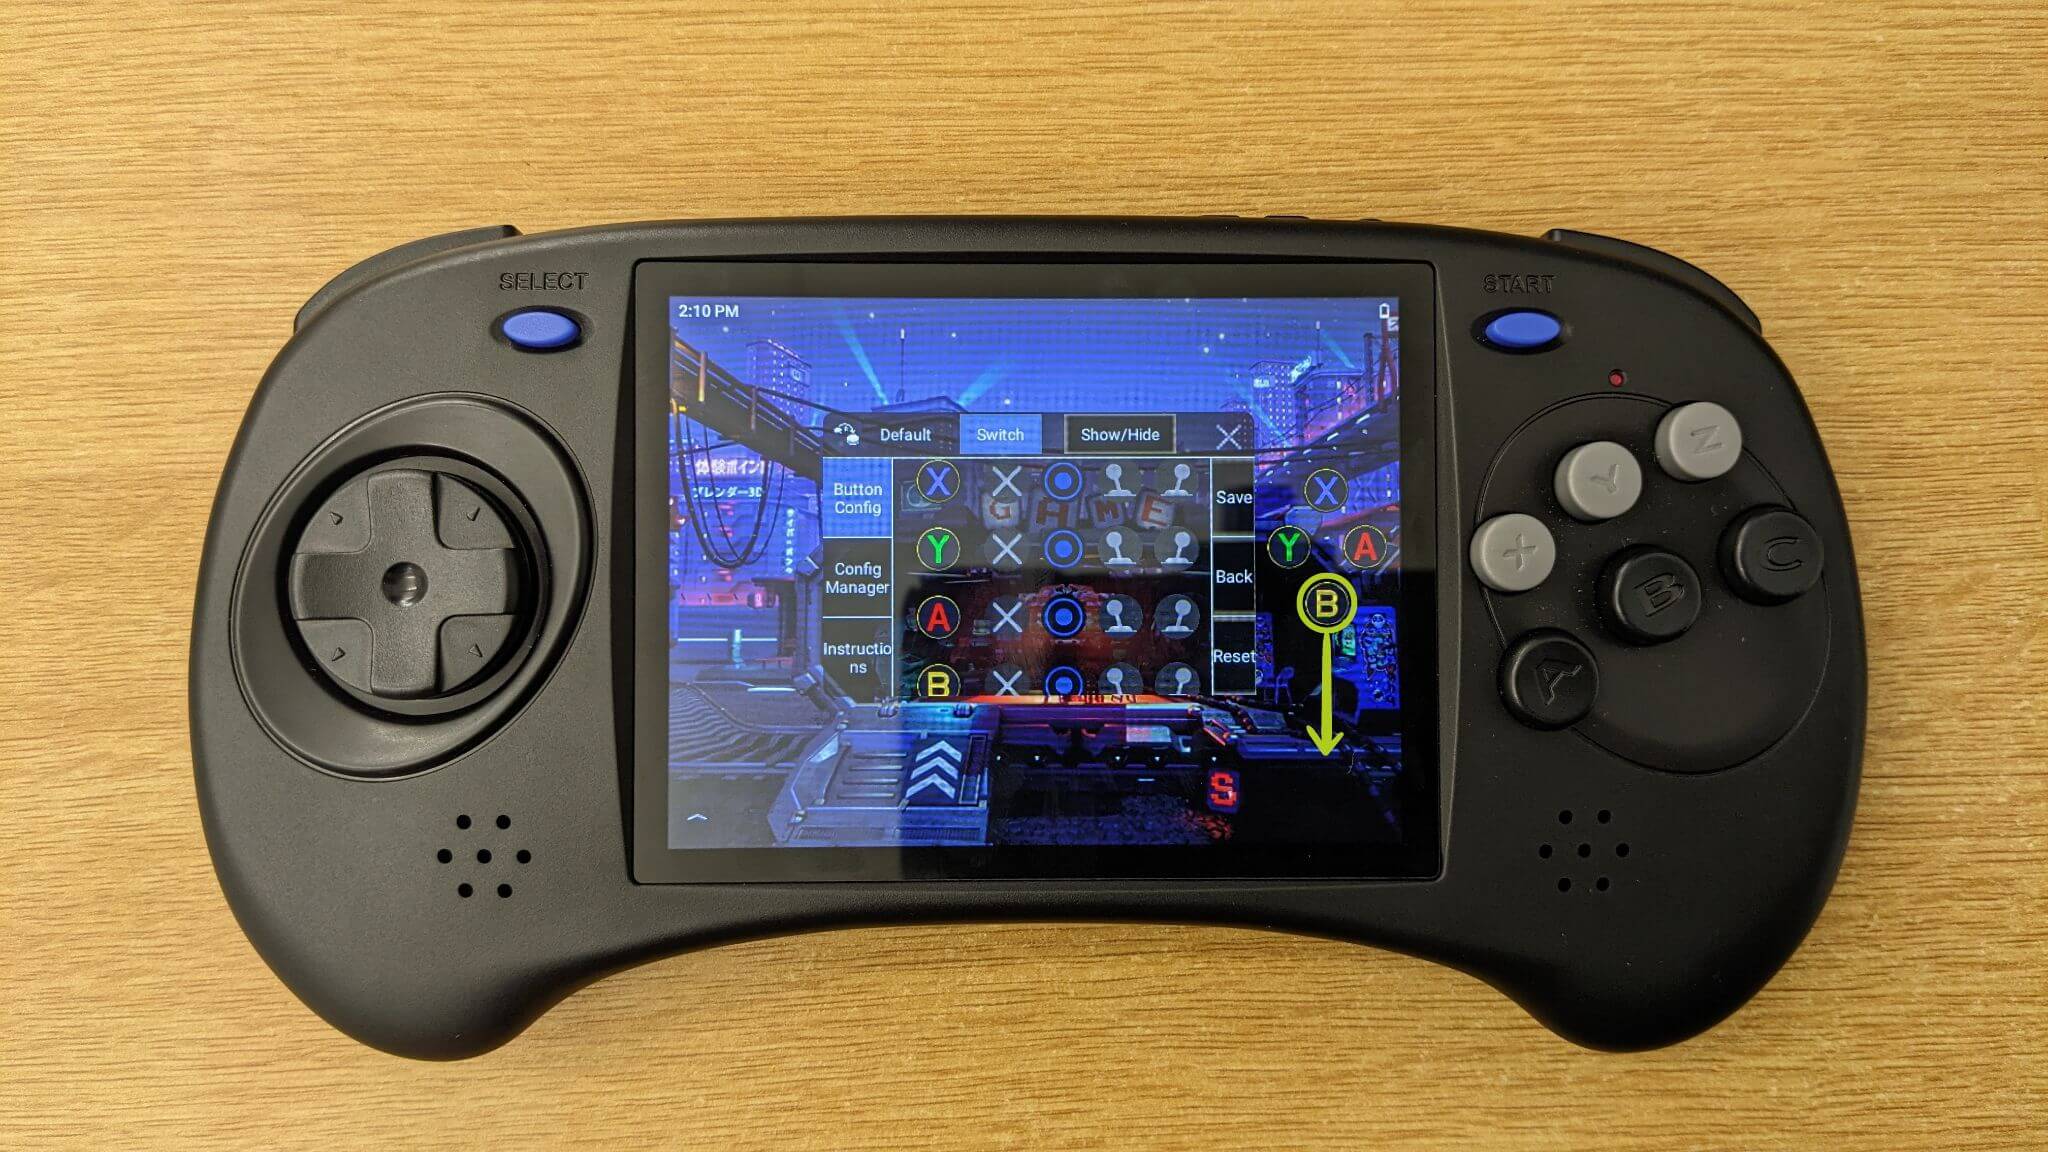
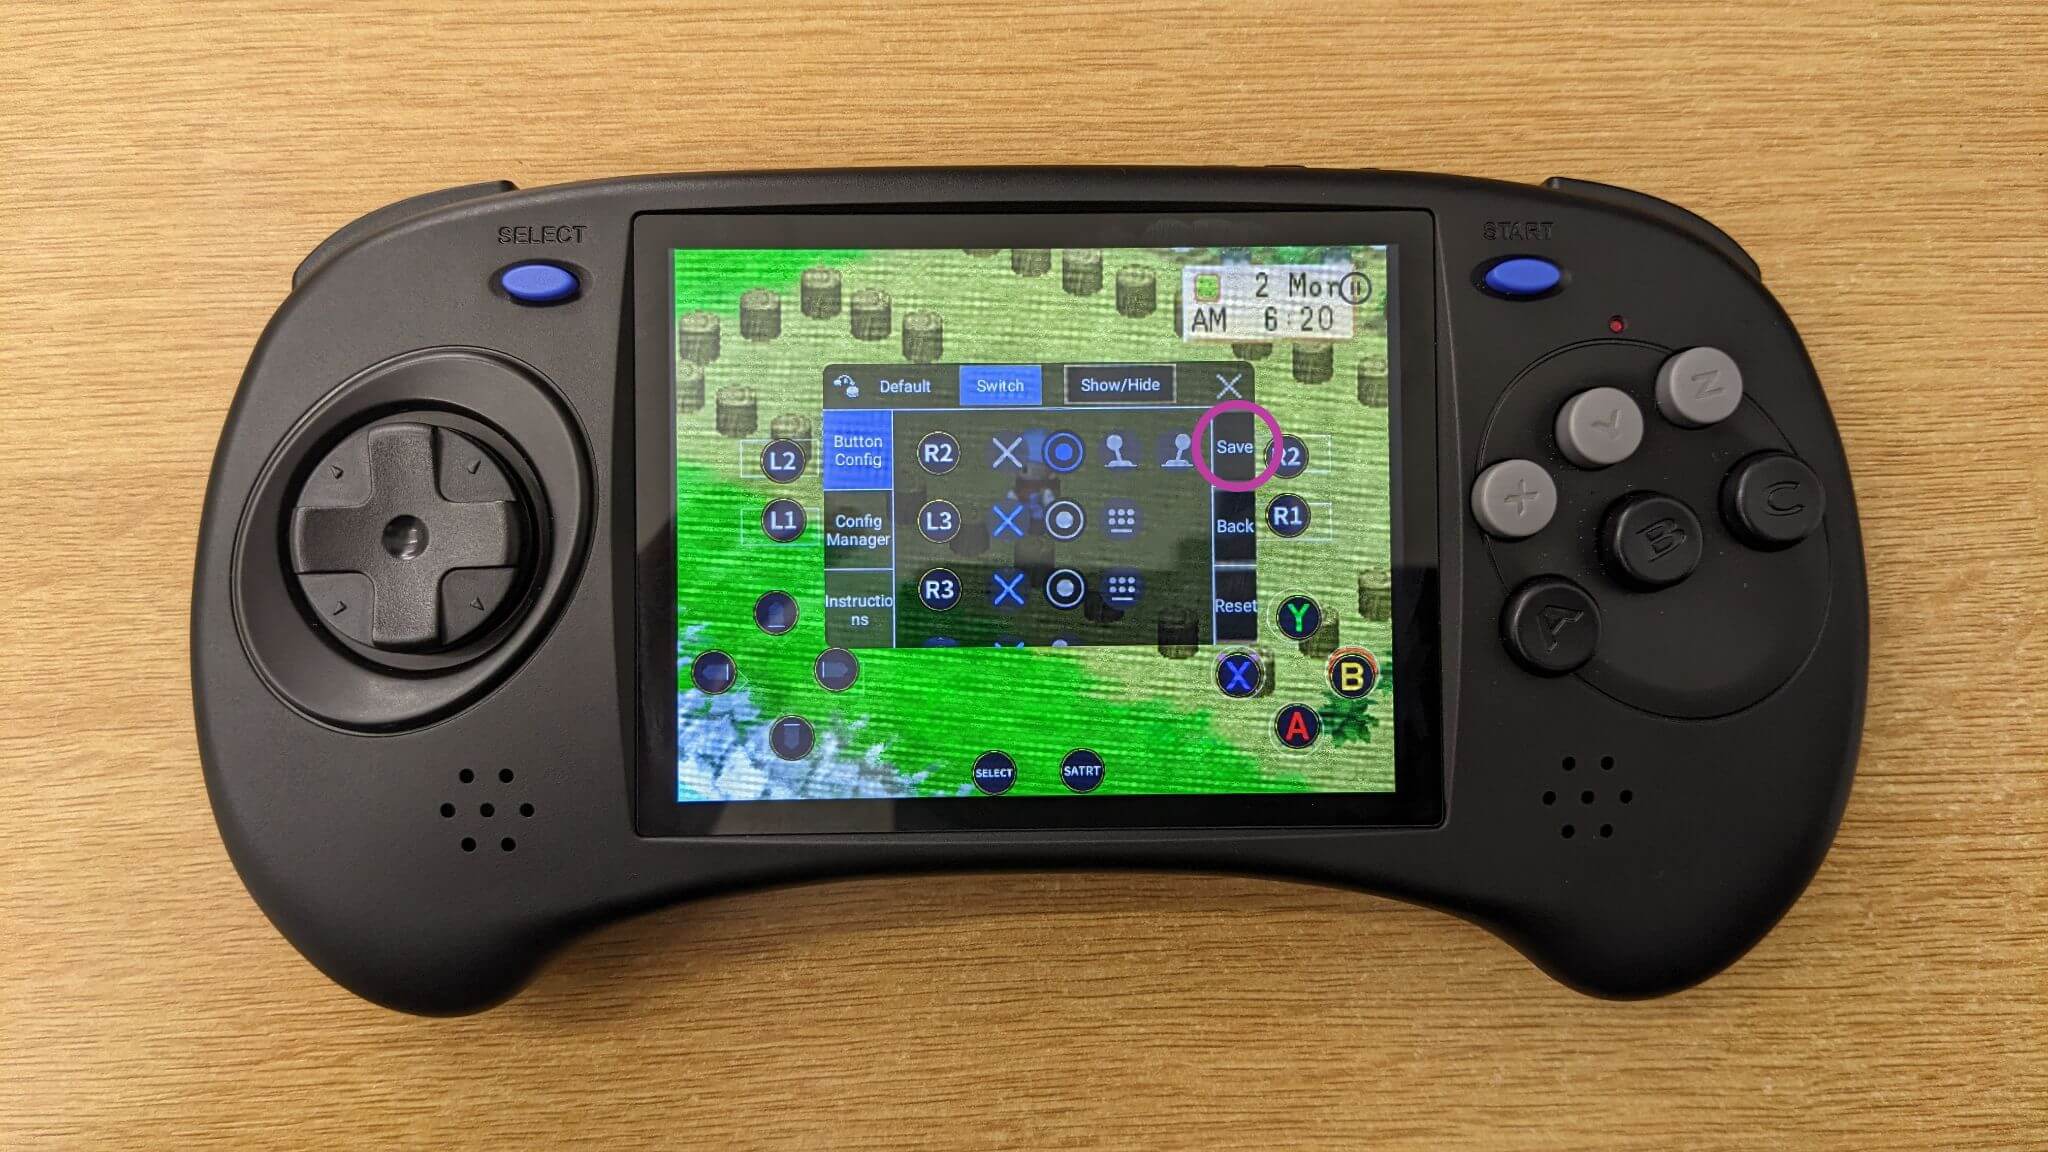
When adjusting key mappings, ensure you are on the Button Config page (check Image 3 below). Here, you have the option to enable or disable various inputs, a feature that comes in handy for games requiring fewer or more controls (refer to Image 4 below).
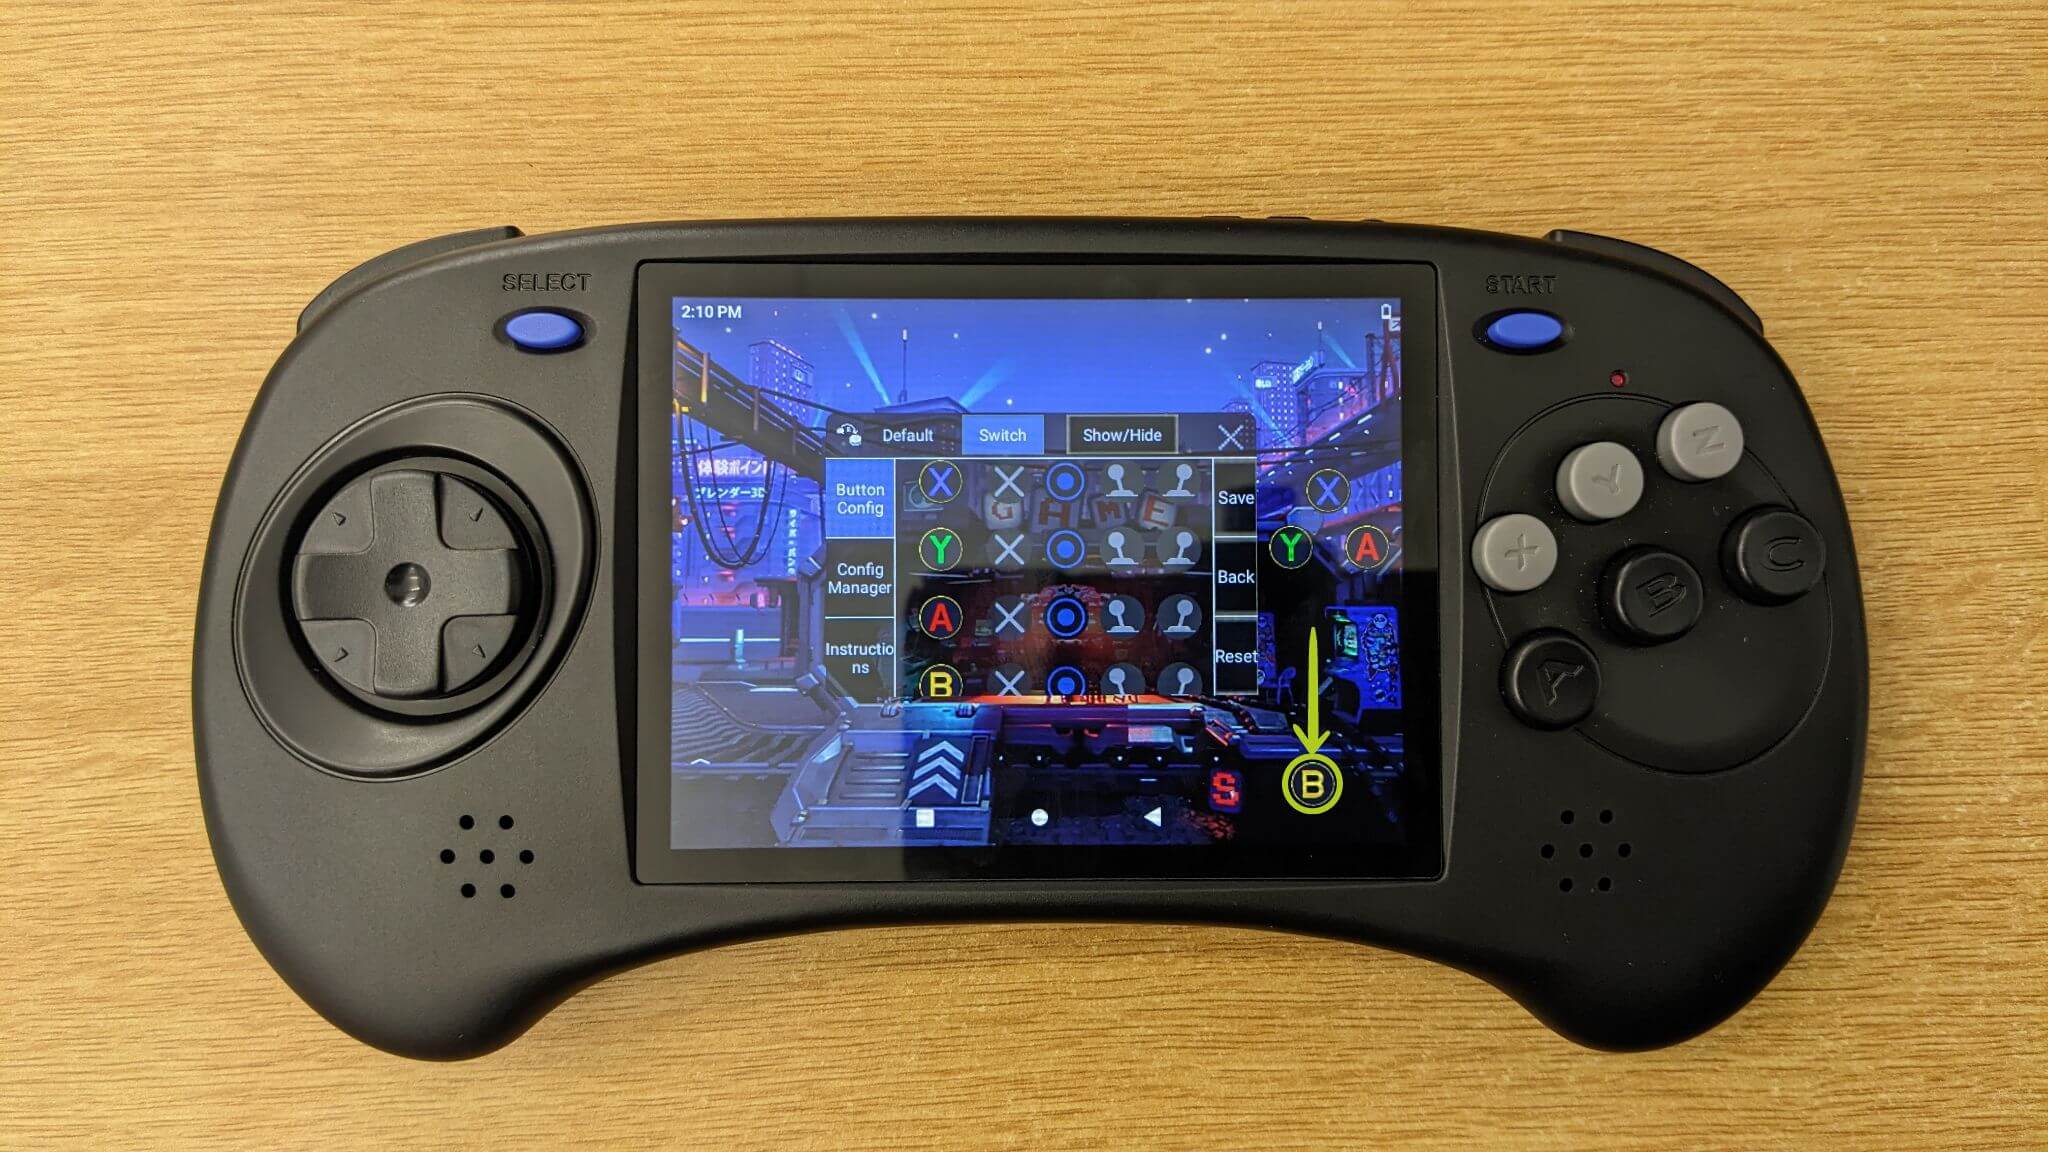
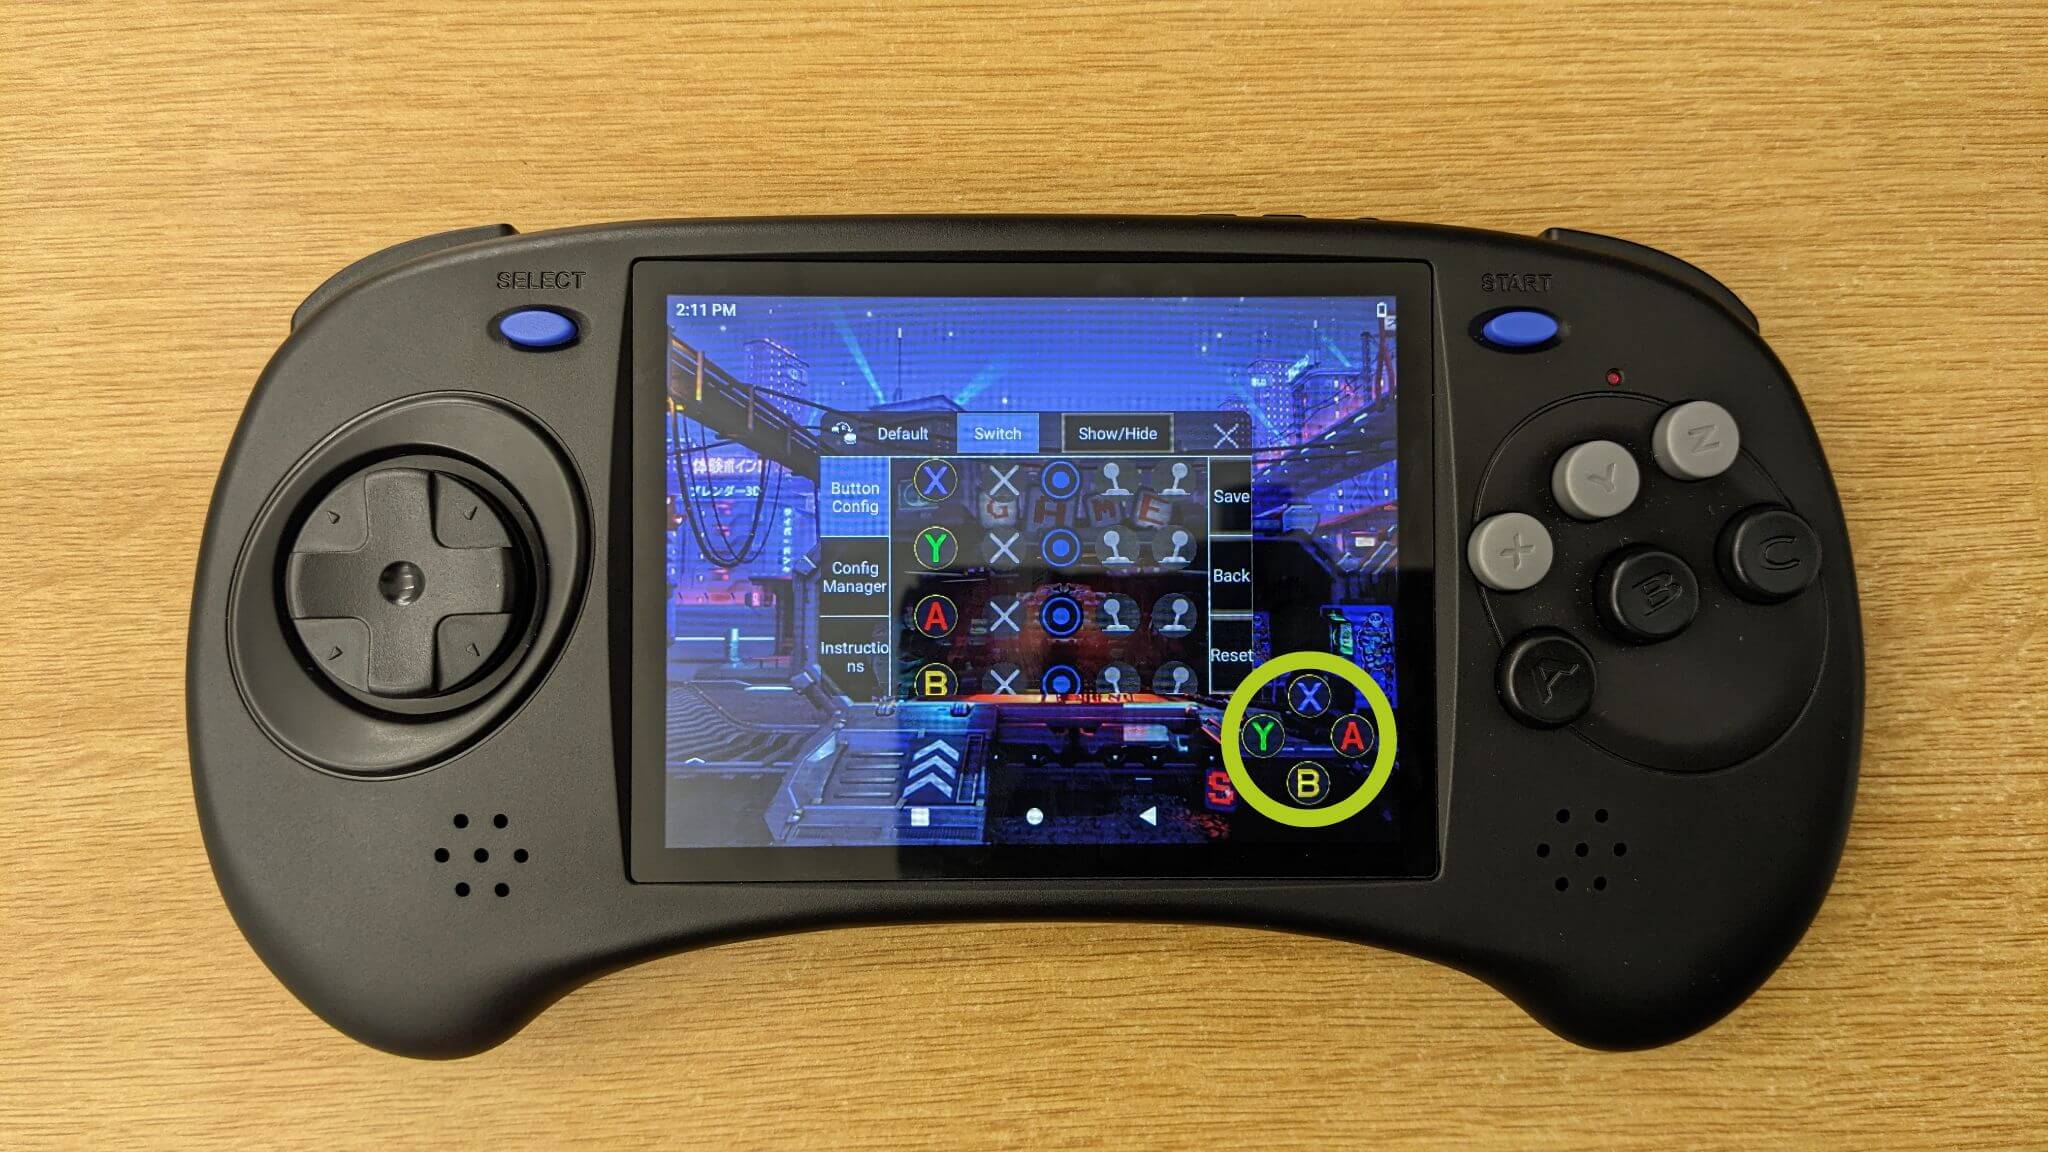
Before mapping inputs, let’s go over how to relocate the input icons which represent our device’s physical buttons and inputs. Simply use your finger to drag each icon to the desired position on the screen (refer to Images 5–7 below). Typically, we will need to move these to the virtual gamepad that appears whenever you launch a game.
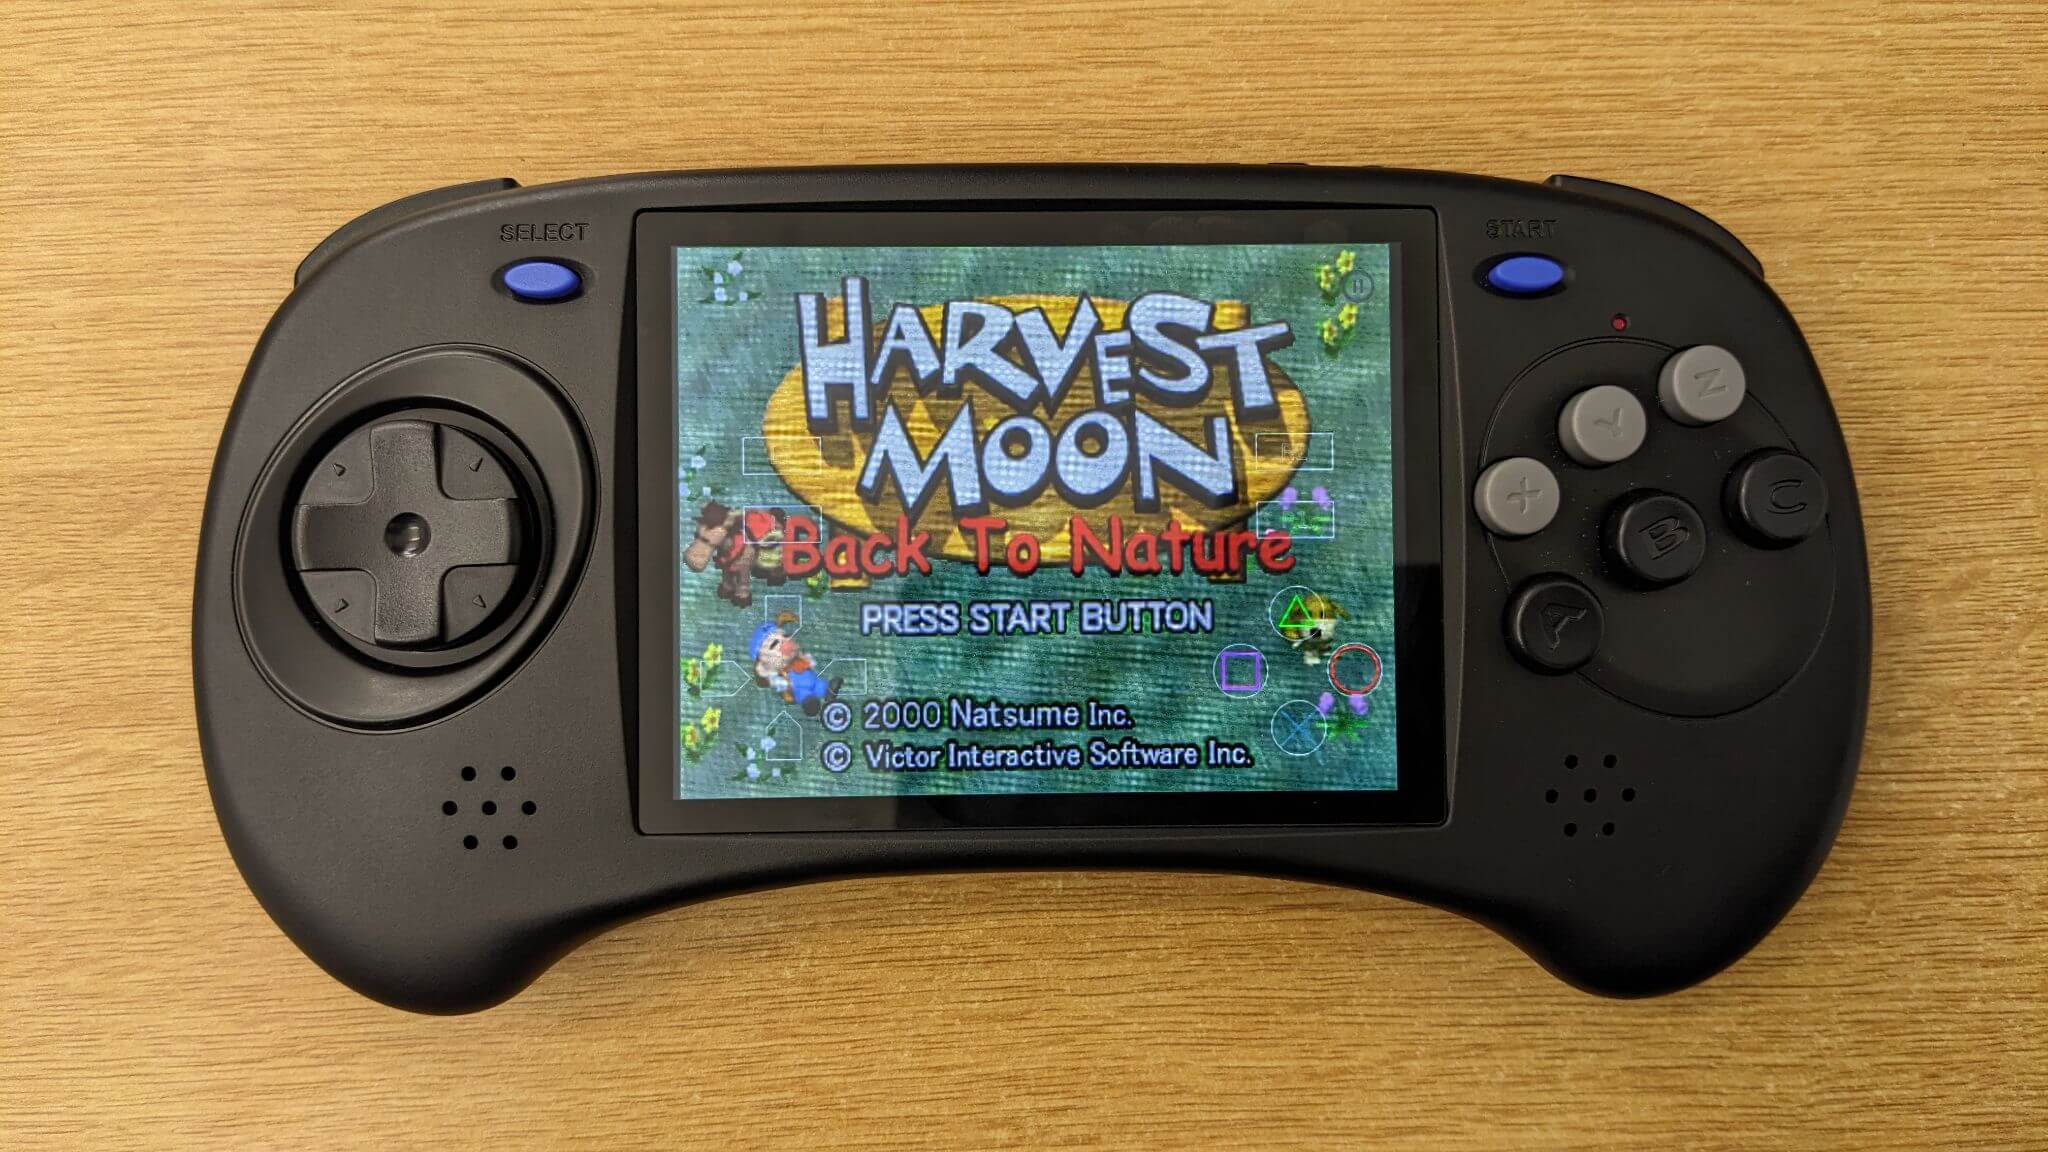
Now you may be asking how you configure an actual game – simply launch the game and you should see virtual controls displayed onscreen (as shown in Image 8 below). Then, open the Key Mapper software as previously described and assign the Key Mapper icons, which represent your physical controller buttons, with the corresponding virtual buttons (illustrated in Images 9 & 10 below). Feel free to customize the key mappings to suit your preferences. Once you’re satisfied with the setup, remember to confirm and save your changes (see Image 10 below).
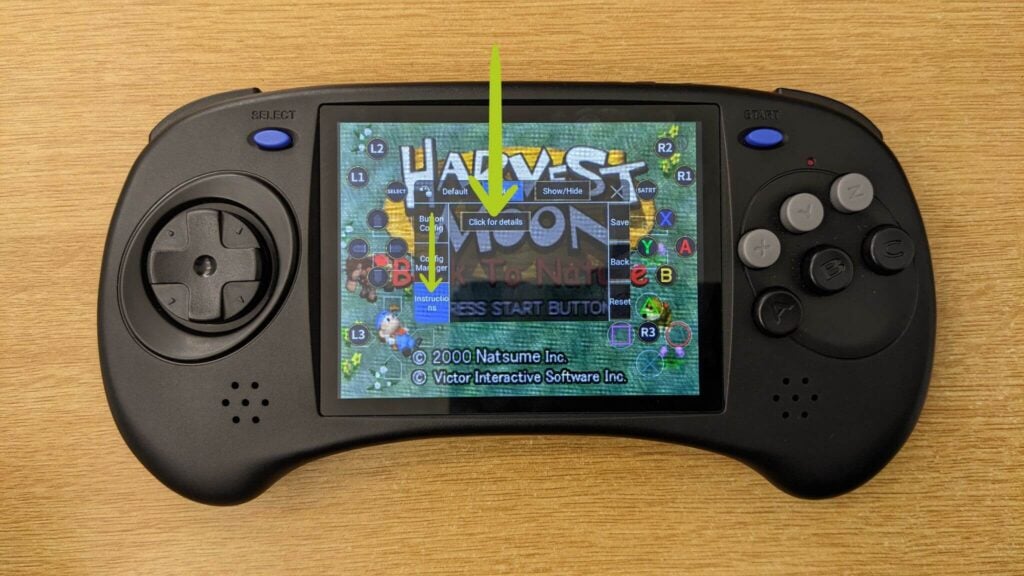
For additional assistance or a more detailed guide, Anbernic has got you covered. They have included an in-depth guide within the mapping software. To access it, go to the Instructions tab and select Click for details (refer to Image 11 below).
With your button mappings fully set up and configured, you’re now equipped to dive into gaming on your Anbernic device. Enjoy the improved controls and tailored experience.
Retroid
In this section, we’ll focus on screen mapping for Retroid devices, including popular portable gaming handhelds like the Retroid Pocket 3, Retroid Pocket 3+, Retroid Pocket Flip, and Retroid Pocket 2S. Our guide covers the use of Retroid’s Game Assist overlay, a built-in feature designed to enhance your gaming experience with personalised controls.
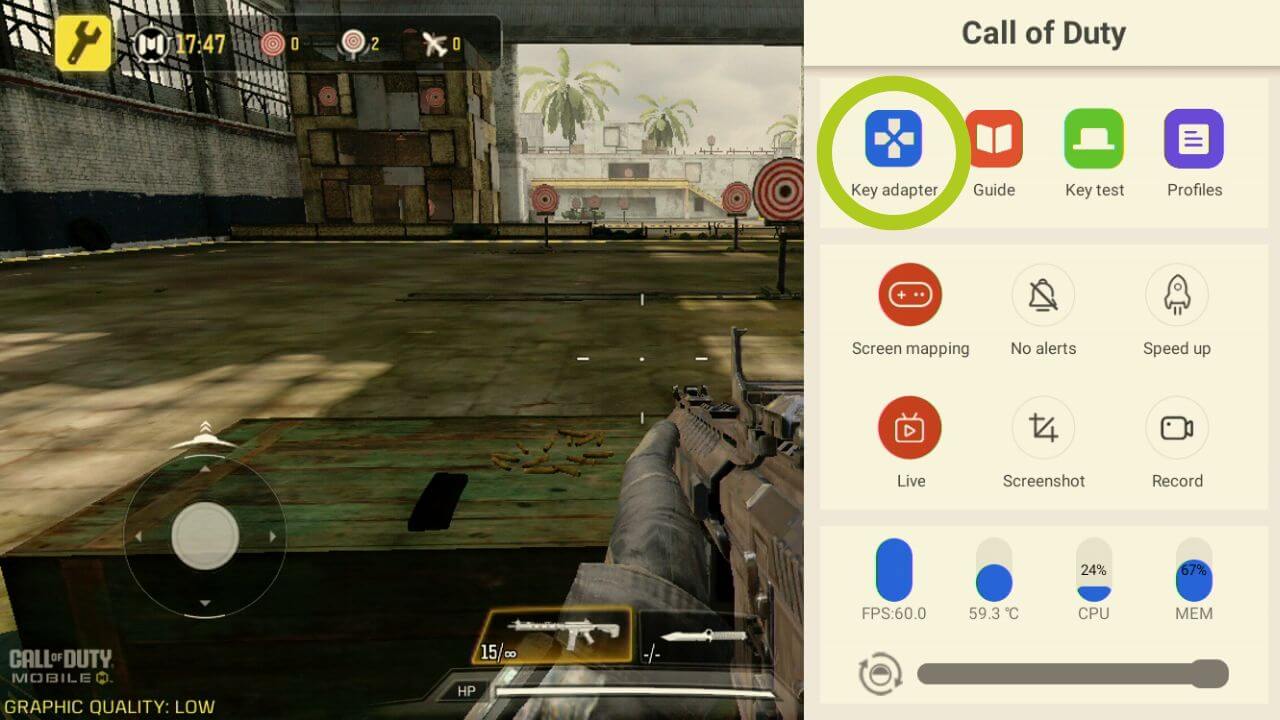
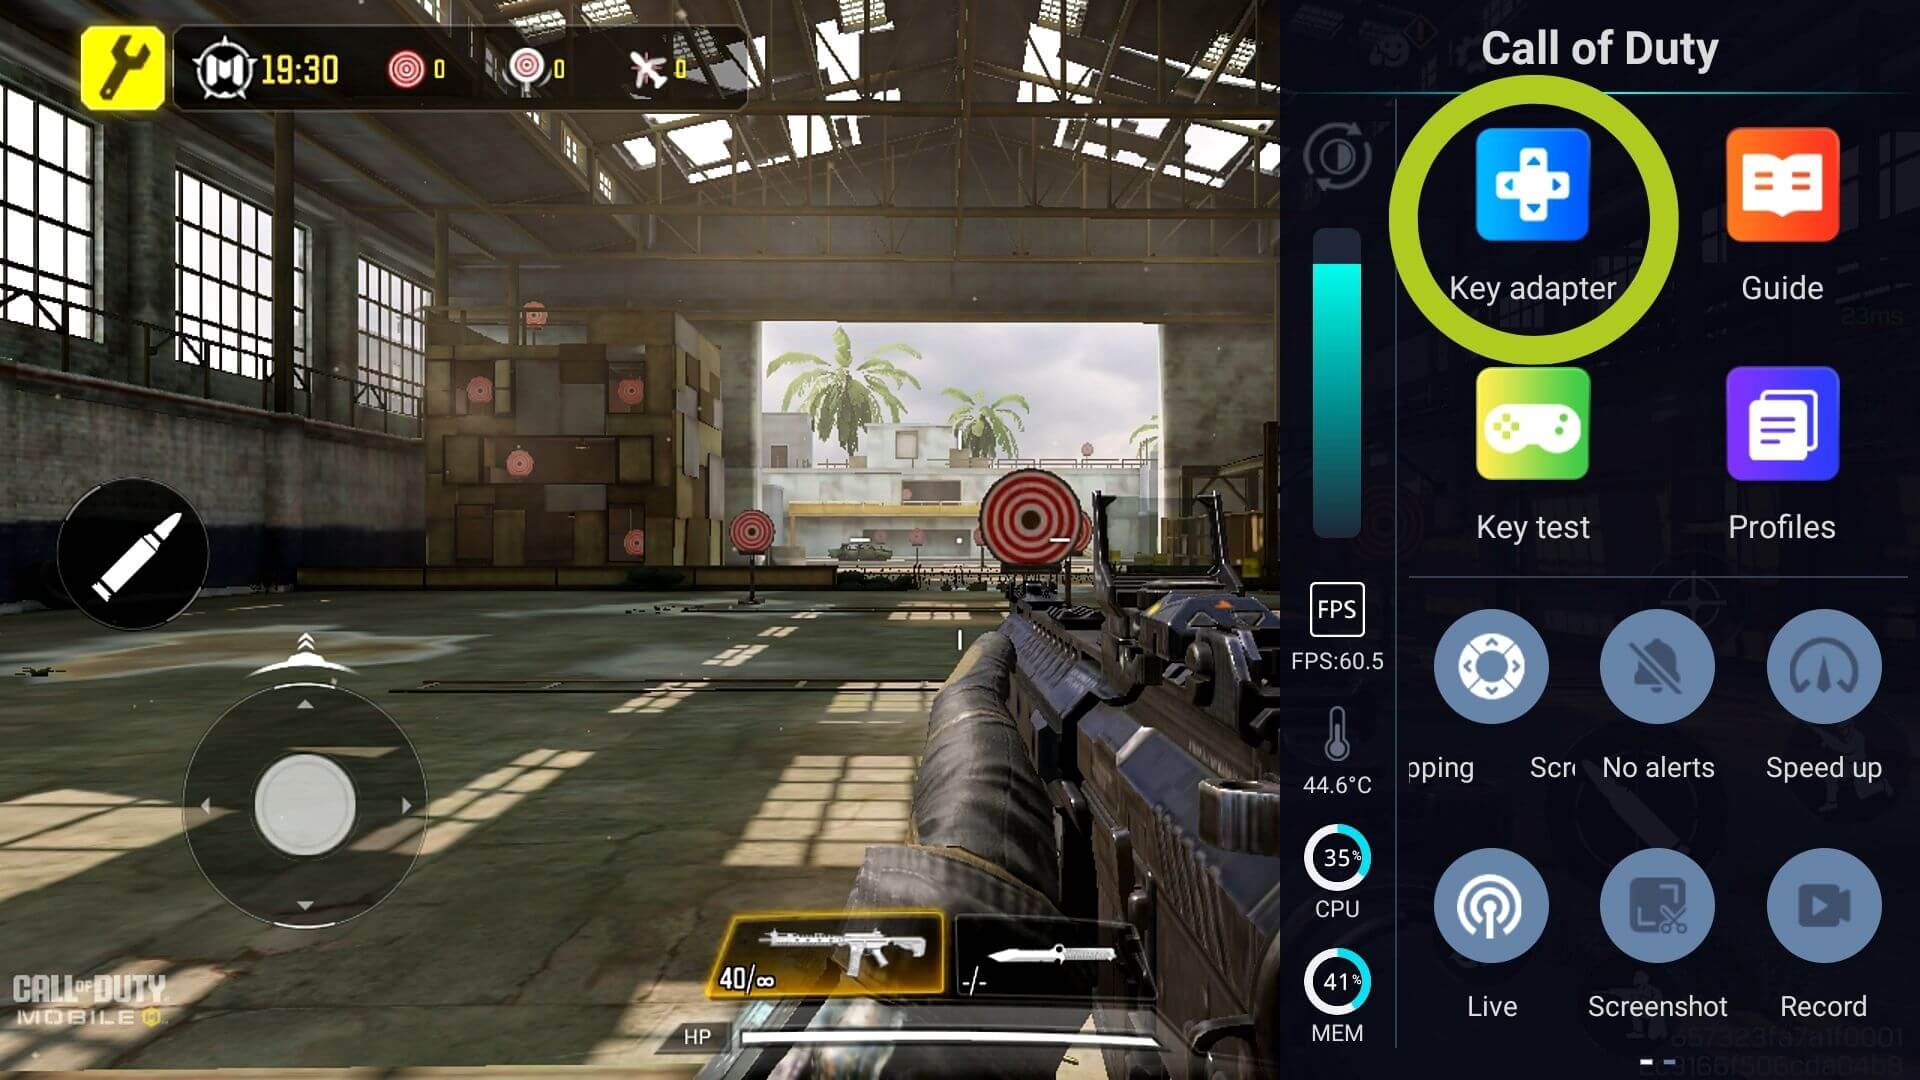
Upon launching a game on your Retroid device, you’ll notice a subtle white line on the right side of the screen. Swipe left from this line to open the Game Assist overlay (illustrated in Images 1 & 2 below). Within this menu, you’ll find several options – which are all relatively self-explanatory. The key feature for screen mapping is the Key Adapter (see Image 2). Tap this to start personalizing your game controls.

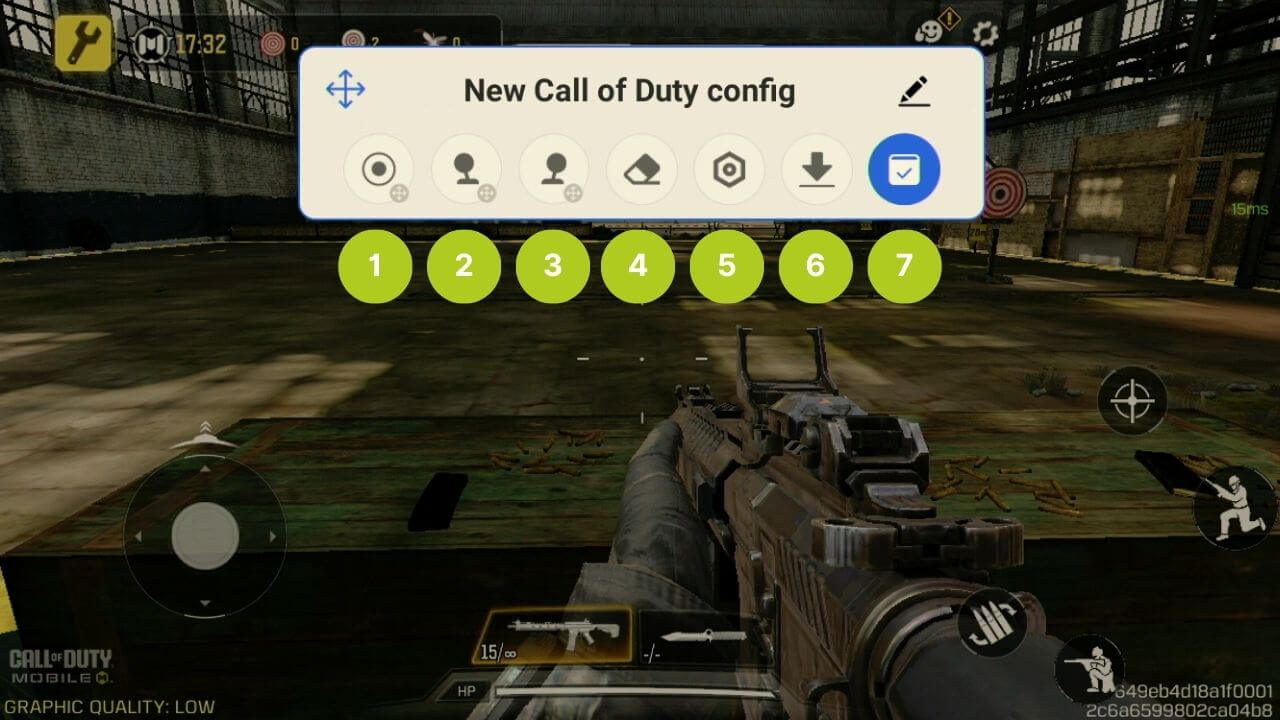
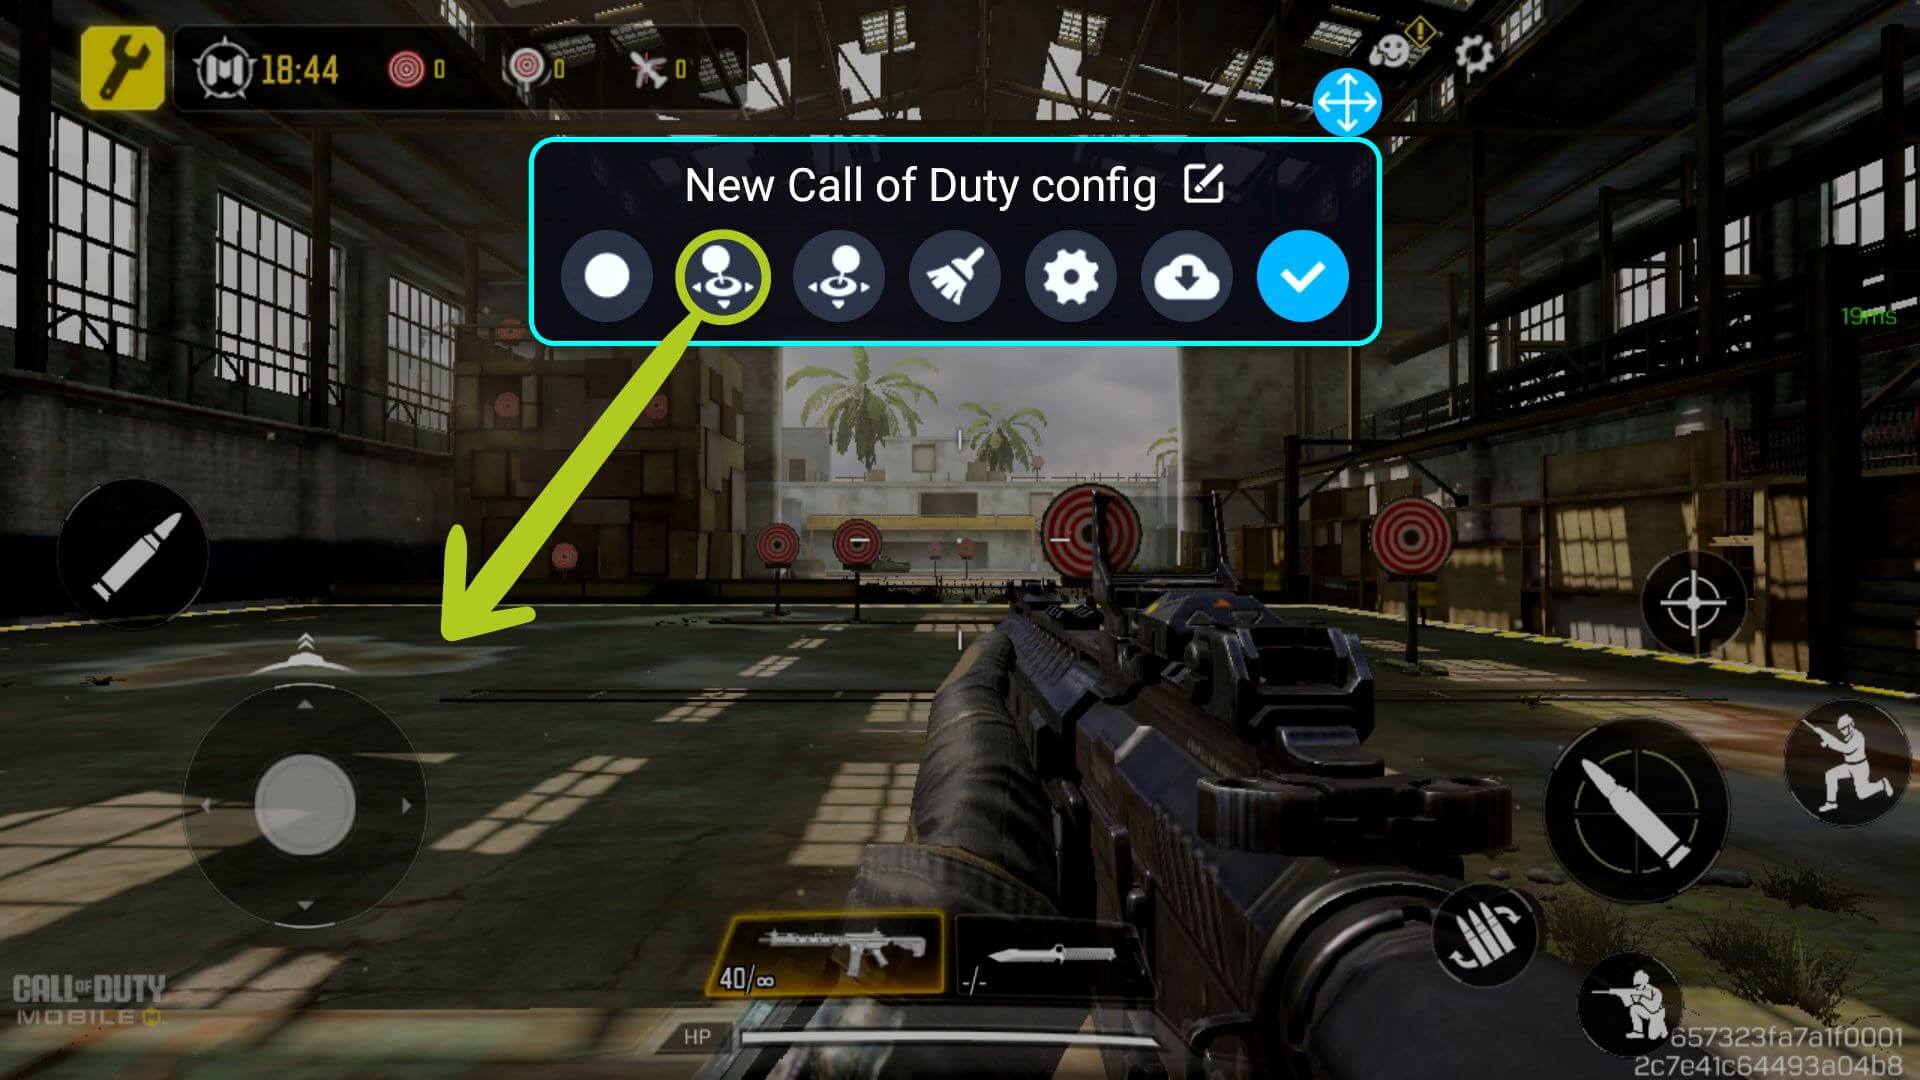
This will open the Key Adapter configuration, there are many important different options so we will list them below:
- Button: configures any button input
- Left Joystick: configures the left joystick
- Right Joystick: configures the right joystick
- Delete: clears all mappings
- Settings: change scheme settings, including overlay transparency
- Cloud Saves: for any preset settings
- Save: confirms changes
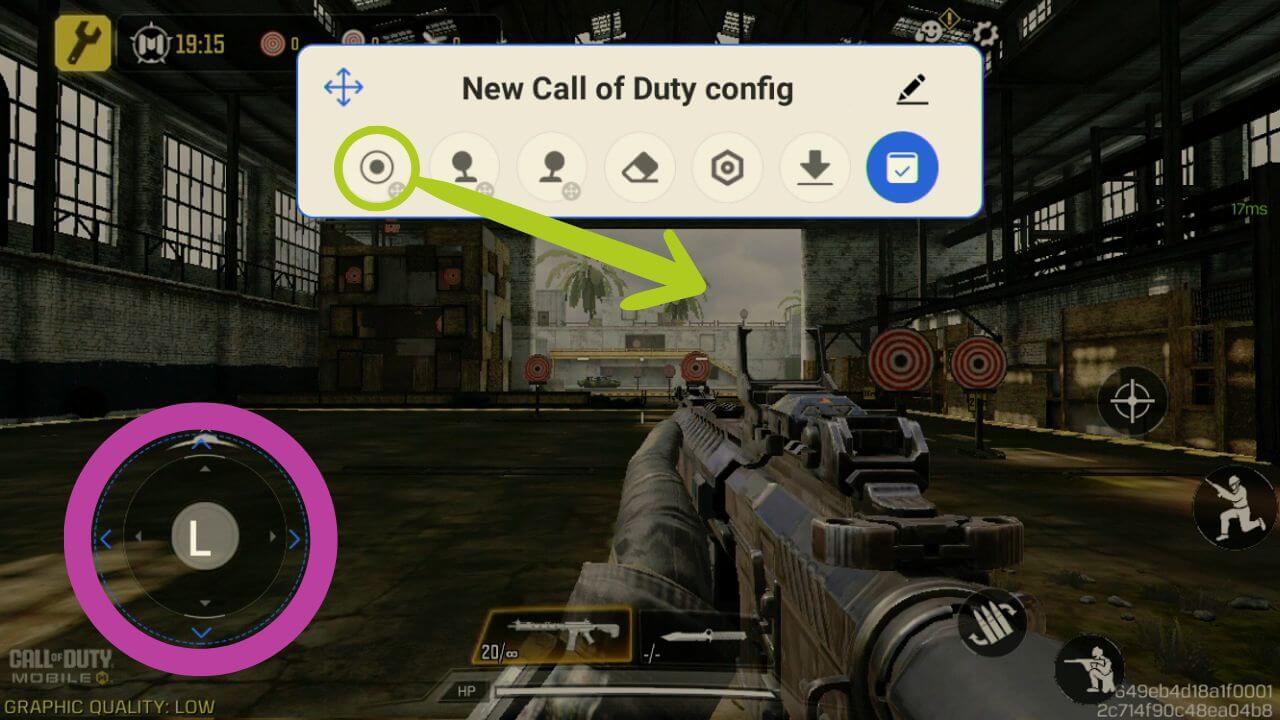
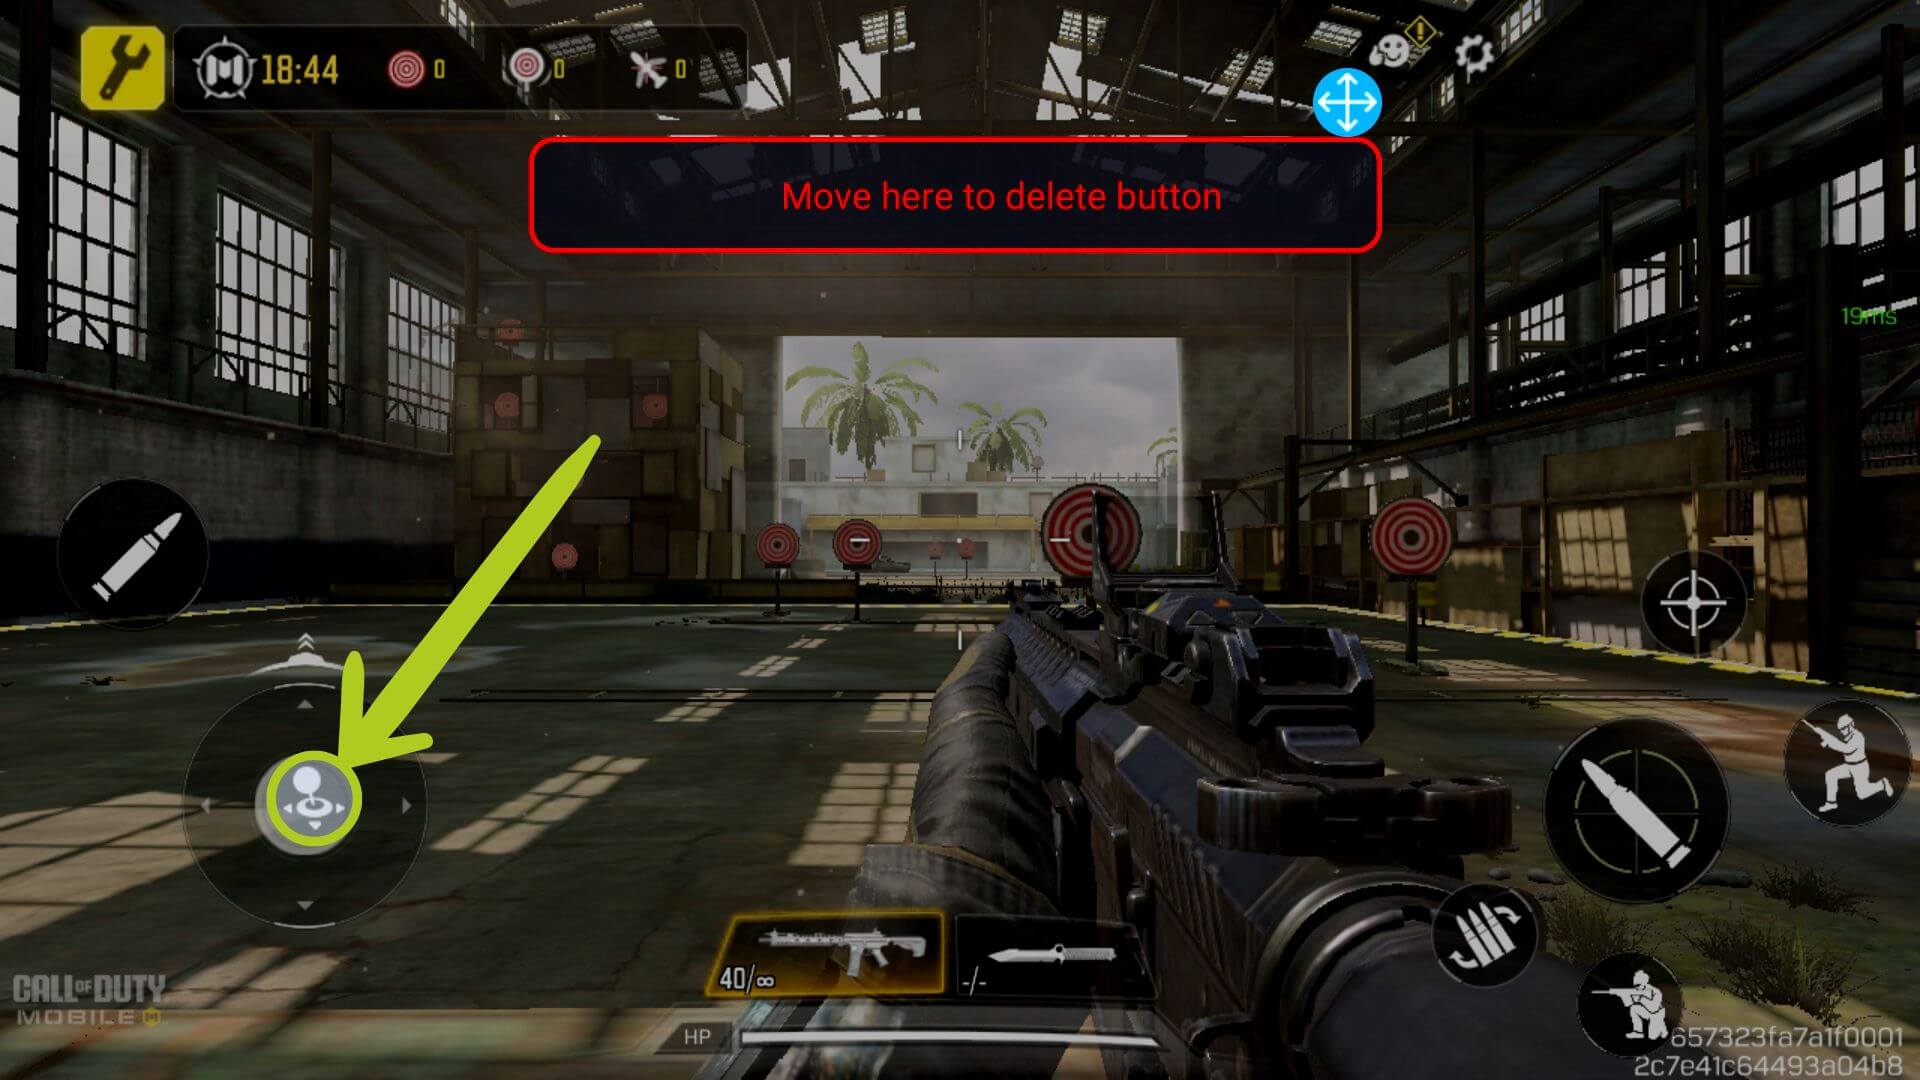
You can adjust these settings however you feel comfortable, and adapt them for all different types of games However we’ll be using Call of Duty for this example. The first thing we want to do is set up the movement. Simply, drag and drop the left joystick icon onto the virtual joystick that controls the ingame movement (as shown in Images 4 & 5 below). The same can be done for the right joystick – simply drag and drop the icon to wherever you want the right joystick to control. In our case (FPS game), it will be used to control the rotation/camera of our character.
You have the flexibility to adjust these settings to your comfort, making them suitable for various game types. For illustration, we’ll use Call of Duty as an example. Start by setting up the movement controls – drag the left joystick icon and drop it onto the game’s virtual joystick, which controls in-game movement (as shown in Images 4 & 5 below). The process is similar for the right joystick. Drag and drop this icon to the location for controlling the right joystick function. In most mobile FPS games, the right joystick typically controls the rotation or camera angle of your character.
You can see the joystick has been set up, highlighted in purple, showing the icon now has an L representing the left joystick (refer to Image 6 below).
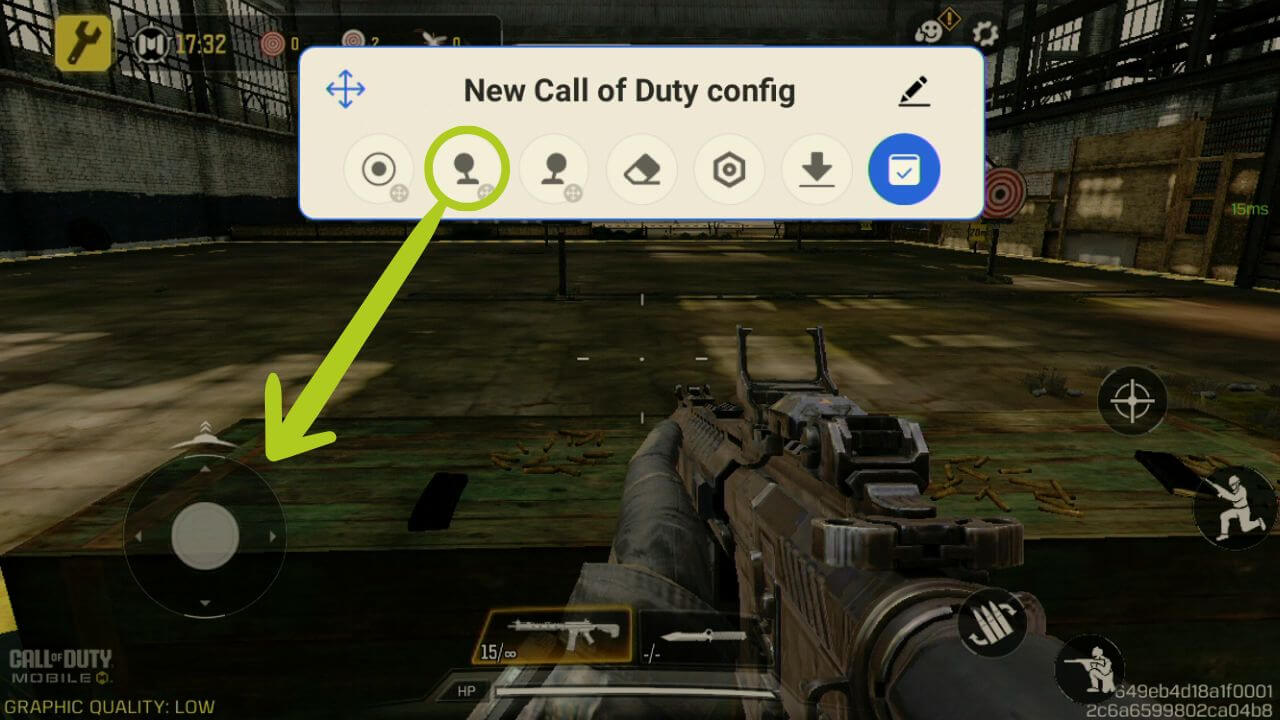
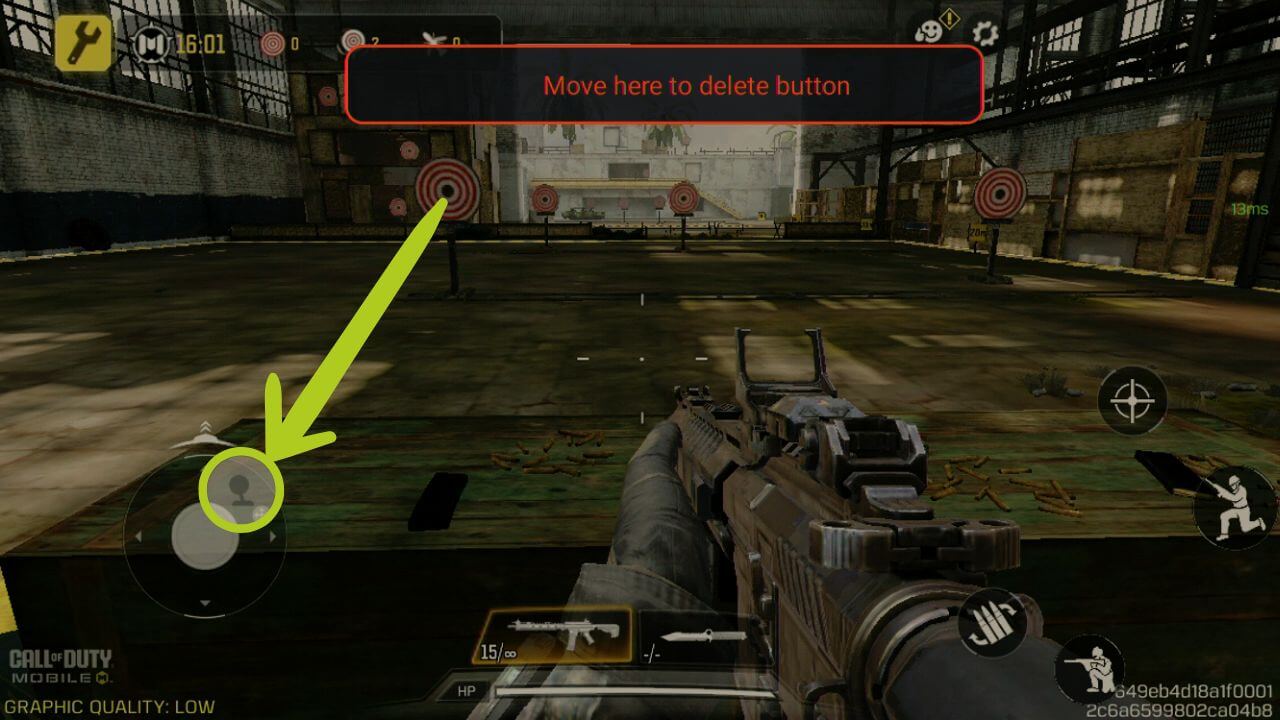
To map buttons to specific functions or controls, we start off doing the same as the previous step, drag the button icon onto a virtual button that you wish to map it to (see Images 6 & 7 below). This will ensure the key mapper understands which physical button corresponds with the onscreen controls.

Unlike the joystick, we now need to define which button will be assigned to this button mapping. To do this, ensure the button icon is selected (represented by a blue circle around it) and then press the physical button on the controller that you wish to key set it as. The icon will then change corresponding to whichever icon you’ve selected (refer to Image 9 below).
Essentially what’s happening is whenever you push the button, the software will then create an input at the location of its respective mapping, which is the reason why the button icon needs to be placed on top of the onscreen button you wish a configure.
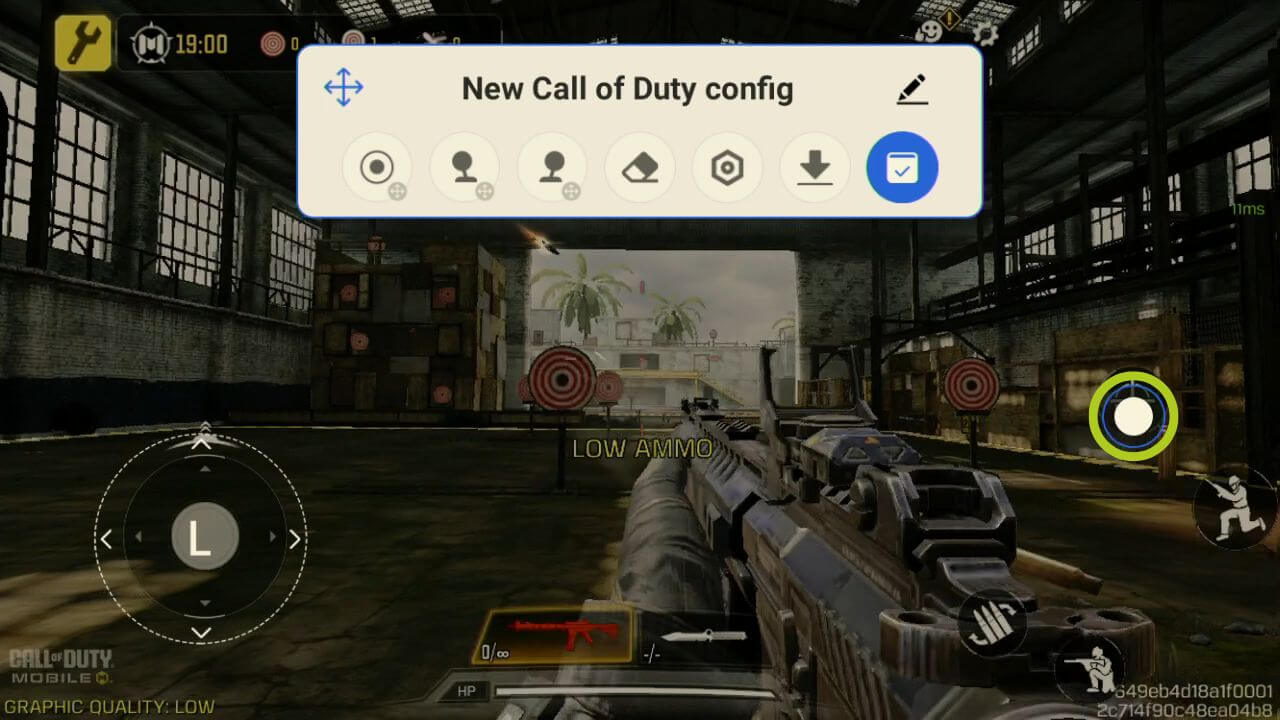
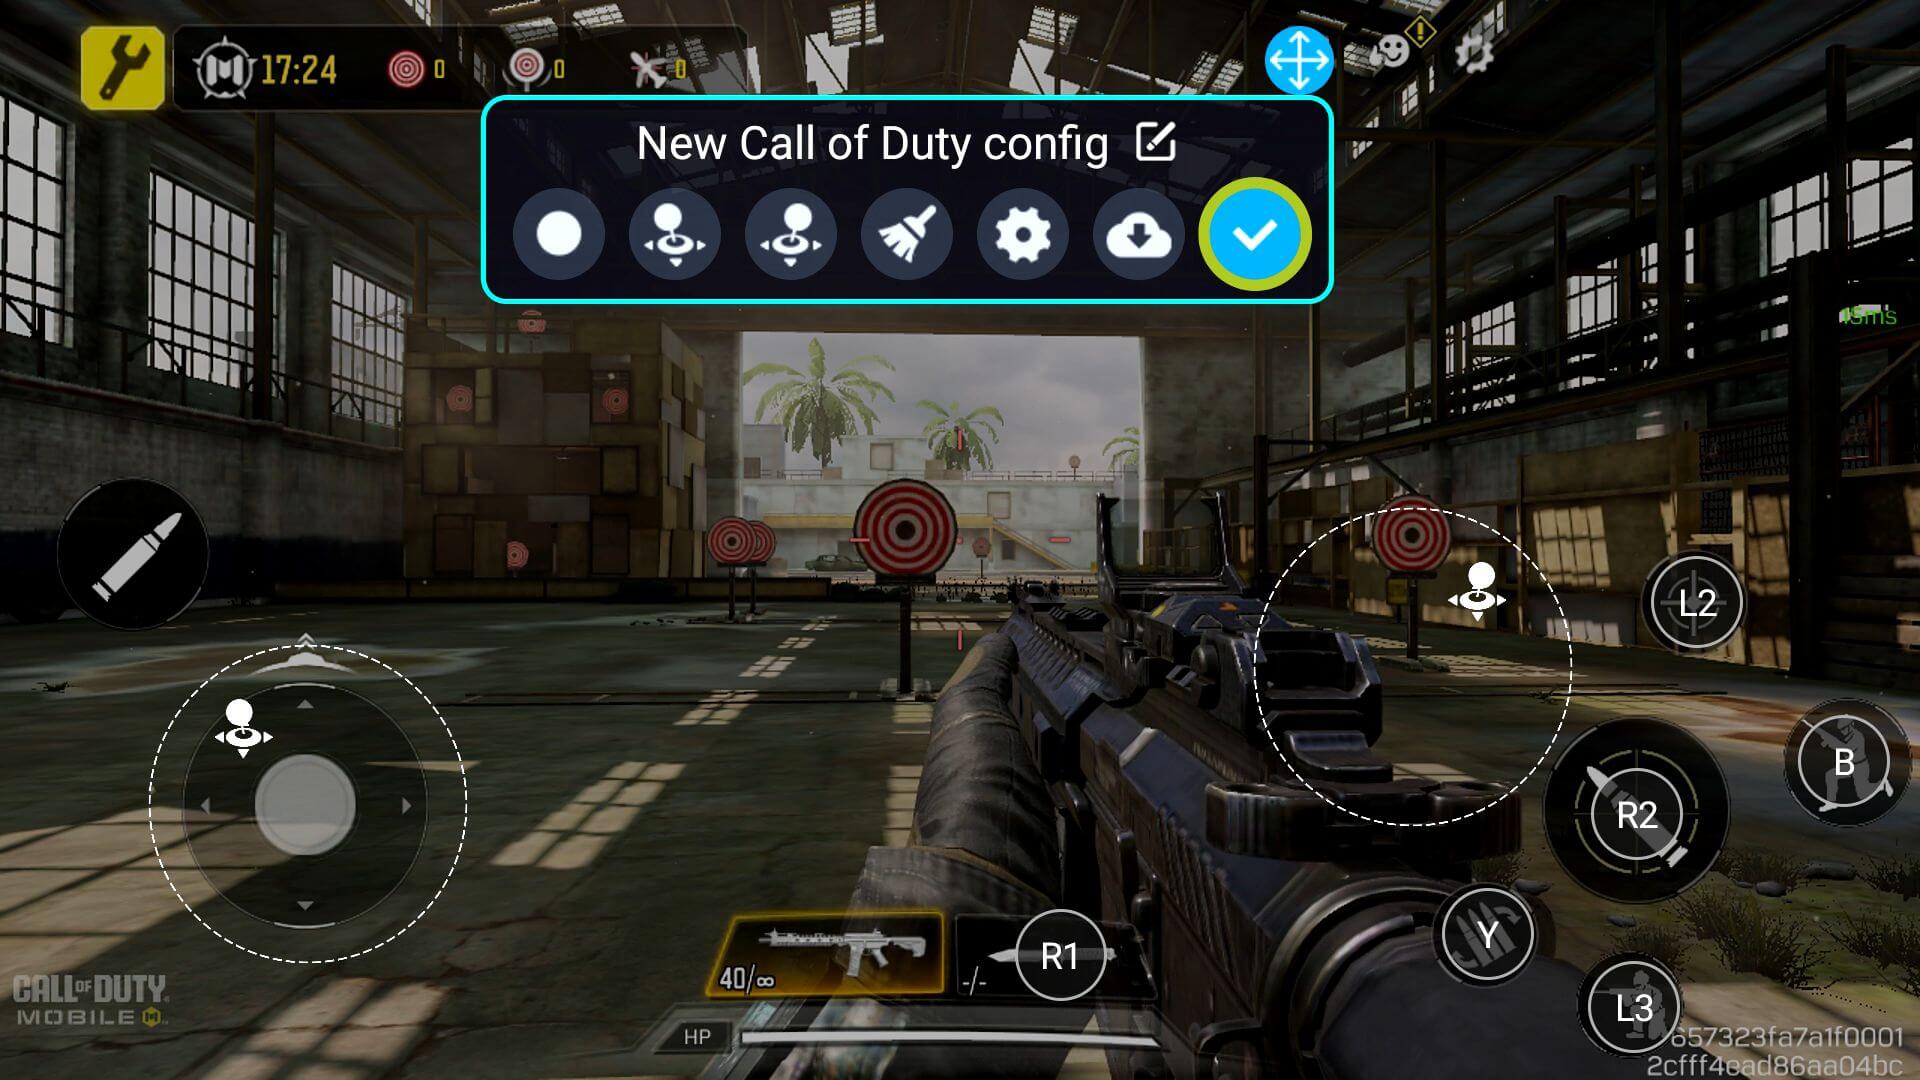
Continue doing this for every onscreen button (or input) that you wish to be bound to a physical button, once you have done make sure to save and apply your changes by pressing the blue button (refer to Image 10 below). You should now be able to play using the key mappings you just configured (see Image 11 below).
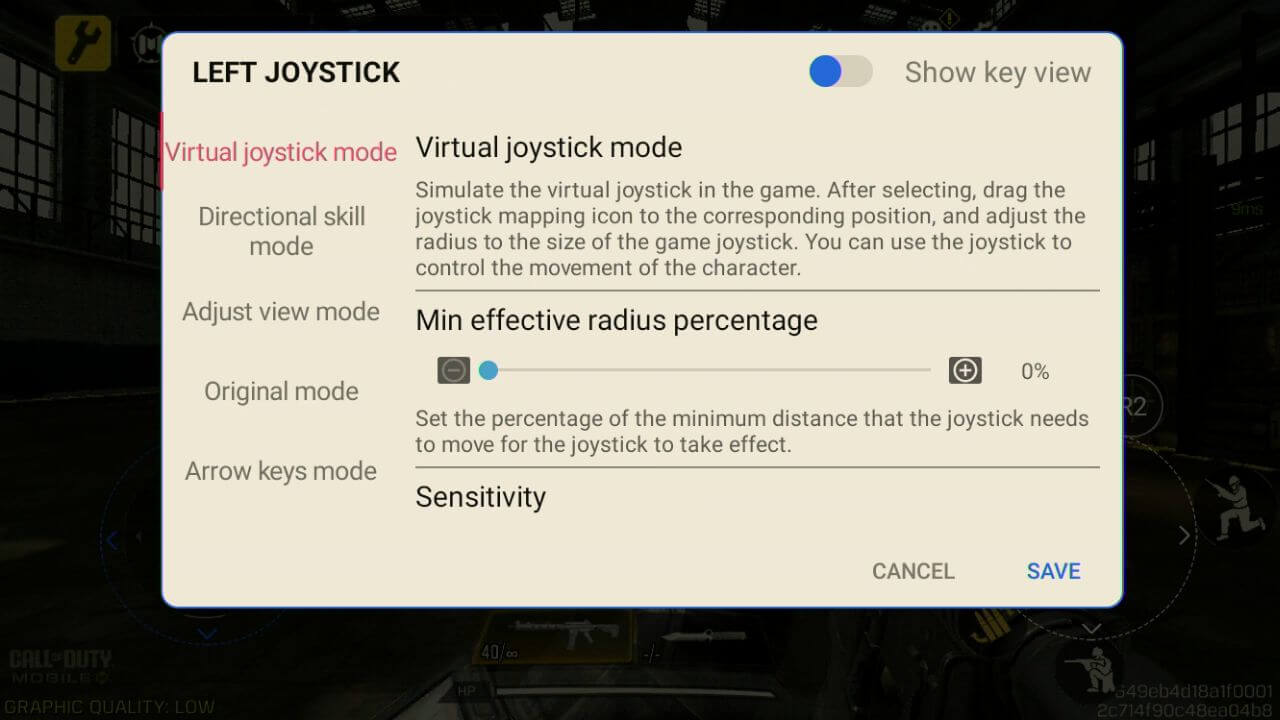
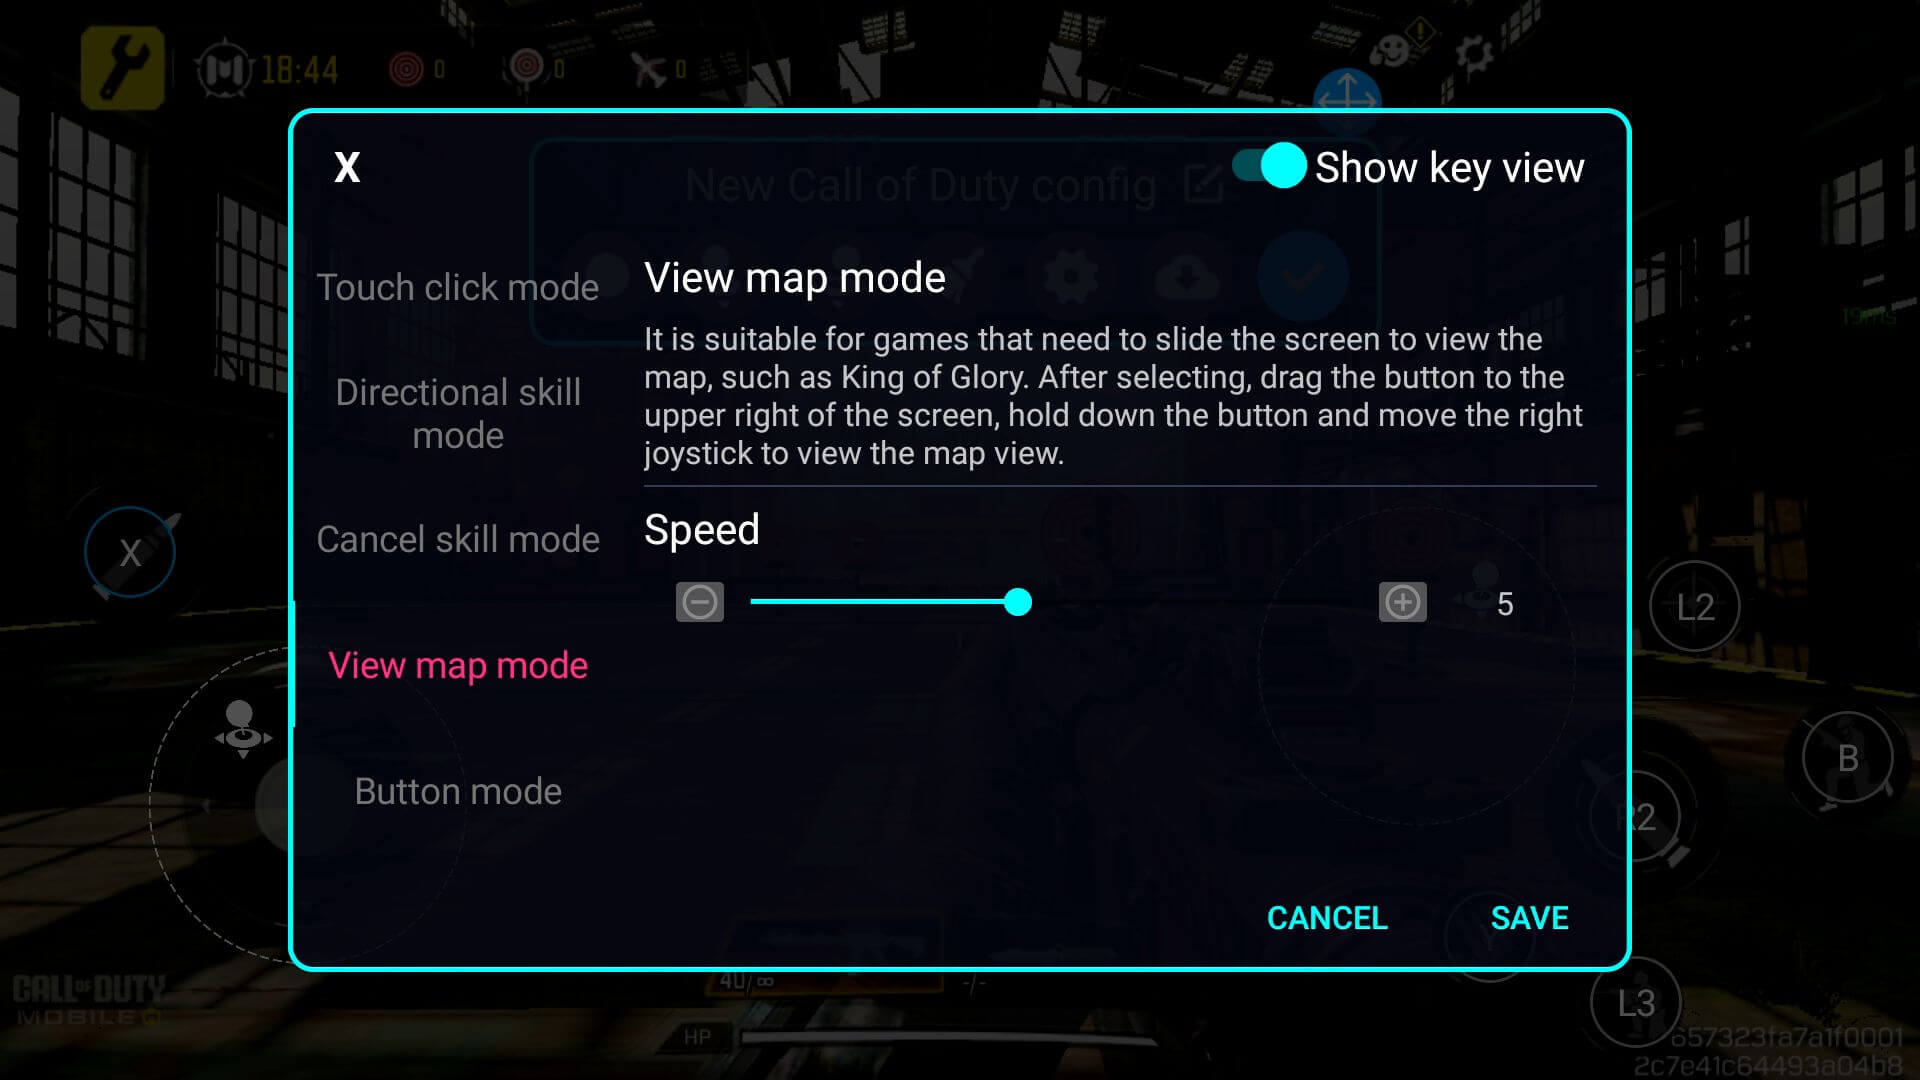
If you find yourself needing to fine-tune or tweak the joystick/button settings such as the sensitivity, or setting up compatibility for specific game genres and more – you can do so from the Key Adapter menu. Once here, tap on a mapped key and a settings menu for the selected input will appear. Every option is explained in detail, so go through them and change them as you see fit (refer to the Images below).

AYN
Here, we’ll cover the Android gaming devices from AYN, with their in-game overlay called Game Assistant. This applies to devices such as the AYN ODIN, AYN Odin 2 and other compatible models.
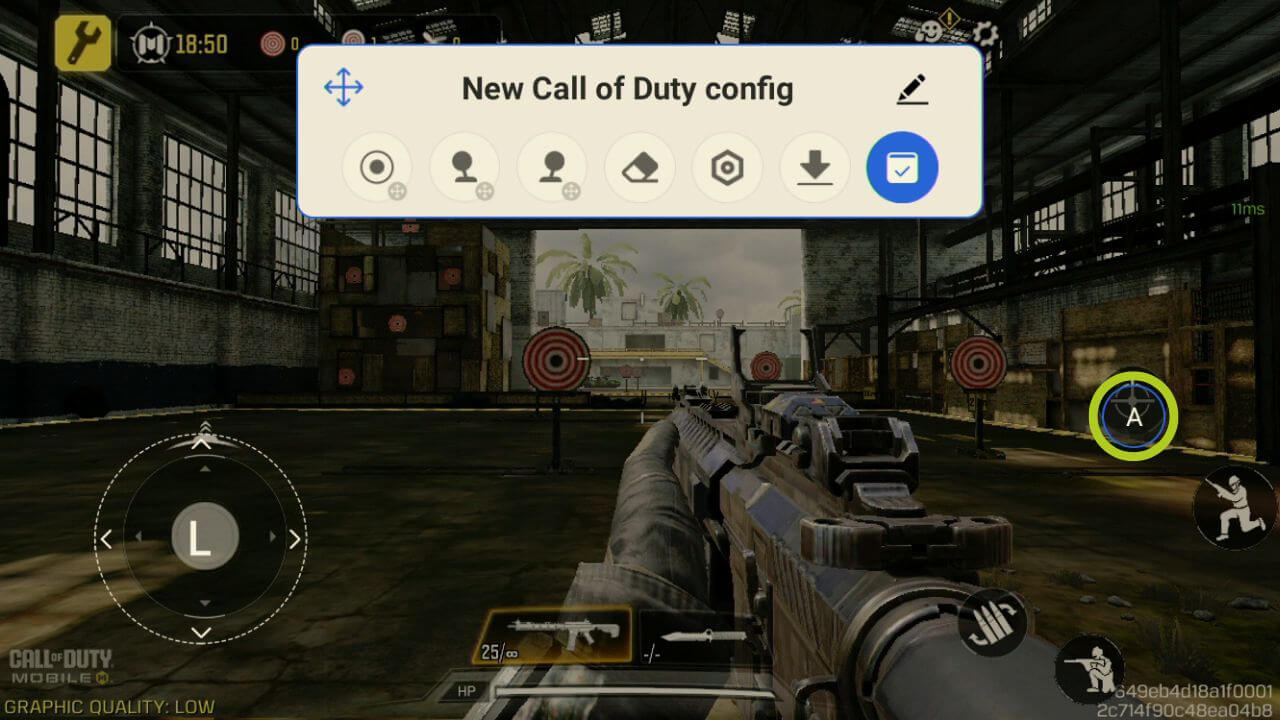
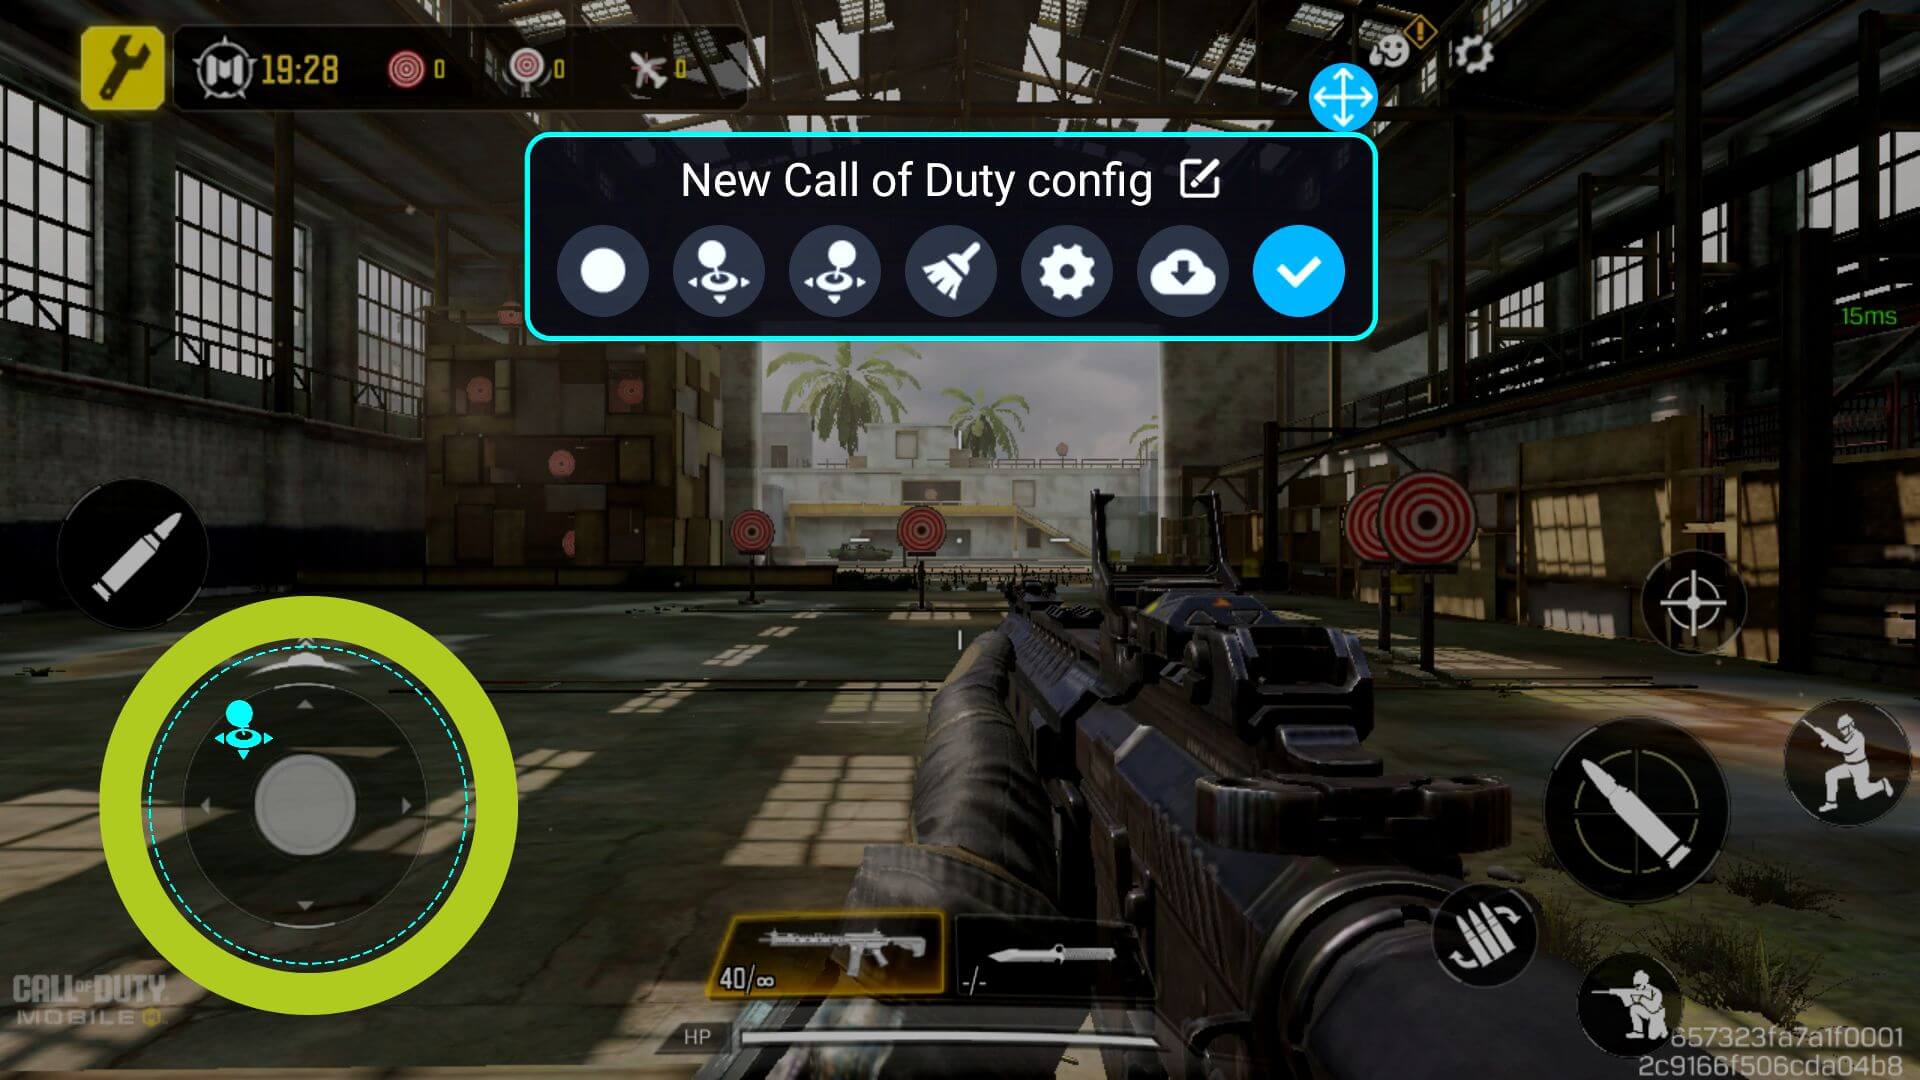
Similarly to Retroid, you can swipe left from the edge of the screen ingame, whenever you see the fine white line appear, to open the in-game overlay (shown in Image 1 below). From the overlay, tap the icon named Key Adapter, which we will use to configure our controller (refer to Image 2 below).

Within the Key Adapter menu, there are many important different options each listed below:
- Button: configures any button input
- Left Joystick: configures the left joystick
- Right Joystick: configures the right joystick
- Delete: clears all mappings
- Scheme Settings: change scheme settings, including overlay transparency
- Cloud Schemes: for any preset settings
- Save: confirms changes

To set up joystick input, simply drag and drop the Left Joystick icon on the virtual joystick that controls the ingame movement (as shown in Images 4 & 5 below). The same can be done for the Right Joystick – simply drag and drop it to wherever you want the right joystick to control. In our example, a first-person game, the joysticks will be used to control the movement and the rotation/camera of our character respectively.
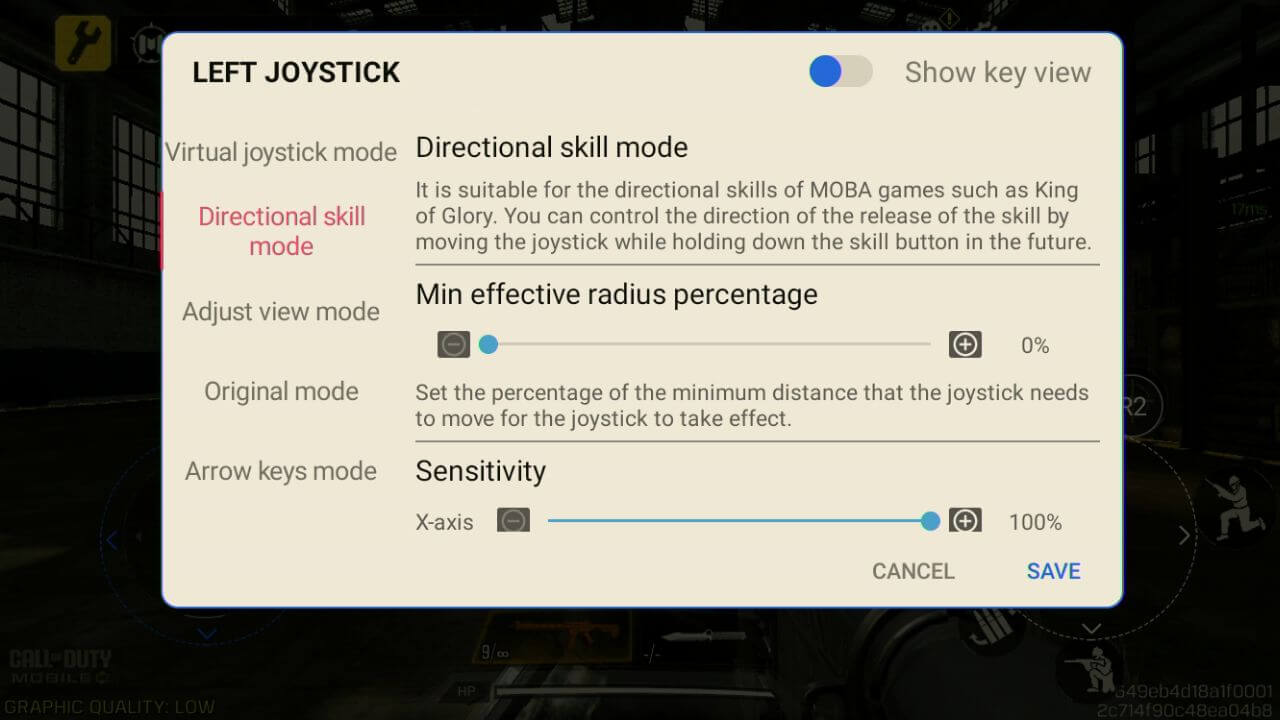
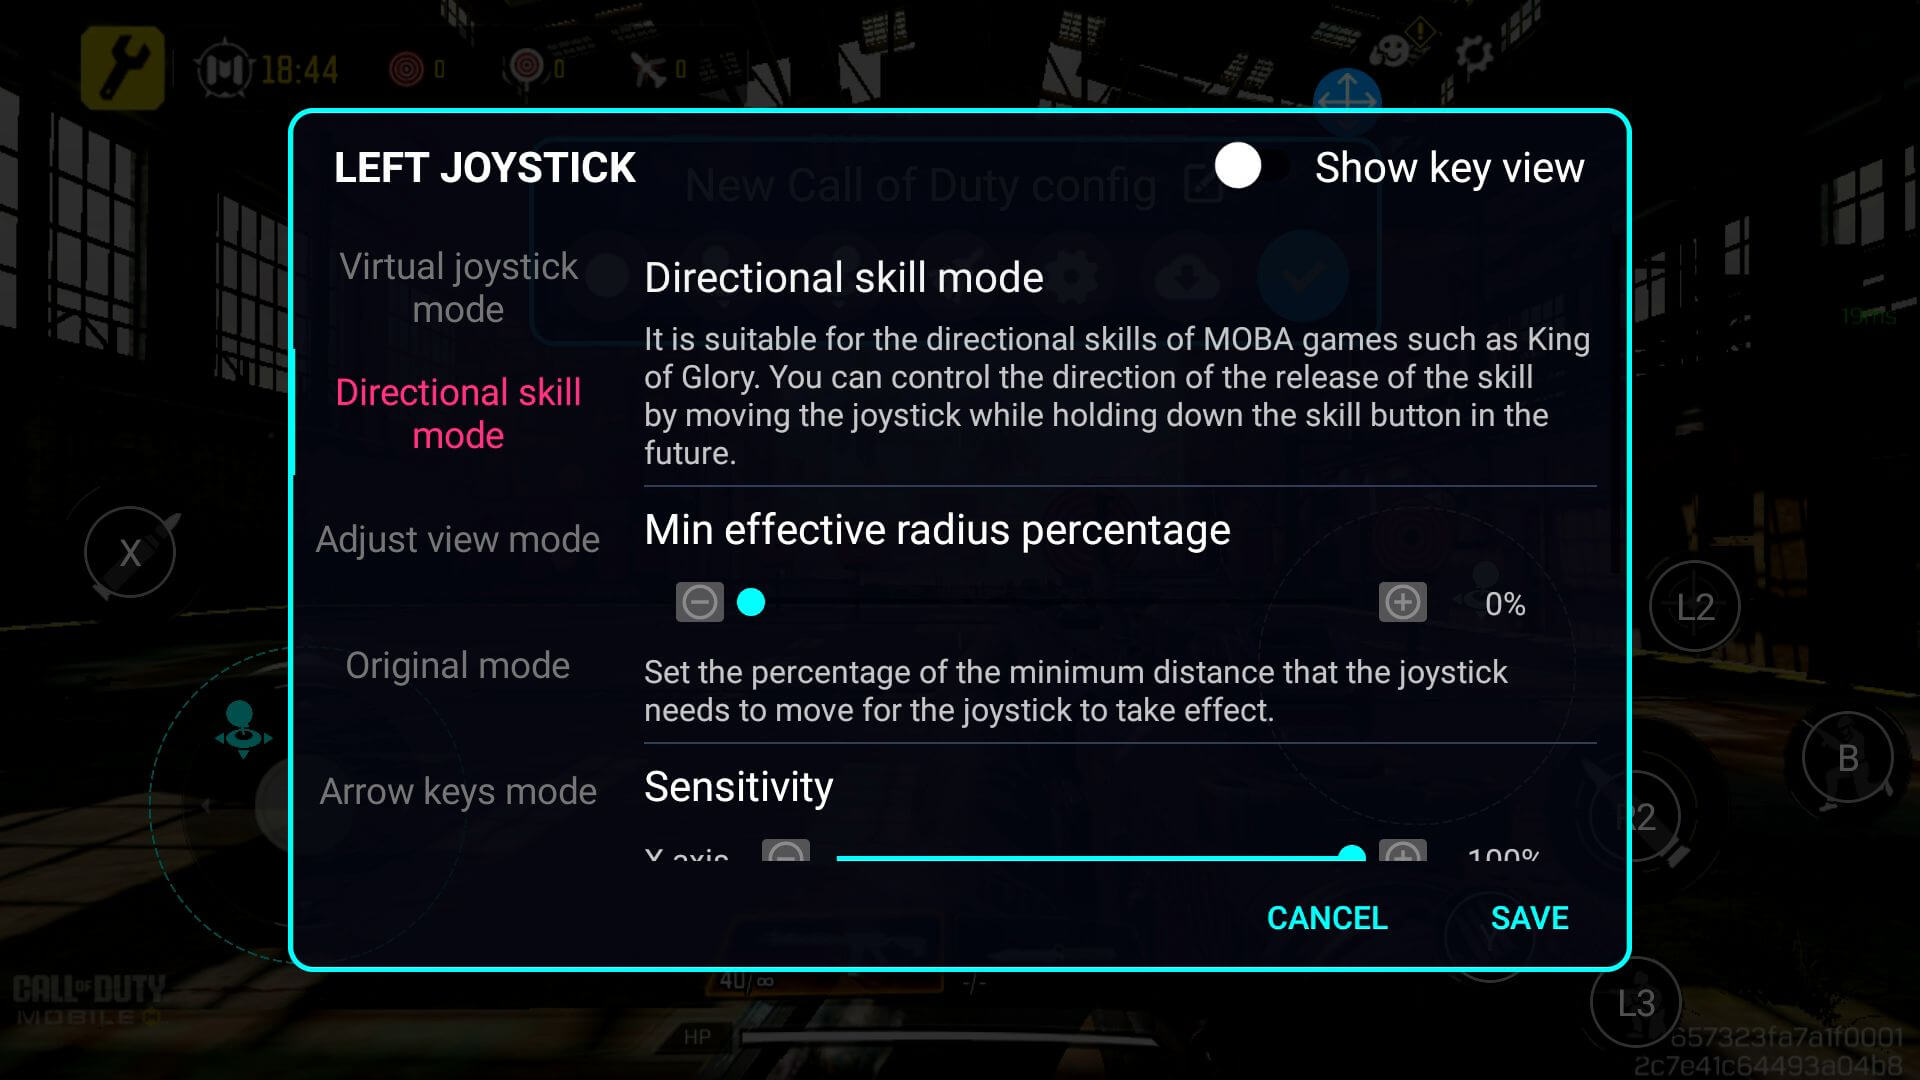
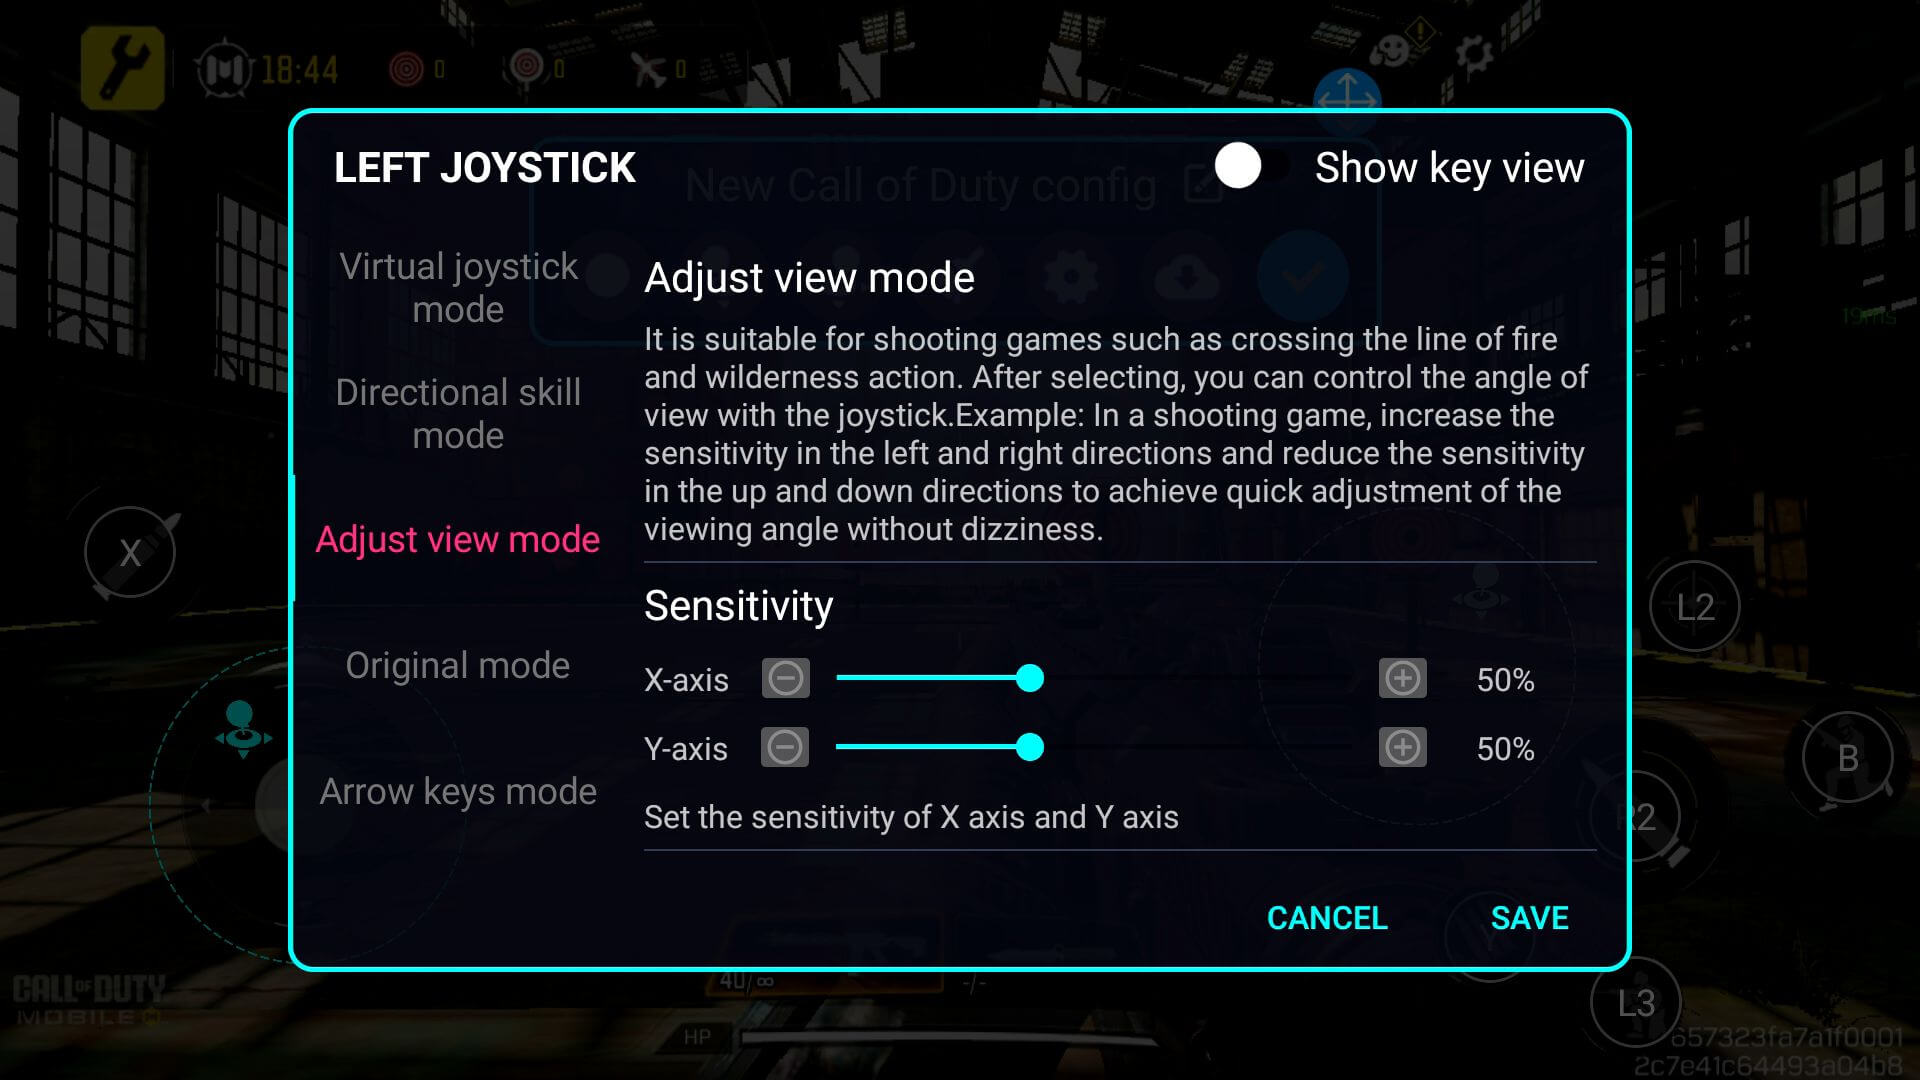
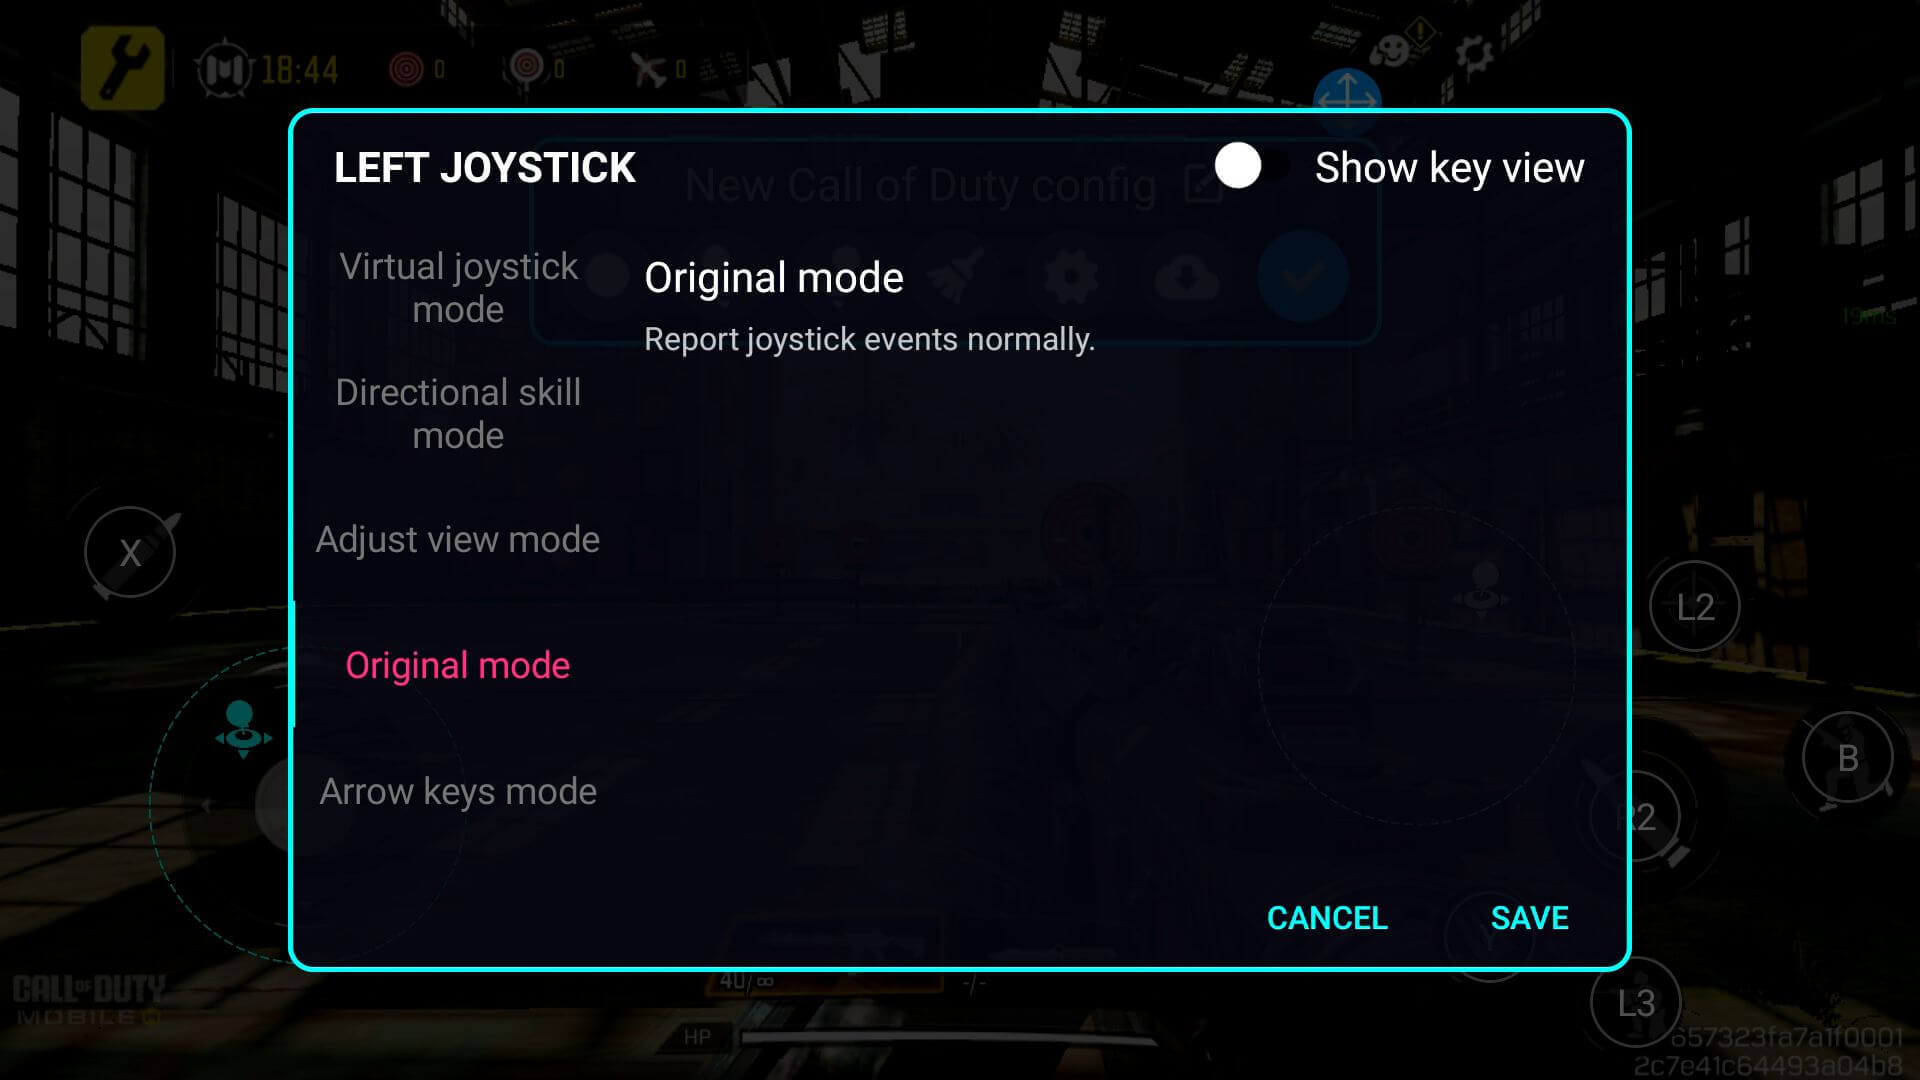
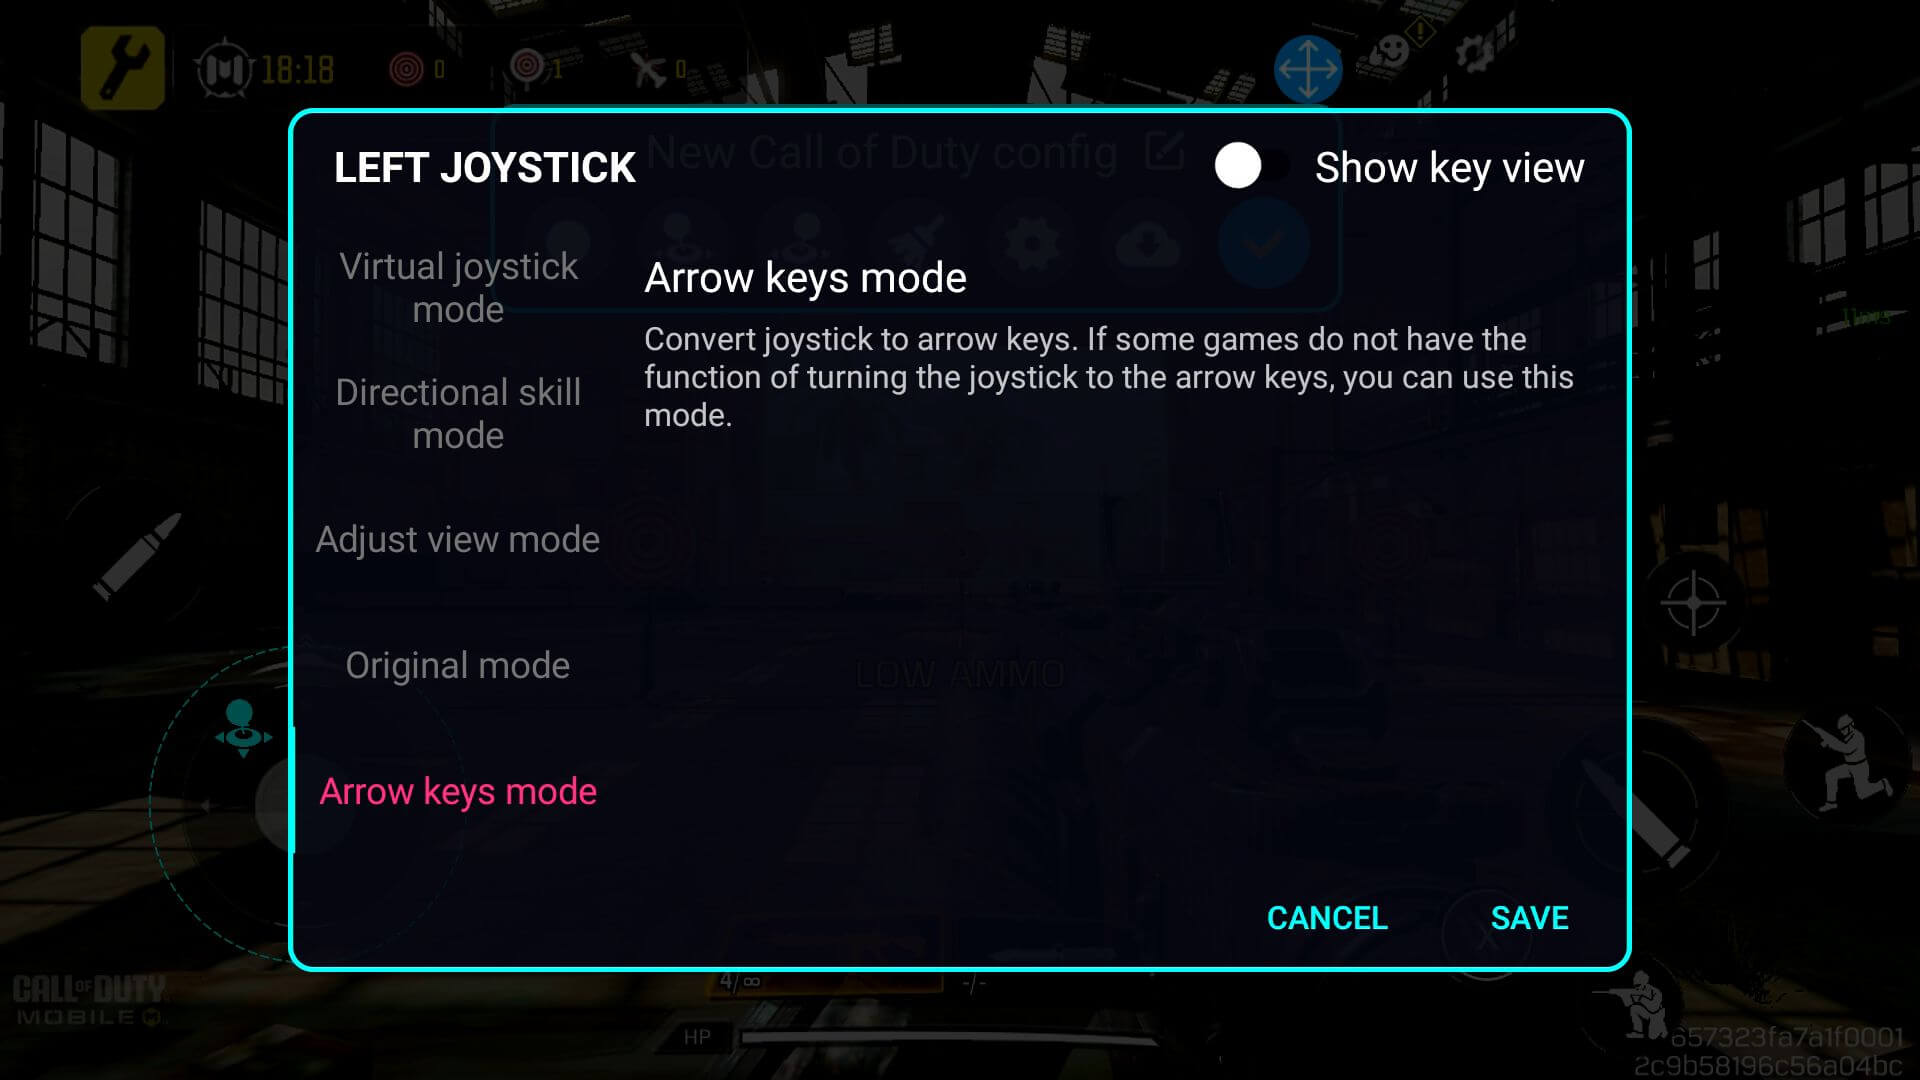
To change the settings of the joystick, whether it’s altering input sensitivity, enabling better MOBA control, or more, you can do so by simply tapping again on the configured icon (see Image 6 below). Doing so will prompt the selected input’s settings to open up. Each option is thoroughly explained within the menu and will be shown below.

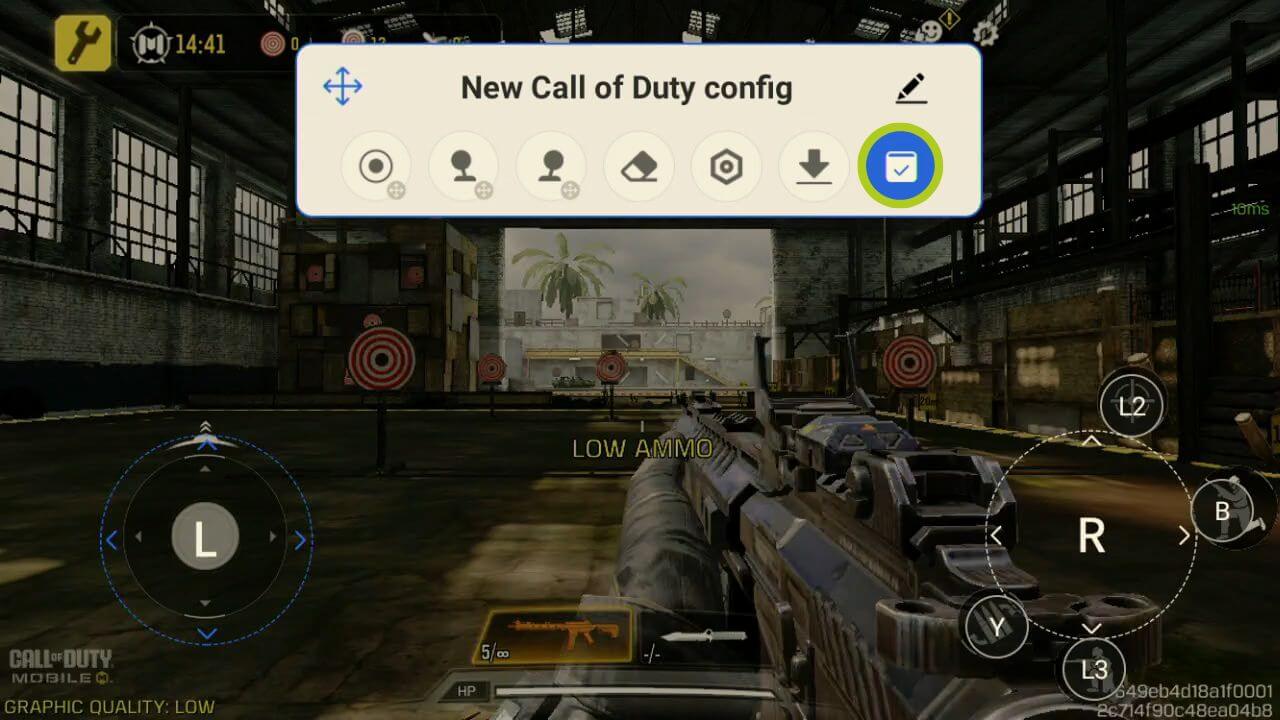
Configuring button controls is similar but instead, we’ll use the button icon – make sure that the button icon is dragged onto the virtual button that you wish to configure (see Images 12 & 13 below). This will ensure the key mapper understands which physical button corresponds with the onscreen controls.
Unlike the joystick which is already defined, a physical button will need to be assigned to this button kep mapping. To do this, ensure the button icon is selected (represented by a blue circle around it) and then press the physical button on the controller that you wish to keymap. The icon will then change corresponding to whichever icon you’ve selected (refer to Images 14 & 15 below).


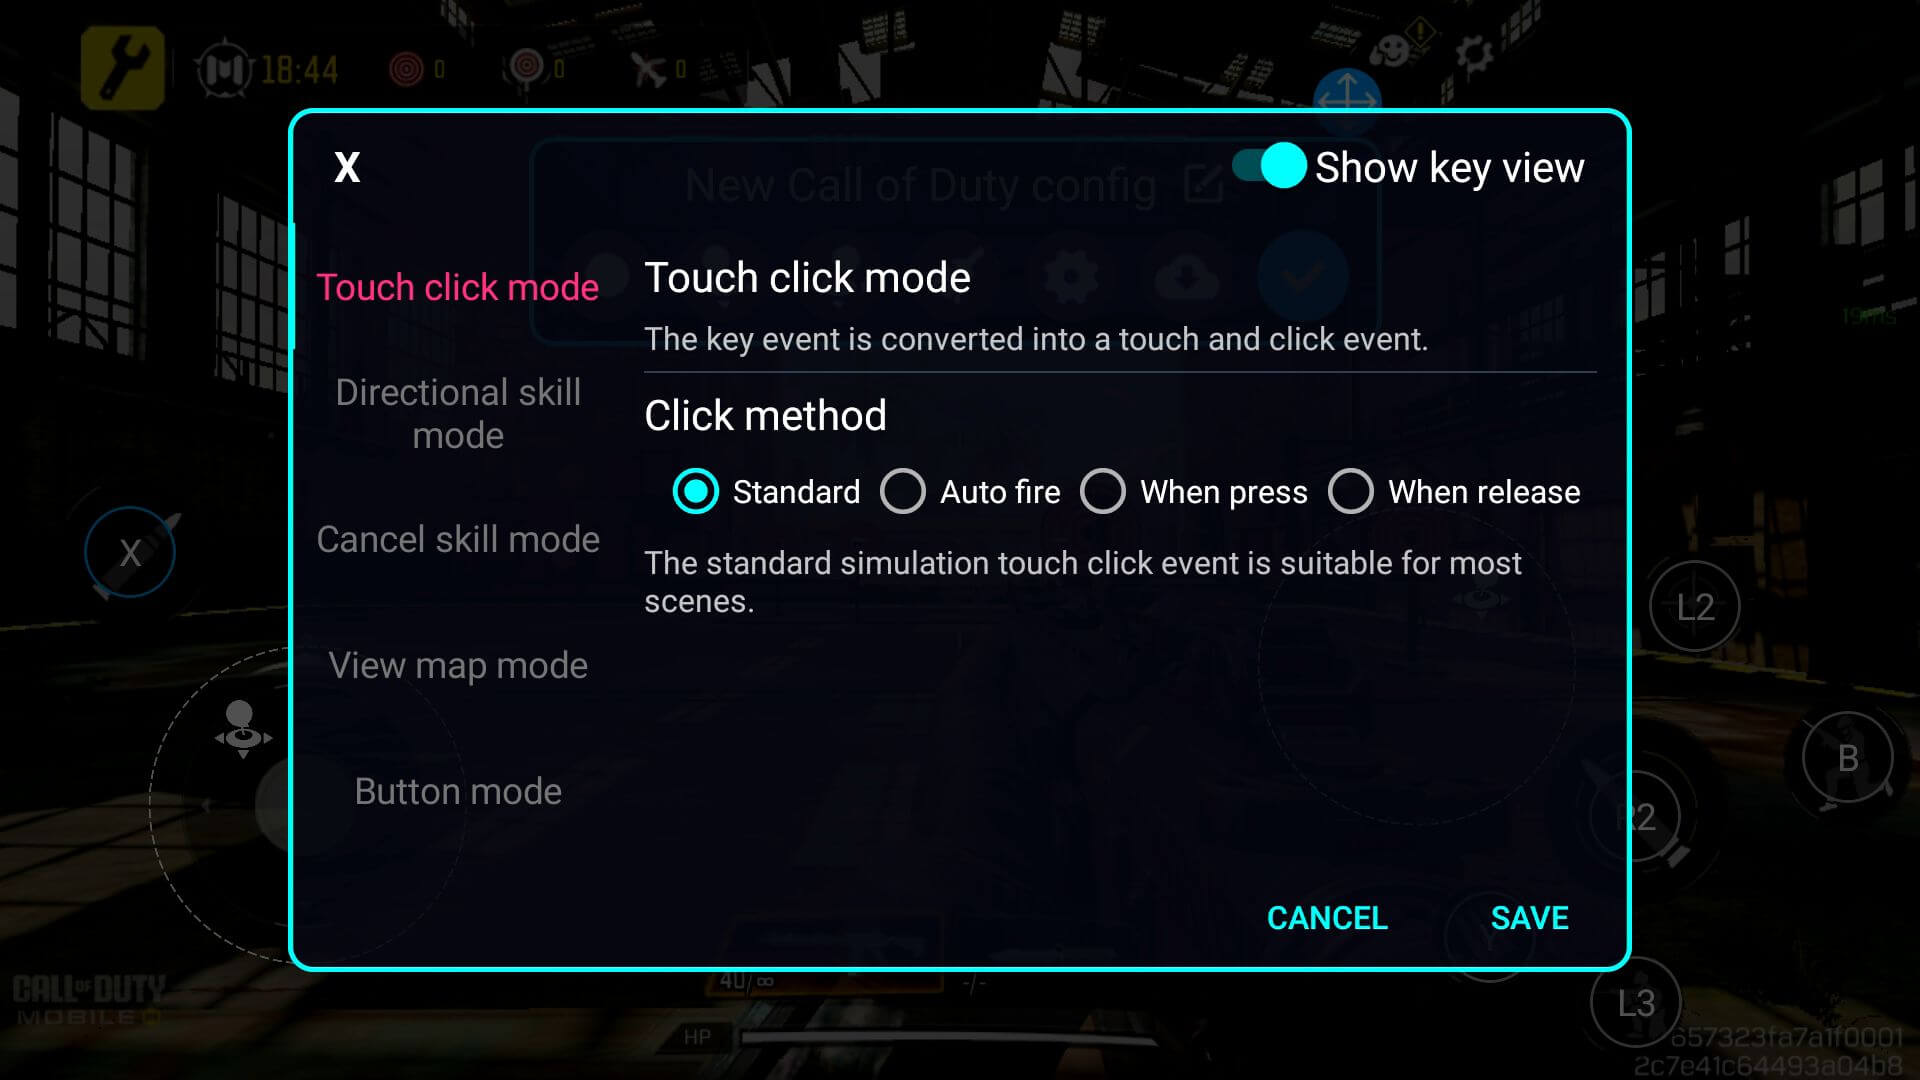
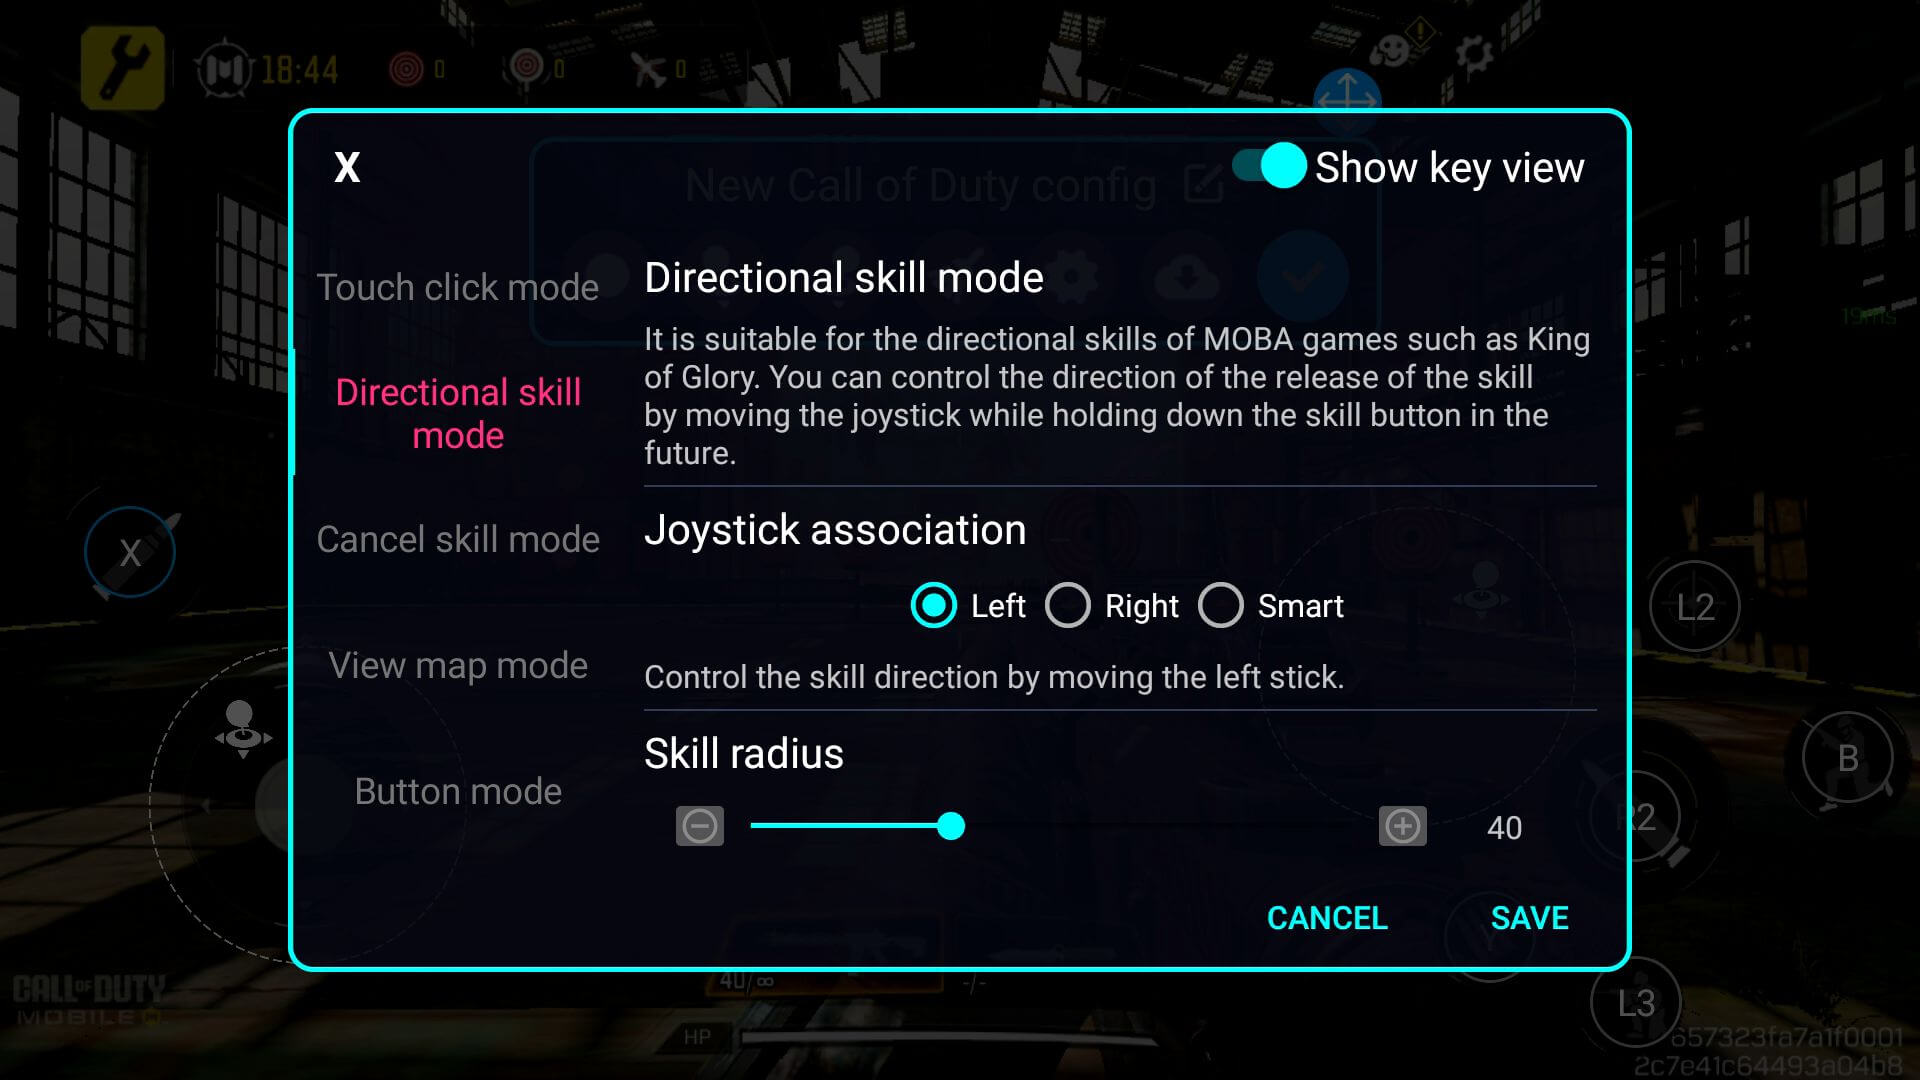
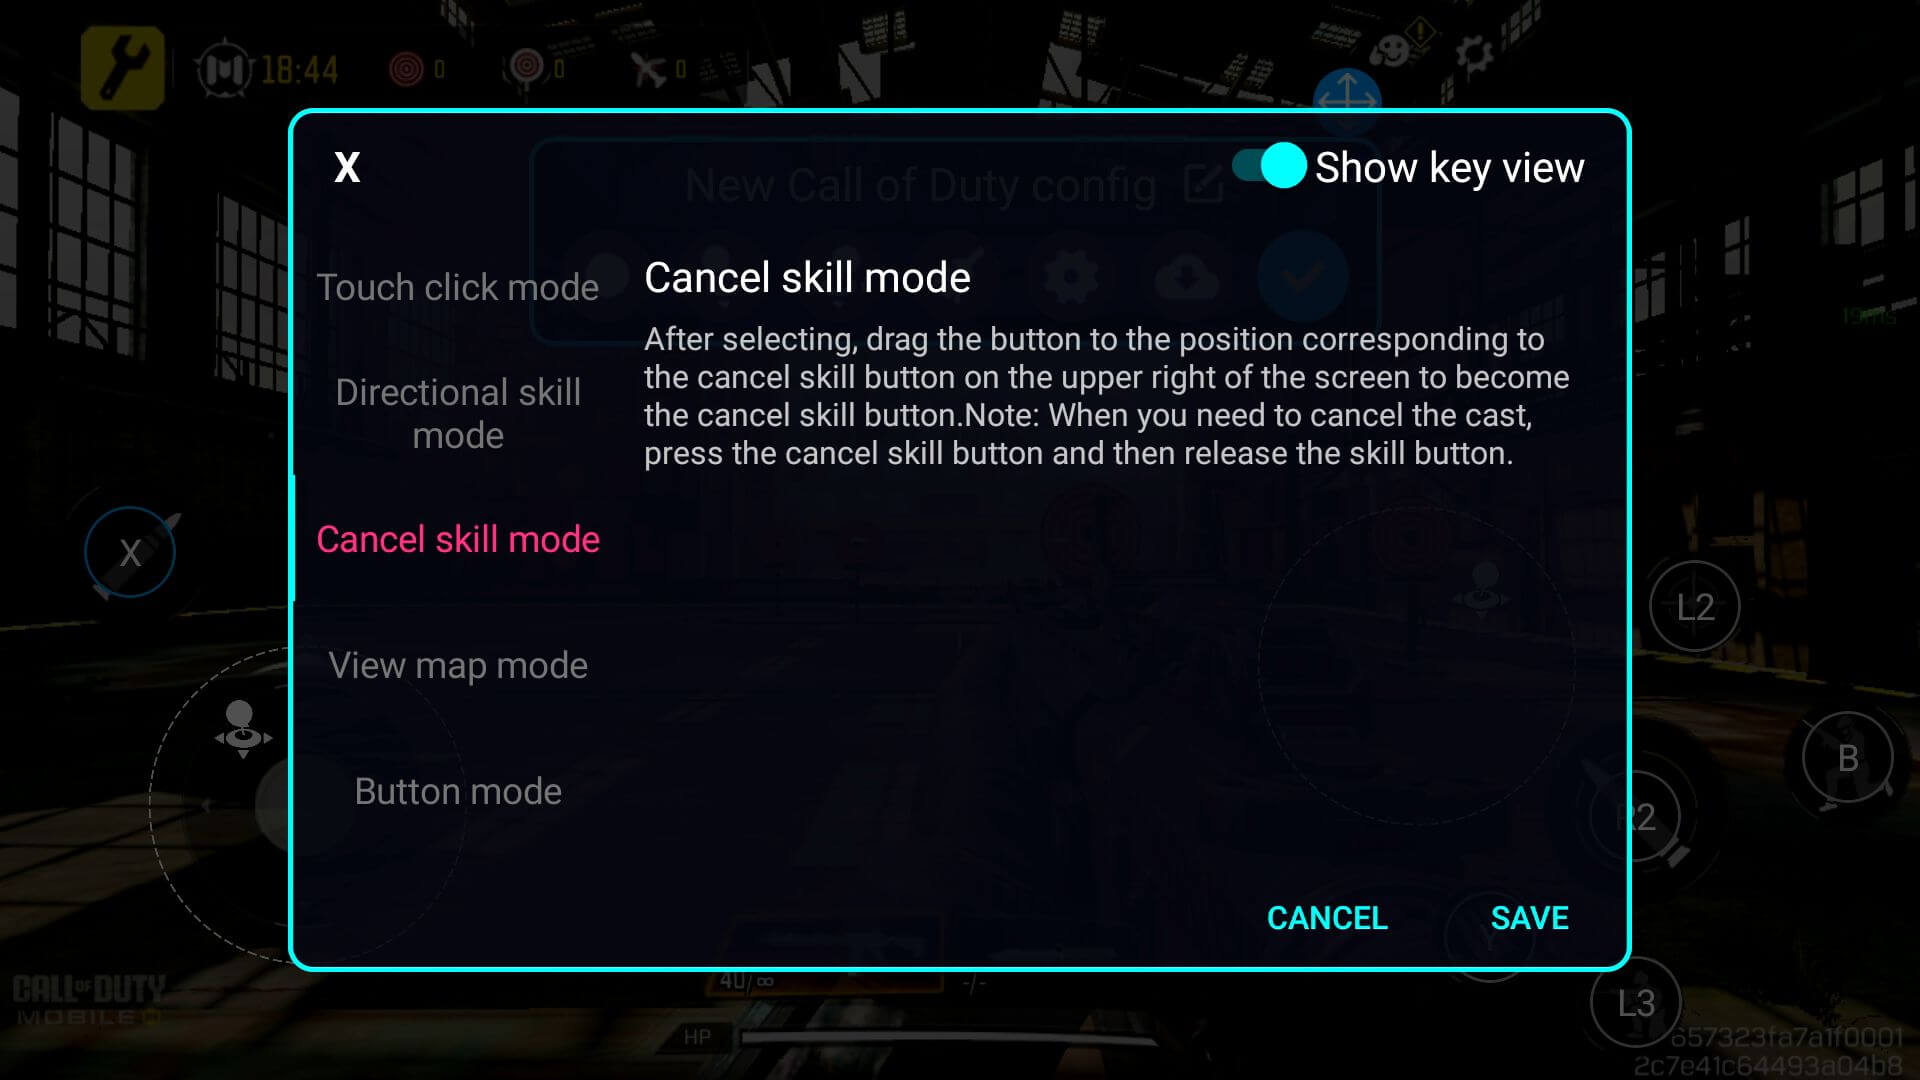
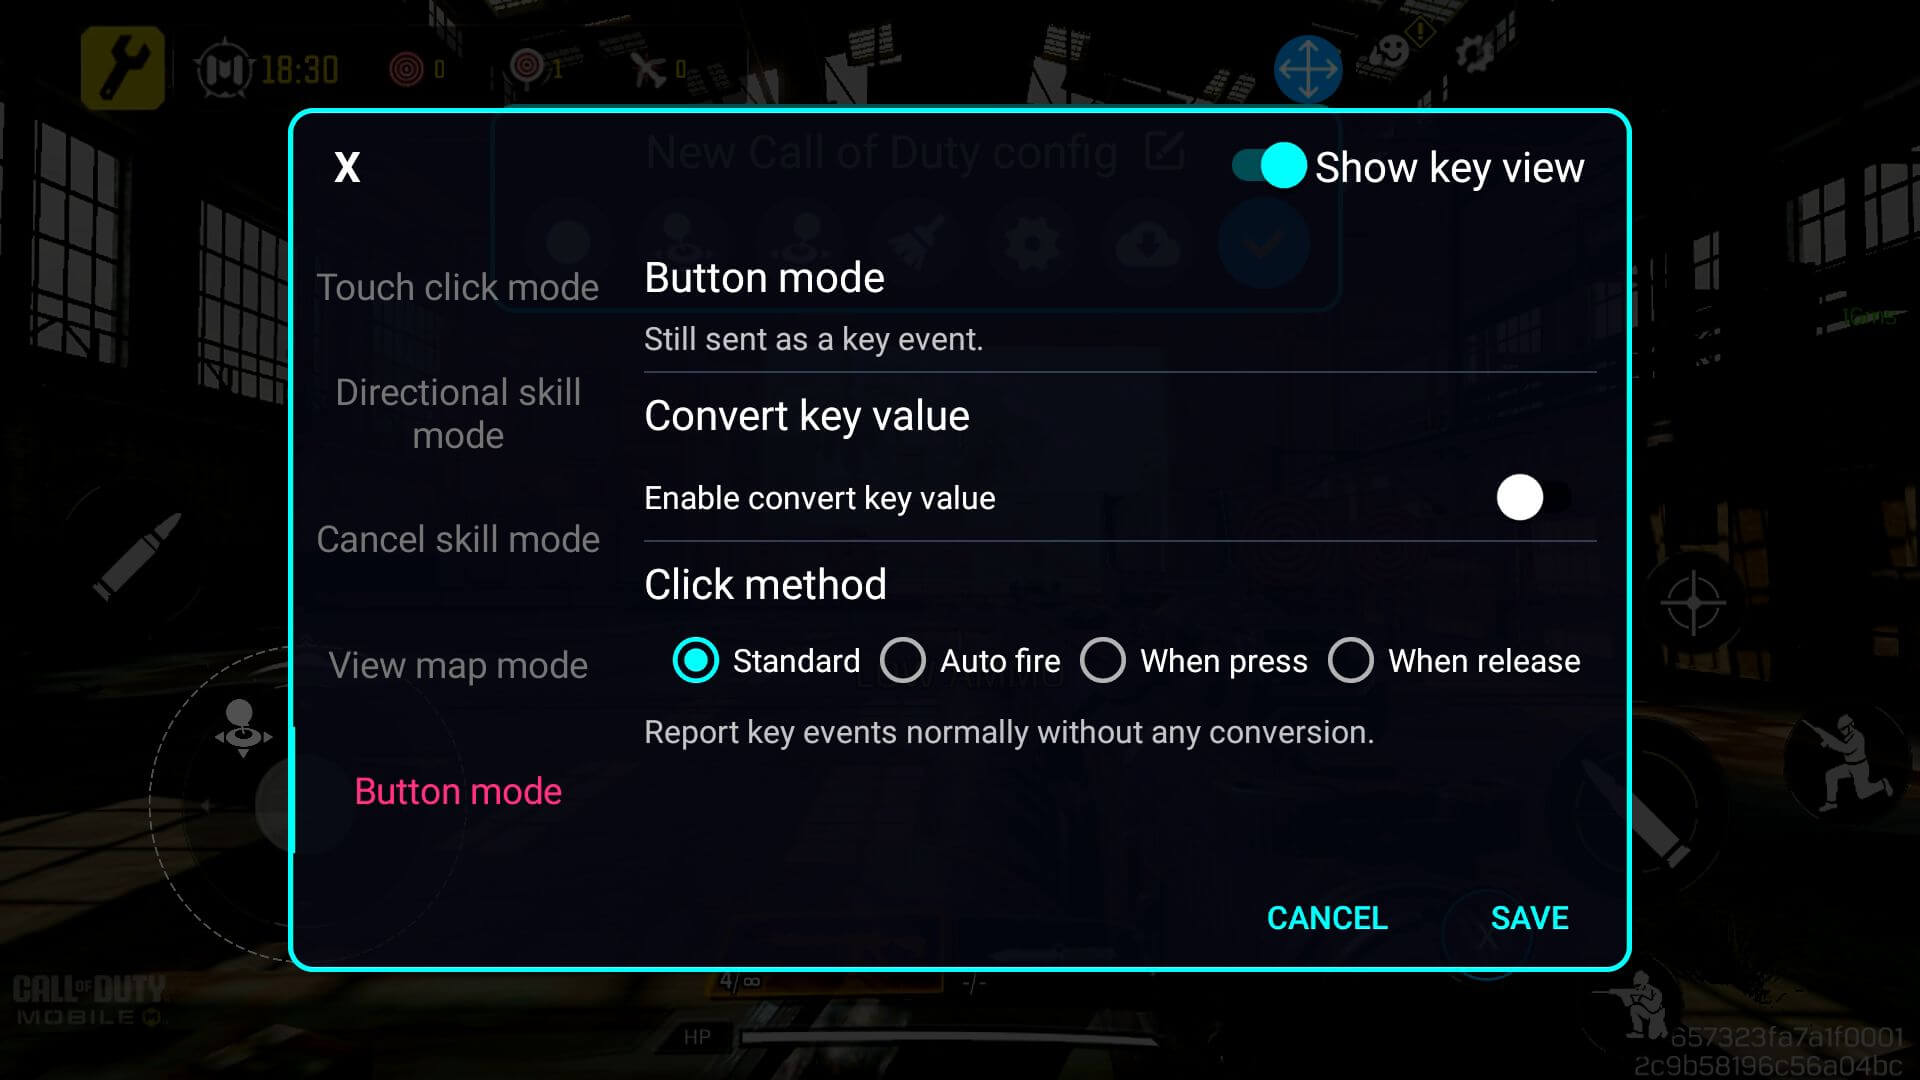
To change the settings of a button, whether it’s enabling directional skill (for MOBAs), changing the on-press event, or something else, you can do so by simply tapping again on the configured icon (see Image 16 below). Doing so will prompt the selected icon’s settings to open up (see the Images below).

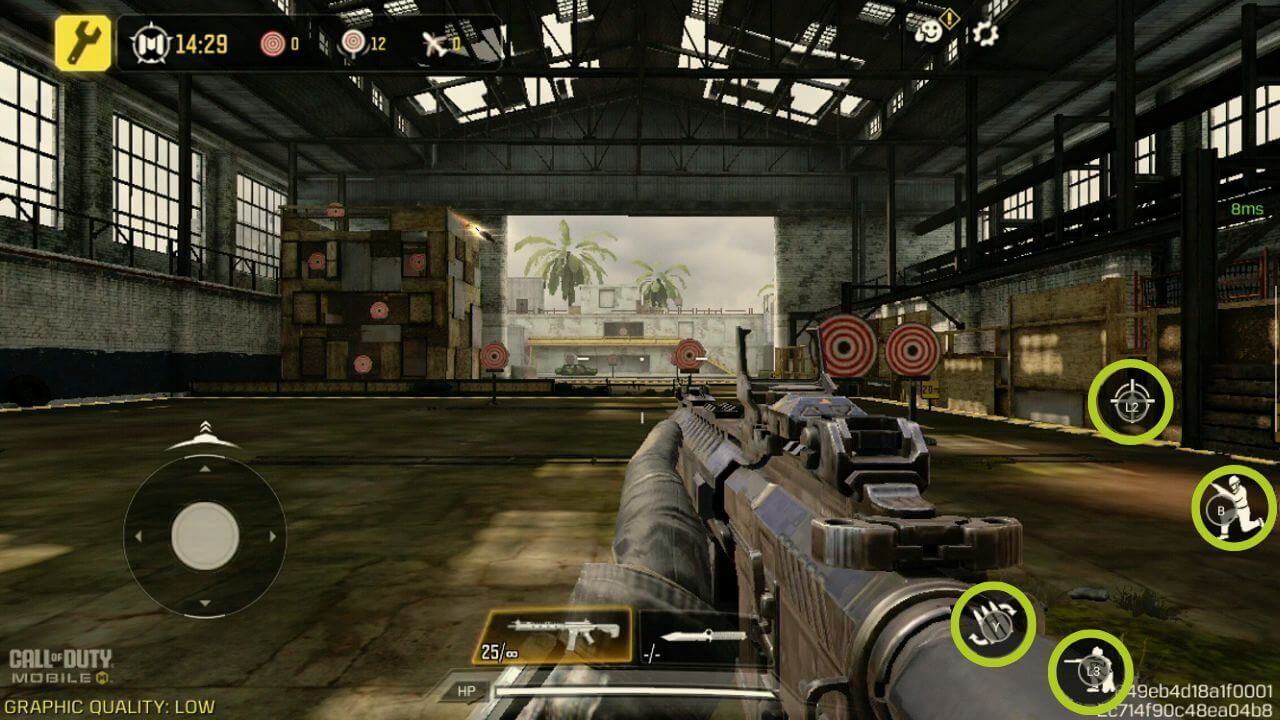
Continue key mapping for every onscreen button (or input) that you wish to be bound to a physical input – once completed, make sure to save and apply your changes by pressing the blue button (refer to Image 10 below). You should now be able to play using the key mappings you just configured (see Image 11 below). You may need to adjust the settings as you see fit for your specific game and playstyle.

Questions & answers