Congratulations on purchasing the BudPlus S3 Projector. We’ve prepared this getting started guide which we highly recommend going through. It contains what to check, how to update device-specific software and much more relating to your new mini projector!
Here at DroiX, we’re big proponents of the user’s Right to Repair. So, if you find any issues and feel confident enough to repair them, we encourage you! You can also contact DroiX Customer Support for any assistance or questions.
Setting Up Your Device
Hardware Setup
Begin your BudPlus S3 Projector journey with the hardware installation. In this section, we’ll guide you through the hardware components, connections, and any additional information you might need while getting ready for an immersive viewing experience.
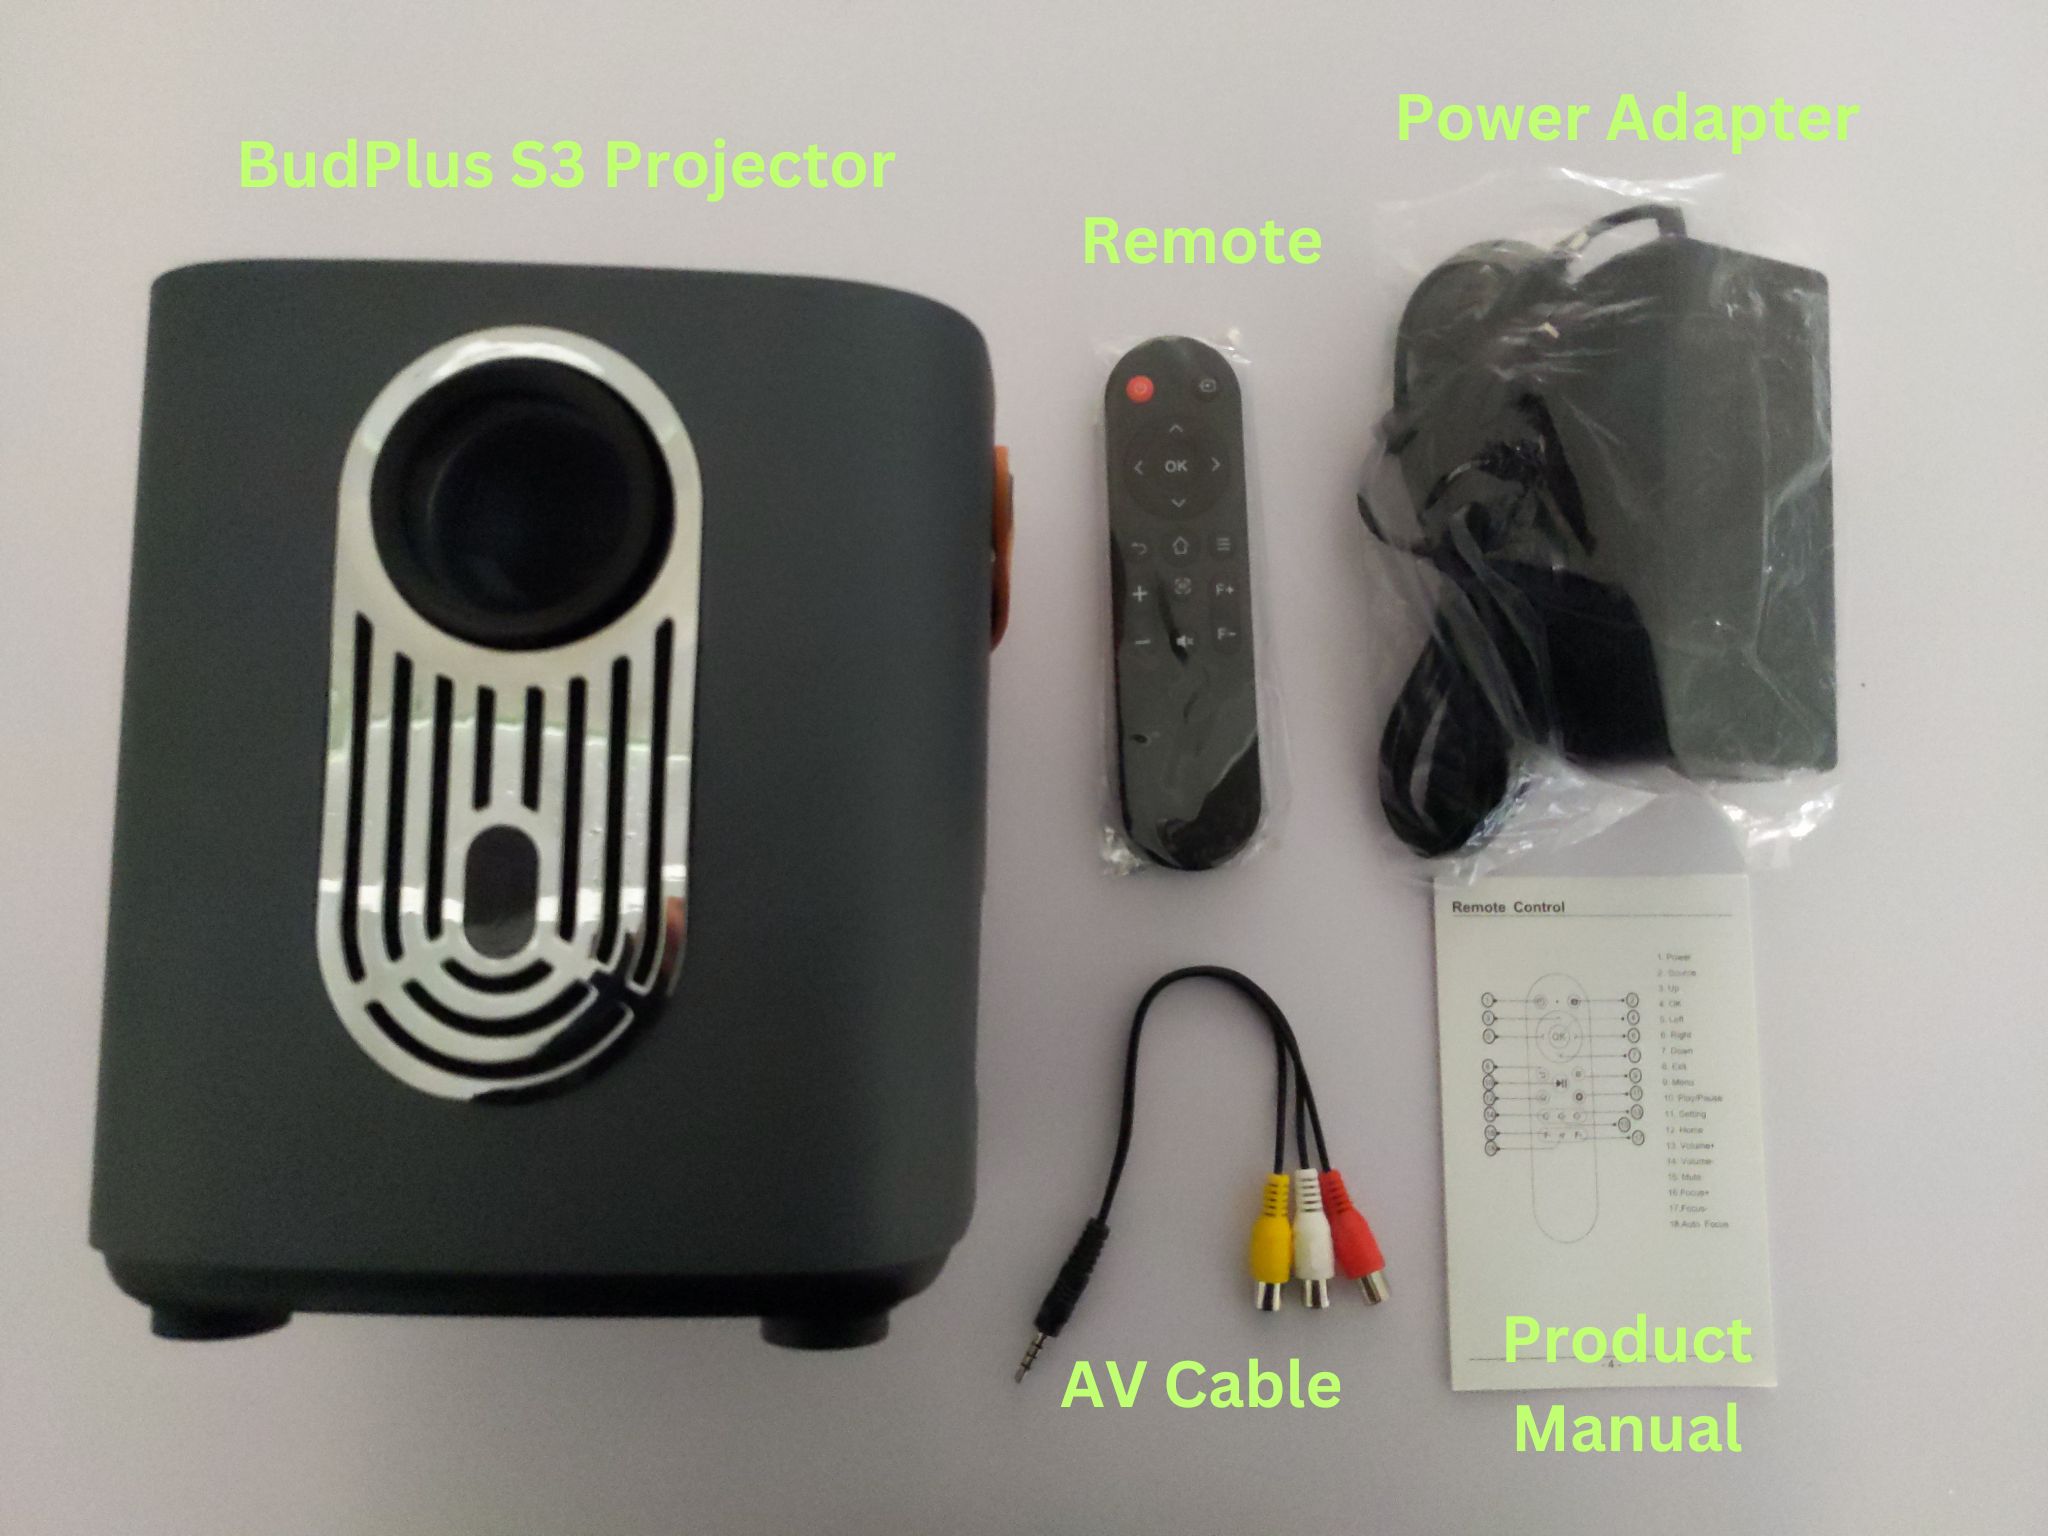
What’s Inside the Box?
When setting up your device, ensure you have all the correct components and accessories. Whilst unboxing, take care to handle the projector with care to avoid any damage.
Inside the box, you should find:
- 1x BudPlus S3 Projector
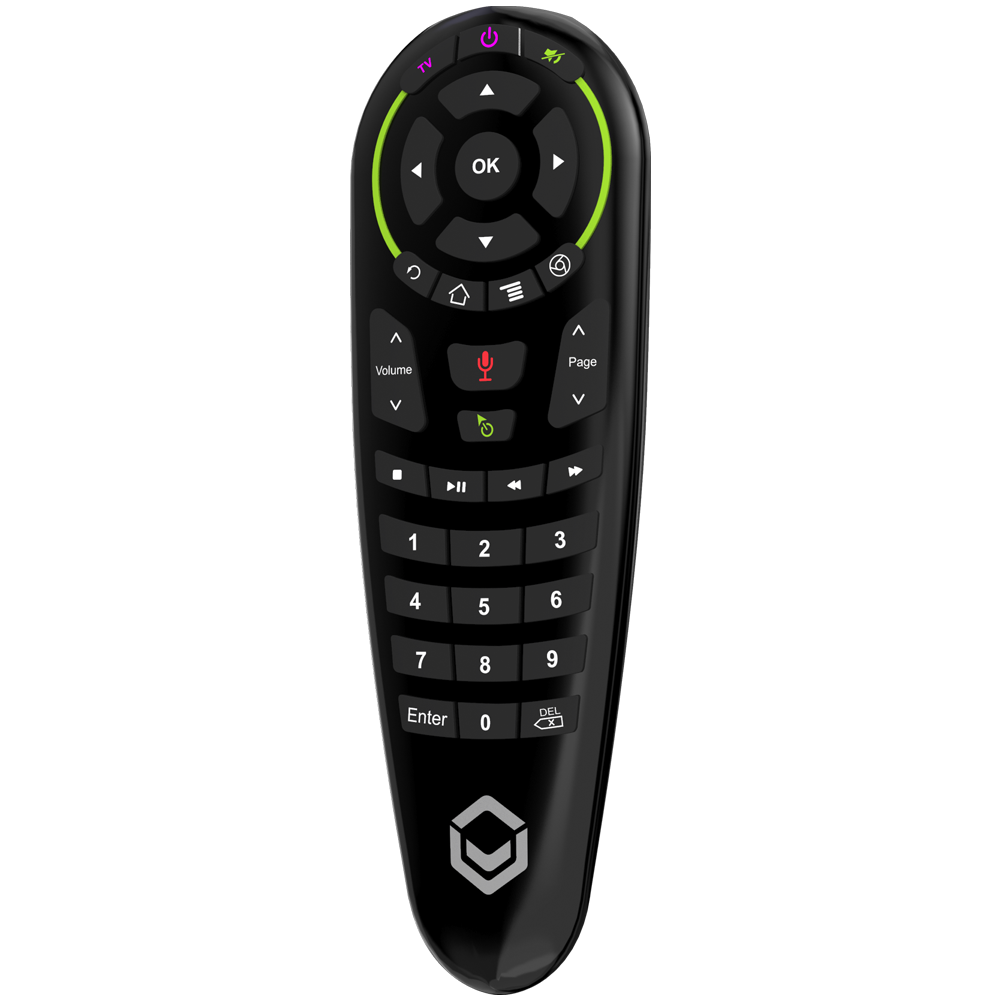
- 1x Remote
- 1x Power Adapter
- 1x AV Cable
- 1x User Manual
What To Do?
Ensure the BudPlus S3 Projector is positioned on a secure, stable surface to maintain focus. Any shifts or bumps may affect the focus, causing the projected image to become distorted. Ideally, the projector distance should be between 1-6 metres. The further your projector, the larger the image – with the BudPlus S3 capable of projecting up to a 60-inch image. Connect the projector to the provided adapter and confirm there’s a stable power supply.
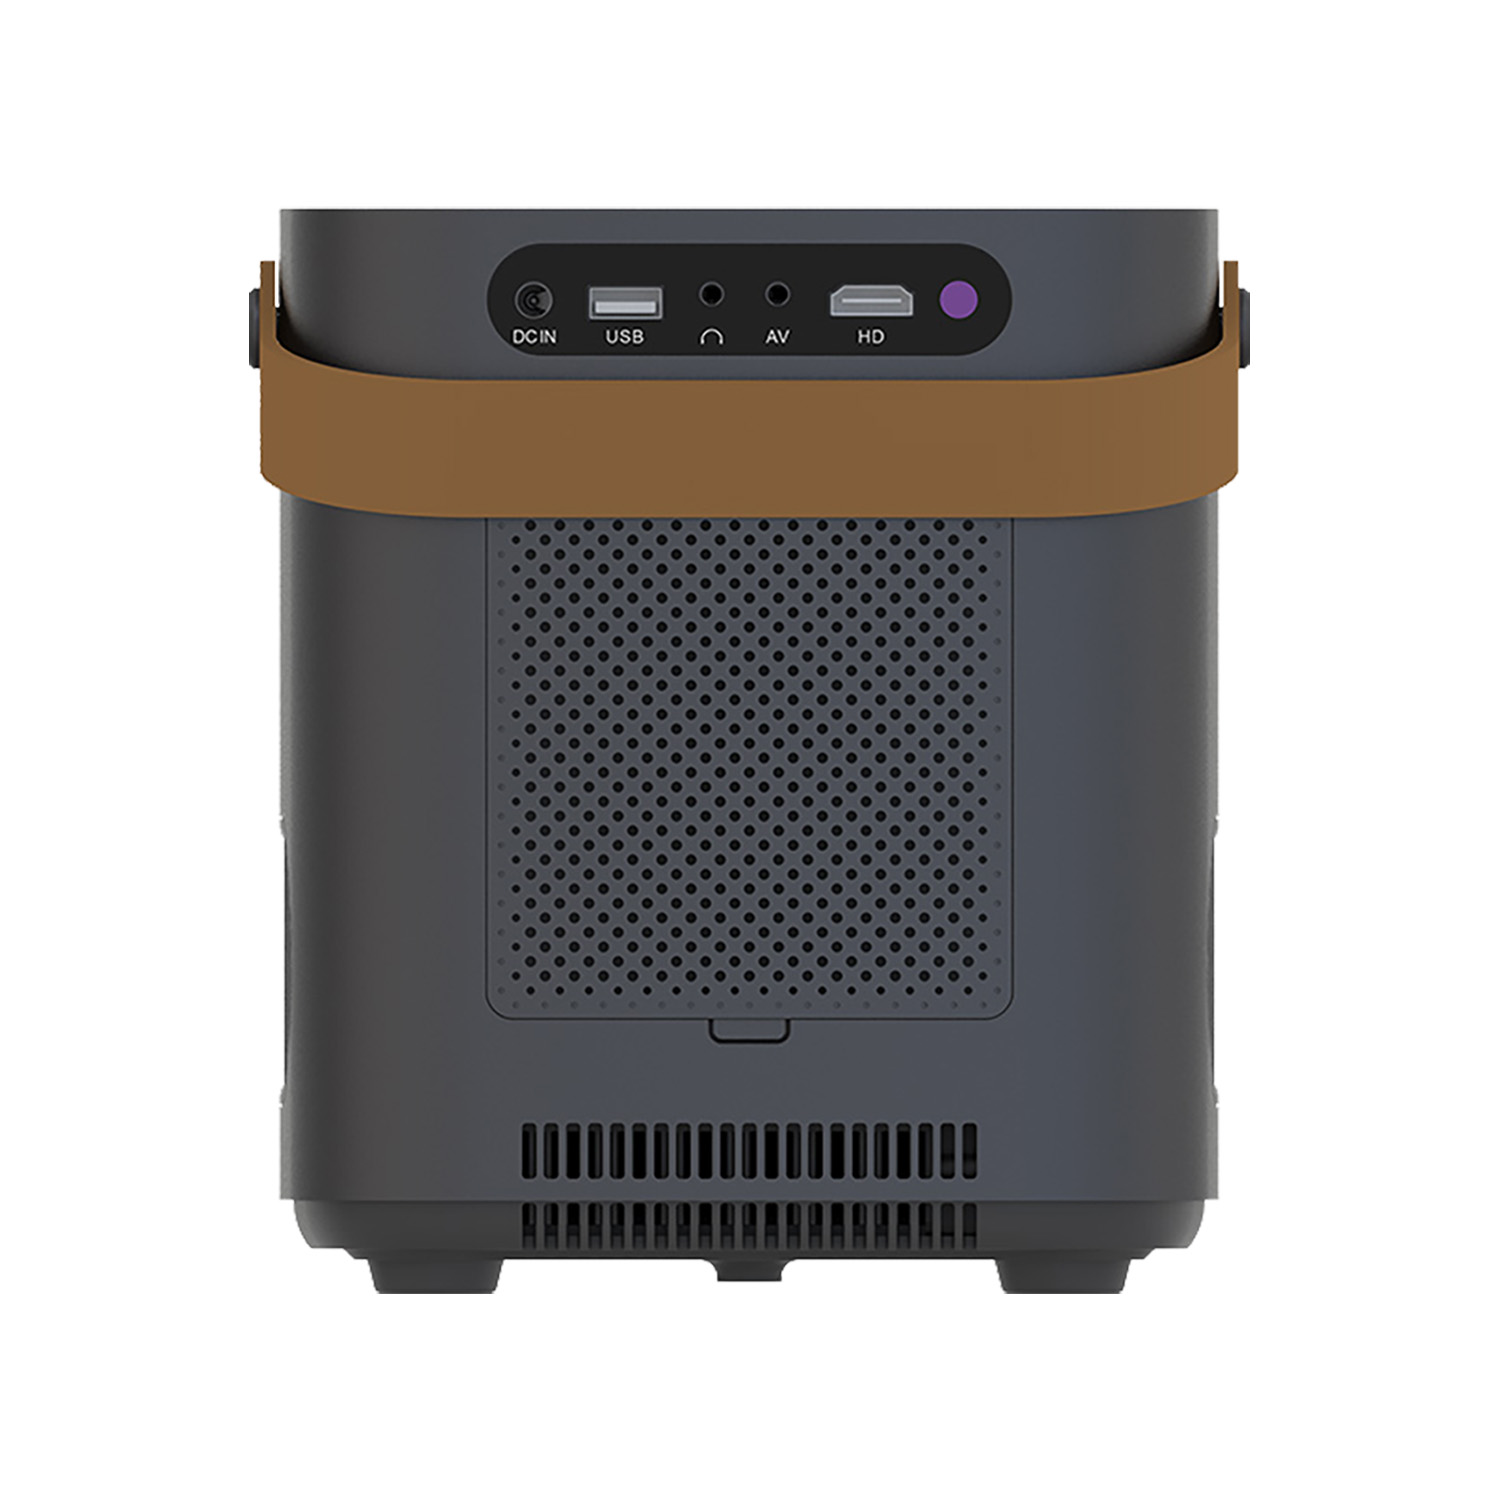
Your BudPlus S3 Projector boasts two built-in JBL-level speakers and is ready to be used out of the box. However, the BudPlus S3 Projector offers multiple ways to connect your devices to the Projector. You can use the HDMI and AV ports for wired connections, or take advantage of the wireless alternatives with Bluetooth 5.0 and dual-band Wi-Fi 6 connectivity. We’ll dive deeper into these topics later.
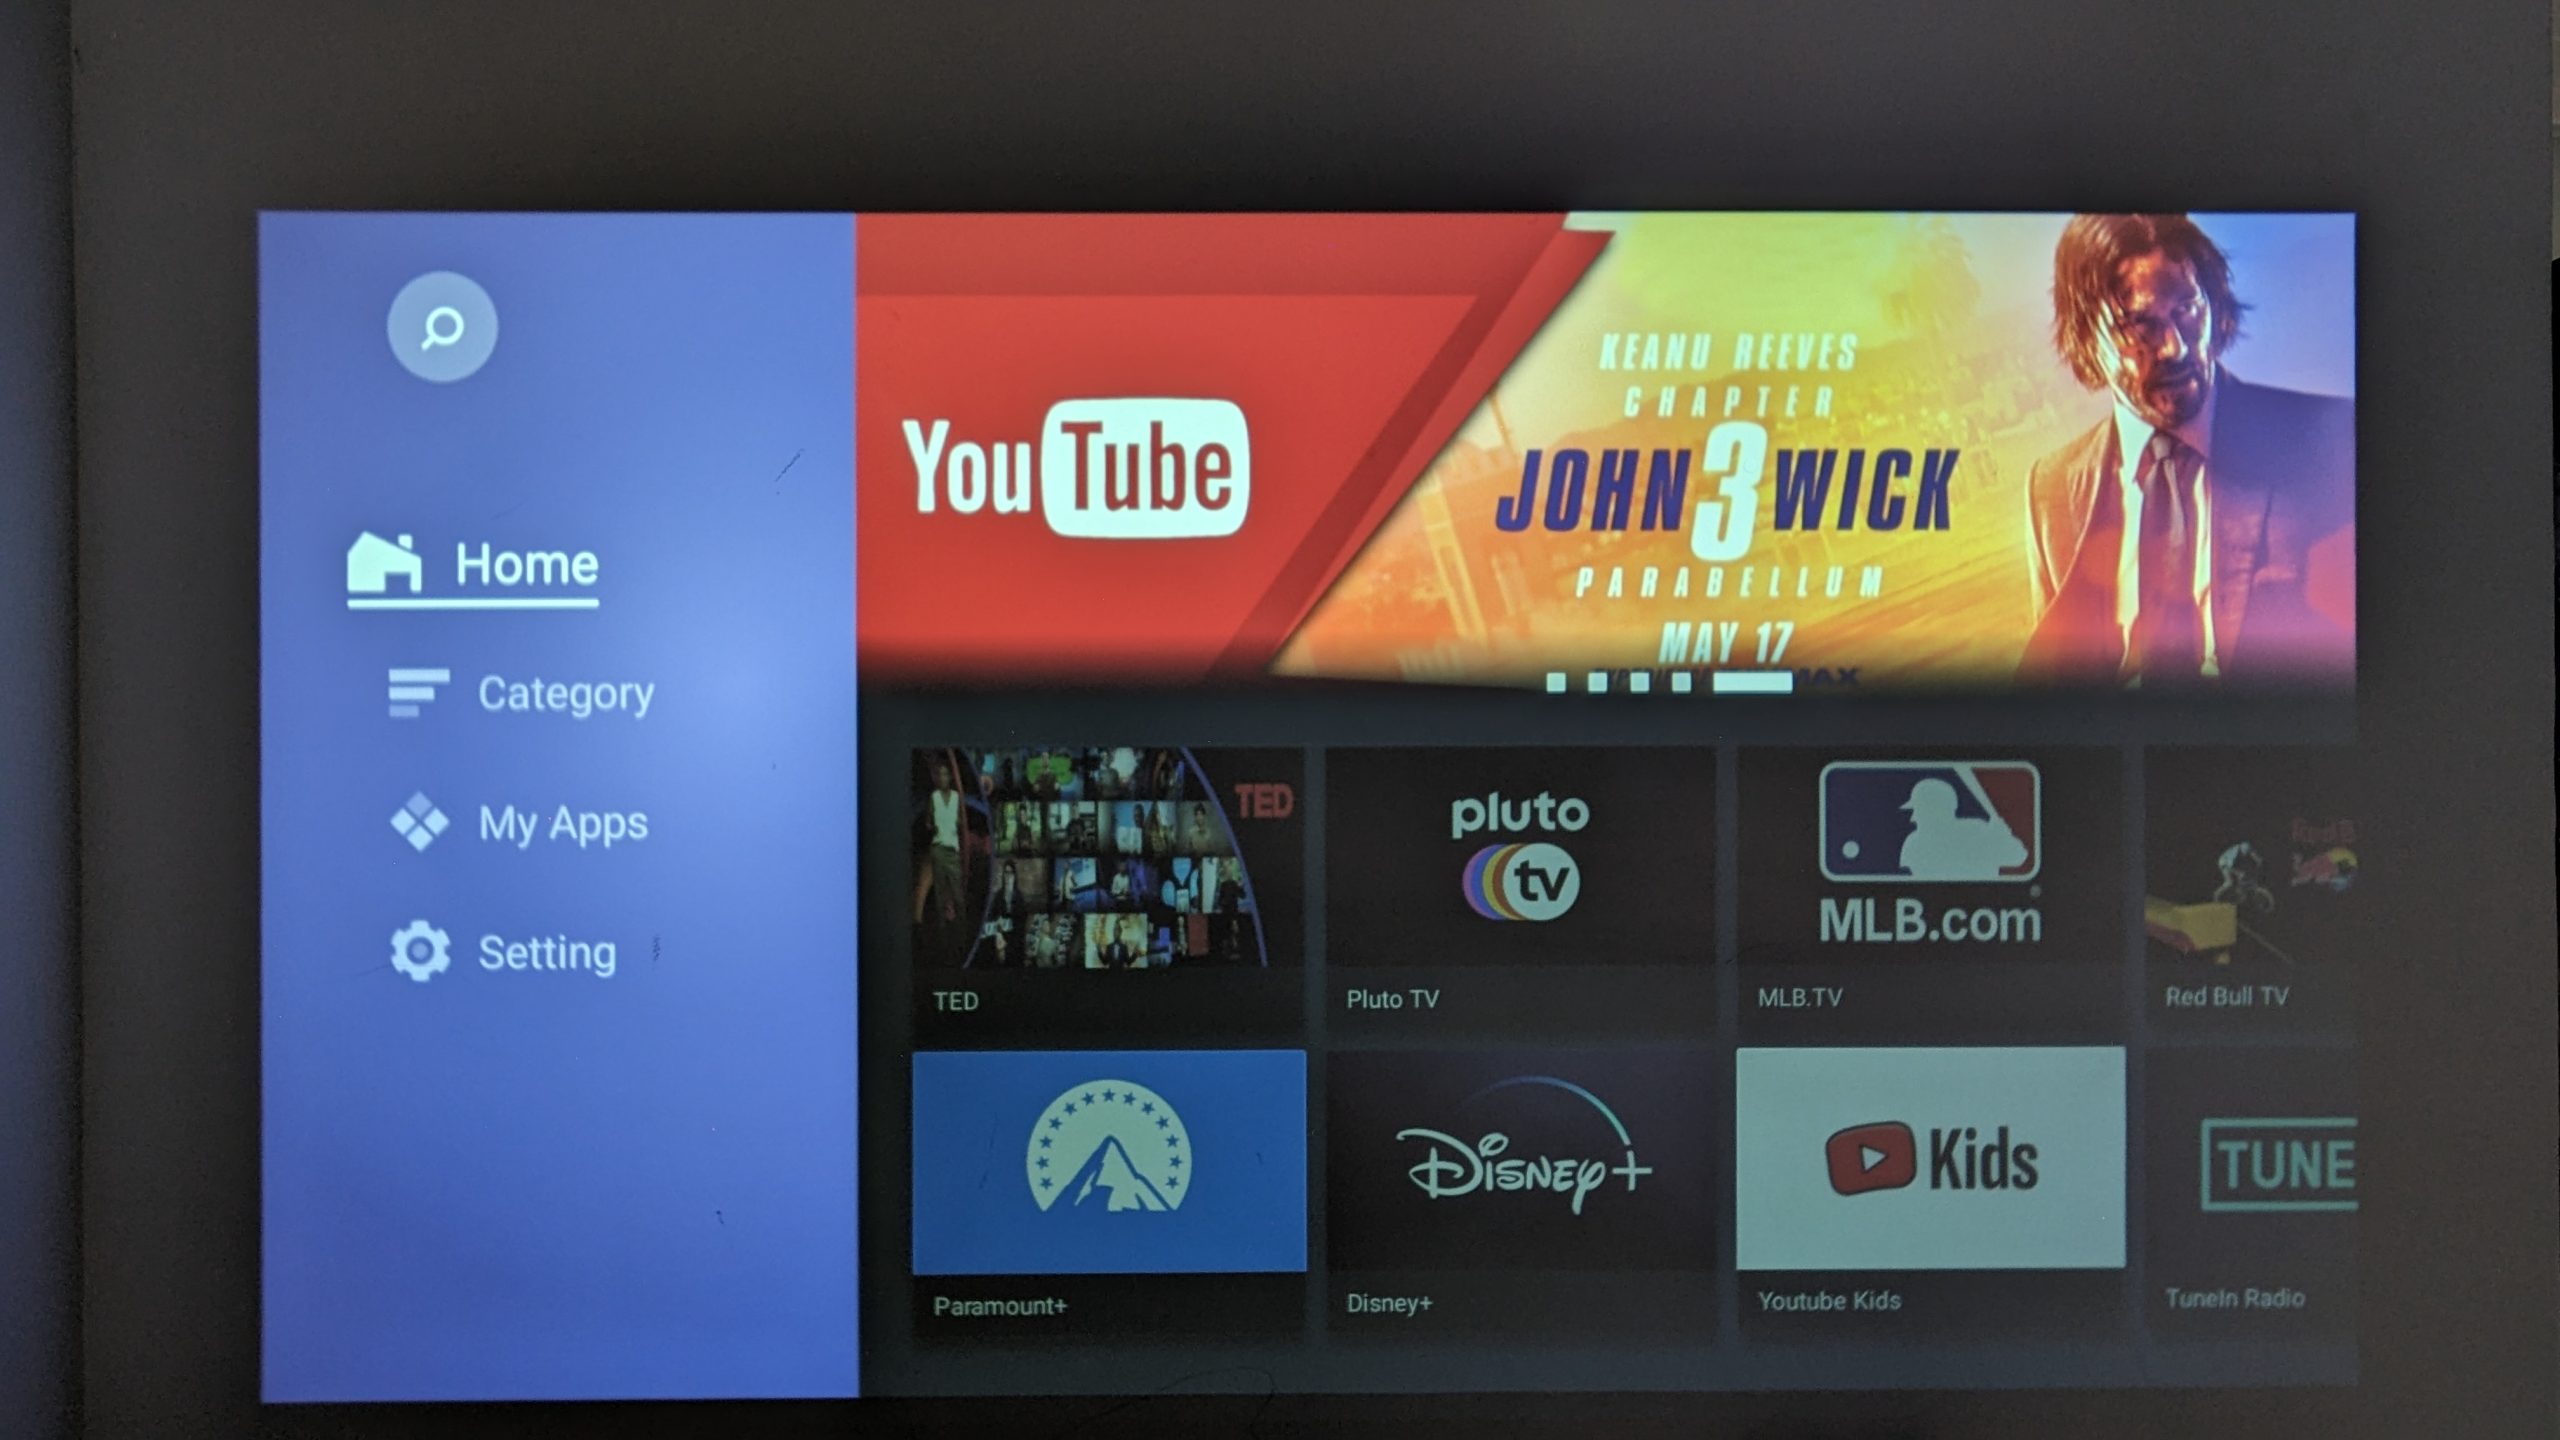
BudPlus S3 Settings
After the hardware setup, ensure your BudPlus S3 Projector has the appropriate settings and software updates for a smooth experience and easy application installation. When setting up your device or launching an app, you may need to accept its requirements or policies.
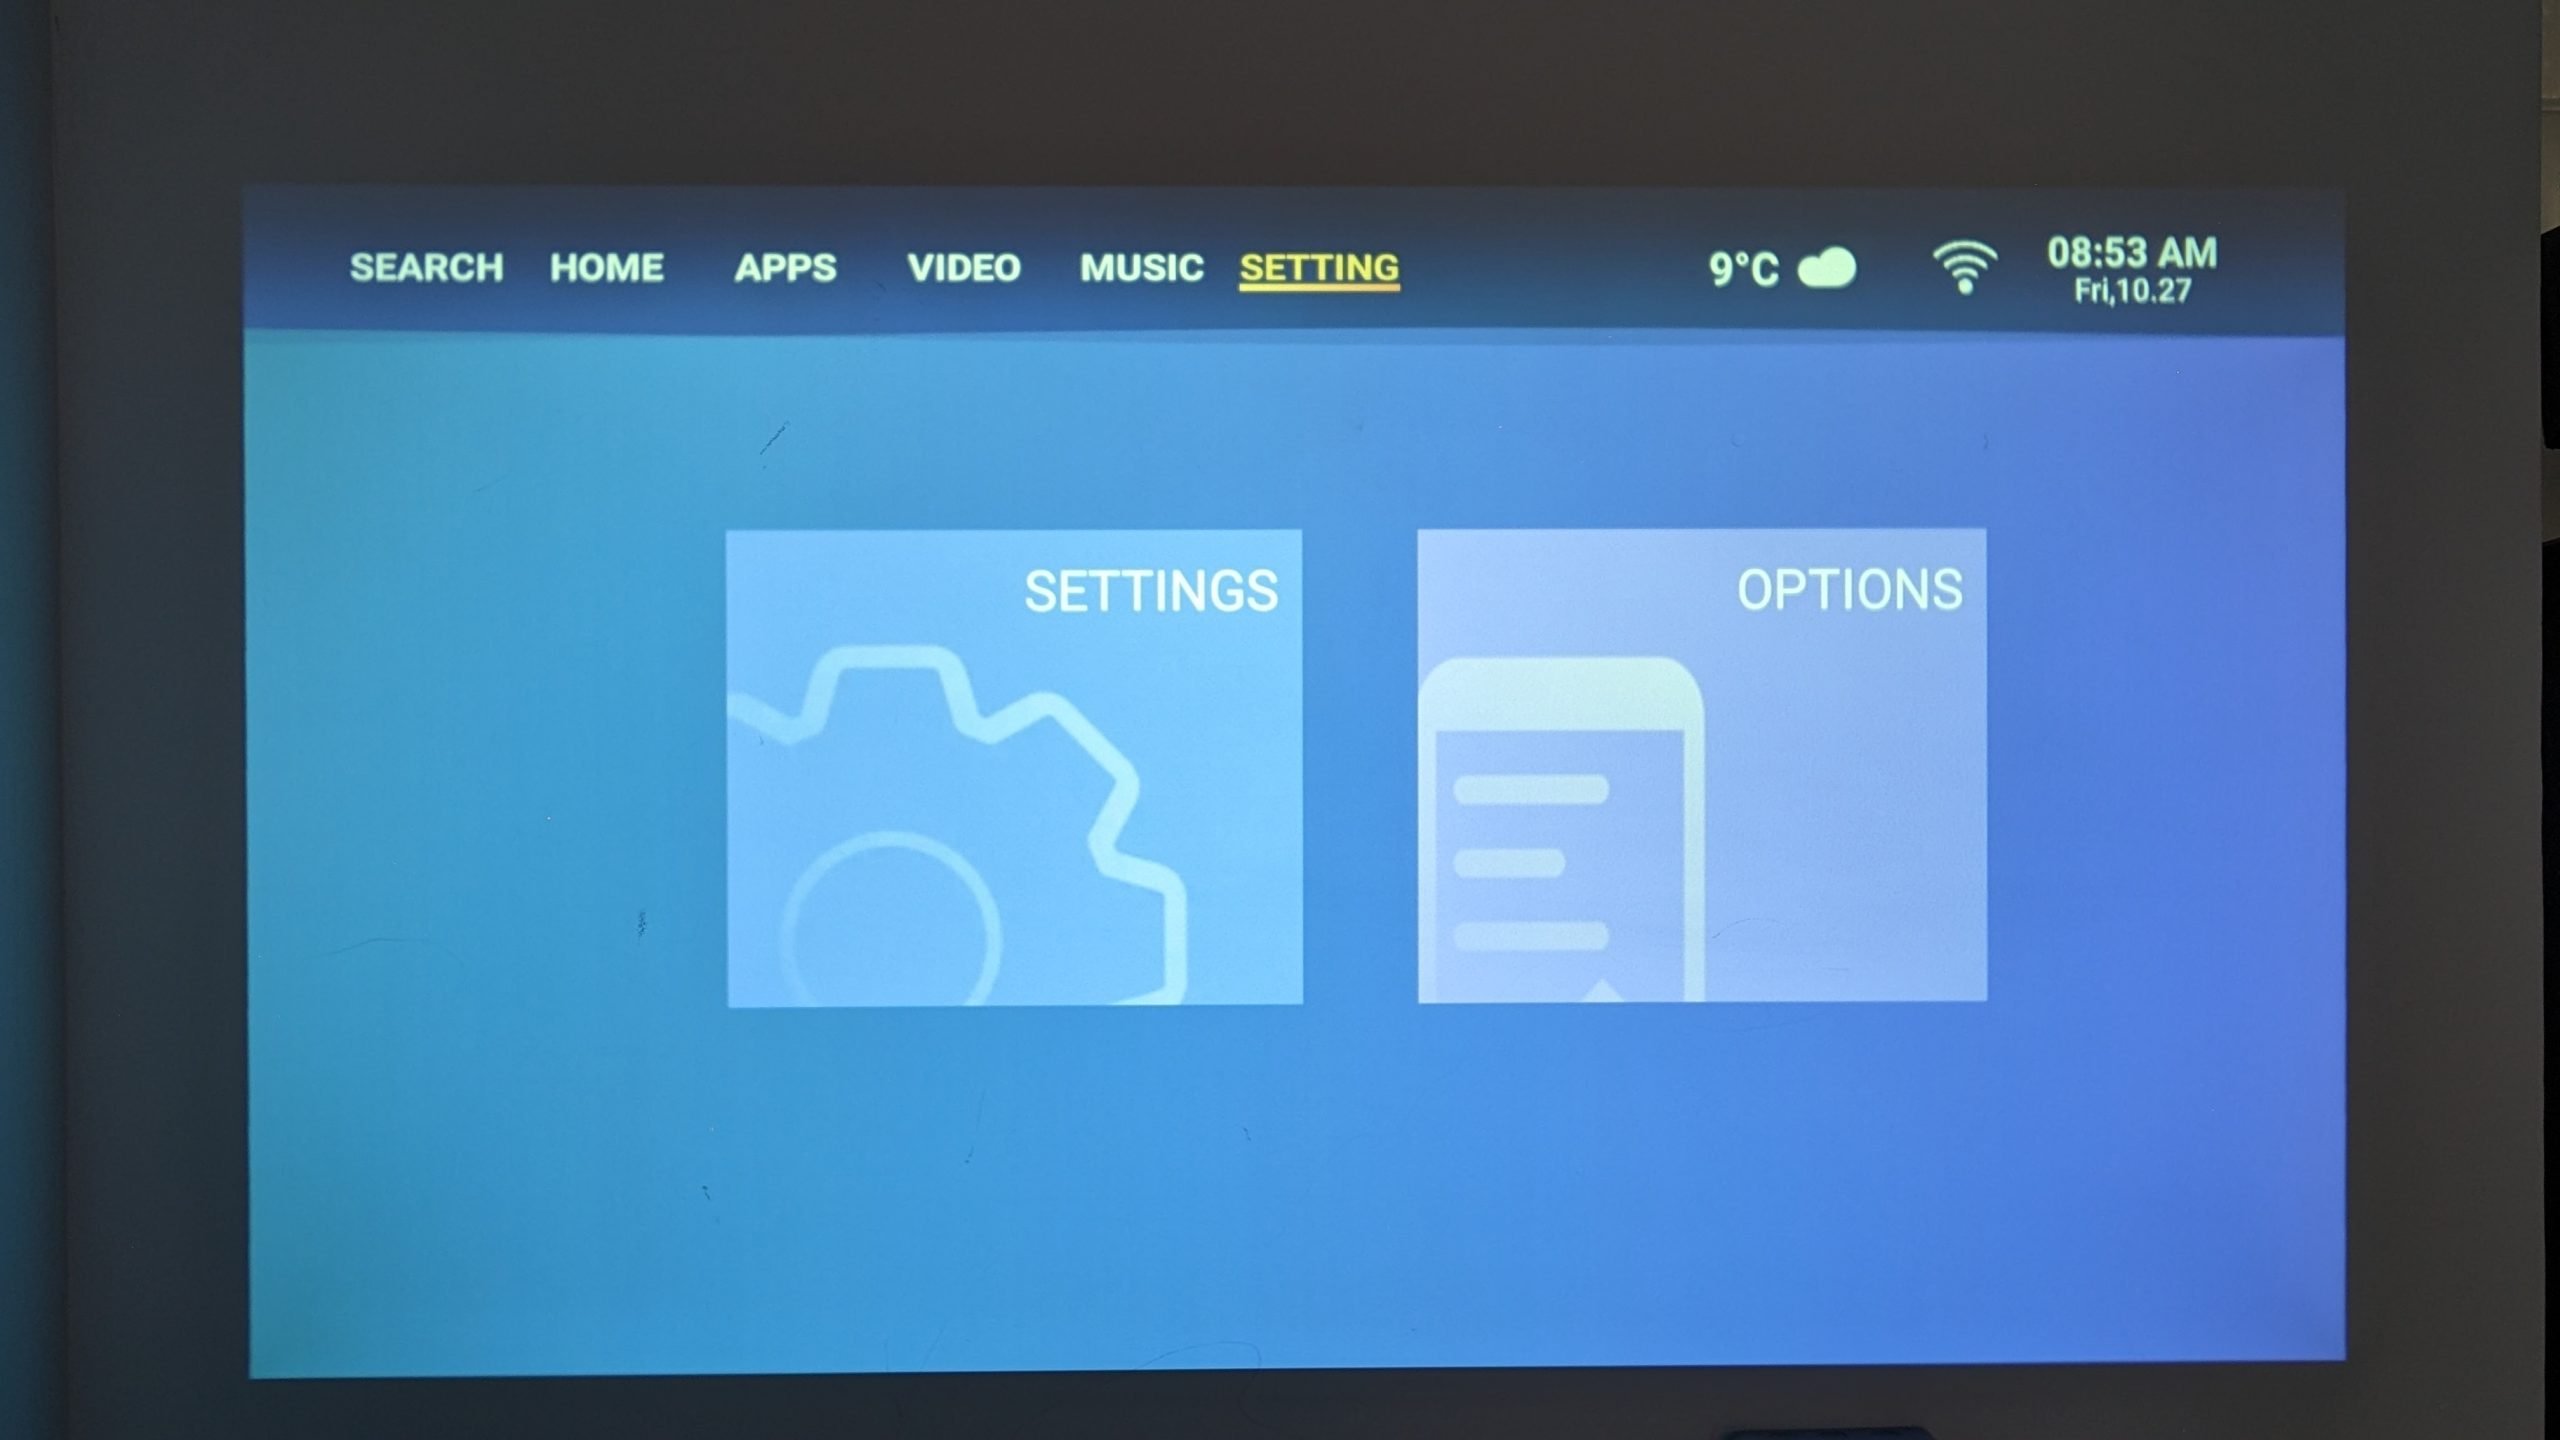
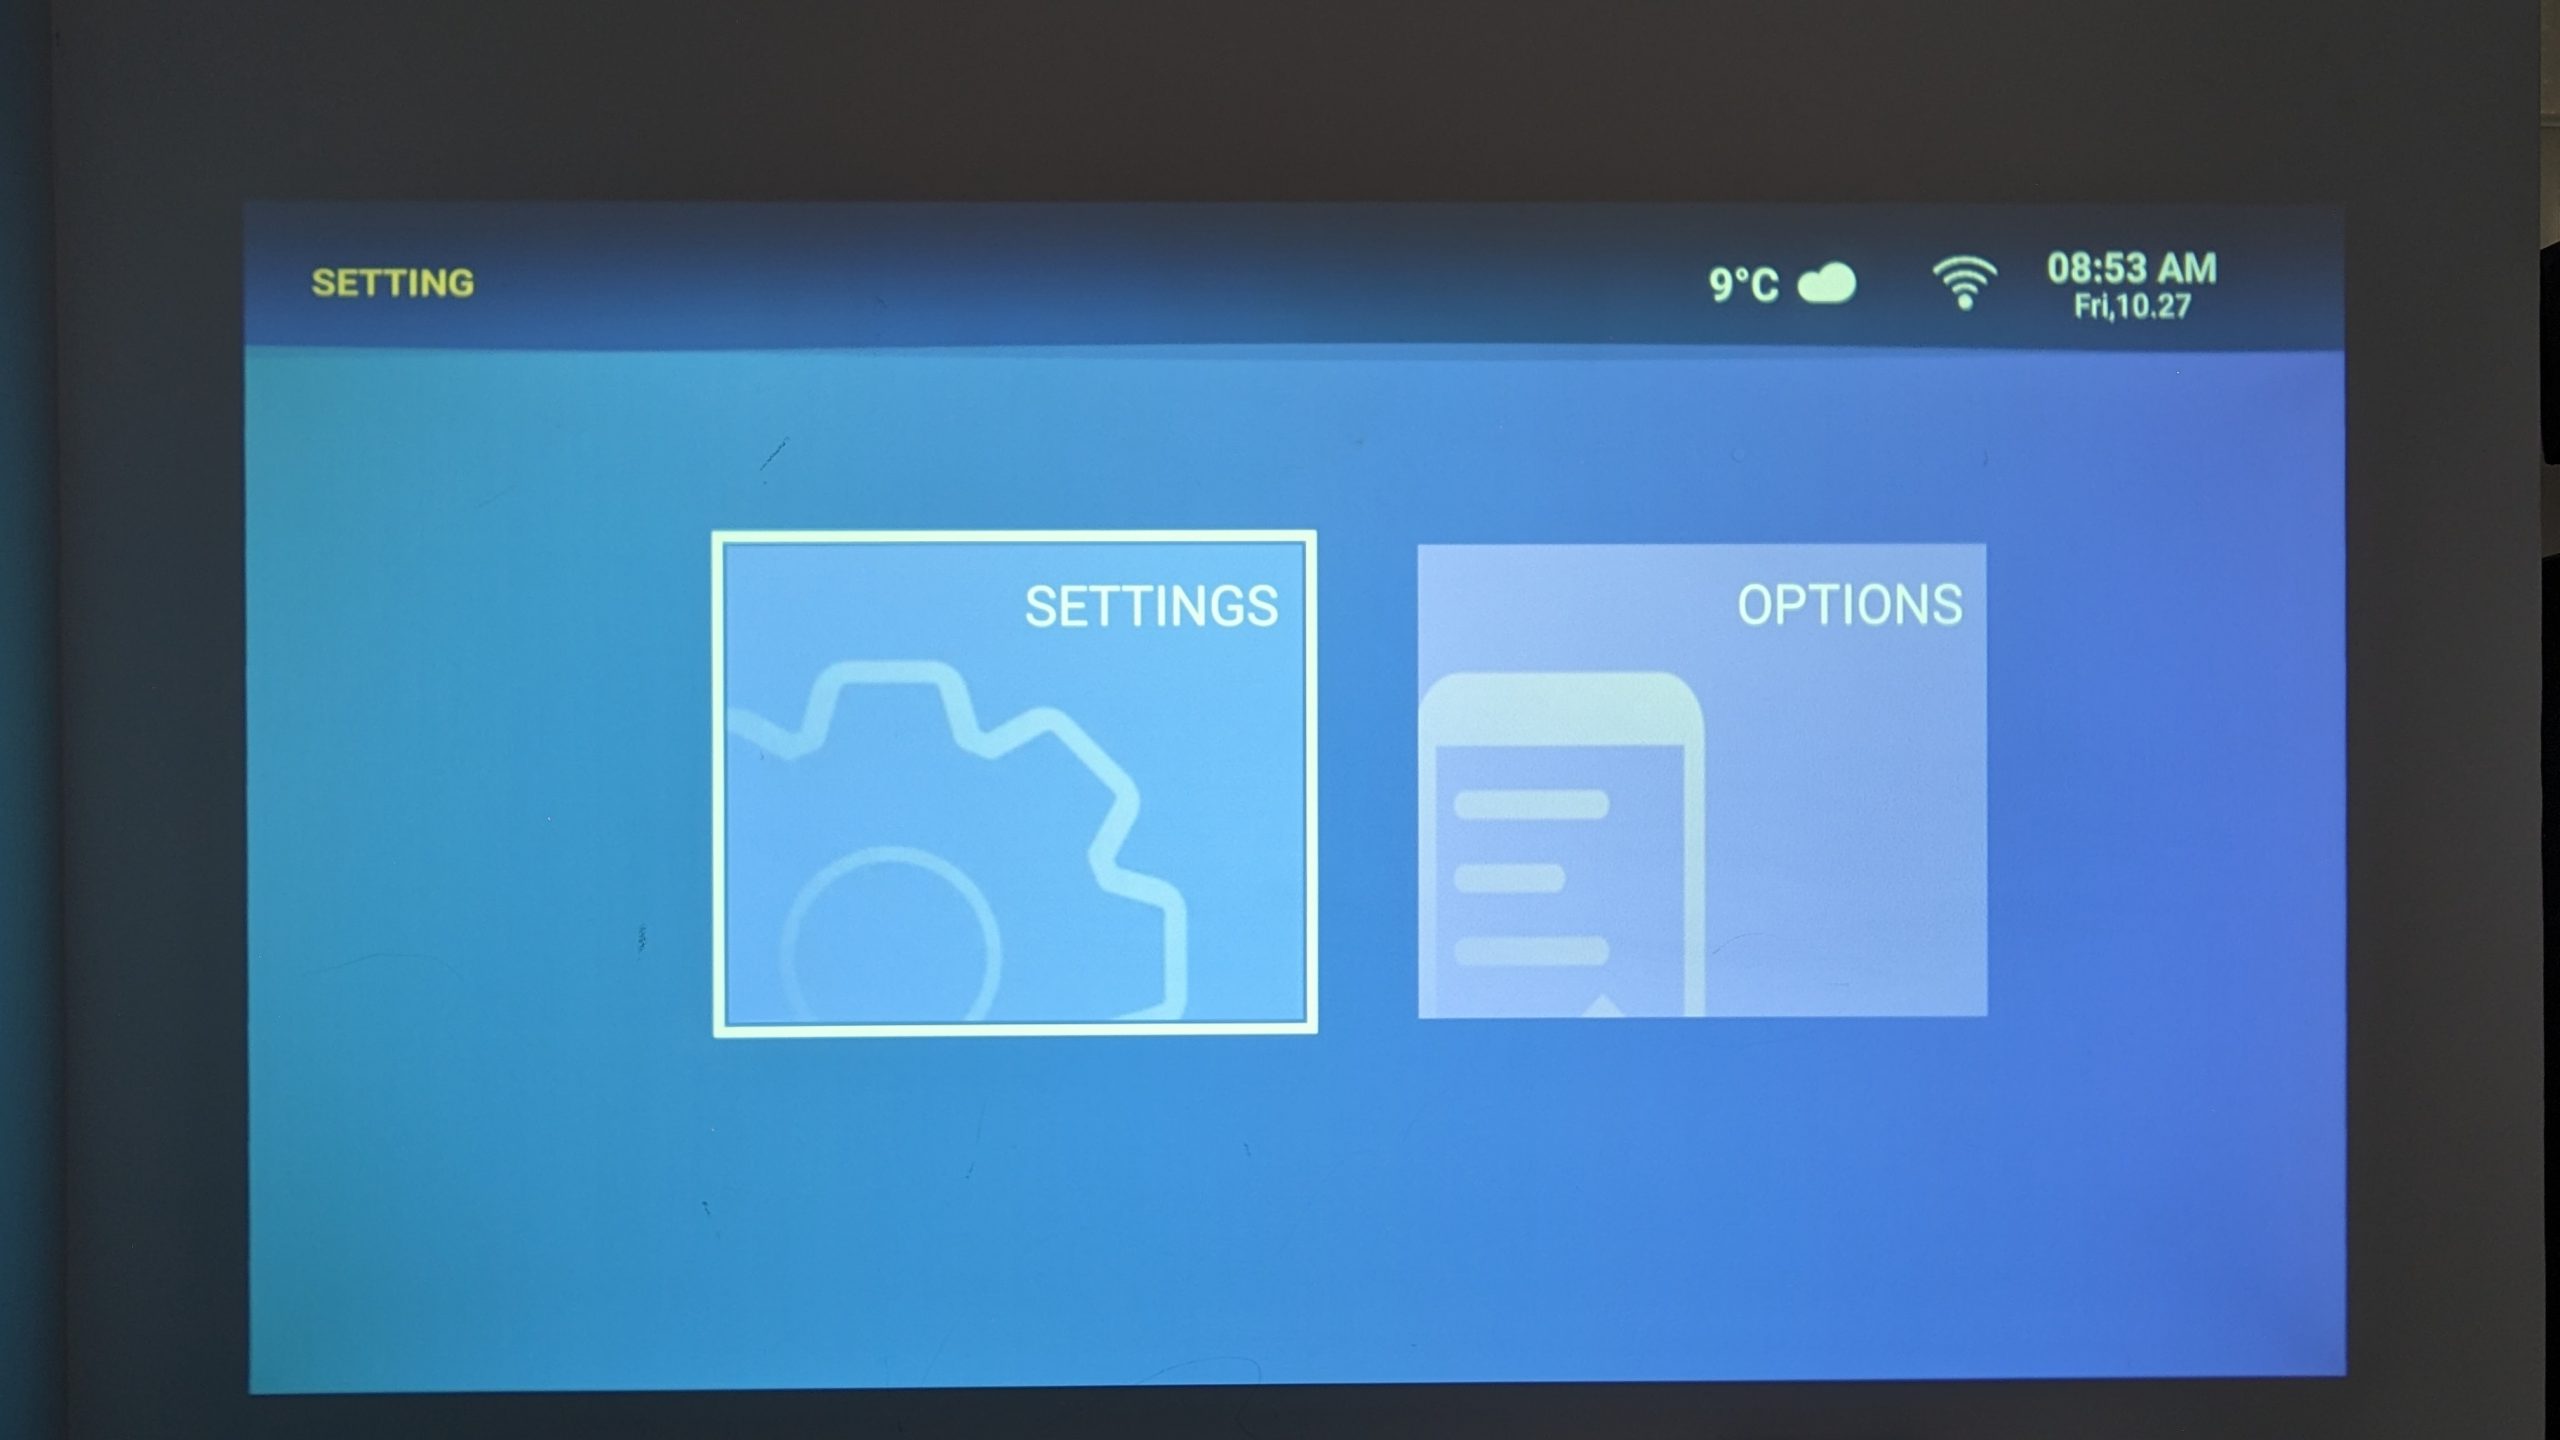
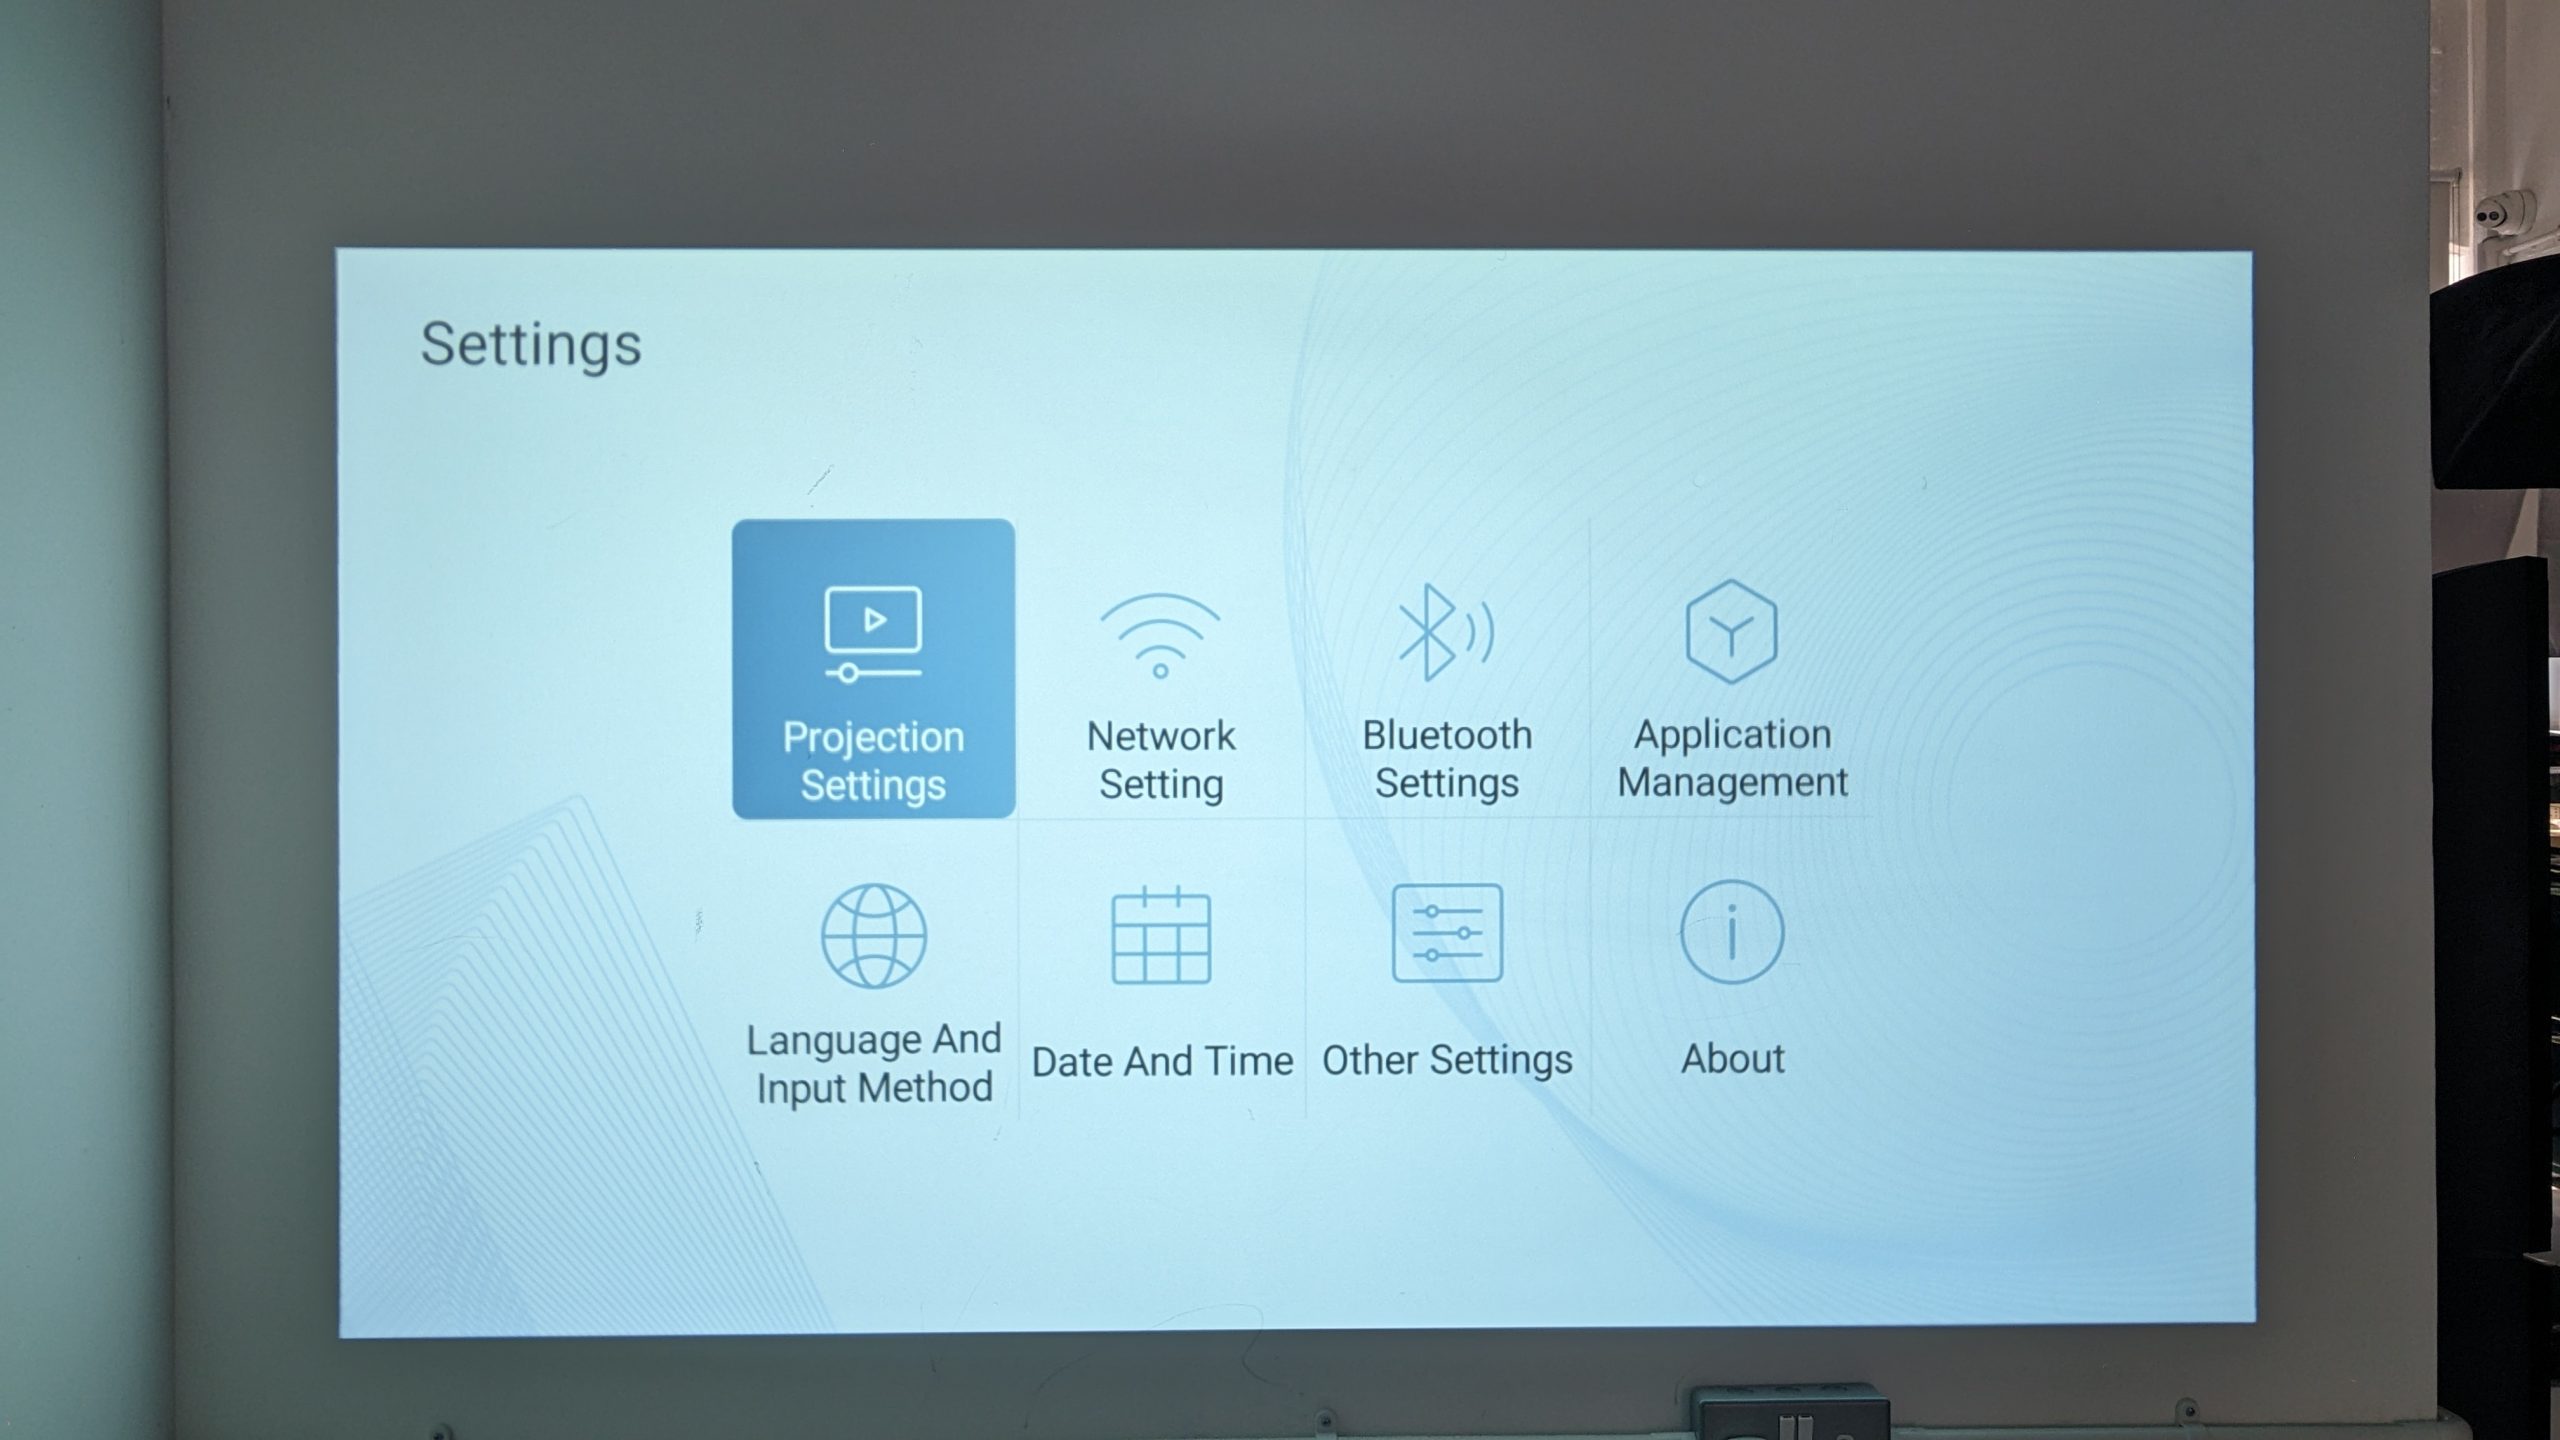
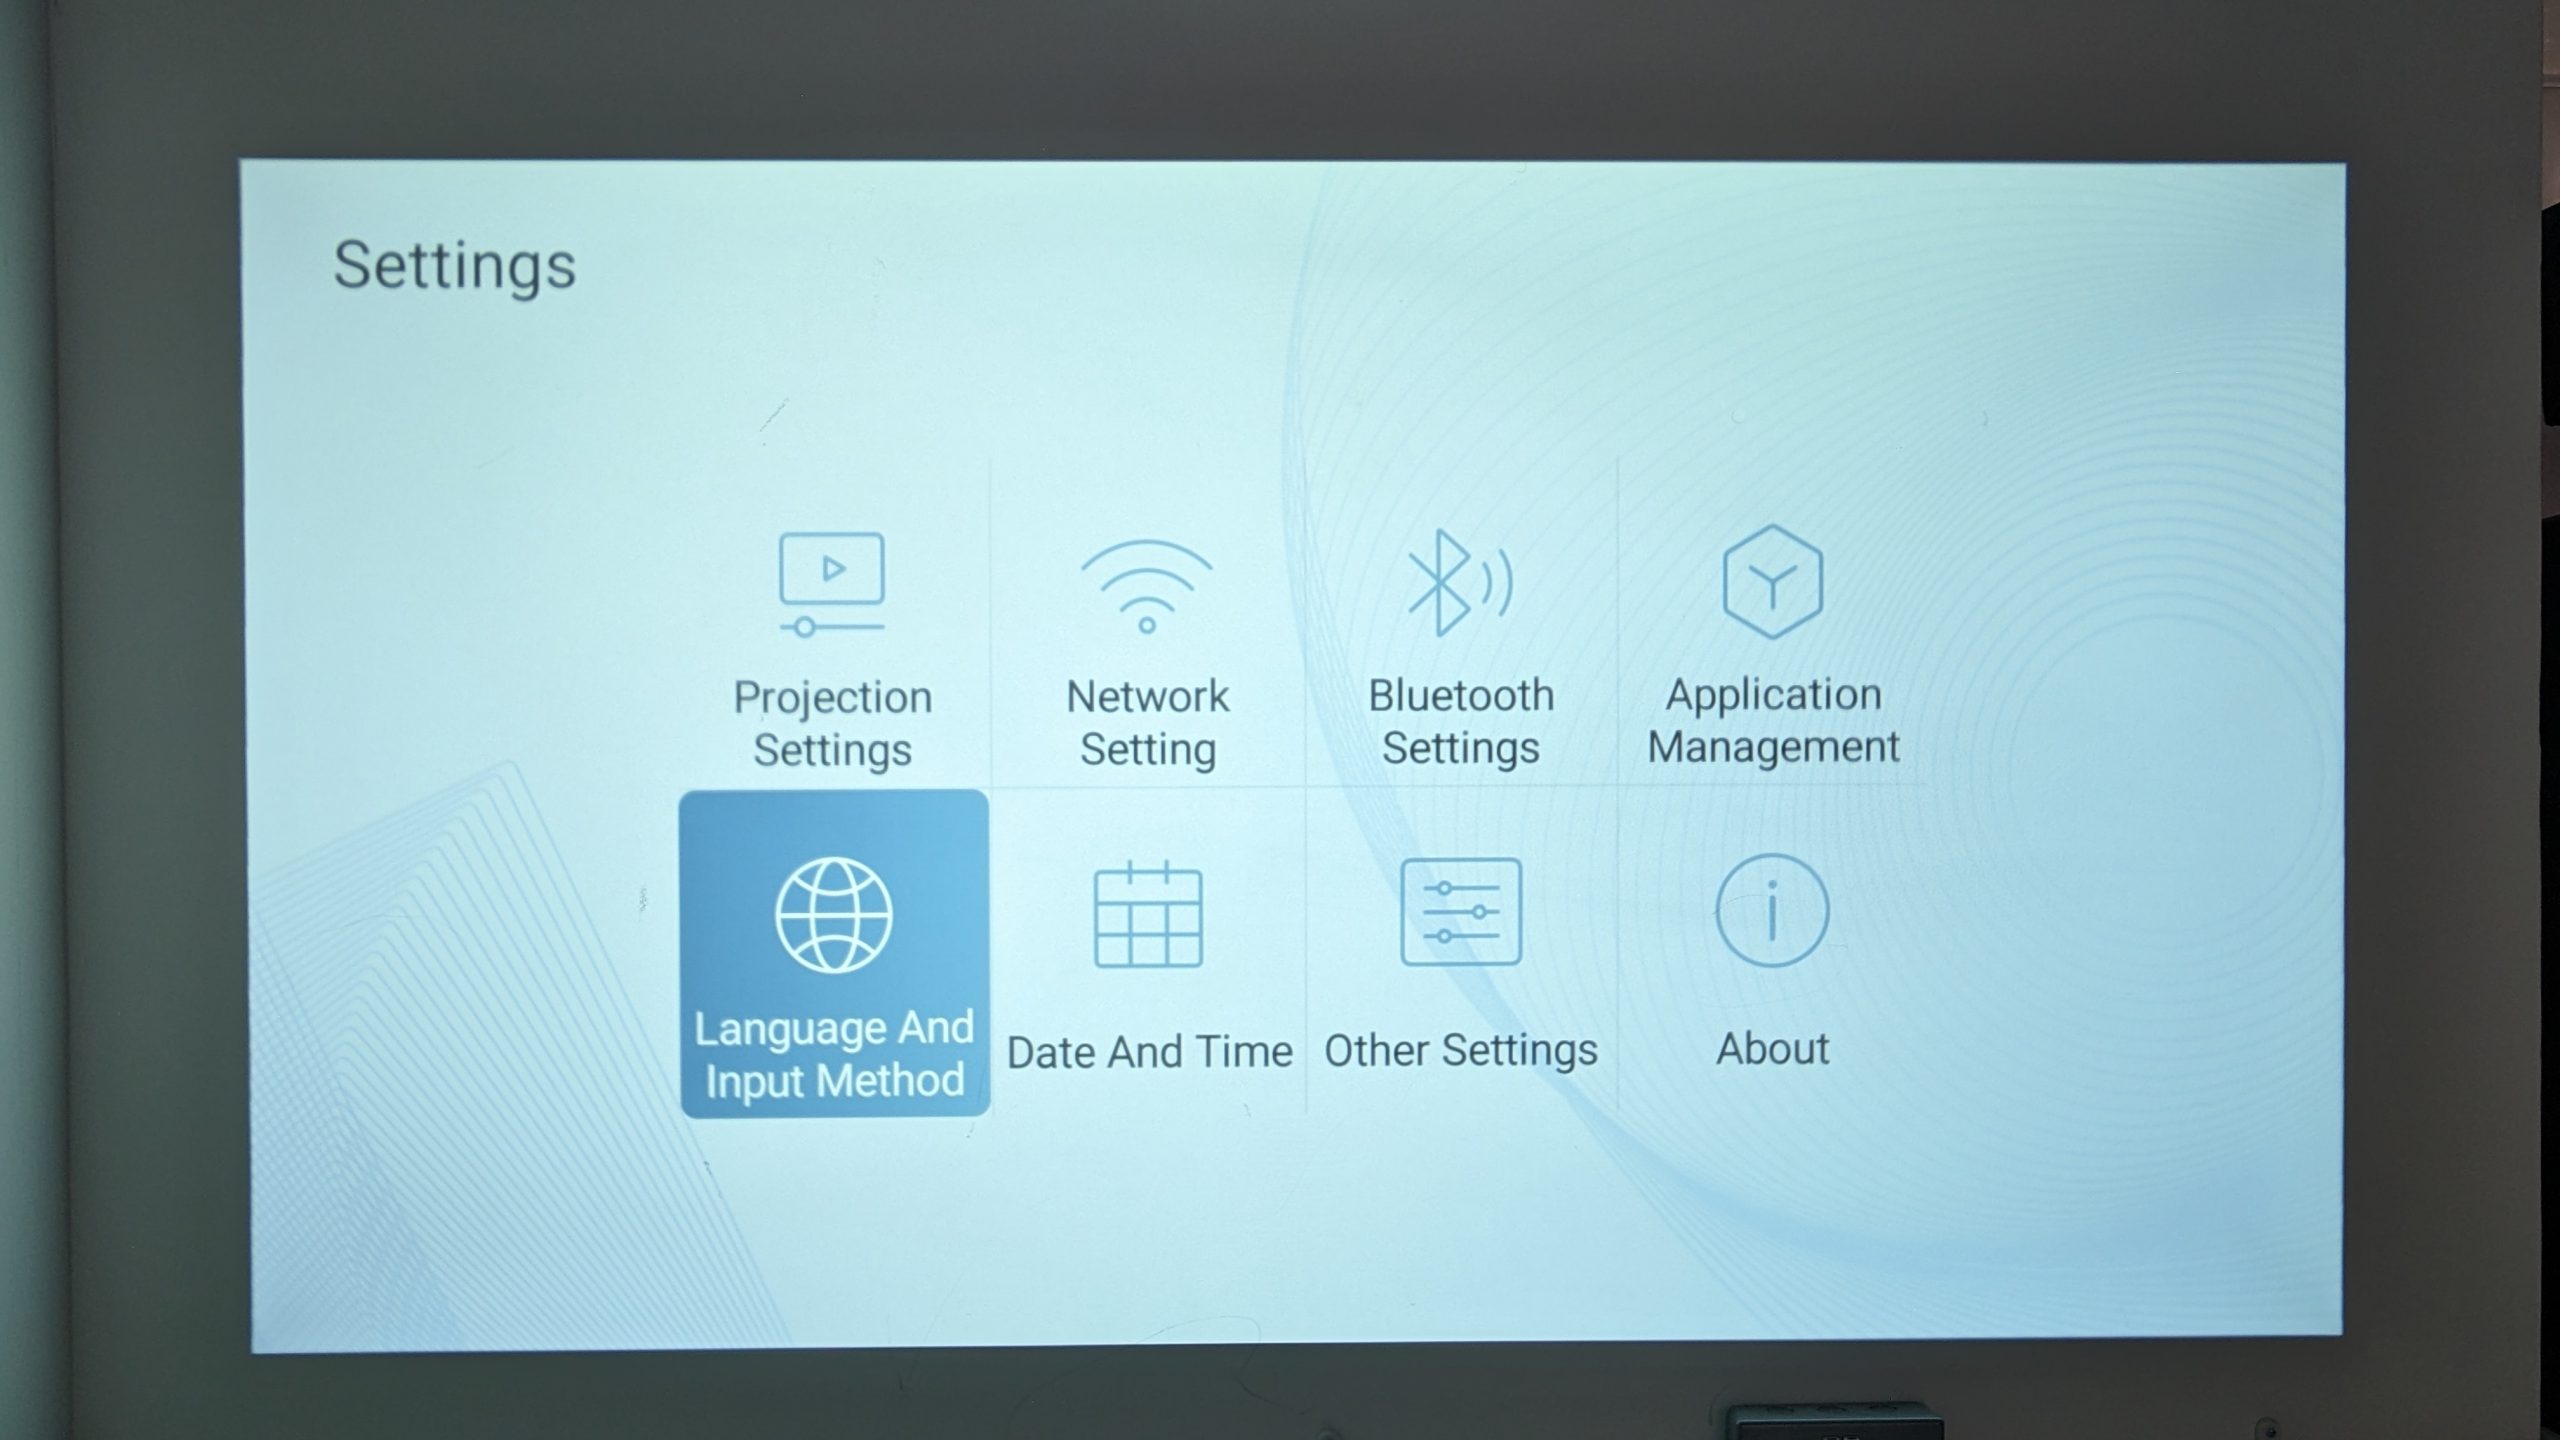
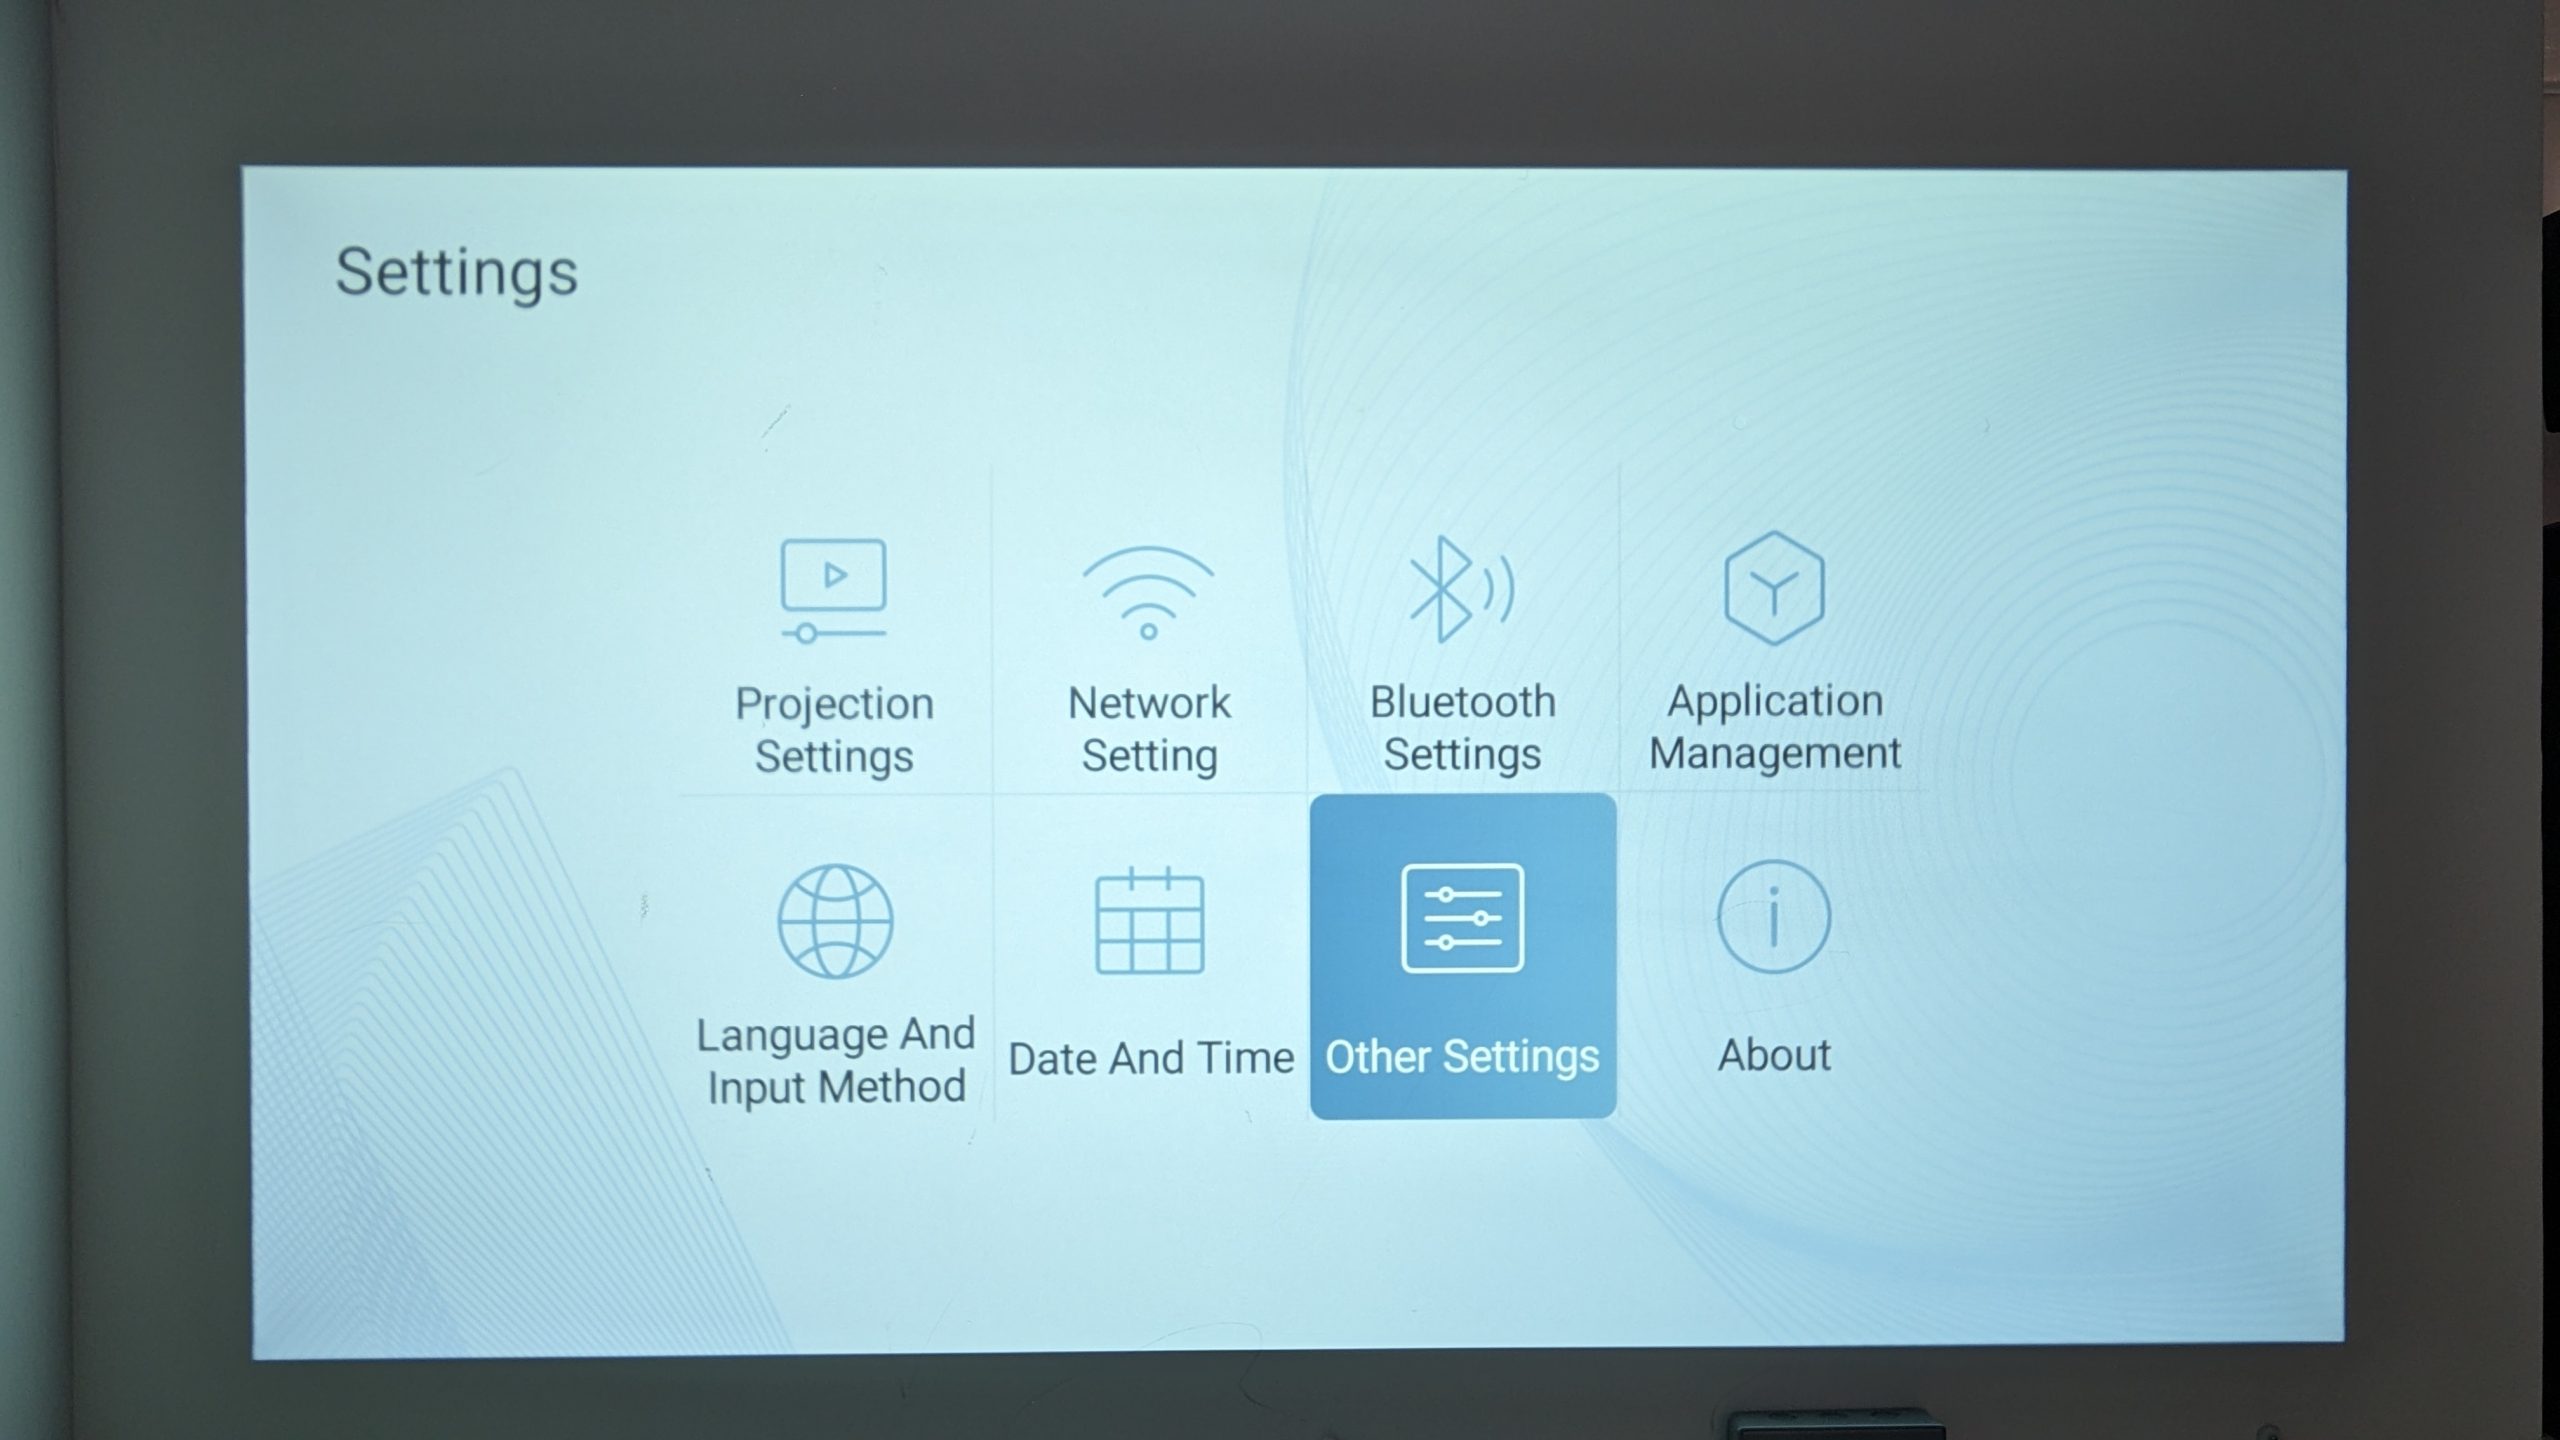
Access Settings Menu
To access the BudPlus S3 Proejector’s Settings menu:
- Go to the Settings tab.
- Select Settings.
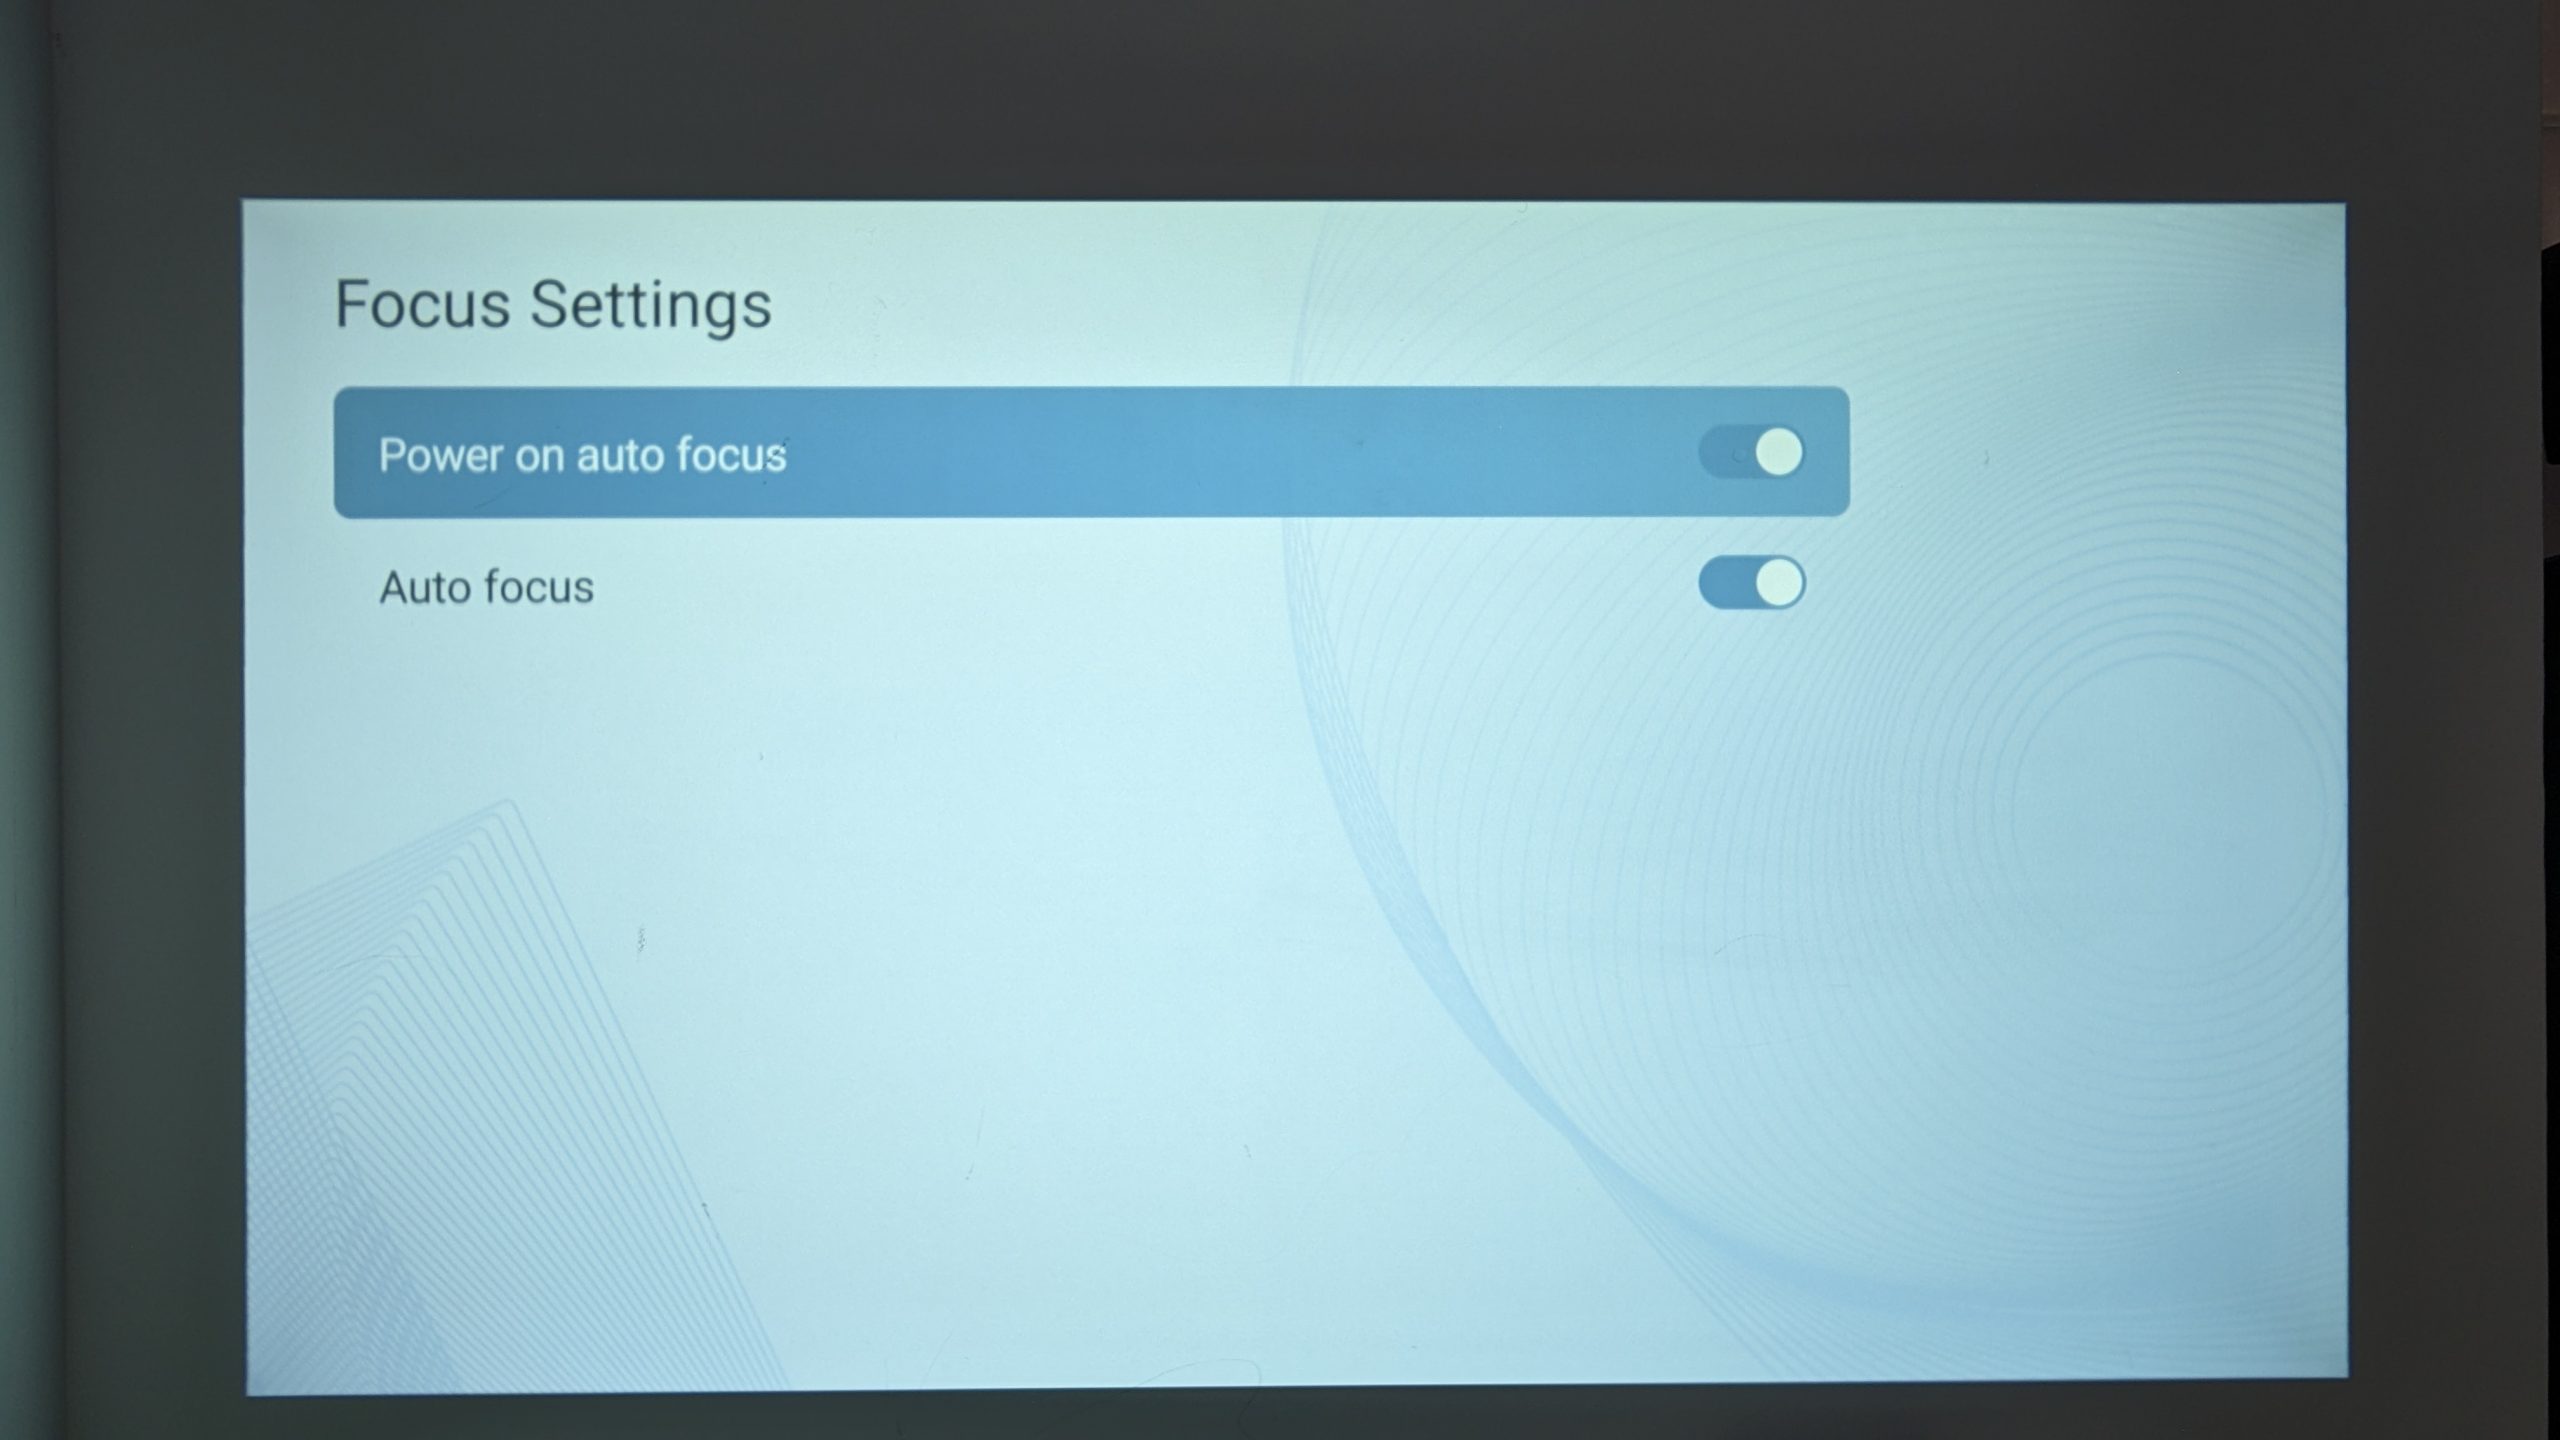
Focus Adjustment
Auto Focus
If your projected image looks blurry or unclear, the BudPlus S3’s focus may be off. We recommend you turn on autofocus and autofocus on startup. Doing this will attempt to automatically readjust and recalibrate the focus to improve image clarity and sharpness. This will occur not only when you boot your device up, but also any time the projector recognises a significant change in position.
To turn on Auto Focus:
- Go to the Settings tab.
- Select Settings.
- Go to Projection Settings.
- Go to Focus Settings.
- Turn on Power on Auto Focus.
- Turn on Auto Focus.

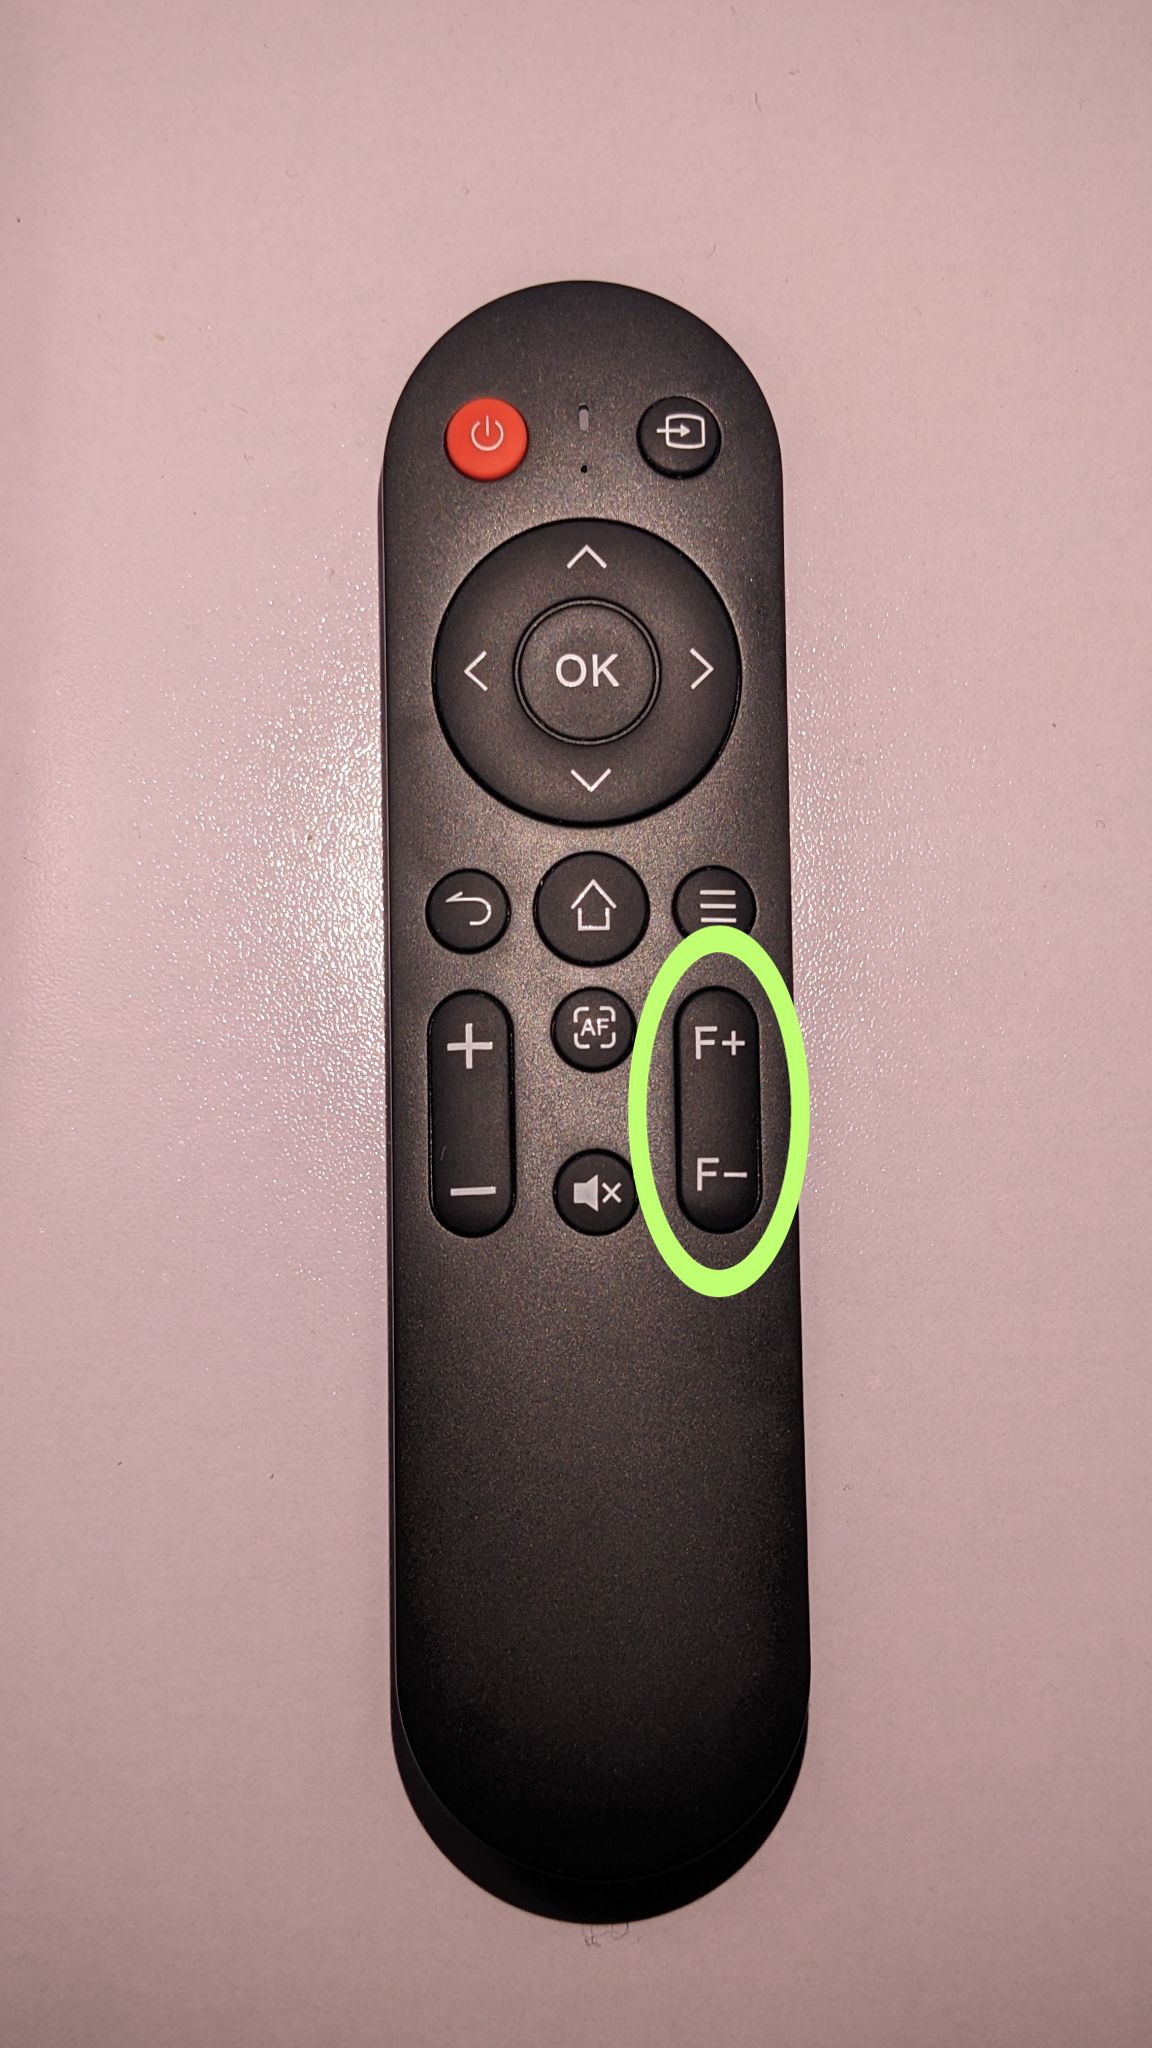
Manual Focus
In the case where the projector doesn’t automatically recognise the projected image is blurry, you can focus the device in two different ways:
- Using the autofocus button on the remote.
- Manually adjusting the image focus on the remote.

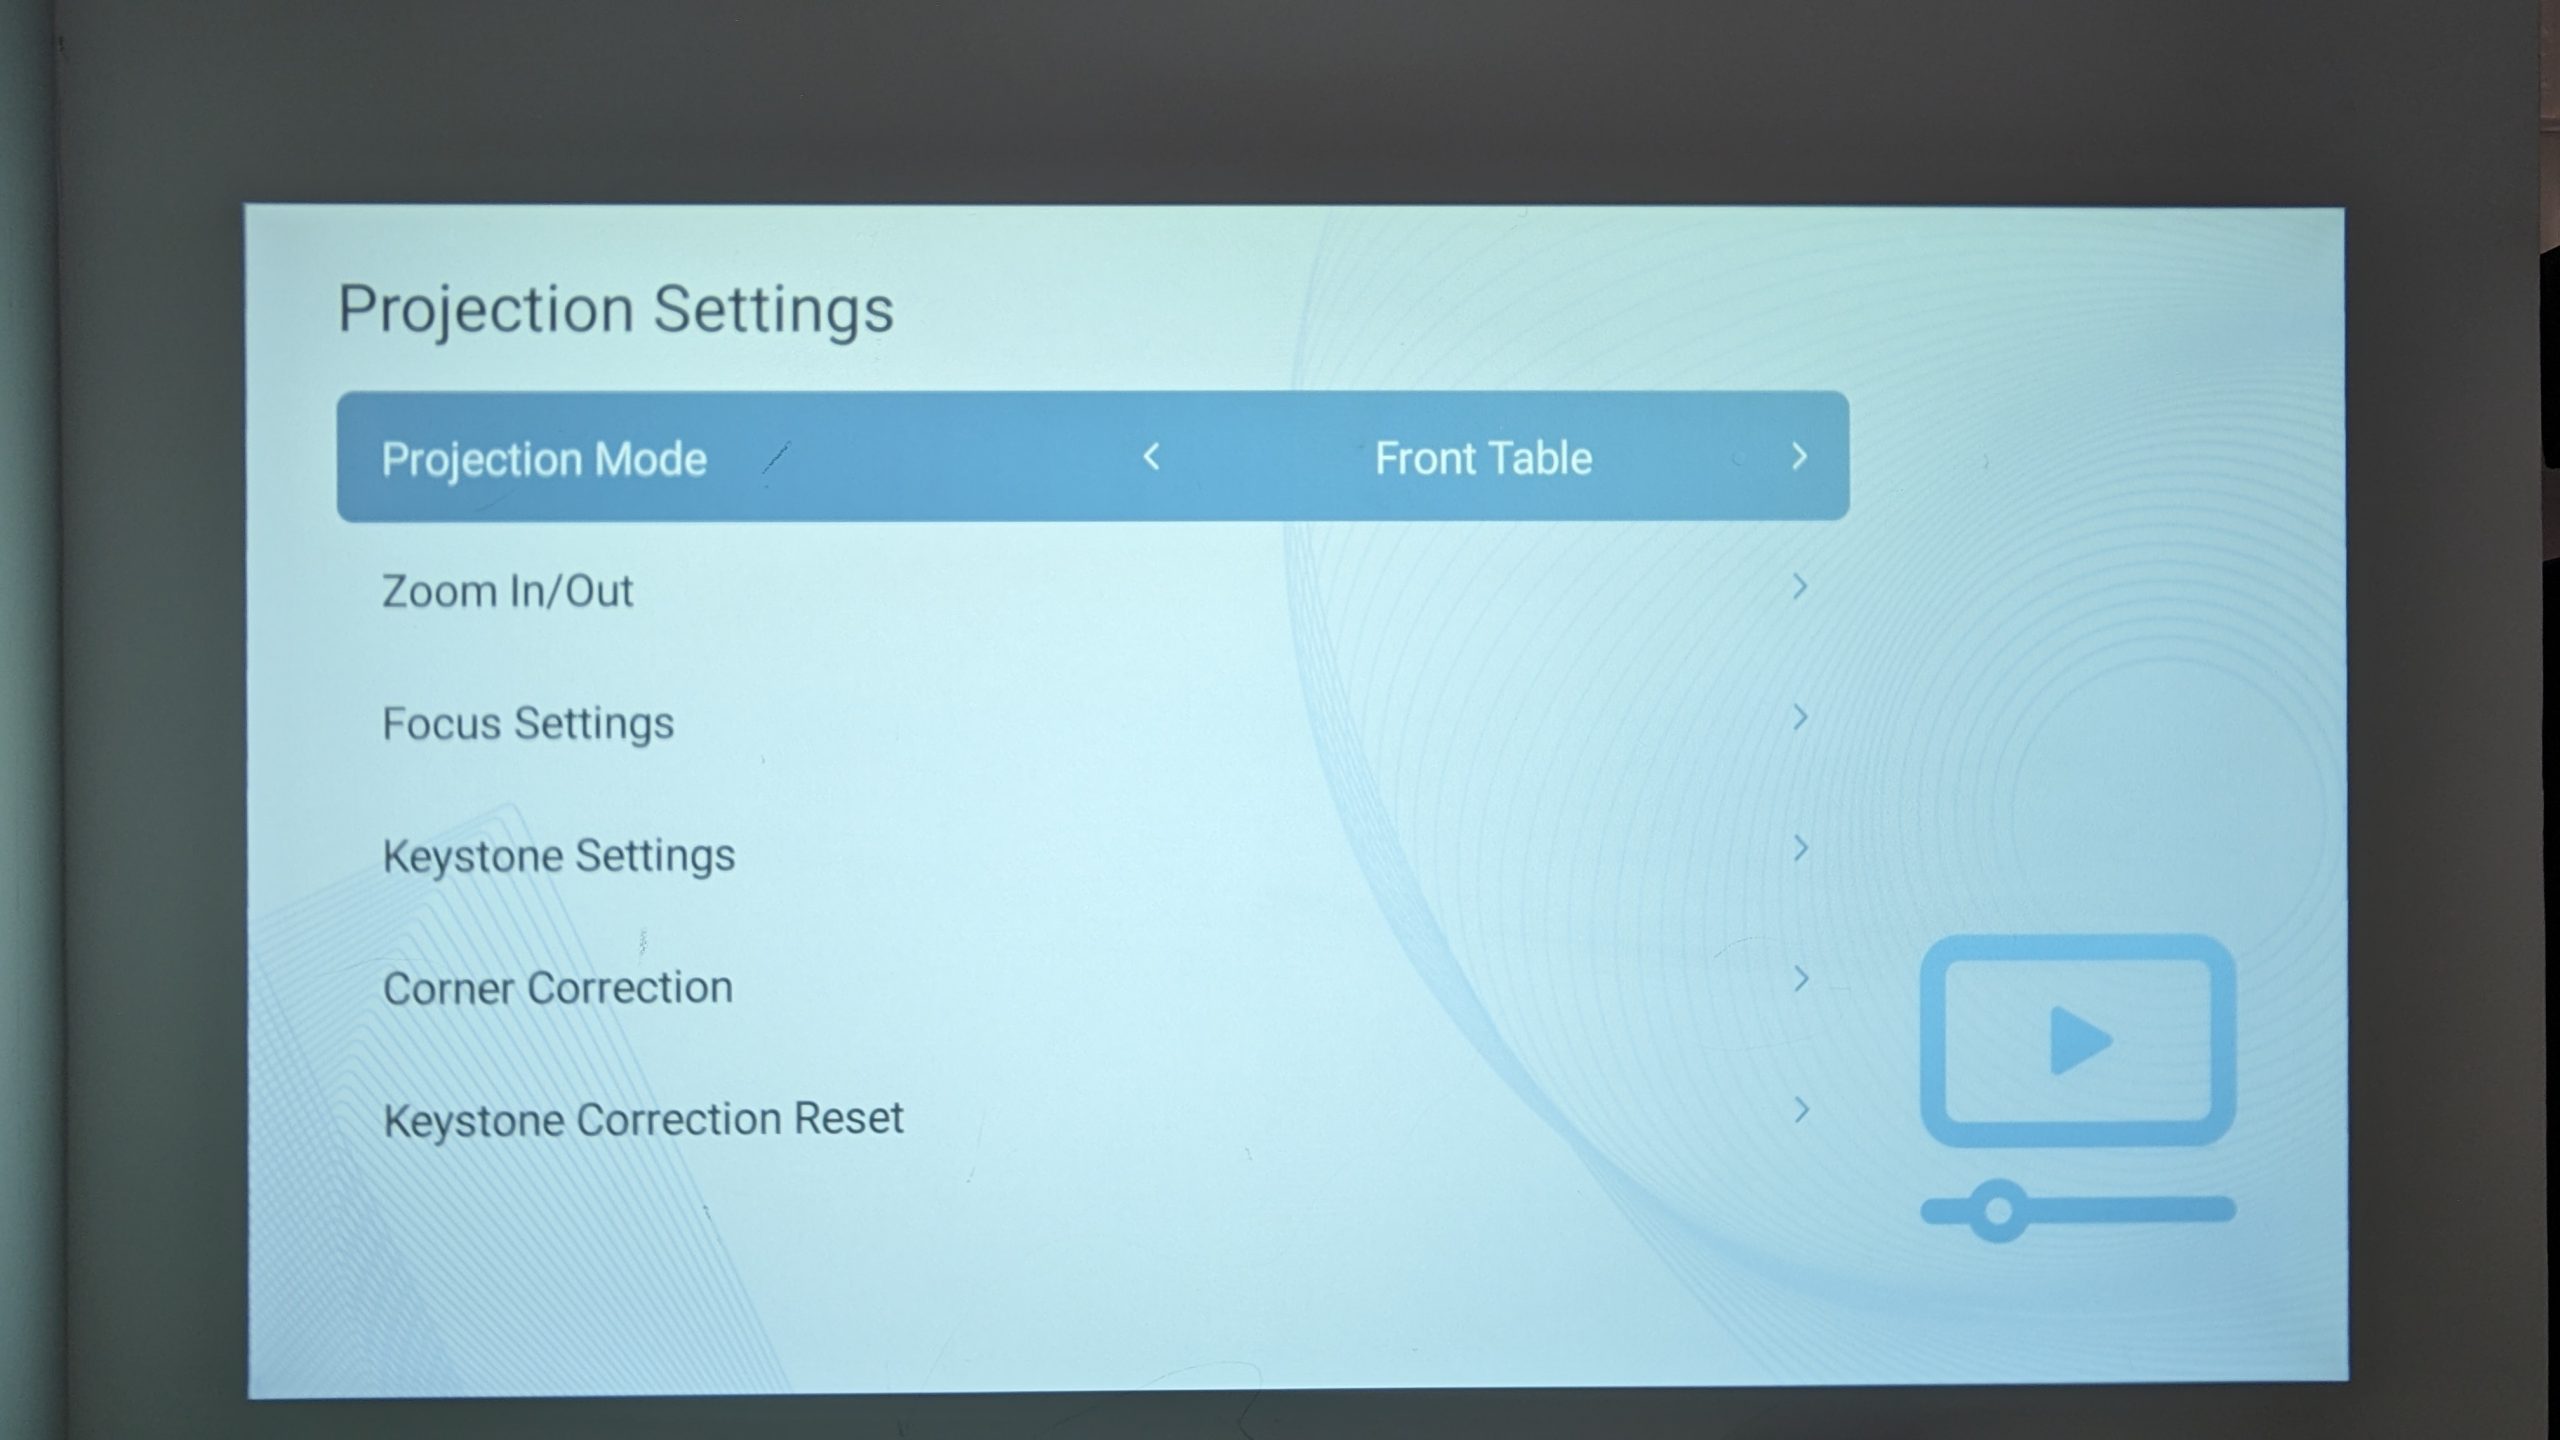
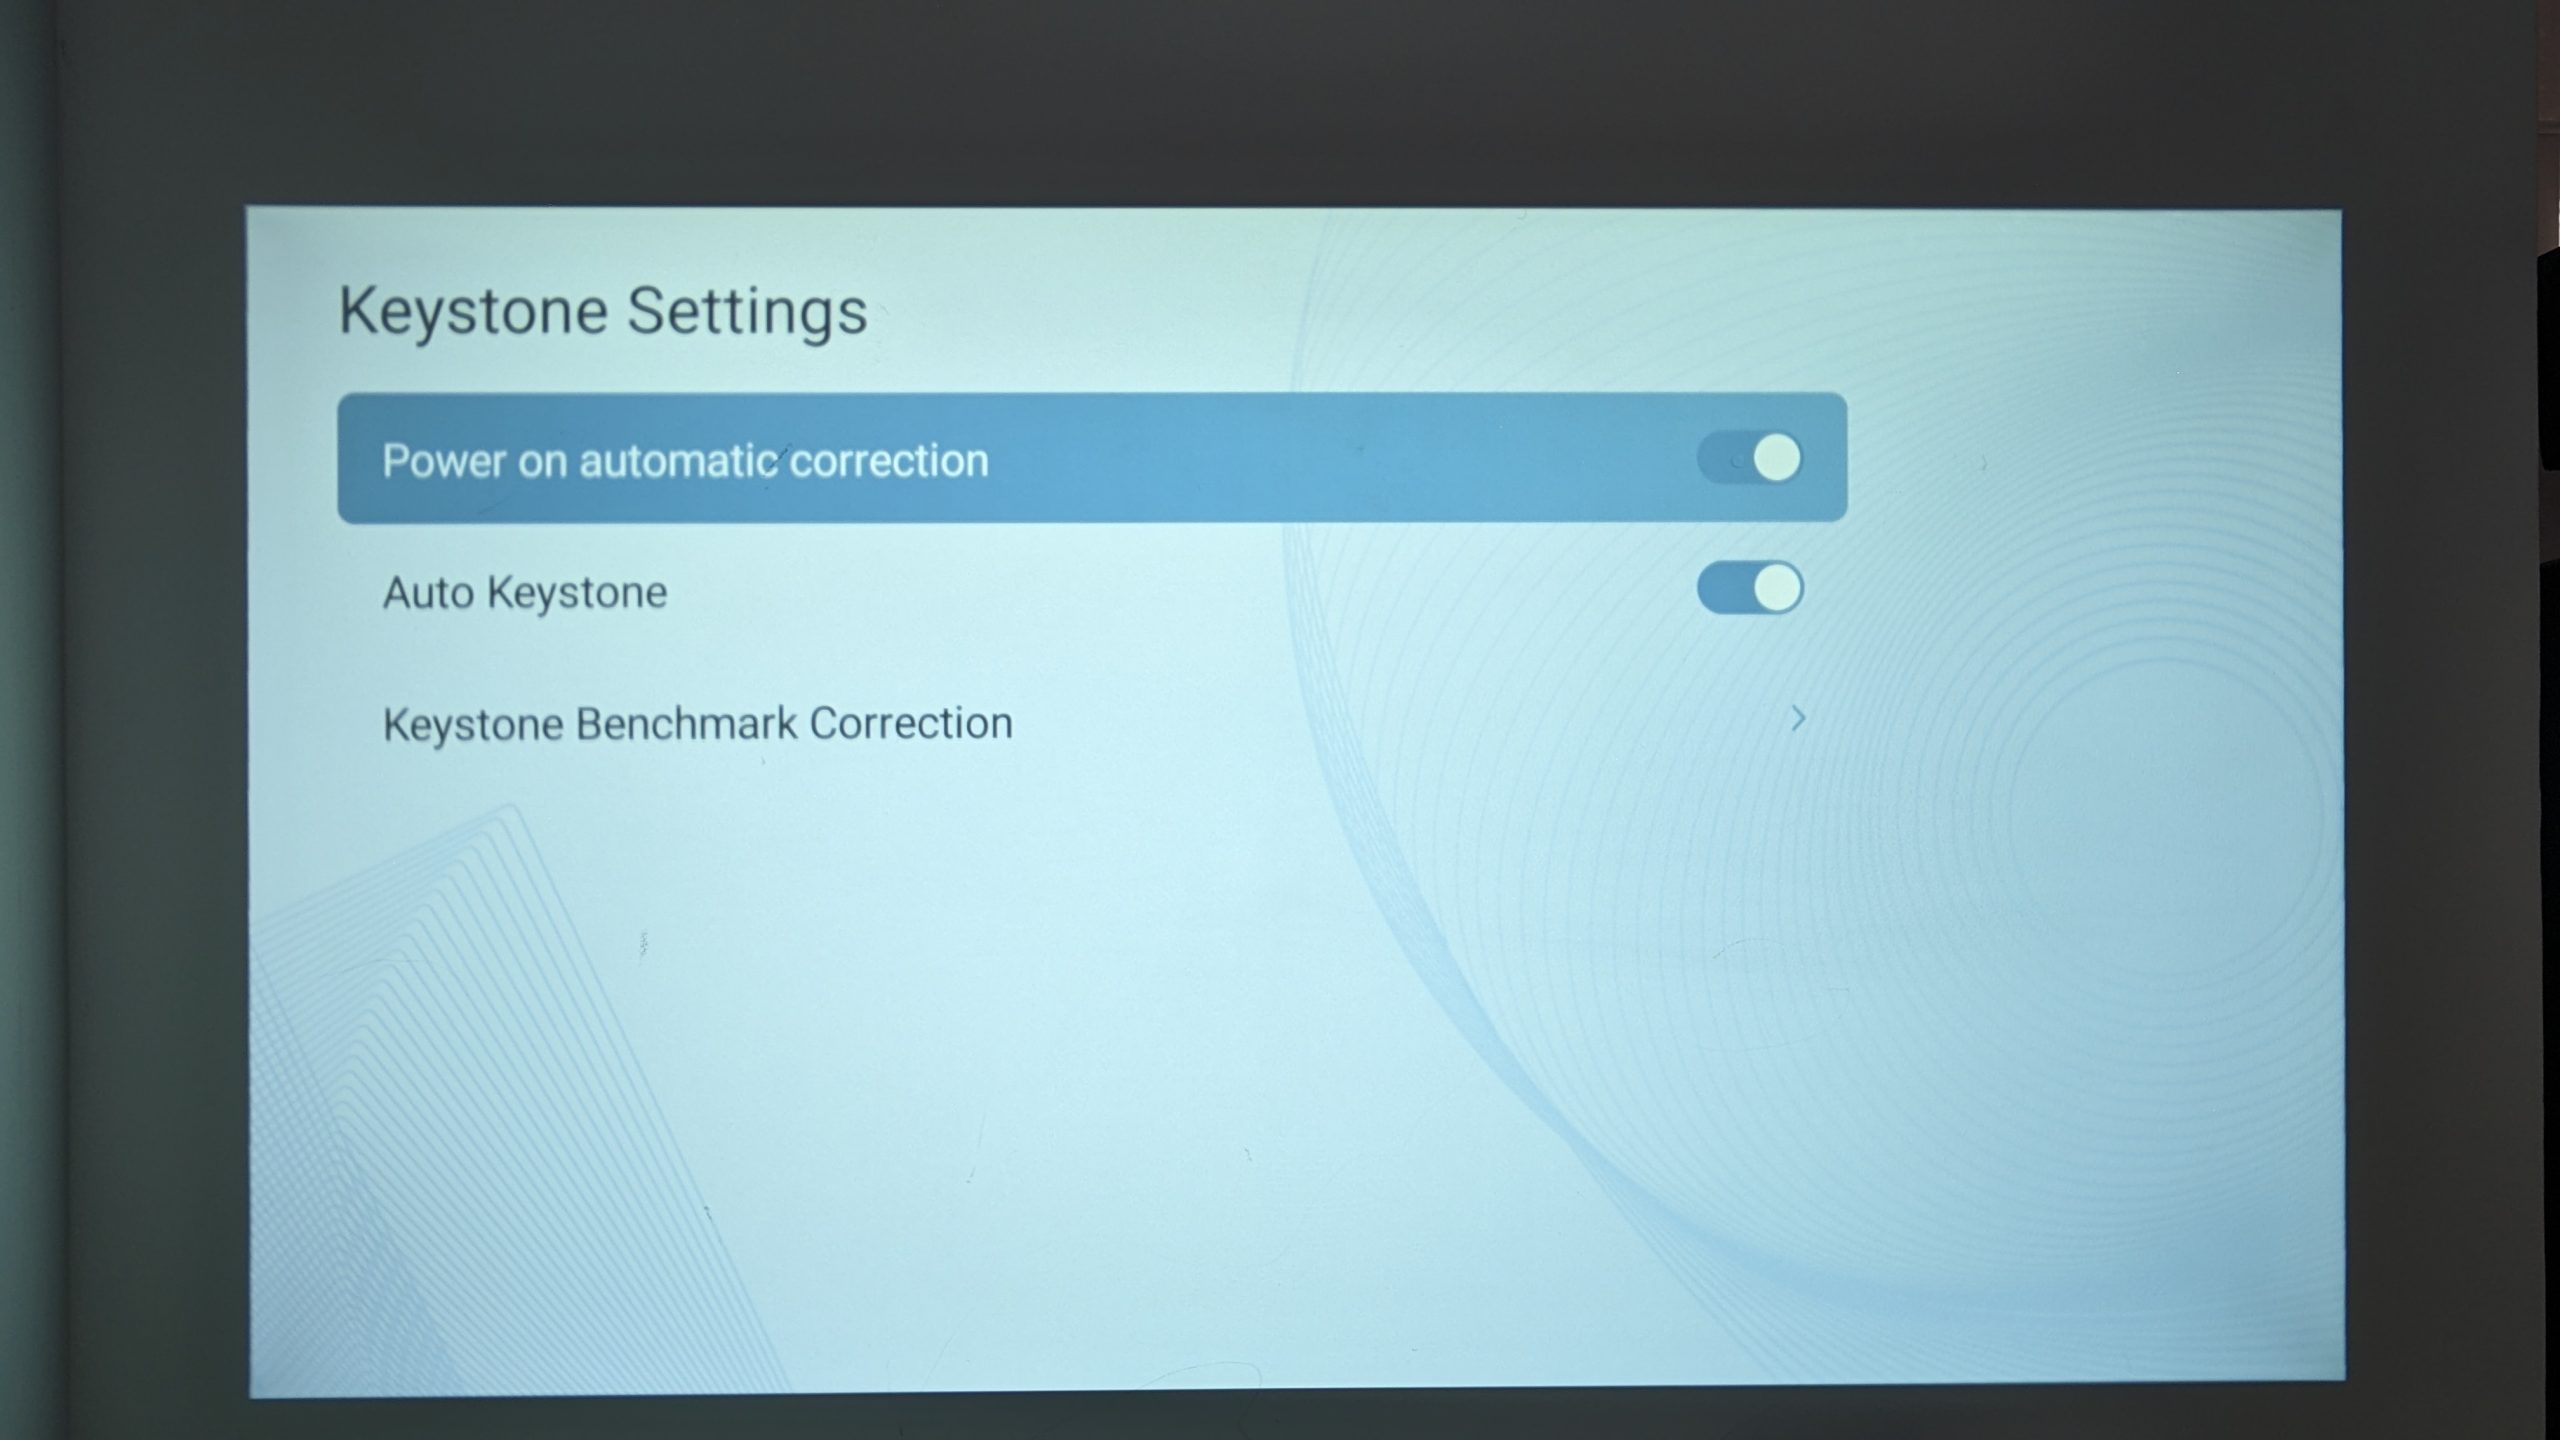
Keystone Correction
If the projected image shape is wonky or incorrect, we recommend turning on automatic keystone correction. What is that? Keystone correction is a feature that allows you to adjust the shape of the projected image, particularly when the image is tilted or distorted usually due to the projector not being perpendicular to the screen or wall. This ensures the image is not distorted and appears correctly regardless of angle.
To turn on Keystone Correction:
- Go to the Settings tab.
- Select Settings.
- Go to Projection Settings
- Go to Keystone Settings.
- Turn on Power on Automatic Correction.
- Turn on Auto Keystone.

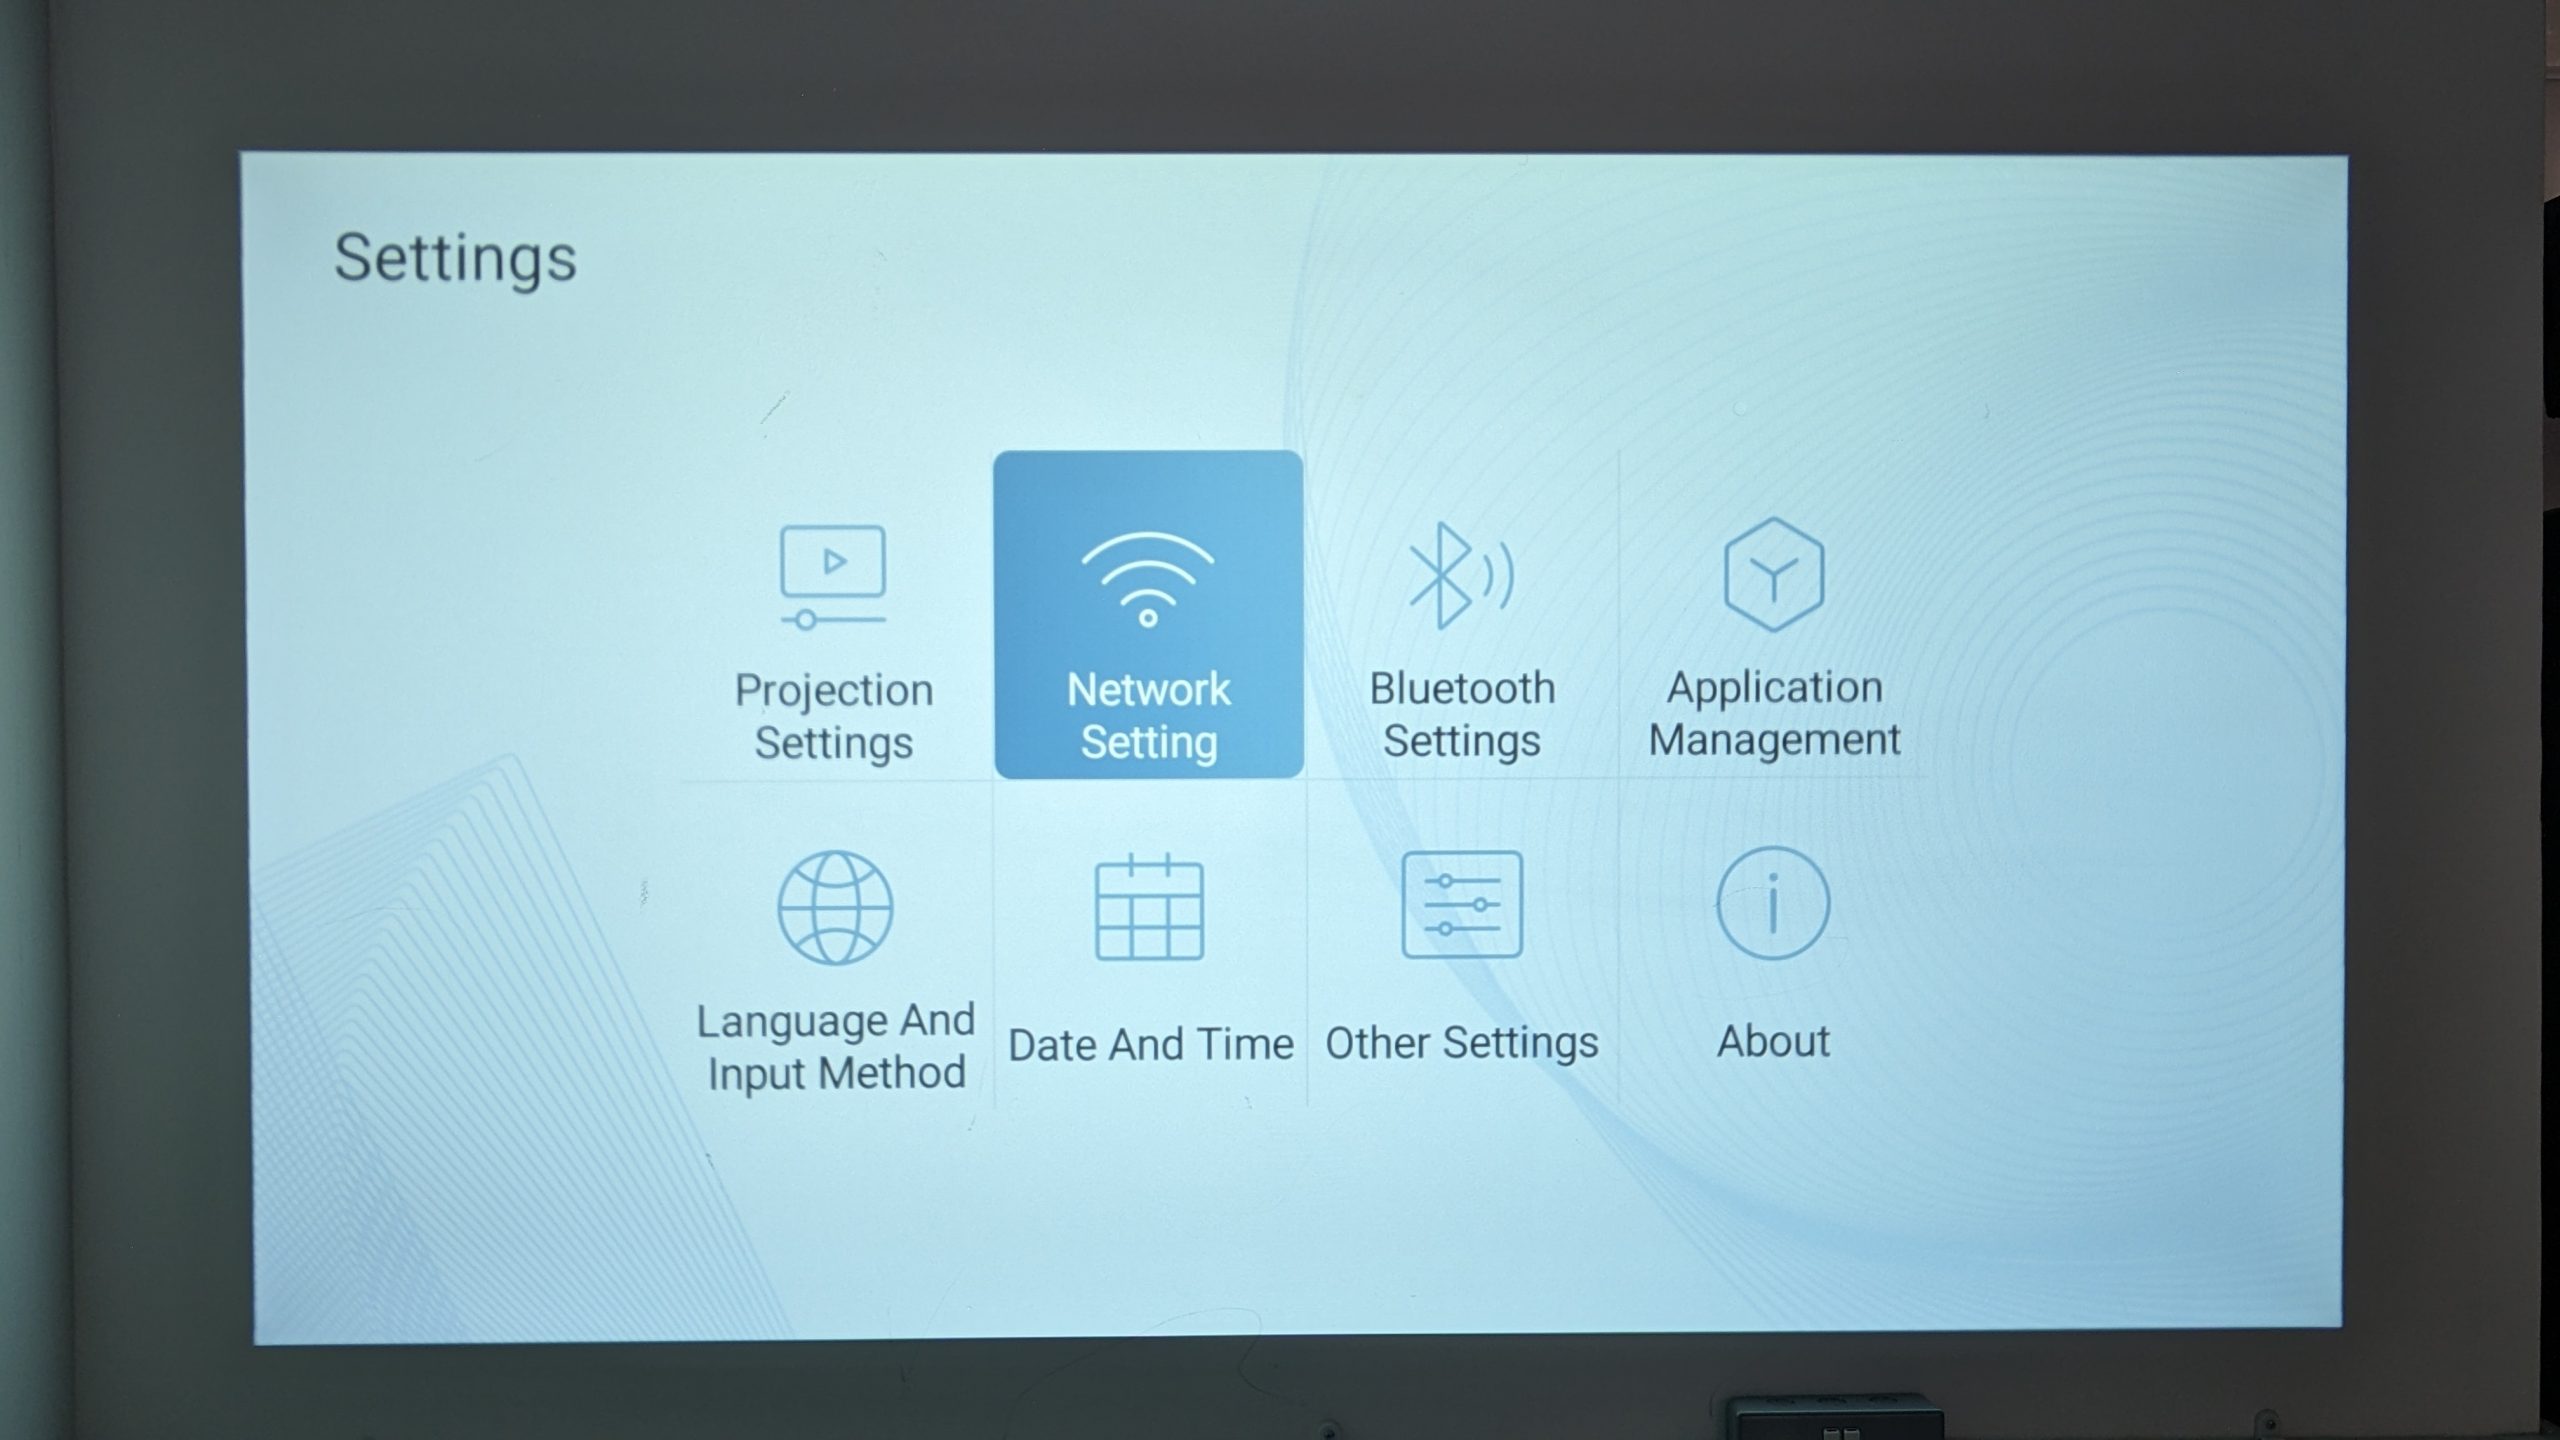
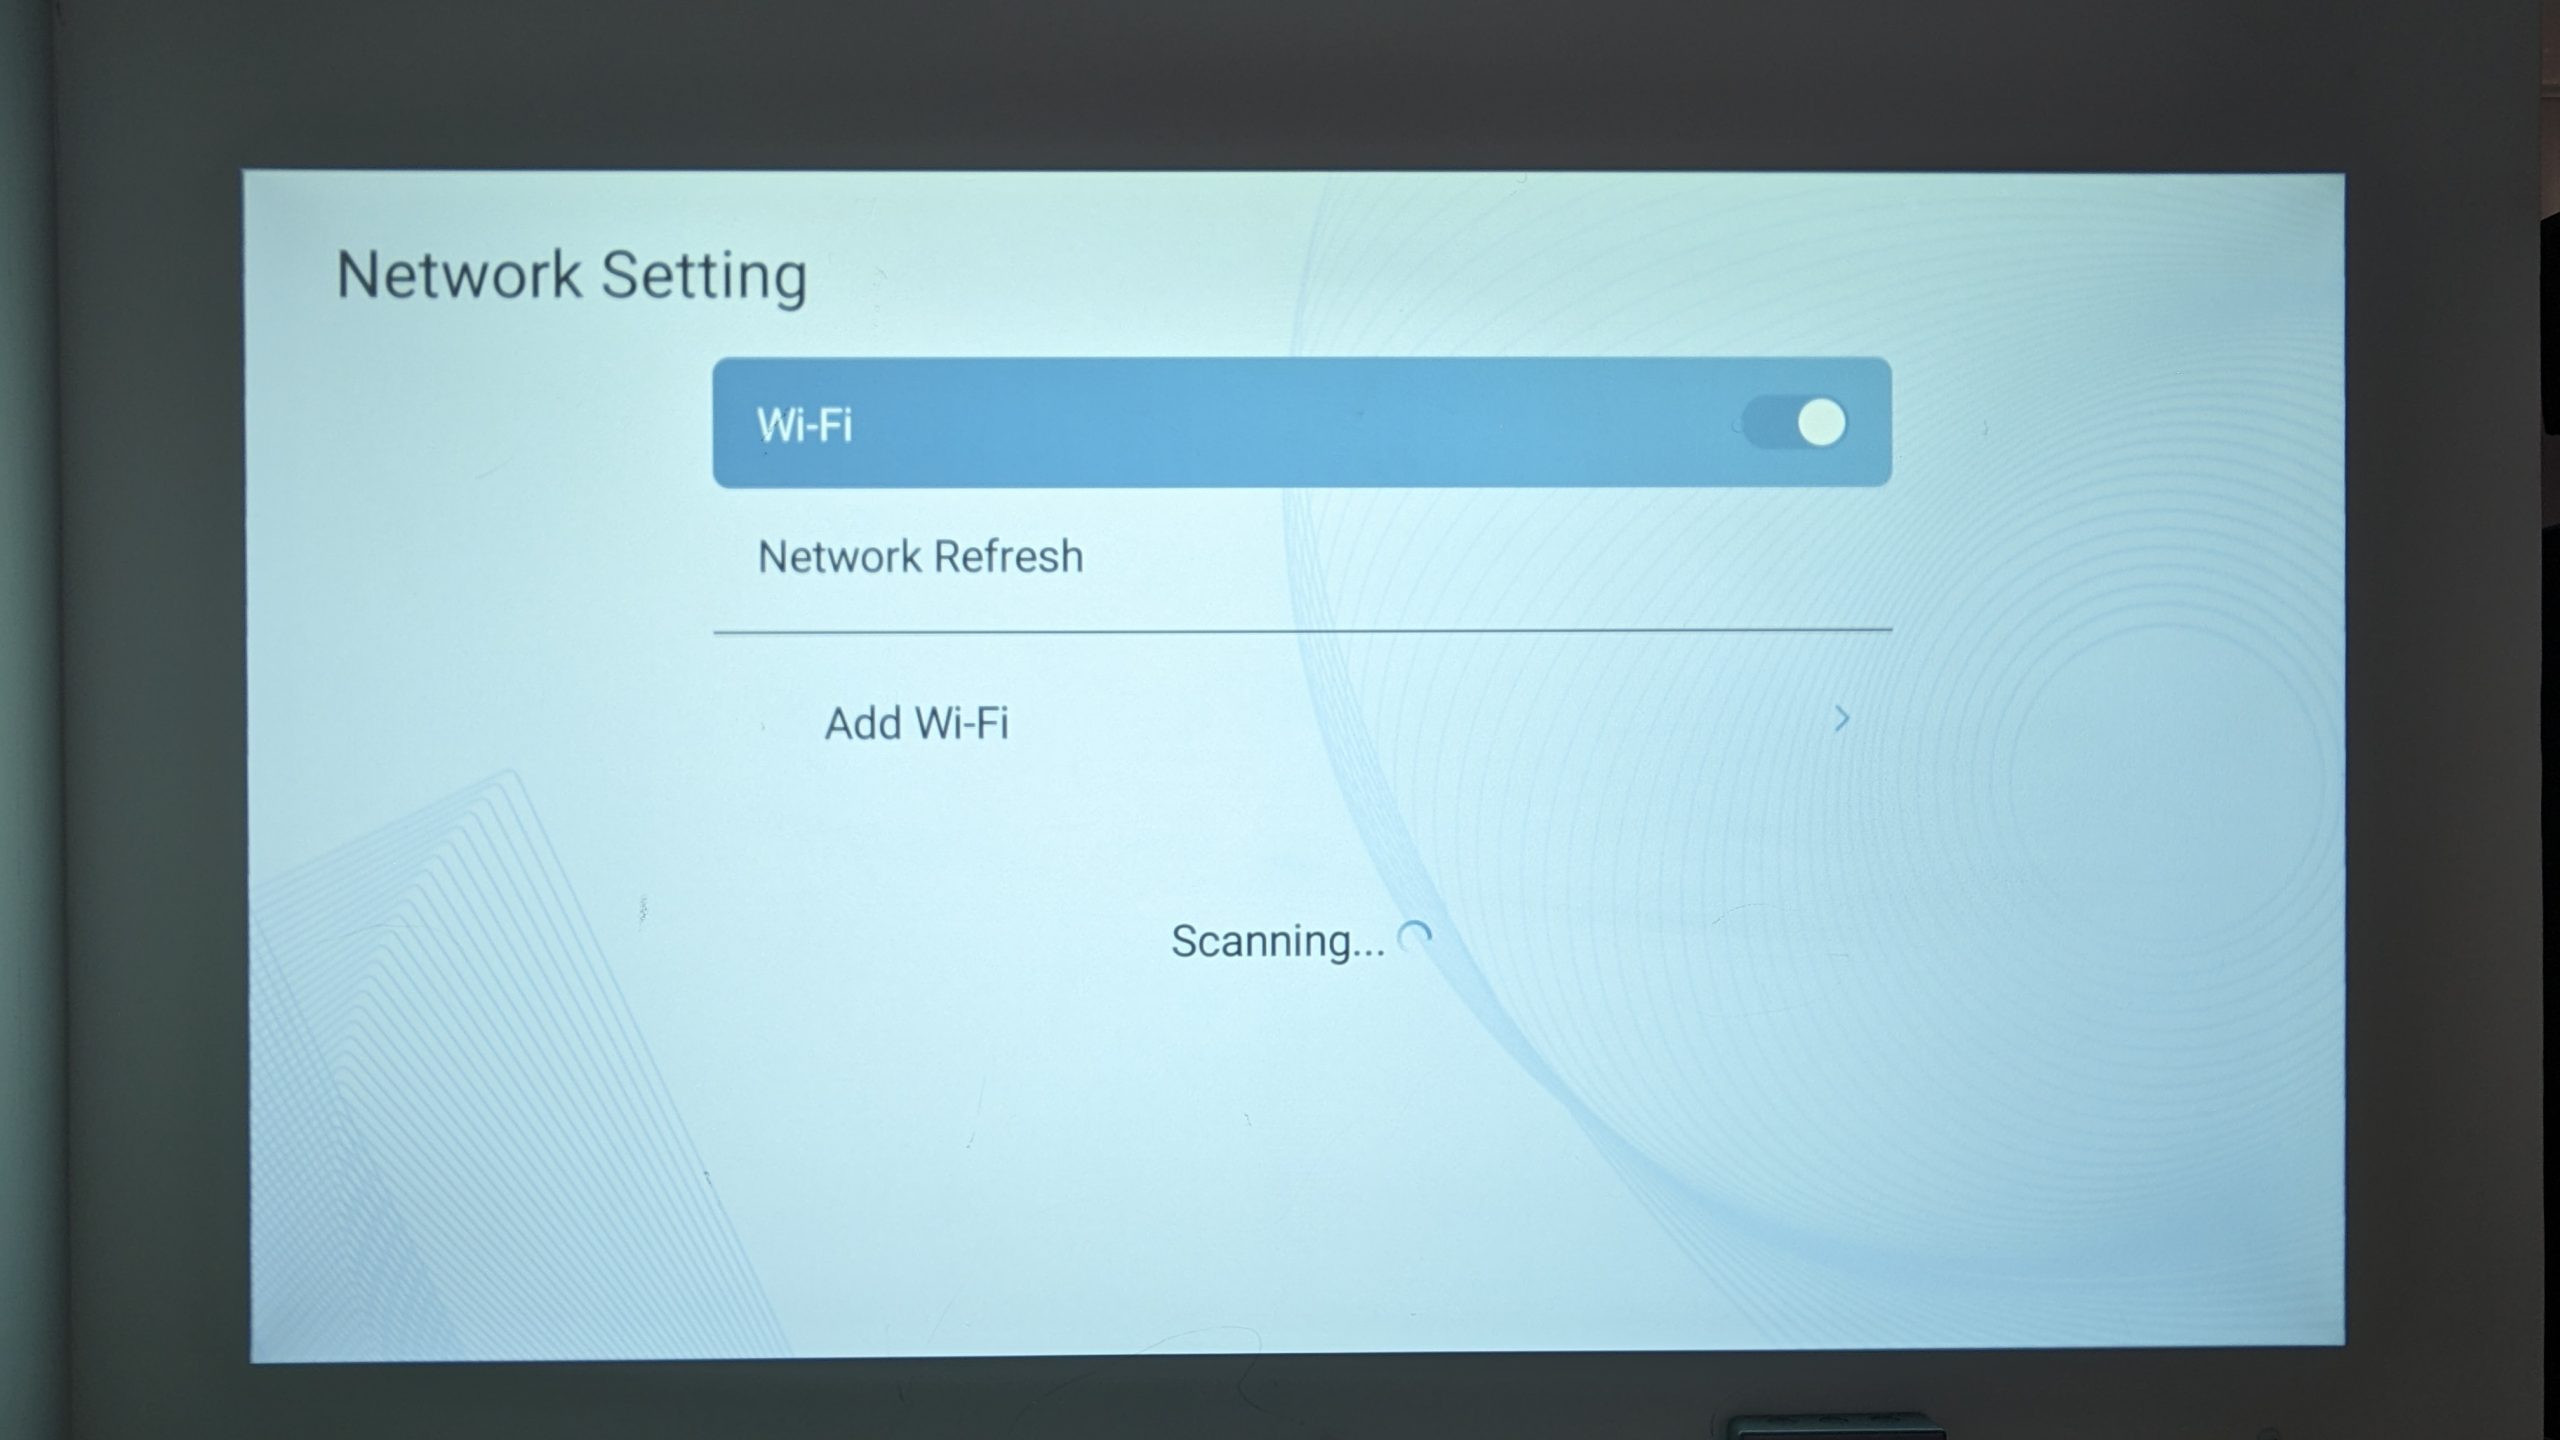
Wi-Fi
A Wi-Fi connection is necessary to access online content and use certain features that require internet access, such as the App Store or streaming services.
To connect to Wi-Fi:
- Go to the Settings tab.
- Select Settings.
- Go to Network Settings.
- Connect to your Wi-Fi.
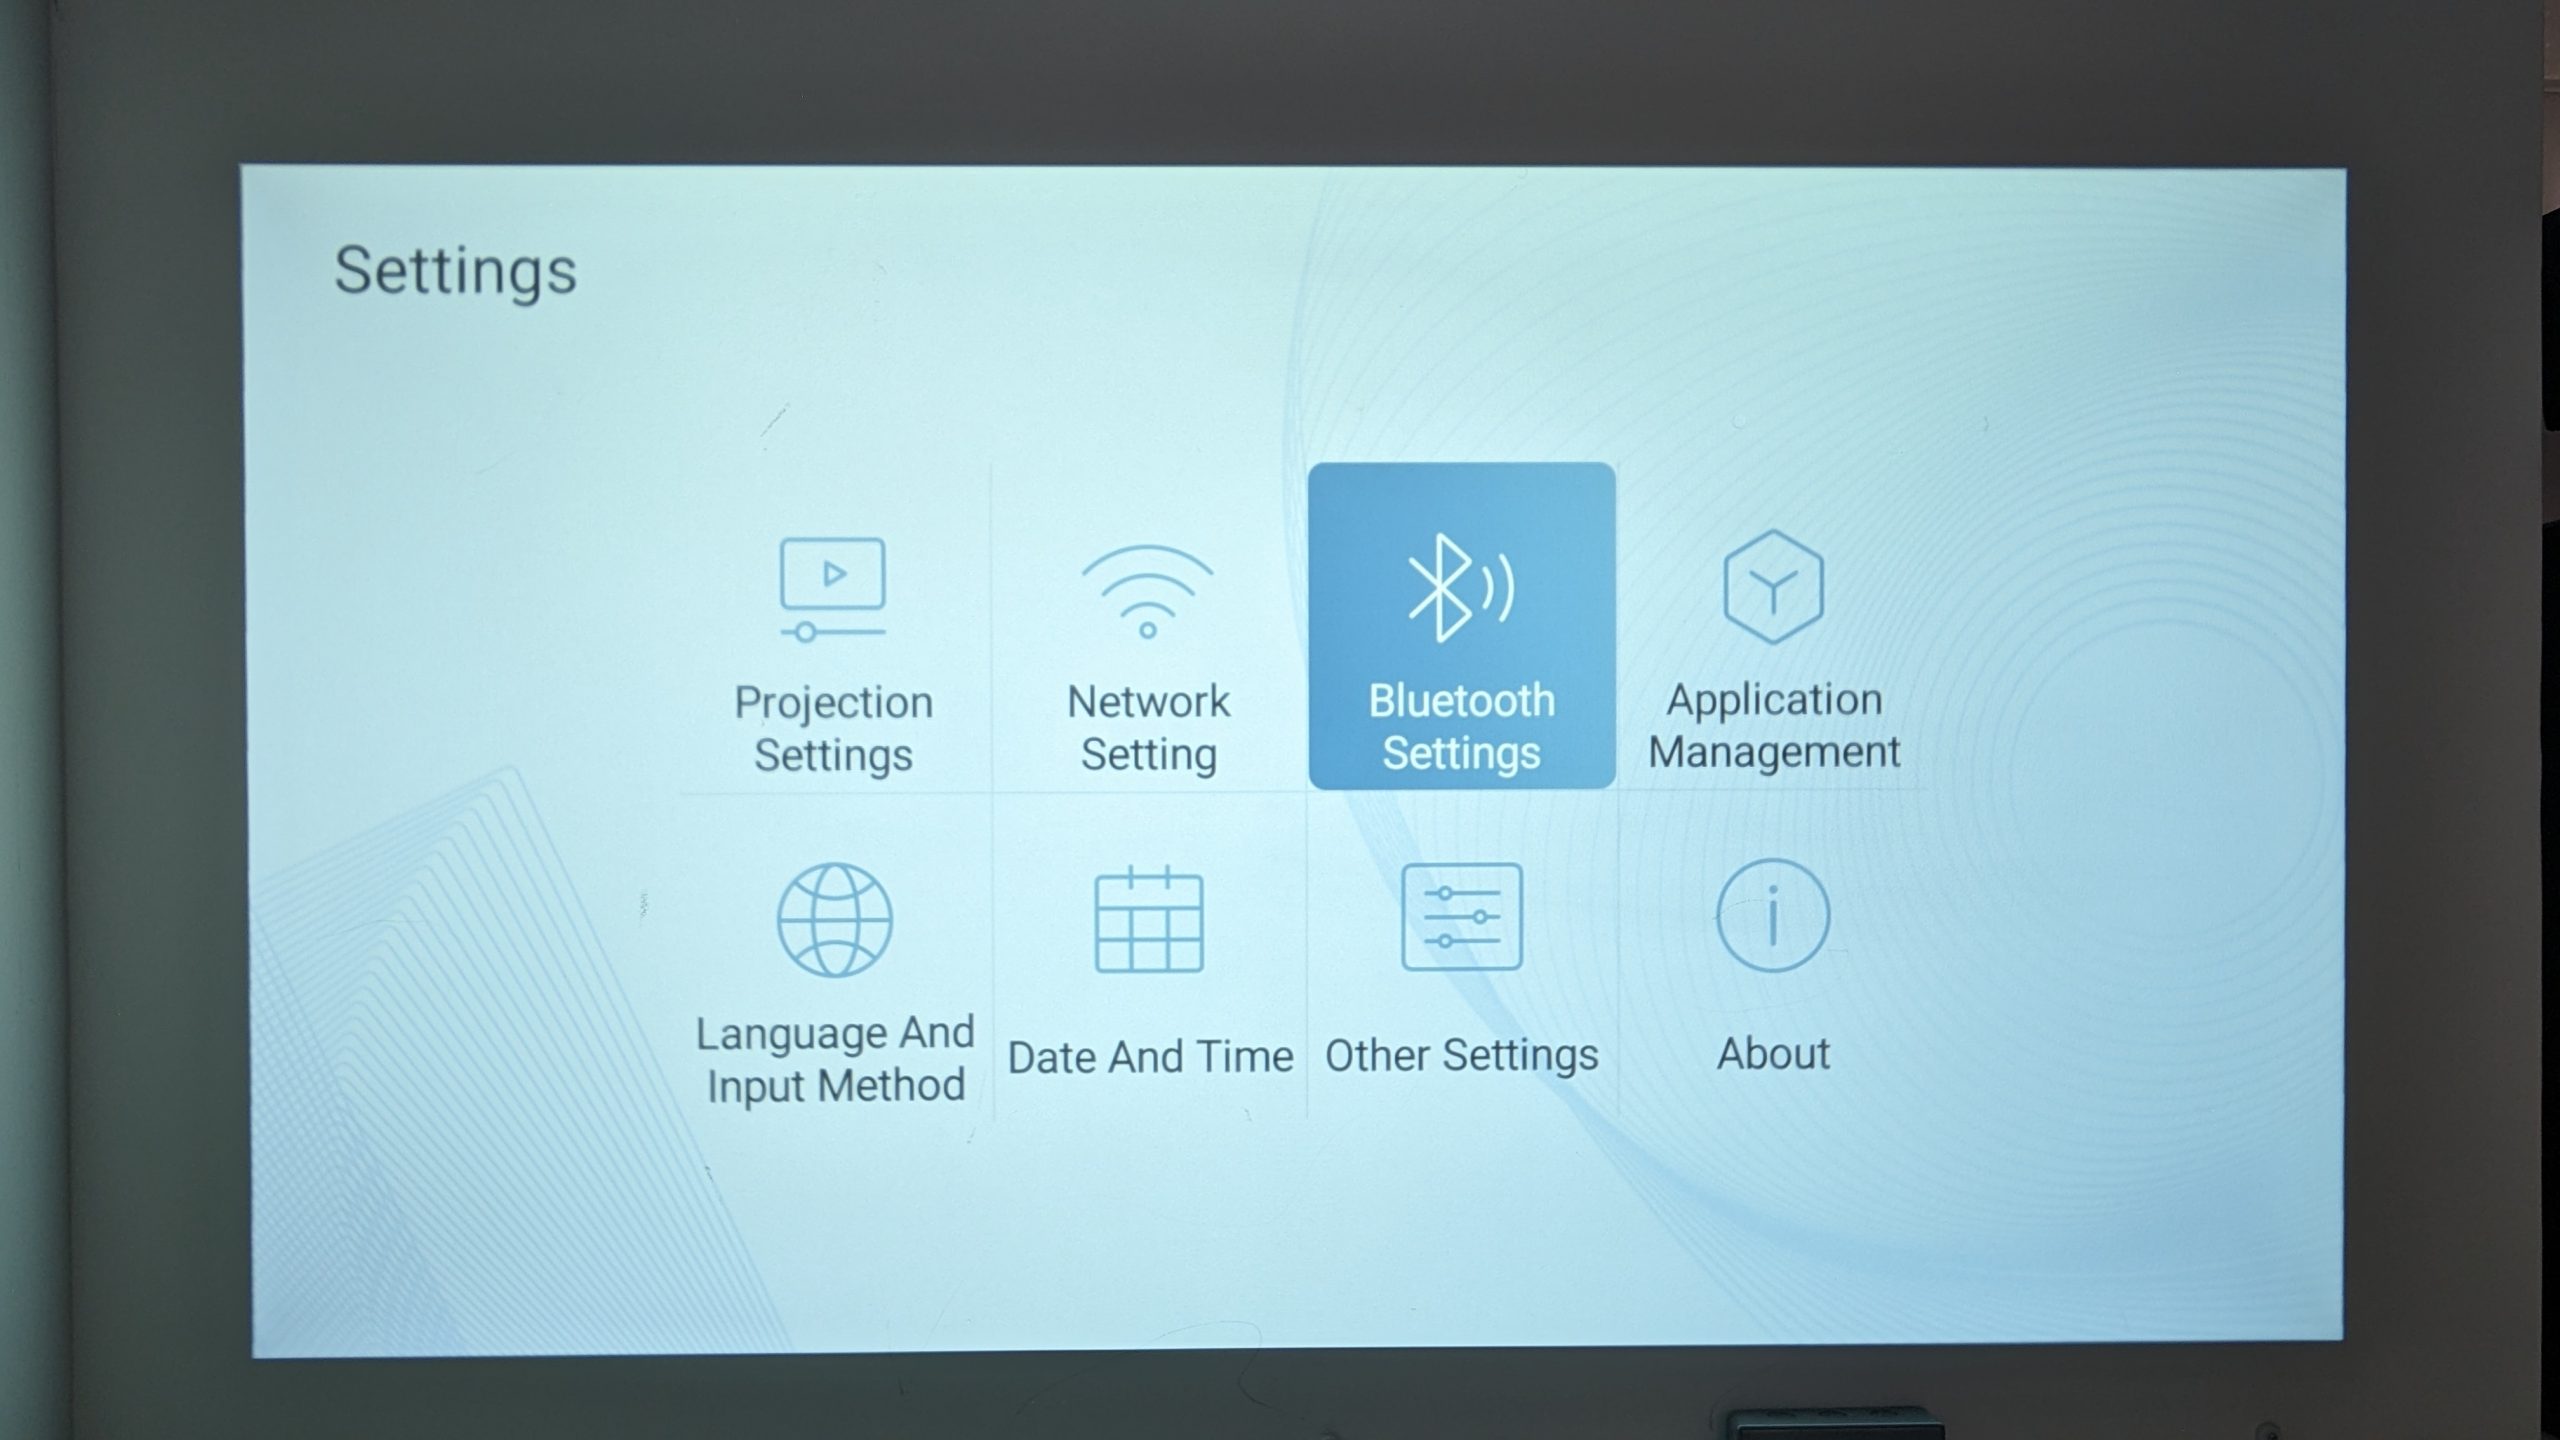
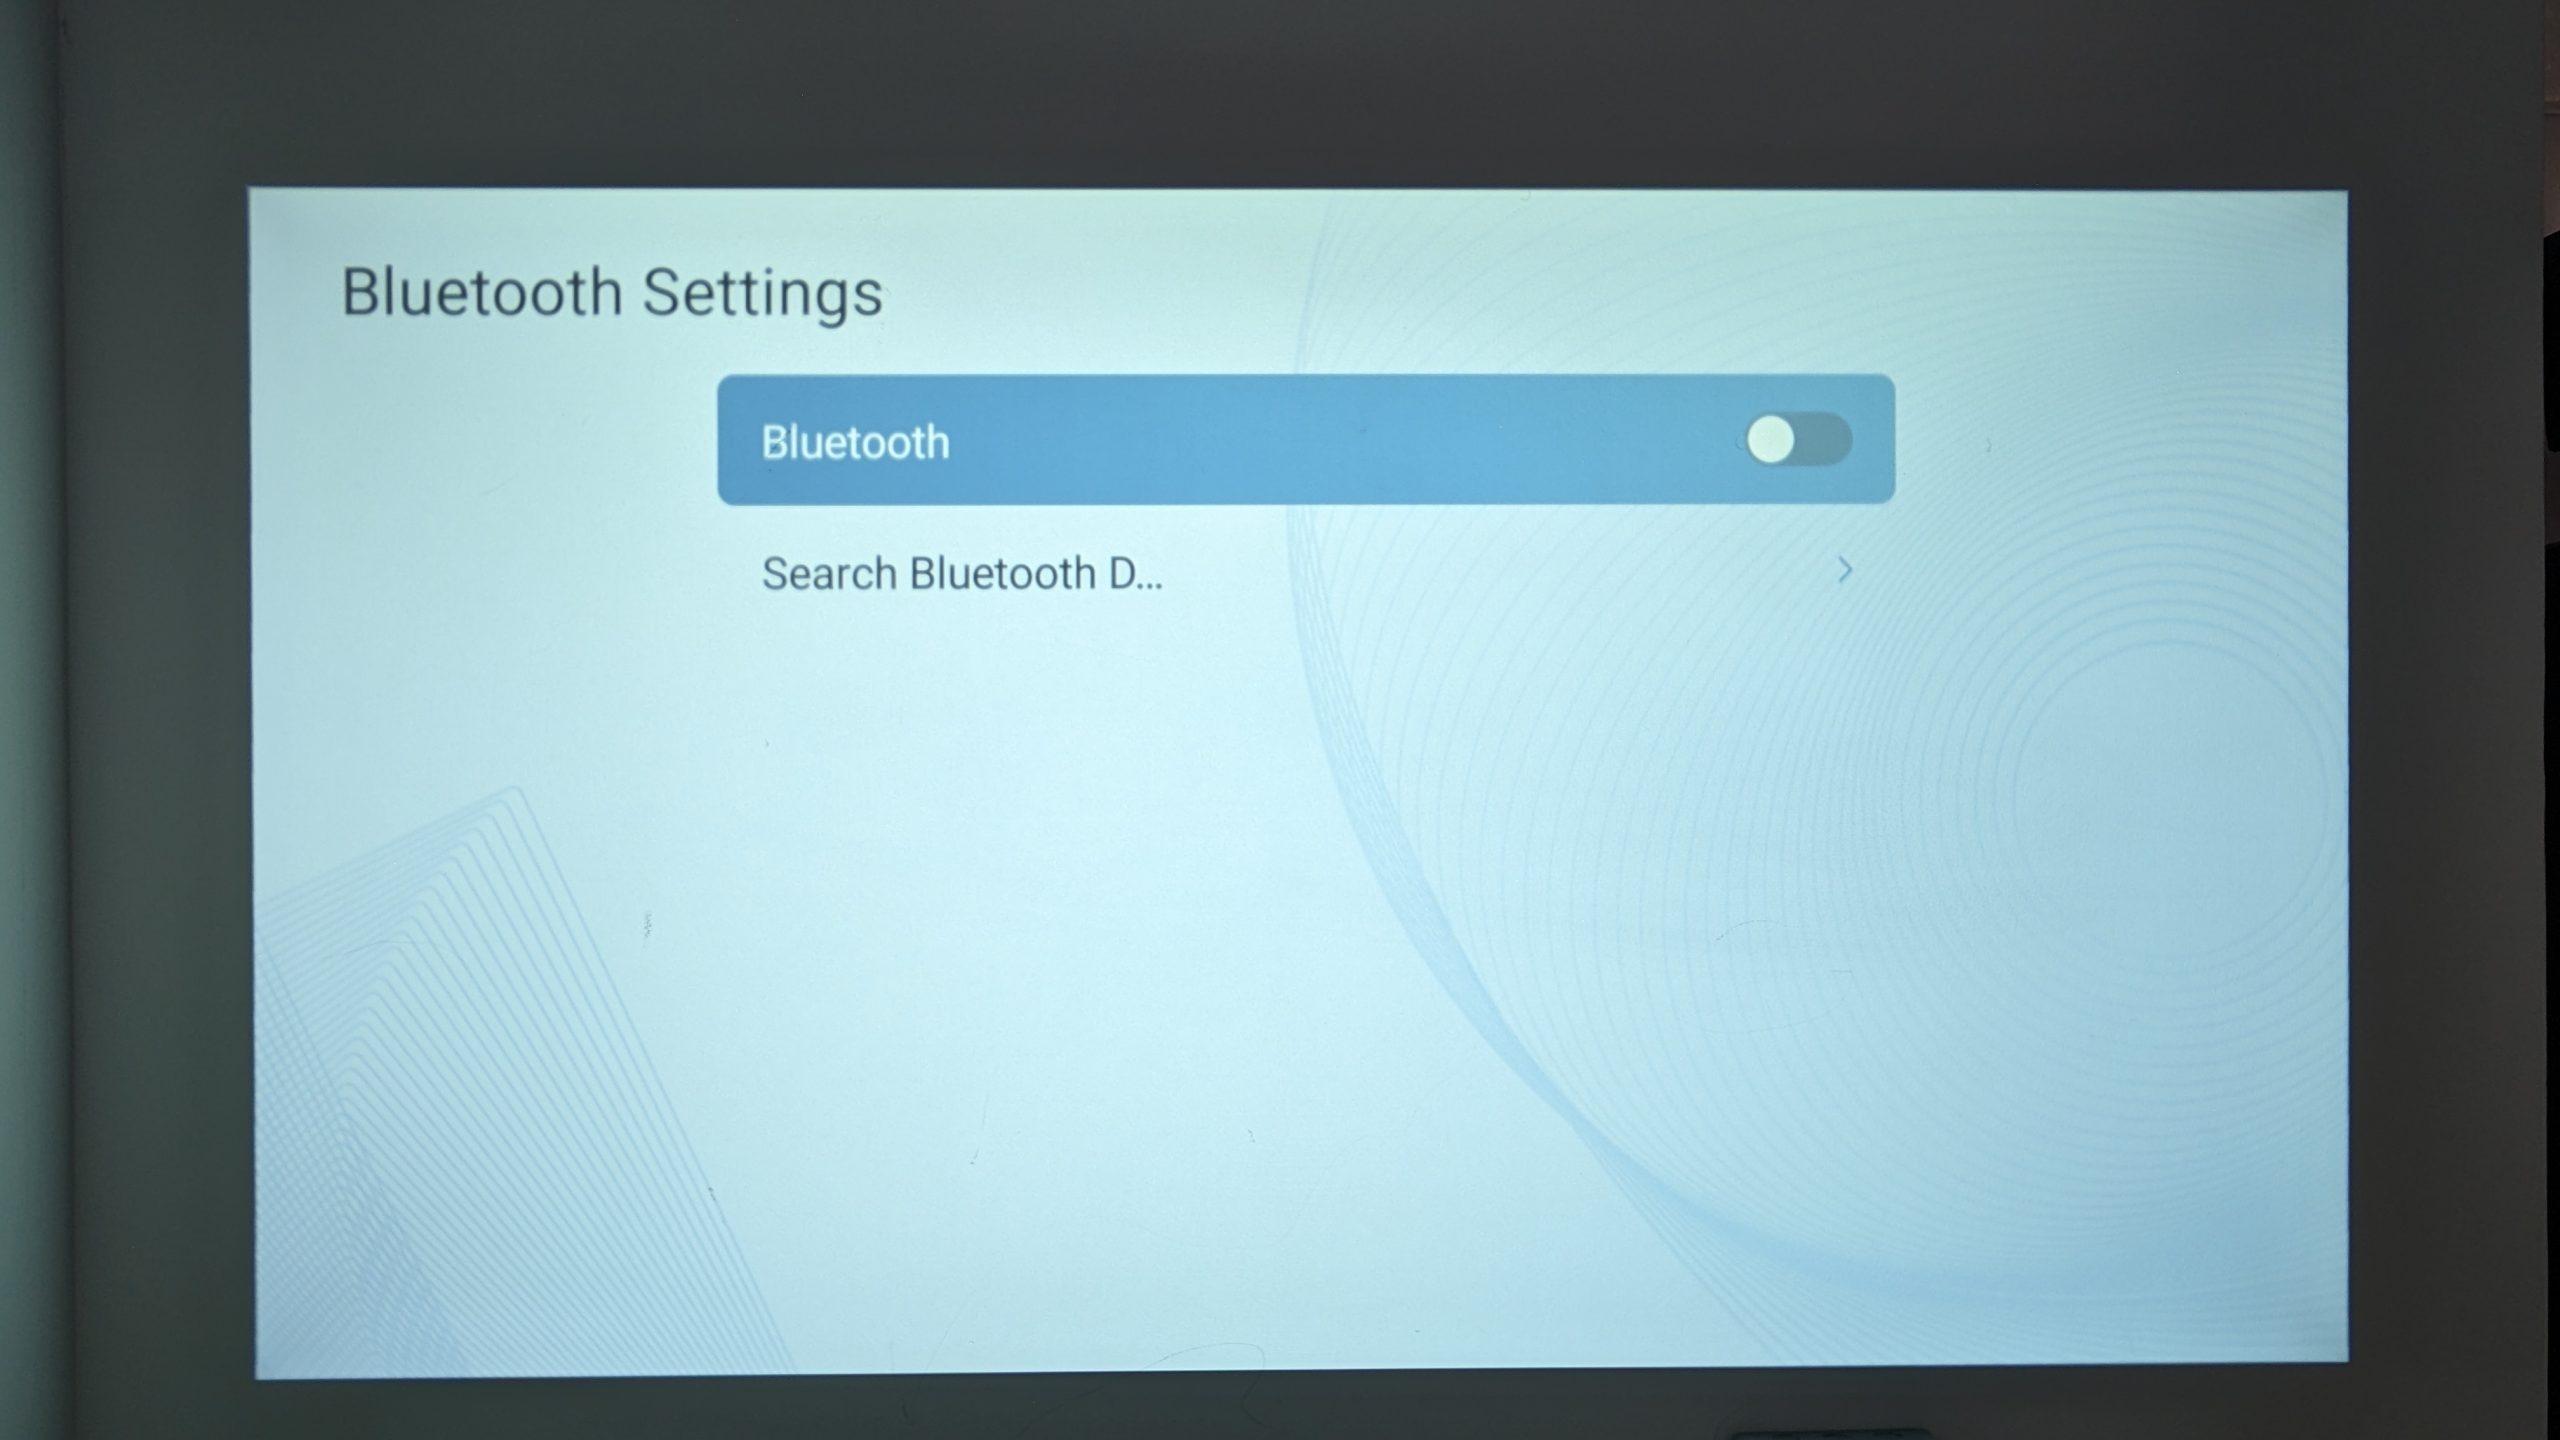
Bluetooth
The BudPlus S3 comes with Bluetooth 5.0 connectivity which enhances the versatility and functionality of your projector. Although the BudPlus S3 Projector comes with amazing dual speakers, the Bluetooth connectivity allows you to connect to external speakers for a better surround sound experience. Alternatively, headphones make for a more private or less distracting experience.
To connect via Bluetooth:
- Go to the Settings tab.
- Select Settings.
- Go to Bluetooth Settings.
- Connect to your Bluetooth Device.
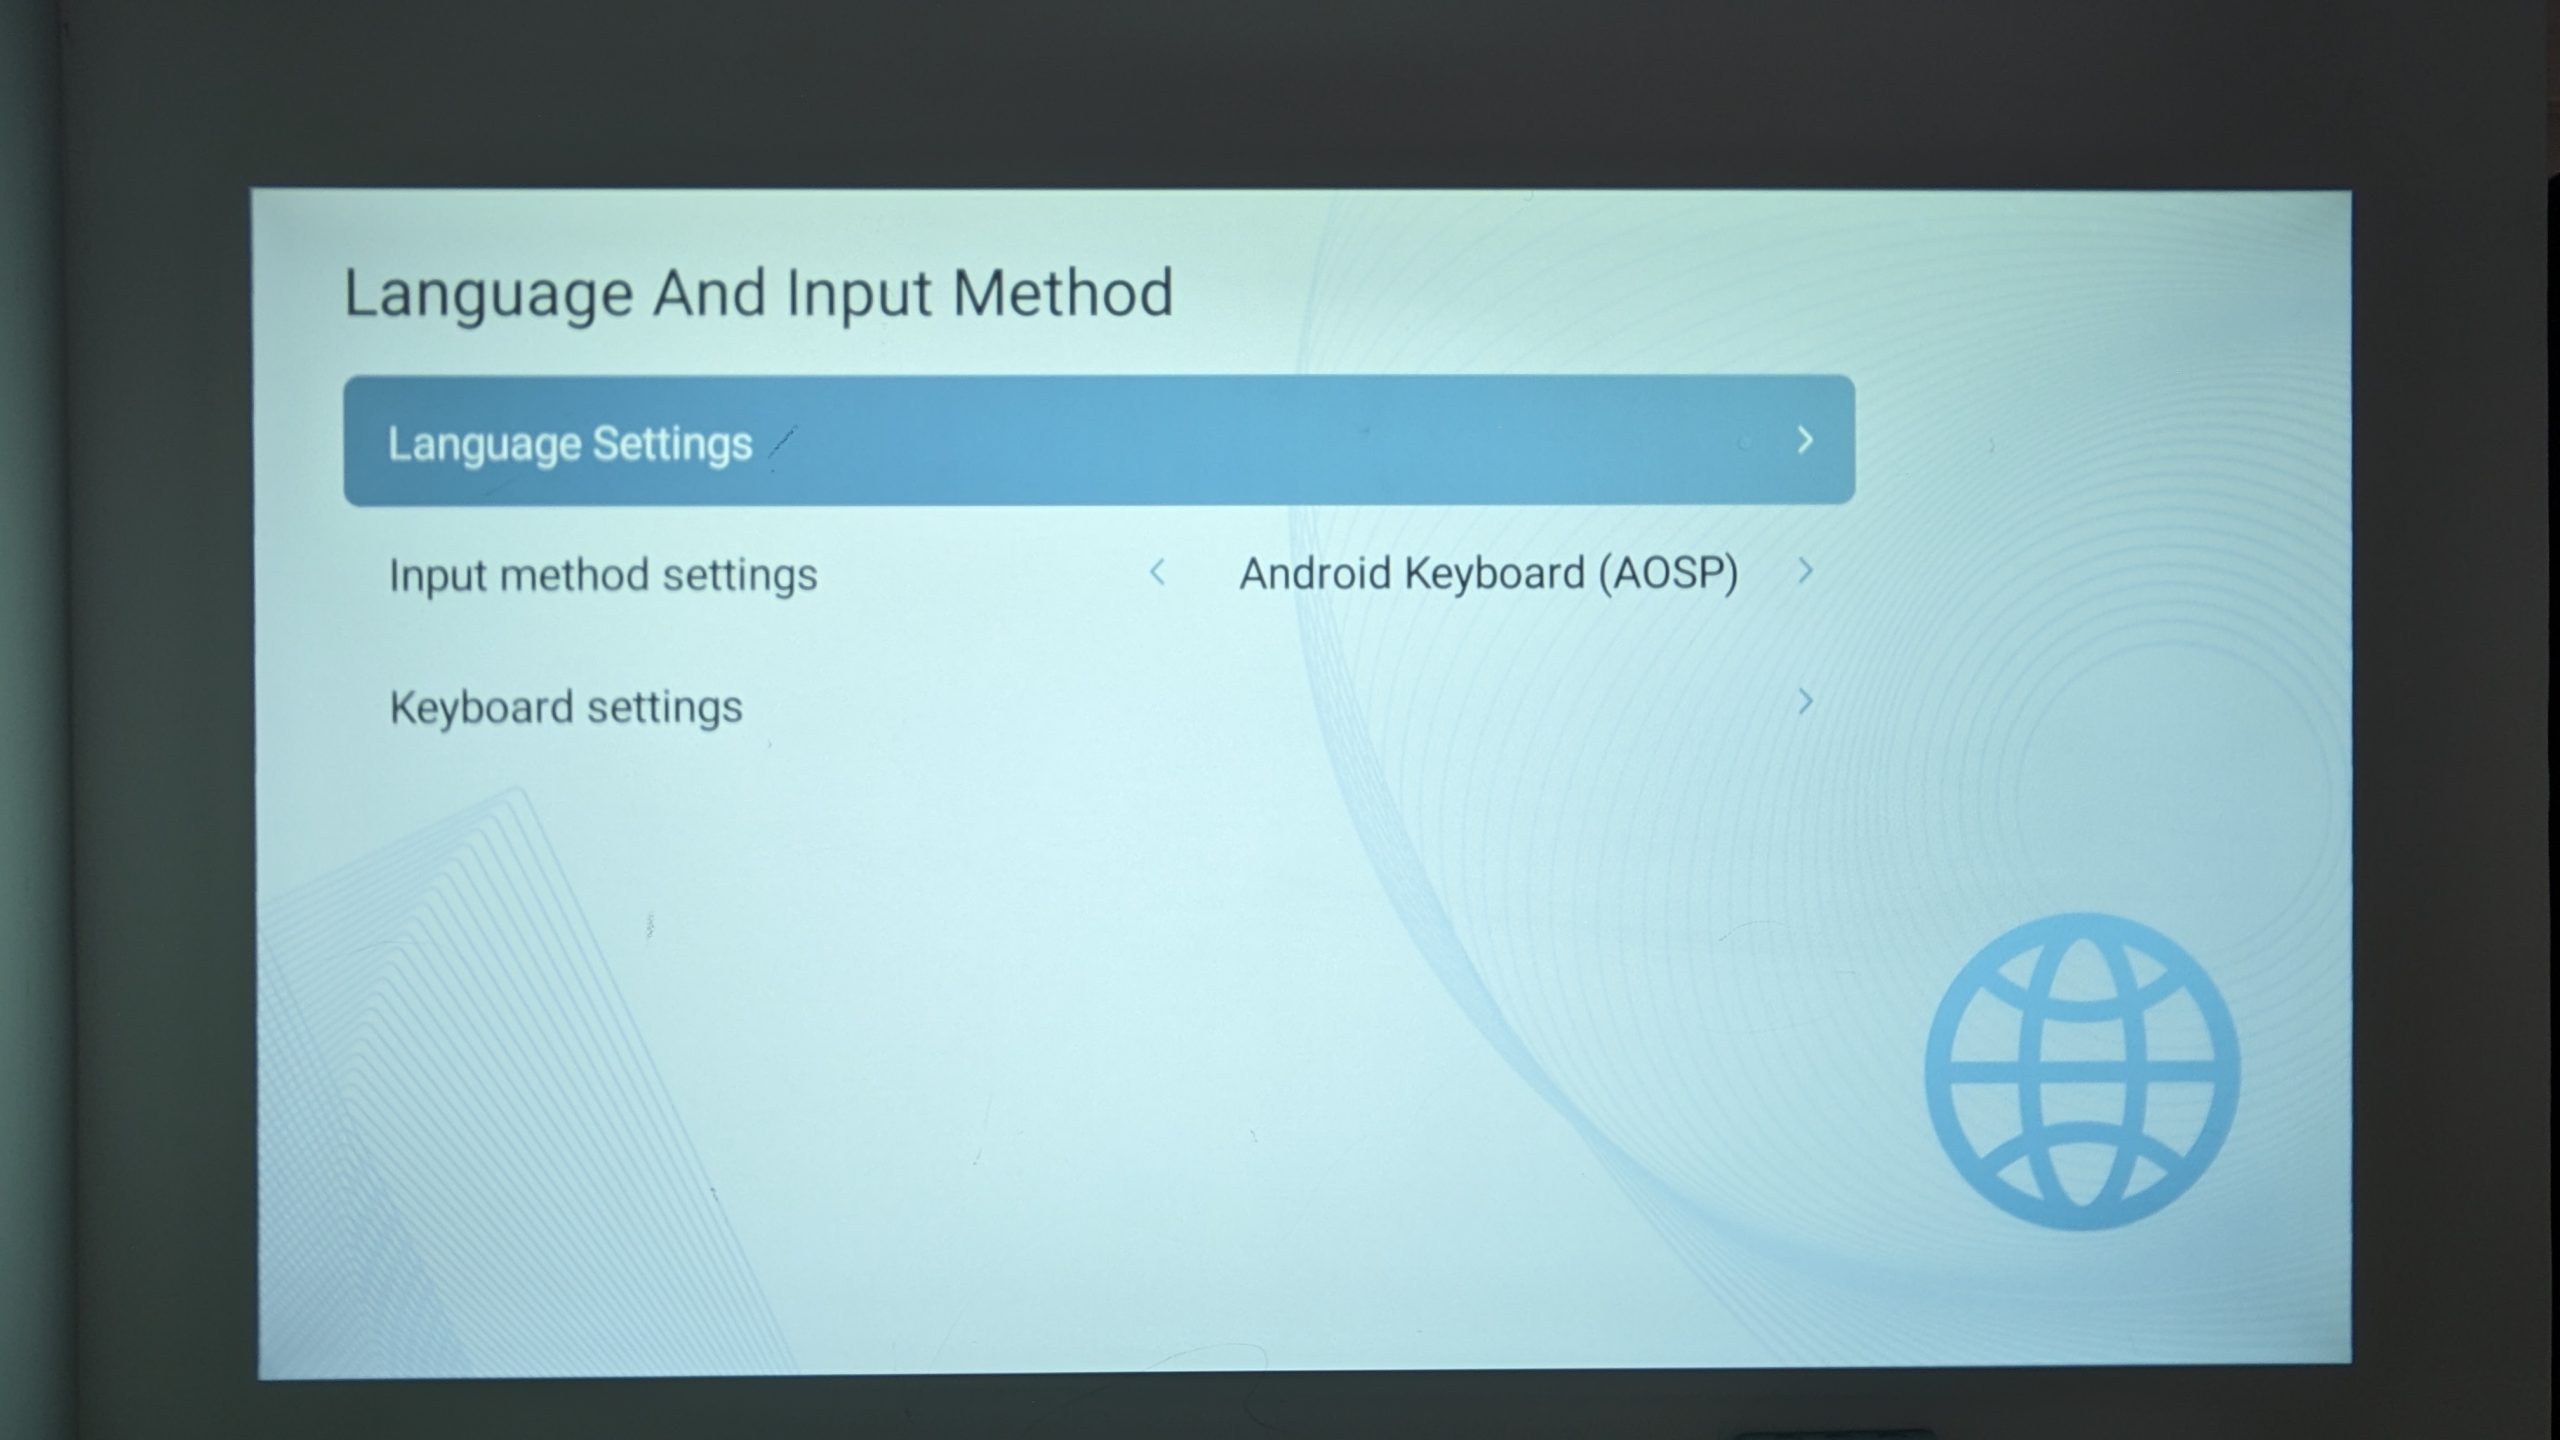
Language & Input Device
Your BudPlus S3 supports an extensive range of different languages and input styles. No matter where you are or what your language & input preferences may be, the projector can seamlessly adapt to provide you with a personalized and user-friendly experience.
To change your language settings:
- Go to the Settings tab.
- Select Settings.
- Go to Language and Input Method.
- Select your Language and Keyboard settings.
The full list of supported languages (as of writing) includes:
- Catalan (Spanish)
- Croatian
- Czech
- Danish
- Dutch
- English
- Finnish
- French
- German
- Hungarian
- Indonesian
- Italian
- Norwegian
- Polish
- Portuguese (Brazilian)
- Romanian
- Romansh (Swiss)
- Slovak
- Slovene
- Spanish
- Zulu
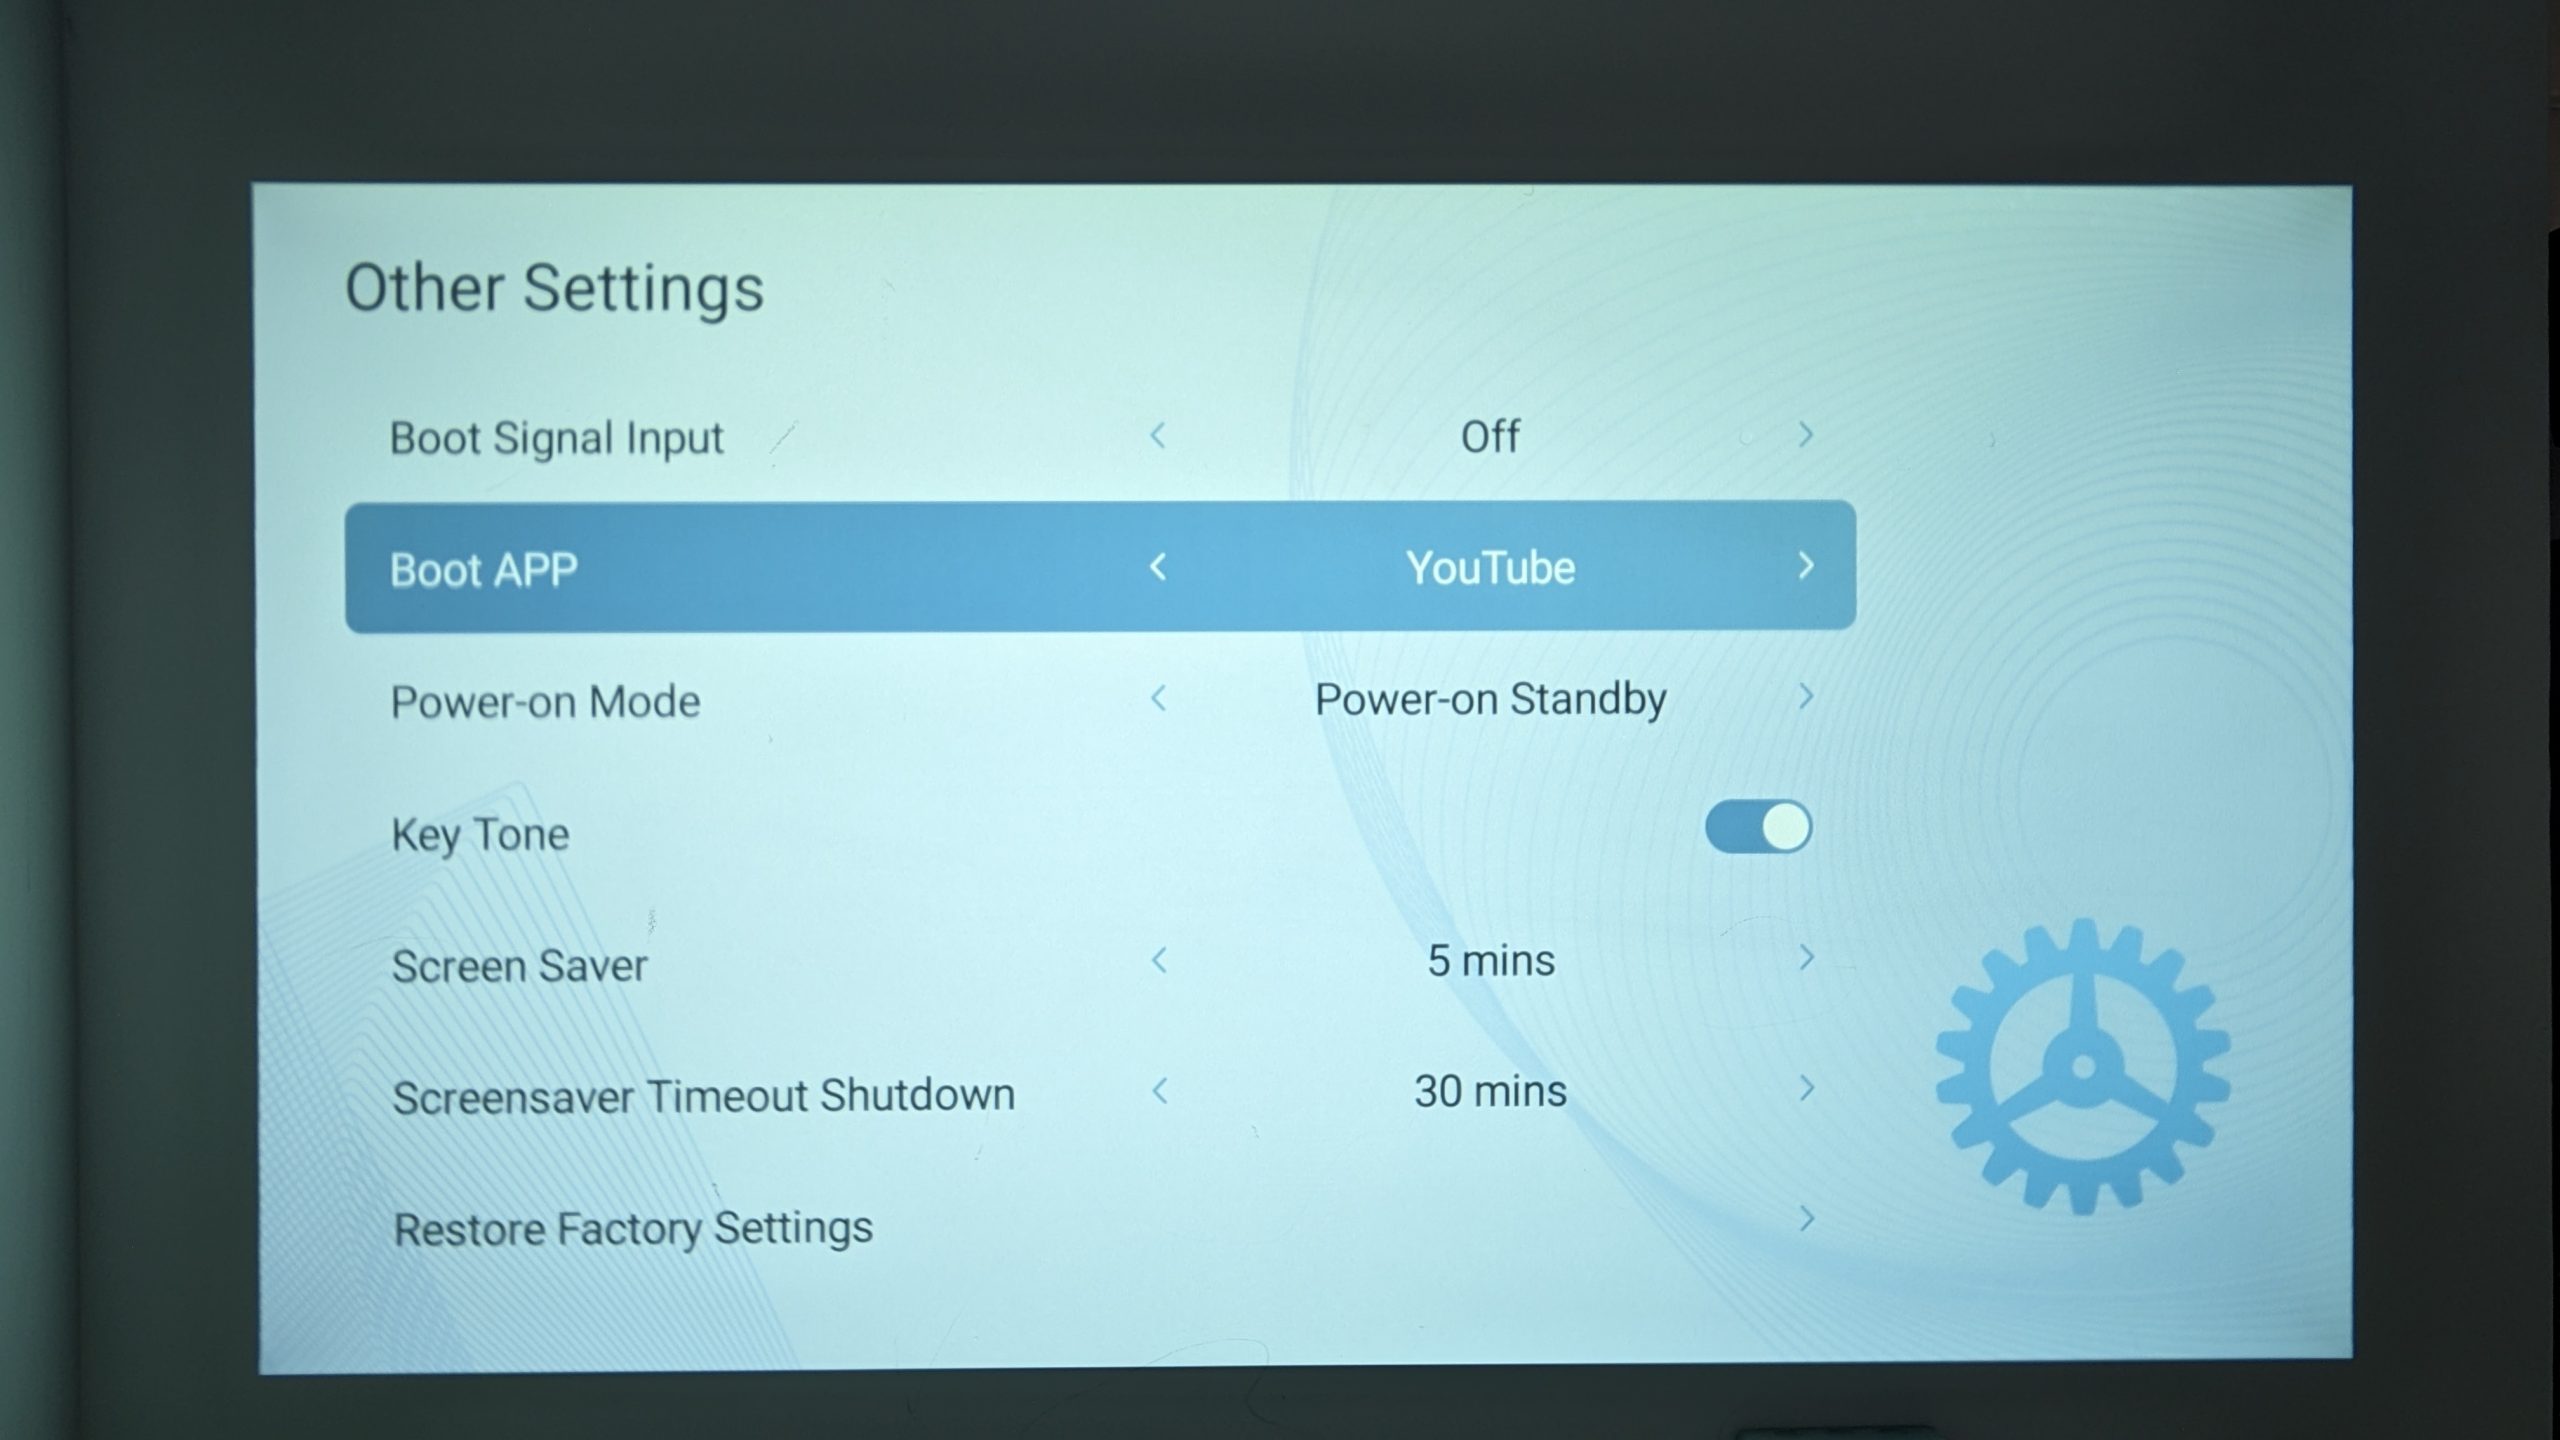
Startup Settings
If you’re looking to use your device for a specific application or purpose, such as only watching YouTube or mirroring, you can set your BudPlus S3 to launch a specific application on startup, provided it is installed on the device. You can also even change to a specific input source on startup instead if you’re commonly streaming from another input/device.
If you’re looking to use your device for a specific application or purpose, such as watching YouTube or mirroring, you can configure your BudPlus S3 to do so. You can set it up to launch a particular application on startup (provided it’s installed on the device) or automatically switch to a specific input source when powered on, which is convenient if you frequently stream from another input or device.
To change the boot settings:
- Go to the Settings tab.
- Select Settings.
- Go to Other Settings.
- Go to Boot Signal Input (change source at startup).
- Select Input Source.
- Go to Boot App (open app at startup).
- Select App.

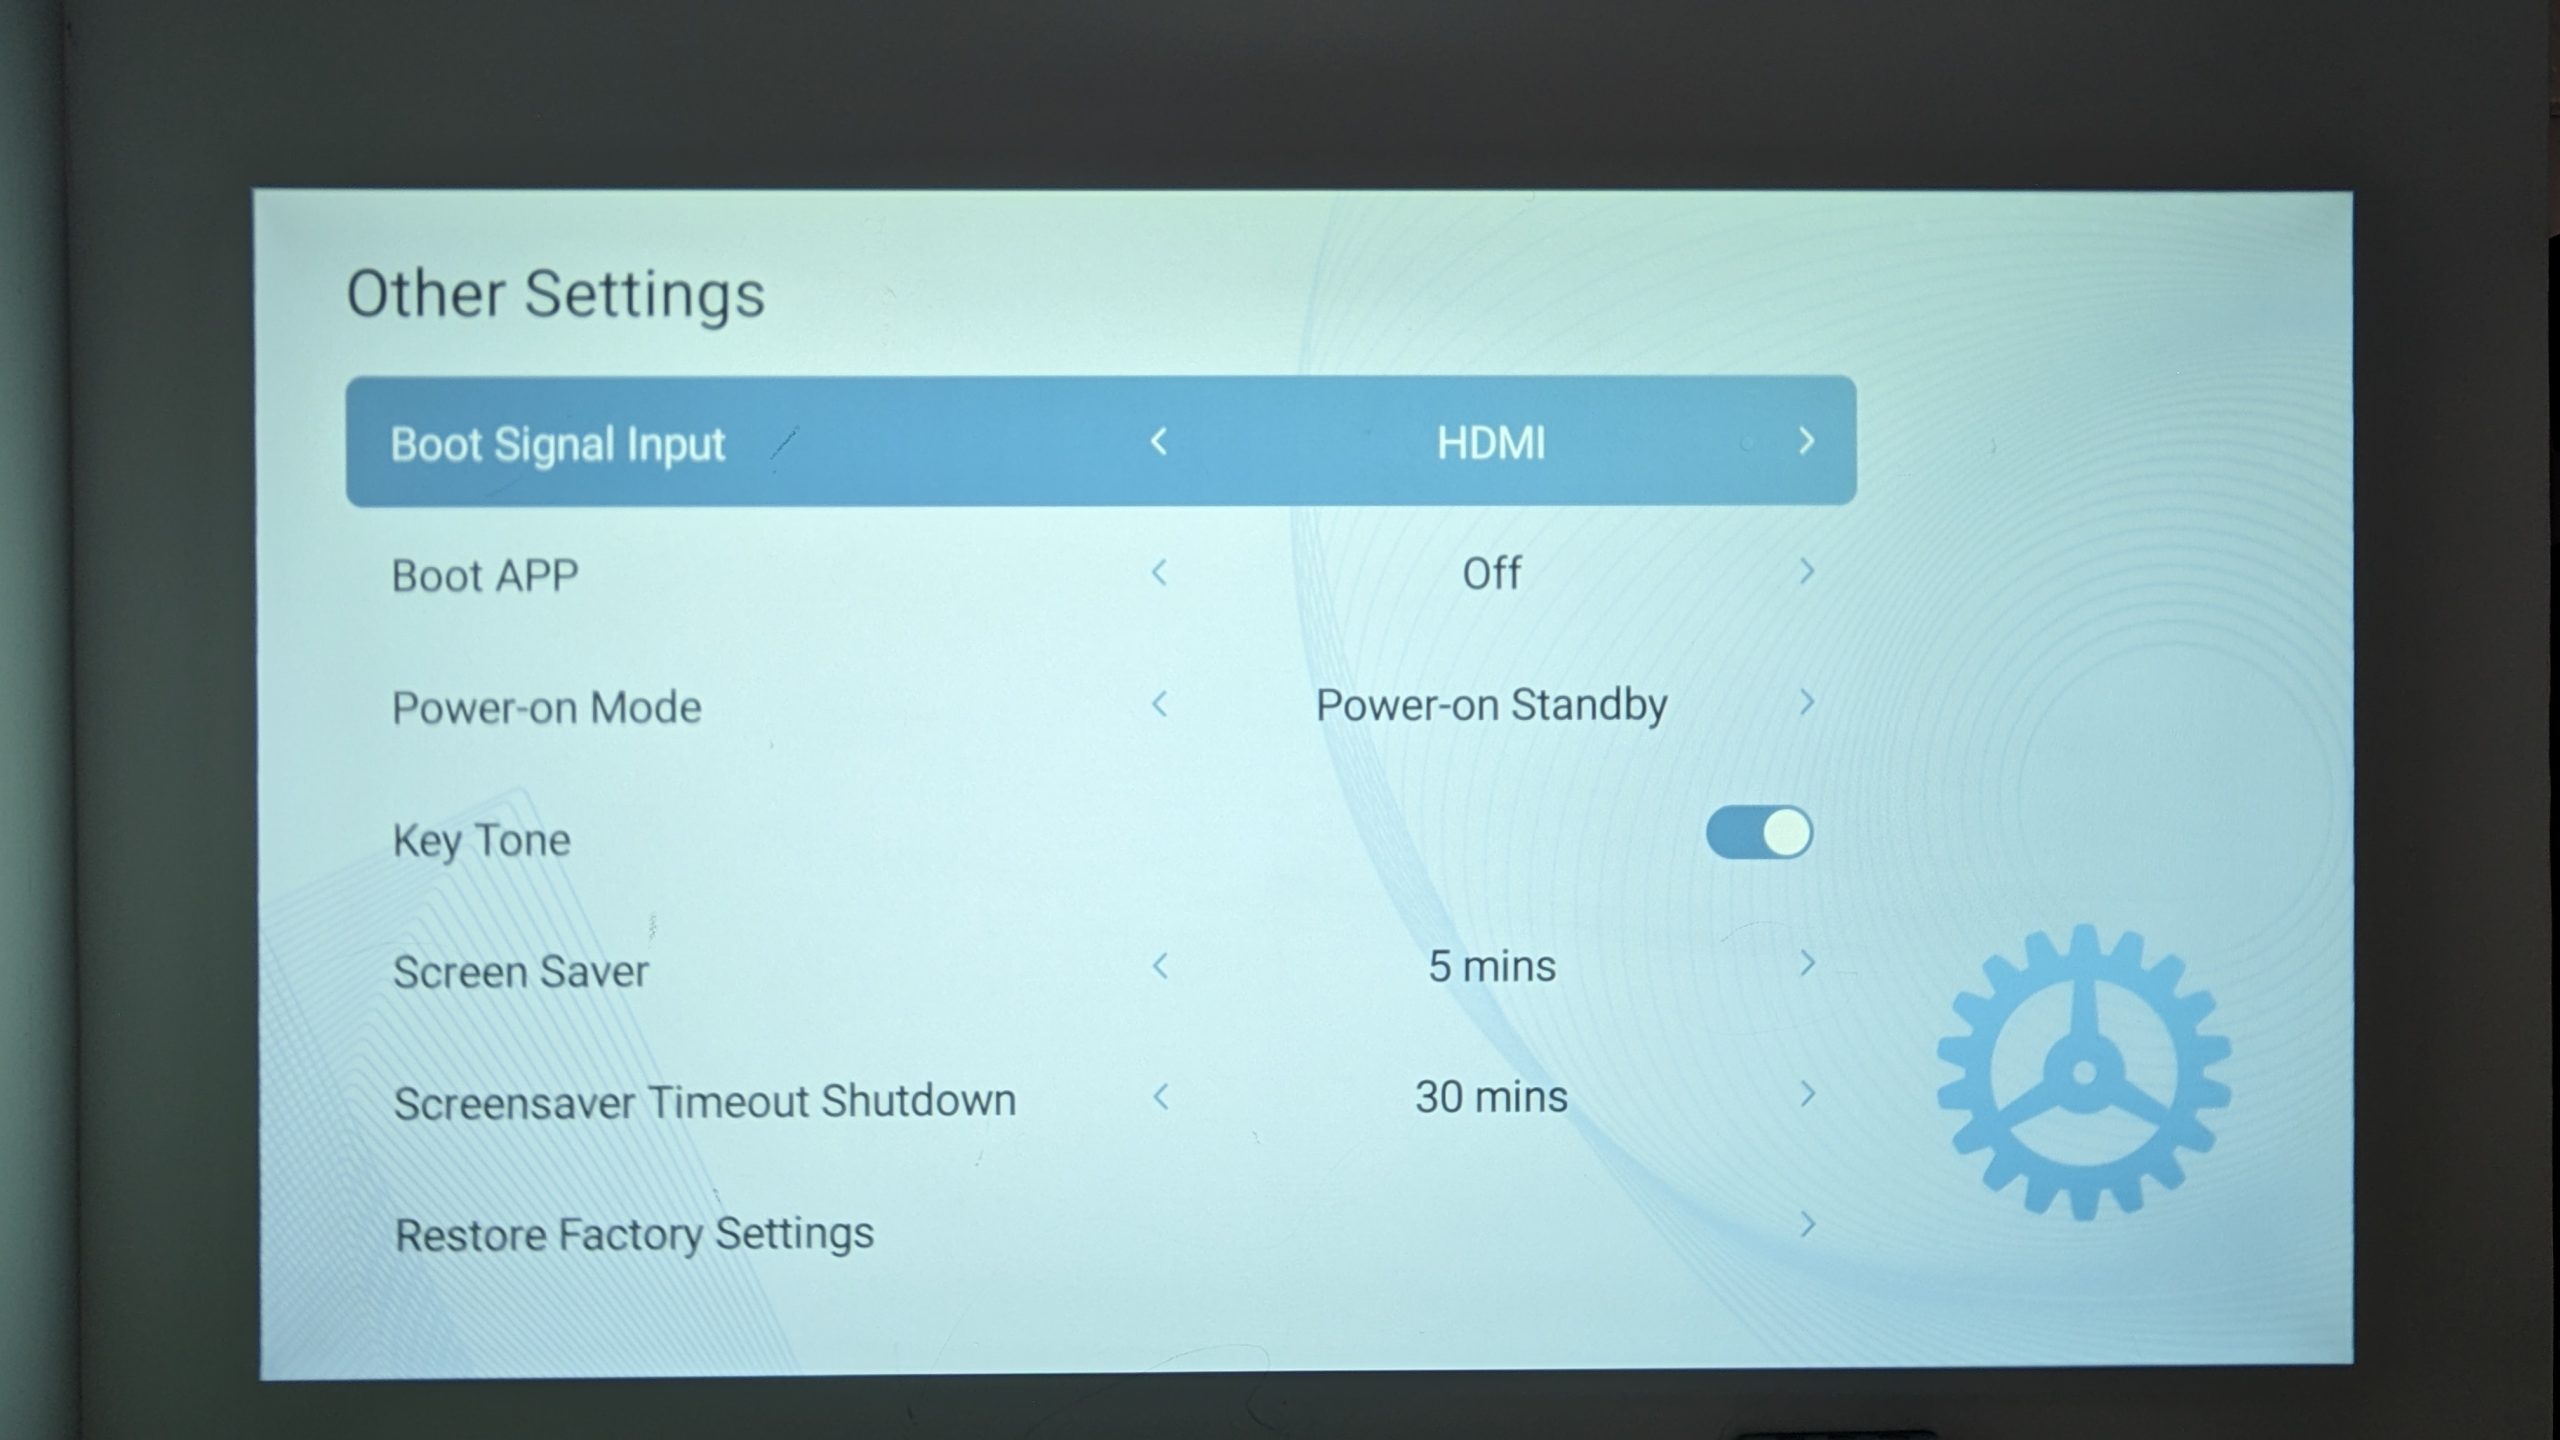
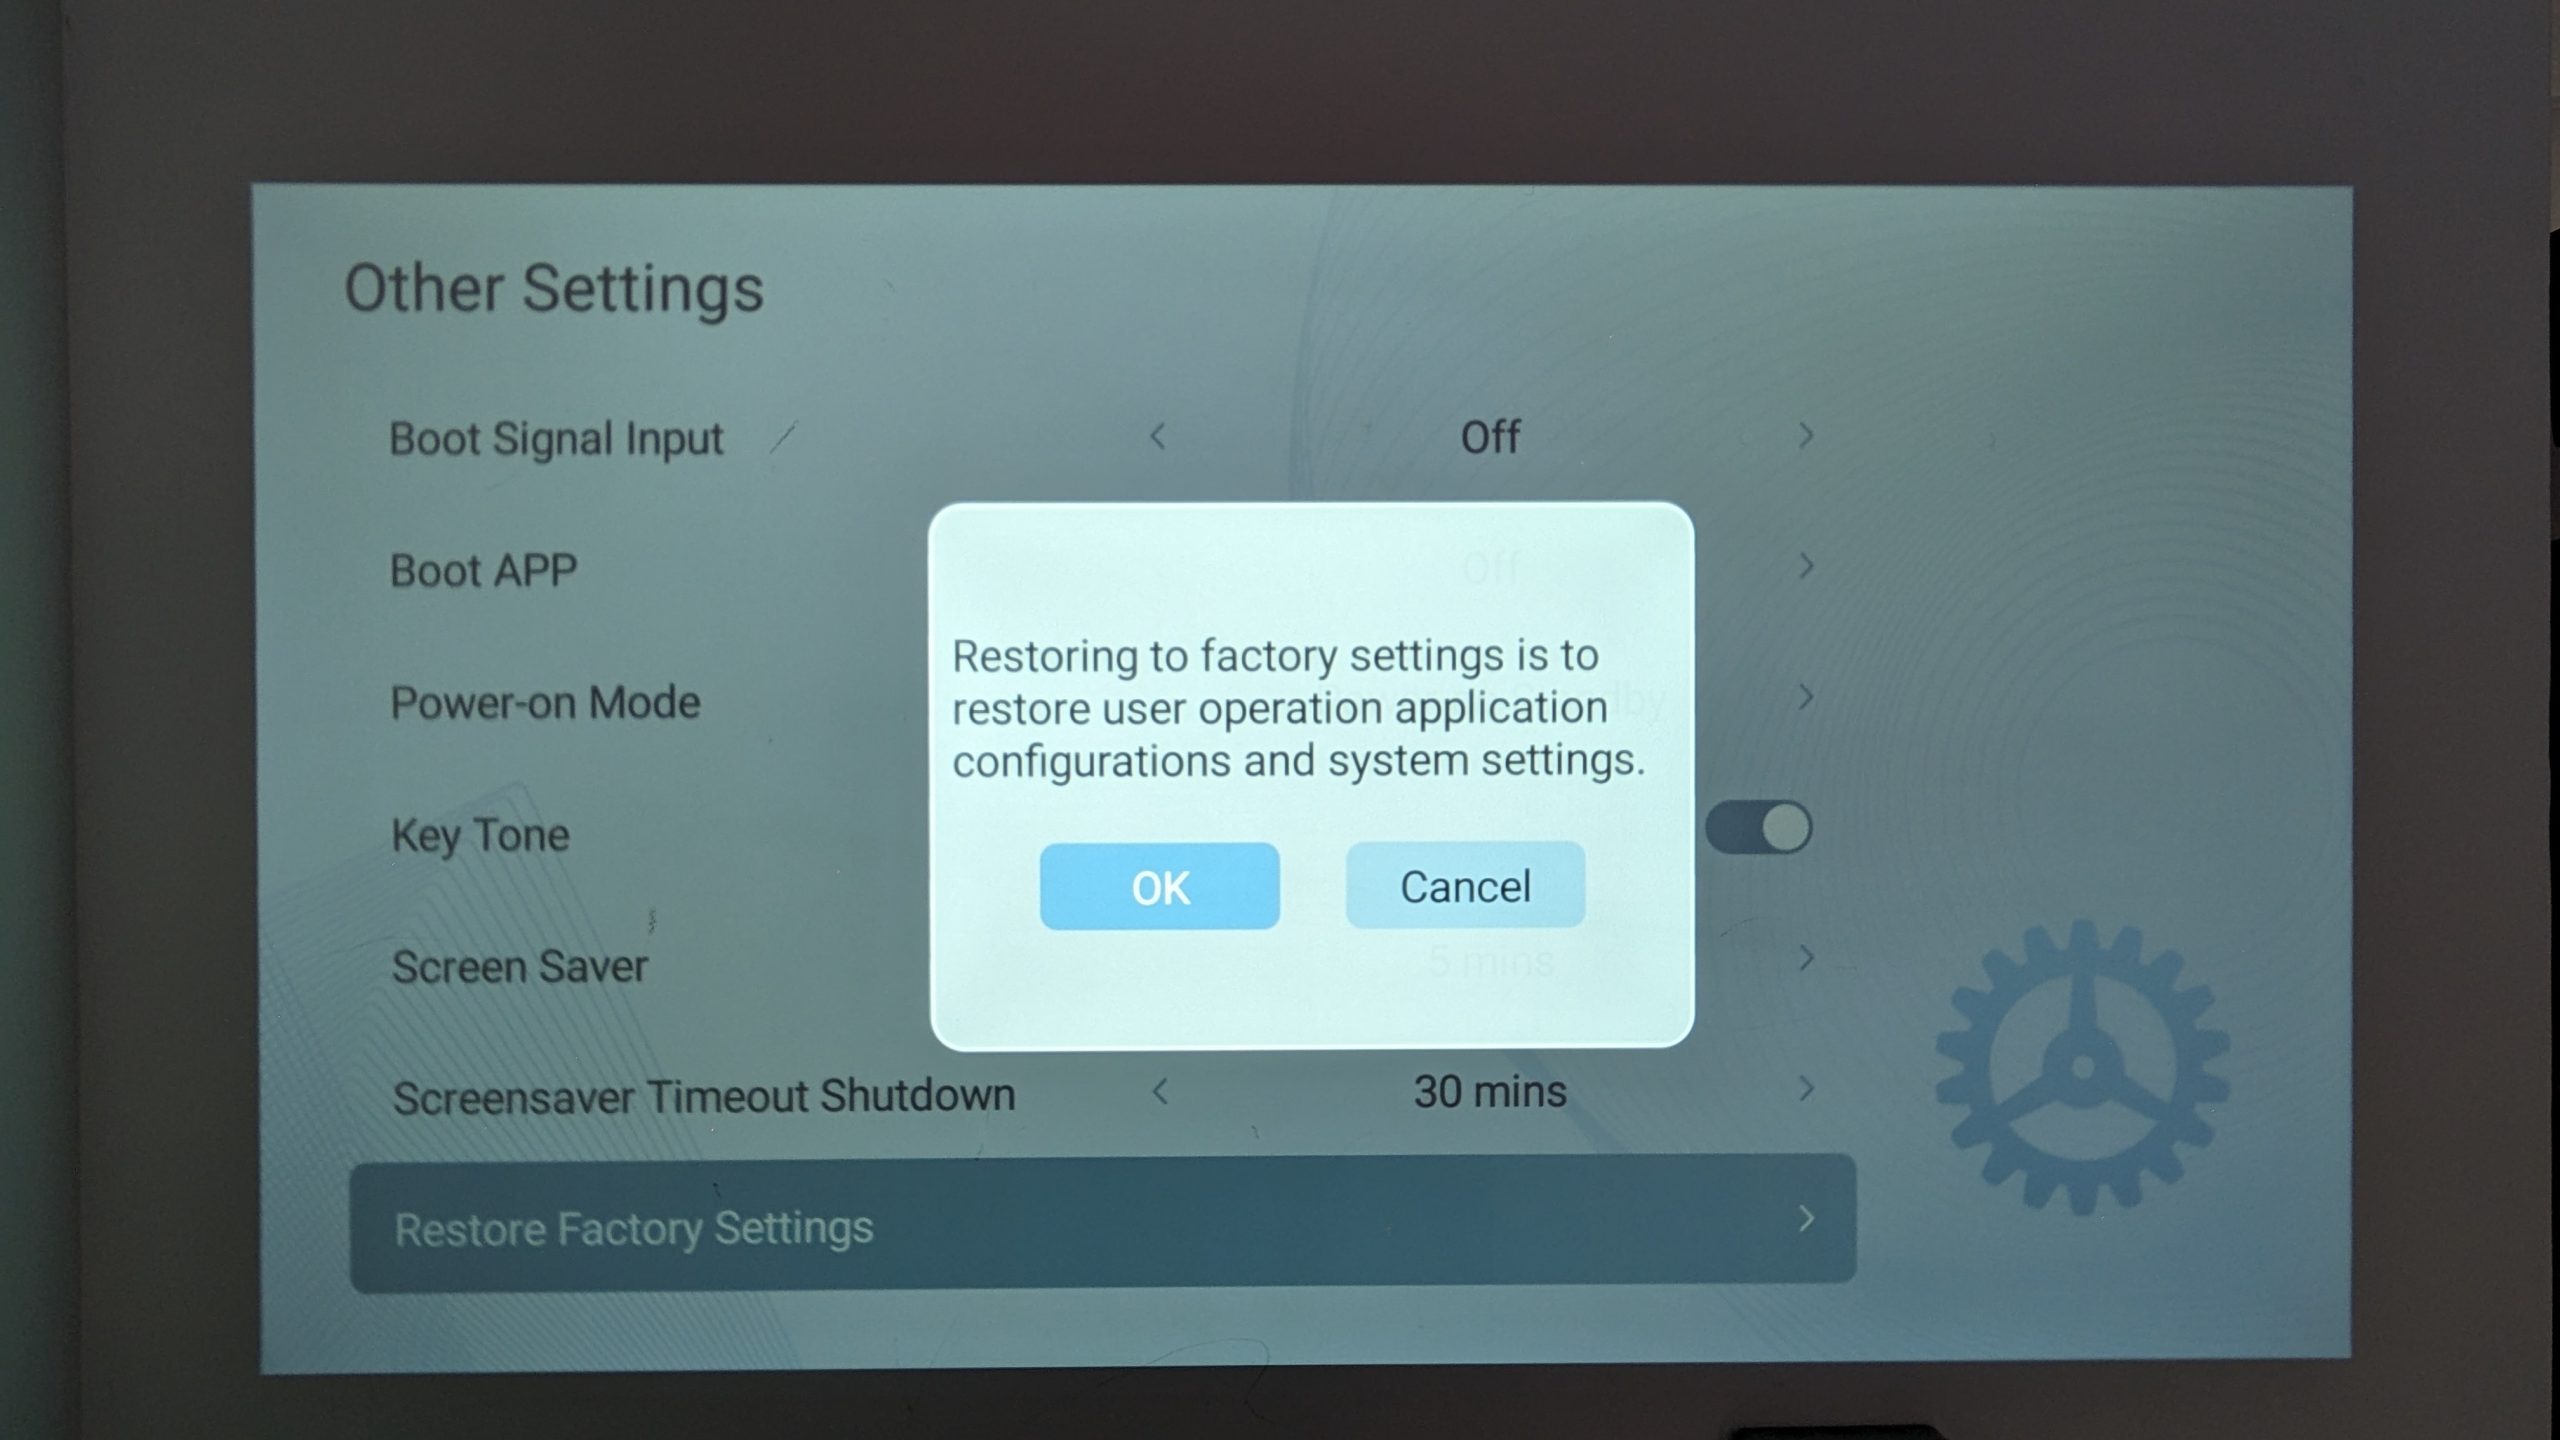
Factory Reset
A factory reset, also known as a hard reset, refers to the process of restoring a device to its original factory settings – this results in all user data being wiped permanently. This is an irreversible process, so why would you want to do this? There are several scenarios where it becomes necessary. These include addressing persistent software issues, troubleshooting the device quickly, trying to improve the performance of a slow device or deleting all data on the device.
To restore your BudPlus S3 to factory settings:
- Go to the Settings tab.
- Select Settings.
- Go to Other Settings.
- Select Restore Factory Settings.
- Follow the onscreen instructions.

Testing Your Hardware
Once you’ve completed the initial setup, it’s time to put your projector through some tests to confirm it’s working as intended.
Here at DroiX, we’re big proponents of the user’s Right to Repair your device. So if you find any issues and feel confident enough to repair them we encourage you! Reach out to DroiX Customer Support for any assistance in doing so.
Projector
- Physical Damage: Inspect the outer casing of the device for any damage.
- Touchpad Dead Zones: Test every part of the touchscreen to ensure it responds correctly to touch. Make sure you can touch and interact with all corners and areas of the screen without any unresponsive zones.
- Functionality: Ensure that the touchpad is functioning correctly. Any erratic or unexpected behaviour could suggest a need for an update or other fix.
- Audio Functionality: Check the audio to ensure it is working correctly.
- Resolution & Refresh Rate: The projector’s native resolution is 1920x1080P at 30Hz. If your device is set up correctly and the image still appears of low quality, please ensure the media supports 1080P.
Remote
- Physical Damage: Inspect the outer casing of the device for any damage.
- Check Buttons: Check all dedicated buttons (Volume, Input, Shortcut controls) all work as intended.
- Infrared Sensor: The remote has an infrared sensor located at the bottom front of the device, when testing ensure that the IR sensor is not covered and has a clear direction to the Projector.
App Store
The BudPlus S3 runs on Android 9 but doesn’t have full access to the Google Play store and instead runs a proprietary application store, called the ‘App Store’. Each application will work seamlessly with the BudPlud S3. You can access this from the Home Screen by going to the Apps tab and then opening the ‘App Store’.
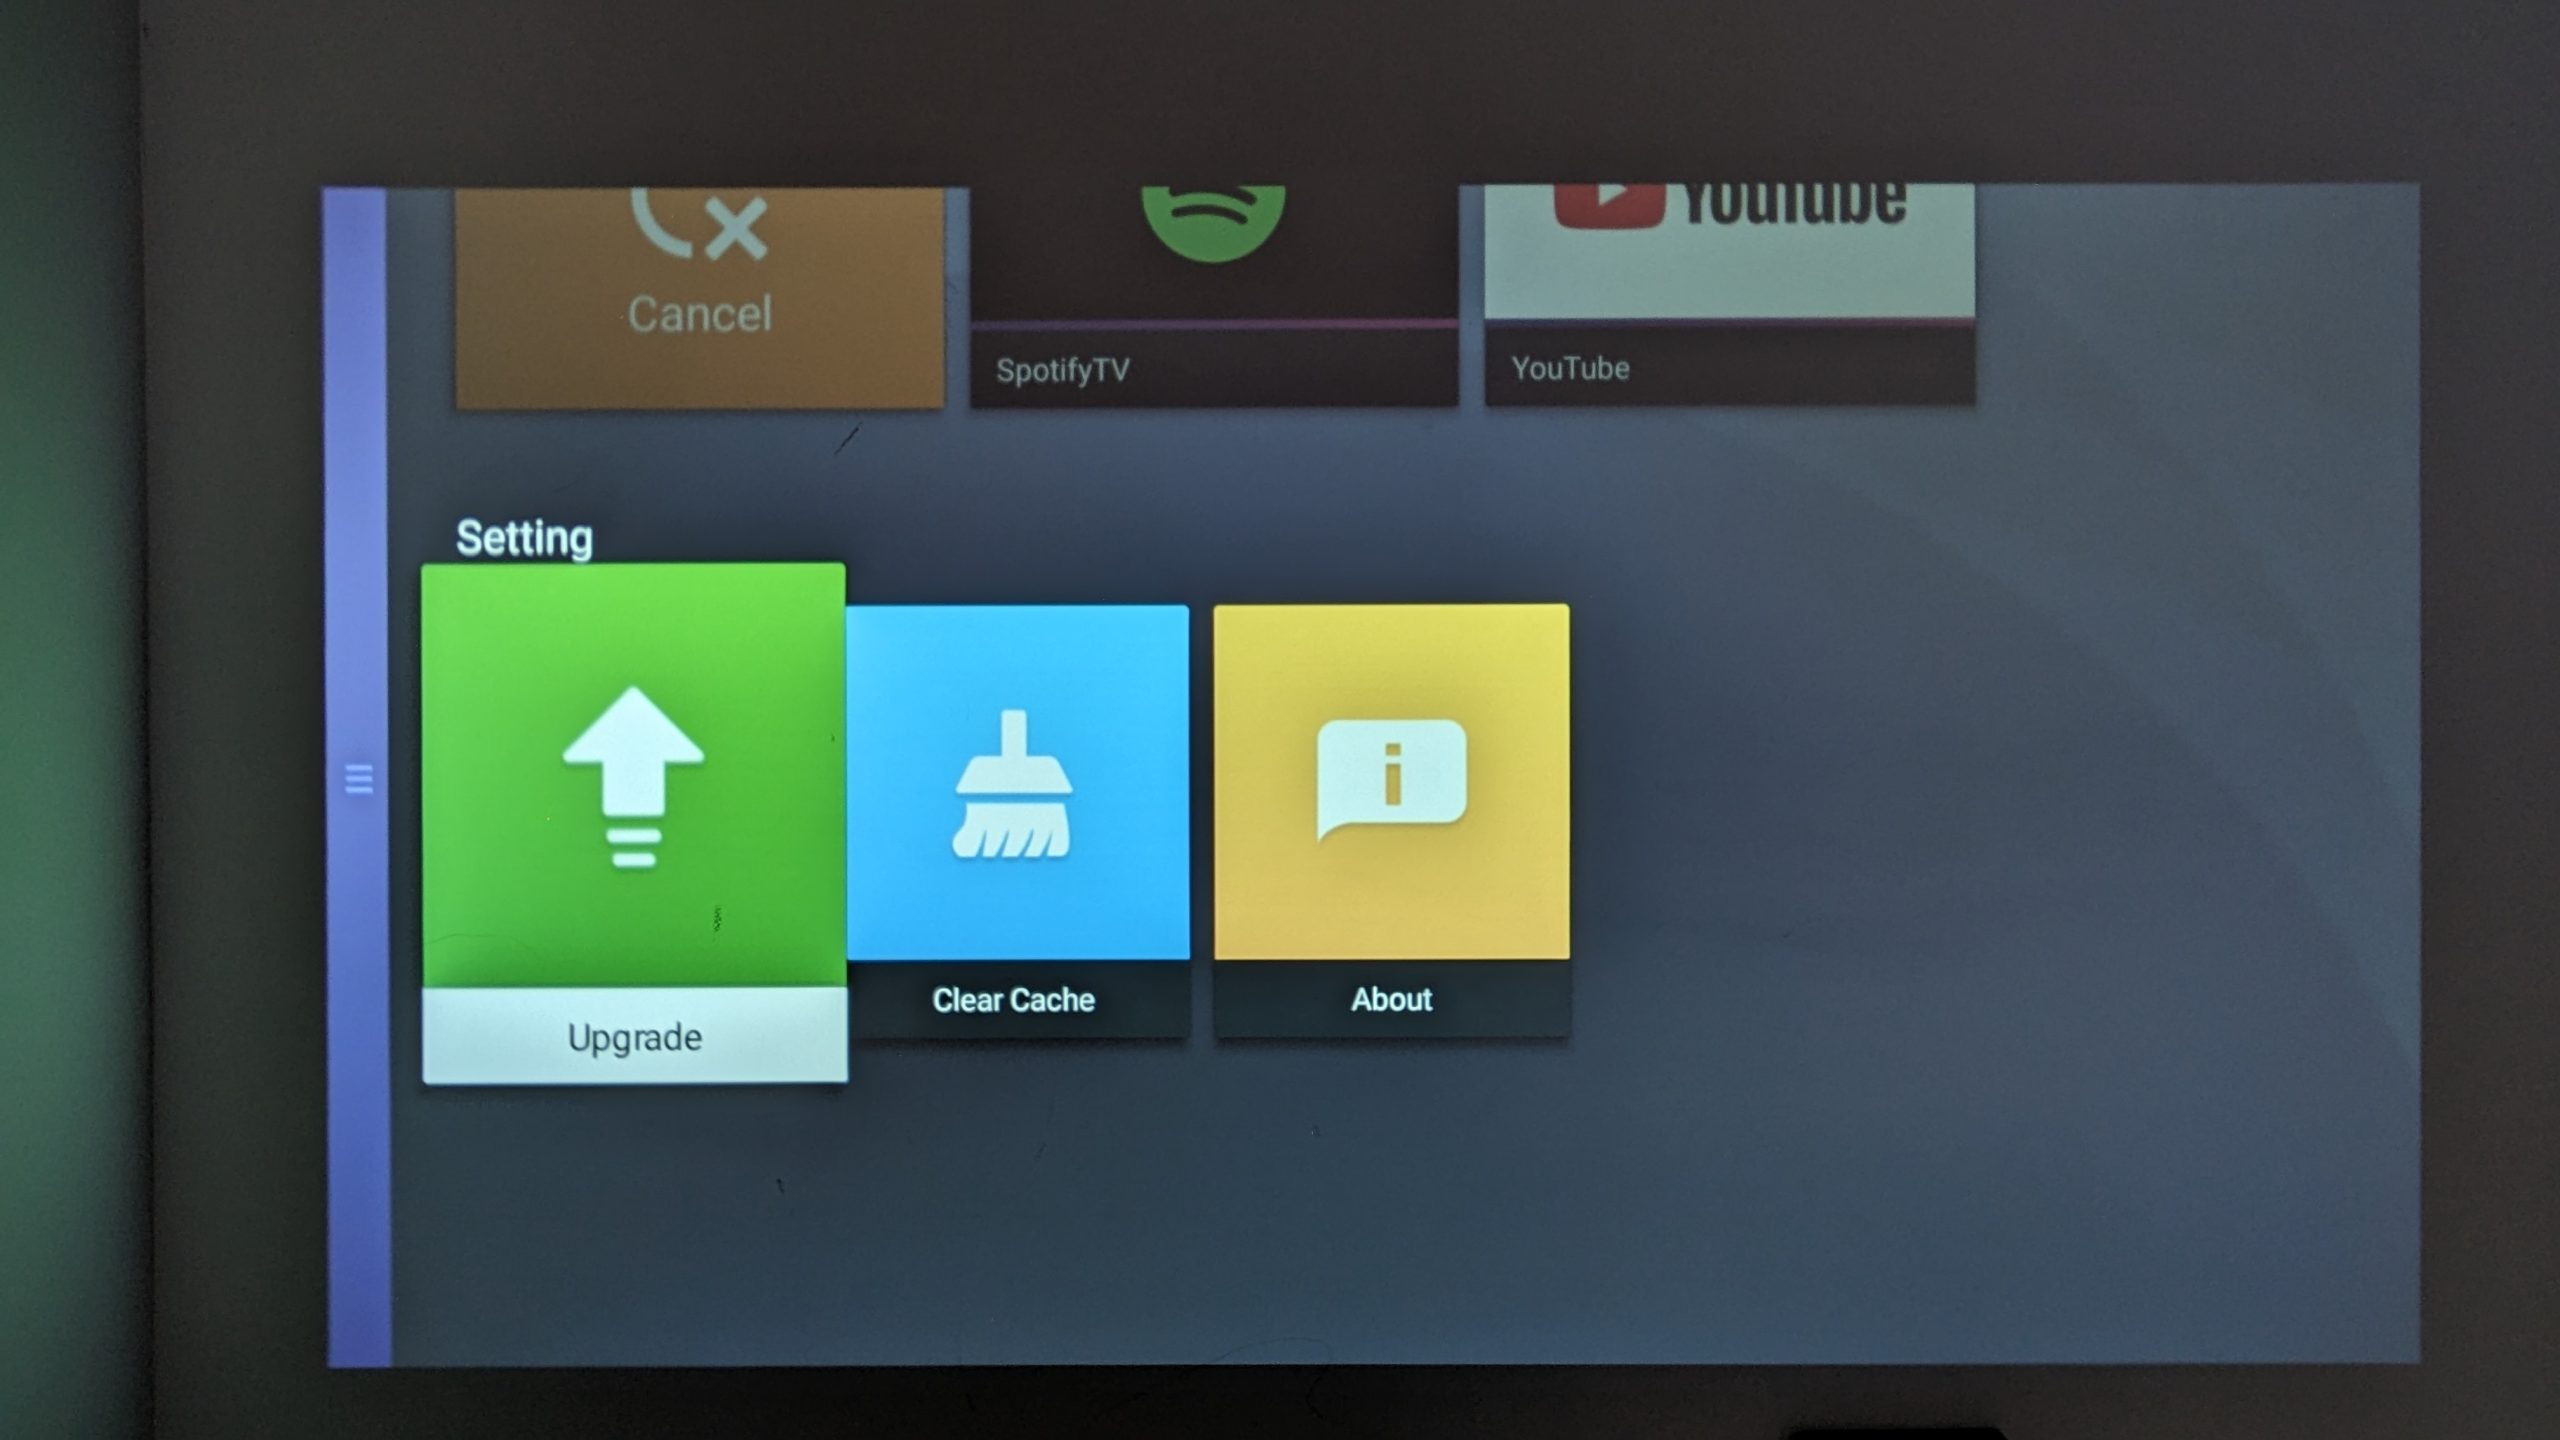
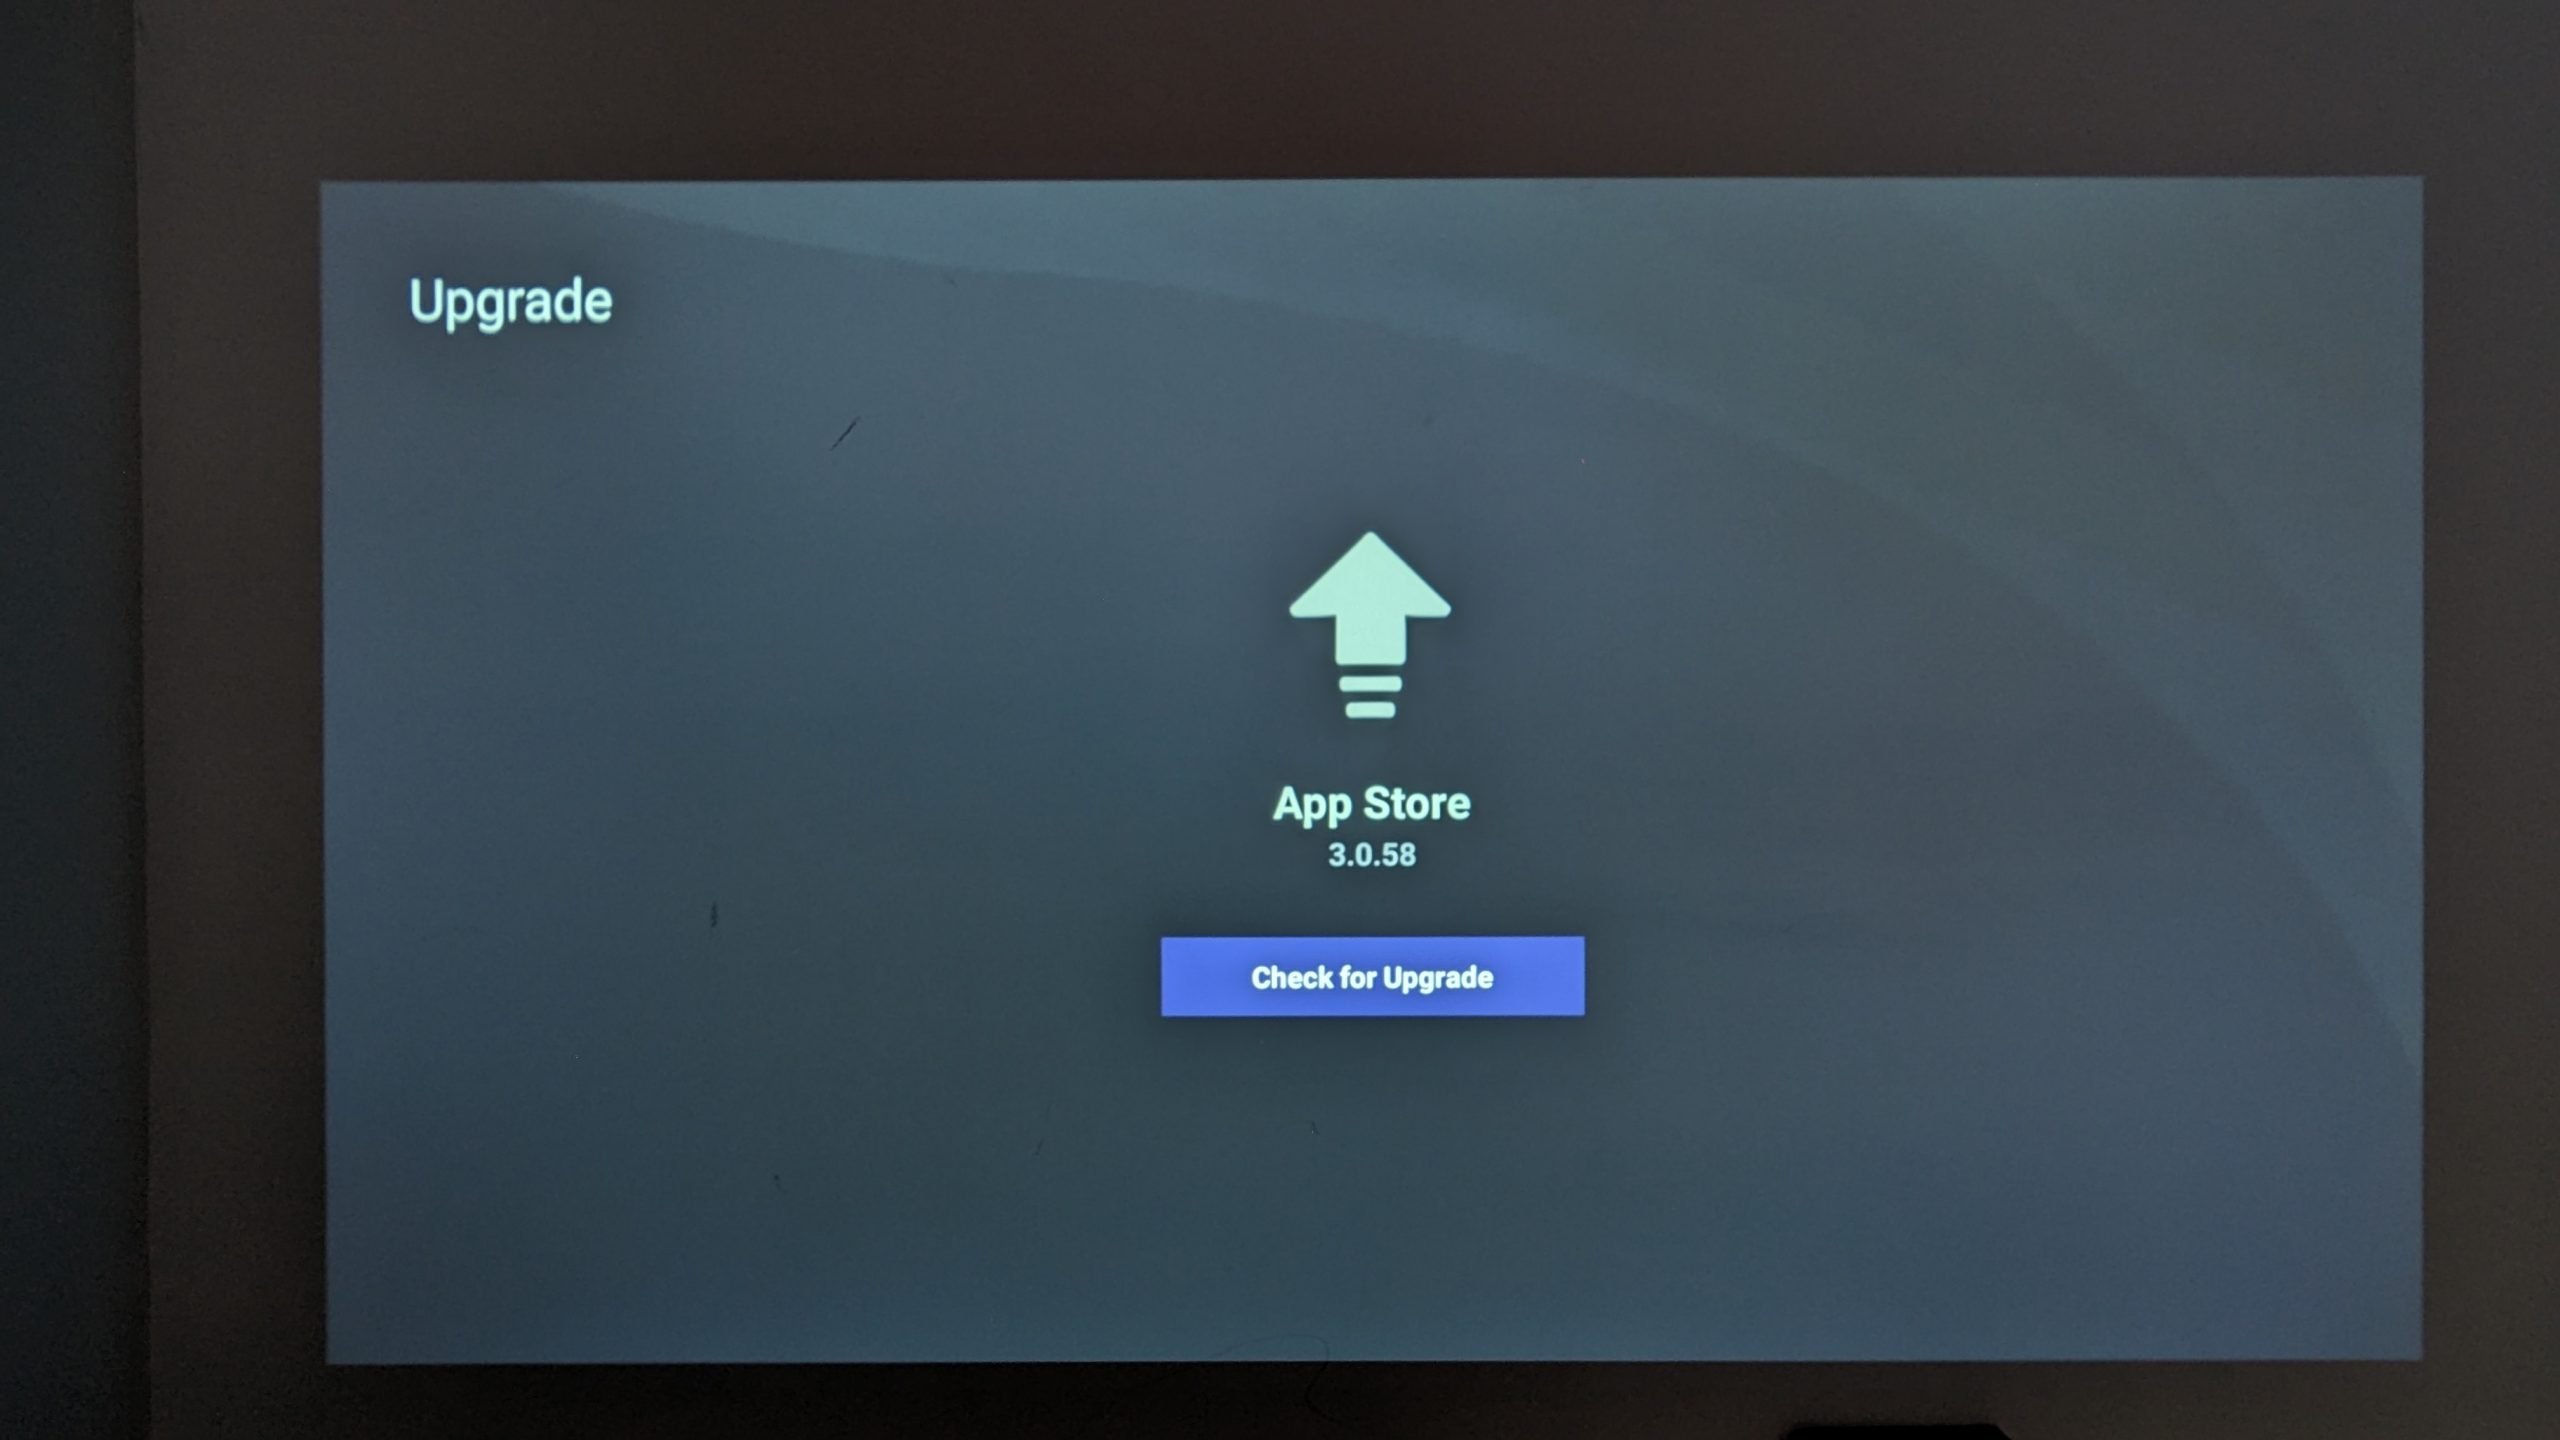
Updating The App Store
Ensuring you have the latest App Store version is essential as it provides access to the latest application updates and new features, which will improve the performance and compatibility of your BudPlus S3. As the ‘App Store’ is a unique application store, these updates may include entirely new apps for you to discover.
At the time of writing, the version was v3.0.58. To ensure you have the latest version:
- Go to the Apps tab.
- Open the App Store.
- Go to Settings.
- Go to Upgrade.
- Select Check for Upgrade.
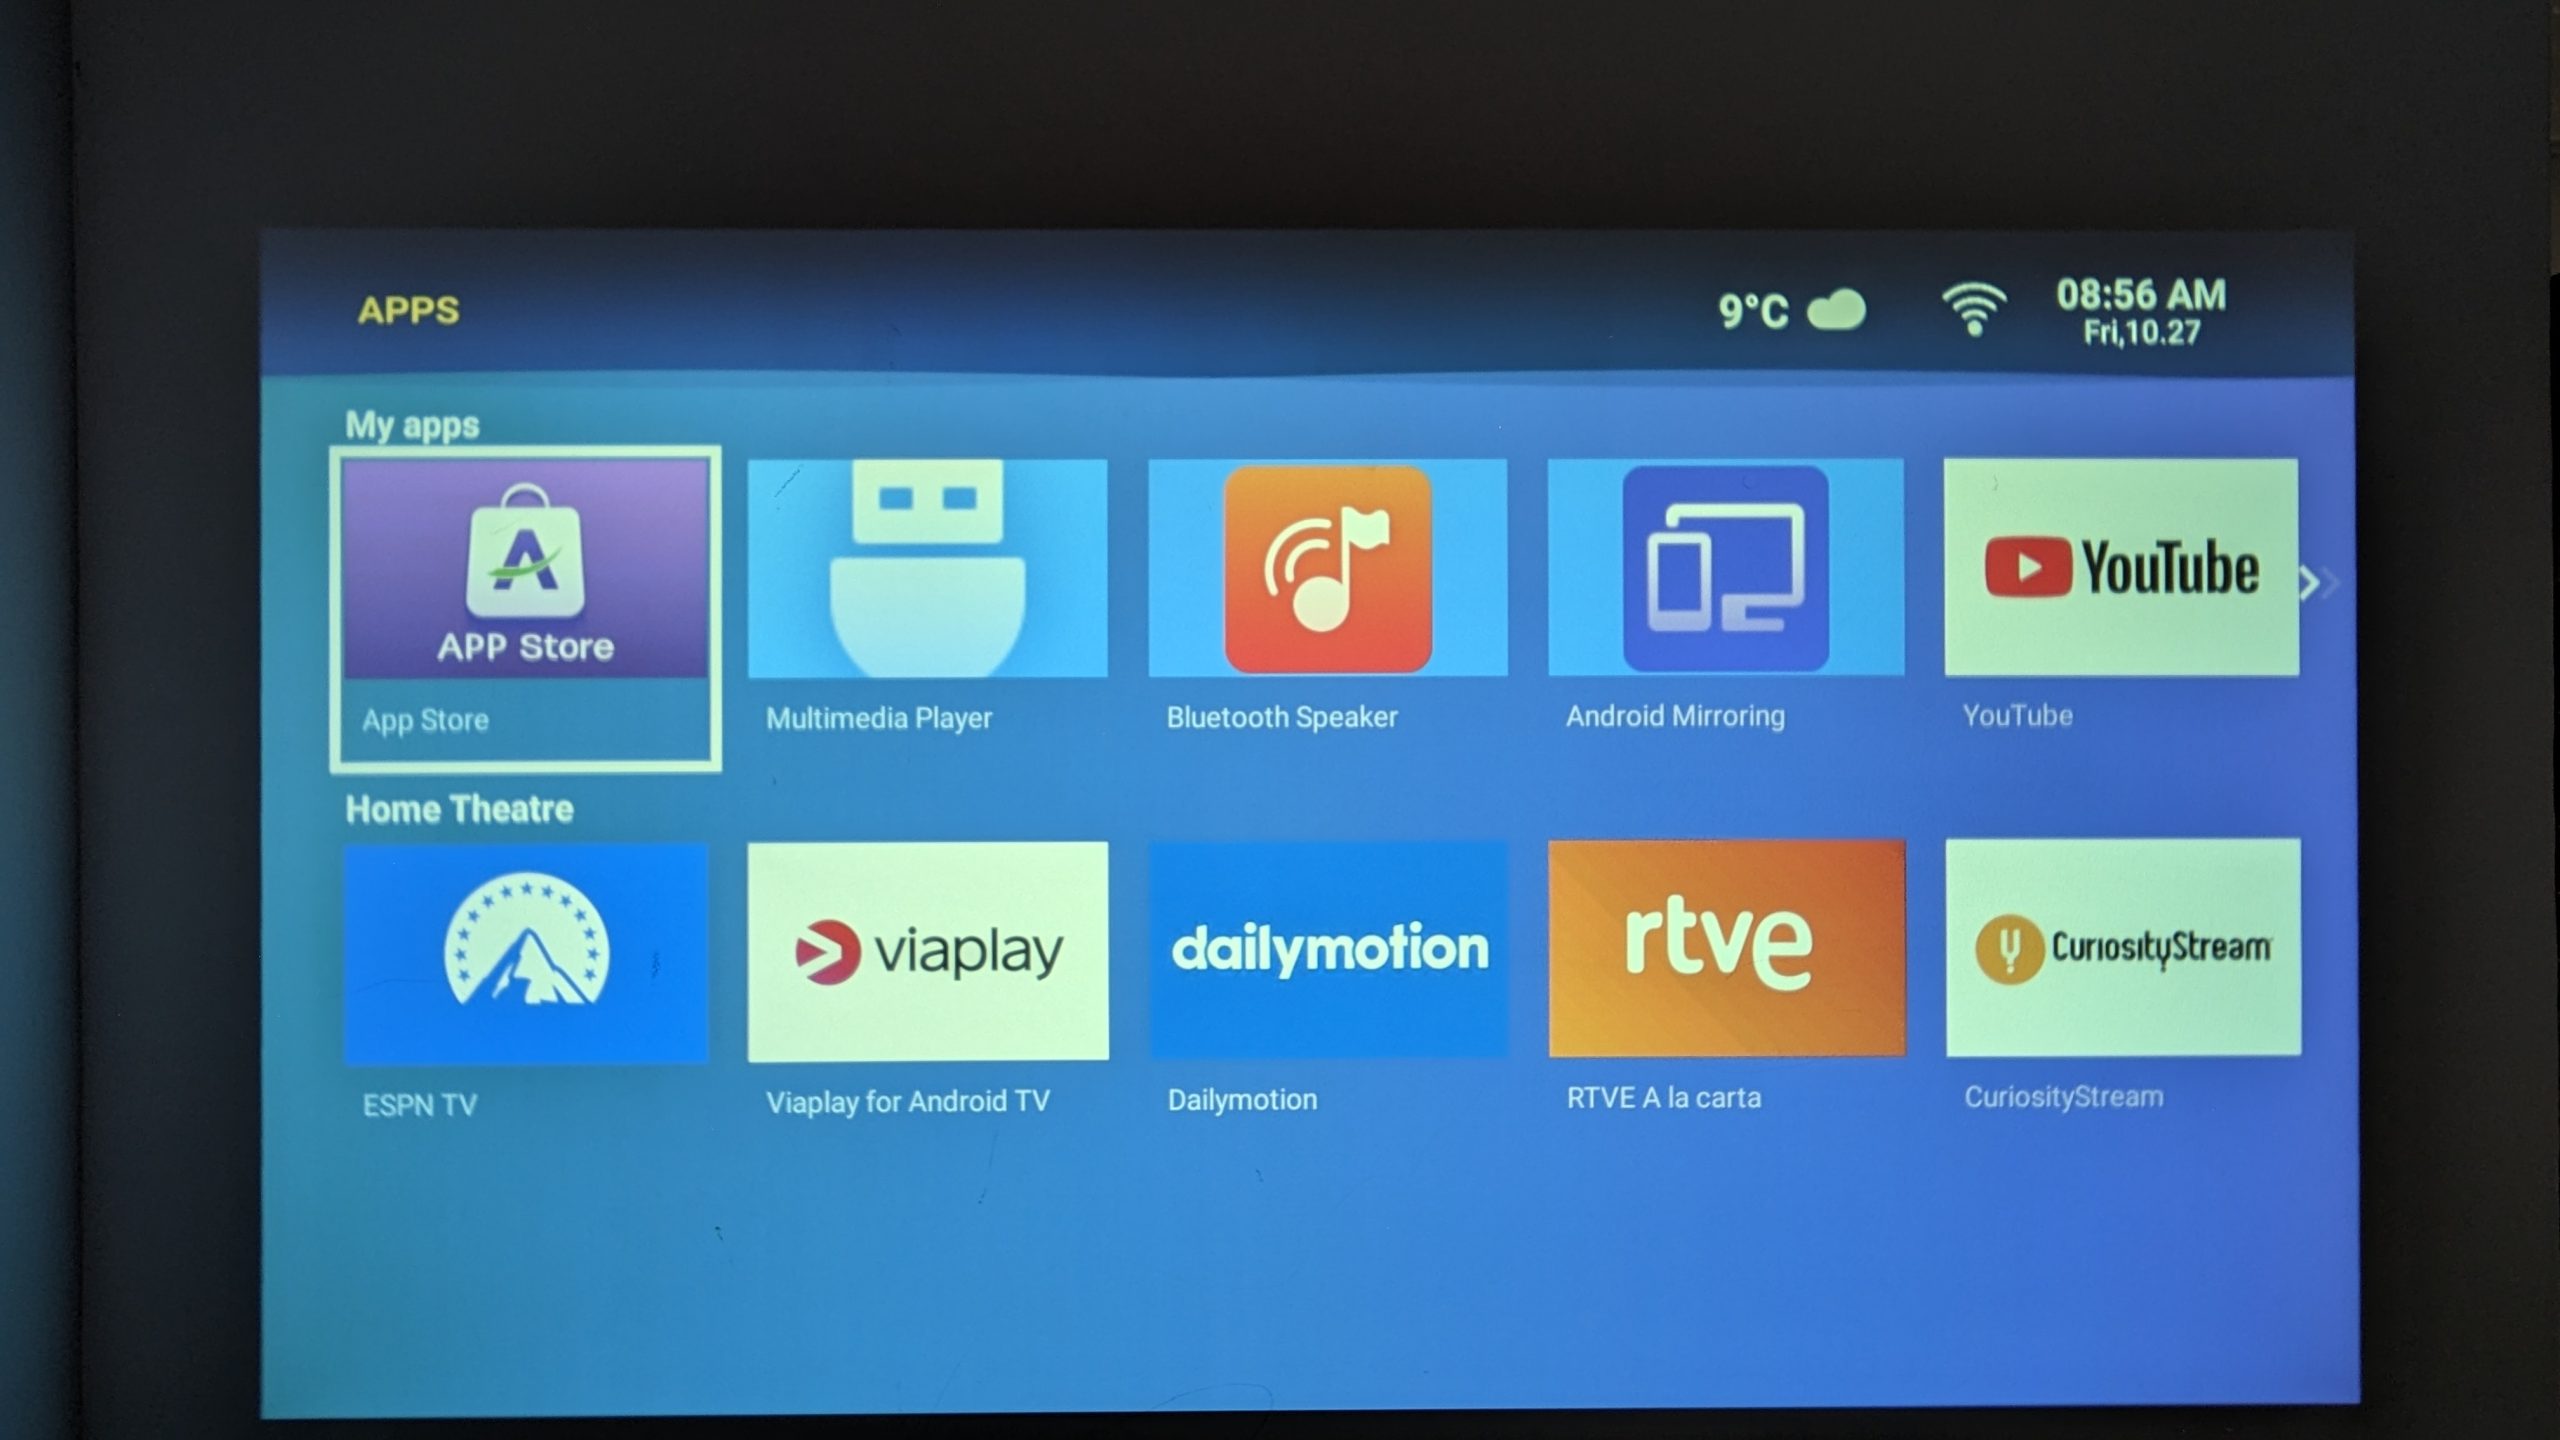
Installing Applications
With your App Store on the latest version, you can now install any applications you require. As noted earlier, this is a bespoke application, meaning the applications you can download are limited to media, sports, and news applications such as YouTube, Prime Video, ESPN and more.
Accessories & Add-Ons
It’s incredible, right? Your new projector can do so much already, what more is there? Believe me, there’s more. With additional accessories and add-ons available for the BudPlus S3 Projector you can take your device to an even higher level and keep it running for years to come.
Input Devices
G30 Air-Mouse with Voice Control: Elevate your BudPlus S3 experience with the G30 Air-Mouse – a must-have accessory for enhanced navigation and convenience. This versatile remote offers precise and responsive control, eliminating the need to stay close to your projector. Whether you’re browsing or delivering presentations, the G30’s wireless cursor navigation ensures seamless interaction, with a range of up to 10 meters. The G30 Air-Mouse even support voice commands, offering effortless, hands-free controls on compatible voice-enabled applications such as YouTube and more. Elevate your control and convenience with the G30 air mouse, designed to enhance your overall entertainment and productivity.
Output Devices
Portable Projector Screen: Although the BudPlus S3 can project images onto any surface, most surfaces are not completely level and may have imperfections that affect image quality. A Projector Screen provides a smooth and clear canvas designed to reflect light uniformly to produce sharper, more immersive images and truly captivate the colours. These portable projector screens are also incredibly compact, making them ideal for saving space when not in use. Additionally, when paired with a tripod, these screens become the perfect travel companion, ensuring you can enjoy a quick and hassle-free setup wherever your adventures take you.
Cables
Amazon Basics HDMI Cable: HDMI cables are an industry standard connection that guarantees seamless connectivity with a wide range of devices, from laptops and gaming devices to streaming devices. These cables are designed to transmit high-definition video and audio signals without losing quality to guarantee that every projection is crystal-clear and immersive. It’s not just about connecting devices; it’s about delivering uncompromised native quality.
Storage Devices
Kingston DataTraveler 128GB USB 3.2: A USB drive is a versatile and practical accessory for your BudPlus S3 projector, allowing you to expand your storage capacity effortlessly. With a USB drive, you can easily access and store multimedia files, ensuring your favourite content is readily available, even without an internet connection. This simple yet valuable addition enhances your projector’s functionality and versatility, making it ideal for various uses, including watching movies, viewing photos, or delivering presentations.
Mounts
Amazon Basics 60-inch Tripod with Bag: This affordable tripod provides excellent stability and flexibility when it comes to positioning the projector. It ensures the projector will be at the desired height and level, whilst being extremely portable and easy to set up, making it ideal for many different environments and setting up on the go.
Projector Ceiling Mount: A ceiling mount is the ideal space-saving solution, offering convenience and eliminating the need for a table or tripod with a clear view. Perfect for more permanent setups, so whether you’re optimising your home entertainment setup, office, or classroom experience, you can enjoy the benefits of a much cleaner, professional setup. Eliminate bumps, and obstructions to ensure an uninterrupted viewing experience with a ceiling mount! Although not specifically tested with the BudPlus S3, this accessory is designed to support projectors of similar weight and specifications.
Whew! That was a long read. That should cover just about everything to get you up and running with your new device. Go have fun and binge all your faves!
Questions & answers